-
Van 5: Making the bed
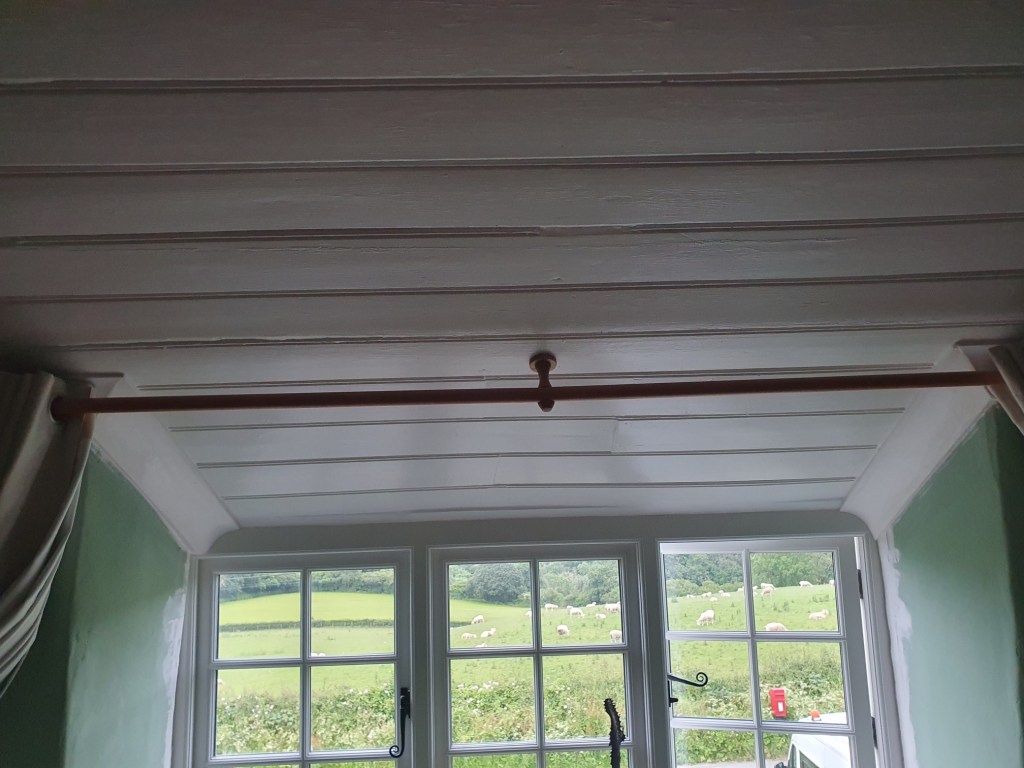
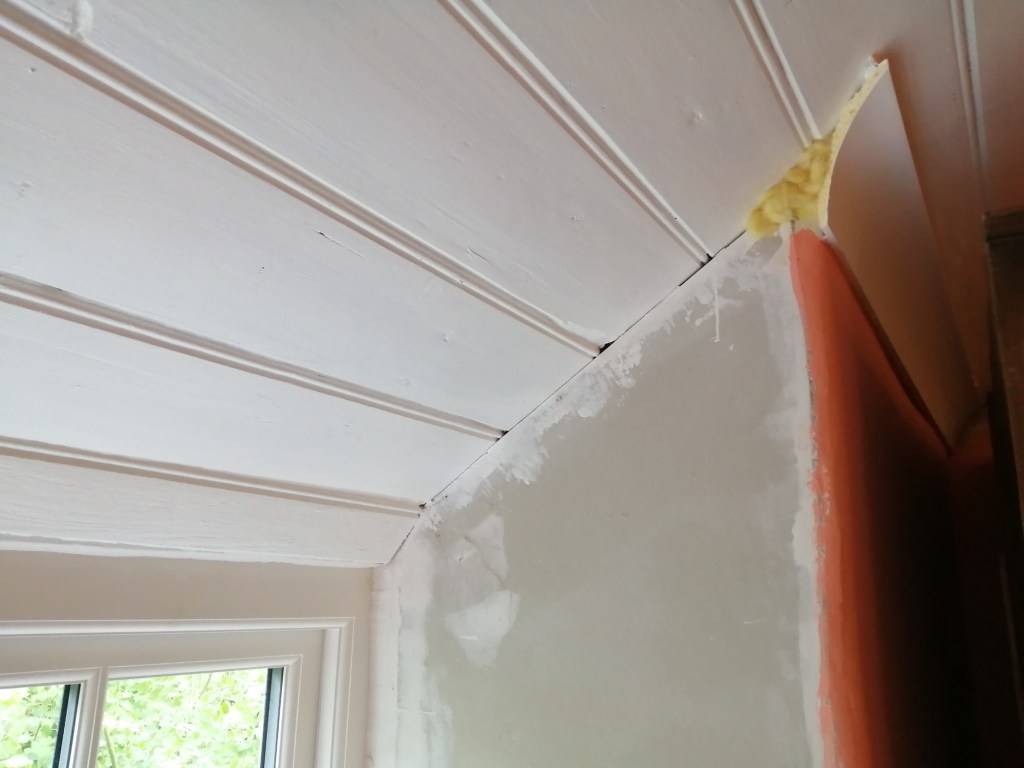
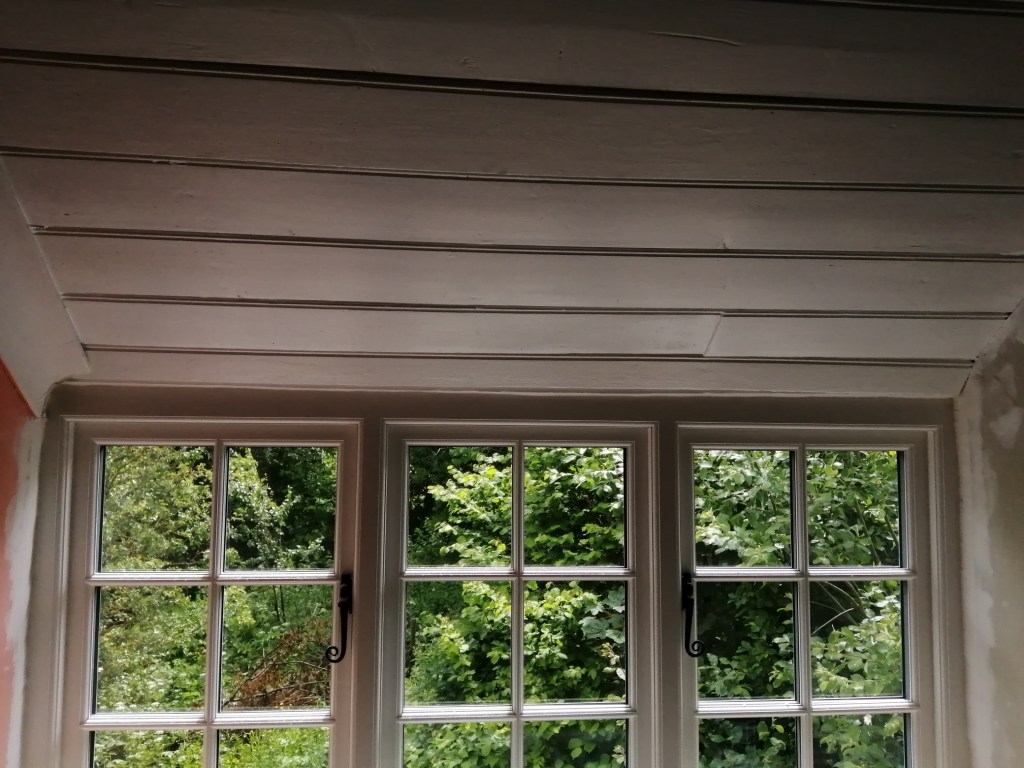
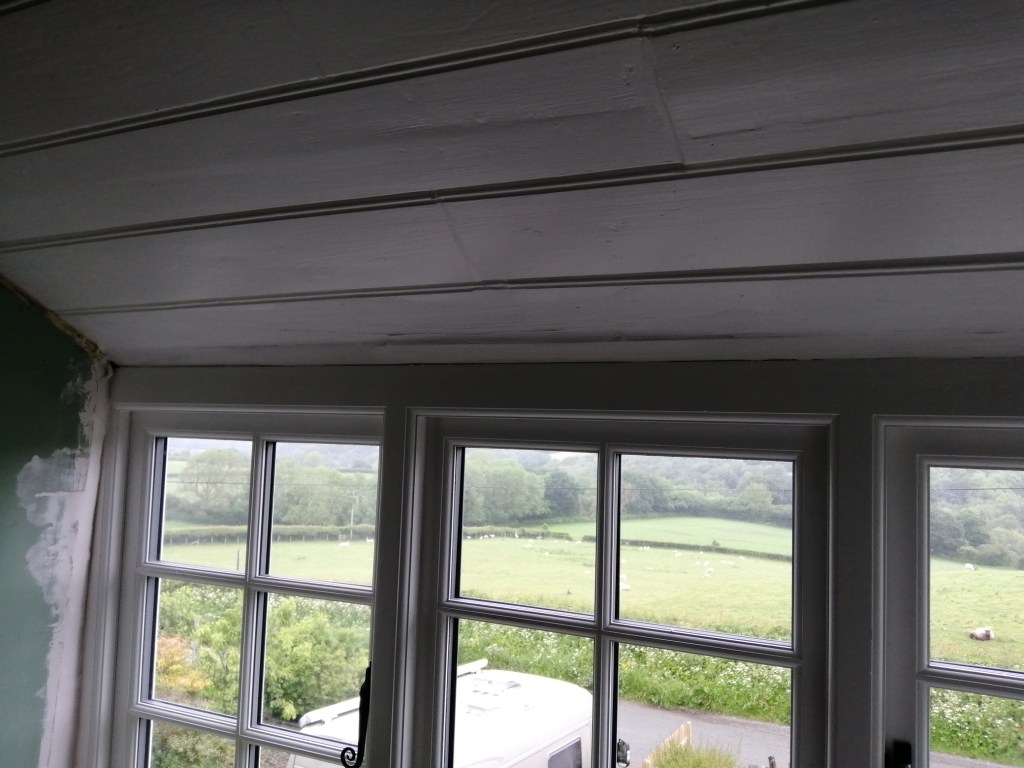
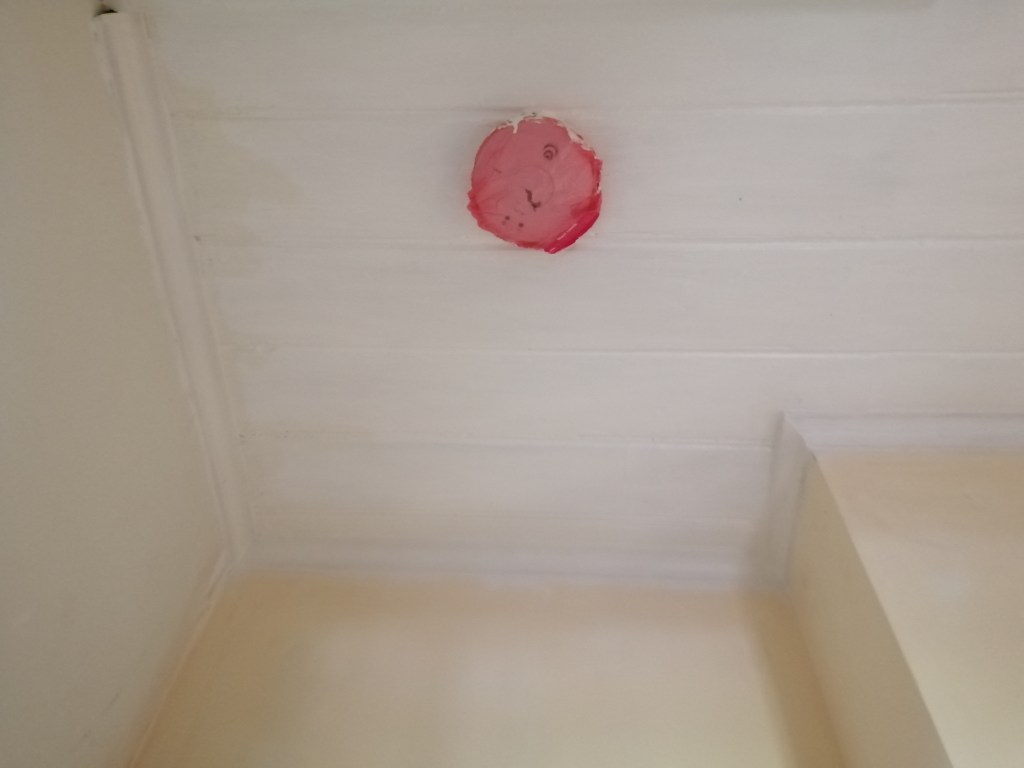
The amount of time I’ve spent on coving four windows would be hard to believed. They’re finally done; filled, sanded, and caulked. Although they are a tiny detail in much bigger rooms, it’s amazing how much more finished they make the rooms look. So they may be bodge jobs, because the angles were impossible to calculate, but I’m still pretty happy with them.


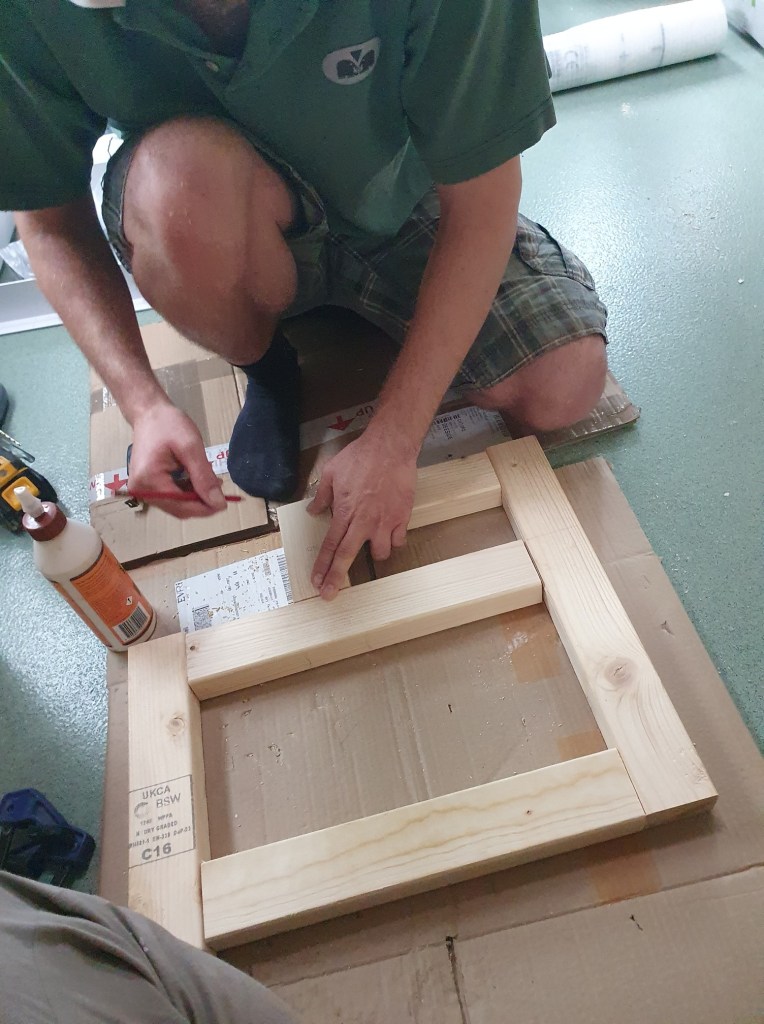
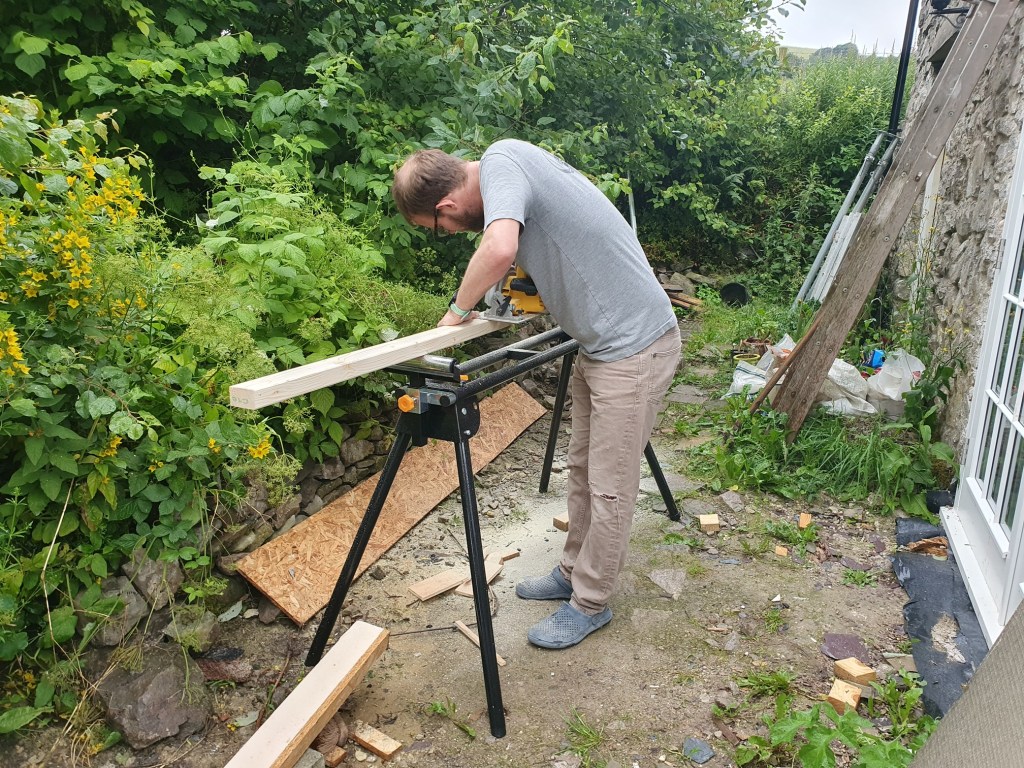
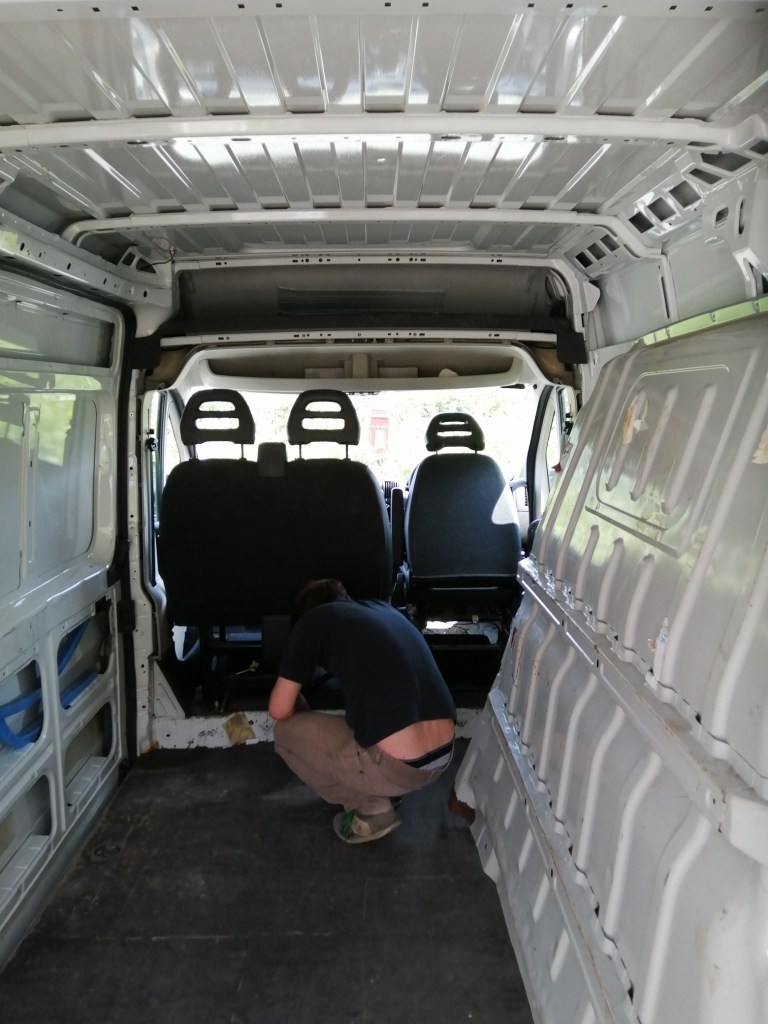
Out in the van it’s all similarly mathematical, as we moved on to building the bed frame. Chris has found a design online, which was fairly simple to follow. Still it took a long time cutting every piece and putting them together.
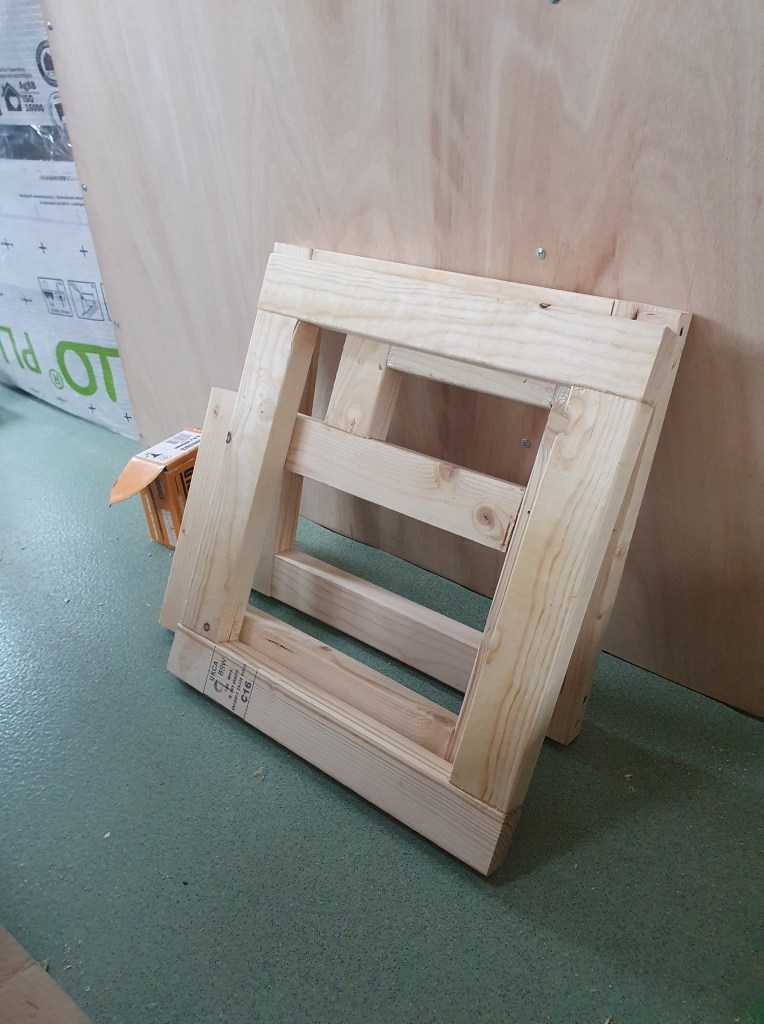
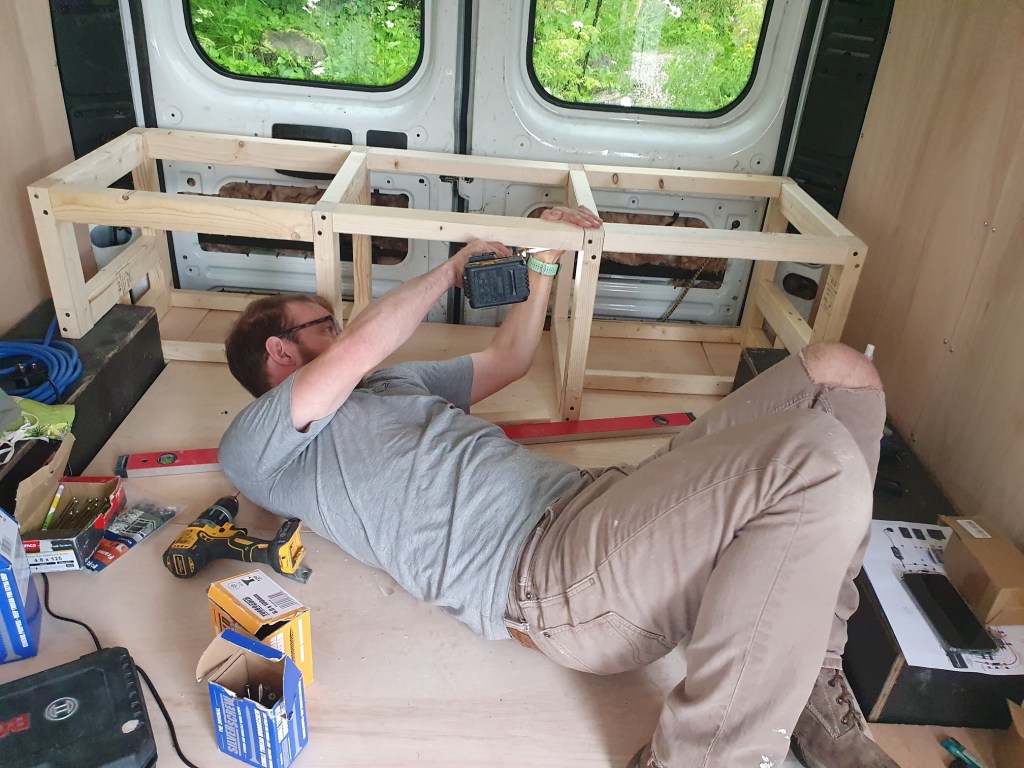
We started with the back bench, which needed two sets of hands to keep everything in the right place while joining them together.
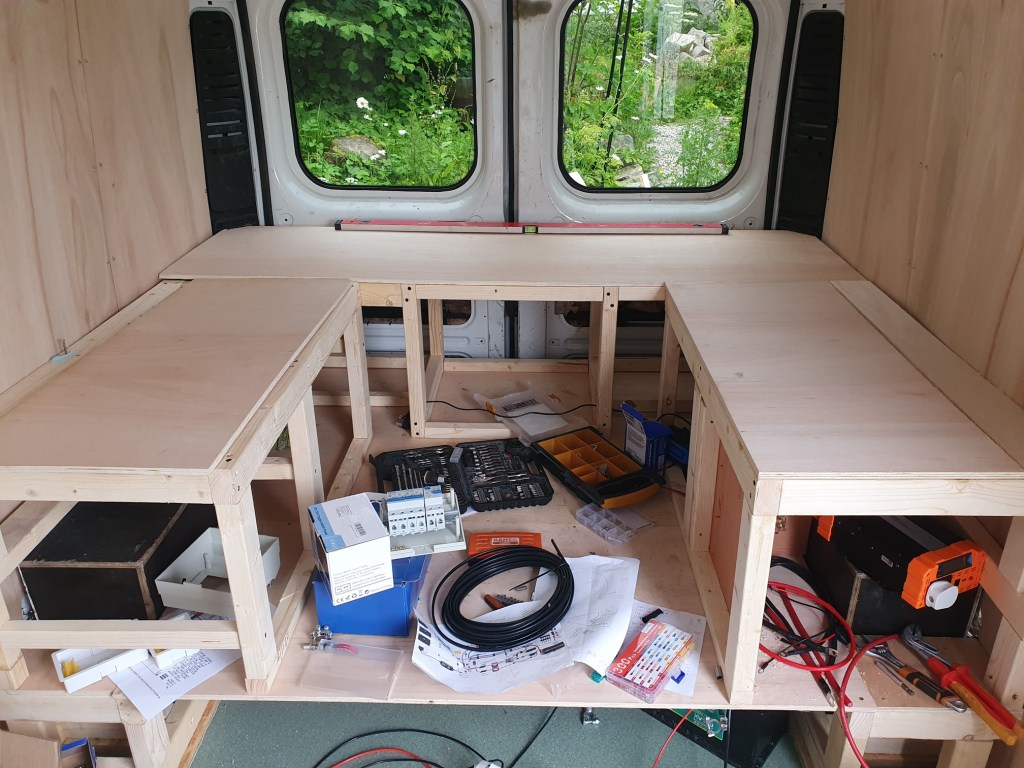
The sides were easier for me to get on with on my own, so Chris could concentrate on the electrics, which is the biggest headache of doing up a van, and something I don’t understand in the least.
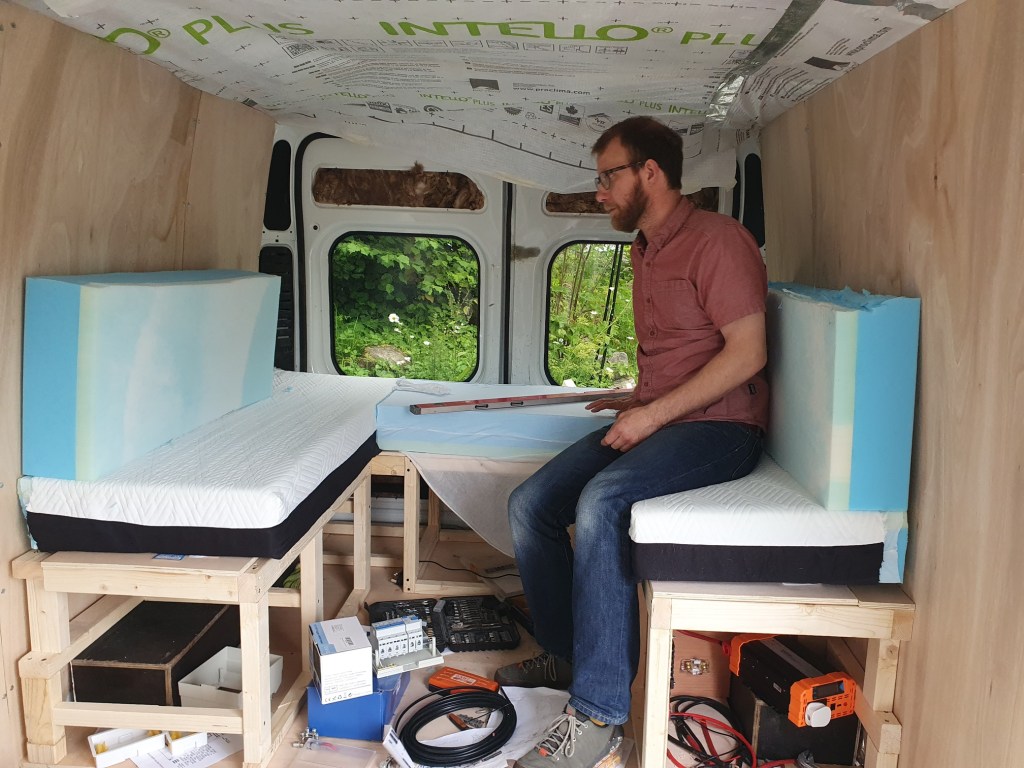

With the benches built, we cut down the mattress we’d bought into the right sizes, so they can be benches or a bed, when needed. Now these are all cut up my next evening job will be sewing the covers.
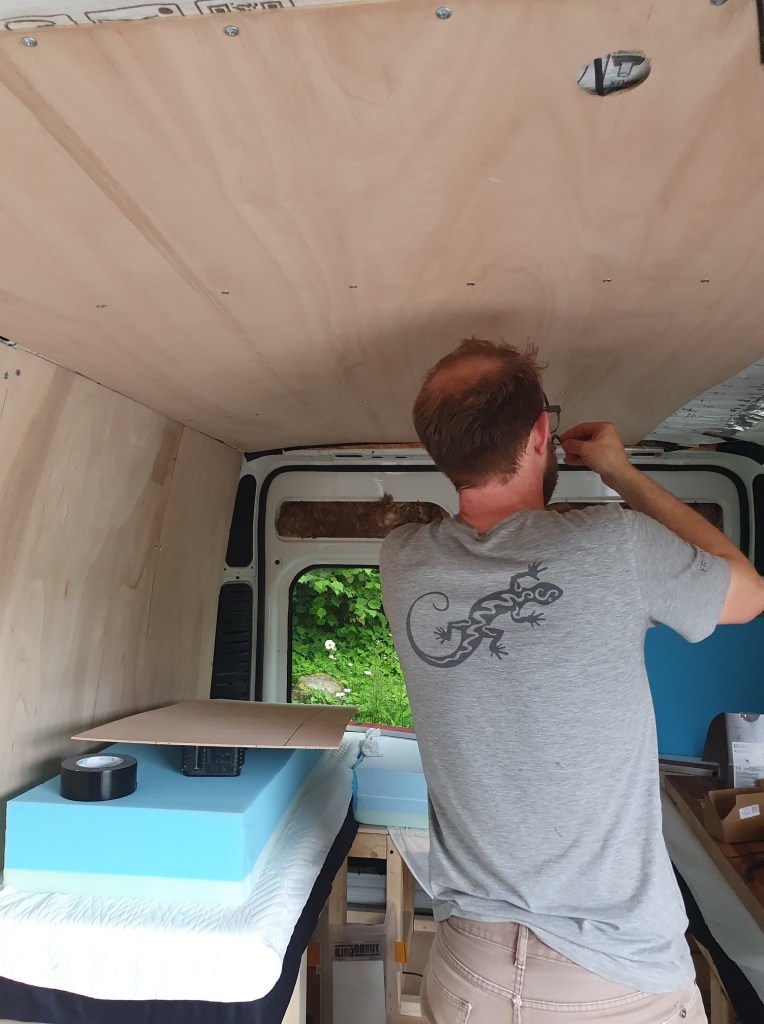
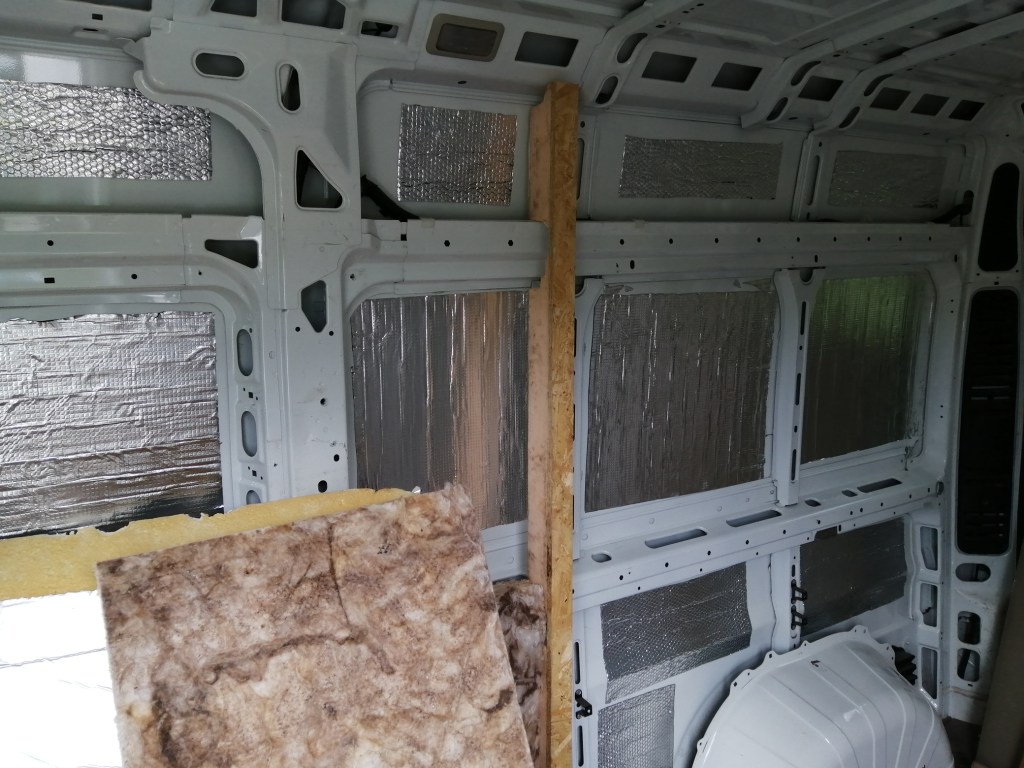
We then started to get the ceiling on, Chris laying the wire for the lighting first.
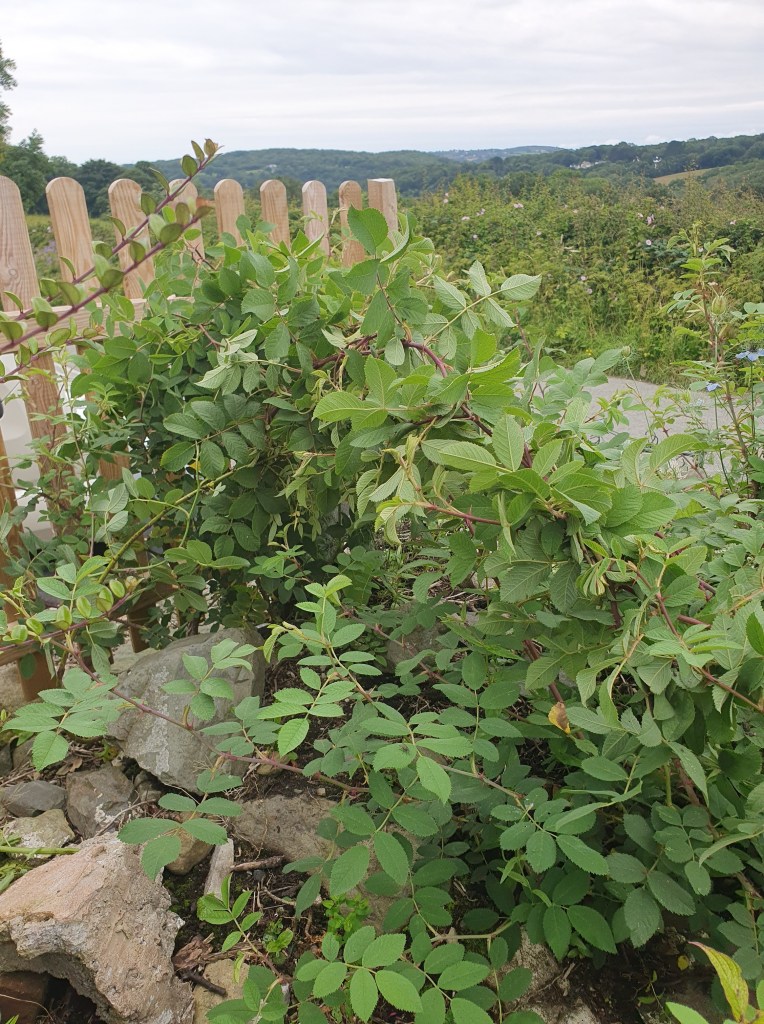
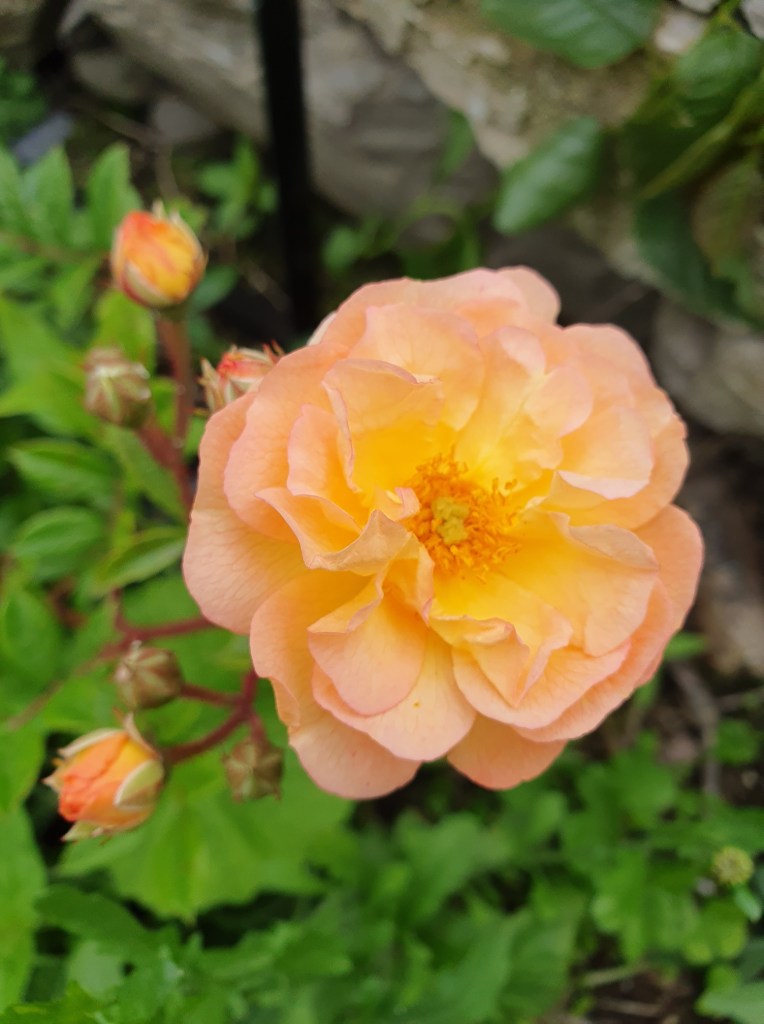
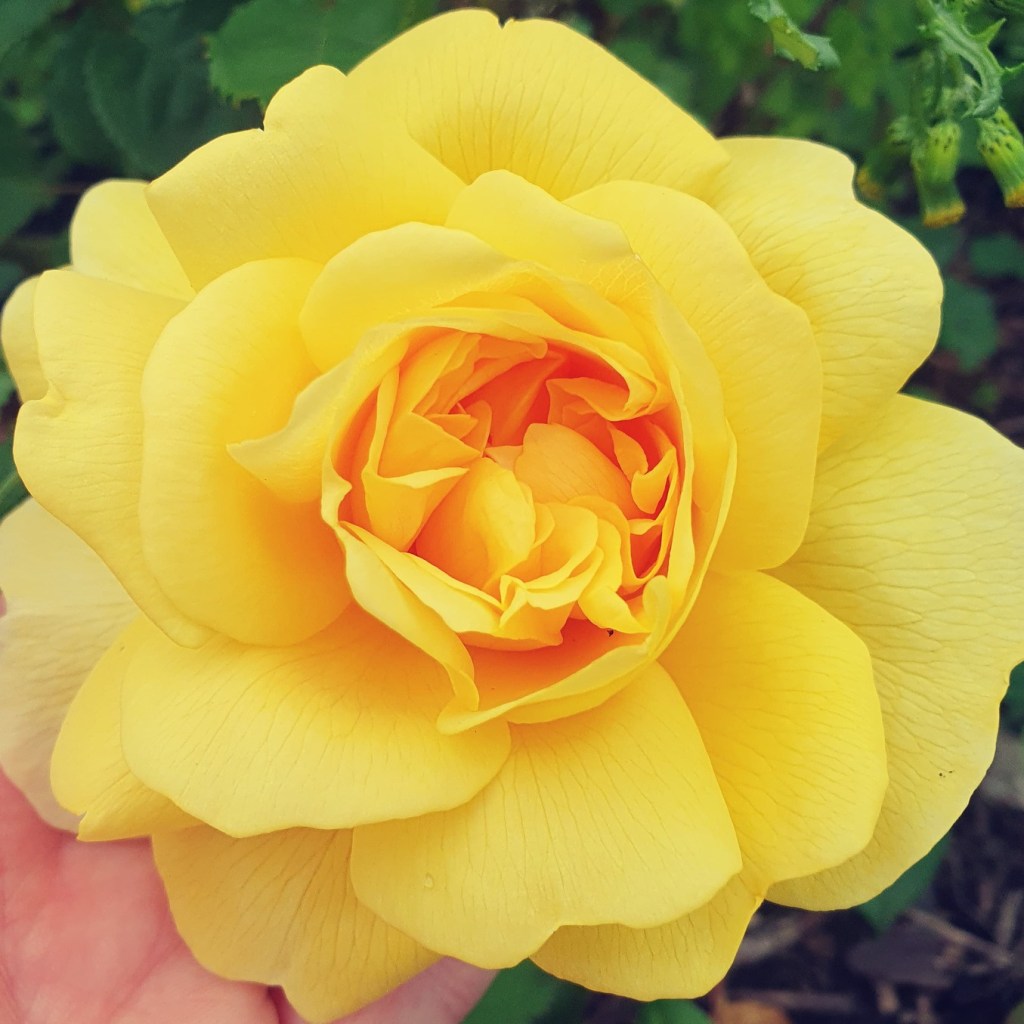
Outside the van, the garden is coming along well. It still looks like chaos, but slowly some order is forming. As part of this I’ve started shaping the rambling roses into a coherent form, pulling in tendrils to create a sphere. It’s a bit of an experiment, but hopefully it will mean I can form them into a kind of rose topiary. The other garden roses are starting to put on a show, and I look forward to the day when the garden is full of the scent of roses.
-
Van 4: Making good
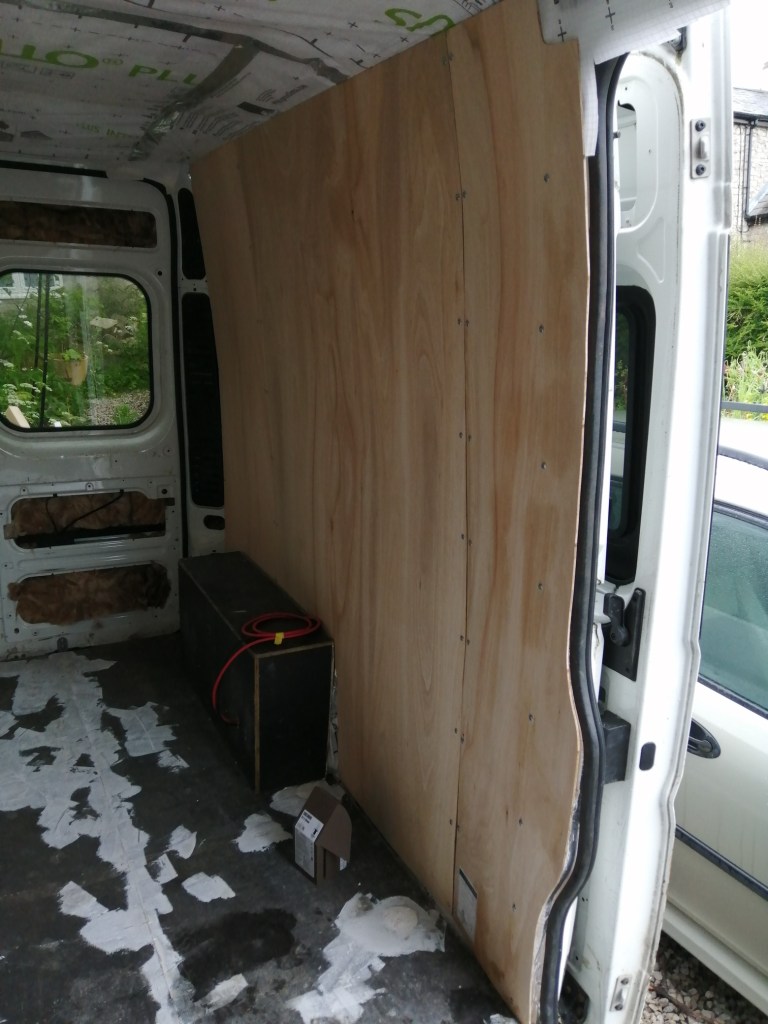
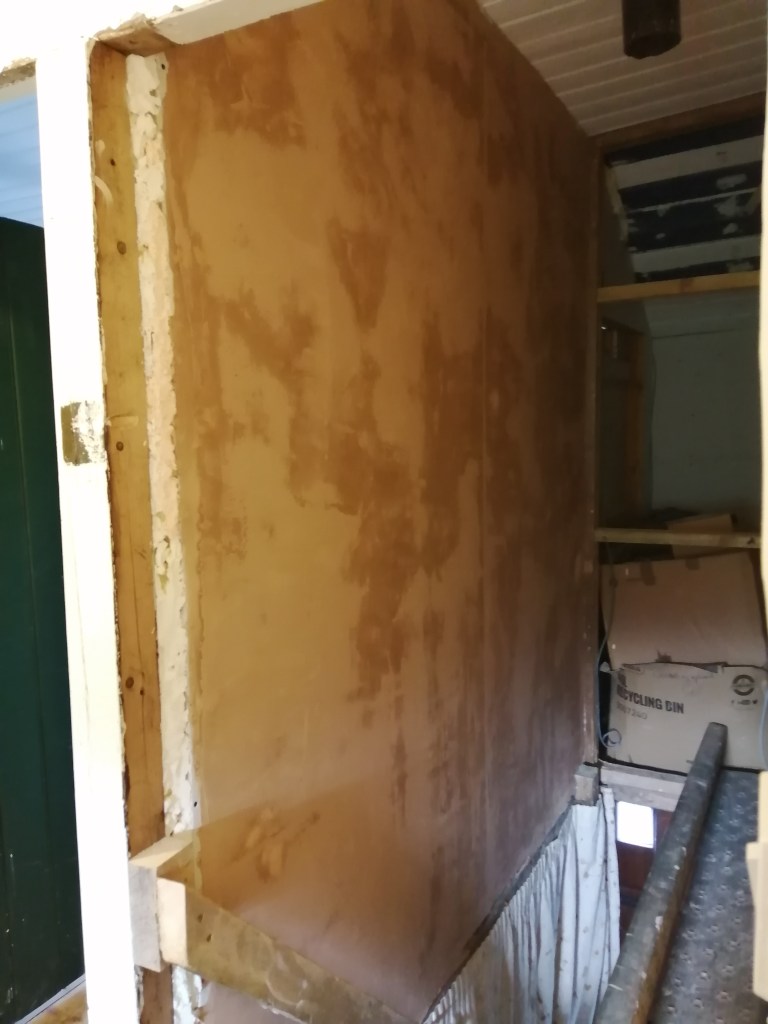
Now the van is insulated it’s time to make it look less like a van and more like somewhere you can live. Our first job was cutting and attaching thin sheets of plywood to the wall. We’re a little undecided whether to paint them or just varnish, so for now we’ve been as regular as possible with the screws to keep it looking tidy if we go with varnish. There are some some gaps between the boards, which will need filling. The one patch of wall we’ve left is the bathroom, which will need something more waterproof to line it.

While Chris installed the electric hook up in the van side, I filled any holes or dips on the floor, before sanding it flat.
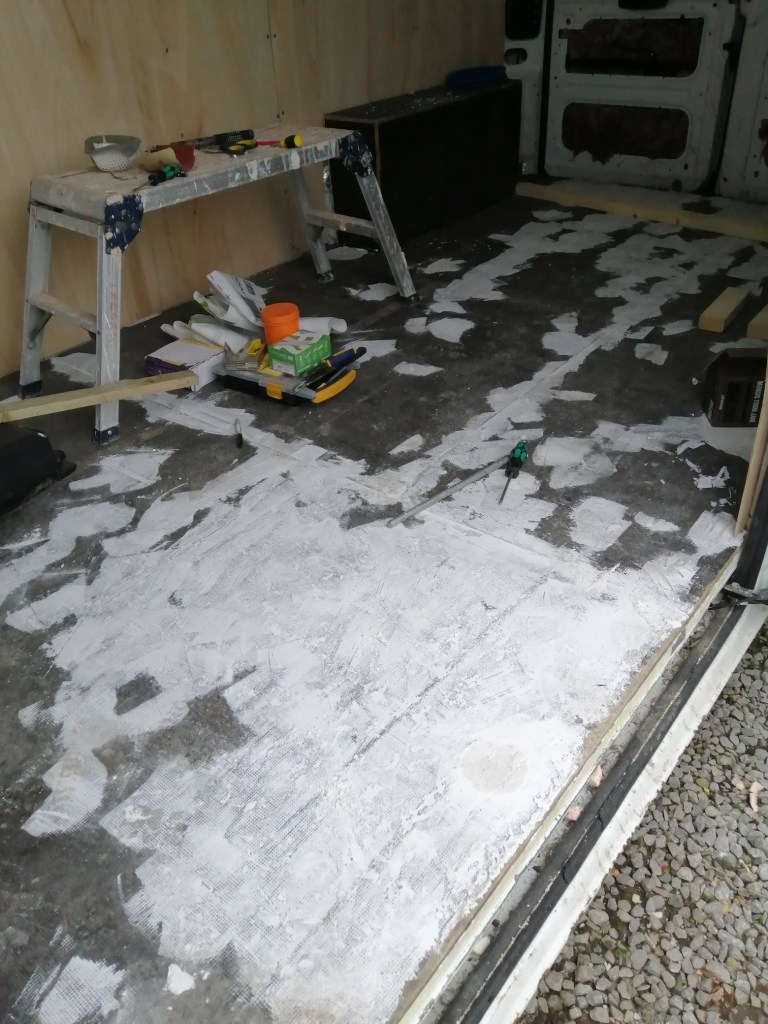
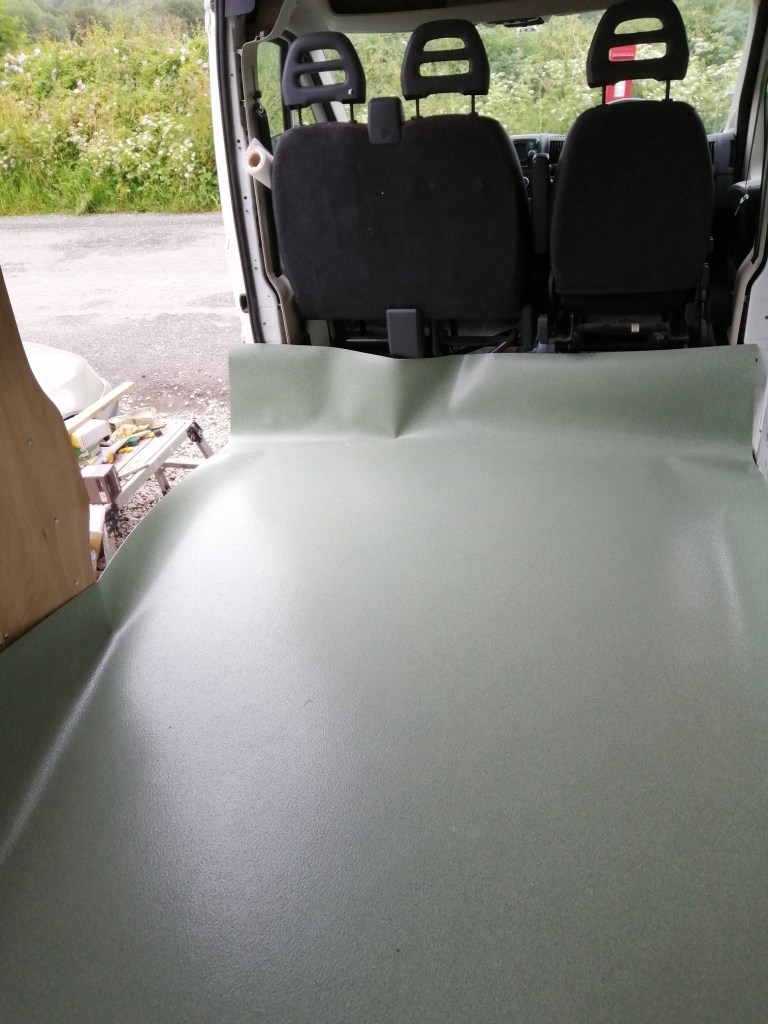
With the floor a little less bumpy we unrolled the lino and cut it shape.
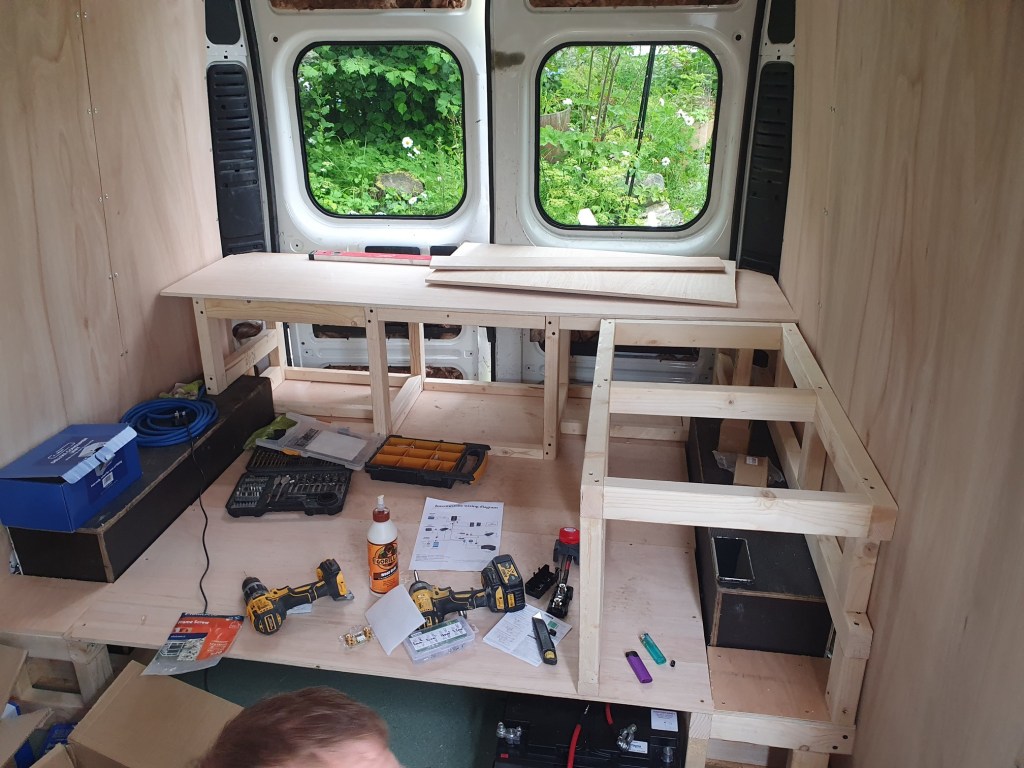
We then got on with building the storage. We’d decided to have a raised floor under the bed/benches for extra storage. To build this, Chris had found a design online and adjusted it to our needs. With thick plywood on top to act as a suspended floor we’ll next build benches on top, with a table that can convert into a bed. Sounds complicated.


Inside the house I’ve spent a few evenings faffing around with the coving over the windows. It’s not an easy job with wonky walls and a slanting ceiling, but finally all the coving is attached, and will just need filling, and sanding and caulking…. Nearly there.

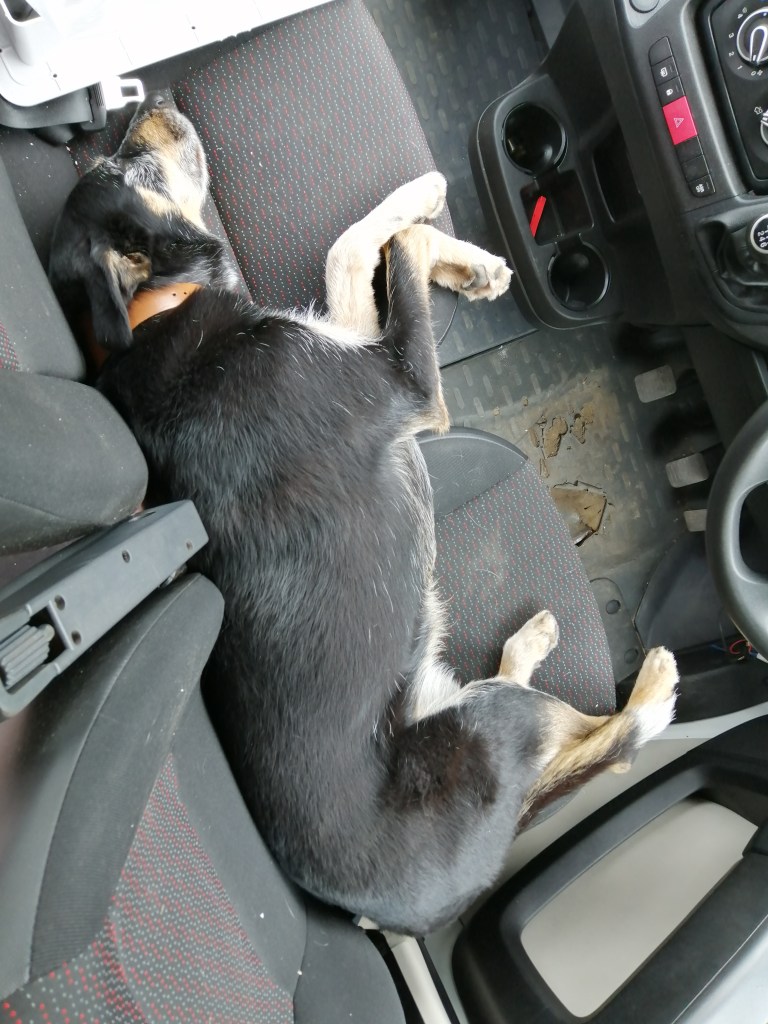
The dog has decided he doesn’t like leaving us unsupervised in the camper, so the compromise is he sleeps on the front seat while we work behind. It doesn’t look as comfortable as being asleep on the sofa, but at least it means he’s getting used to being in the van.
-
Scuppered by gravity
I’ve had quite a long break from drystone walling, but after a particularly irritating teams meeting I got out in the garden to build some more, my own bit of meditation. It’s a bit of a unstable wall at the moment as I need to backfill in a number of the places, having built the wall straight when the earth bank isn’t.
But come the weekend it was back to the campervan. Unfortunately, our plans were a bit undone this weekend when Chris woke up on Saturday morning feeling terrible. He therefore got the day off to lay on the sofa and I did what I could on my own.
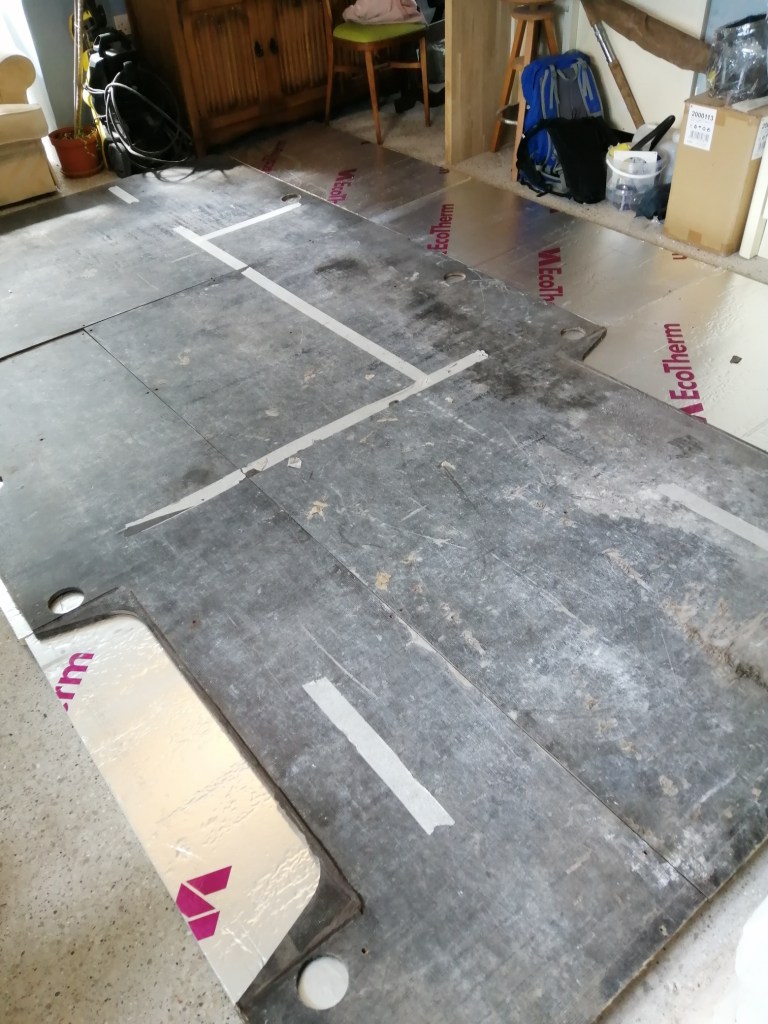
Firstly, I had to clear the kitchen to lay out the flooring from the van, on top of the insulation to allow me to cut it out. Chris did have to get up briefly to help me move some of the heavier furniture out of the way to make space.
The template worked really well and I only had to shave a small amount off one corner to get it to slot in.

Prior to the insulation going down a couple of cables needed to be laid to be connected up later.
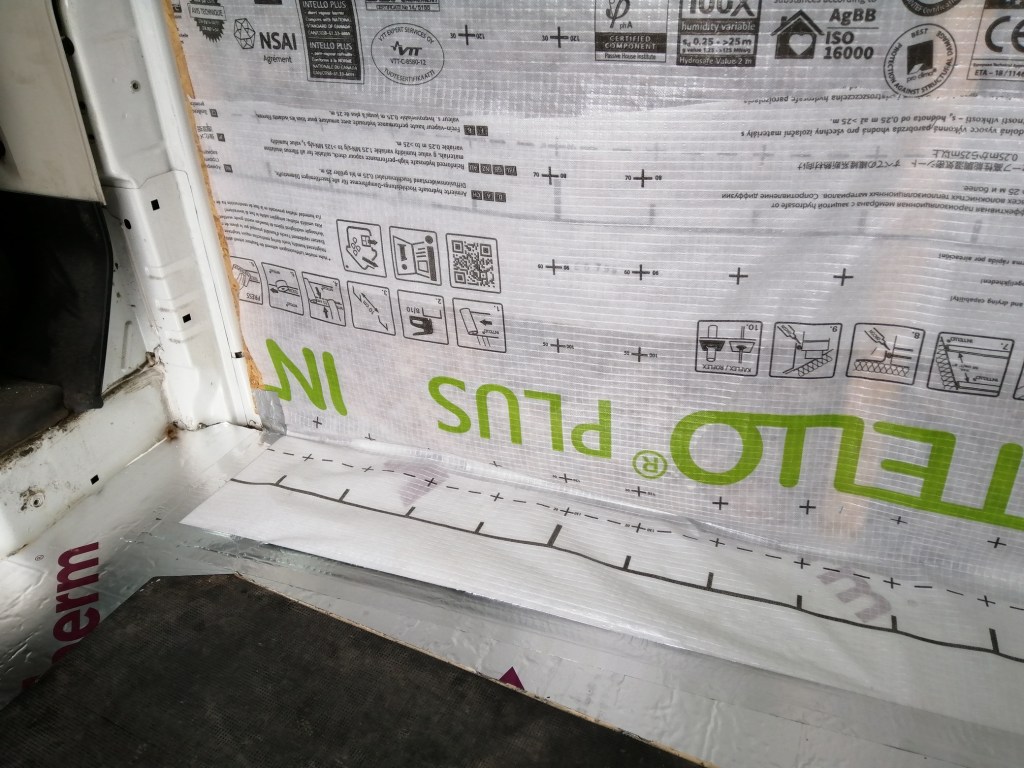

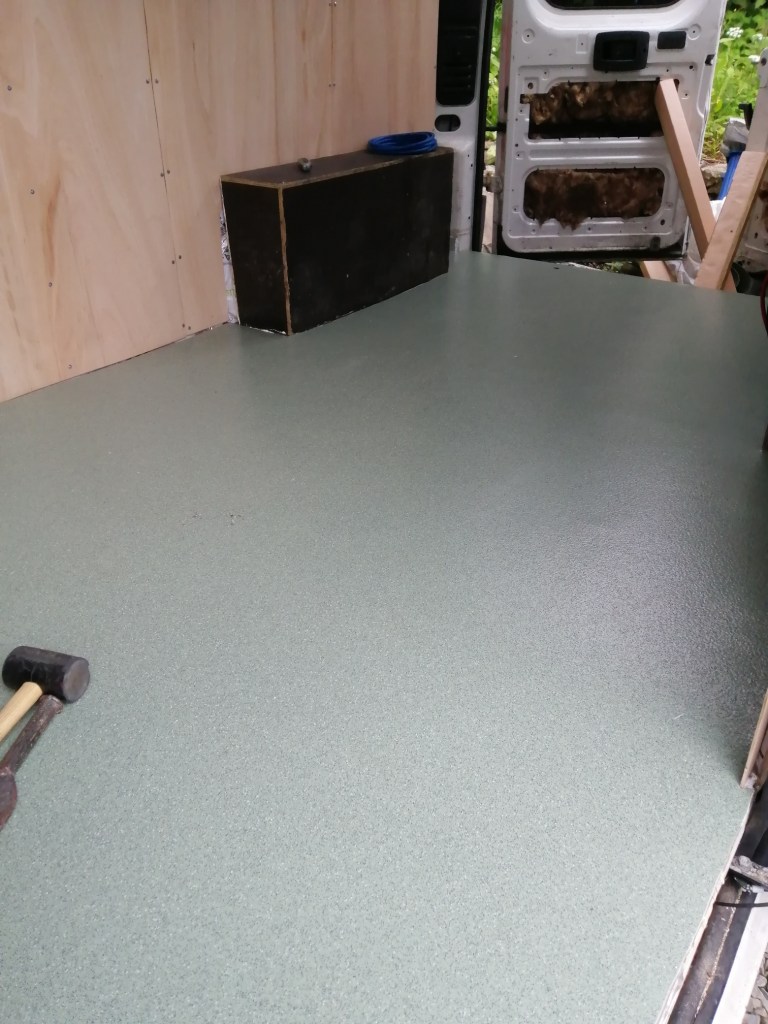
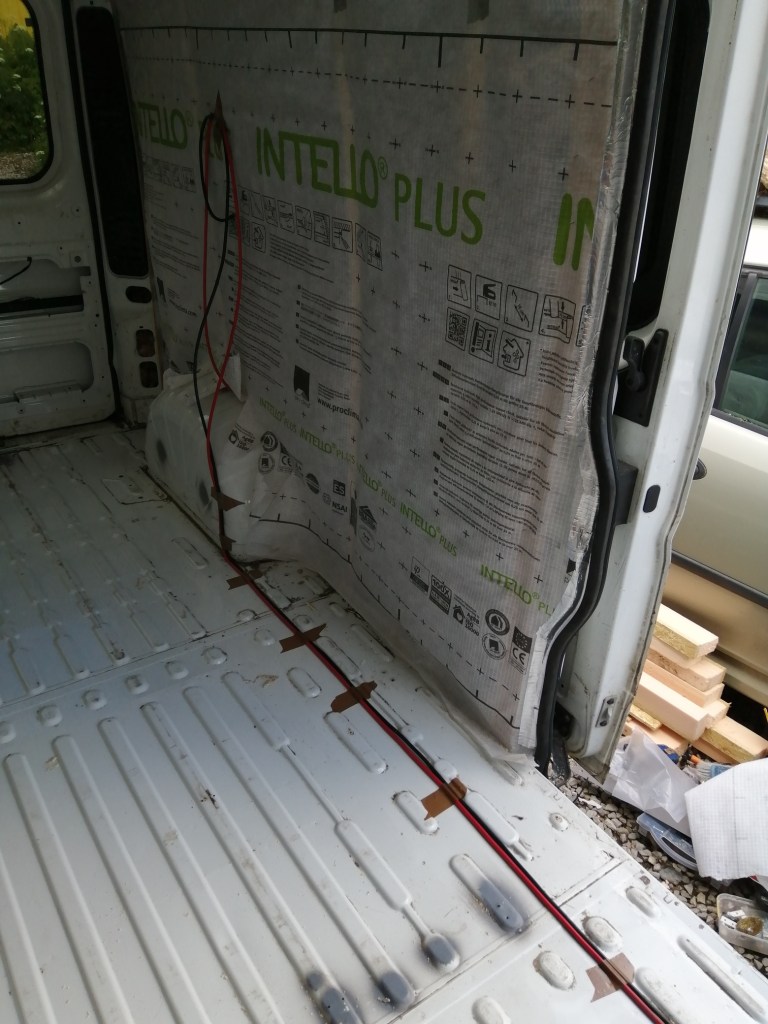
I then cut and attached additional vapour membrane where it was missing. The vapour membrane was then taped to the floor and membrane added over the wheel arches.

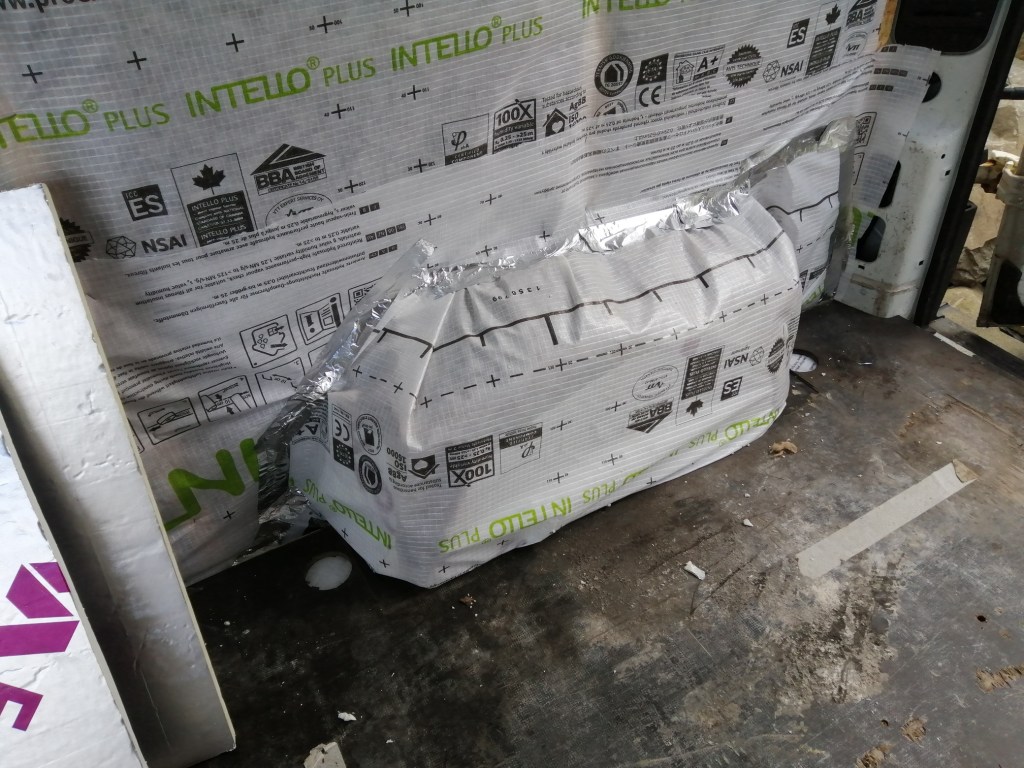
The solid flooring now put back down, and screwed into place through the old screw holes, I had to pack insulation around the wheel arches and tape to tops to the wall to seal. An awkward present to wrap.
I felt pretty pleased with my progress on my own, particularly as I had a late start after fetching supplies for Chris. So when Chris said he would be well enough on Sunday to lend a hand I thought we’d fly along the rest of the jobs…
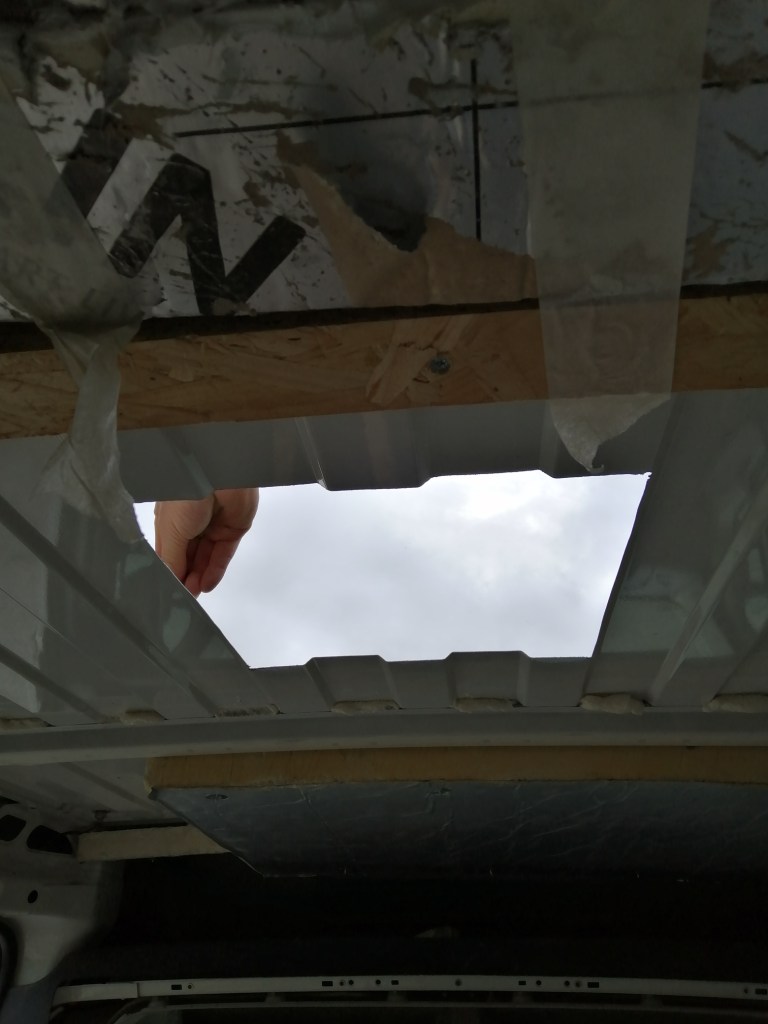
Sadly, Sunday was a bit of a disappointment. We’d hoped to get onto building the structure and the electrics, but the ceiling just sapped all time out of the day with two simple jobs.
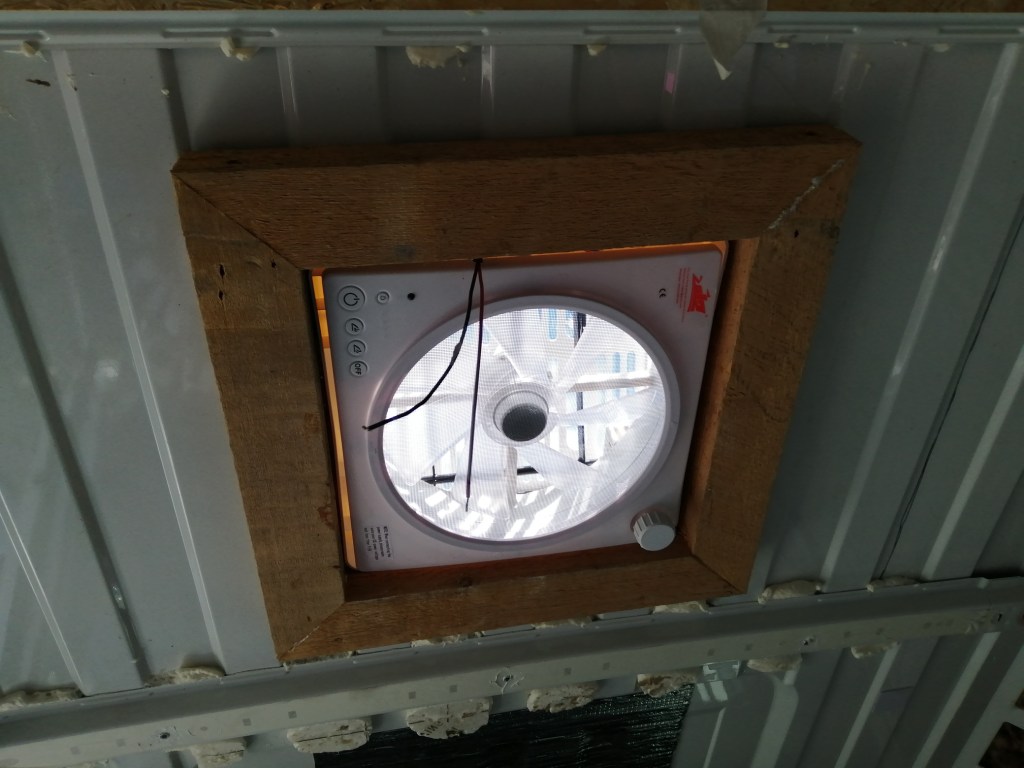
Firstly, Chris wanted to get the ventilation fan in place, needing to cut out a hole in the metal and then secure it in place. With one thing and another the job took most of the day as it refused to fit, and it turned out we didn’t have the right wood.
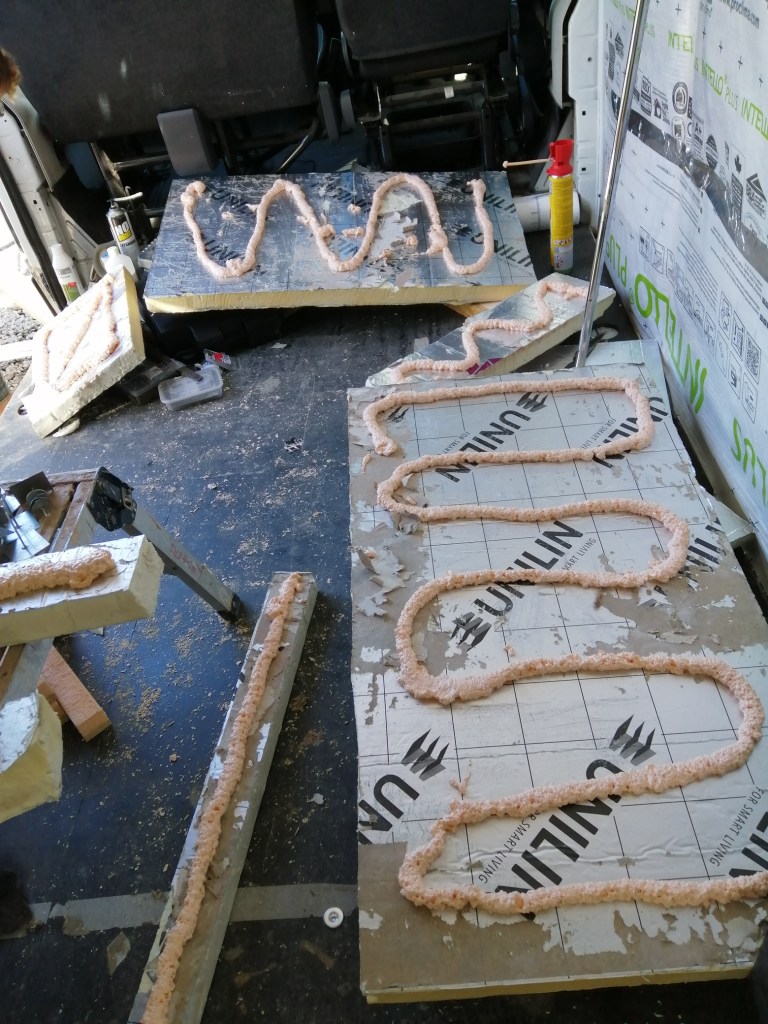
The job I spent my time on, after adding more insulation to a few awkward places in the walls, was trying to get the insulation to stay on the ceiling. Firstly, I needed to drill holes for a special bolt system for the batons that the ceiling would attach to, but despite the instructions recommended a 7mm drillbit the bolts just slid back out. Not a good sign.
When that was finally resolved we attempted to stick the remaining insulation up with expanding foam, as the specialist spikes we’d brought didn’t work. Unfortunately, the foam didn’t harden quickly enough so in the end we had to screw in batons to keep the insulation in place while it dried.
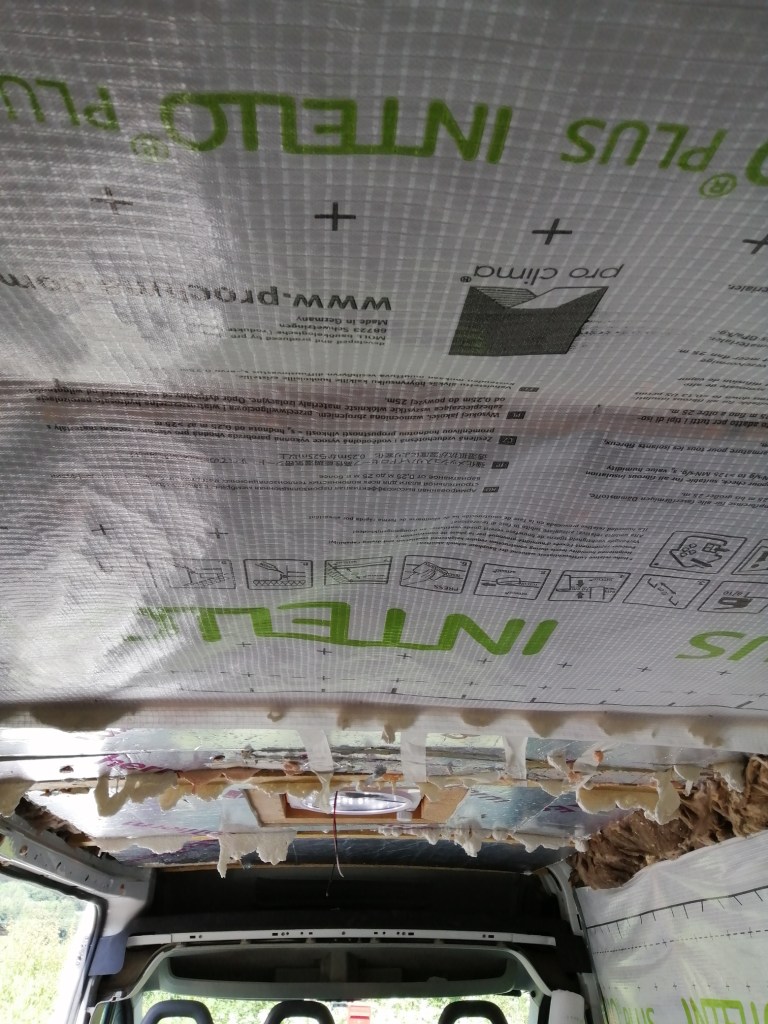
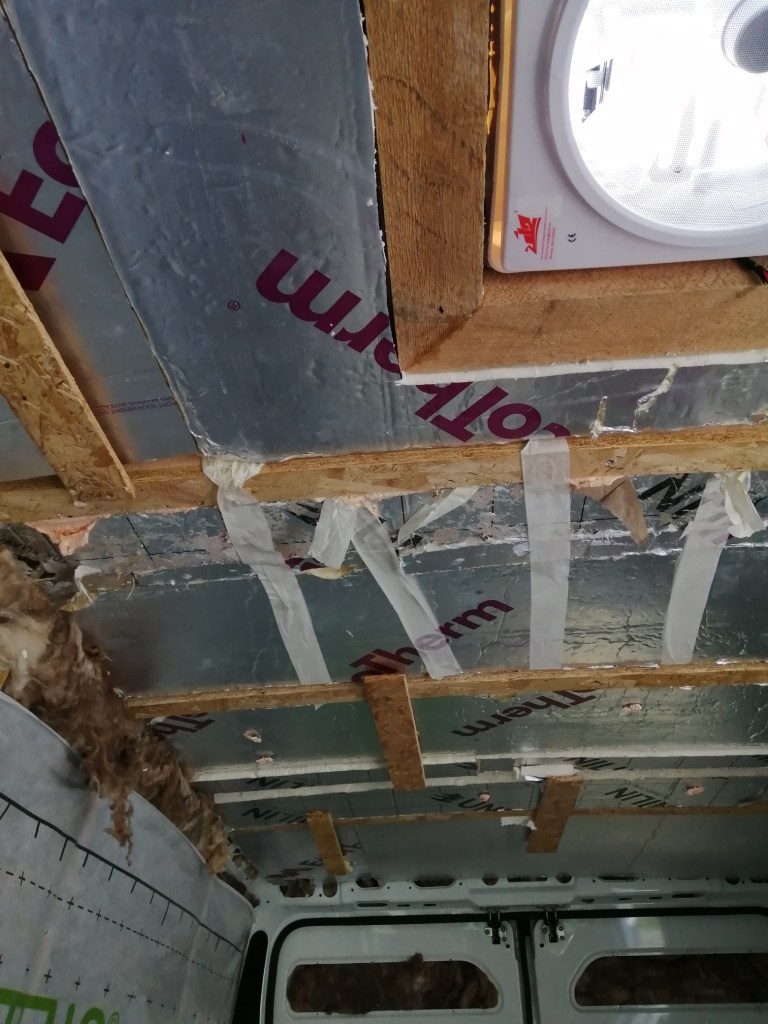
Finally, we got to fill the remaining gaps with expandy foam and attach the vapour membrane to the ceiling. It felt like a very unsatisfactory day, with it feeling like we’d barely moved the needle. But hopefully now the ceiling is at least fixed in place, things might be a little easier with most of our jobs no longer fighting gravity.
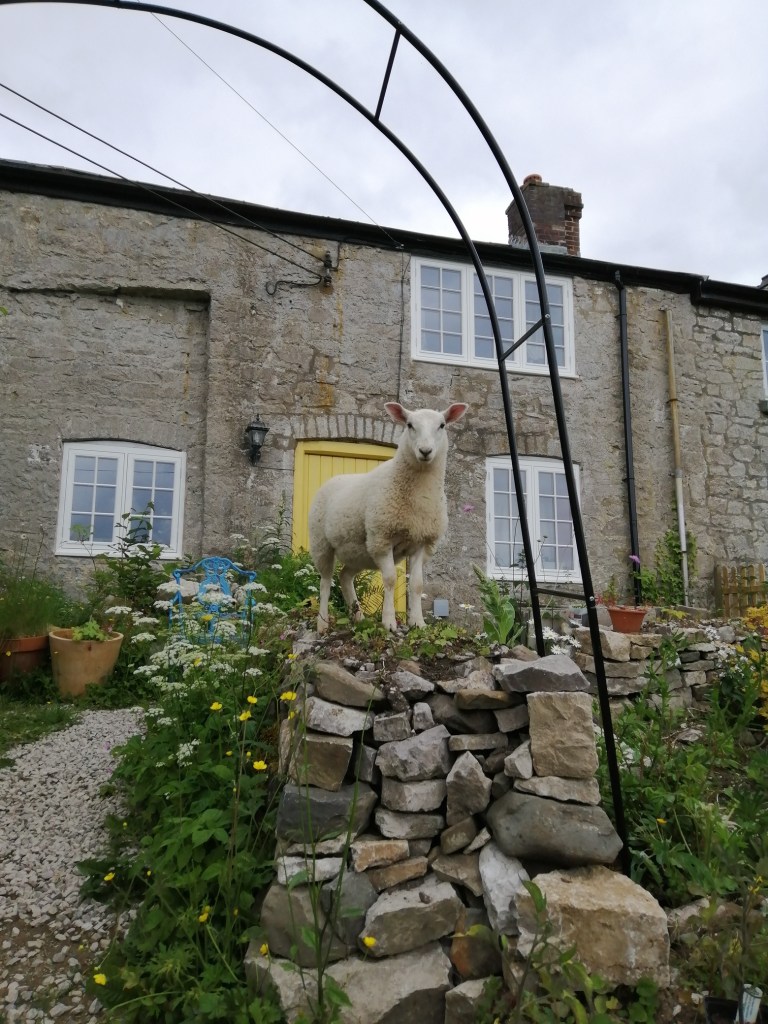
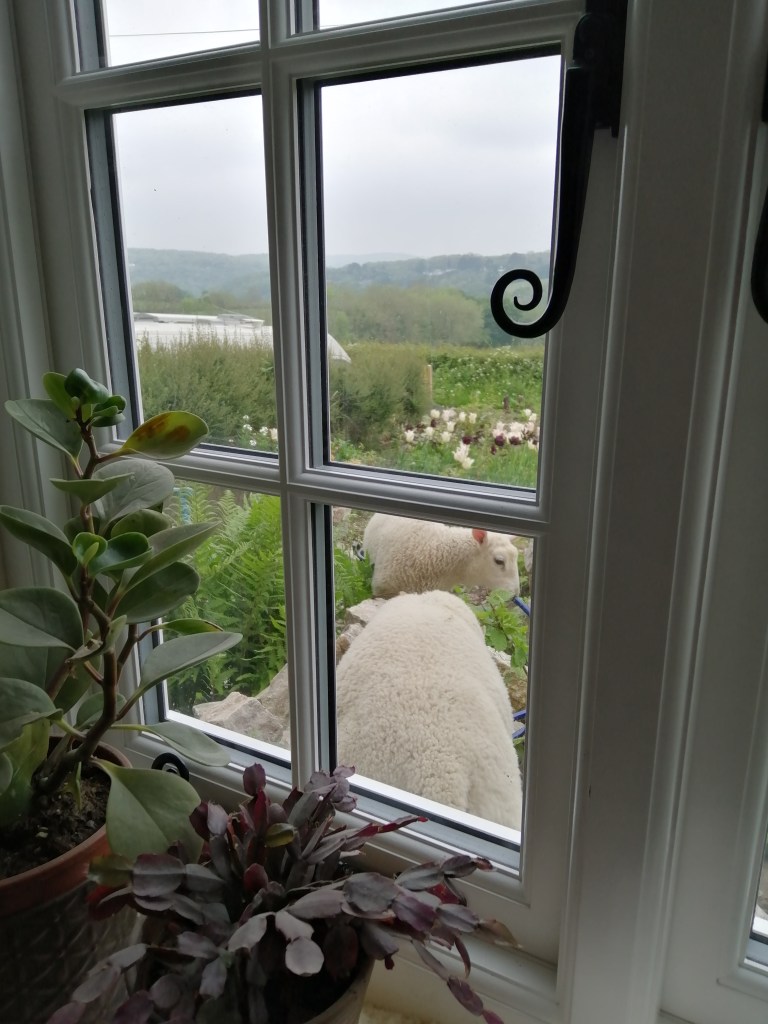
I had a particularly cheeky visitor one day, a lamb escaped from the neighbouring field. I wouldn’t have minded his presence, except he insisted on eating my prettiest flowers, so in the end I had to herd him back home. He can come back when he’s learnt to appreciate my planting scheme.
-
Van Post 2
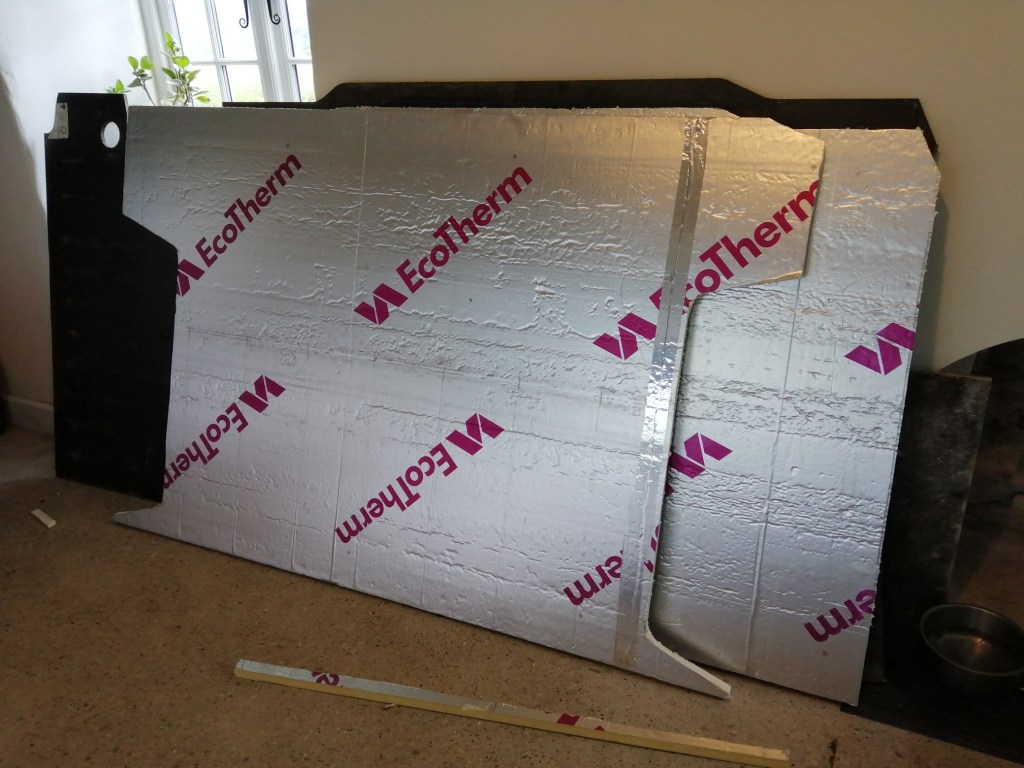
Stage two of the van transformation was to insulate it. As someone that feels the cold this is a particularly important step for me. We’ve gone for slightly unusual insulation, as it’s actually the same stuff we insulated our house with. Chris found someone selling all the materials the contractors had left behind at a very cheap price.

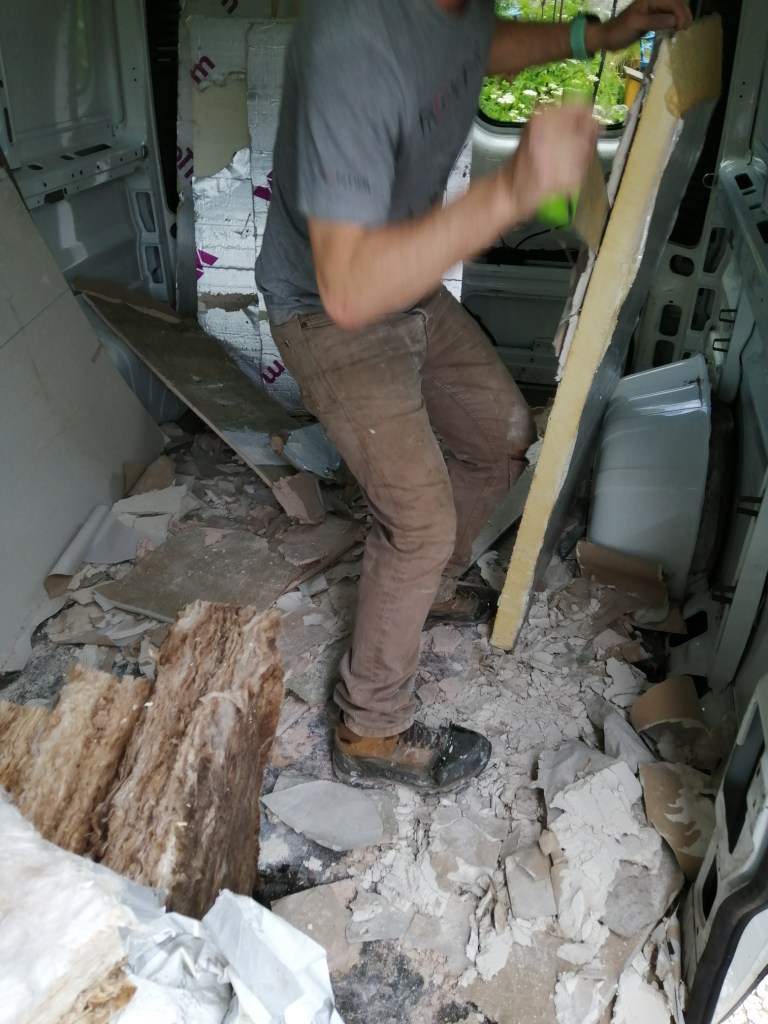
The one problem with using materials not designed for the job was that we needed to prise the unneeded plasterboard off the insulation, a surprising difficult job.
Before attaching the insulation we first cut up and applied a sound deadening material to the various panels. This should reduce noise when driving the van.

Sticking the insulation on the ceiling was a pain. Even though Chris had brought special attachments to make it easier, the glue kept failing and the boards were constantly falling down.

The batons were cut to shape and attached to the side of the van.

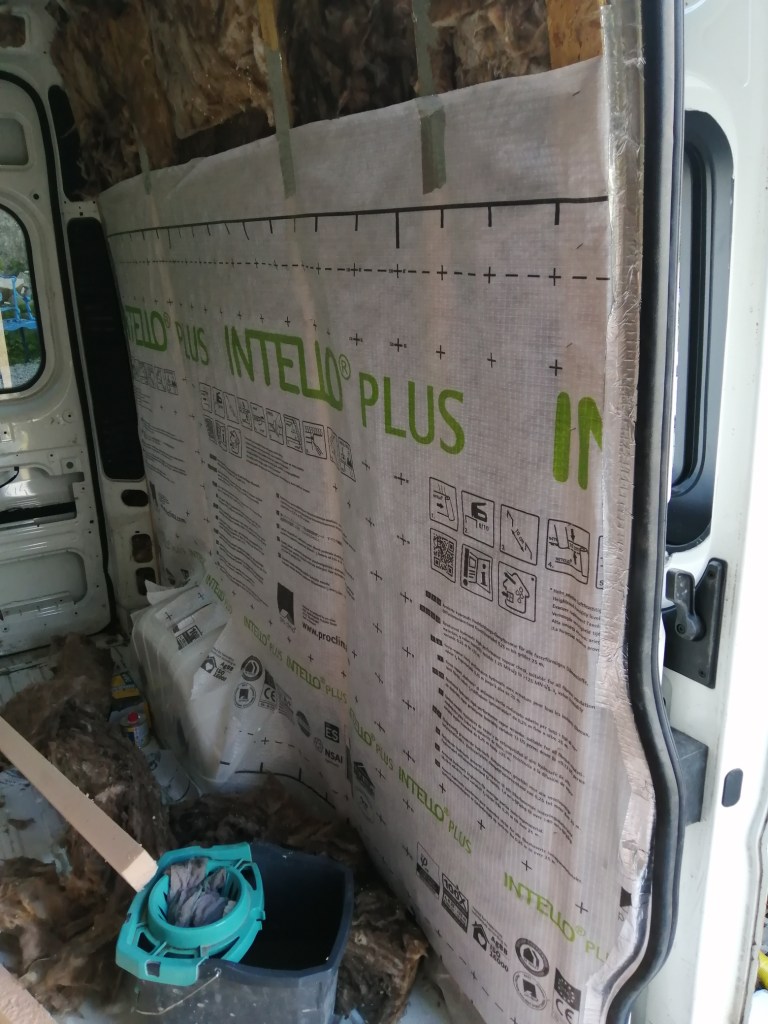

We wedged soft insulation between them, as well as stuffing it into every nook and cranny. In general, it’s not recommended to use this kind of insulation in vans, as moisture can condense between the van interior and the insulation, however we’re using the same vapor membrane as in the house so moisture won’t get in to the insulation.

Next, we took up the floor of the van. We’ll reuse the existing boards, but need to lay insulation underneath.
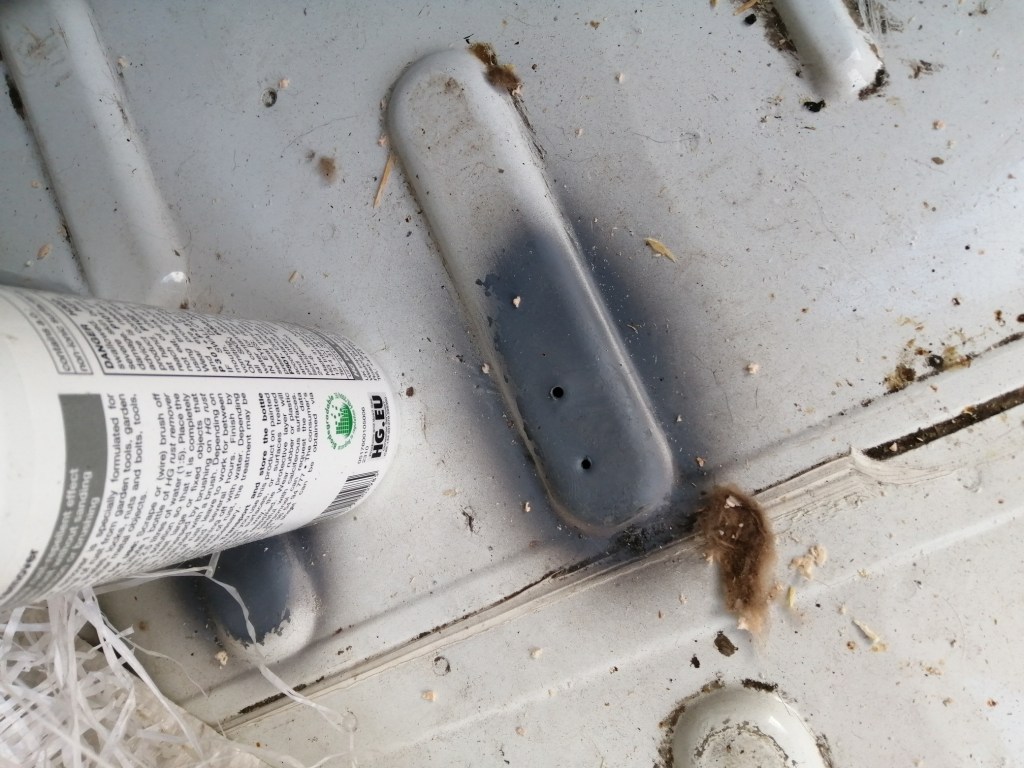
Chris spent a bit of time sanding back and priming any small areas of rust.
As usual we didn’t get as much done as we were hoping, but still most of the insulation is in place, on to the electrics next week!


As always I’ve been trying to tick off a few jobs inside the house during the evenings to make up for concentrating on the van on the weekends. I finally finished filling, sanding, caulking and painting the new wood covering the window lintels, a fiddly and thankless job.

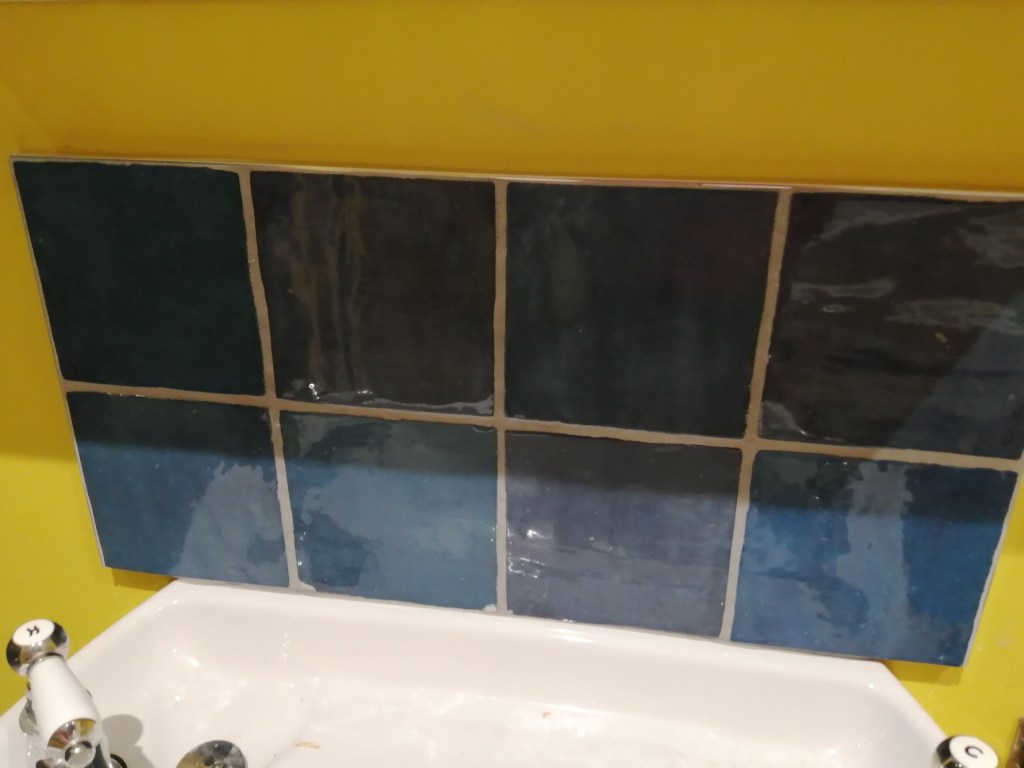
In the bathroom I finally got round to grouting the splashback.
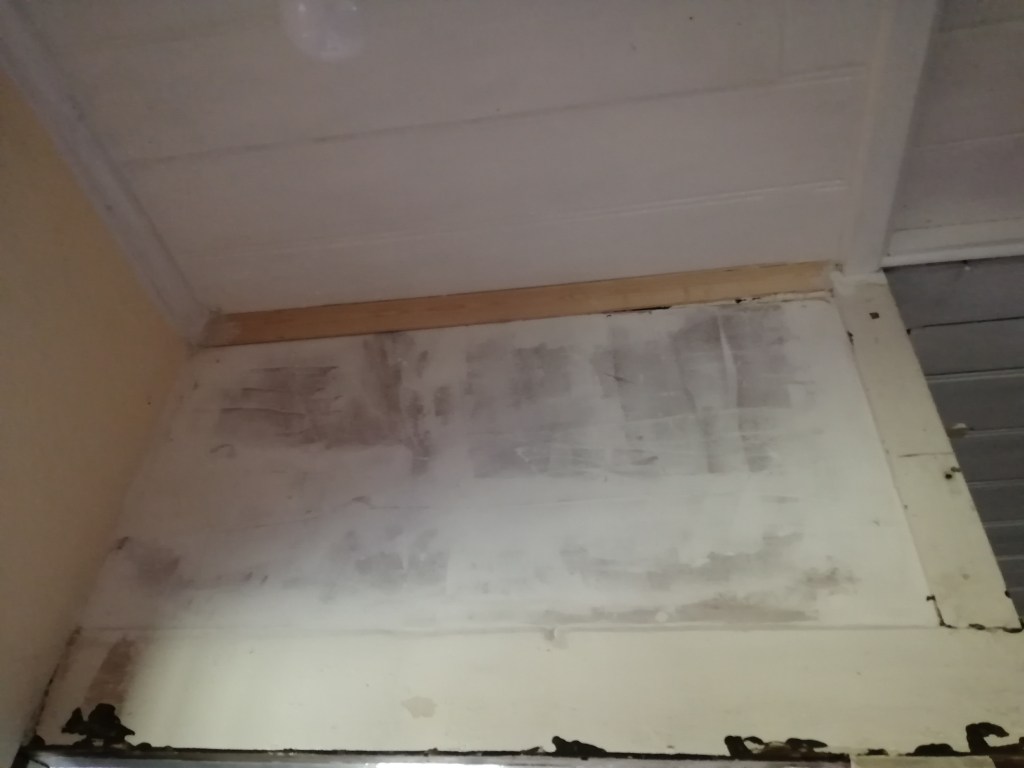
Above our bedroom door I filled, and sanded the plasterboard, before attaching the final piece of coving and filling and caulking around it.
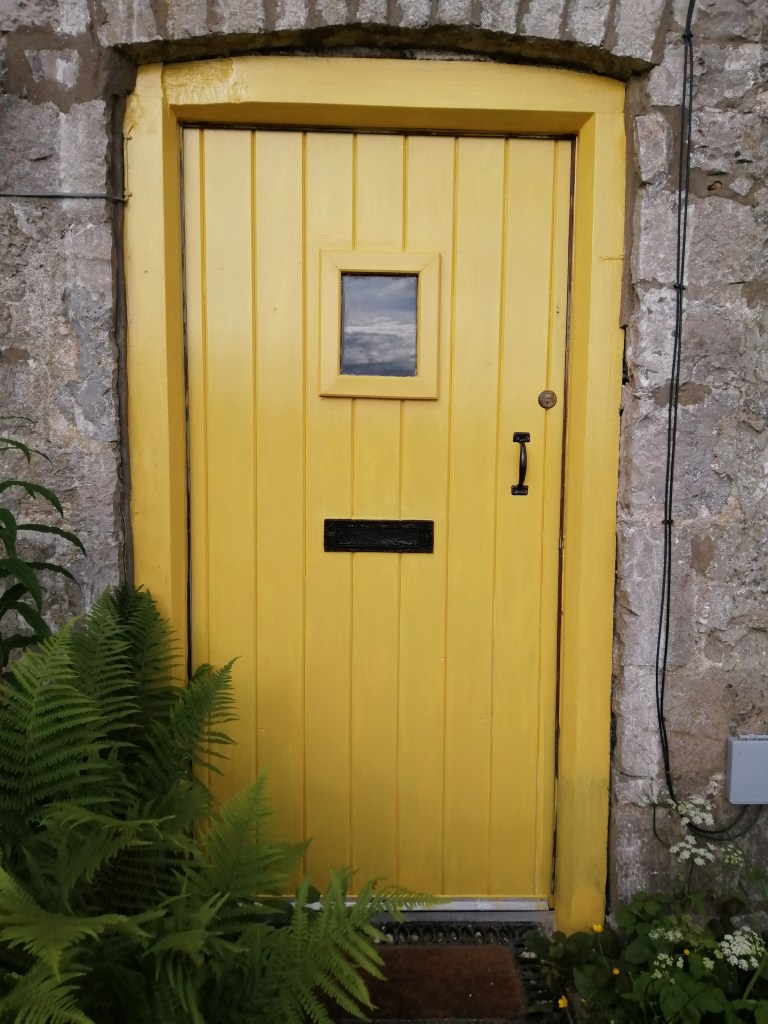
And, after filling and sanding the places where the wood had rotted away at the bottom of the doorway, the front door got another coat of yellow, and the ironwork a coat of black.


The garden is full of flowers at the moment, particularly the irises. I’d love to get more of the garden done with summer in full swing, but the van takes precedent… Lots to do and always little time.
-
Van Day 1
It’s certainly not a sensible thing to do, starting a van conversion when you still haven’t finished your house restoration, but this is exactly what we’re doing. In part we’re switching jobs because the IVF treatment starts in July so it’s possible next year we’ll be too busy with a baby to convert a van. In the house, jobs are slowly getting smaller and more managable, something one person can do while the other one looks after a baby. It may be faulty logic but it’s the route we are now taking.


Chris had already spent an evening playing round with the van electrics and had successfully turned off the faulty handbreak off alert, got the wing mirrors and window electrics working, and uplocked the radio. So far so good.
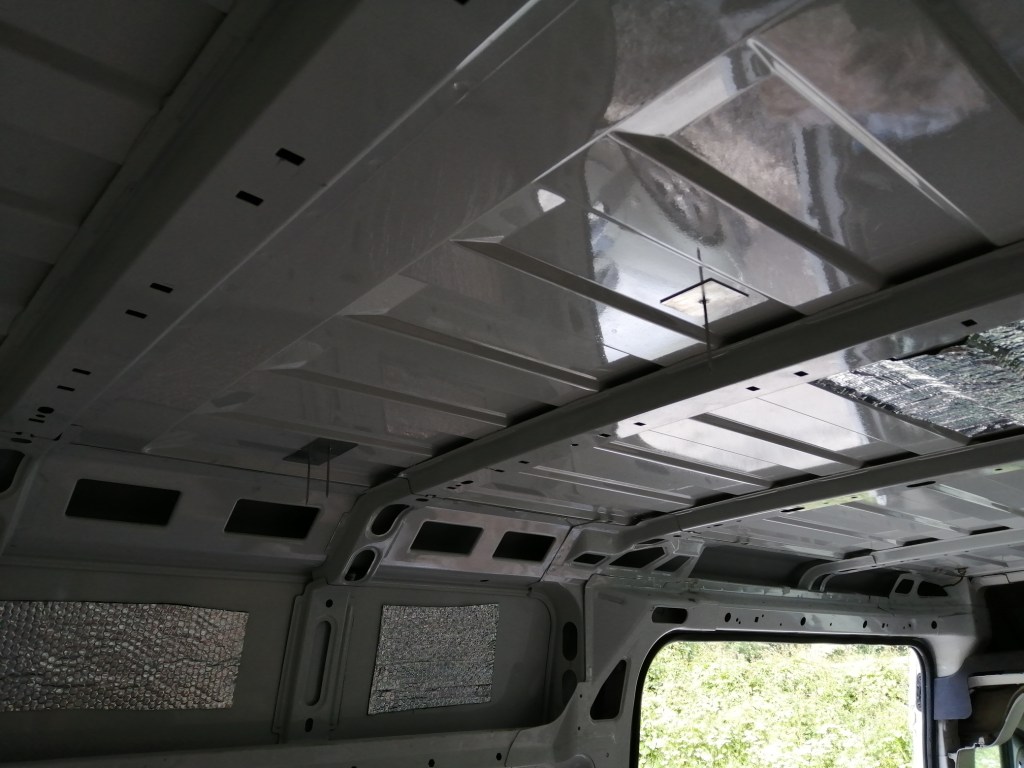
Inside we now stripped out all the plastic lining the walls, and emptied to rubbish left behind by the previous owners.
Next we unscrewed the bulkhead, which was lighter than expected. I then gave everything a good washdown and a sweep.

Our first big job was to cut the holes for the windows. I was pretty worried about this, both incase we cut the wrong bit, and in terms of how hard it would be to cut through the metal. However the jigsaw actually made easy work of the metal cutting. The only issue was that the shape we needed to follow was marked on the inside of the van and we needed to cut from the outside. To get round this we drilled holes through from the inside to show where to go.
Once cut we applied a primer to the cut edge and some sealant, before pressing on the window trim. The most difficult bit was the thick black glue that needed to be squeezed out around the opening to attach the window. Chris struggled so much to get it out of the tube I had to guide the nozzle so he could use both hands. After applying some primer to the edge of the windows they now just had to be stuck on.

Next we tackled the side window, which followed exactly the same process.
I was pleased to have gotten this stage out of the way, as it was the bit I was most worried about.
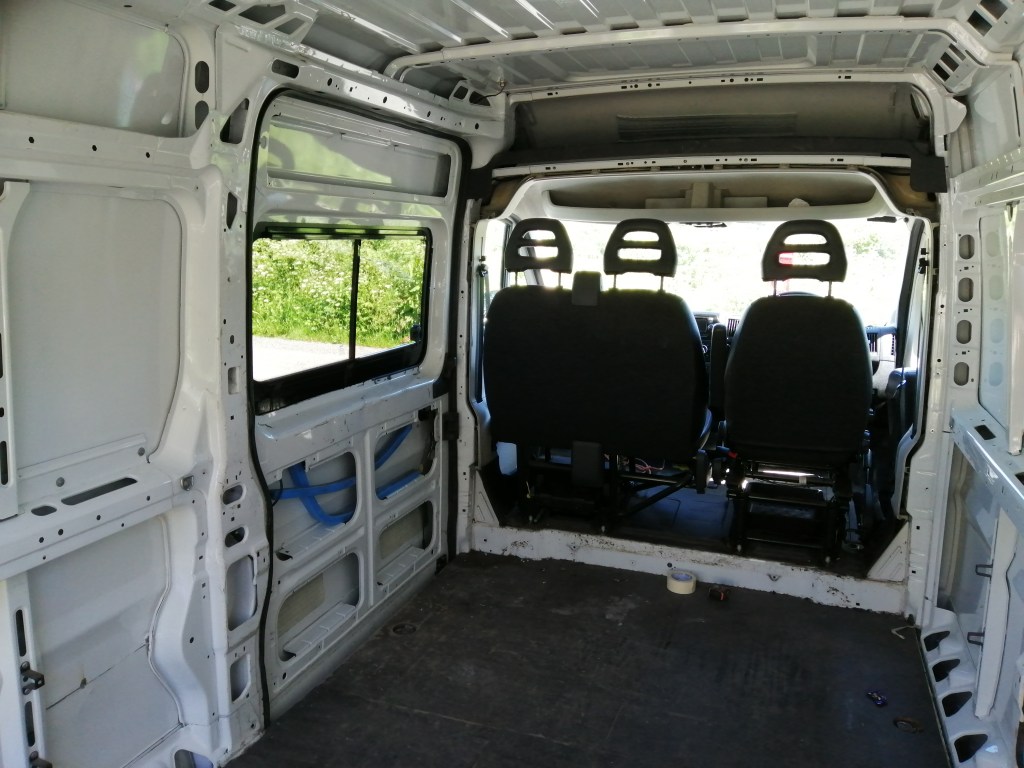
With the bulkhead gone and the windows in, the inside of the van is wonderfully bright.

Outside Chris sanded down any rusty areas and applied new primer and paint. He wasn’t particularly pleased with the colour match, despite it being exactly the right shade, but longterm we’ll probably cover it up with some decoration.
The next step will be to insulate and board, before starting on the electrics and water.
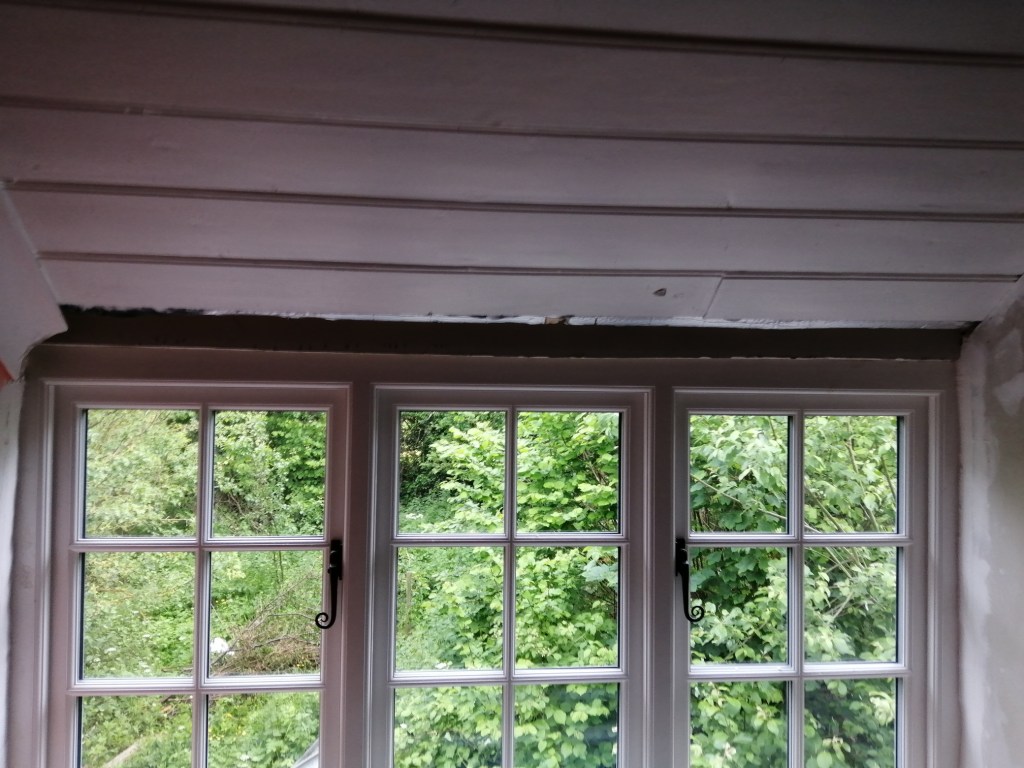
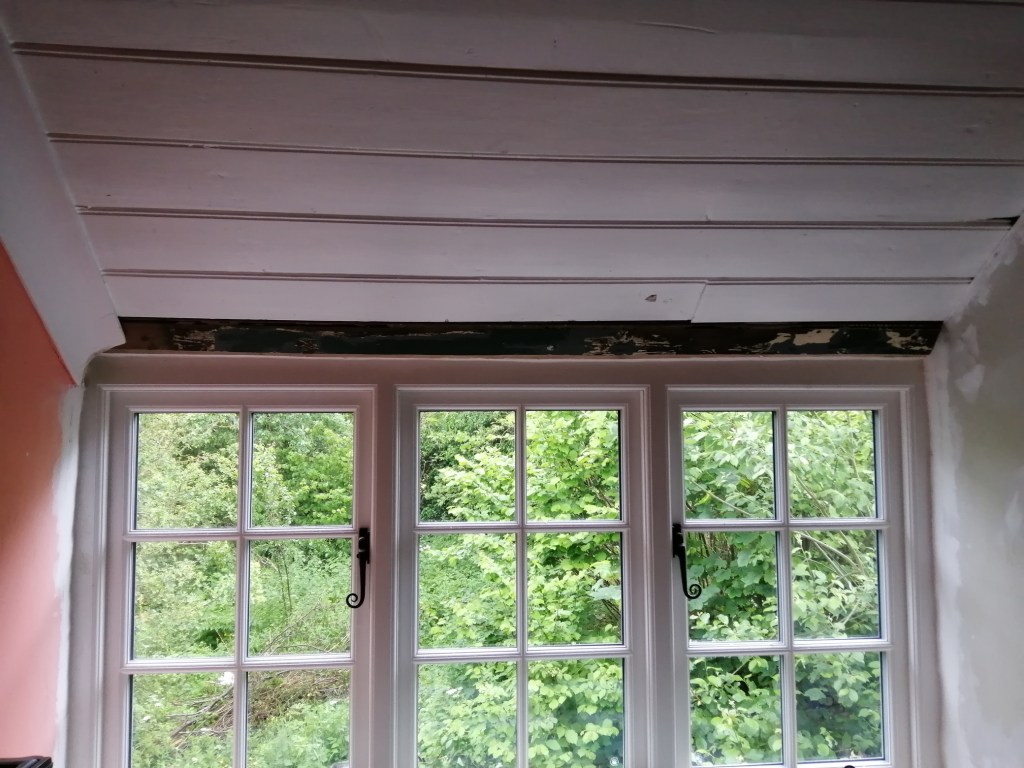
With vanlife beginning I didn’t want work on the house to completely stop, so I’ve been trying to get some smaller jobs done in the evenings. One fiddly job was to insulate around the lintels above the upstairs windows and add a final wooden board to cover the gap.


It’s one of those annoying little jobs that no one will ever notice you’ve done but will be very obvious if left unfinished. I now need to fill, sand and paint before it’s truly ticked off the list.

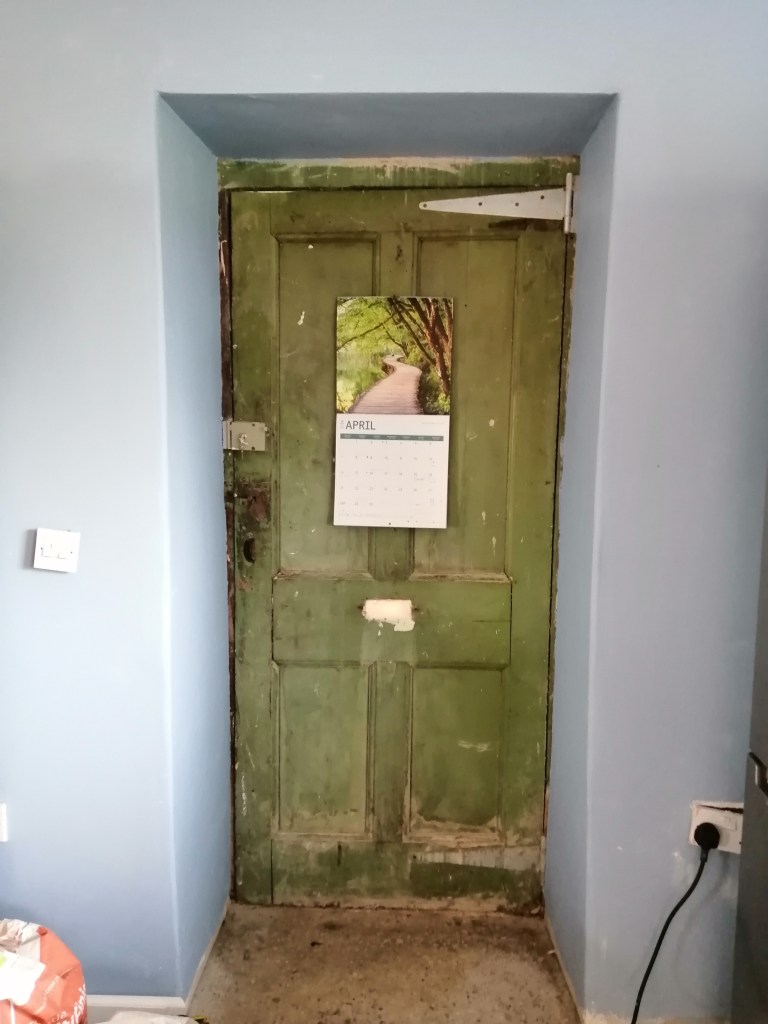
Another little job I tackled was sanding and priming our front door before adding the yellow paint. The bottom of the frame was rotten so I had to apply hardener to that, meaning I couldn’t paint it. The yellow will need a few more coats before it’s completely covering the primer, but already I think it cheers up the house.
It’s exciting to be starting on the van, but with our first van trip booked for August there’s a bit of pressure to get it done. Still nothing like piling things on to help pick up the pace…
Cheeky lambs
-
Once in a Lifetime
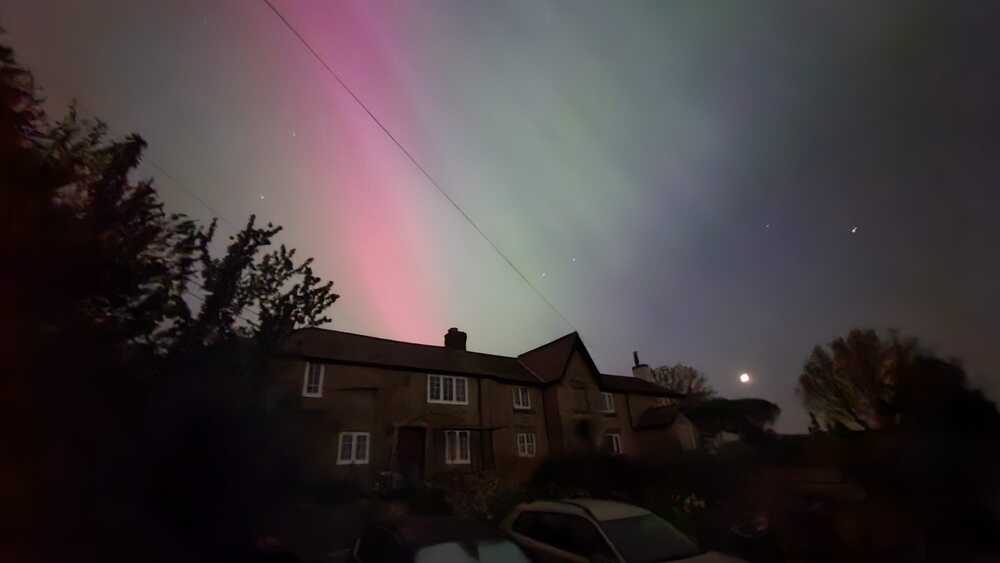
I’m afraid there’s only one thing I can start with, though it’s not DIY related. When I heard solar flares meant we would have the best showing of the aurora in a decade I decided to poke my head out the door, but I didn’t think I’d see anything. We’re very lucky to live in a dark sky area, meaning we didn’t have to drive anywhere to enjoy the lights. It was amazing, though not as bright as it looks in the pictures. It started with a haze of green, which slowly formed into a wide band across the sky. In time a pink starburst settled in the center, with a bow of pink and green heading out from it. Simply amazing.

But the week wasn’t all staring at the sky in awe. One tedious job was filling the gap around the windows inside with expanding foam, cutting it back, filling and sanding it. The bottom didn’t need filling as the windowsills will hide it, and Chris told me not to do the tops for now… Only to turn around and ask why I hadn’t done the tops….
Outside, with the scaffolding taken down, the remaining first floor windows are too high for me to fill even on the ladder, so that’s Chris’s job. Instead I filled around the double door.
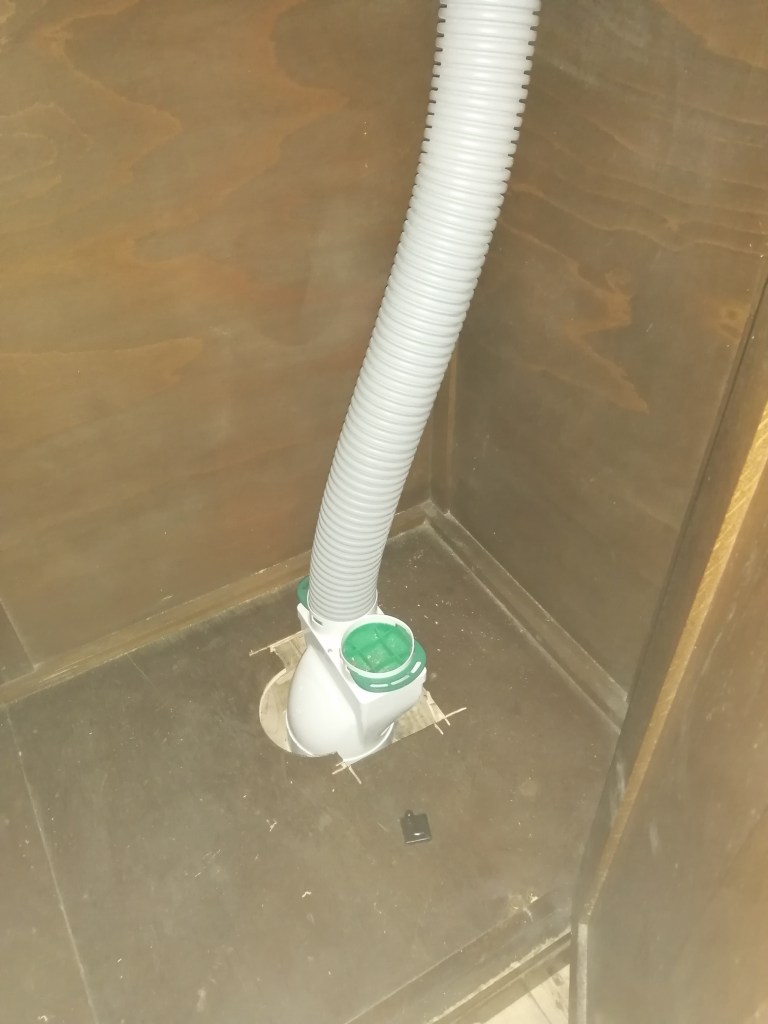
In the spare bedroom Chris cut out a hole in the new cupboard, so we could thread the ventilation pipe through.
Outside I put together a flat packed rose arch. It’s a fairly flimsy frame, but all the more robust options were several hundred pounds. In time the two climbing roses we’ve planted should climb up and over, knitting together and making it more solid.

Another rosey job was to tie down the climbing roses that are a remenant from an historic garden. These rambling flowers seemed to just grow straight up into the air last year, whereas I’d like them to cascade over the front wall, which will require continuously tying them down. While they’ve only just started growing I’m tying down what I can and will keep adding more and more throughout the summer.
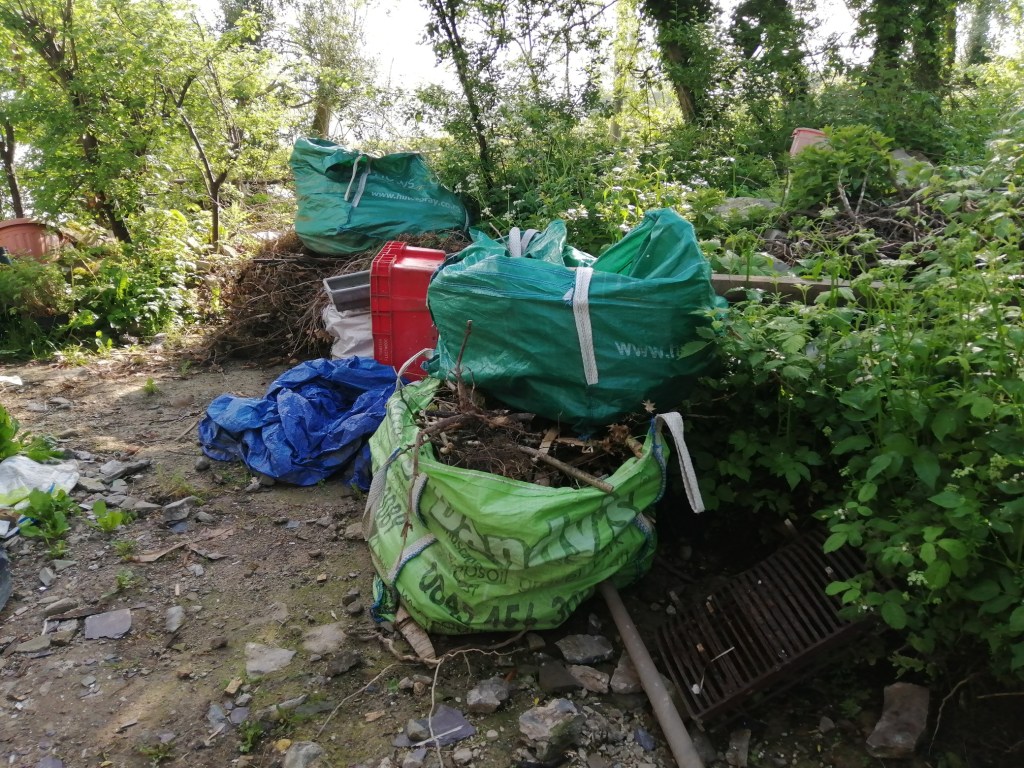
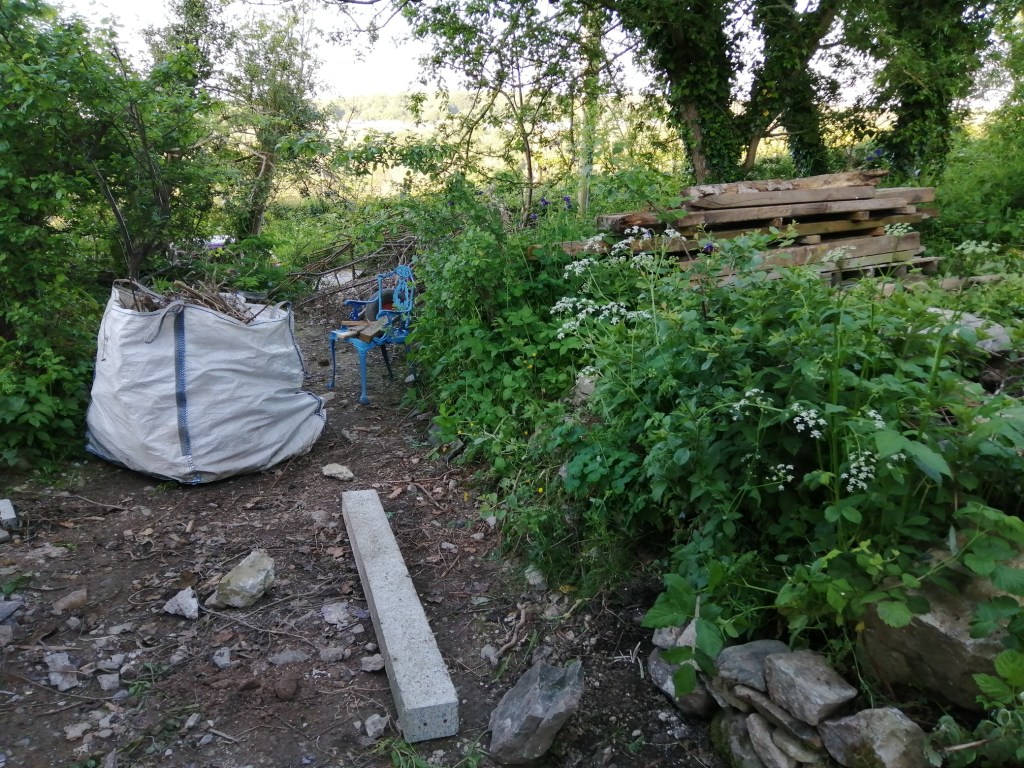
The side garden has been full of rubbish from hedging and piles of wood in need of sorting. We started having a tidy, taking five bulk bags to the recycling center. Chris then sorted through the wood so we now know what’s being kept and what needs to go. Chris has made a neat pile ready for building the frame of his shed, while another pile is set to be kindling once we have fires. Only a small amount needs to make it’s way to the recycling center.

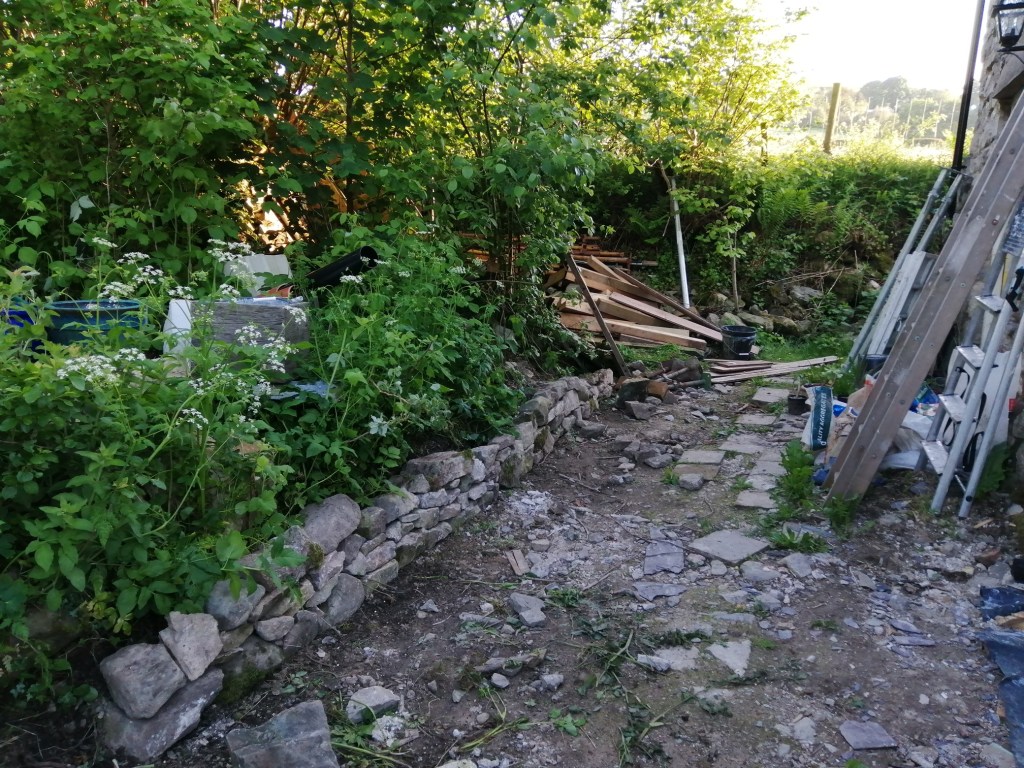
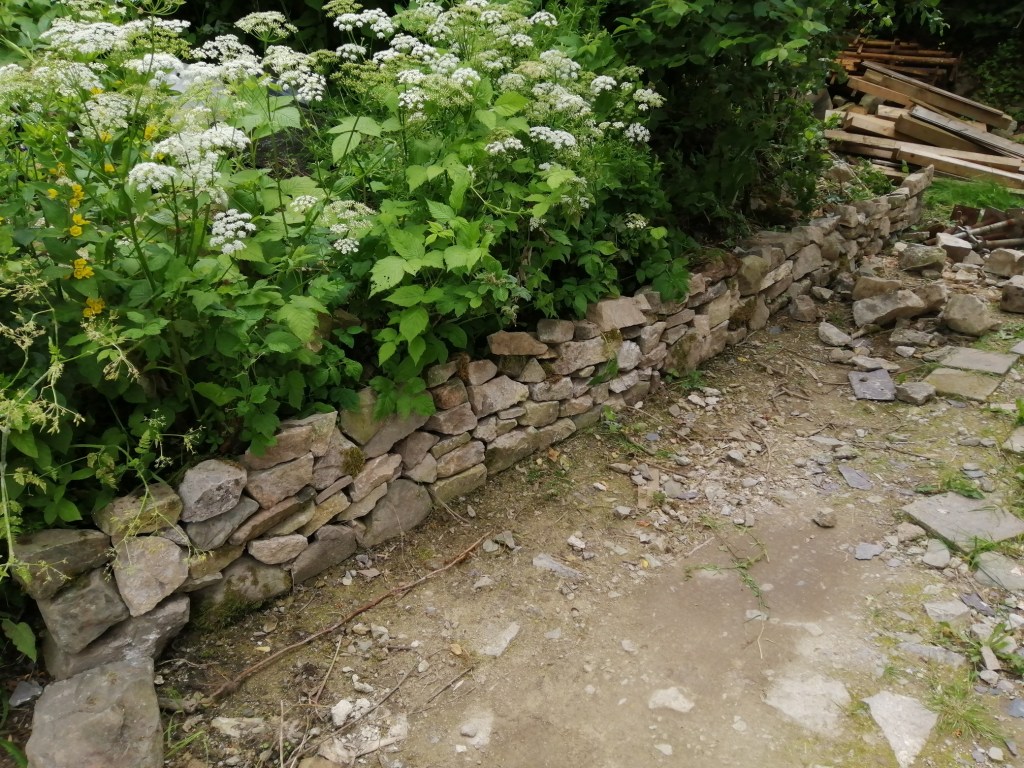
I started building a small single stone wall along the edge of the garden. Though much smaller than the walls I built in the front garden it’s slow progress as the stone aren’t as easy to get hold of – mostly buried in the garden. This will form the edge of the patio in time, and with a little work we can plant flowerbeds above them.
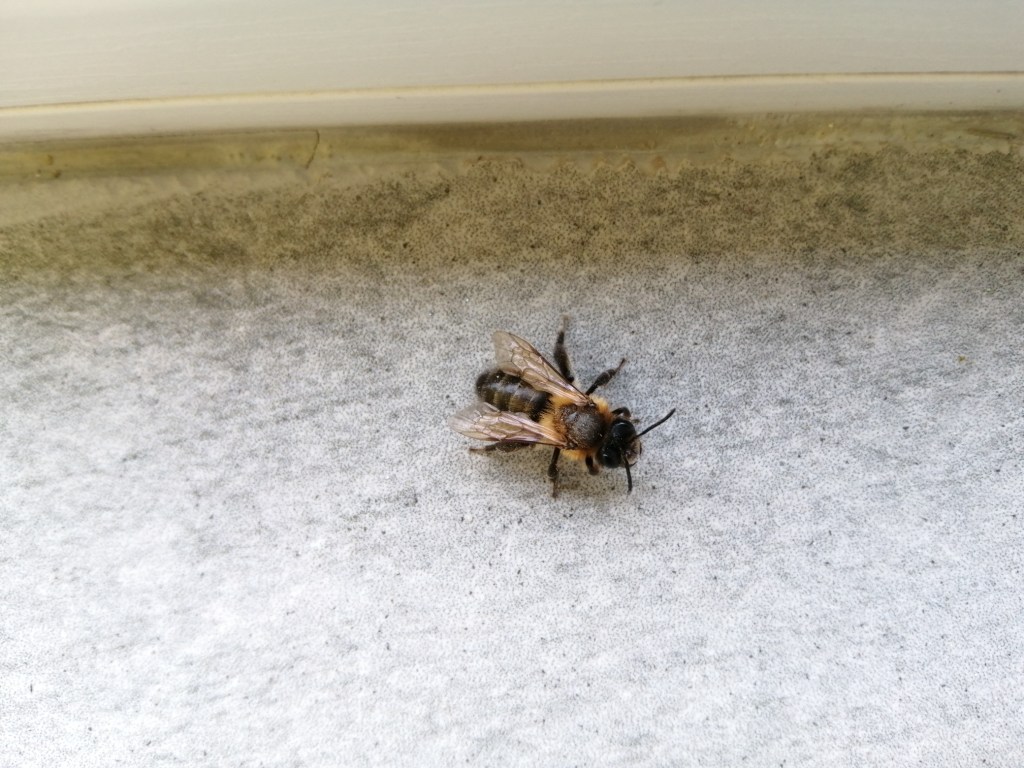
We’ve had a fair few animal visitors lately, from lambs wandering into the garden to bees turning up in the house. Asking my bee expert friend, it turns out they are chocolate mining bees, solitary bees that have probably made their home in the walls and are now hatching in the spring sun and emerging into the house. Completely harmless and great pollinators.
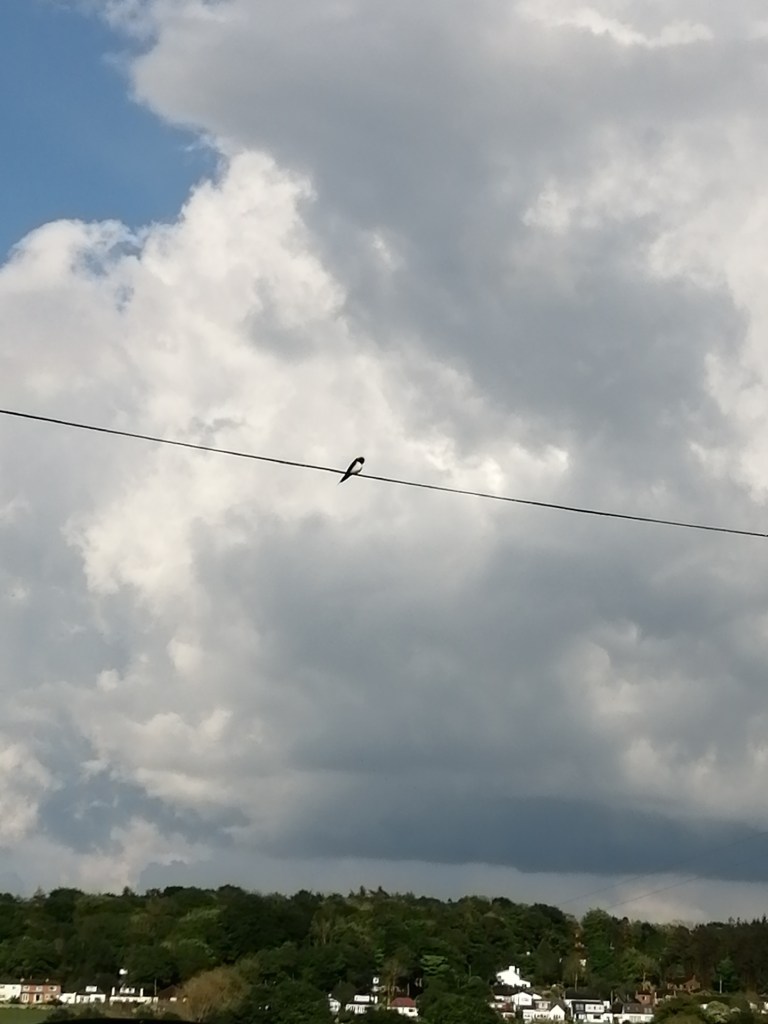
One of my favourite returning guests are the swallows, that like to perch on the telephone wire outside the front of the house. At some point I’d like to put up some nests for them around the house to encourage them to move in, but for now they come and go as they please.
-
Two Years On
This Sunday marked 2 years since we got the keys for our new house, and 10 months since we moved in. We had hoped to have finished the inside by the 2 year mark, but everyone that’s ever watched Grand Designs will know you never make your deadlines.
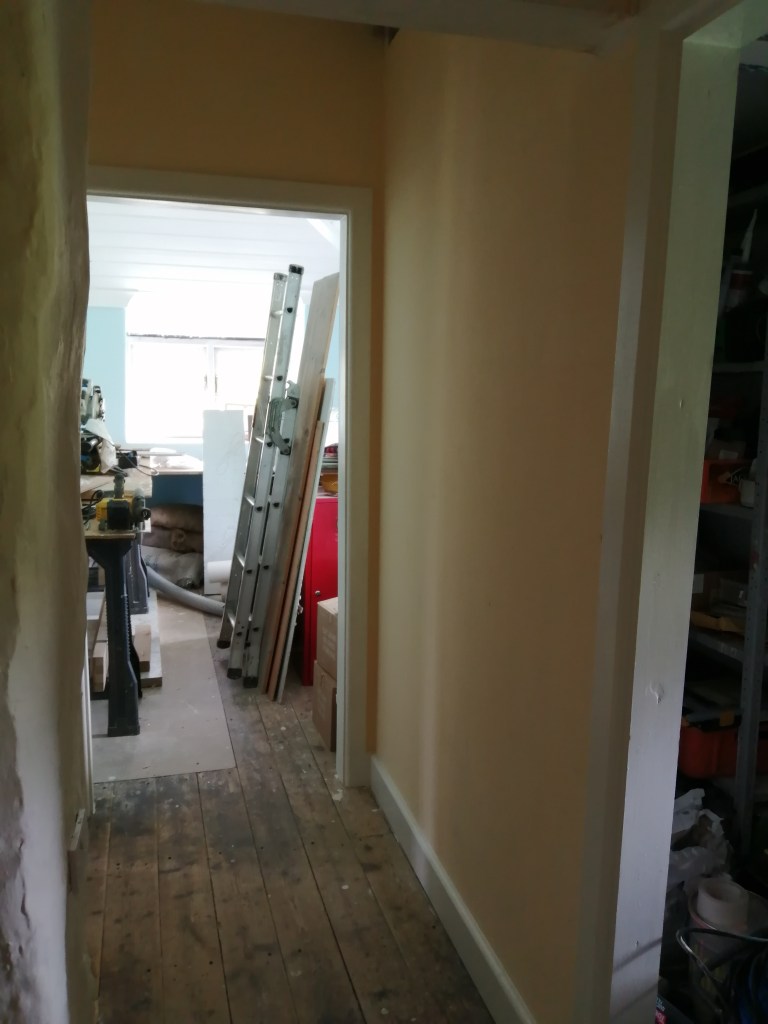
We started the week with some boring tidying jobs, including filling, sanding and painting the coving on the landing, and applying a second coat to the skirting and architrave.
Chris added the final bit of plasterboard on the staircase and filled the joins and screw holes.
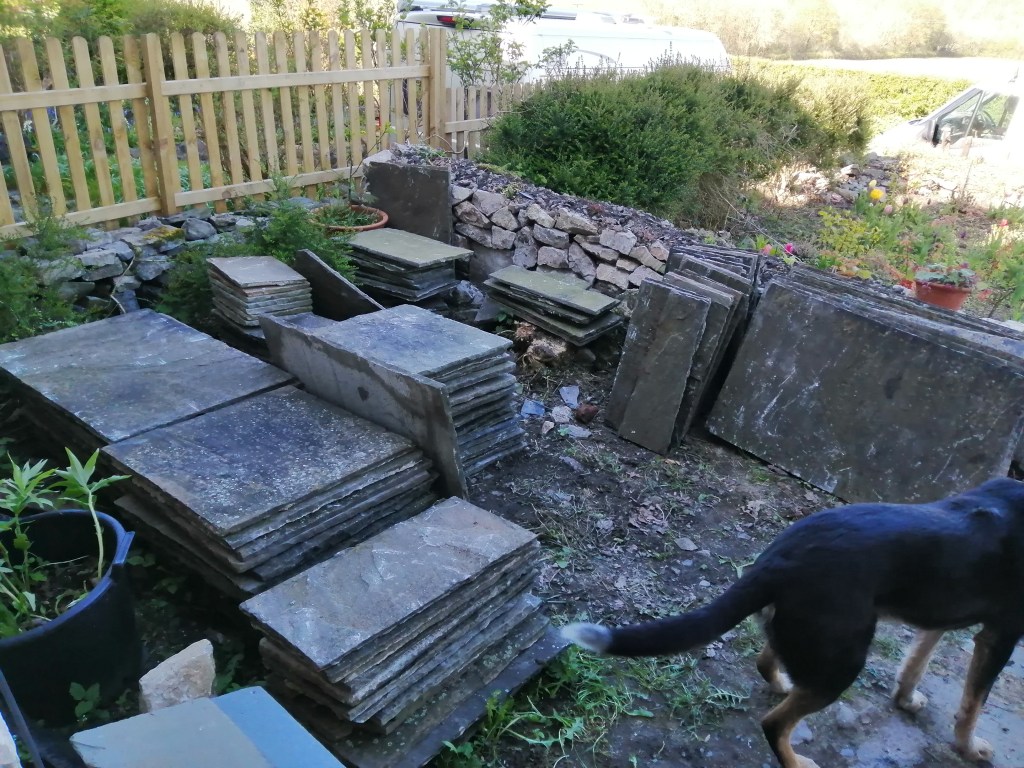
More excitingly, Chris took a day off work to help his brother take up some garden paving slabs. The slabs are being replaced with something more modern, and the owner told Rich simply to chuck the old ones out. But instead they are coming to us to become our patios.
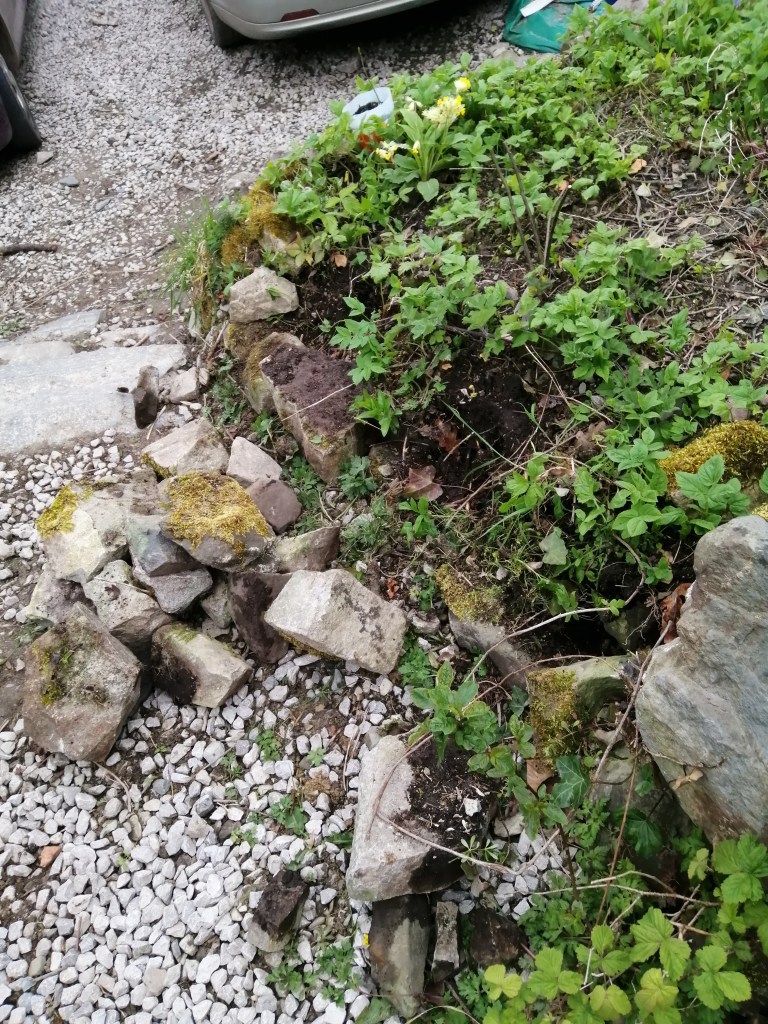
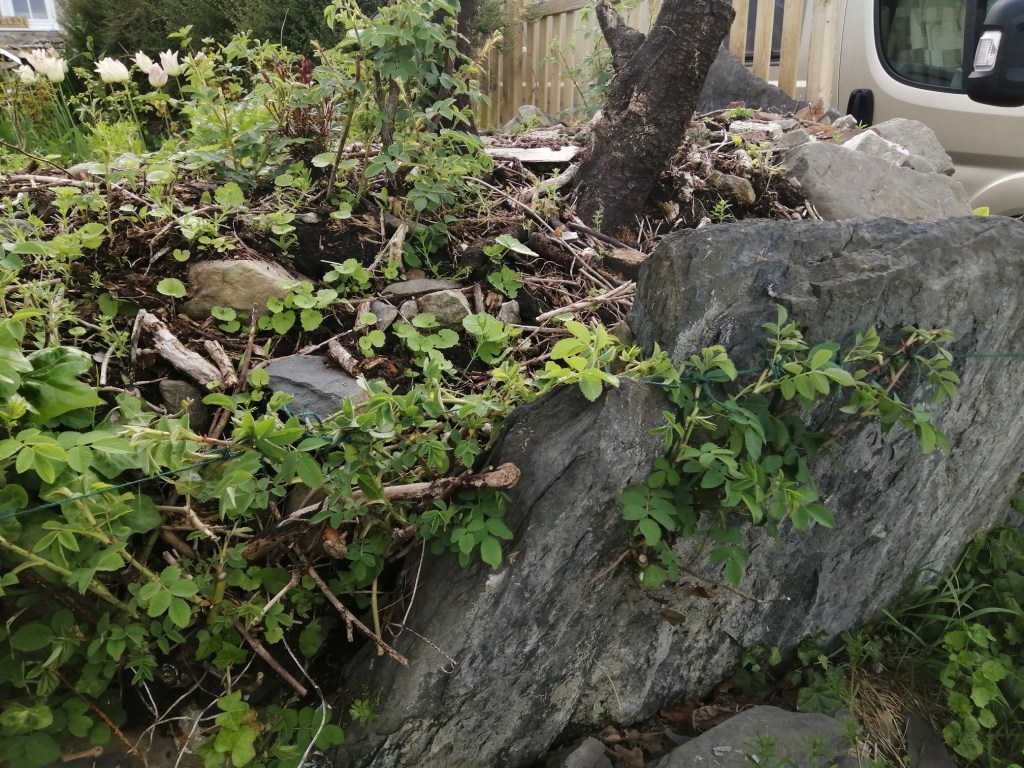
In the garden, I rebuilt another section of wall. I was quite pleased that I managed to lever in a particularly large stone to form part of the wall.
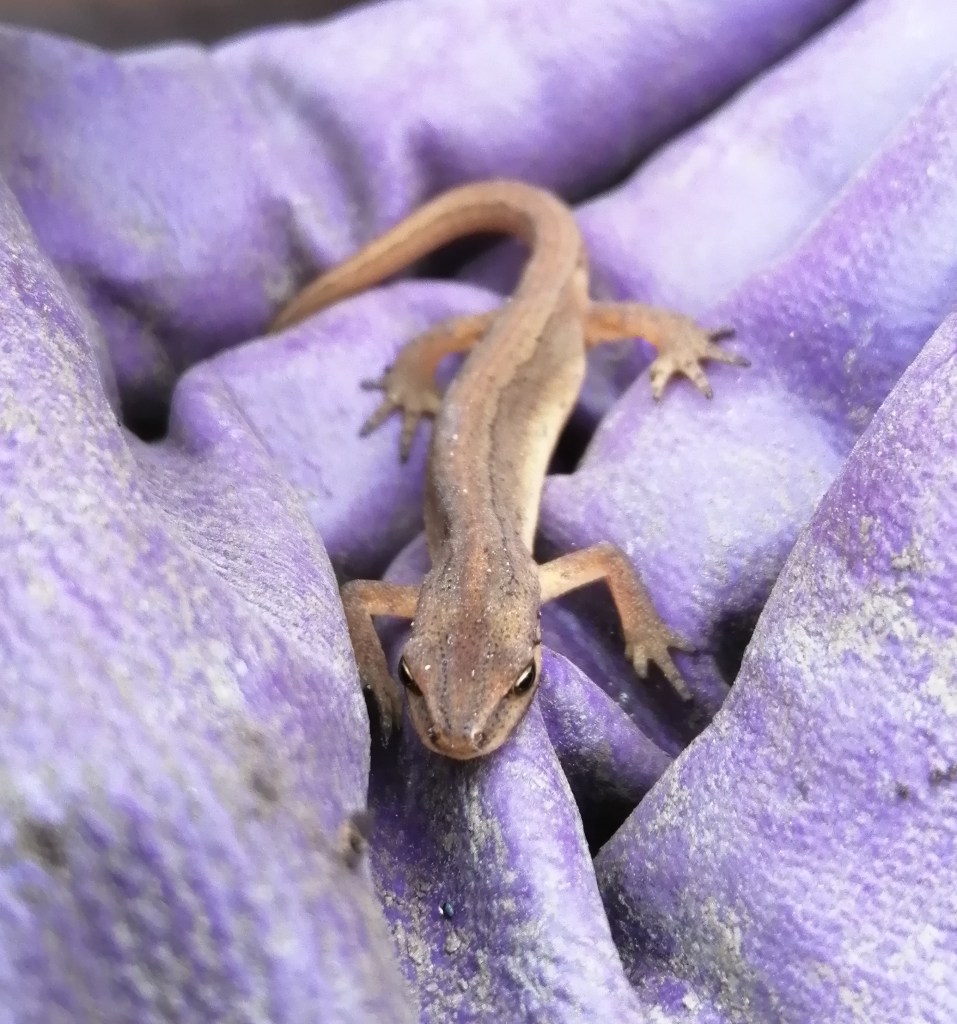
While moving rocks I found a cute little newt. Sadly our container pond is probably too inaccessible for them to breed in the garden, but nice to see they’re around.

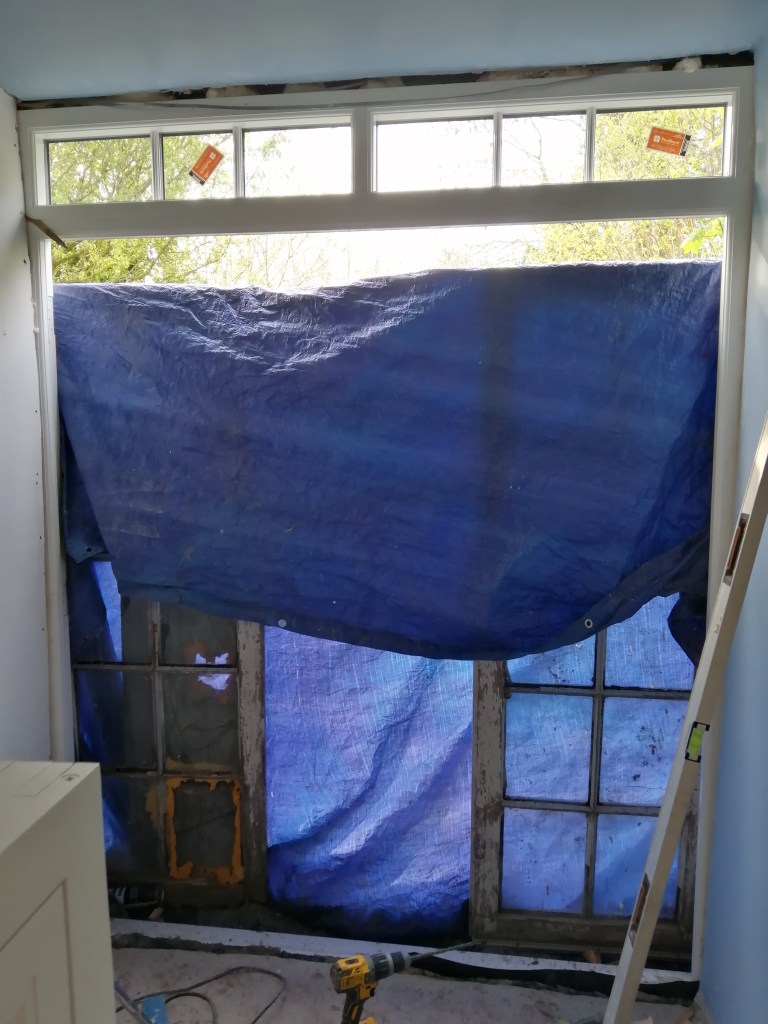
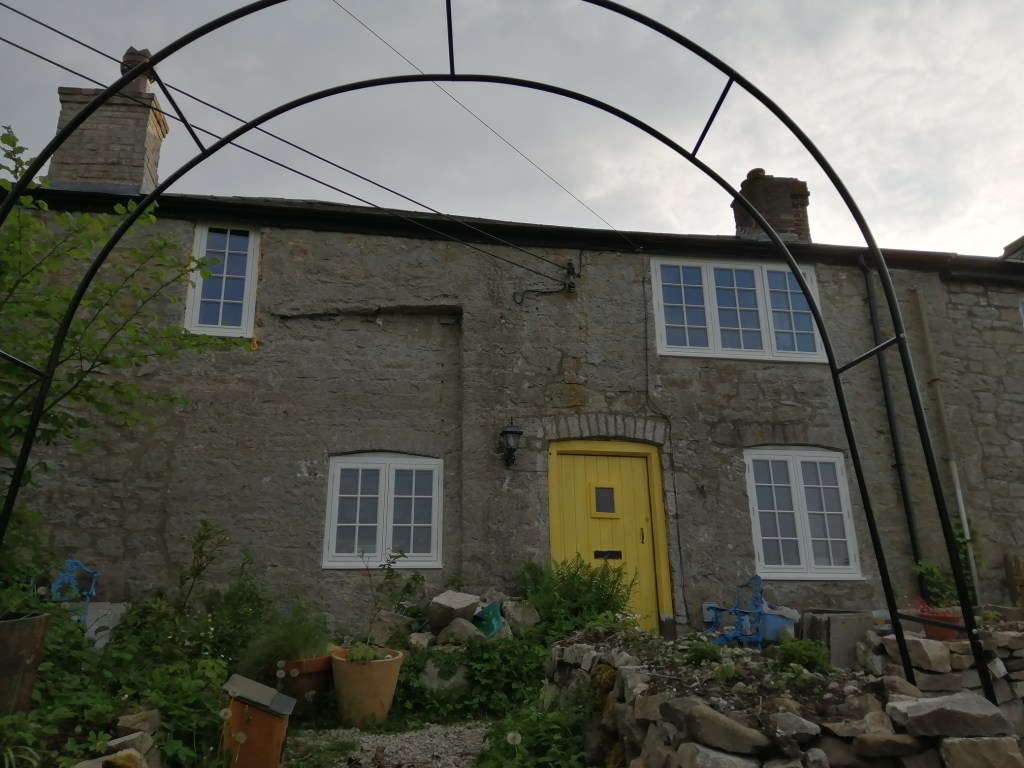
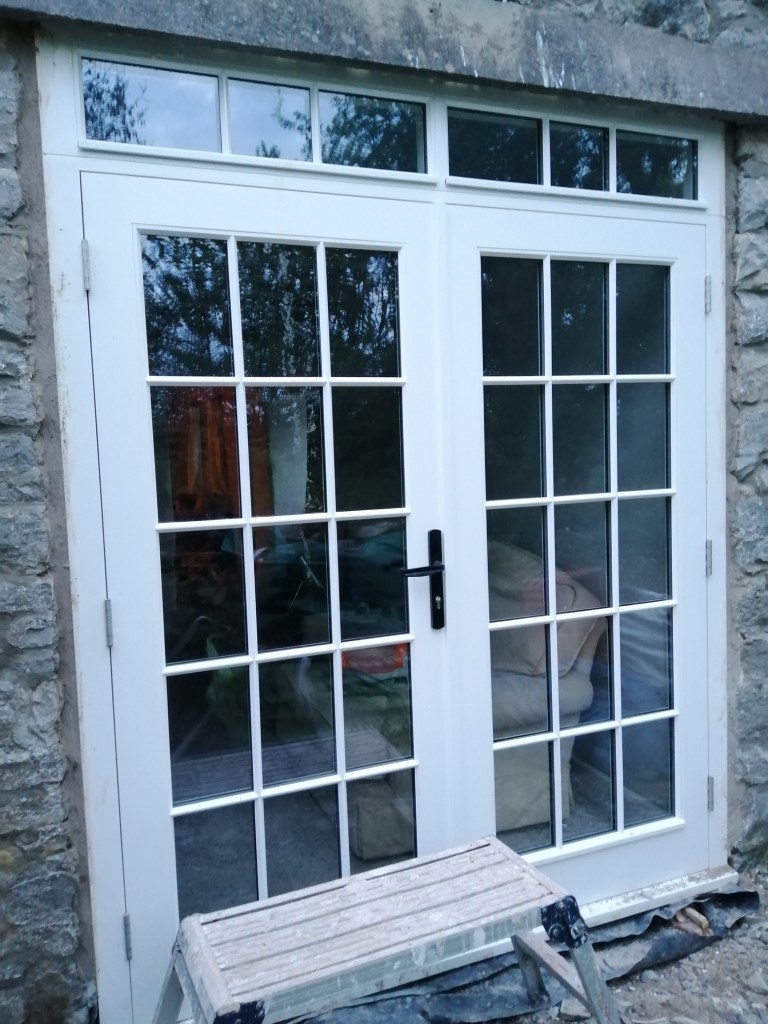
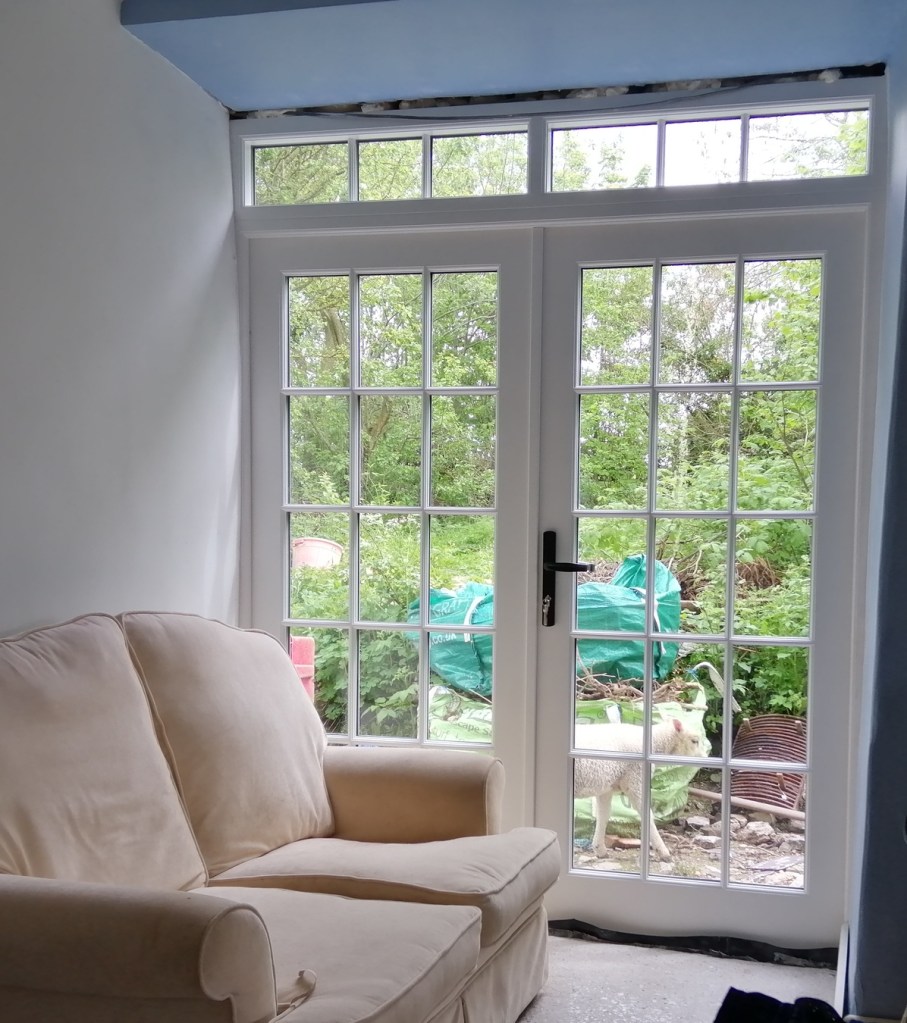
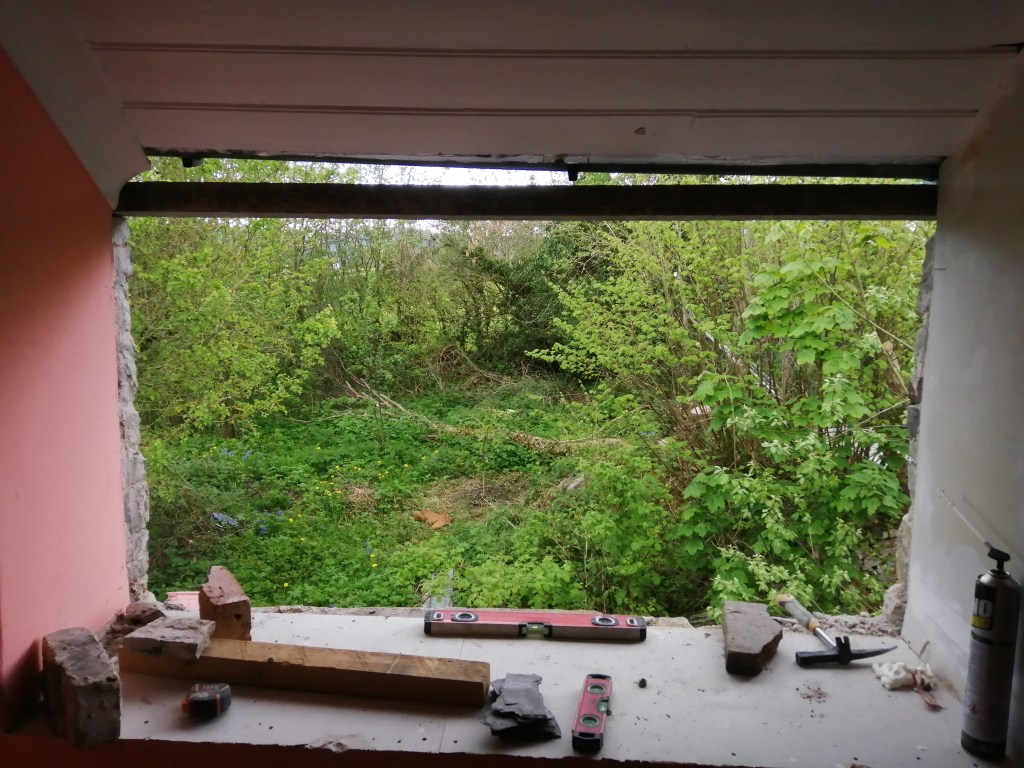
The big job of the Bank Holiday weekend was installing our new wooden windows and our double doors. Carrying the windows inside during delivery, we realised we couldn’t fit the doorway in to keep it out of the wet weather. We therefore decided to spend the evening installing the door.
Unfortunately, a key piece of machinery broke, meaning we spent the night with a big hole in the side of the building, till we could borrow an SDS drill from our neighbours the next day.
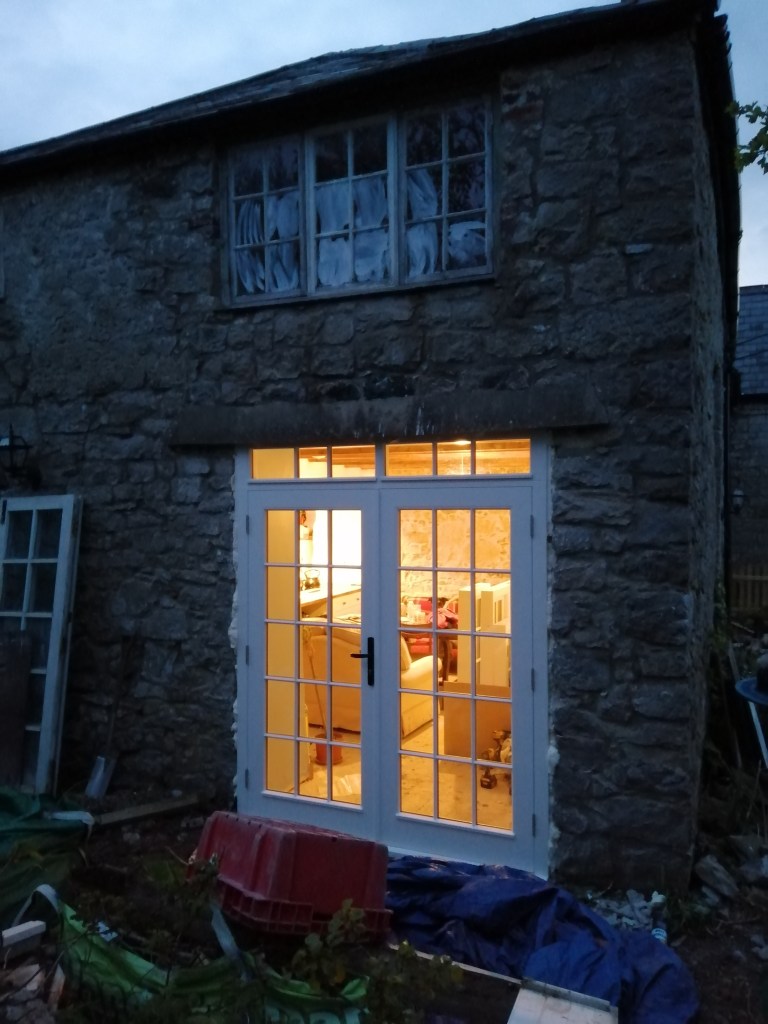
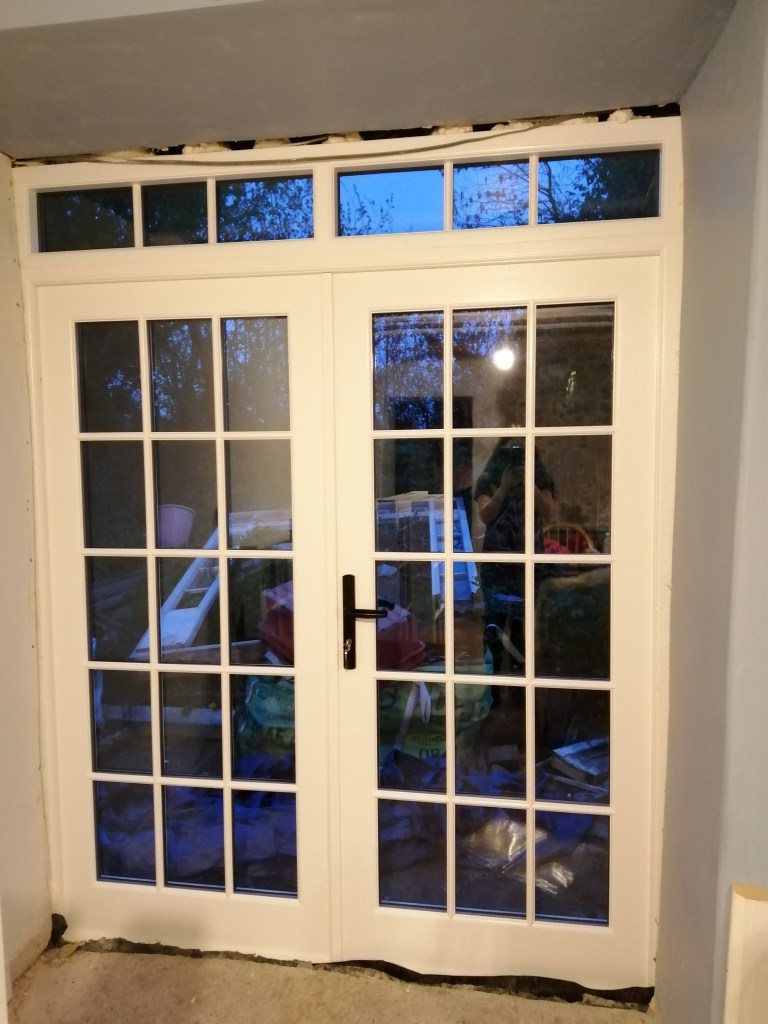
Overall, it’s great to get the new door in place, but I am sad we had to lose the side lights from the frame design. Because modern frames are much thicker, the side lights would have been significantly thinner, and we thought it would look strange.

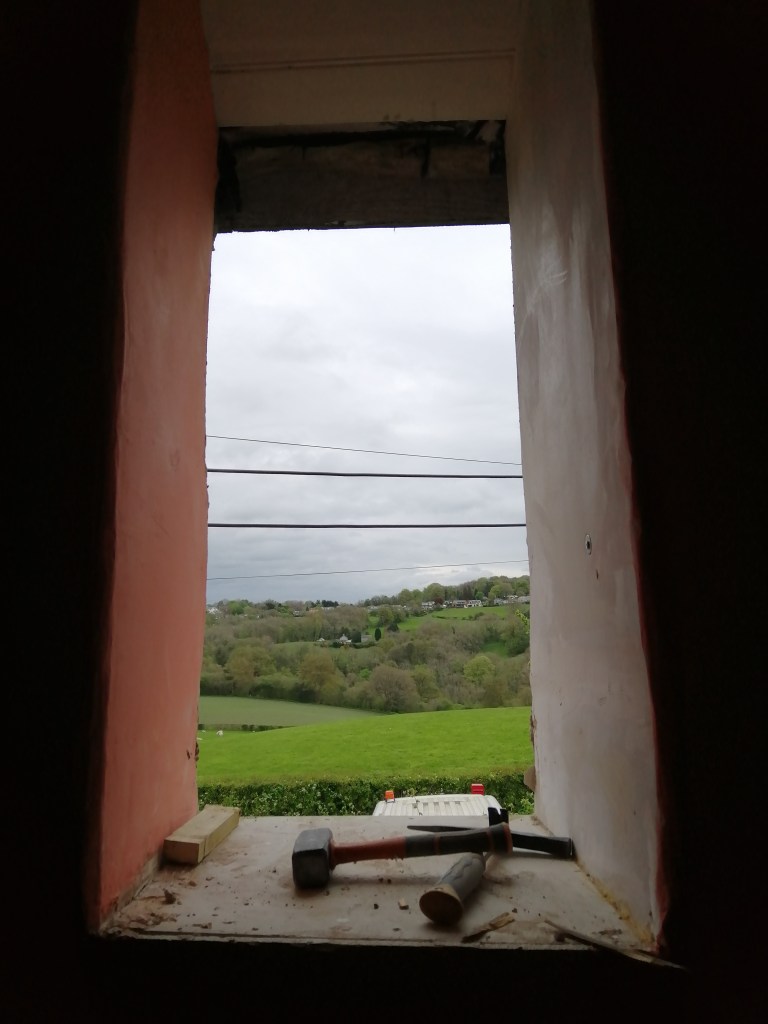

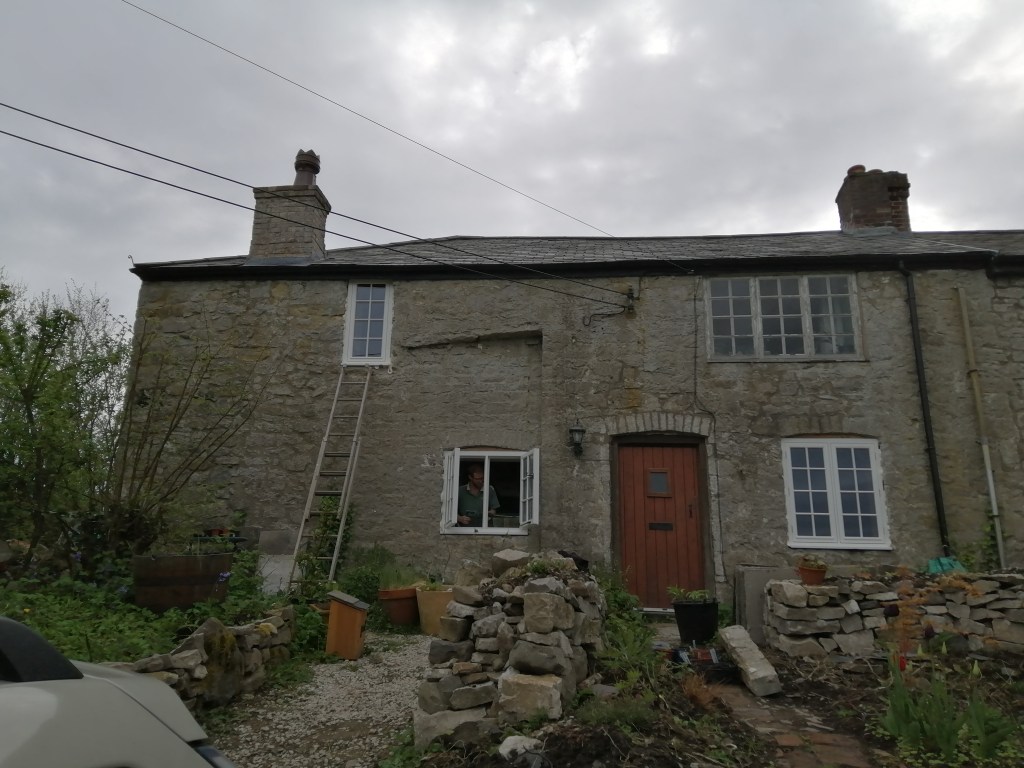
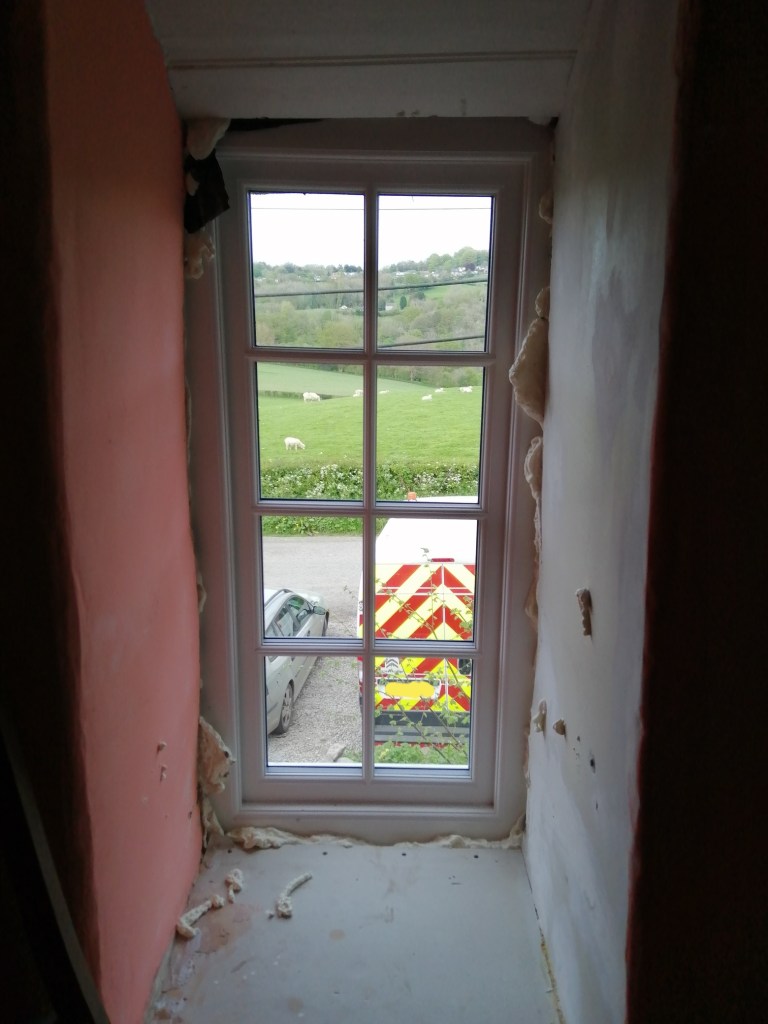
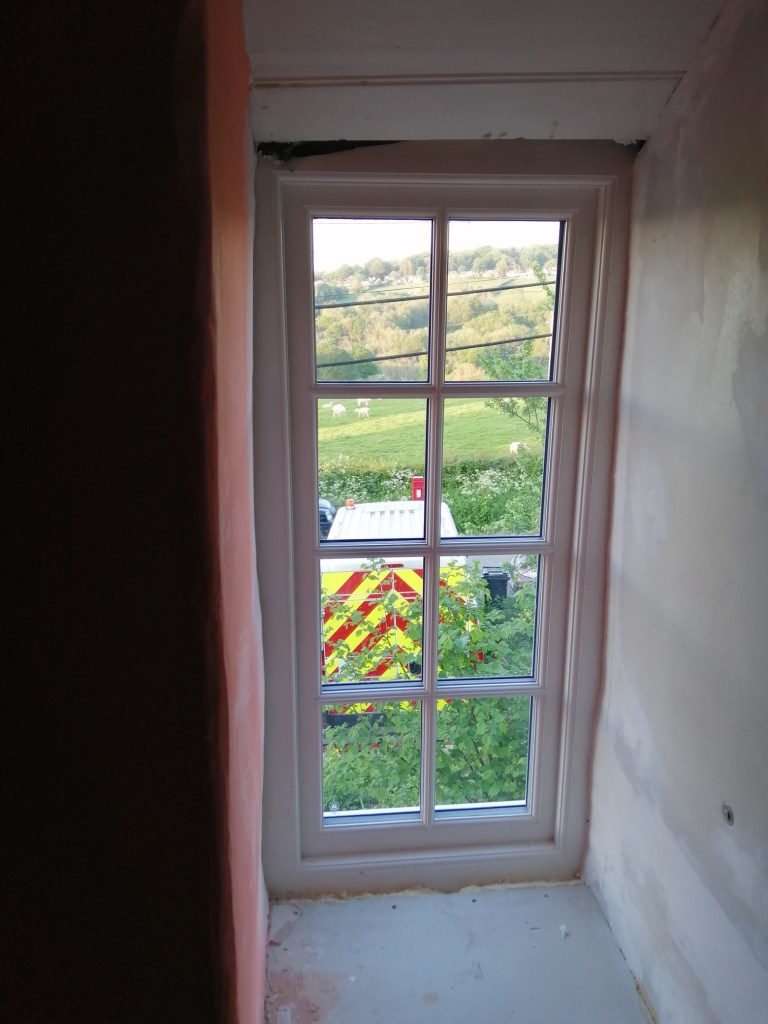
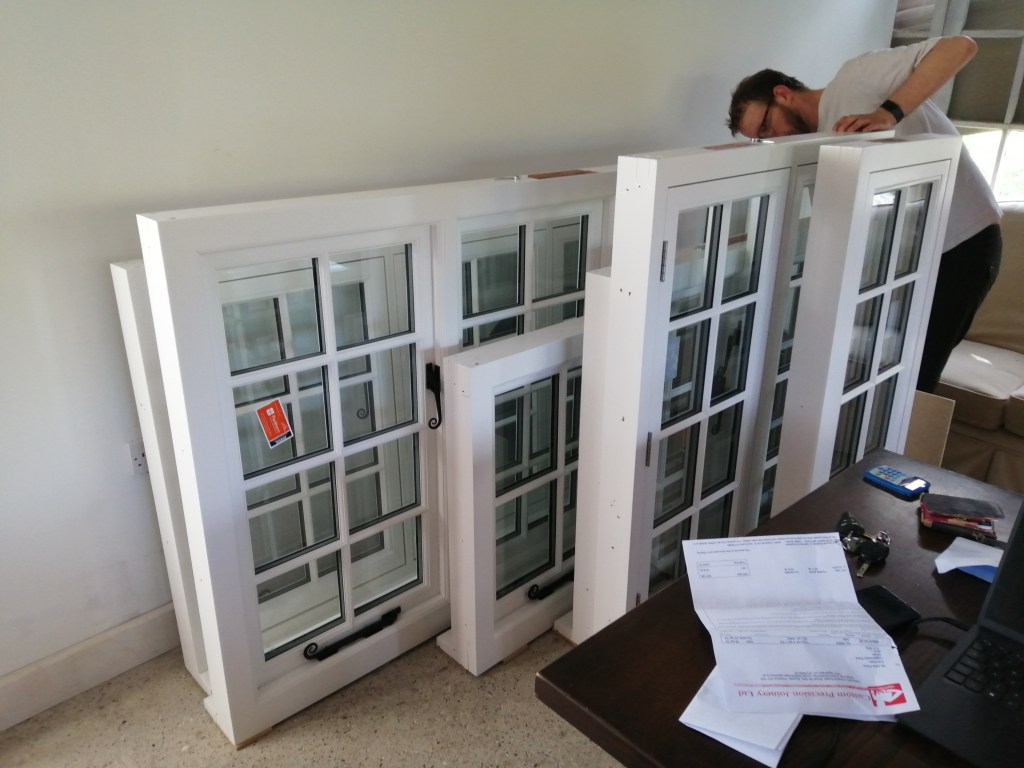
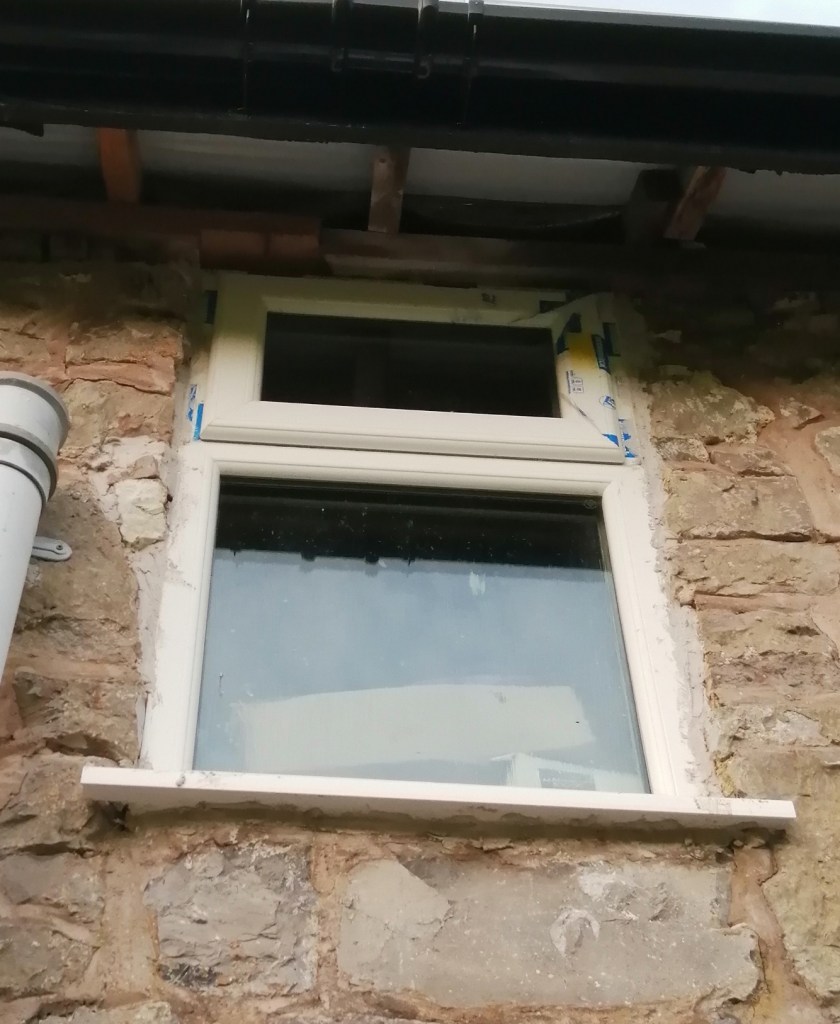
We got four windows in on day 1 of the weekend. We decided the start with the easier windows, those on the first floor and those without the need of concrete lintels.
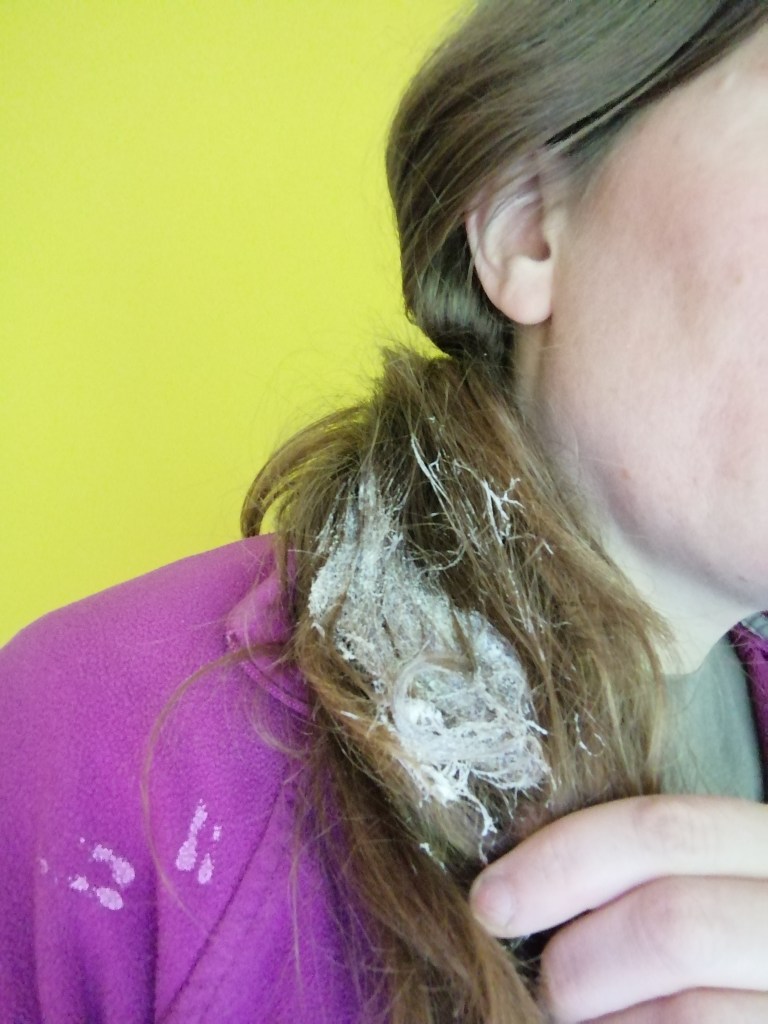
I’d been a little worried about lifting the heavier frames into place, but everything went fairly smoothly. Apart from the moment where I accidently lent back onto the nozzle of a expandy foam canister, and insulated my hair into one amalgamated mass.
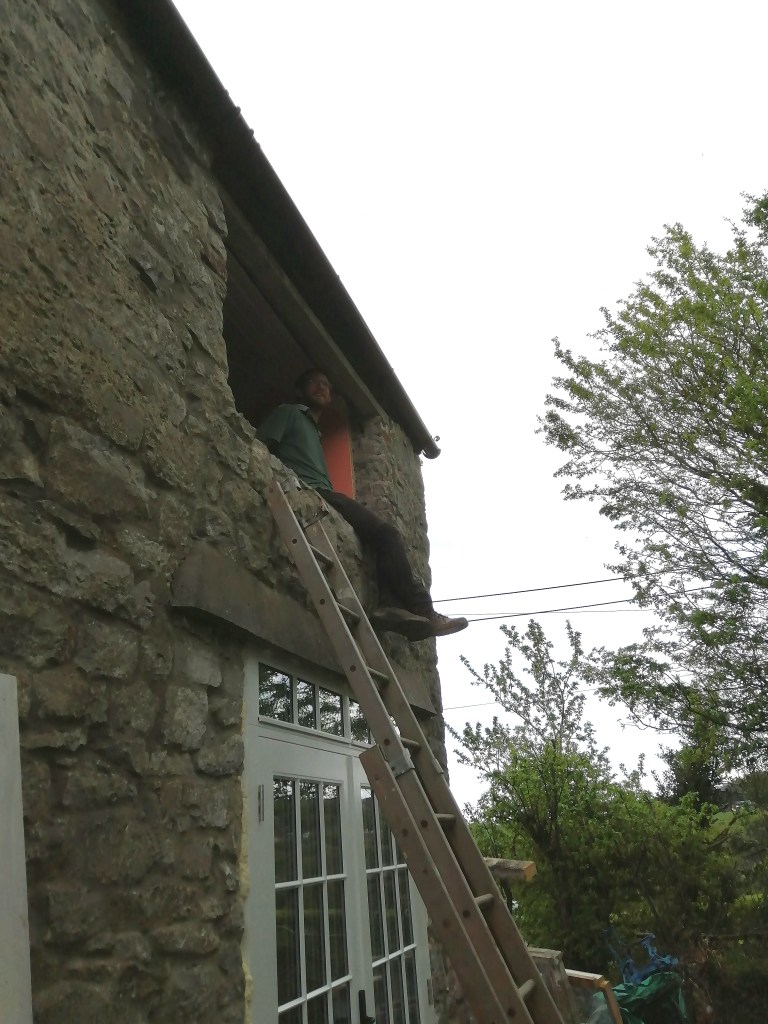

On day two we installed the two more tricky windows, the two larger windows needing concrete lintels installed above them. Amazingly, we managed to get the first window in with Chris on a ladder and me in the room.
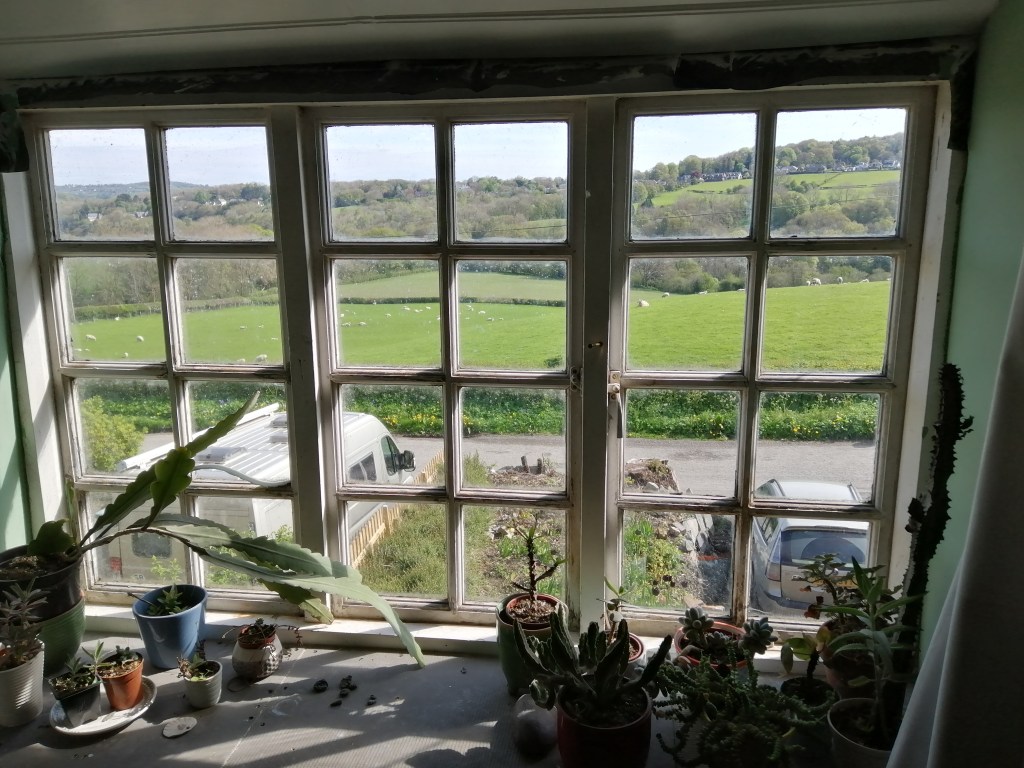
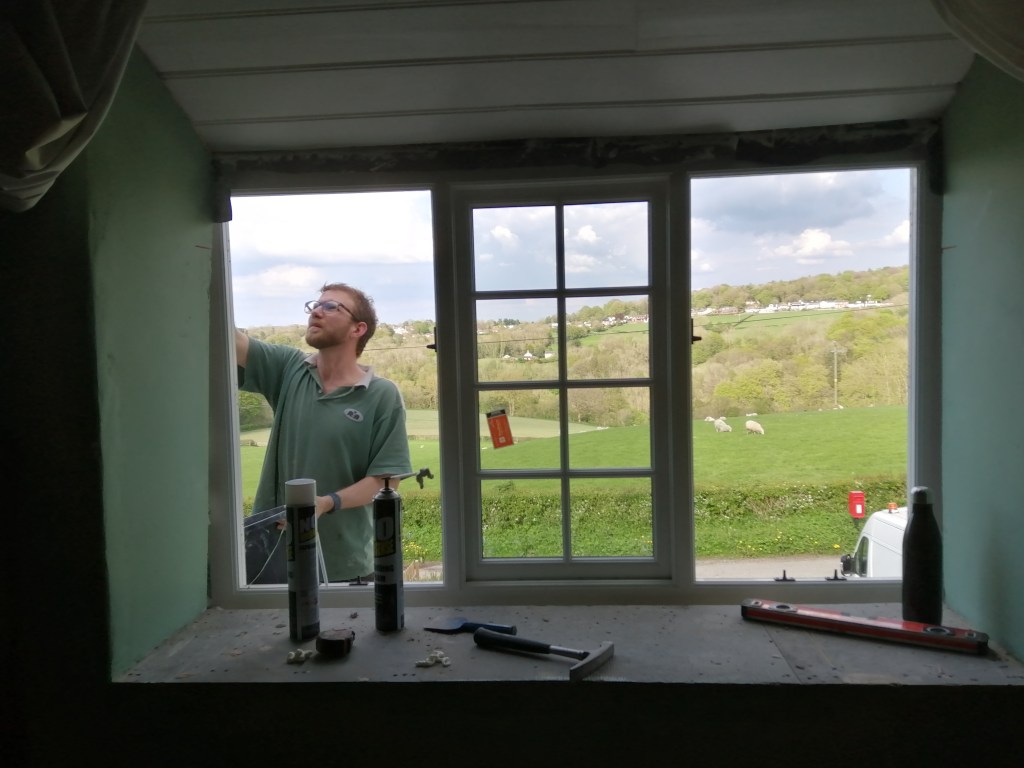
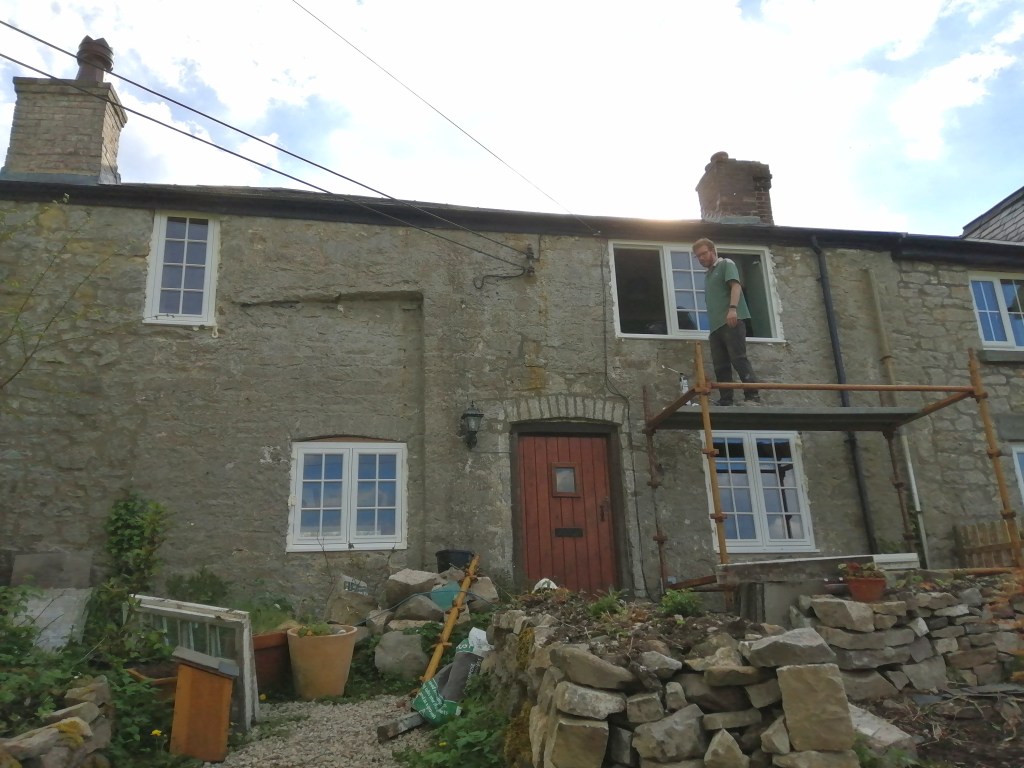
For the second, heavier window, we didn’t think the ladder was a safe option, so we put up the scaffolding. It was lucky we did, as this was the first window that nearly didn’t go in, the frame was so tight to the opening. With some chipping away at the stone, and a lot of straining, it finally slotted into place. And no one died.
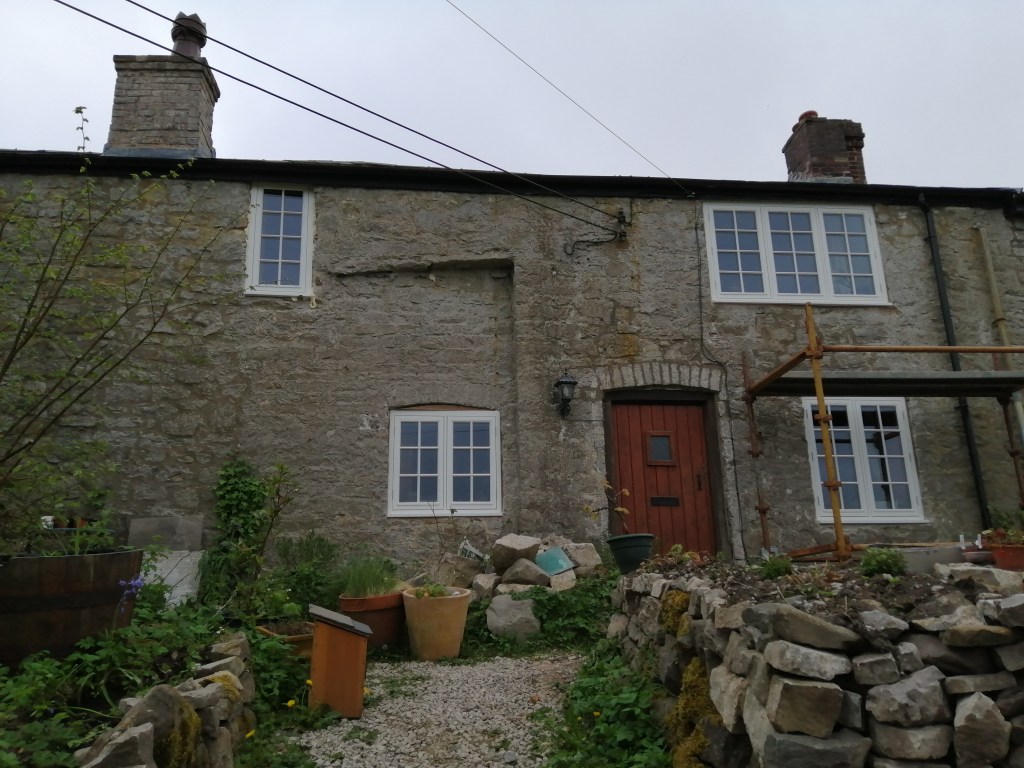
On our final day, we ferried the old windows to the recycling center, and started filling around the windows on the outside. We’ve still got a few to do but the majority are done and looking good. The one downside of having such fancy looking windows now is that our front door looks significantly worse. However, a little sanding and a coat of paint and it should look good as new.
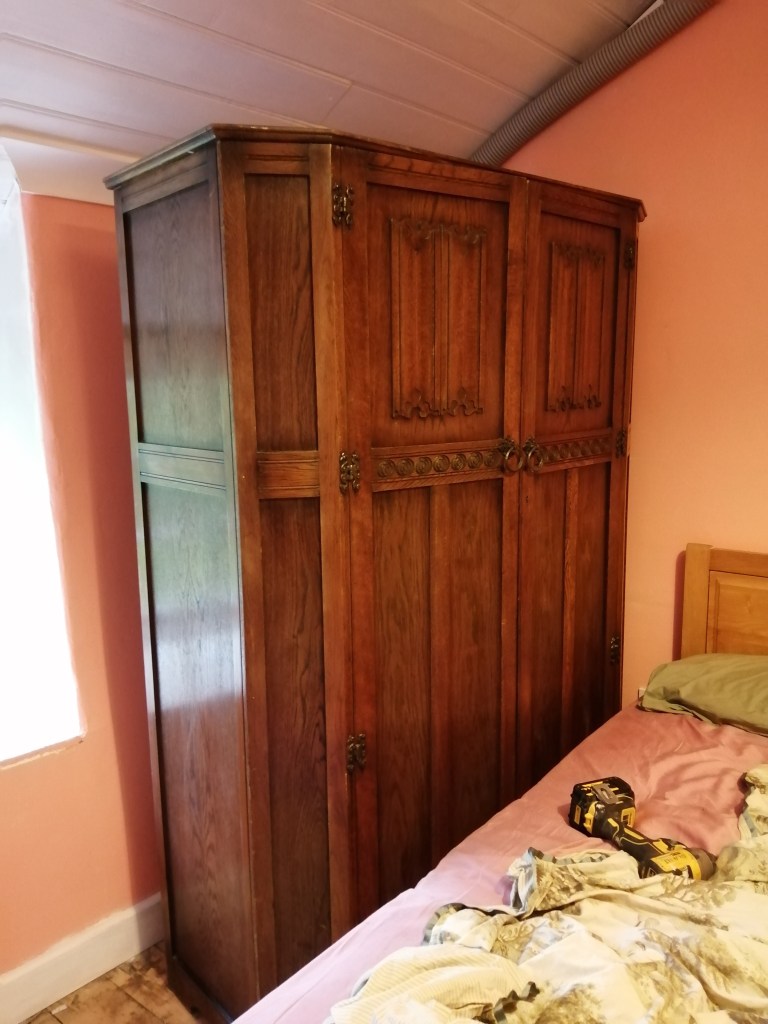
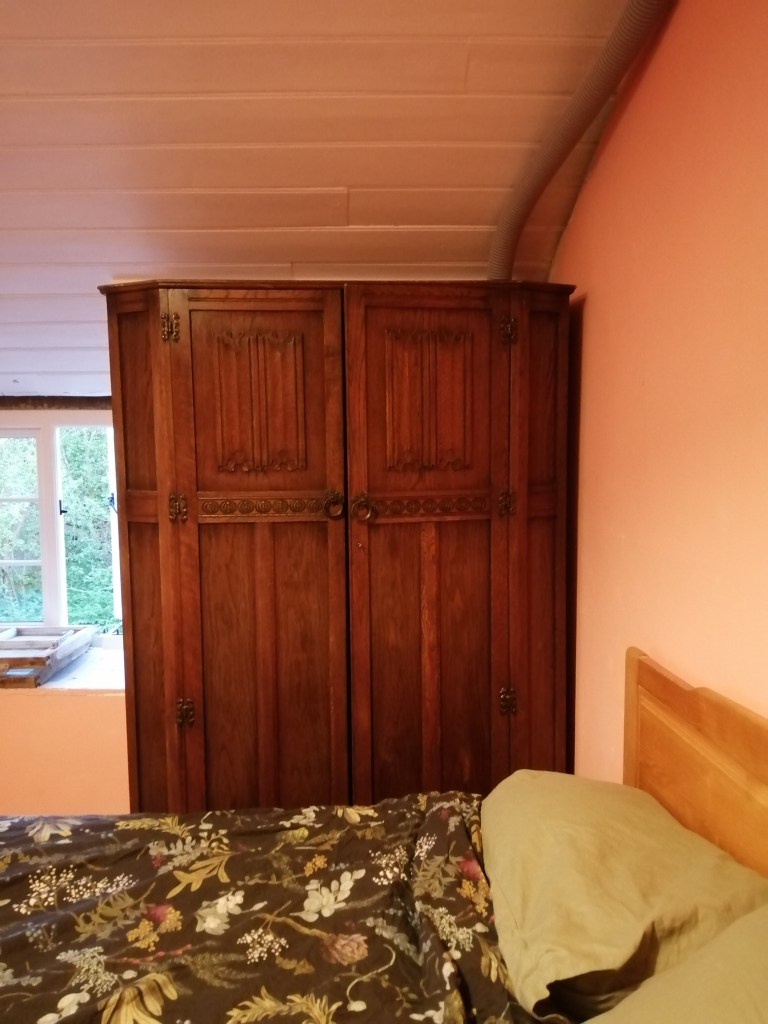
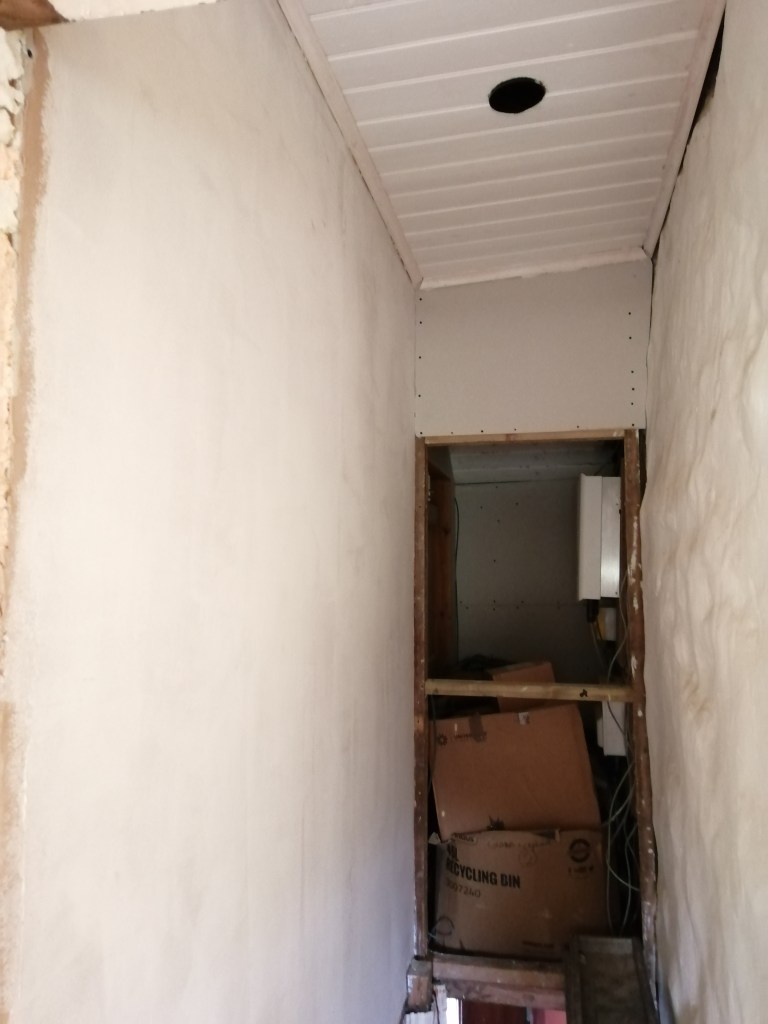
After contacting a lot of people on Facebook marketplace, I finally managed to find a wardrobe small enough the fit below the sloping roof in the spare bedroom. The wardrobe will have a duel purpose, as we’re going to cut a hole in the bottom and thread the ventilation pipe through, serving the box in the piping.

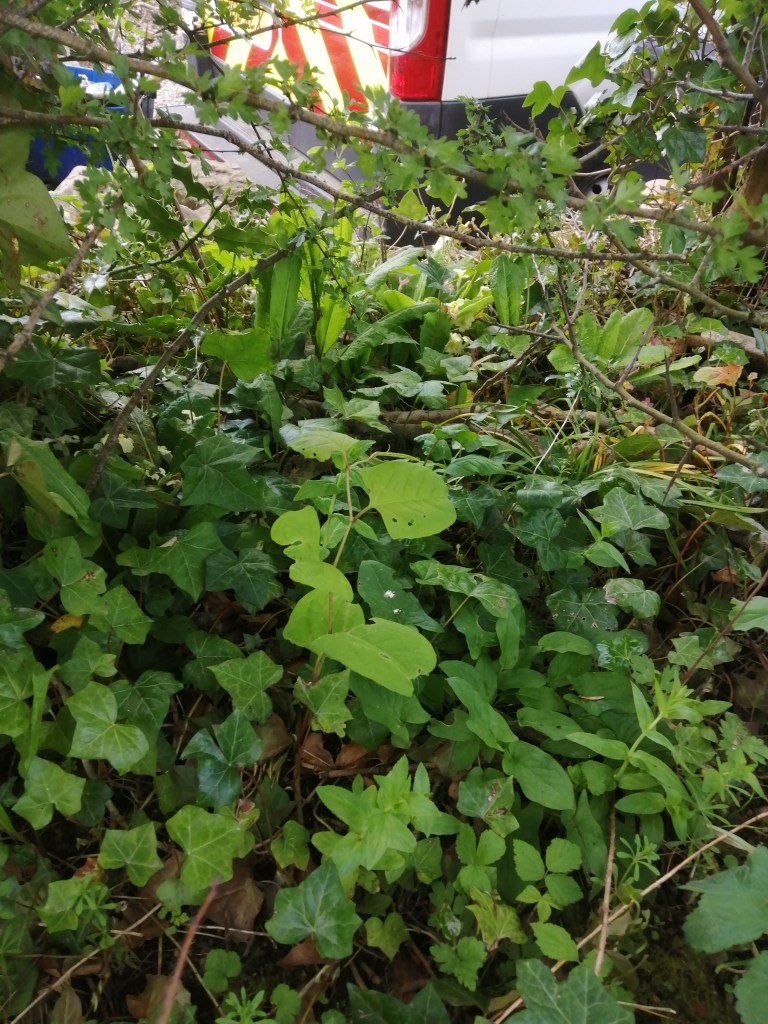
In the garden the invasive species are returning after their winter slumber. The Spanish bluebells are looking deceptively beautiful, and the Japanese knotweed has reared it’s head. The knotweed is significantly smaller than previous years, and we’ll just have to treat it again in the autumn. The bluebells are more of a pain, as they’ll have to be dug out. Perhaps not a job for this spring.
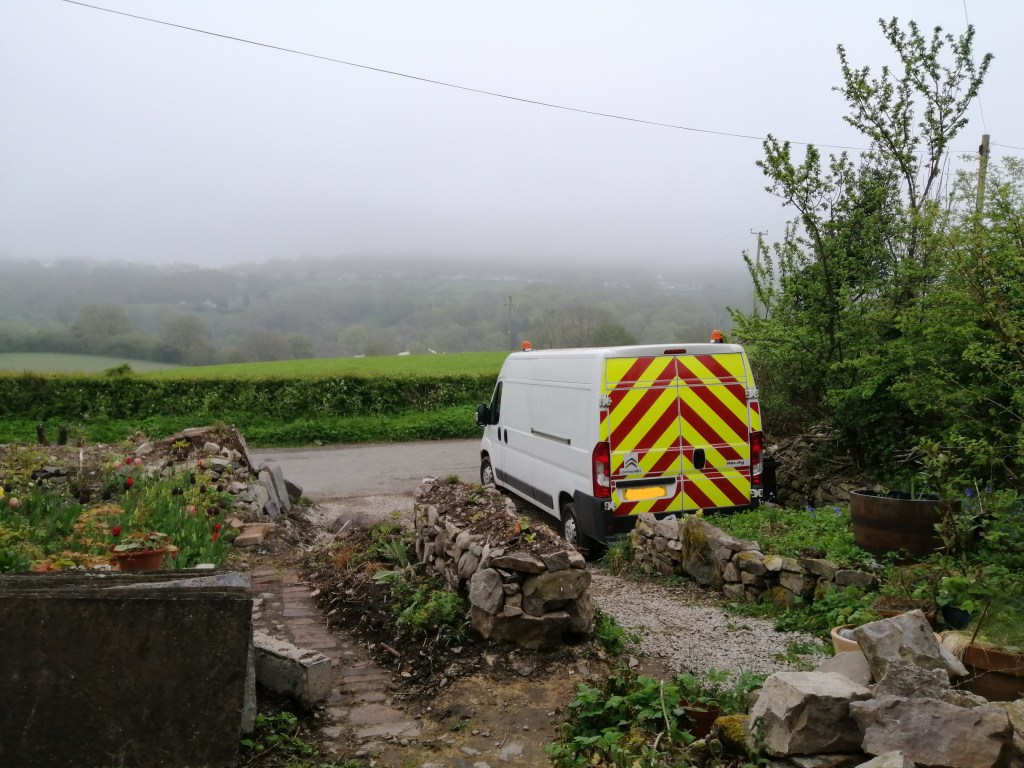
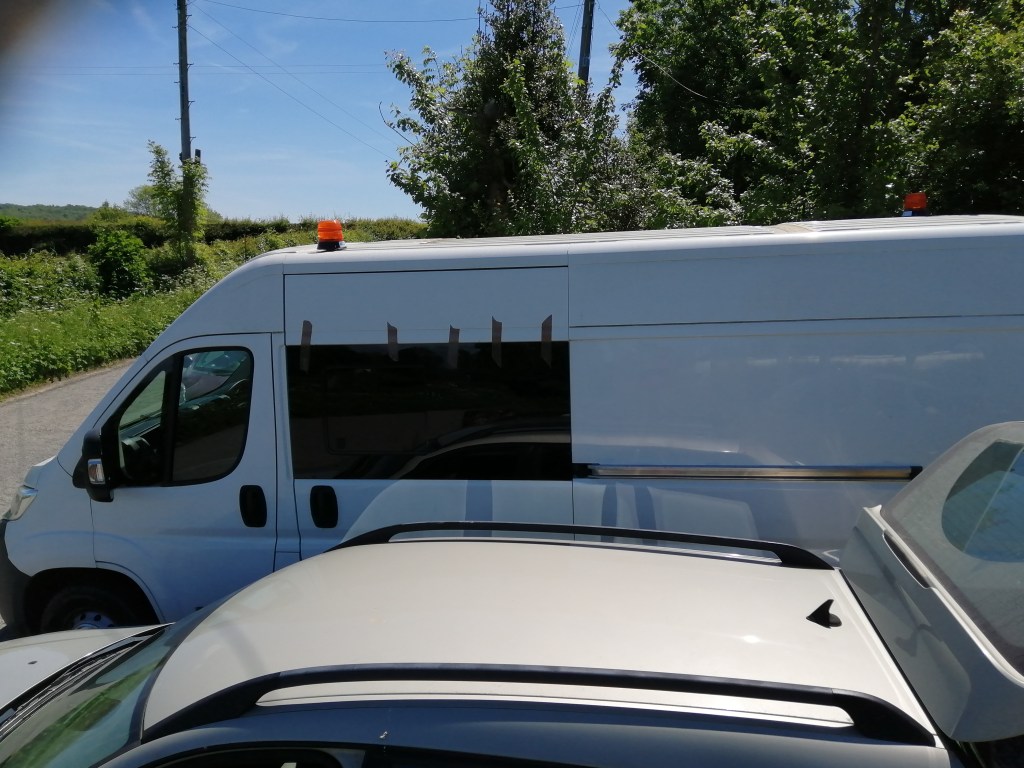
The final bit of excitement this week was the arrival of our van. An unassuming used work van, we’re planning to transform it into a campervan. I had my first go at driving the monster to collect the wardrobe, and it reminded me how terrible I am at reversing big vehicles. Still practice makes perfect…
-
A Little Sunshine
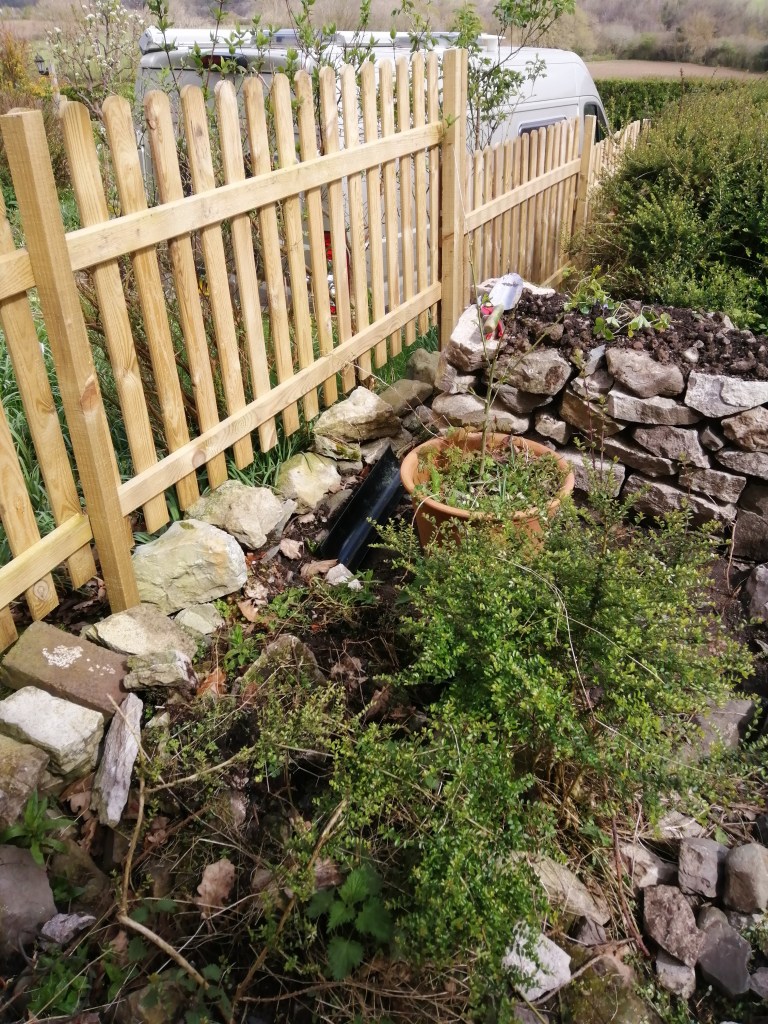
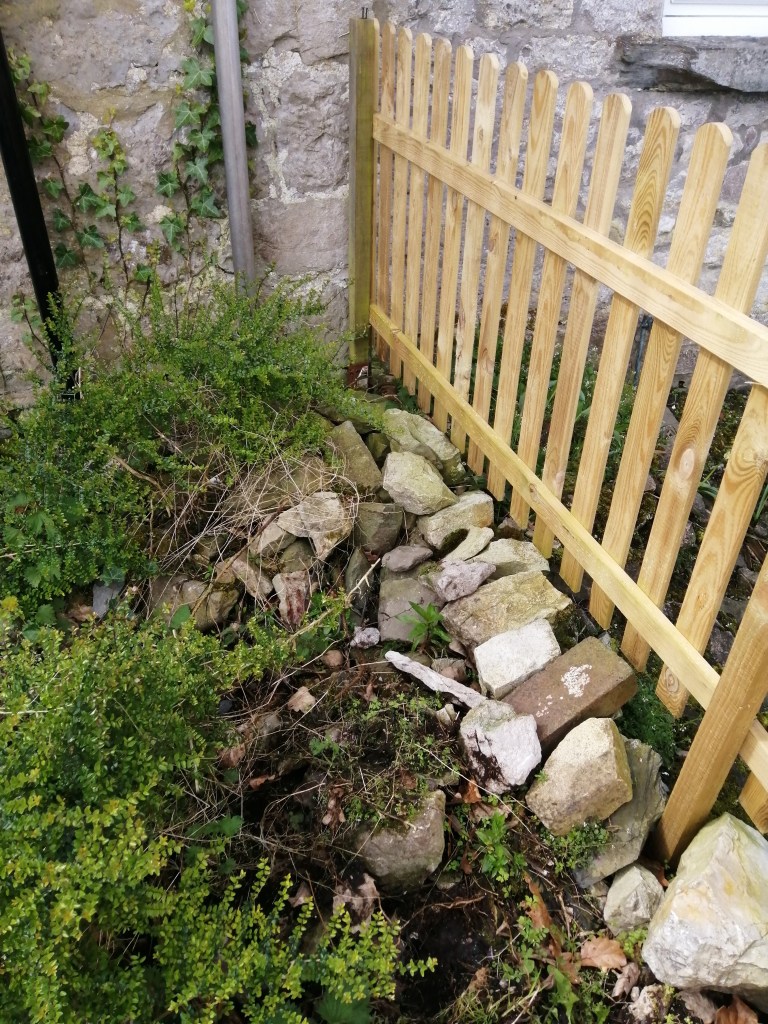
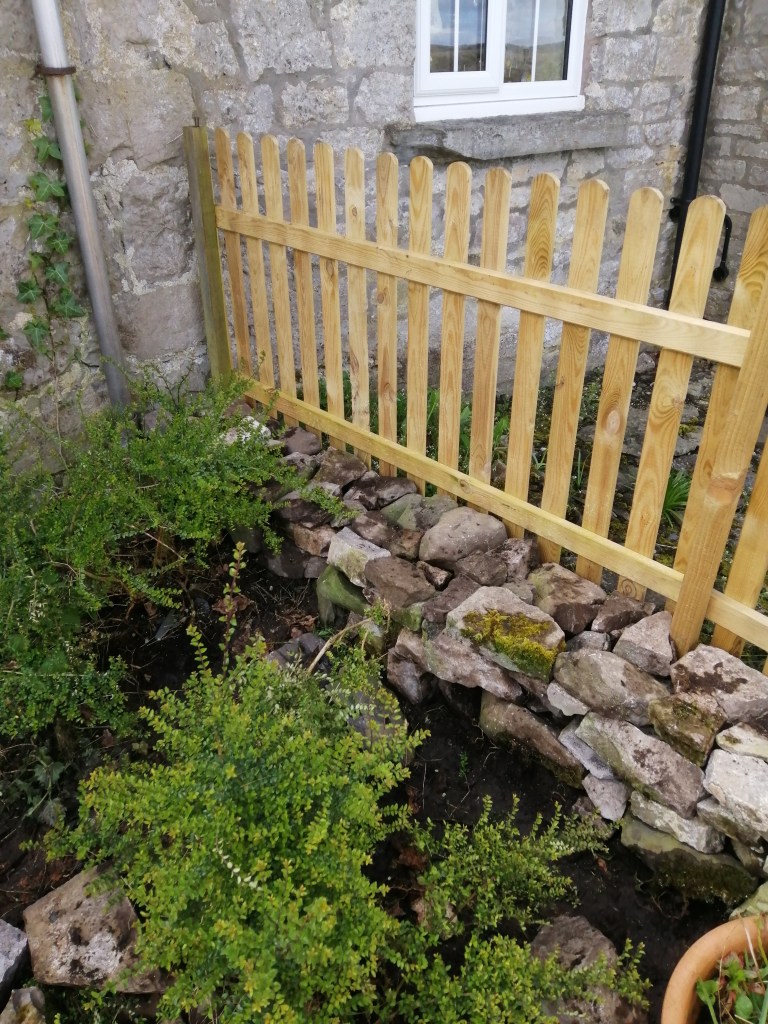
You’d think I’d be bored of building drystone walls, but if anything I wish we had more to build. When the new fence went in our neighbour’s gardener, who put in the fence, piled up some stones along the boundary to cover the gap at the base. We didn’t want a full wall here, as we have the fence, but I tidied things up by building a very small wall to fill the gap.
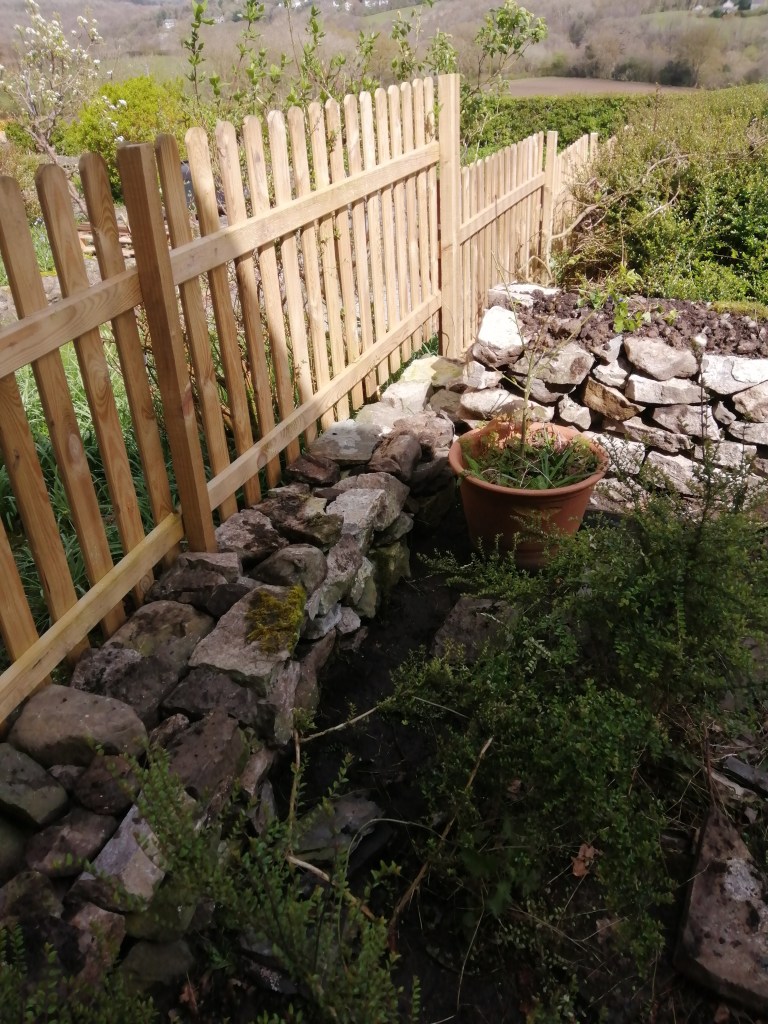
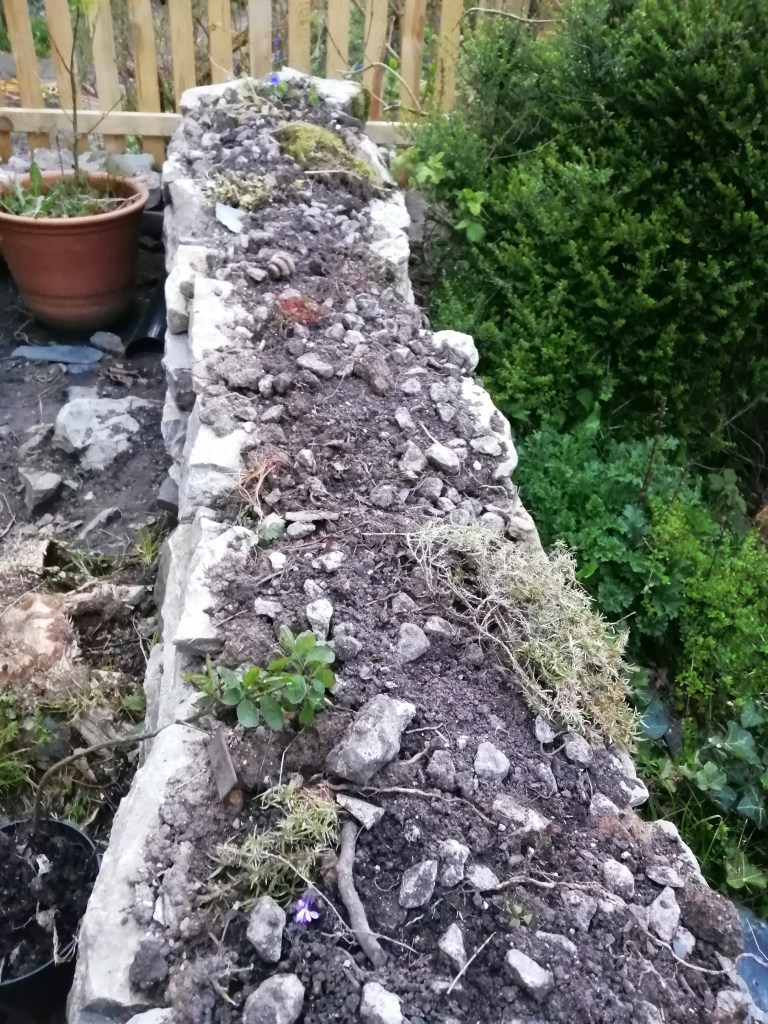
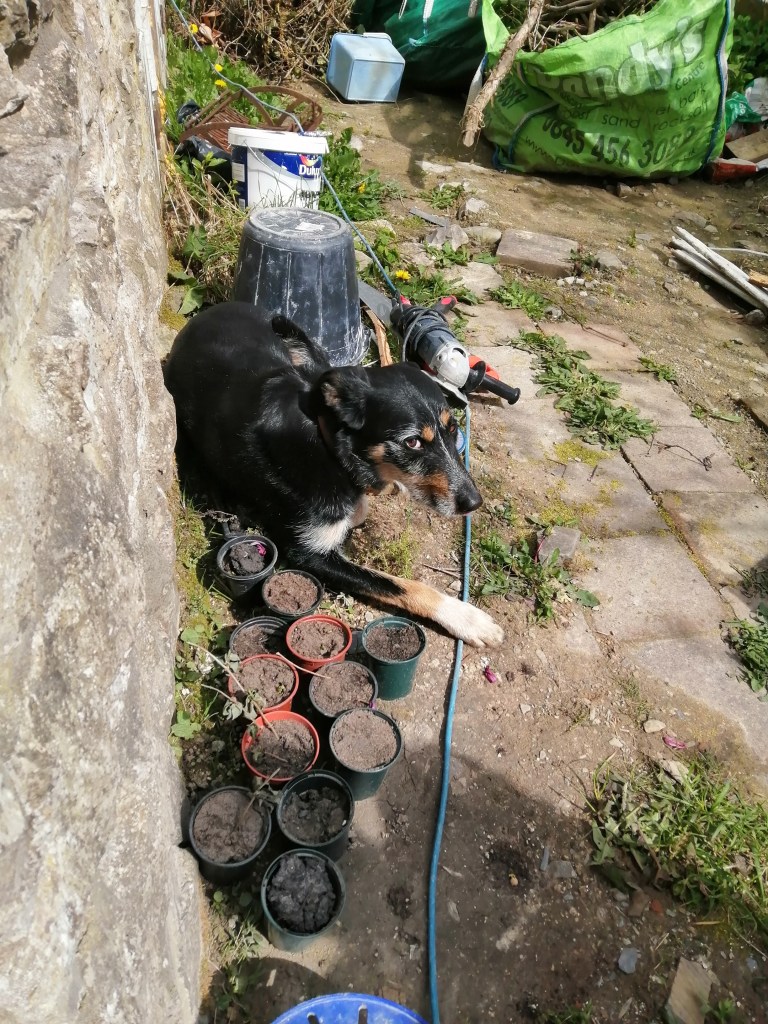
Our neighbour had kindly said we could come and take some cuttings from her garden for wall loving plants. Returning with an armful of greenery I split them out and planted some directly in the wall, and potted some up in a seed tray in case they didn’t survive their first summer in the wall. Idris, of course, spotted the newly planted seed tray and decided it seemed a comfy bed… Hopefully some of the plants survive and start to clamber over the wall, adding some colour and additional stability.
For a ‘quick’ evening job, I started to fill round some of the new windows at the back of the house. I’d previously done the two kitchen windows because they were letting in water, but the rest had fallen to the bottom of the list. With two more filled, there’s just two more to go… Until we install the new new windows at the front of the house that is.

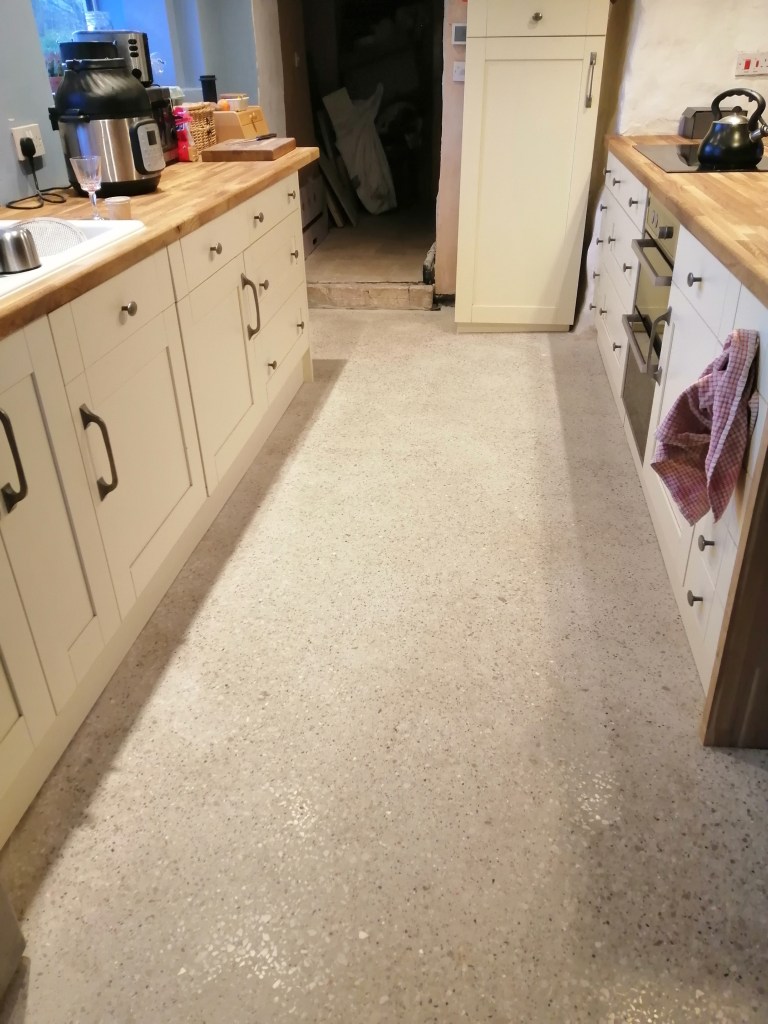
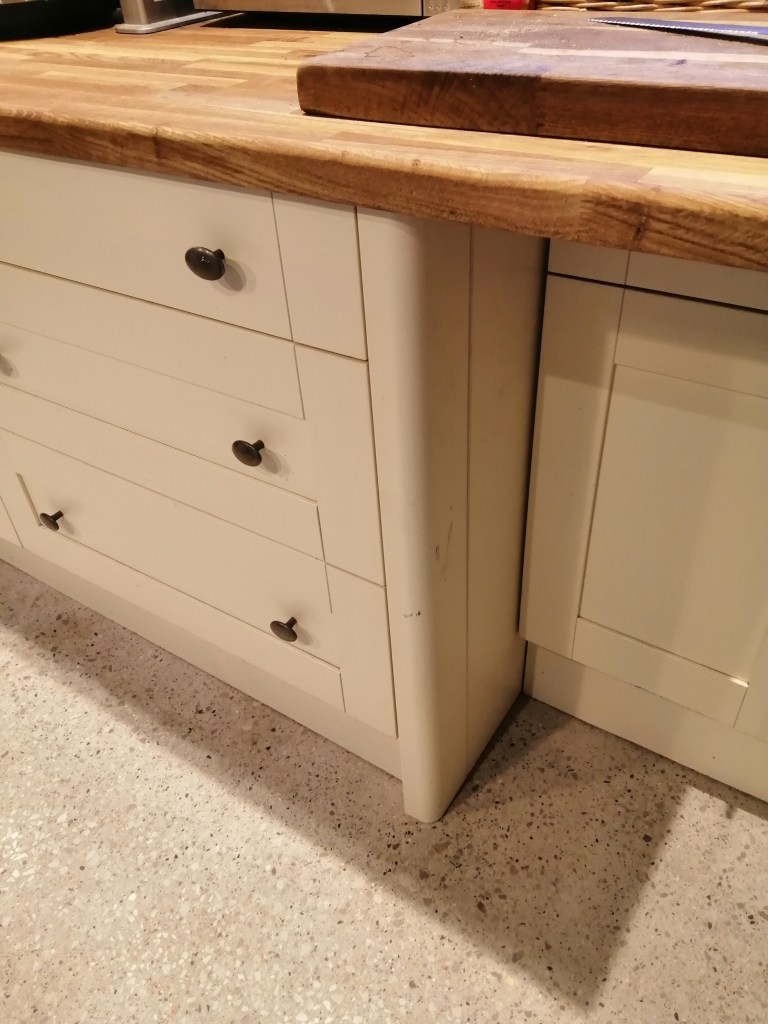
I’d been wanting to put in the kickboards for ages, largely because Idris’s fur accumulates under the cupboards. Mostly the process went fairly smoothly, aside from the longest strip on the wall cupboards. These cupboards weren’t removed when we sanded the floor, meaning the floor directly in front of them is a little more lumpy, where we had to go around the legs. Not an issue in general, until you have to cut a kickboard to fit snuggly beneath them.
I was pleased with the curved corner pieces that went along with the kickboard, as they give the cupboards a gentler feel.

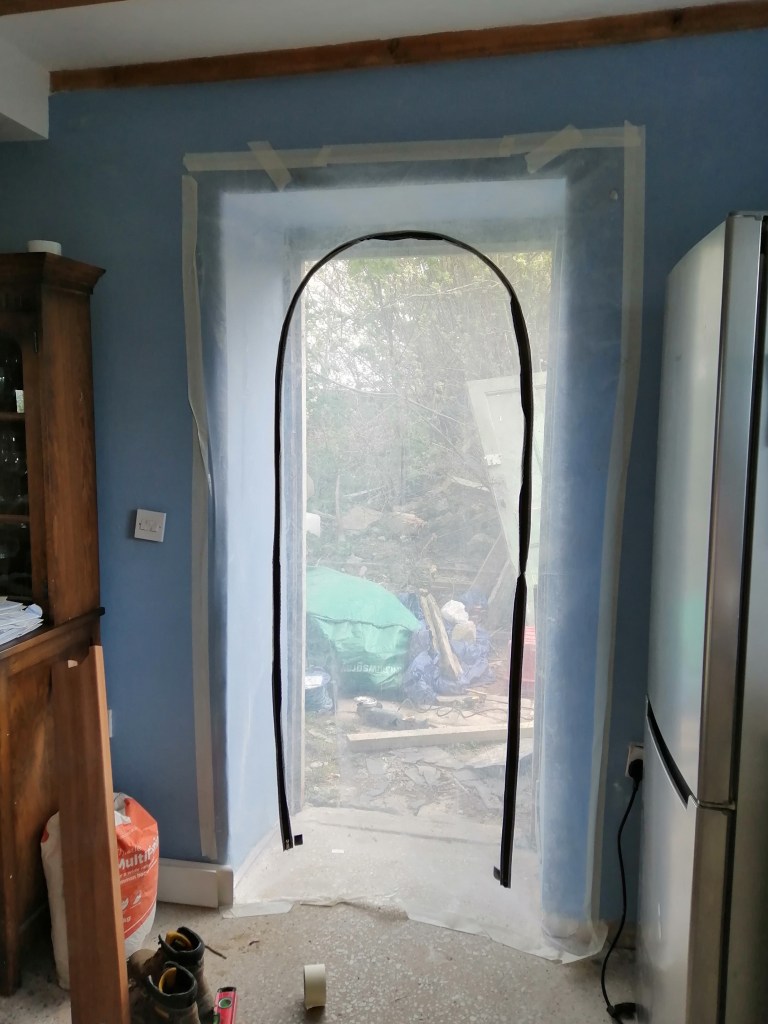
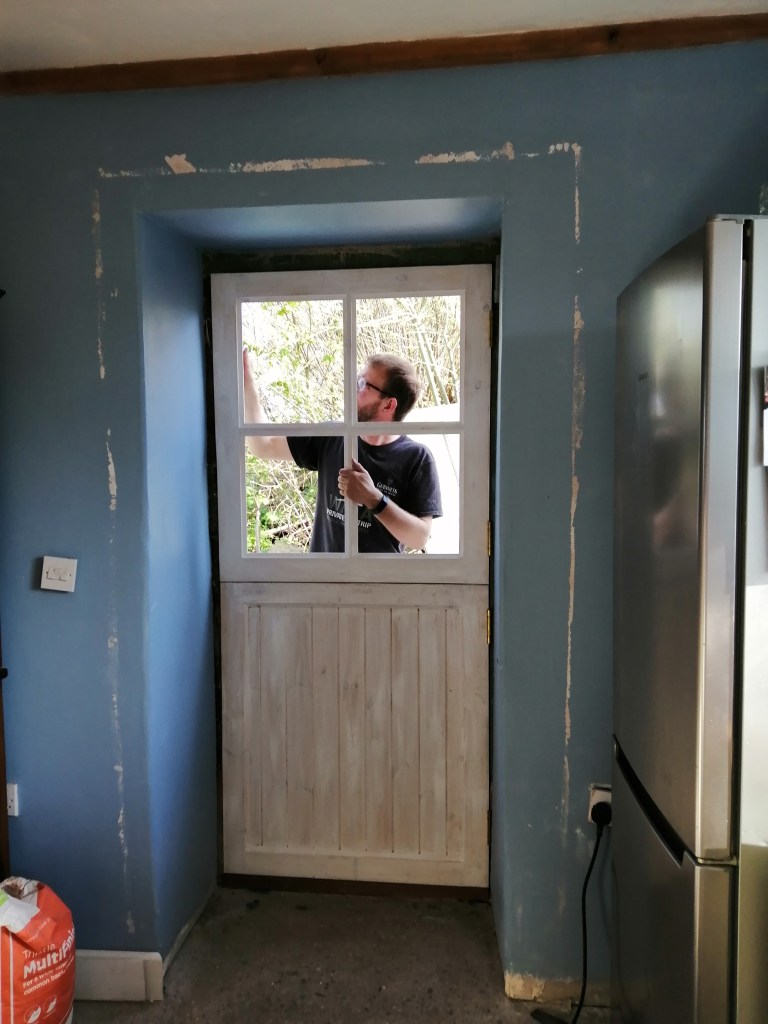
Chris’s big job was installing the stable door, which wasn’t particularly straightforward, given the doorway is very wobbly.
I’d wanted a stable door so I can open the top on sunny days and let in the breeze, but it had been Chris who wanted the windows. As the kitchen is already so light I didn’t think we needed to extra glass, but it does actually brighten up a relatively dark corner.
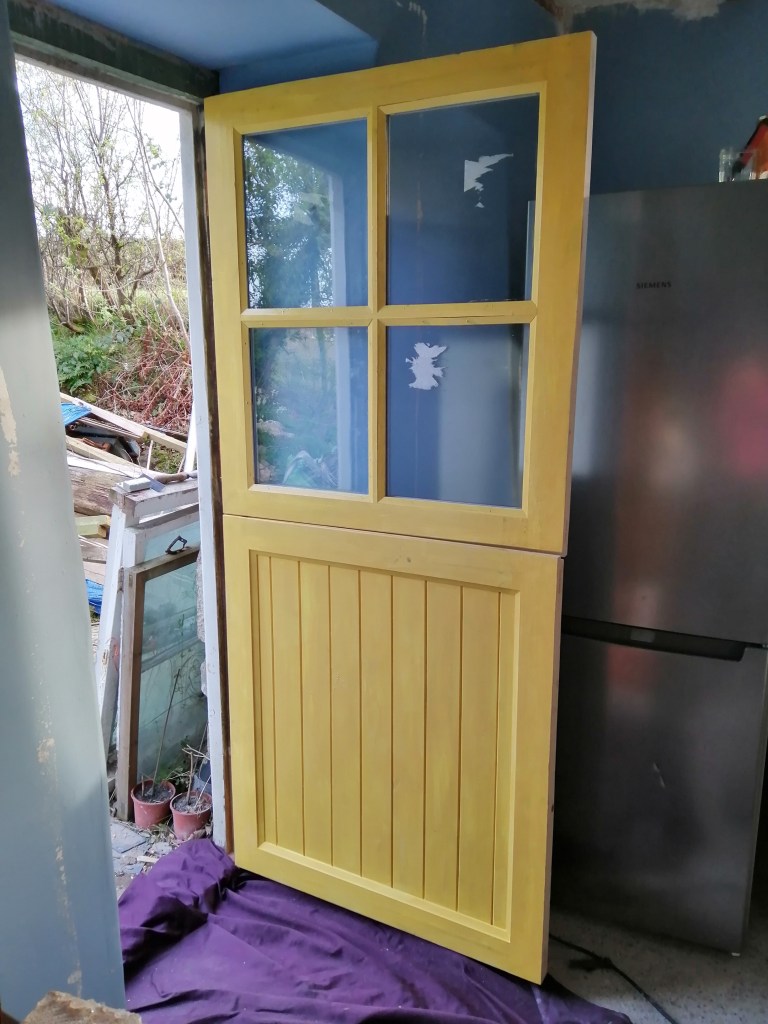
Once installed, Chris had to head off so I finished up by putting in the glazing and giving the external side it’s first coat of yellow paint.

The sunshine this week has made it easy to get a few outside jobs done. One job Chris keeps reminding me of is weeding, which is pretty low down on exciting activities, but perhaps a bit more sunshine will tempt me outside with a trowel… Unless I can find somewhere else to build a wall…
-
Moving stones
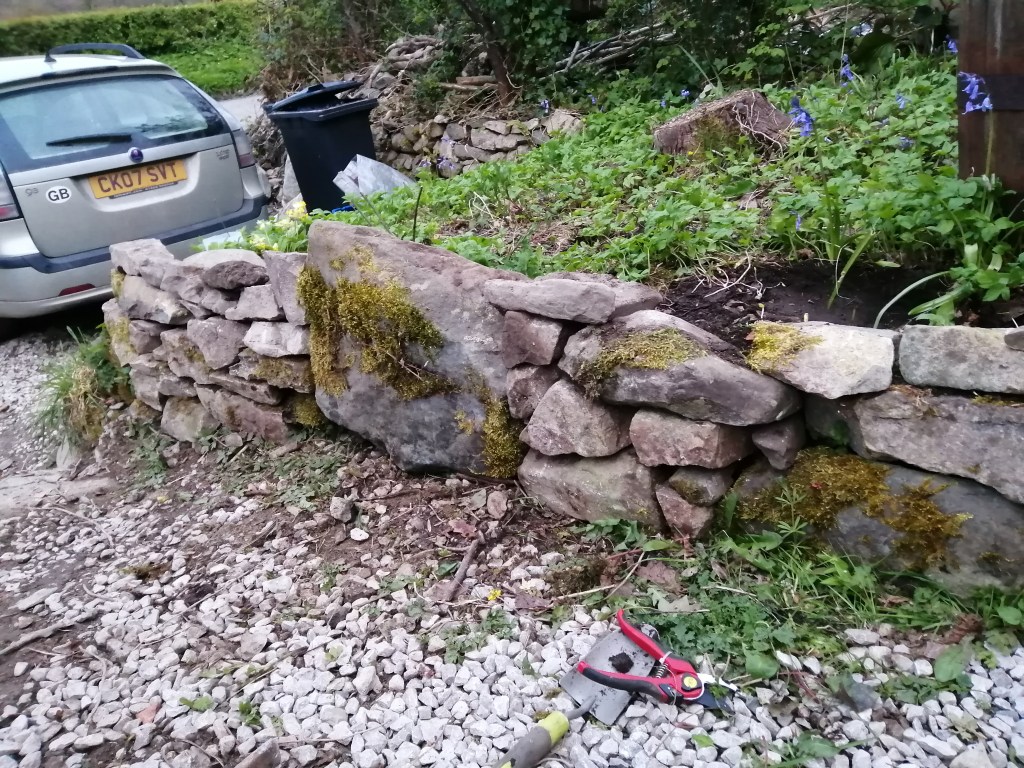
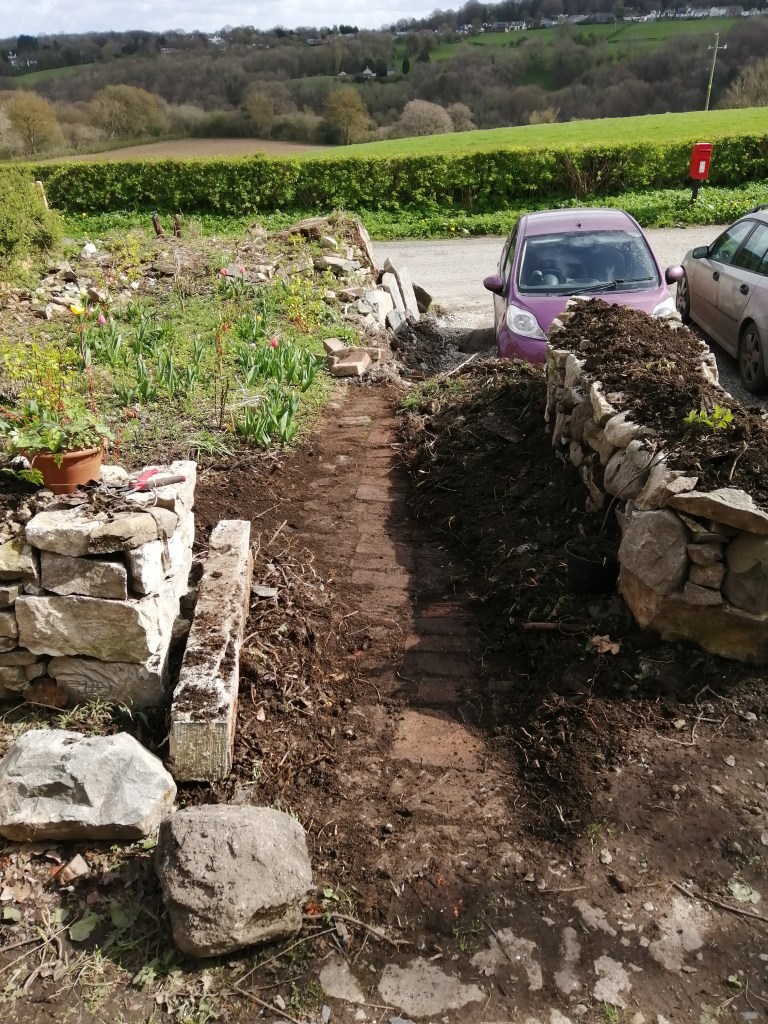
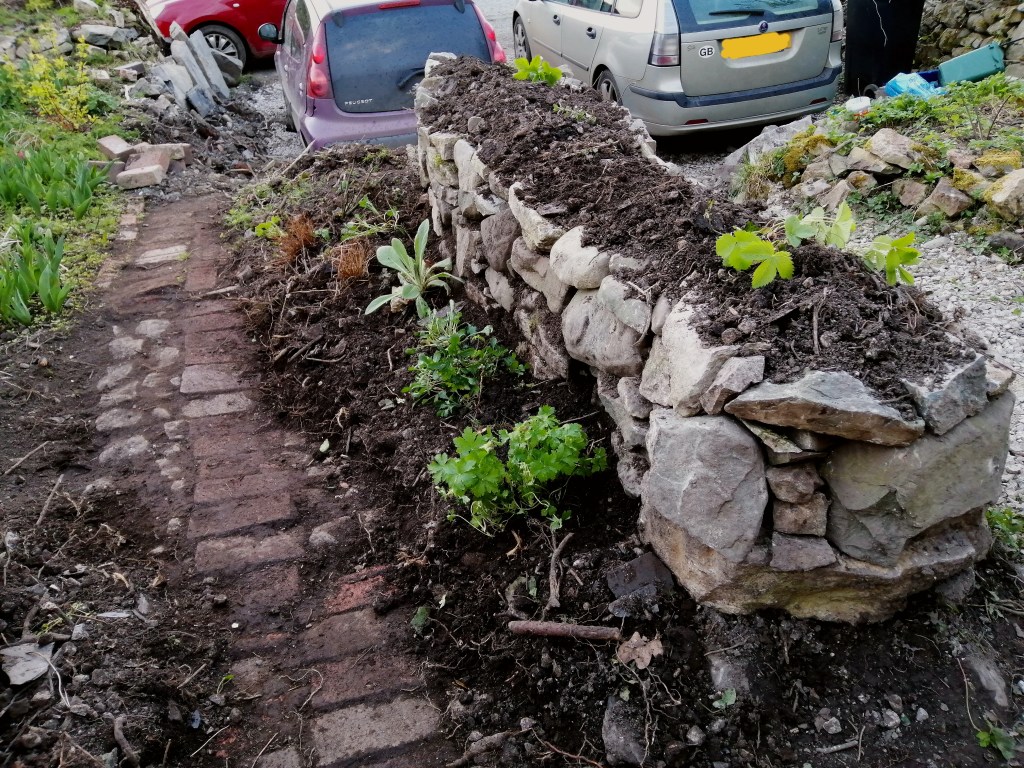
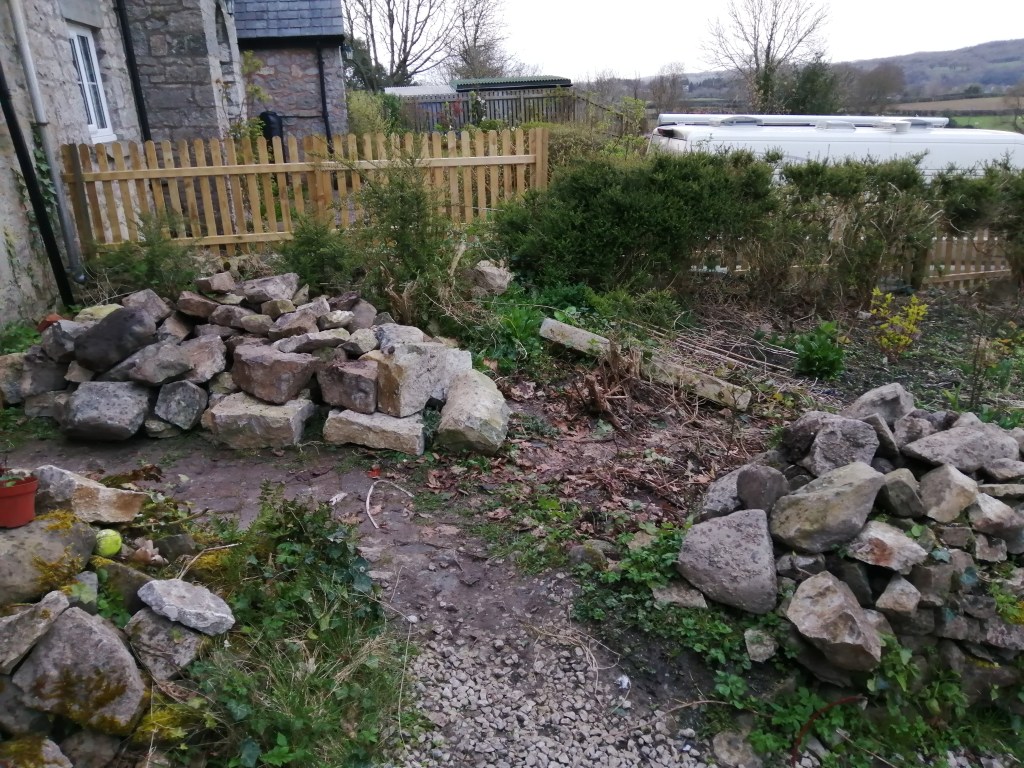
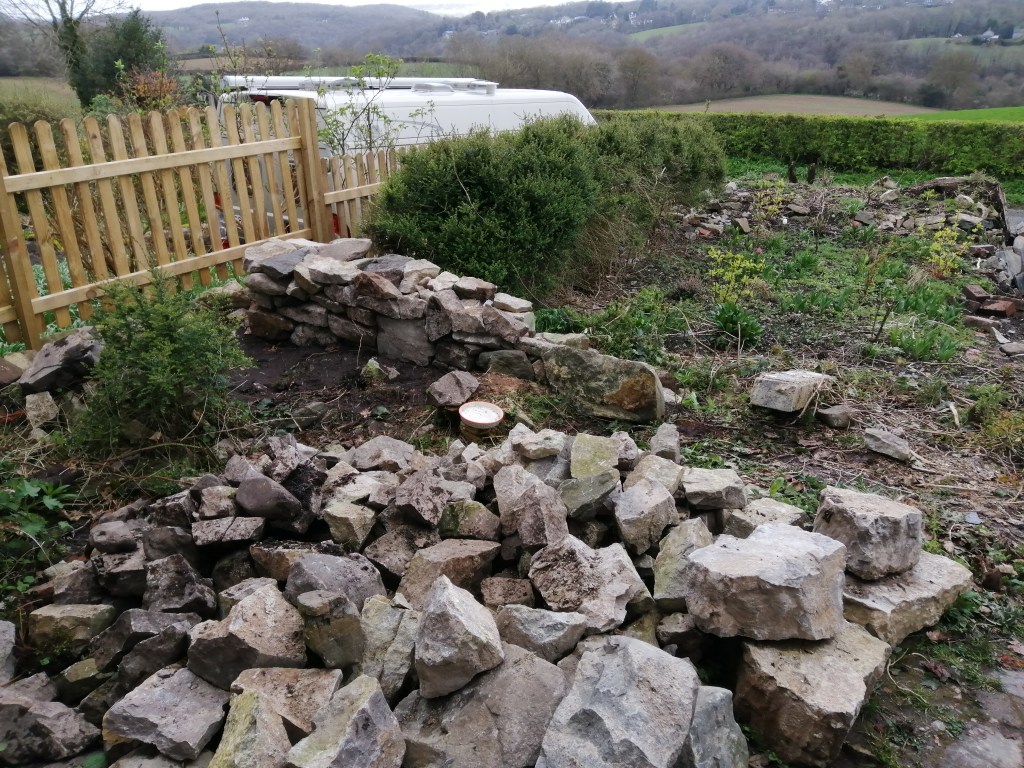
This week I’ve been mostly moving stones around. I was pretty pleased with how the first wall came together. I’ve only done drystone walling once before, right back when I was a trainee, so I wasn’t sure if I’d be able to make anything particularly solid. We didn’t want huge walls, just something to define the garden boundaries, so luckily I didn’t have to go too high.
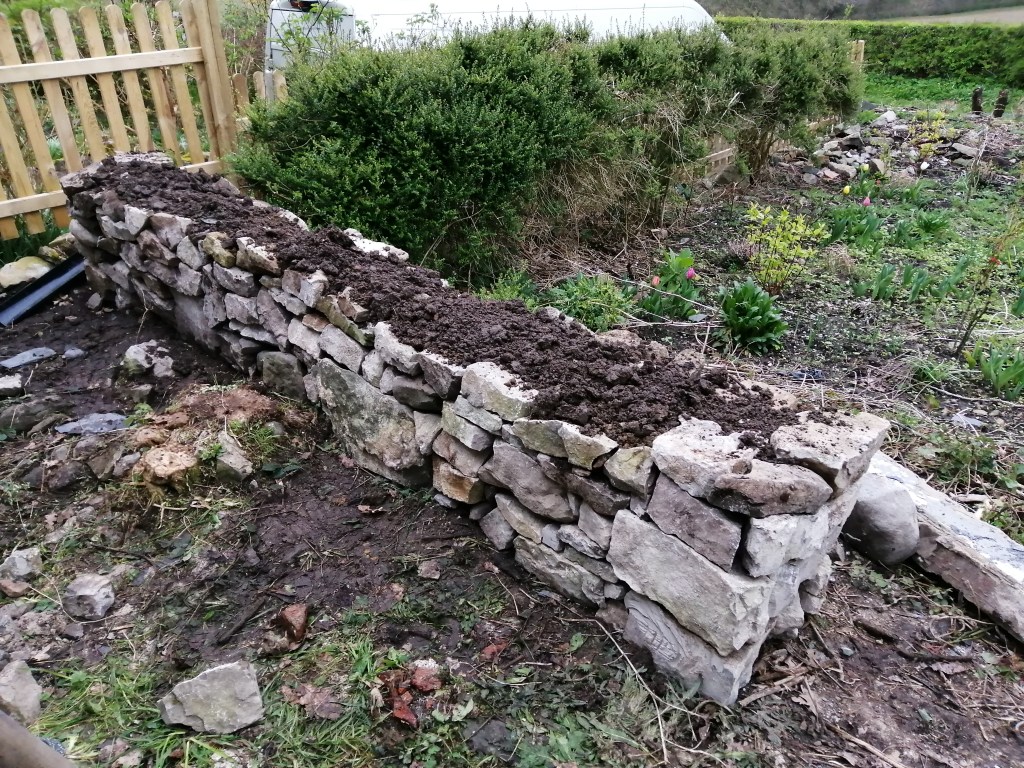
Drystone walls are usually capped with larger stones on top to stablise them, but instead we want to grow alpine plants on top, the roots of which should also hold the walls together, so I added a good bit of soil too.

With my first wall completed I moved on to the wall beside the path. Here part of the old wall was still standing at the base, so I removed the loose rock and built up from what remained. It was very pleasing to see a solitary bee, possibly a red mason bee, checking out the wall as a potential nesting spot even as it was being built.
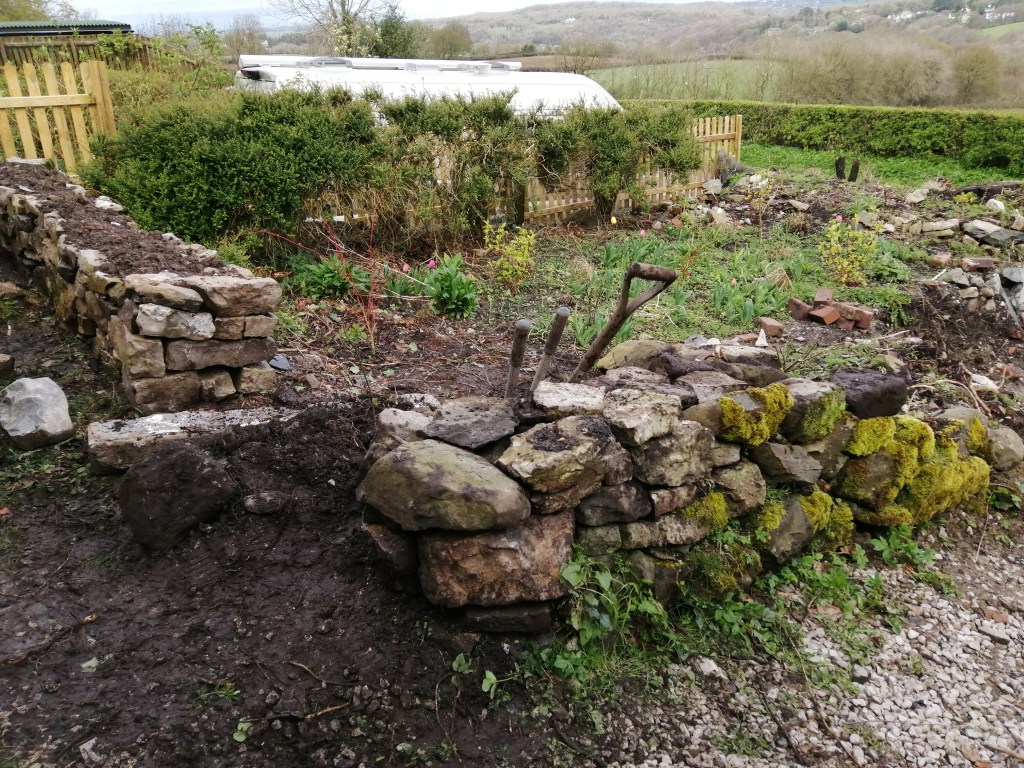
And finally I cleared the soil off the old garden path. This would once have been the path to the front door, when there’d been two houses, but it has long since been covered over. Chris couldn’t see the point of a path to nowhere, but I like the history and think it’s nice to be able to wonder down through the plants.
We need to go shopping for suitable plants for the wall but first I raided our potted plants, many of which have self-seeded plants growing around them. From these ‘weeds’ I got some strawberries, violets, mullein, geranium and oxeye daisies to start the planting. I even got enough young oxeye daisies to scatter them throughout the meadow area.
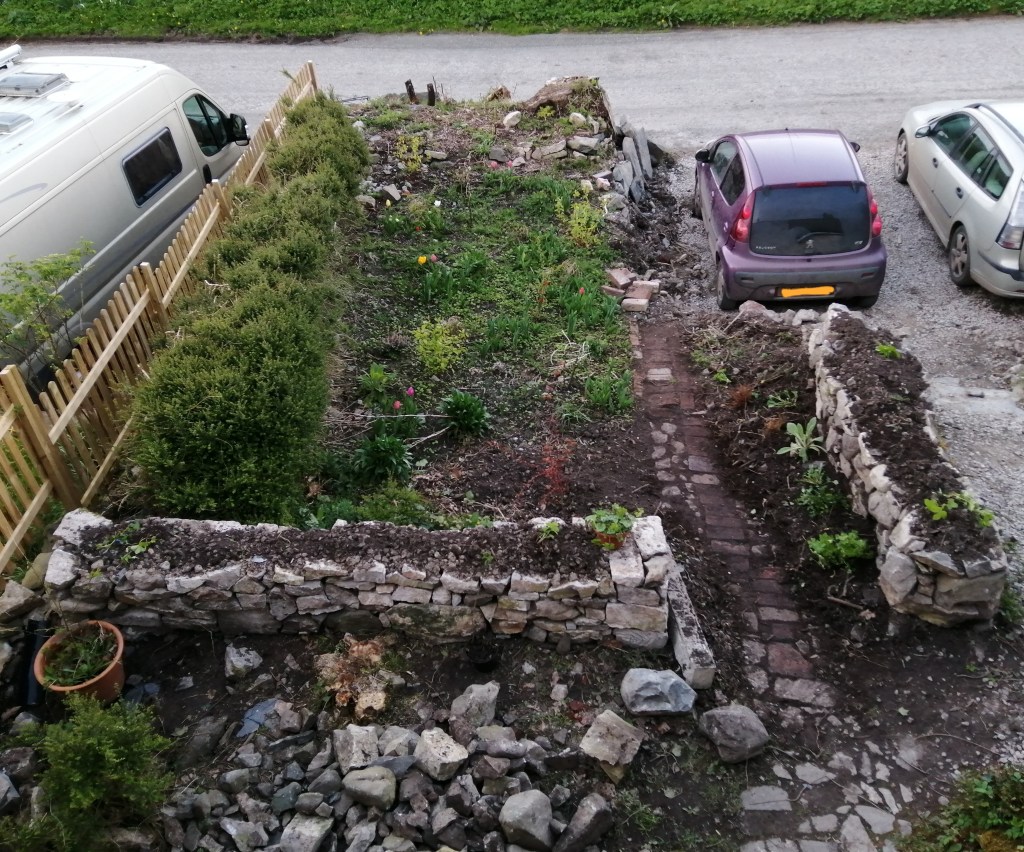
There’s a few more walls to go but the garden is starting to look a little less chaotic.

In the side garden Chris found a spot for our cherry and plum trees, their terracotta pots having broken apart in the frost.
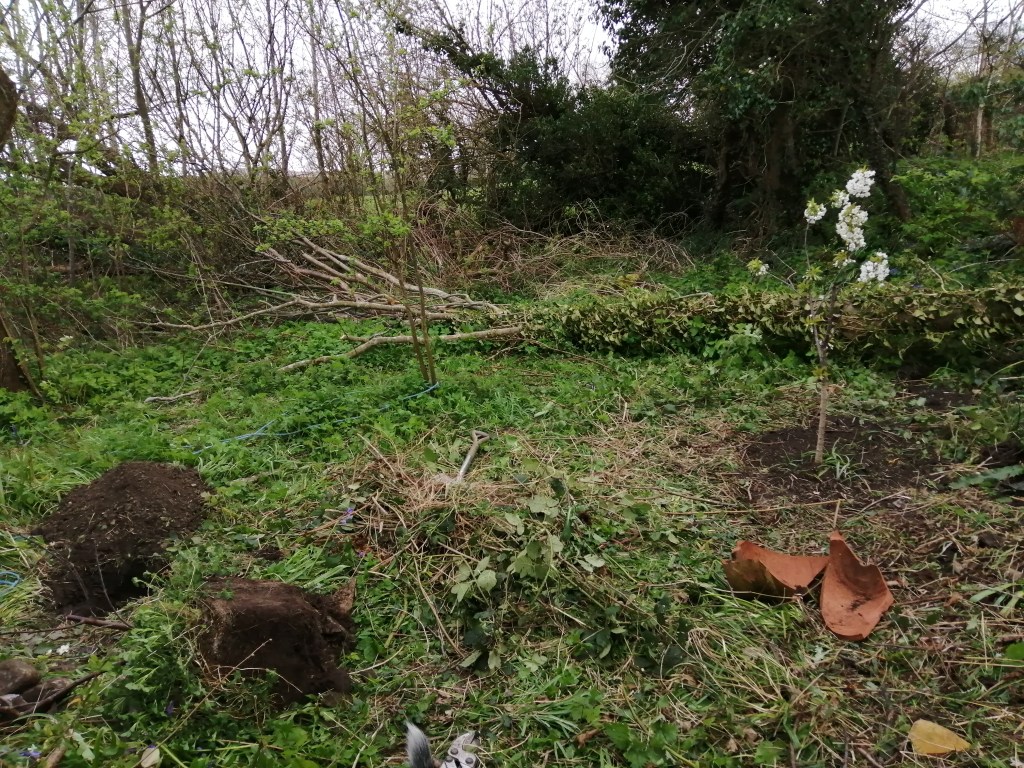
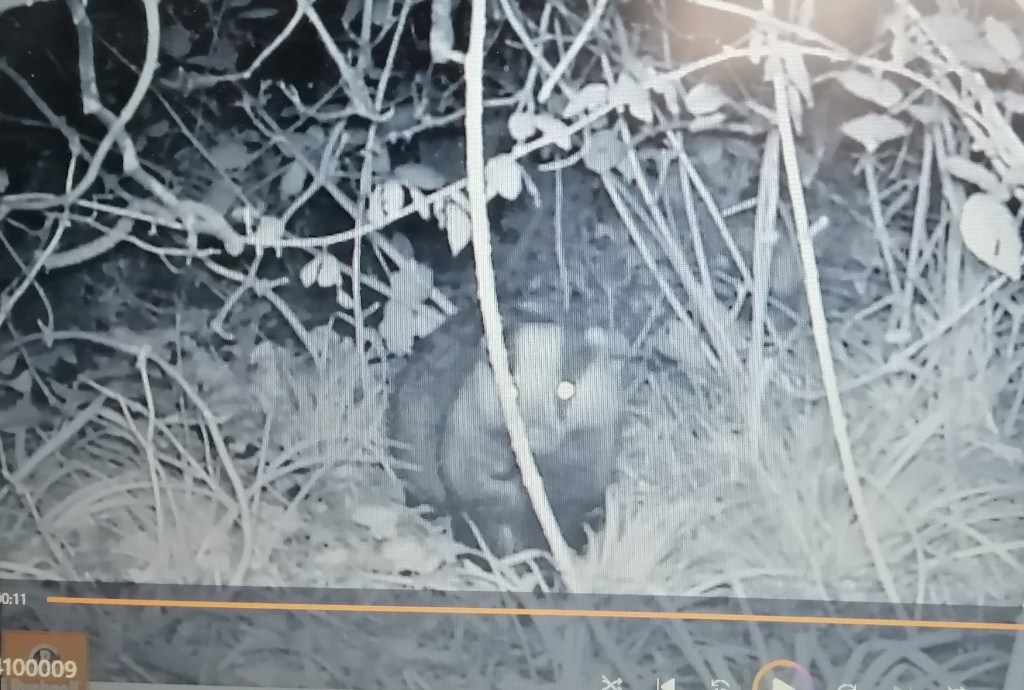
Chris has been itching to start building a shed in the garden, however he noticed some badger holes where he wanted to build it. Badger dens can be abandoned or rarely used, but we obviously didn’t want to cover them up if they were active, so he set out a trail camera. The good news is we definitely have badgers, which is exciting. They don’t seem to be using the dens much, so they’re probably temporary dens they use now and then. To avoid any damage to them however we’re moving the location of the shed and hopefully we can co-exist peacefully.
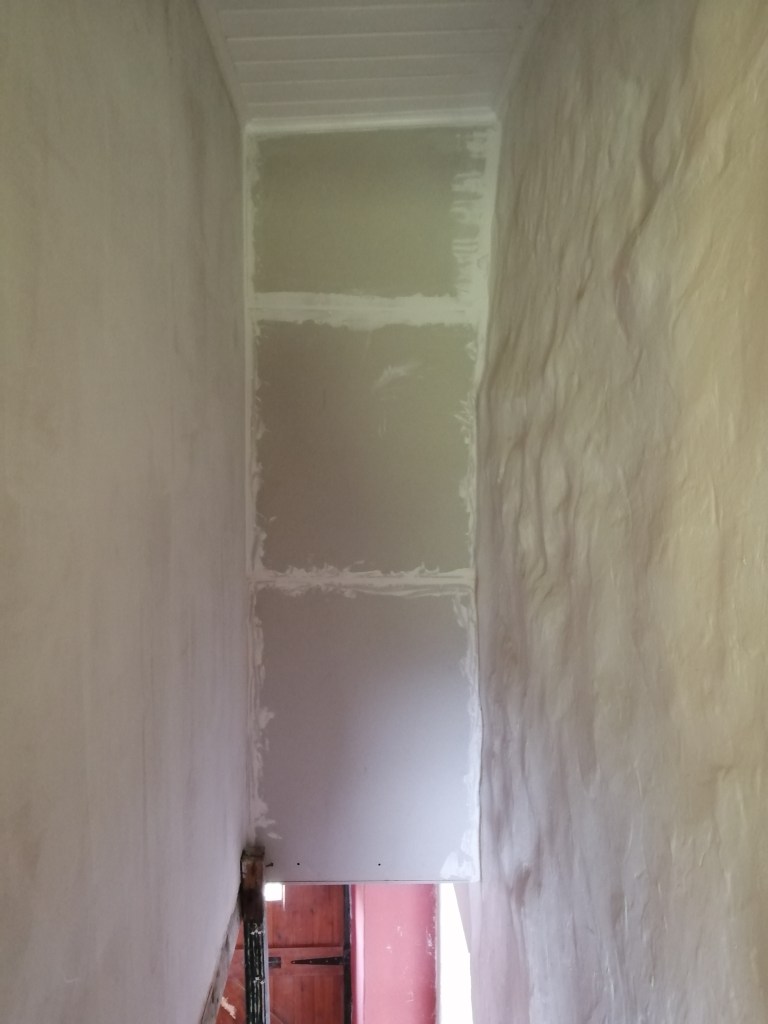
For more conventional, and boring, DIY Chris added another coat to the stairs ceiling and another section of plasterboard to the back before filling the gaps and holes. Unfortunately, once the last piece of board is added we won’t be able to balance the scaffolding planks across the top of the stairs, making it harder to reach the high ceiling and walls.

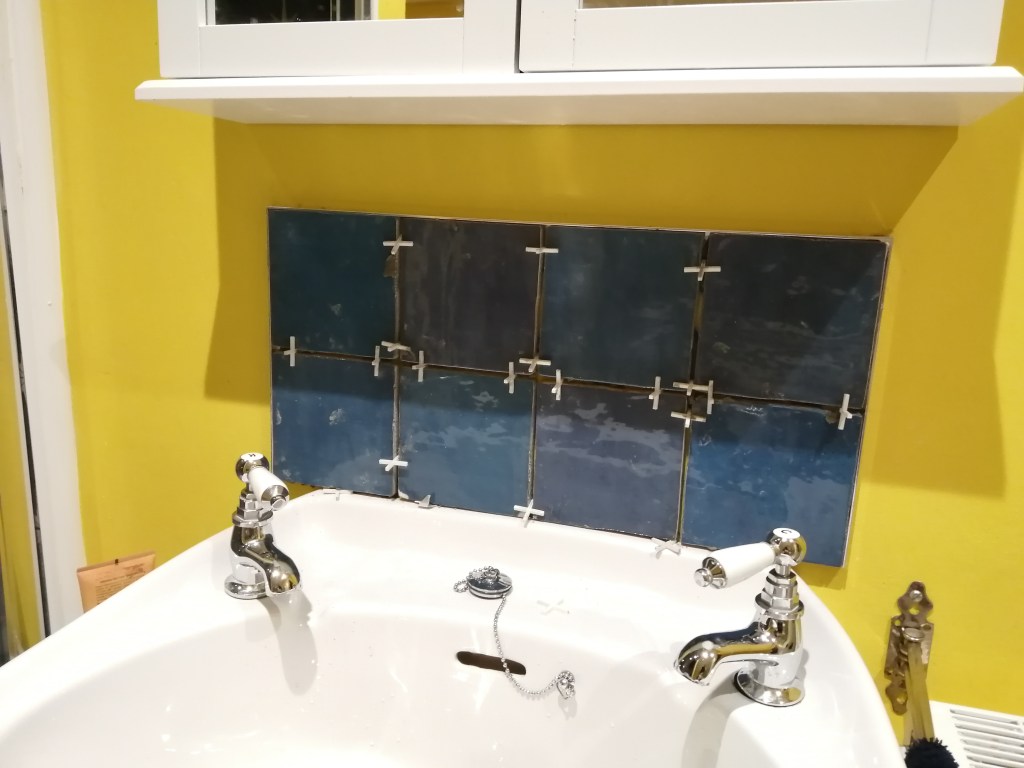
His final job was to add a splashback to the bathroom sink, a job that’s needed doing for a while.
With the sun shining and the birds singing, I mostly want to spend my time in the garden, but there’s lots of to do inside still, so perhaps next week I get back to sanding filler… Perhaps.
-
Puzzled
Filling, sanding and painting skirting is very boring, so I thought I’d take a break from this mind-numbing task to do something completely non-urgent, but more satisfying and fun.
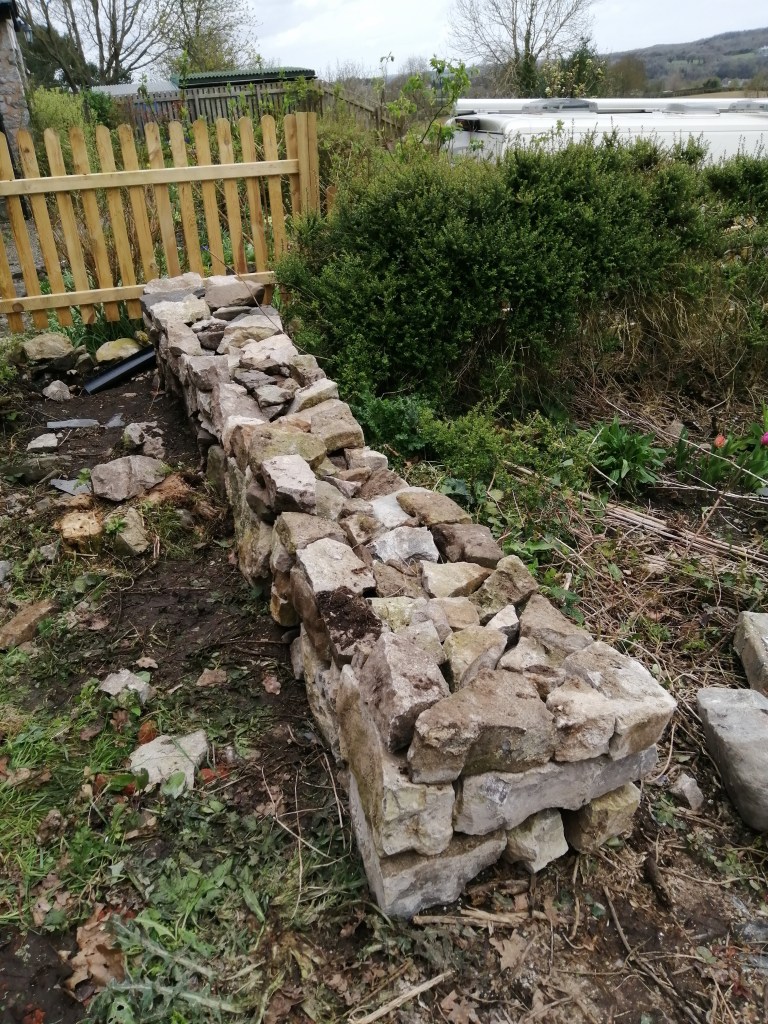
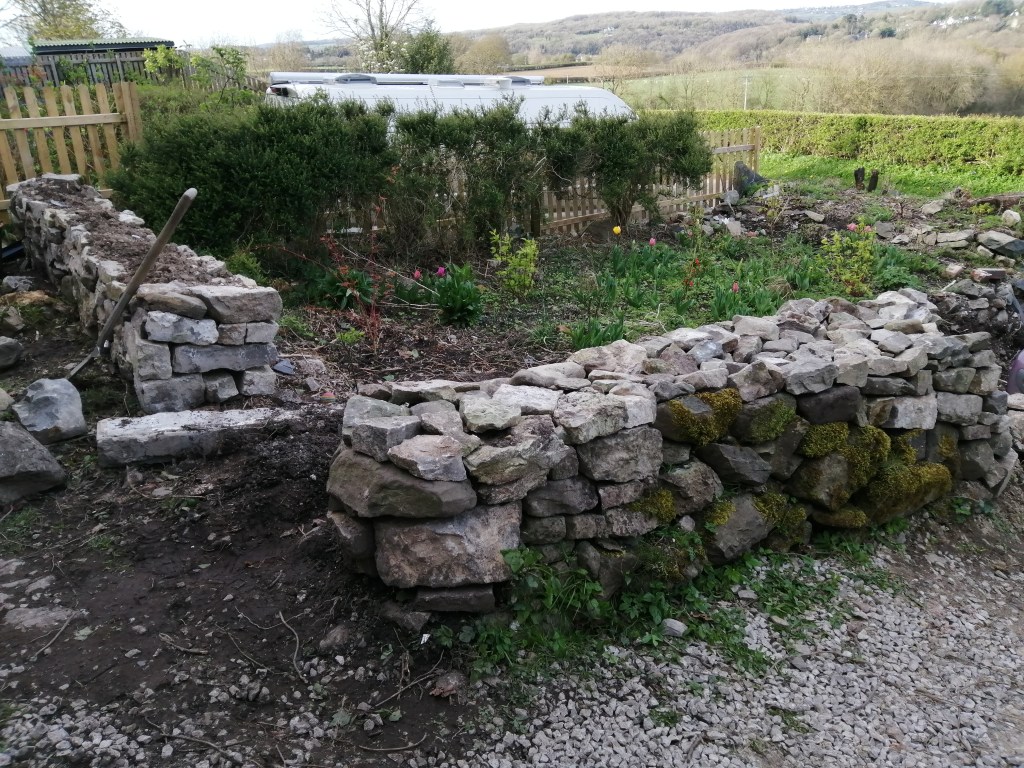
We have a number of piles of rocks in the garden, which need to be rebuilt into drystone walls. Drystone walls are better for wildlife than building walls with concrete mortar, both because concrete has a big carbon footprint, and because leaving out the mortar creates lots of nooks and crannies for things to live.
However, because there’s no mortar to hold the stones together it’s important to build the wall using a certain technique so it remains stable. It’s like building a giant jigsaw puzzle, trying to find the right stone to fit the space. Although the section I’ve built so far may seem small, it’s taken me a few evenings already. With lighter evenings I’m hoping to keep going a little at a time until it’s done.

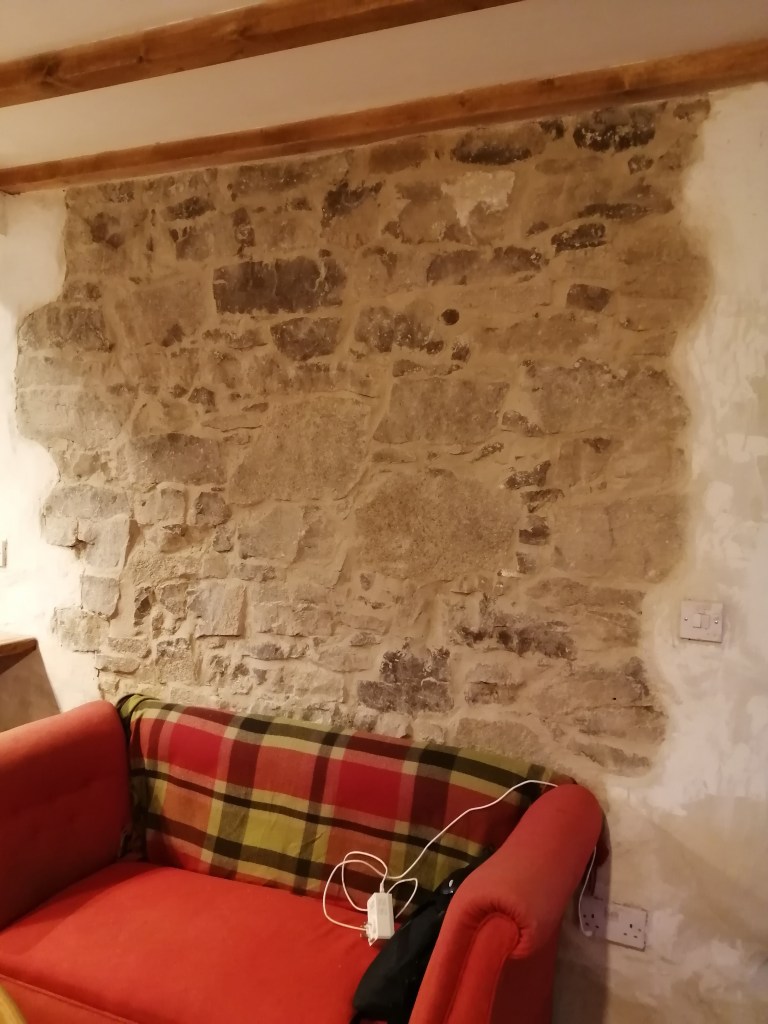
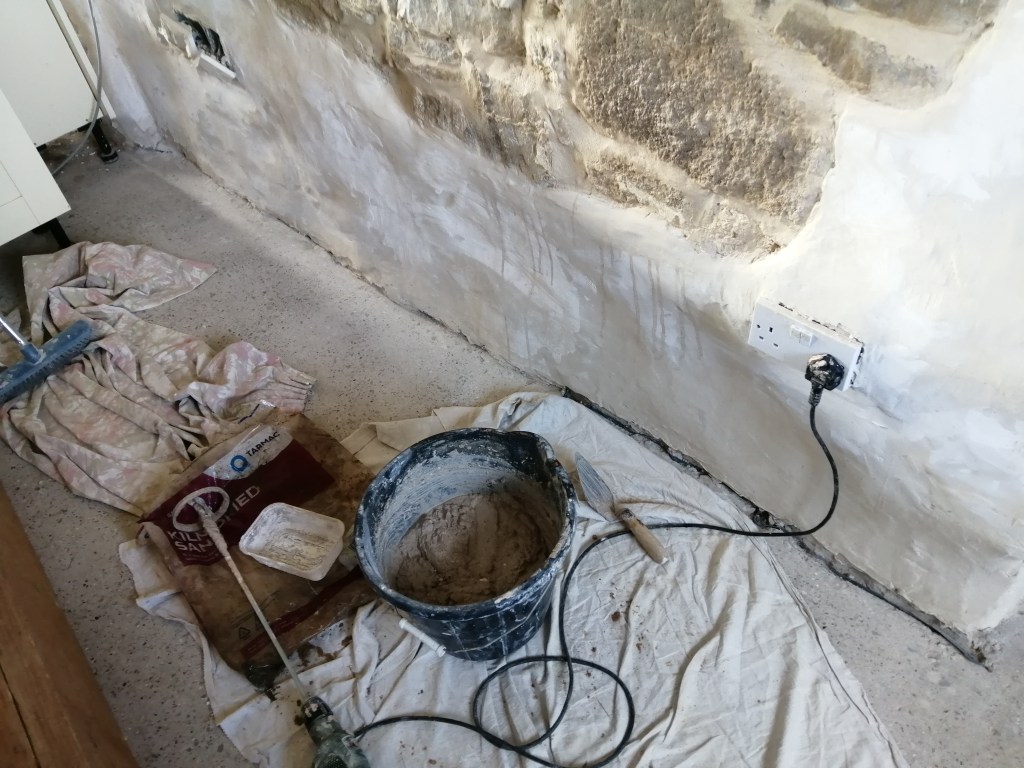
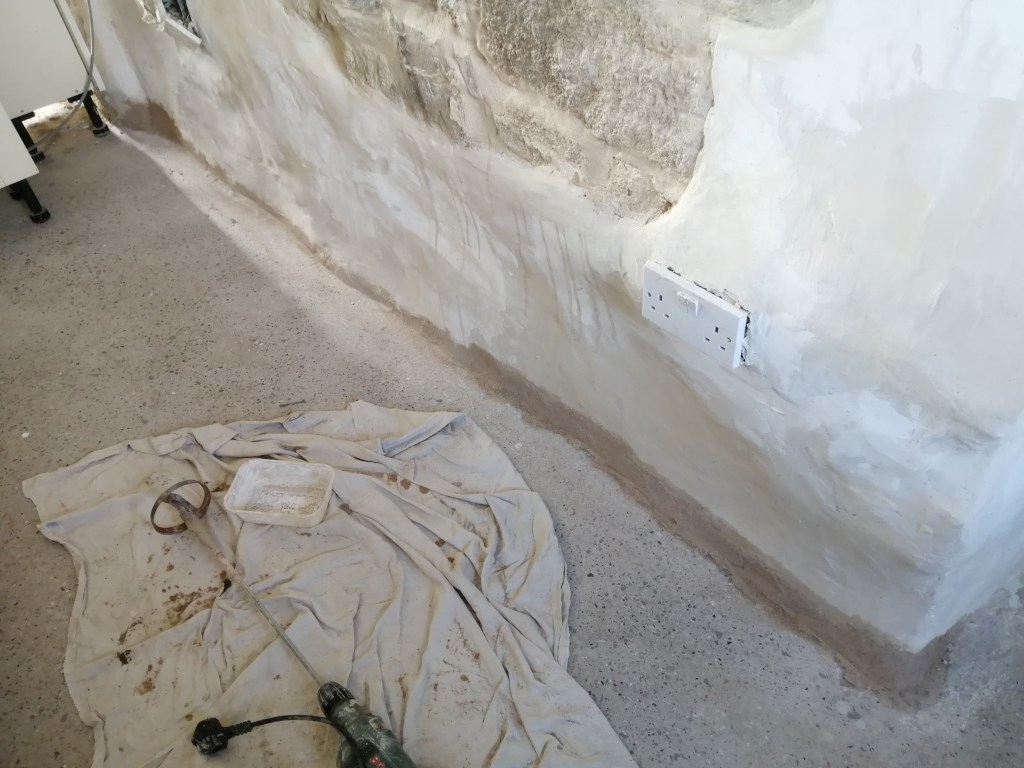
Inside the house I finally got round to cleaning the stone on the kitchen wall, tidying the edges and coating the area with three layers of stone protector.

Meanwhile, Chris plastered the remaining wall on the stairs, and added a watery coat of paint. On the ceiling he added the architrave and a fresh coat of paint. Next the architrave will need filling and the whole thing repainting.
On the landing I installed the remaining architrave.

And in the kitchen I added more skirting, though some of it can’t be attached till we know what we’re doing with the fireplace.

Along the base of the stone wall in the kitchen we’d initially planned to install skirting, so I hadn’t plastered all the way to the floor. However we realised the wall was so bumpy,skirting might not be practical, so instead I filled in the gap with plaster.
As usual I overfilled my bucket, so instead of wasting it I plastered a small section of the downstairs toilet wall.
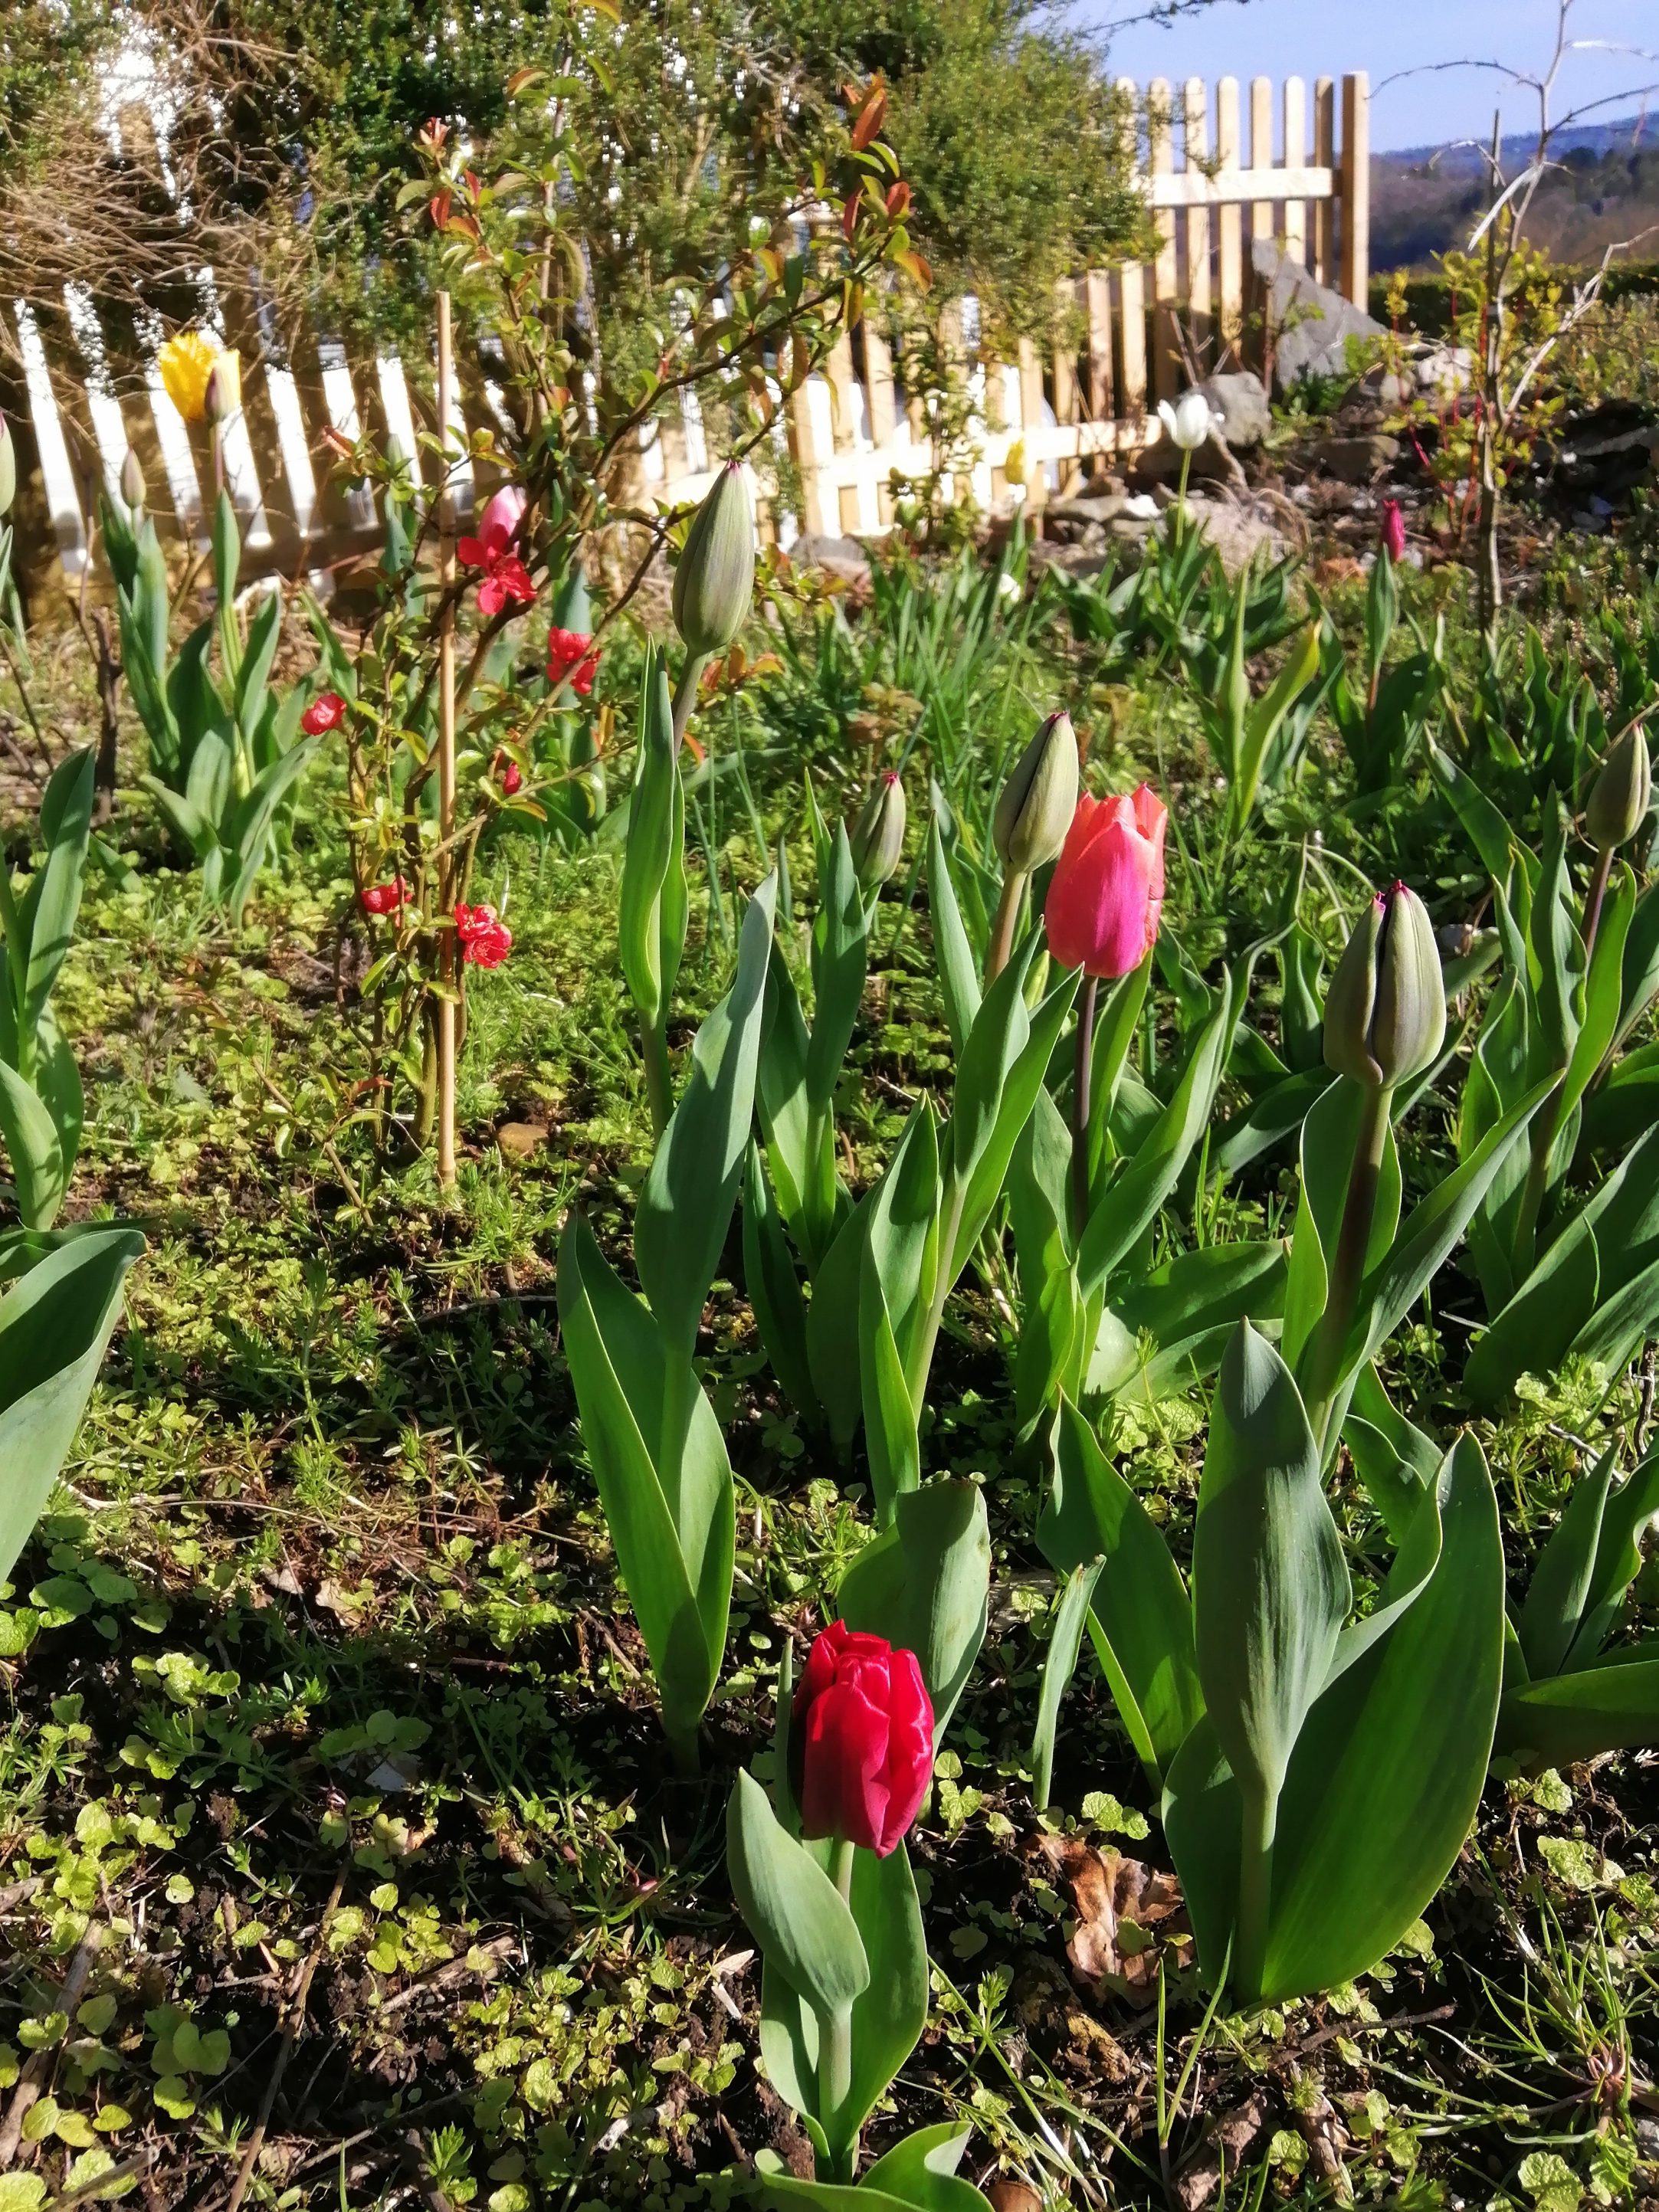
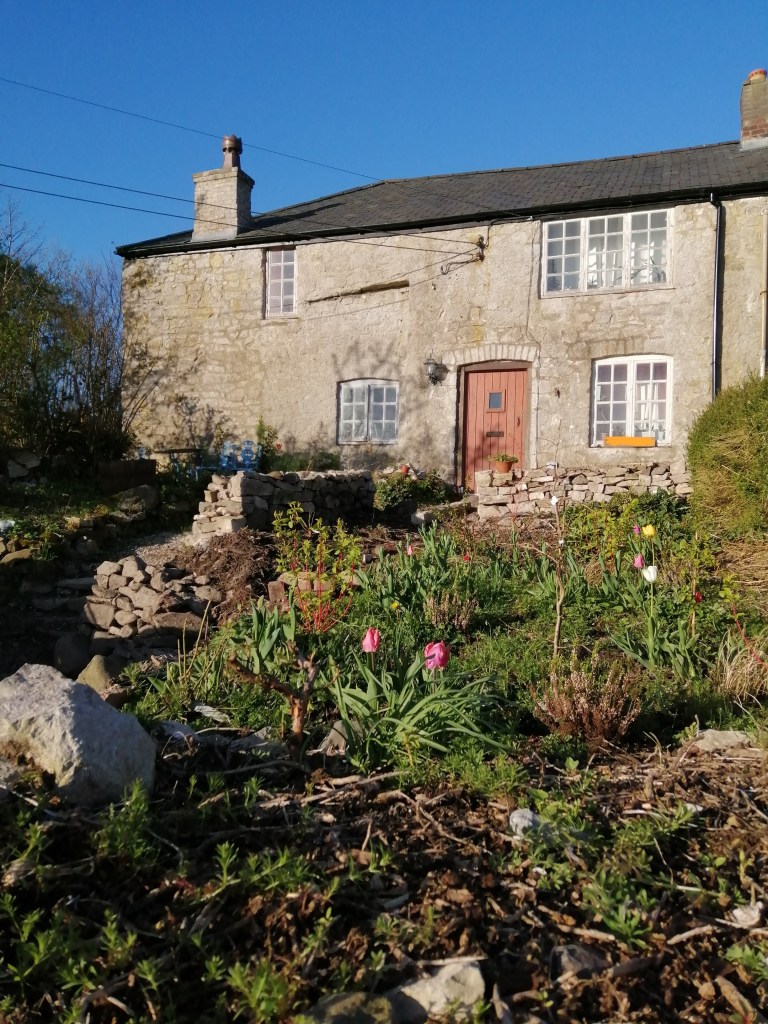
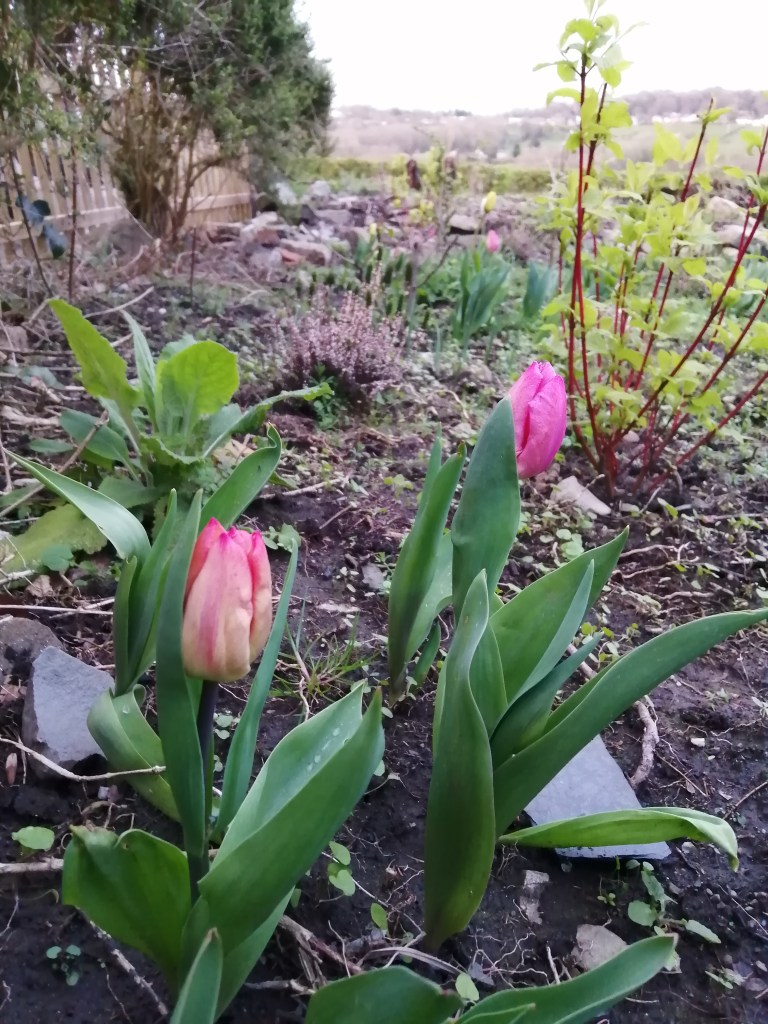
Out in the garden some of the tulips I planted are starting to flower. With the amount of bare ground the garden still doesn’t look very exciting, but at least things are starting to grow. I also finally put our bird box outside, ready for nesting season. I felt bad hammering it on to a tree, so it’s just wedged in the crook of two branches. The 50mph winds yesterday didn’t dislodge it so hopeful that’s that job done, and maybe some birds will make themselves at home.

-
Subscribe
Subscribed
Already have a WordPress.com account? Log in now.
