-
Still Windowsills…
Time keeps ticking away, and the baby is getting bigger and bigger. At 25 weeks into the pregnancy we still have plenty we want to get done before the due date. So despite not having much time, with busy weekends and dark, uninviting evenings, we still tried to get a few jobs done, to move forwards bit by bit.

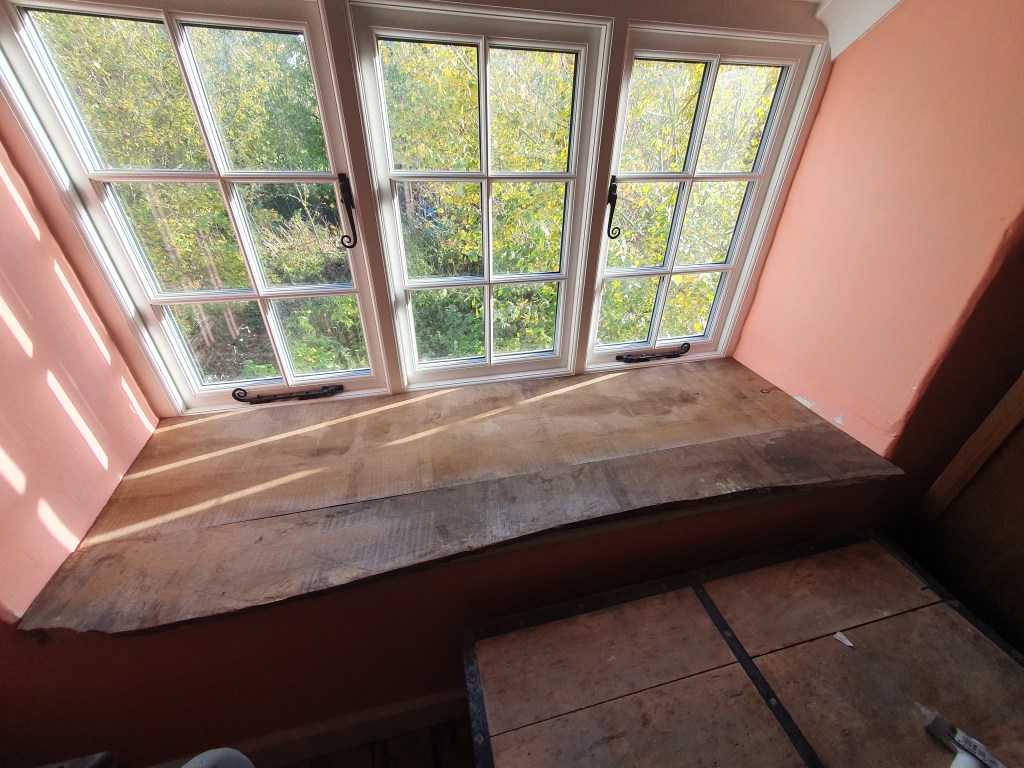
Having glued the planks for the study windowsills, I cut them to size. I needed Chris’s help to lift the bigger windowsill in and out of the alcove to try the fit.
The smaller windowsill wasn’t as tricky, and I managed to trim it down without too much back and forth. All trimmed, I sanded it down using 80 and then 120 grit sandpaper. It needs a little filling and a final sand, before being attached.

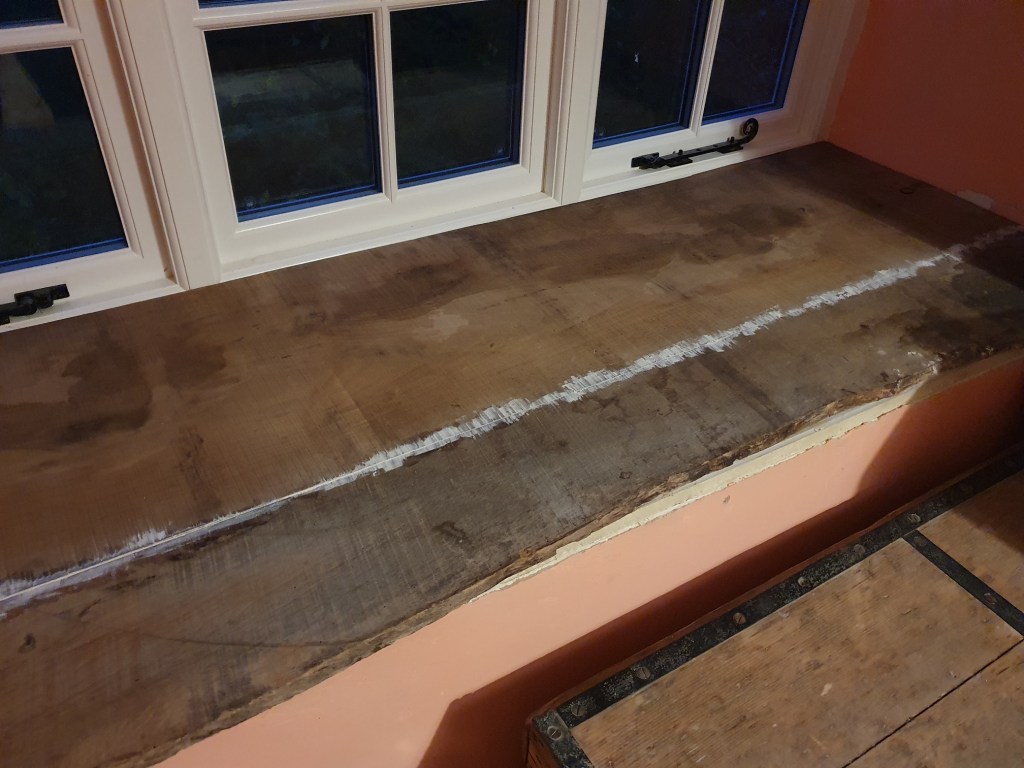
Having previously filled the large windowsill in the spare room, I sanded this one down as well.
The smaller windowsill had previously been sanded, but needed another go over to sand back the filler I’d used to fill gaps surrounding the biscuits.
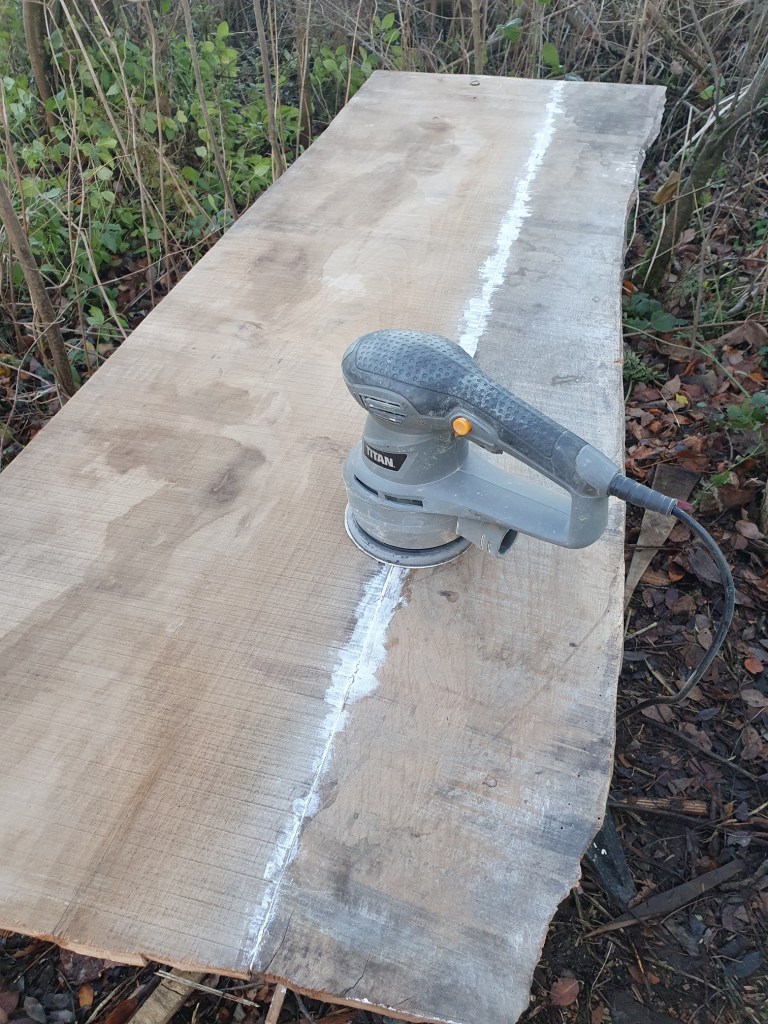
The final windowsill to sand will be a bit of a test run, as this is our first windowsill in spruce as opposed to elm. It’s a much rougher wood so it might need a harsher sand.
After that there’s only one more wooden windowsill to make, and of course all the windowsills to fill, fix and treat.

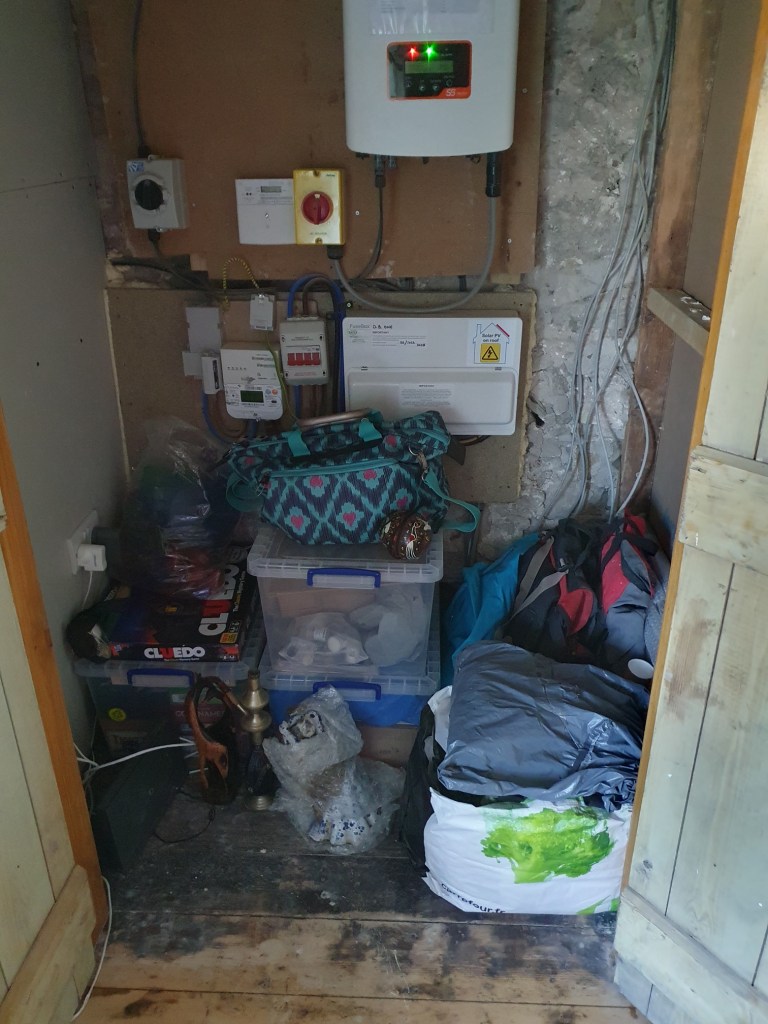
On a less exciting piece of house admin – I finally emptied the three large, and mostly collapsed boxes, that had been living in the cupboard in our room. Having purchased some plastic boxes I was able to create two crafts and a games box, while rehousing quite a bit to other locations around the house. We still need to build shelving for the cupboard, but at least, after 2yrs of living in the house, we actually know what’s in our cupboard….
-
Time off?
We’d booked off two blocks of time, a Thursday/Friday on week 1, and Wedsday/Thursday/Friday in week 2. We’d hoped long weekend number 1 would get the kitchen floor finished off, but as week 2 rolled round there was still plenty to do.
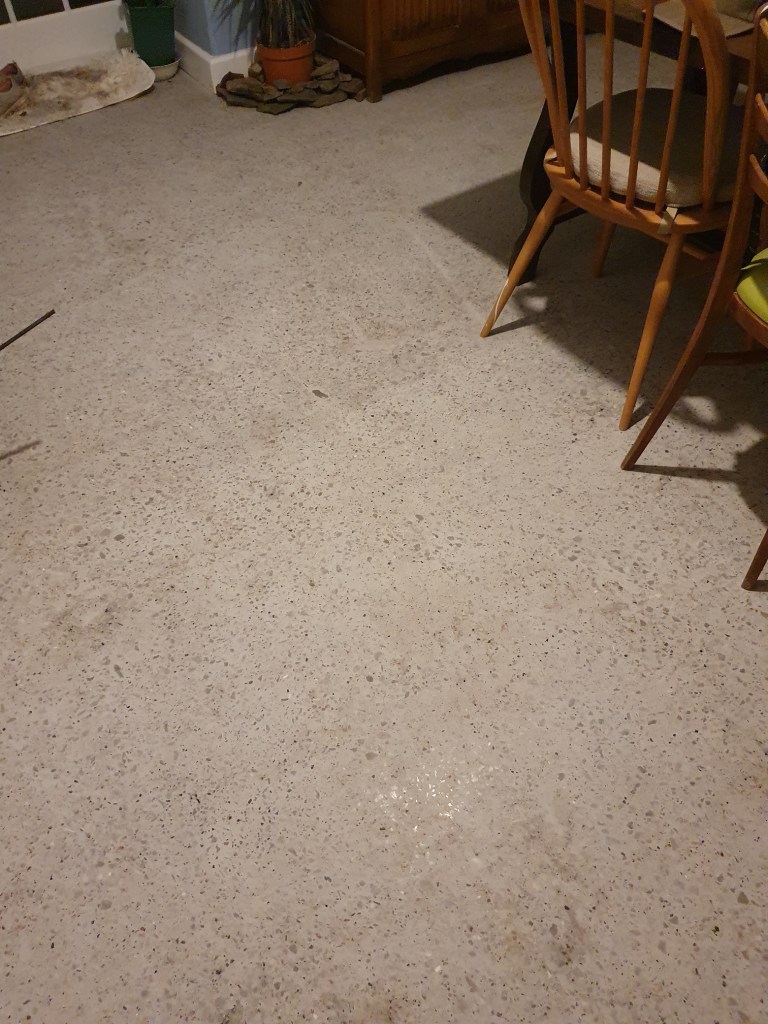
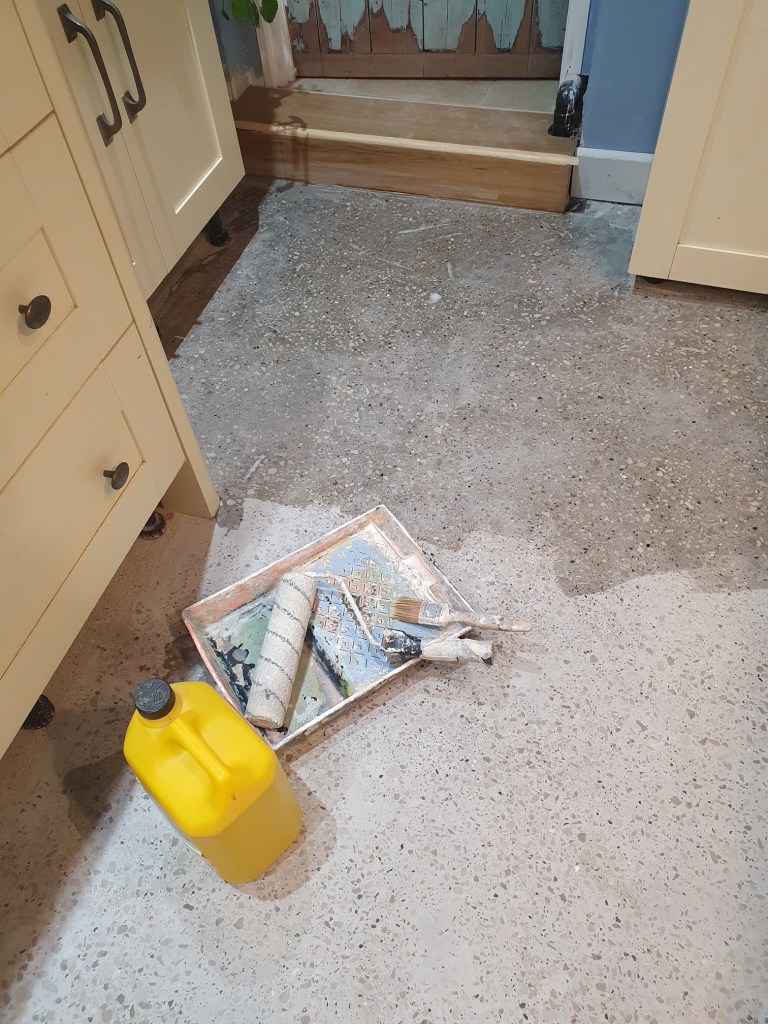
First we moved the furniture off the final area in need of treatment. Though we’d stopped polishing at a 1,500 pad on this section, Chris had since decided to continue on to 3,000 in other areas, so this patch needed one more polish with the higher pads, several mops to clean it up, and then painting with sealant.
On top of that everything in the kitchen was covered by a thick layer of dust. Cupboards needed cleaning out, crockery, glasses and pans needed washing, every surface and piece of furniture needed wiping down.
It was after Chris helped to move the furniture he announced he was moving on to another job, as one person could finish this job. Sigh.
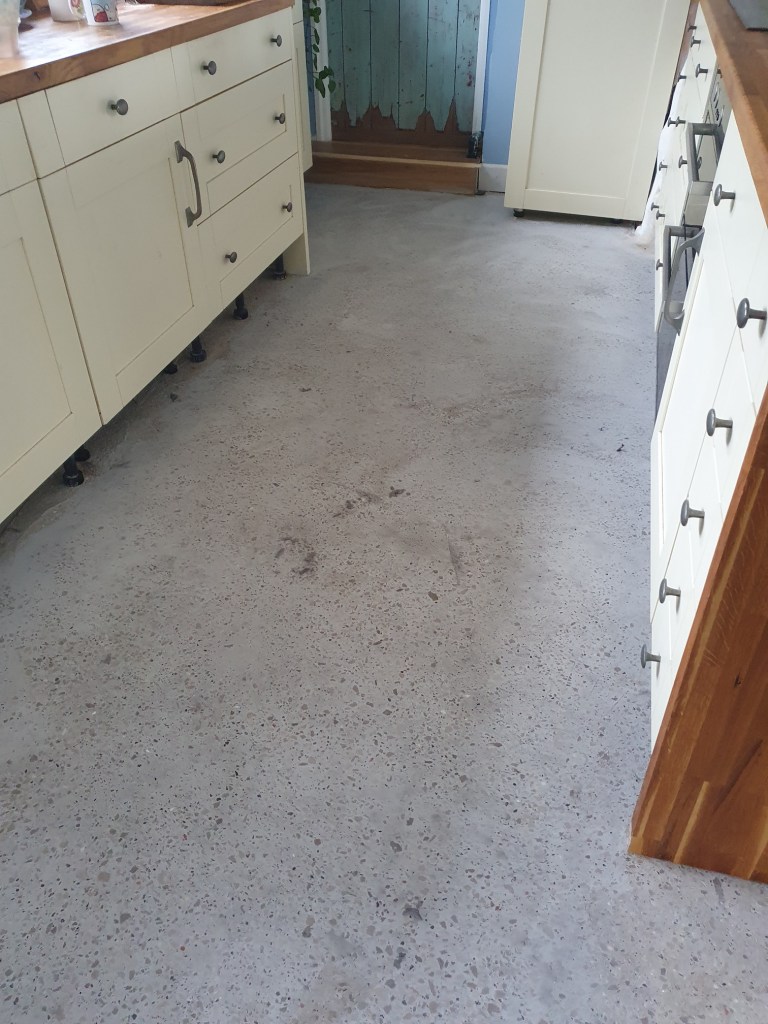
It was a long and exhausting day, getting the kitchen back into order, but most things are finally cleaned and back in place. Overall, I think the floor does look better, though it doesn’t feel as satisfying as it could for 5 days of two people’s work. But it’s done at least.

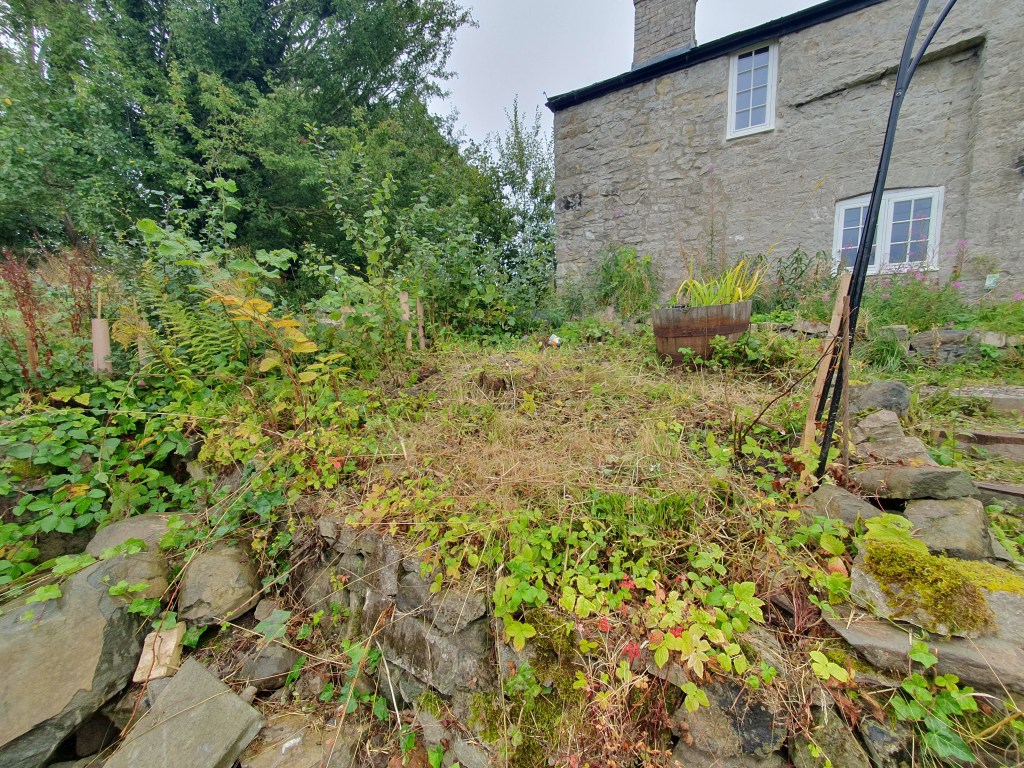
The job Chris moved on to was re-laying the steps up to the house. Our steps were a bit of a hazard, with wobbly, uneven slate, threatening to cause a lawsuit at any moment.
Chris has already replaced the top steps, but doing the bottom ones meant digging down a fair way, rather back breaking work.

Having dug out the steps, Chris used some of our piles of stones to create the step bases.
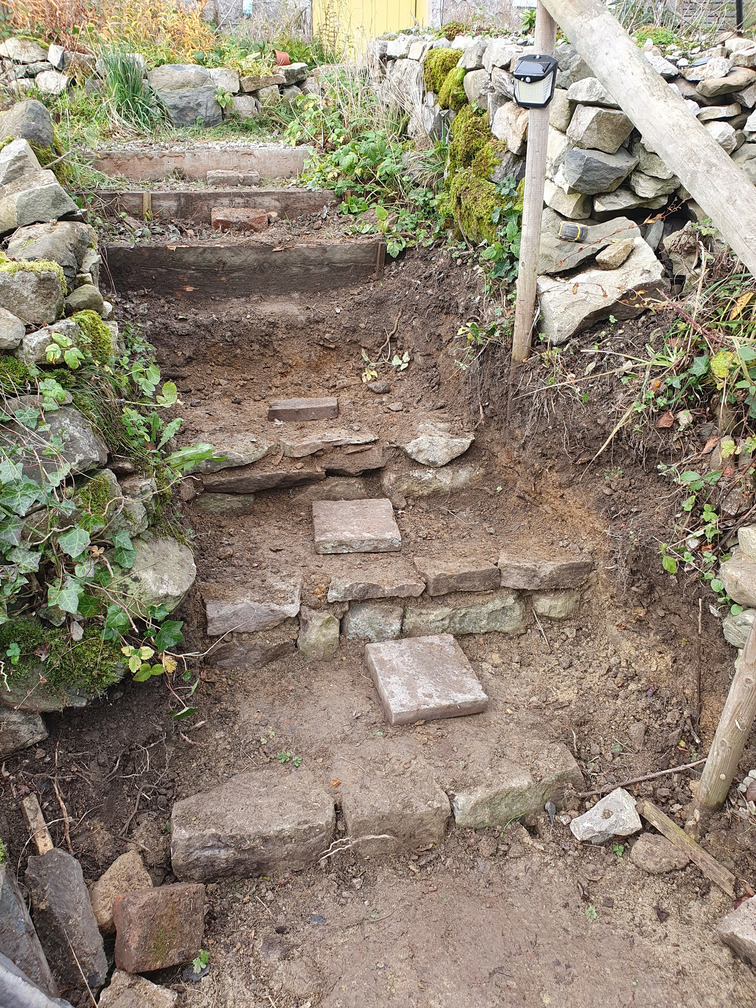
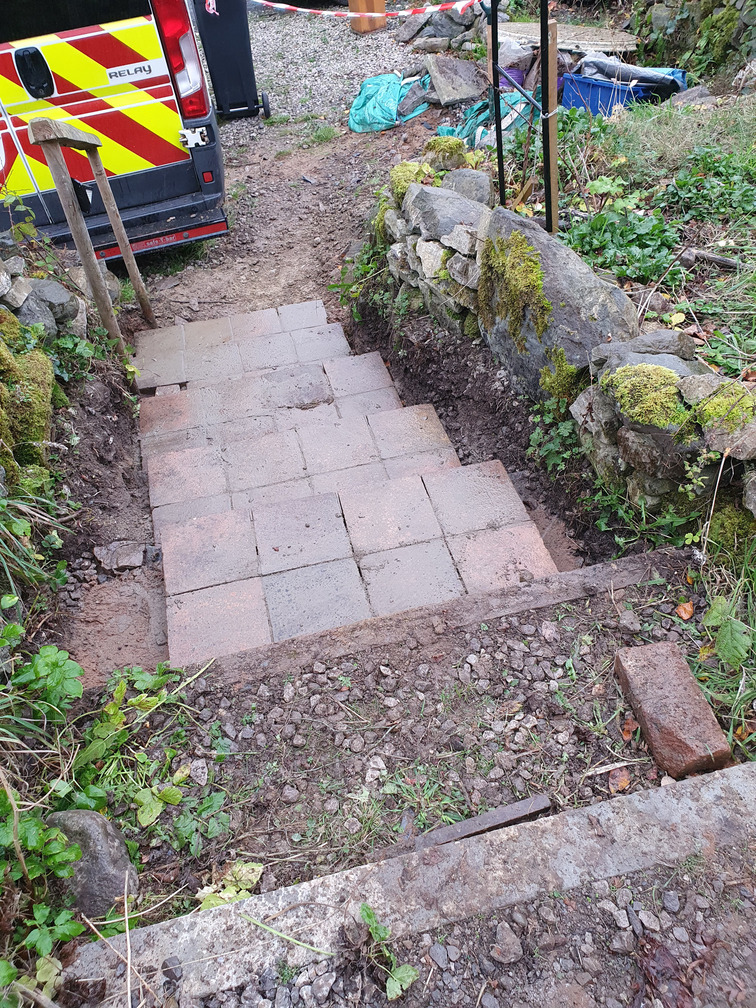
He then reused the tiles we salvaged from the side of the house prior to laying the patio. To give them a bit of stability he mortared in between.
Next we’ll need to rebuild the lower walls beside the path, which have been undermined, and put in a new handrail. Still, a lot safer and nicer looking already.
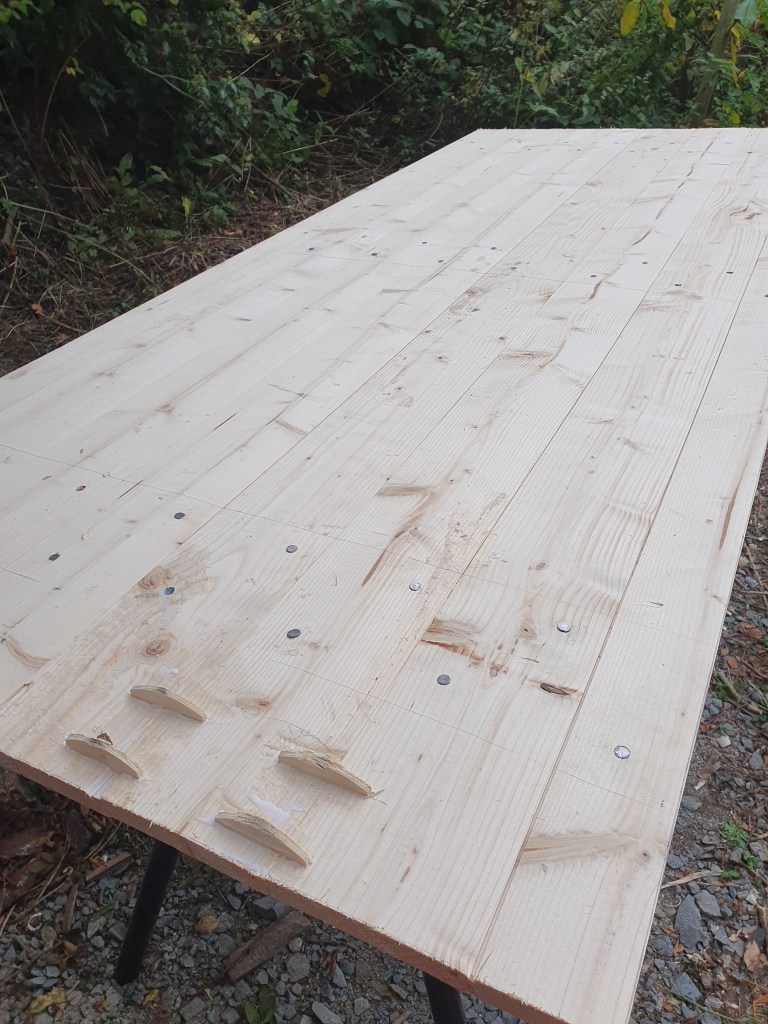
Having finished the kitchen floor I moved on to more windowsills. I decided to focus on the two windowsills in the study. I managed to reuse the template from the bedroom, with a small addition needed, for the large windowsill.
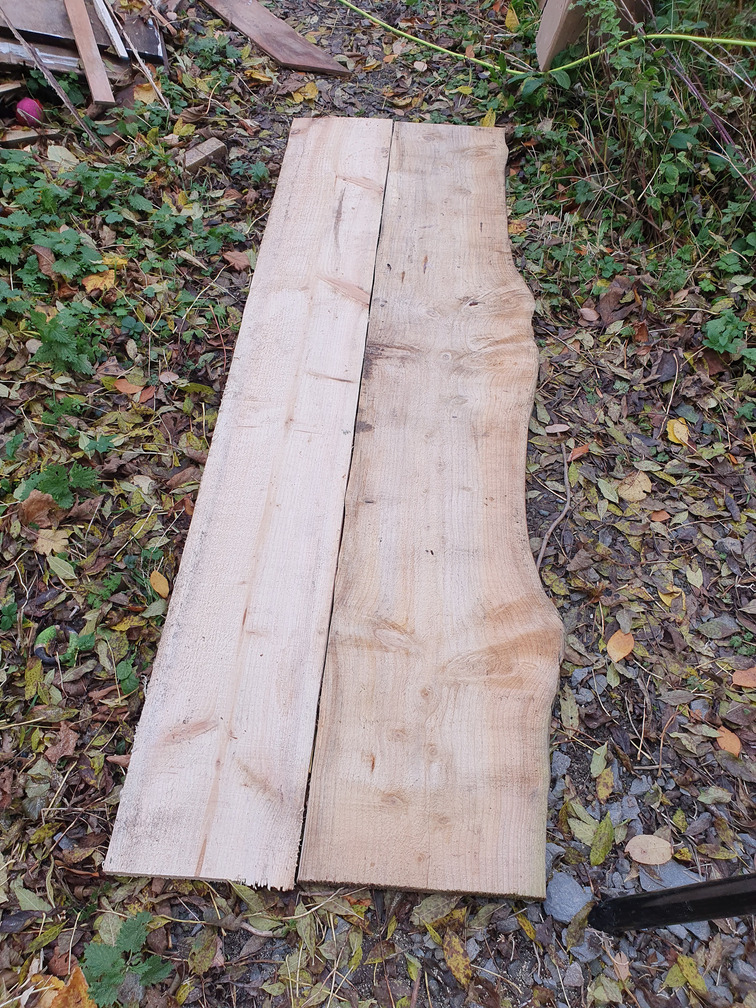
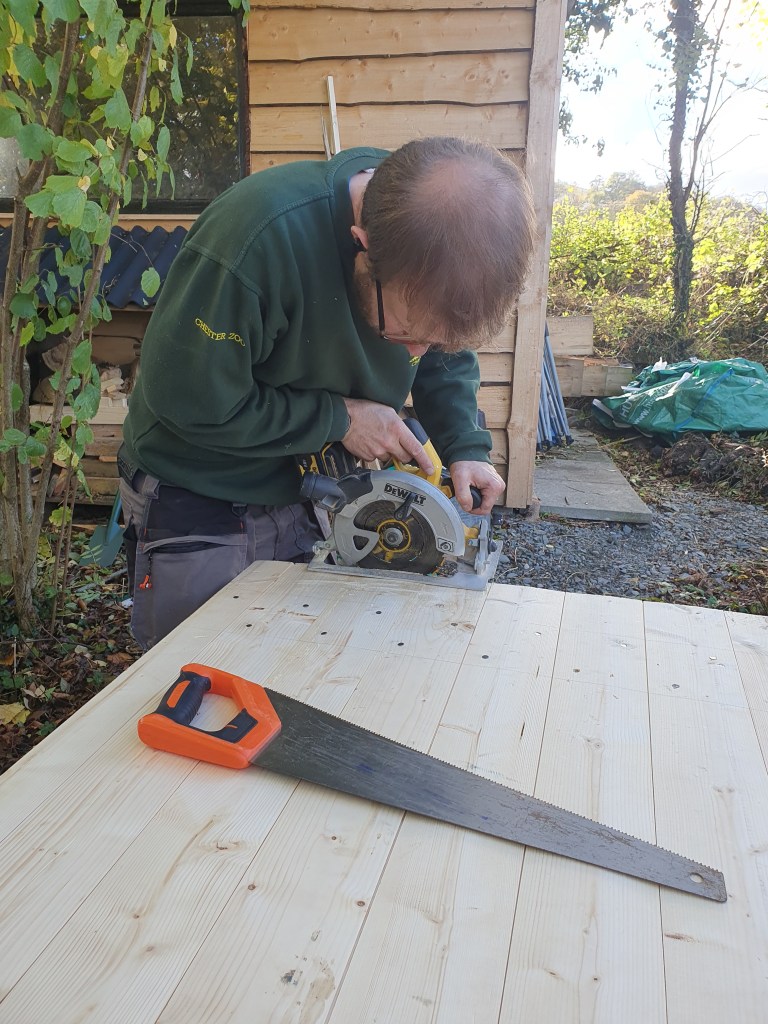
We are out of large pieces of elm so I cut down two pieces of the same spruce we used to clad the shed. I cut straight edges on both sides of one piece, and one straight edge on the second piece, leaving a wavy edge.
For the smaller windowsill, there was just enough elm to fit the space. Unfortunately, one corner wasn’t quite wide enough, so I had to splice in a third piece of elm. I cut the smaller piece first, clamping both pieces together and cutting the irregular shape in one go, to get a closer match. I then cut the biscuit slits and glued and clamped.

Both sets of boards then needed clamping and planing to get matching edges, before cutting more biscuit slits.
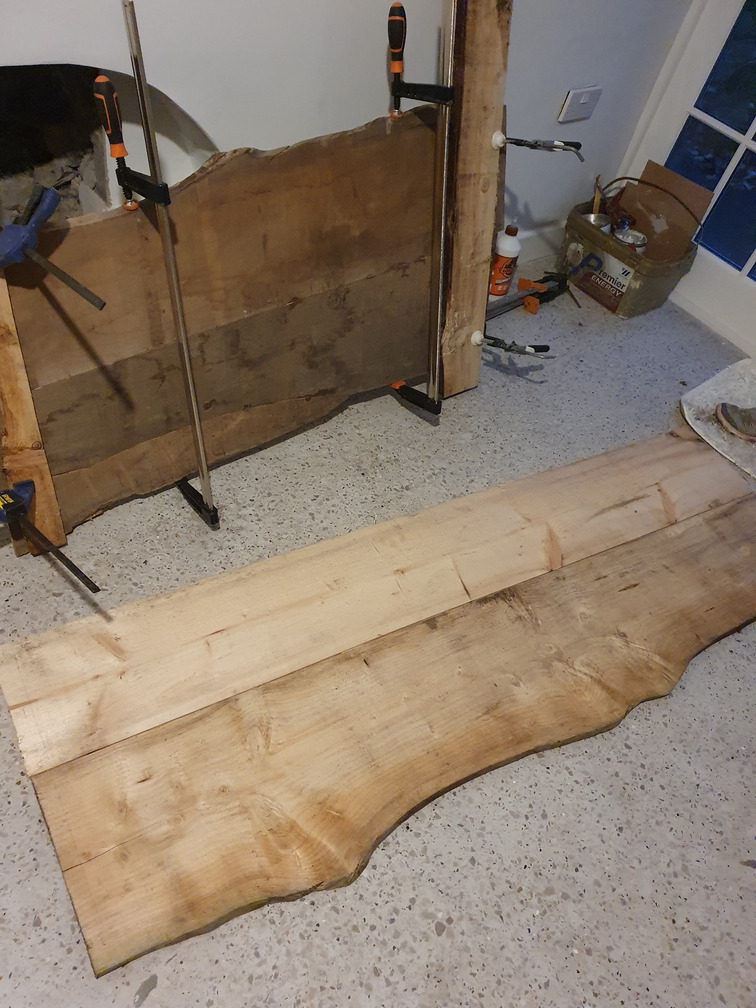
I didn’t have enough clamps to glue and clamp both windowsills so I did the smaller one, and can swap the clamps over once it’s dried. Then both will need to be cut to the template and sanded.
Phew! It’s been a tiring few weeks, but we got through our list of jobs, which is very satisfying. The next few weekends are busy, with few opportunities to progress, so it was nice to take some big steps forward in the last couple of weeks.
-
The Grind
Grouting and regrinding the concrete floor in the kitchen was not a job I wanted to do. Chris had decided on it from the moment we’d finished grinding and polishing it last time, feeling that grouting would fill in some small holes and strengthen the concrete. Having lived through the dusty hell of the first grind I hoped he’d change his mind, however in time we did start to lose little stones from the floor and more holes appeared. The weaknesses are probably because we couldn’t get the concrete compactor to work when we first poured the concrete, meaning it’s not a tough as it should be in places.
With this being a big job, and a horribly disruptive one, we took a couple of days off work to make a long weekend of it.
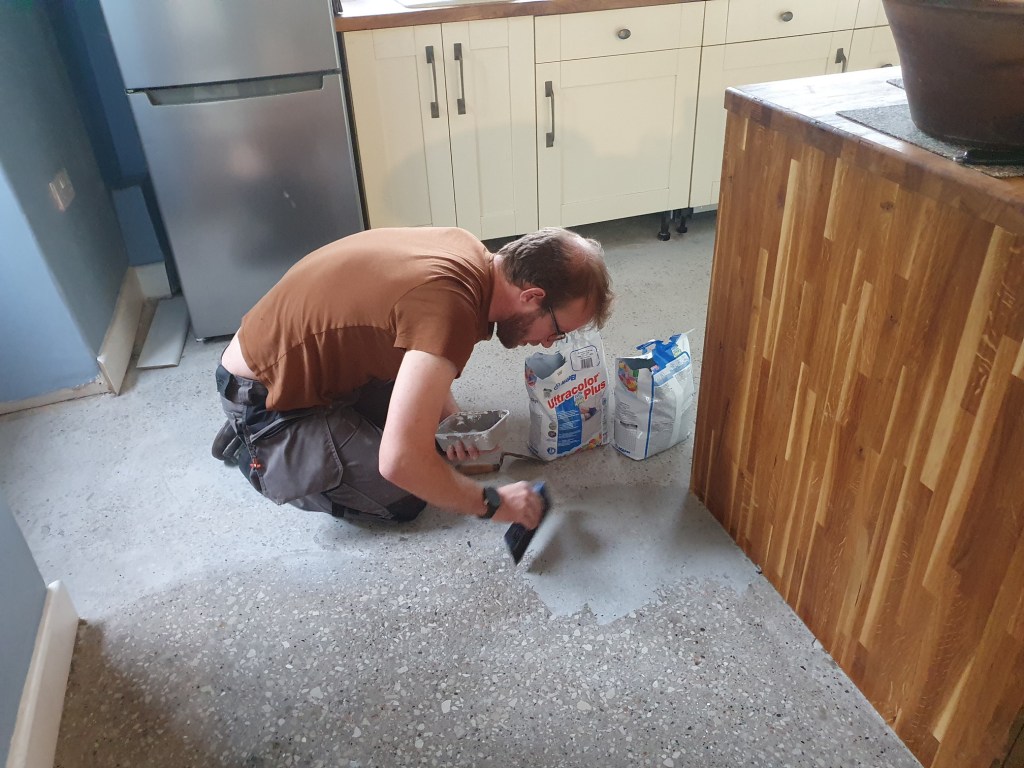
Our first job was to spread of layer of grout across the concrete. It was a little terrifying thinking that we might just be ruining the floor entirely. Chris got started on the grout, while I emptied our welsh dresser to make it light enough to move, and moved various lighter pieces of furniture into one area of the kitchen so we could work on the rest of the floor. Kitchen rearranged, Chris left me to finish the grouting, while he headed off on other small jobs to keep occupied.


One job I was particularly pleased he decided to do was the skirting in the lounge. I’ve done most of the skirting in the rest of the house and I really hate it as a job. Our walls aren’t straight and the internal insulation makes it hard to find where to attach it to.
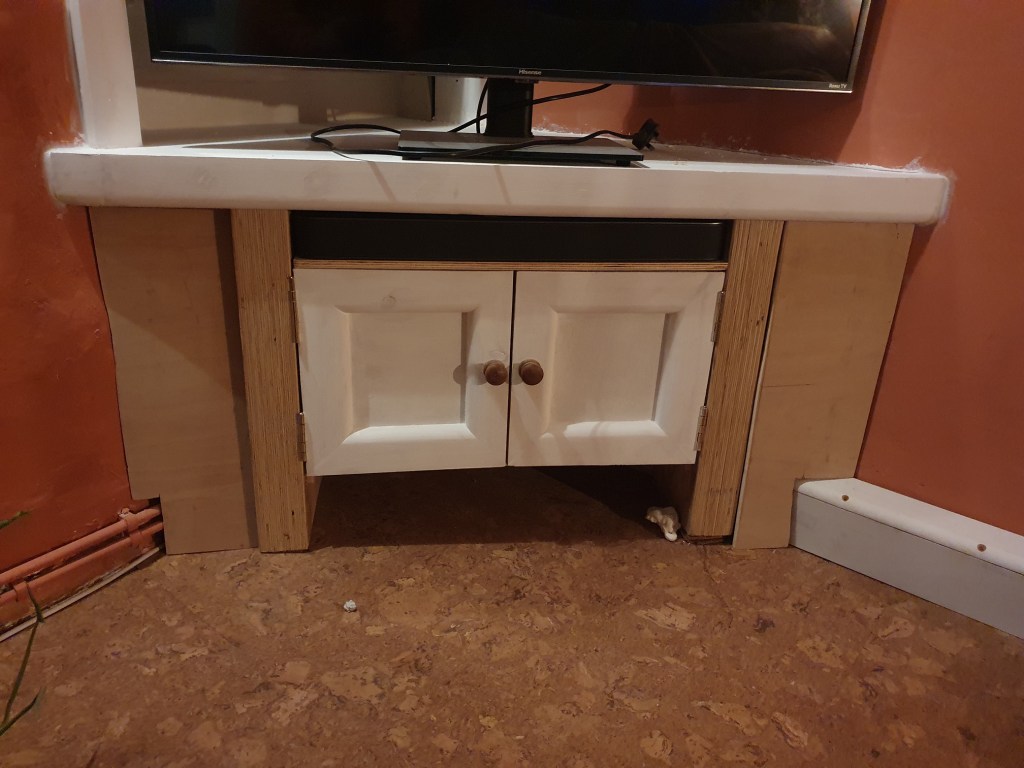
As well as fiddly skirting, he attached the lock keep to the study doorframe, and added side panels to the TV unit.
Grouting, as with all the kitchen floor jobs, had to be done a section at a time, as we had to constantly move furniture from one place to another to get to the floor beneath.
Once the grout was dry, hardener had to be rollered on and allowed to dry for 10hours. We managed to grout and harden all the floor on day one, meaning we could start on grinding on day two.
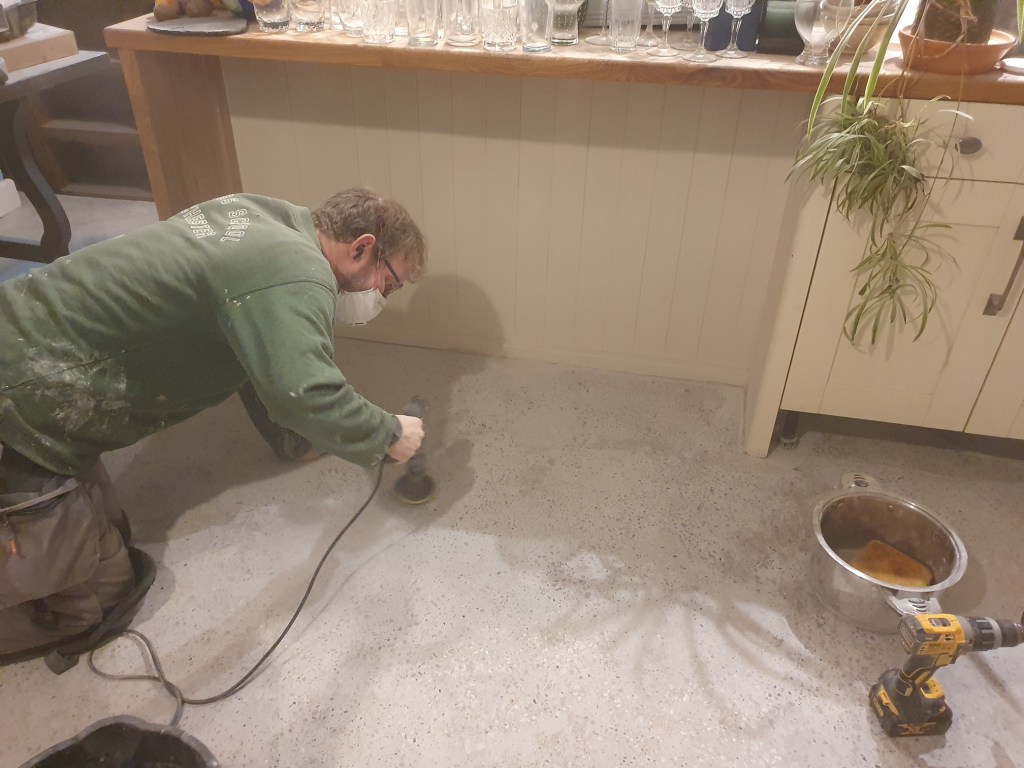

When we ground the floor last time, we hired a larger machine, which you pushed across the floor. This time, Chris brought some pads for our drills, feeling we could get the floor done this way at lower cost. Yes it was feasible, however it took a lot longer, and meant whole days bent over the floor, laboriously grinding away by hand.
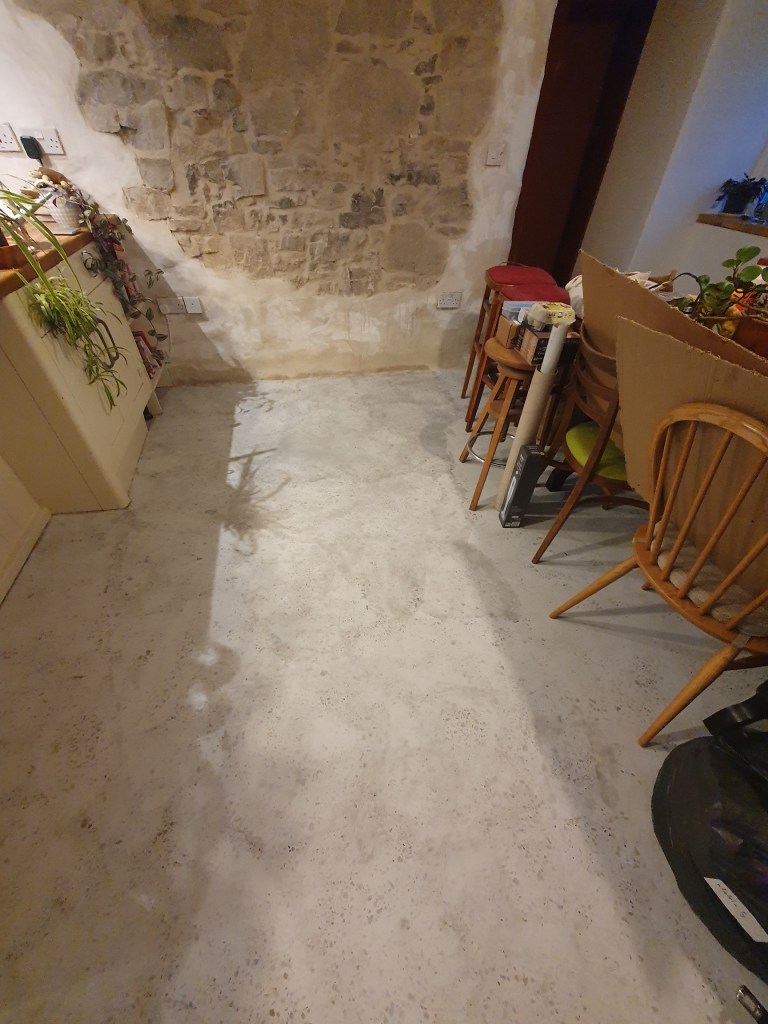
To get the floor looking as Chris wanted it, we went through three grinding pads; 50, 100 and 200. We then cycled through a number which tended more towards polishing; 400, 800 and 1500. This mean each section of floor needed 6 passes, with another coat of hardener between the grinding and the polishing pads, plus lugging furniture back and forth. To say it was back breaking work is an understatement.

By the end of day four, one section of floor has been taken all the way to 1500, a second to 400 and the third to 200. We decided to prioritise getting the grinding out of the way, as the polishing pads barely kick up any dust, and we could start to clean up the horrible dusty mess once these were out of the way. I slightly wish I could book another day off to finish the last few stages and get the kitchen back to a clean and tidy order, but unfortunately neither of us have that luxury. It will be polishing and dusting for a couple of evenings instead.
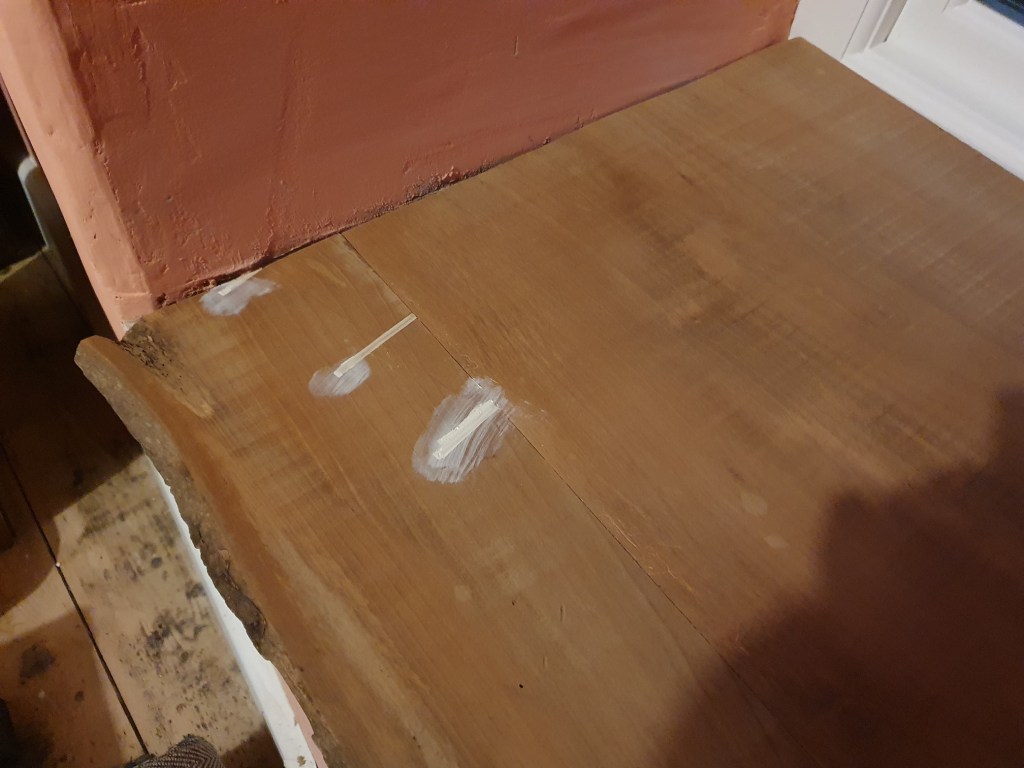
Chris had ordered two sets of pads to allow us both to work on the floor at the same time. Unfortunately, he realised too late he needed an extra part to attach the second set, so for the first day we only had one person grinding at a time, while the other kept busy. My little job was sanding my tiny windowsill for the spare room. Having sanded it down I filled in a few holes with woodfiller, as well as filling the join on the larger windowsill. Once dry I can give the smaller windowsill a final sand, before starting on the bigger job of the larger windowsill.

It’s been such a tiring few days, and it’s frustrating not to have finished the job, still we’re 80% of the way there, and it was always going to be a horrible job to do. It’s been wet autumnal days outside the house, but at least there’s been plenty of rainbows to enjoy after the harshness of the rain.
-
Fitting
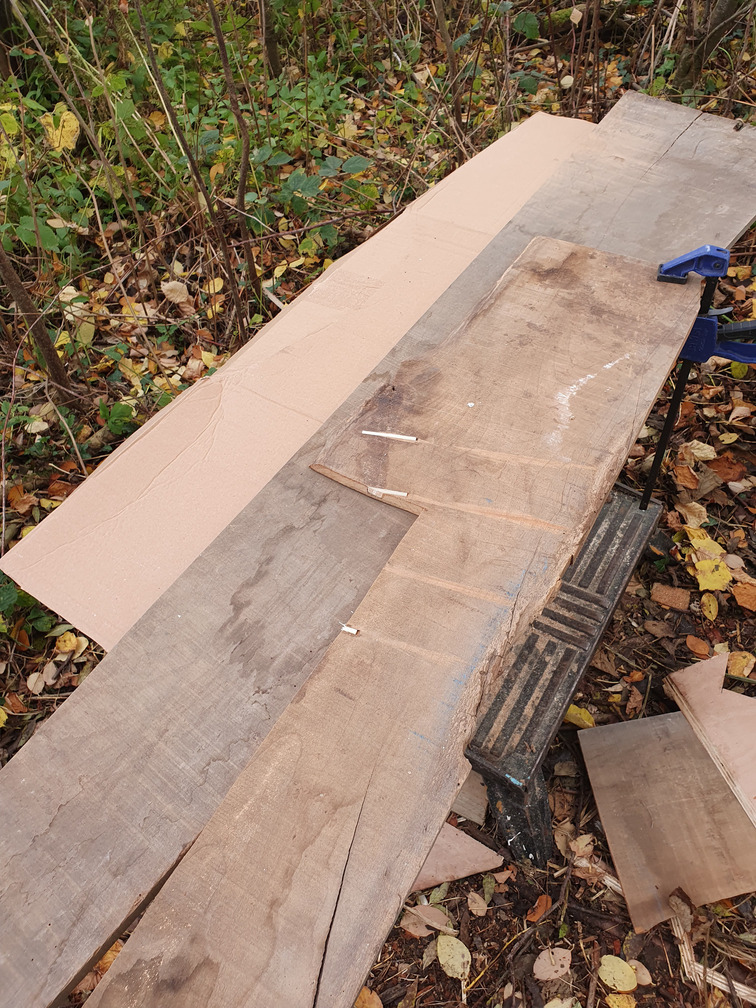
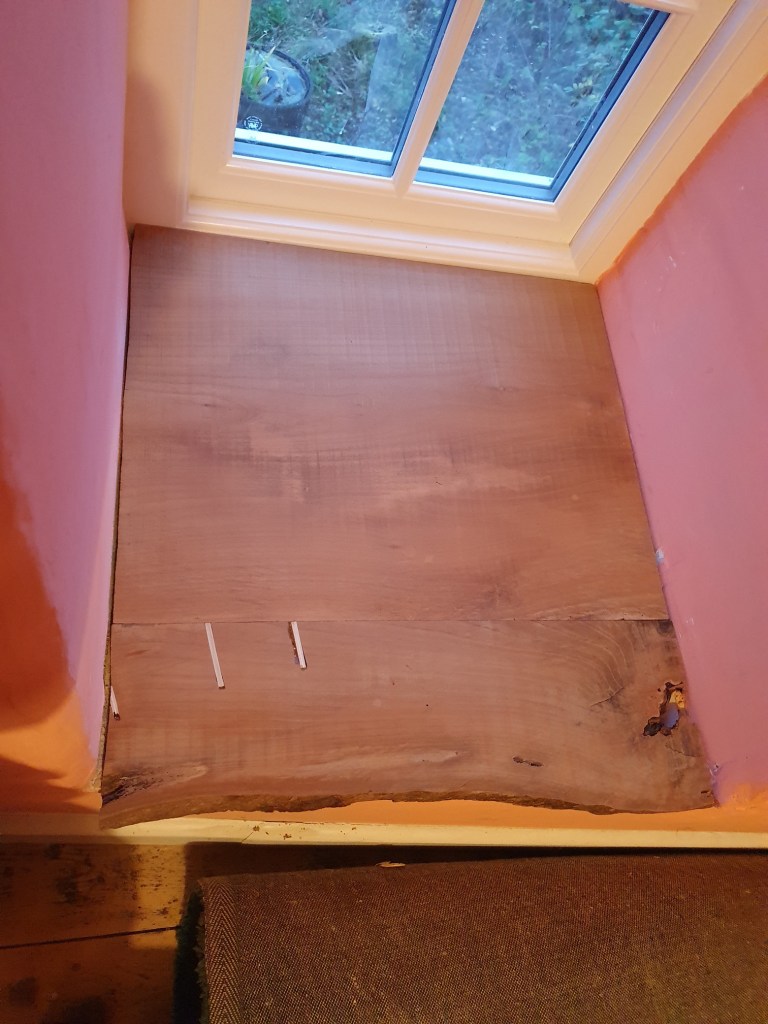
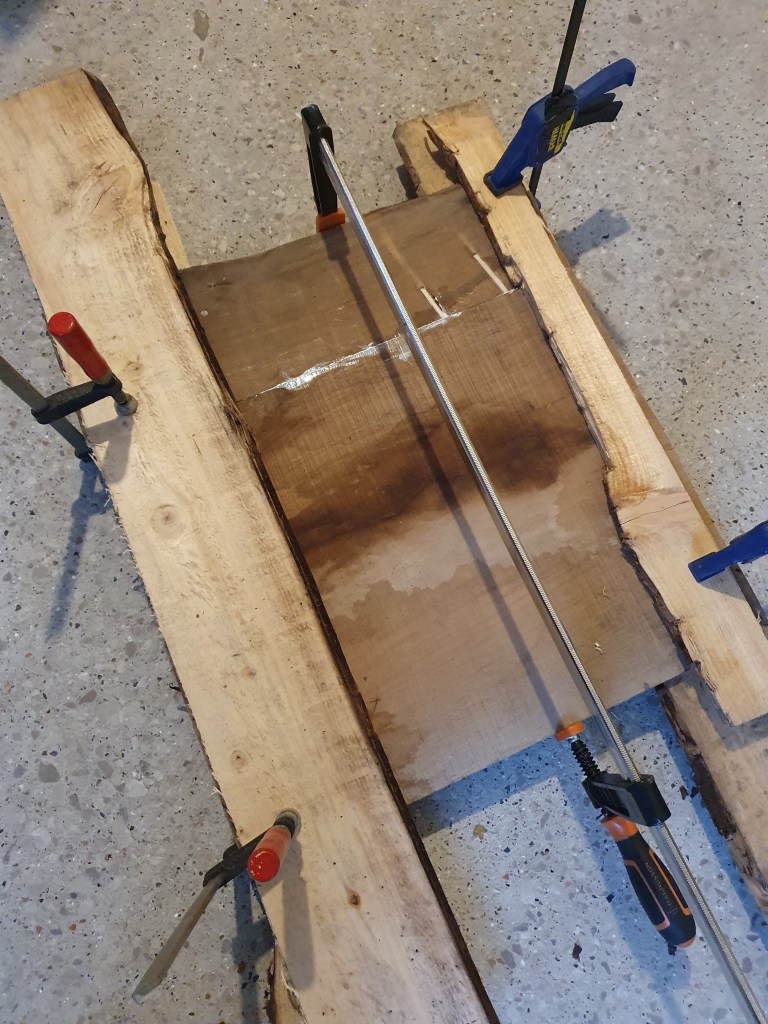
Having had an evening out at a local beer festival, Chris didn’t have the energy for DIY, so I decided to crack on with the windowsills on my own. I had the theory down, however, the practice was very rough. I took the previously cut pieces and joined them together with a set of clamps so I could plane along the edge to flatten the join and make them match. Getting it completely flat was a challenge but I got it fairly close.
Next I needed to use the biscuit cutter to cut slots in both pieces of wood. This is where it went wrong. I didn’t realise there was a flap that folded down on top of the wood to keep the cut at the same height all the way along. So instead I ended up with randomised depths of cuts, I then had to match to the second piece. It took me a fair while to rectify, but with a bit of fudging, I managed to join the pieces together.
With biscuits and wood glue applied I now needed to keep the sill flat, using a piece of wood either side with clamps to keep the join from bending and a couple of large clamps to pull them together.
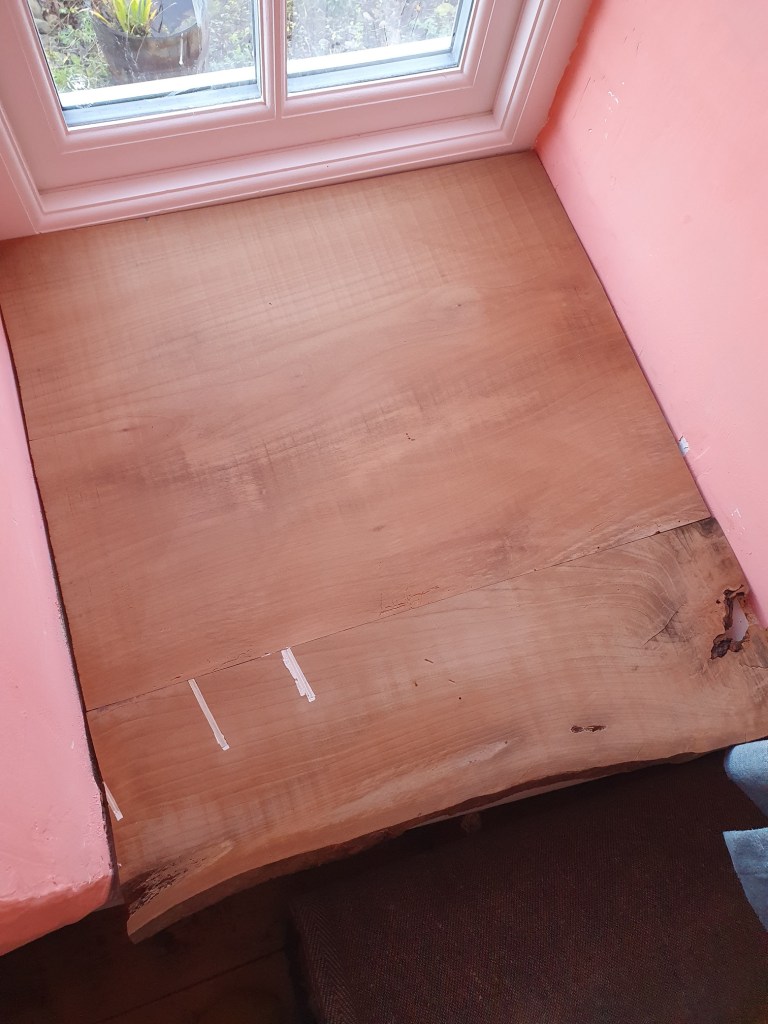
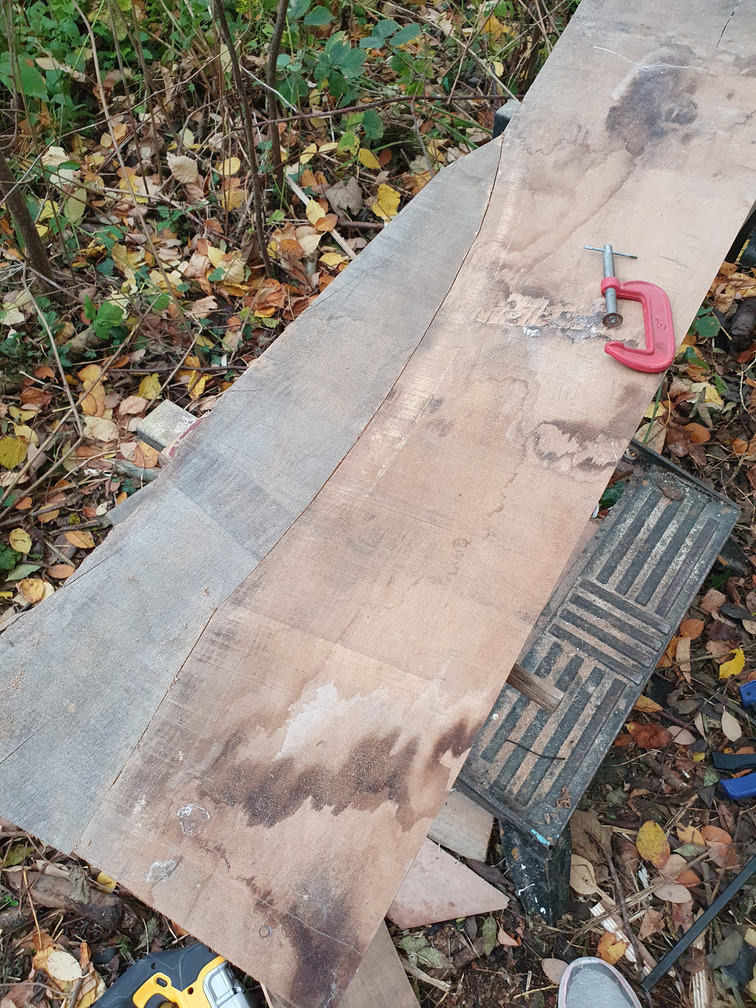
Pieces joined and dried, I used my cardboard template to mark out and cut the edges. I ended up going back and forth to trim several times, not wanting to accidently cut it too small.
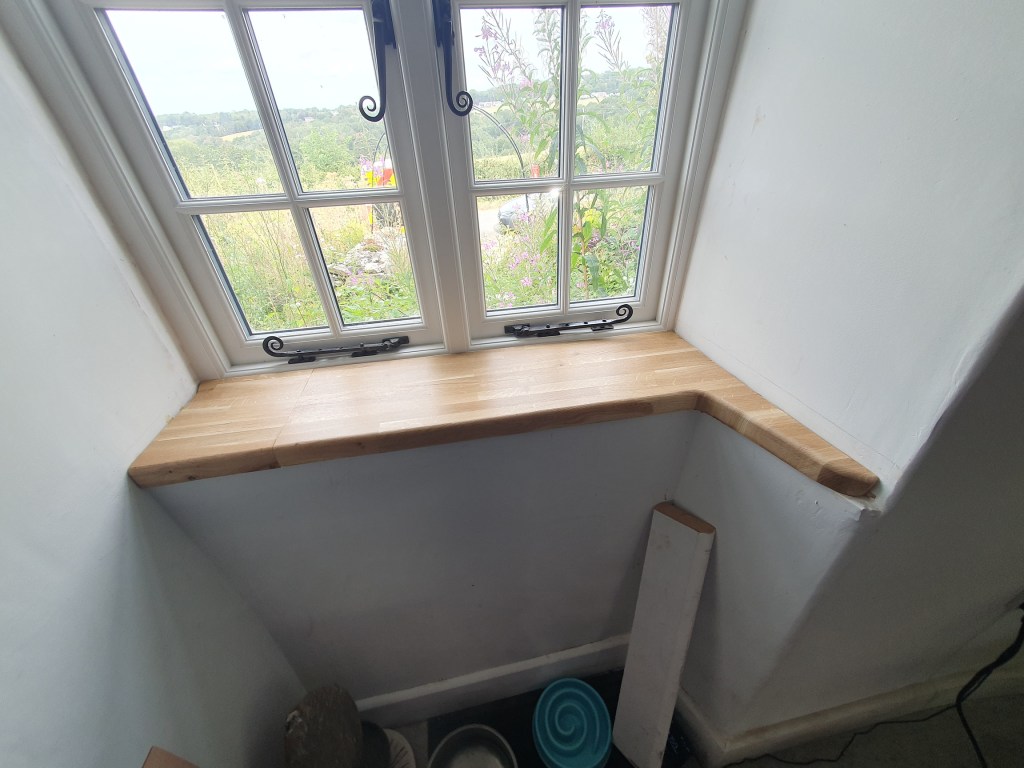
Overall it’s not the tidiest job. The gap is a little wider than desirable, and the second smaller piece slants up a little – I think from not using the guide while cutting. Still, for my first attempt I’m happy – and once it’s sanded it’ll look really nice.
Having learn all the ways to go wrong on the first windowsill, the second was significantly easier. First I cut out my missing edge piece from the cracked piece I’d joined with biscuits previously. I then cut off the protruding biscuit edges.
As with the first Windowsill I cut out slits for the biscuits (this time with the guide) glued and clamped.
I’m much happier with this sill, though it was also simpler because it’s smaller. Both just need a lot of sanding and treating now. Only four windowsills to go.

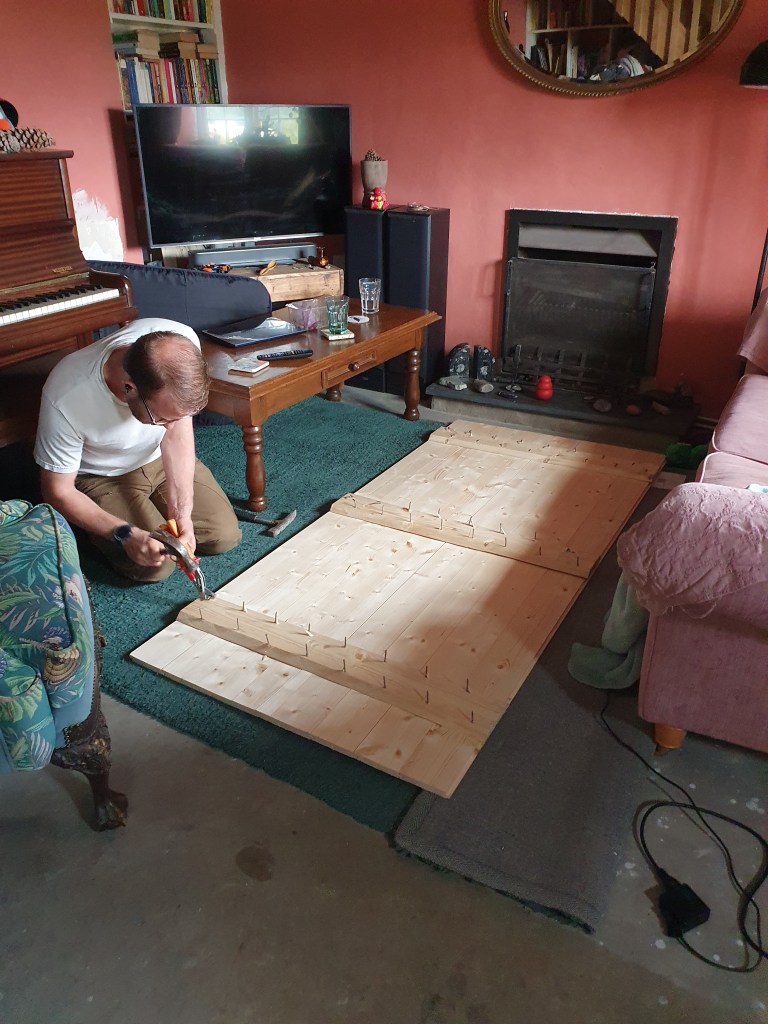
Having rested up, Chris got on with the job of trimming down and hanging the door he made. This was a little more complicated than it should have been as he realised, in order to use some old hinges we had laying around, he needed to remove the architrave we’d already attached. But it’s all up finally, with a handle and everything. Given this will be the babies room in 5 months time, a door is definitely a big plus.
-
Biscuits
It’s been a busy couple of weeks – but we managed to squeeze in a few jobs along the way.
With our first fully van-based week long holiday looming, we wanted to get a few small jobs done in the campervan.
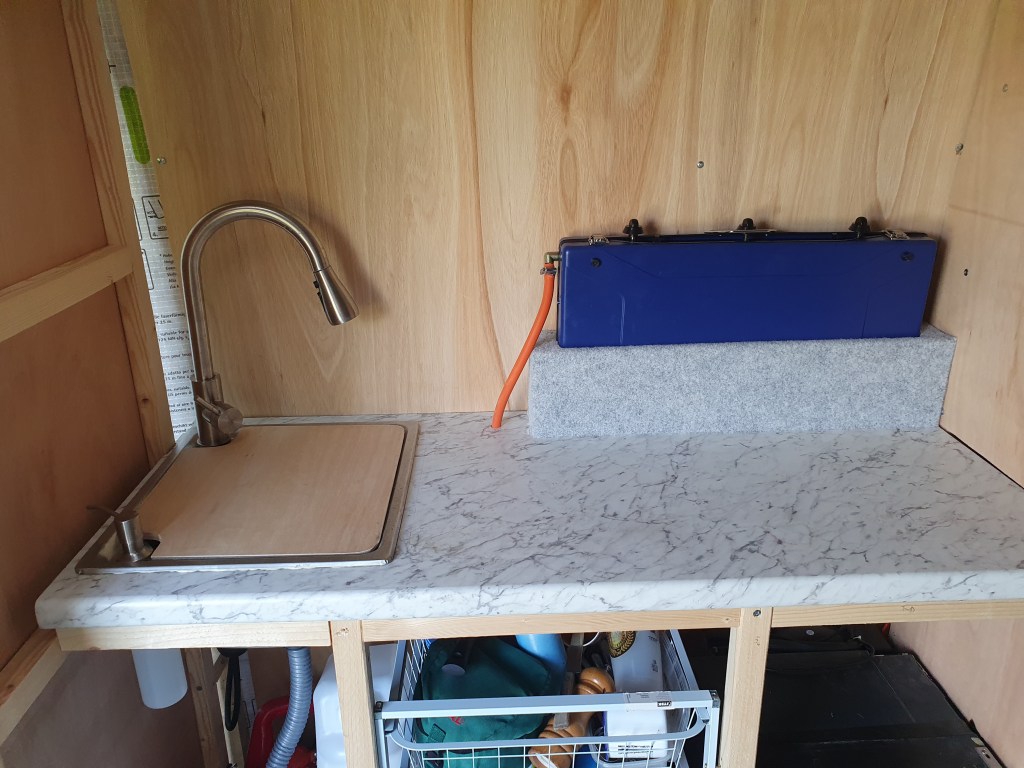
Chris cut out some spare pieces of plywood to create a top for the sink and draw bottoms. The sink top would allow us extra cooking space when the sink wasn’t in use, while the draw bottoms would stop smaller items dropping through.
He also fed the gas pipe through the worktop and created a holder for the camping stove, so it could be easily packed away when not in use.
For my part I lined a small cubby hole above the driving seats with carpet, so we could use it to store our clothes.

With these small adjustments we headed up to the Cairngorms for a week in the campervan.
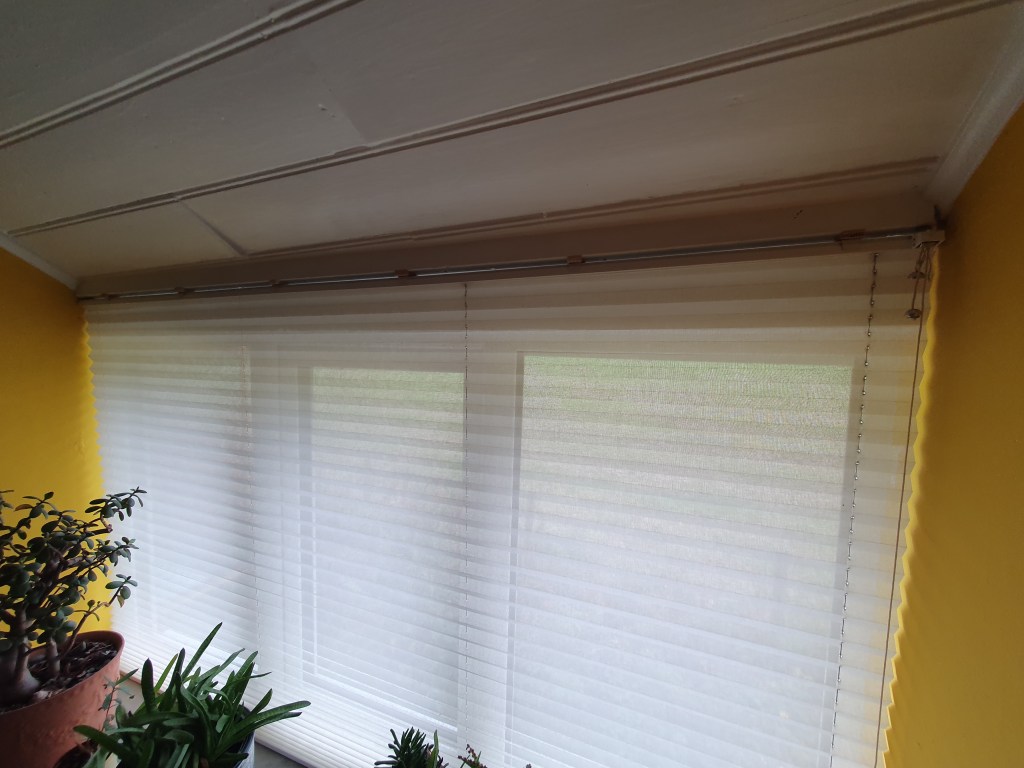
On our return Chris finally put our bathroom blinds back up. He’d taken them down as a slight twist in the wood they were attached to meant they looked a little crumpled. After putting it off for a few months he finally made some blocks to straighten up the attachment so the blinds hung a little straighter.

Having previously made a door for our study, Chris cut it to size and added some biscuits to secure a small crack in one of the planks.

It just needs hanging now before being painted.
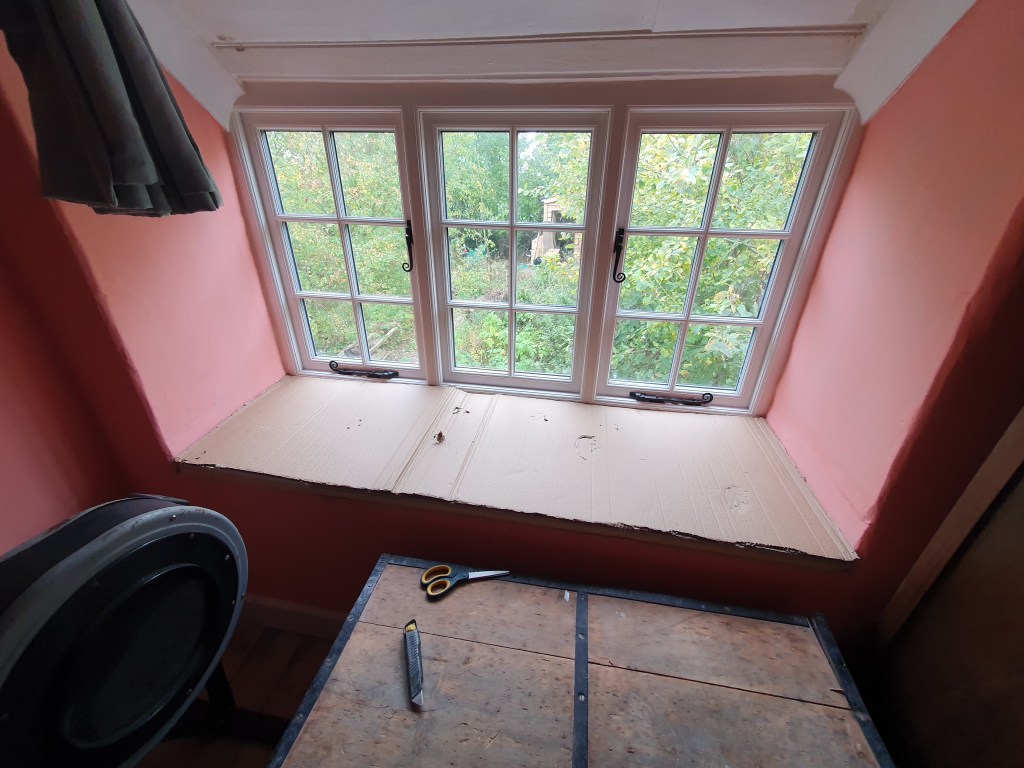

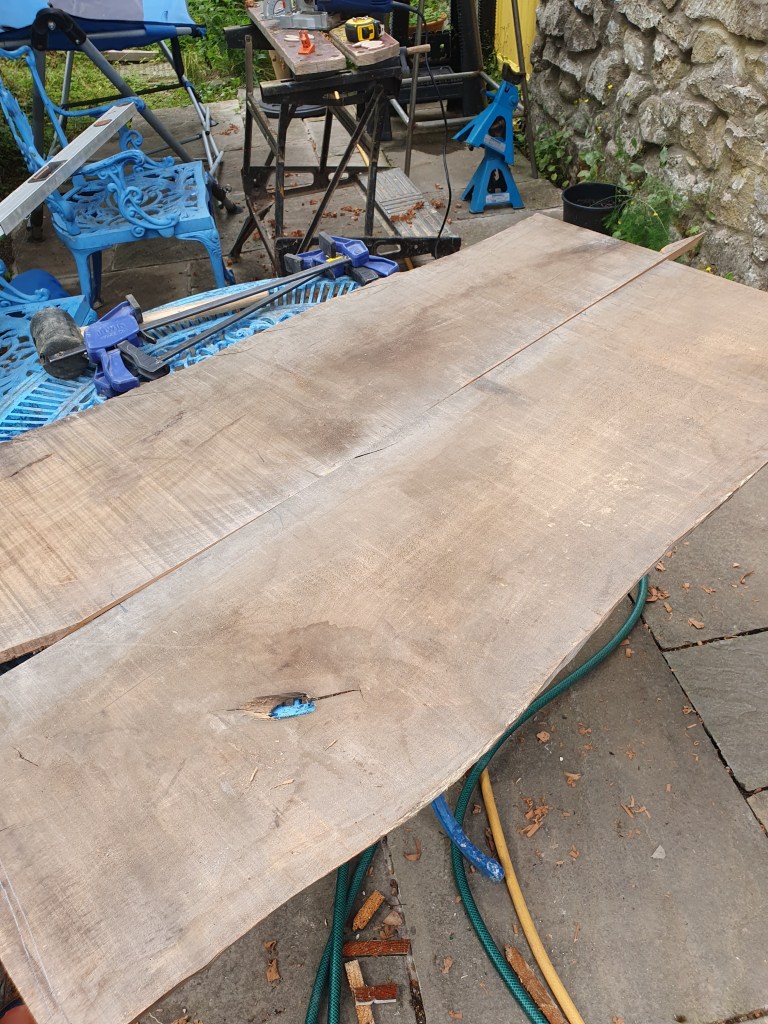
I used my time to start on the spare bedroom windowsills. We don’t have enough elm left for all the windowsills but we’re trying to make it stretch as far as possible.
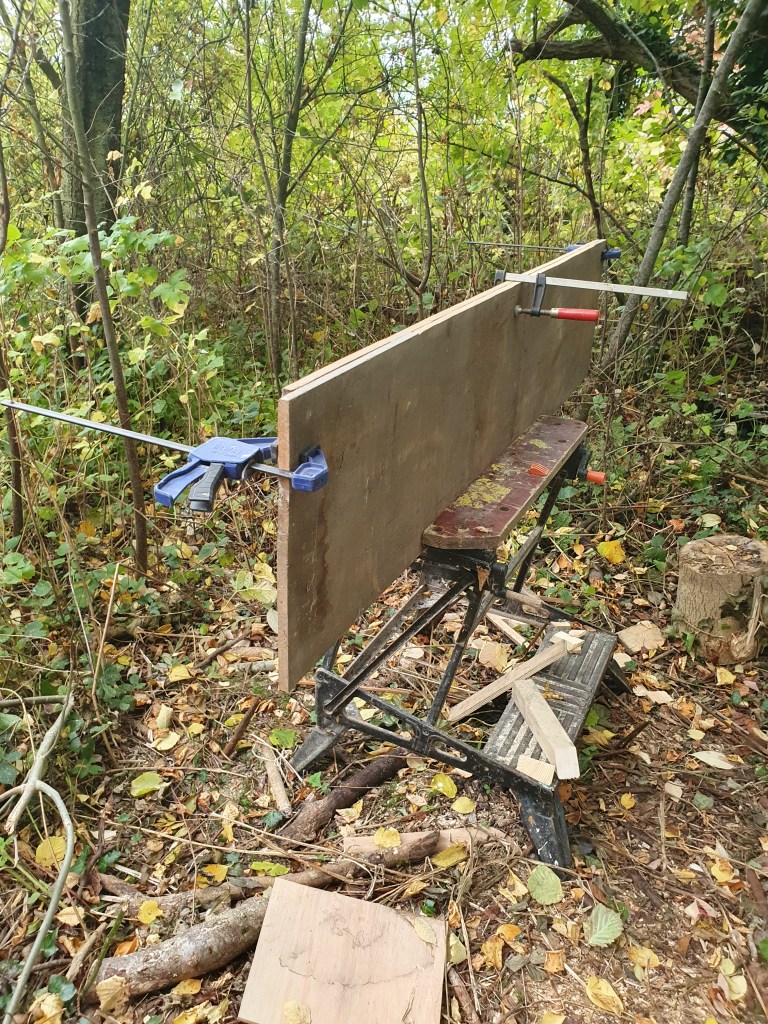
I made new cardboard templates, before deciding how best to cut up the wood. One plank wouldn’t be wide enough so I would need to join two planks with biscuits.
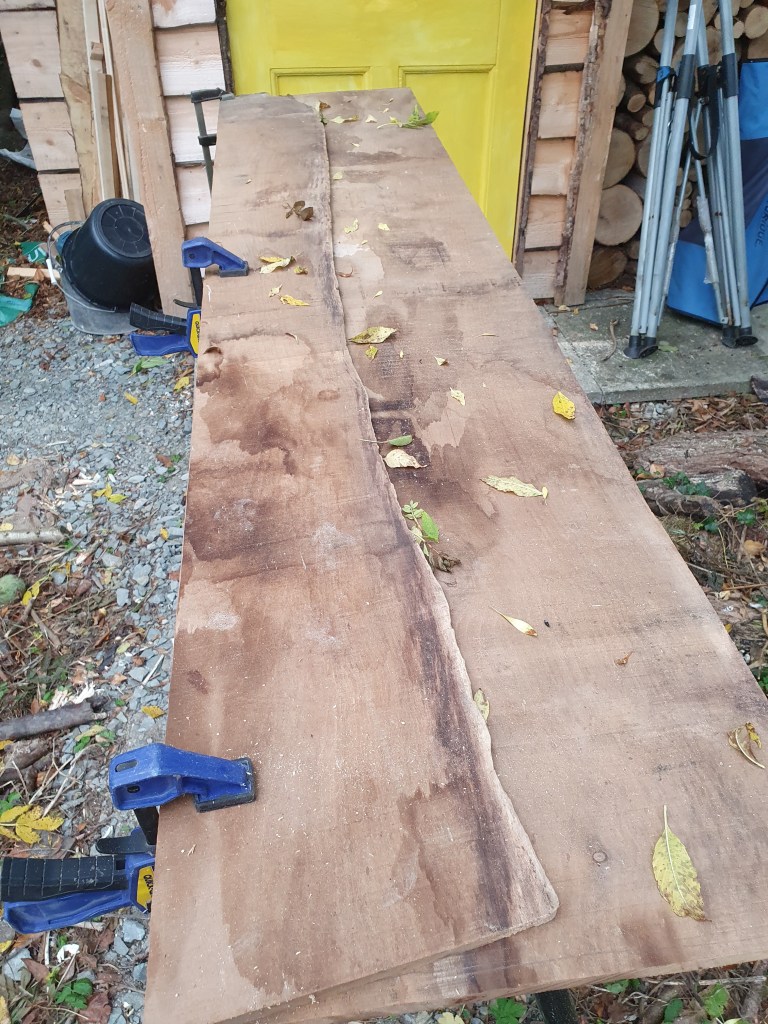
For the larger sill I cut the biggest piece of wood to size and then straightened both edges, before measuring up a second piece to join on. For now both are clamped together in an attempt to straighten them, I can then plane the joining edge before using the biscuits to join them.


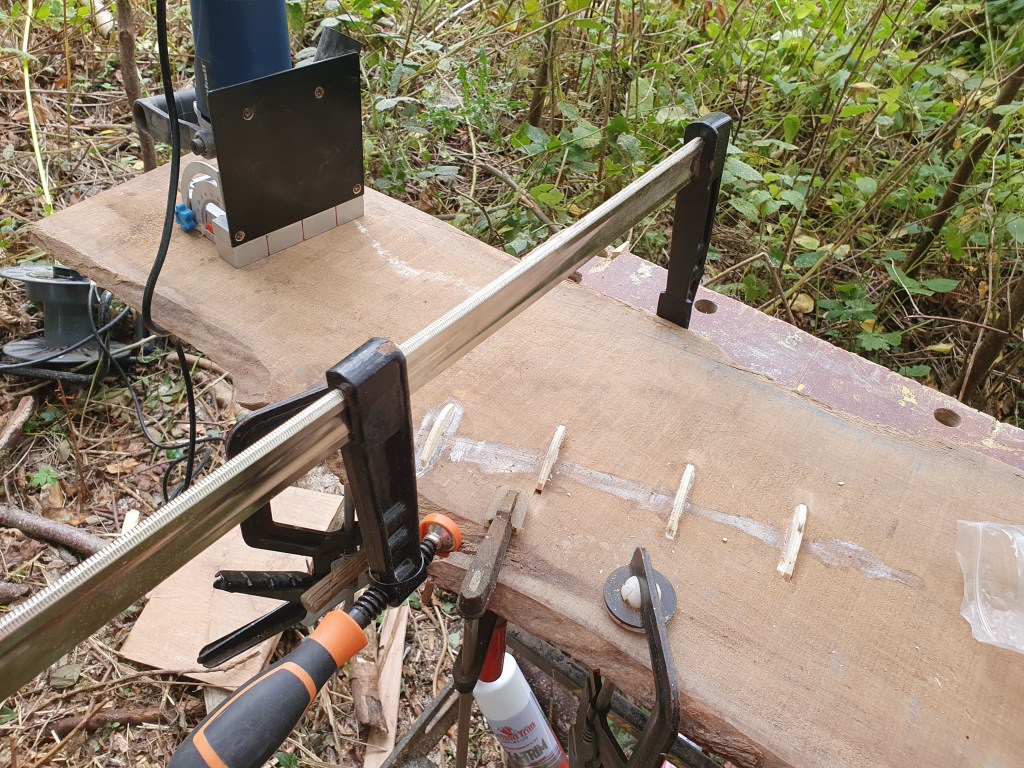
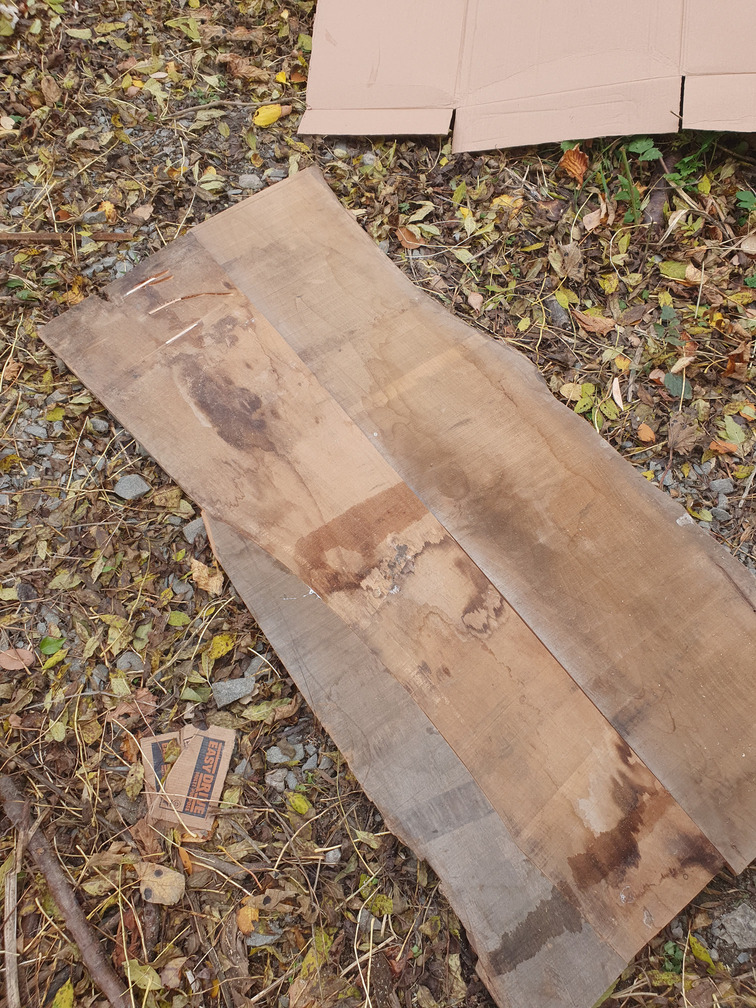
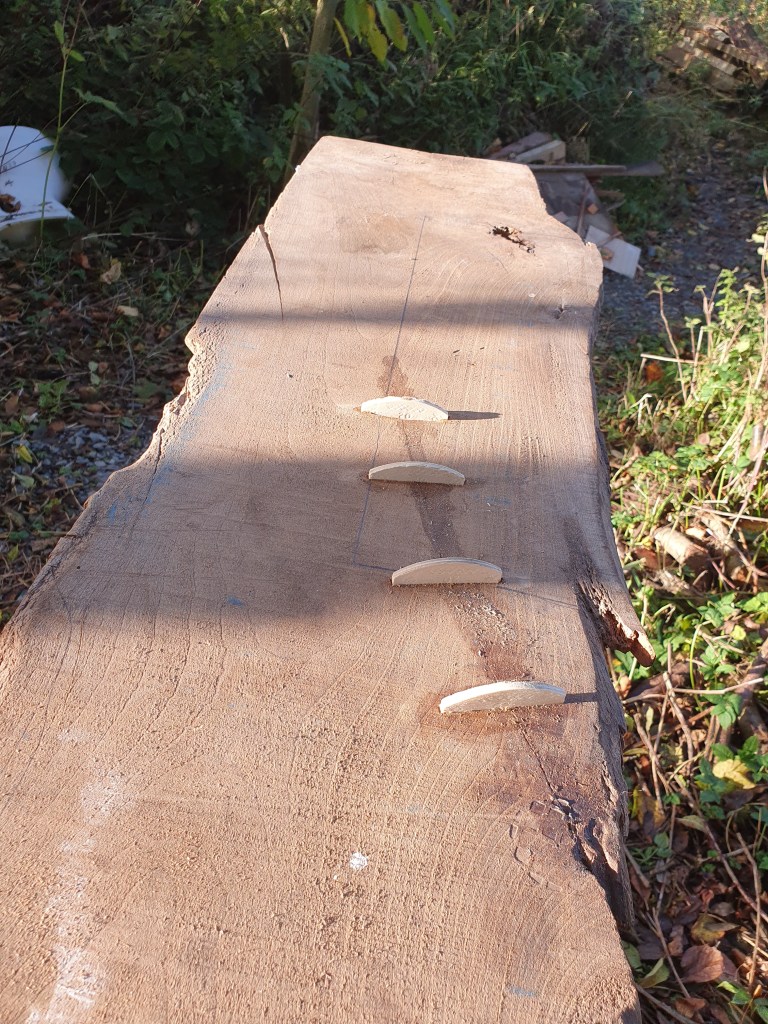
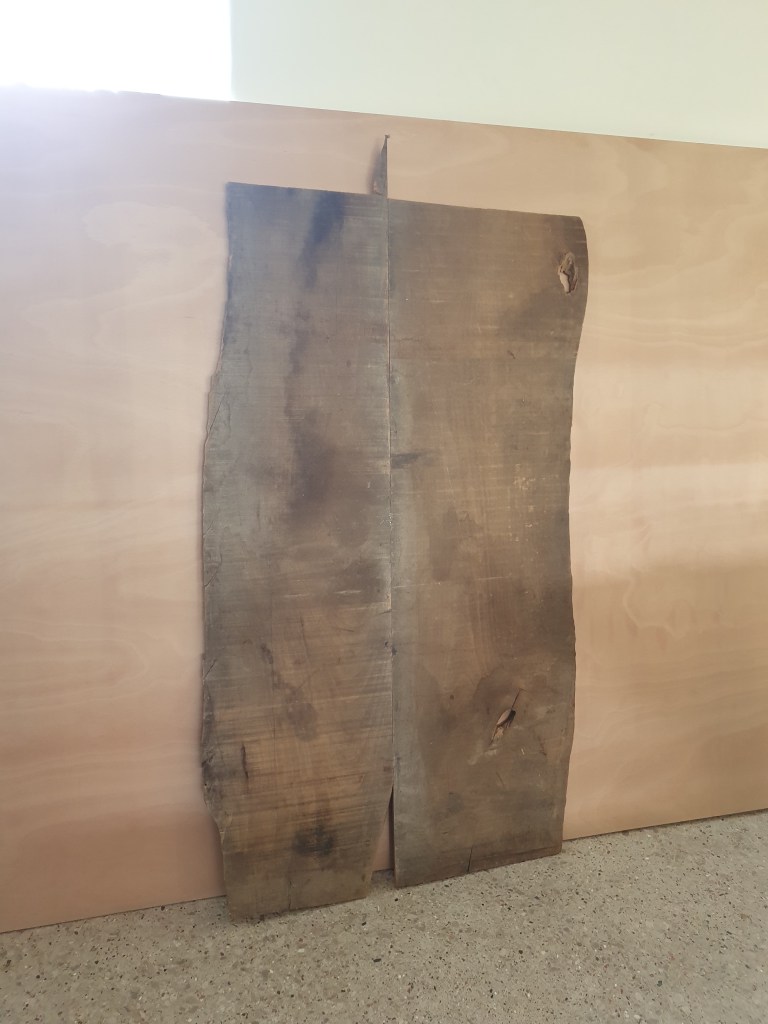
The smaller Windowsill was a little more complicated. I cut out the back piece but wanted to avoid cutting the joining front edge from one of the larger, more useful pieces of wood. We had one scrappy, small piece of wood, but it had a bad crack through it. Chris suggested using biscuits to stabilise the crack before cutting it to size.
I glued and clamped the wood to close the crack, before cutting a series of biscuit holes along it. I then glued the biscuits in place. Once the glue dries I can cut off the protruding half of the biscuits and cut the piece to size.
We probably only have enough elm left for one more small windowsill. We’ve decided to make the final two windowsills from the larch cladding we have left from the shed, a little rougher wood but should still be a nice feature.
-
Sleepy Jobs
Being 15 weeks pregnant I must admit my energy level for DIY is significantly lower than pre-pregnancy. While I can do the same jobs as usual, they leave me exhausted within half a day, or for a few days after. This has meant a slow in progress.

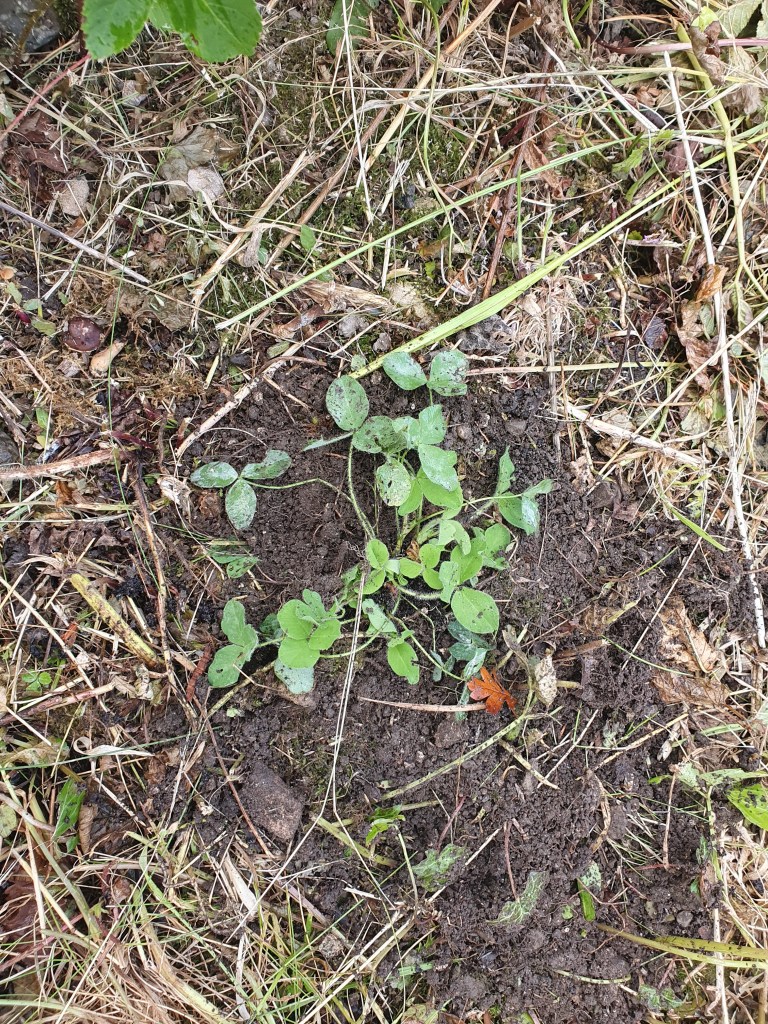
One job I was keen to do was cutting back the mini-meadow and the road verge outside the house. Since laying the hedge, the extra light has made the verge grow rampant, with fast growing grasses and ground elder taking over. We want to give the more interesting native plants a chance, so will cut and rake for a few years to try and drop the soil nutrient levels, which will encourage wildflowers.
The mini-meadow has been developing well, from a patch almost entirely filled with ground elder, it now contains a range of grasses, ox-eyed daisy, bird’s-foot-trefoil, yarrow, selfheal and cow parsley. With the help of a strimmer from our neighbour, and my visiting friend Becky’s muscle to remove some tree saplings, we cut and raked it. There’s few more bigger stumps to tackle, and Japanese knotweed to treat, but it’s getting there. I planted a few more species I had collected as seeds or cuttings from local hedgerows; crosswort, creeping cinquefoil, autumn hawkbit and red clover. Hopefully next year will see the meadow being more diverse and interesting.

Meanwhile, Chris has been working his way through the massive pile of firewood we made after cutting down a few trees in the garden. We’ll have to get the fireplaces in the house sorted for the winter to take advantage of it.
He also took down a ash and holly in the front hedge. It was a shame to lose these trees, though neither was that nice to look at, but they had fallen sideways as the soil in the sinkhole had settled, and their root plates pushed out the wall lining the drive. With the trees cut back we can now fix the wall. The ash should resprout in time but sadly a big cut will probably finish off the holly.
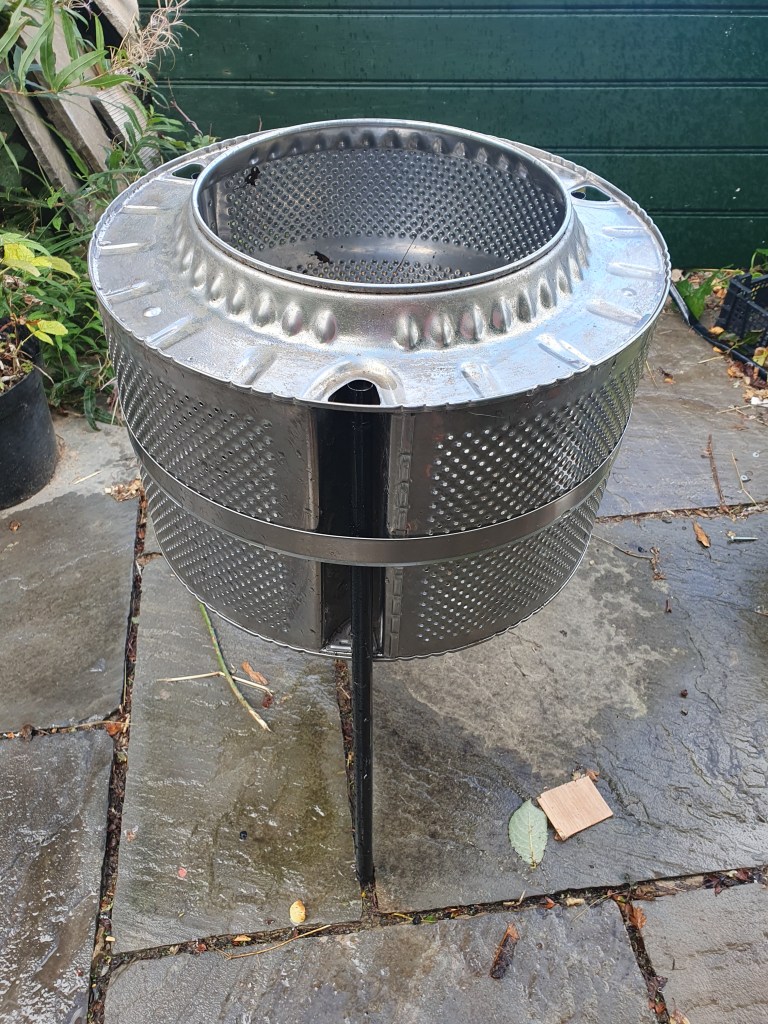
As well as preparing for indoor fires, Chris also cannibalised our old washing machine and some left over garden poles to make a firepit. I was just glad I could finally take the rest of the washing machine to the recycling center, after it’s lived in the garden for a few months.

My painful weekend job was sanding, refilling, sanding again and painting the downstairs toilet. Despite being a small space, the various crevices and awkward corners, made it an absolute pain to do. After three coats it’s good enough until we tile, and then it can have a coloured coat of paint. Next we need to finish the boxing and paint the wood. For such a tiny room, it seems to have endless jobs.
Chris continued with his TV unit, sanding the filler and painting on an undercoat.
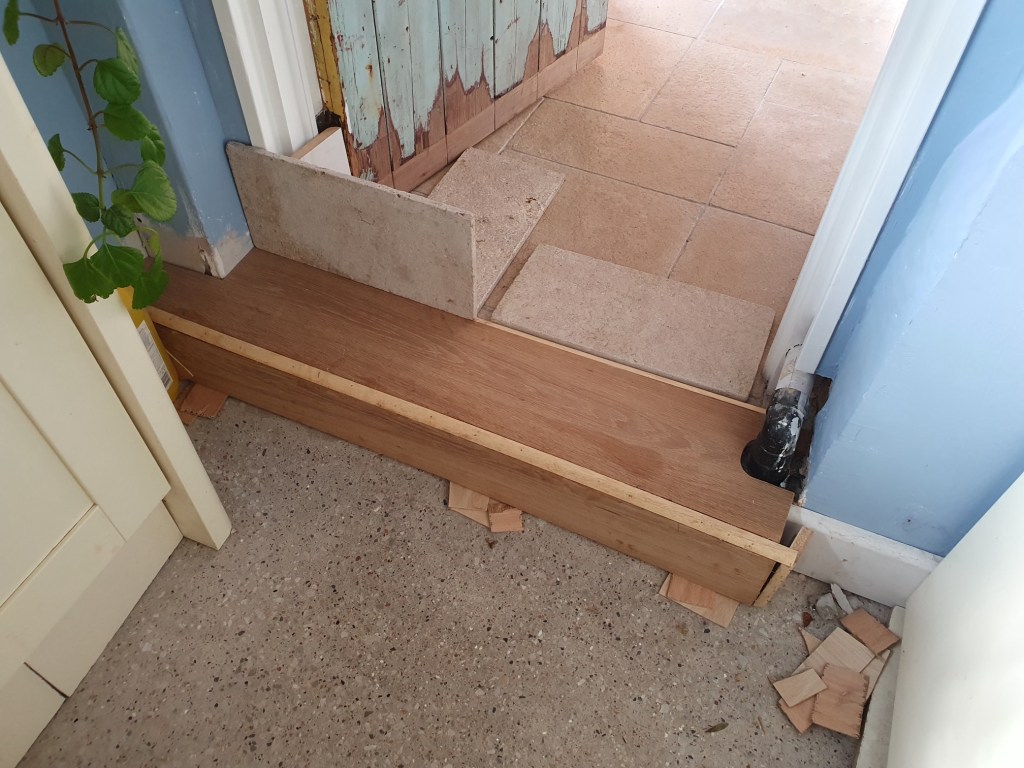
He also sanded the kitchen step and treated the wood. It still needs one side attached but unfortunately Chris has missed placed a small piece of wood to finish off the edge. It’s highly likely it was left on the floor and disposed of during cleaning.
With the baby due to arrive in March, this winter will see a big push to finish up the inside of the house. There’s not such a big list of jobs left – I just need to find the energy to do them.
-
A little Carpentry
With the long weekend we thought we’d get a decent amount of work done. Of course things never go as quickly or as smoothly as we’d like but a few jobs got moved forwards despite a number of delays.
We decided not to bother trying to straighten the lounge windowsill, and just stuck it down as flat as we could. Chris also rounded the edge of the kitchen windowsill and stuck that in place, before treating both.

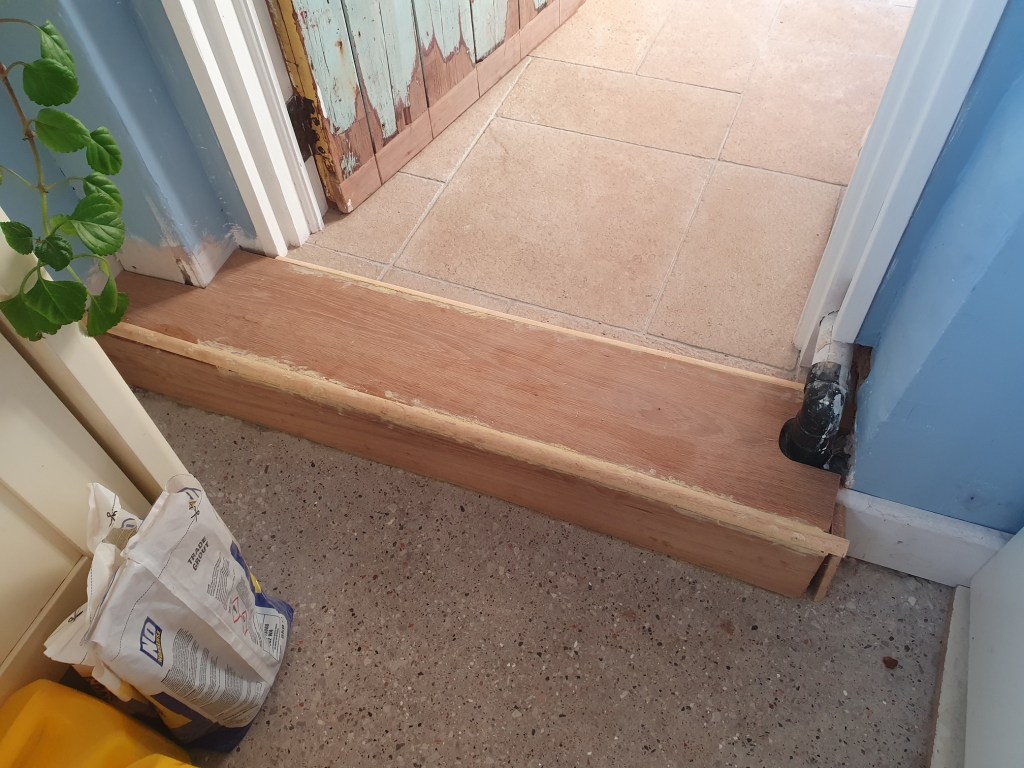
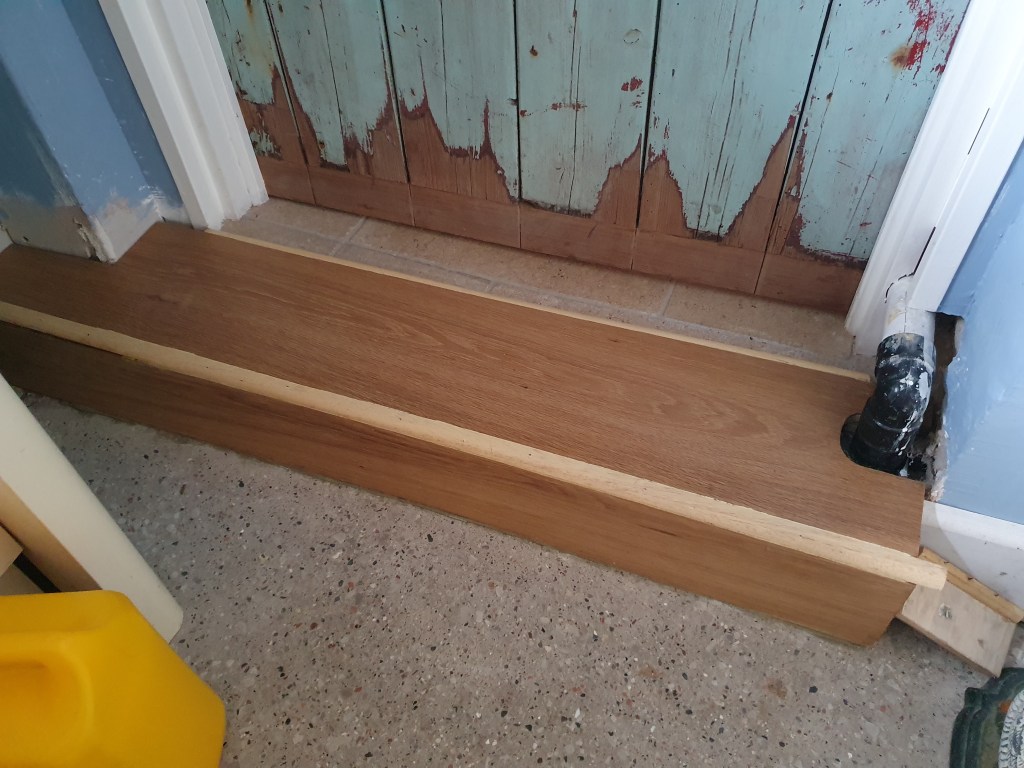
The kitchen step has been a puzzle for a long time. Because of the outflow pipe for the washing machine, we weren’t able to lay the utility slabs over the top at the same level as the rest of the floor.
Chris was keen just to lay them at a raised level, however, I was worried they would fade in with the rest and people wouldn’t notice the step up and trip at the threshold.
Having avoided the problem for a few years, we finally agreed to create a wooden step, which would at least be more obviously different. Chris used some spare planks of wood and bought some trim to create a rounded edge. Hopefully we won’t have too many people pancaking on our kitchen floor.
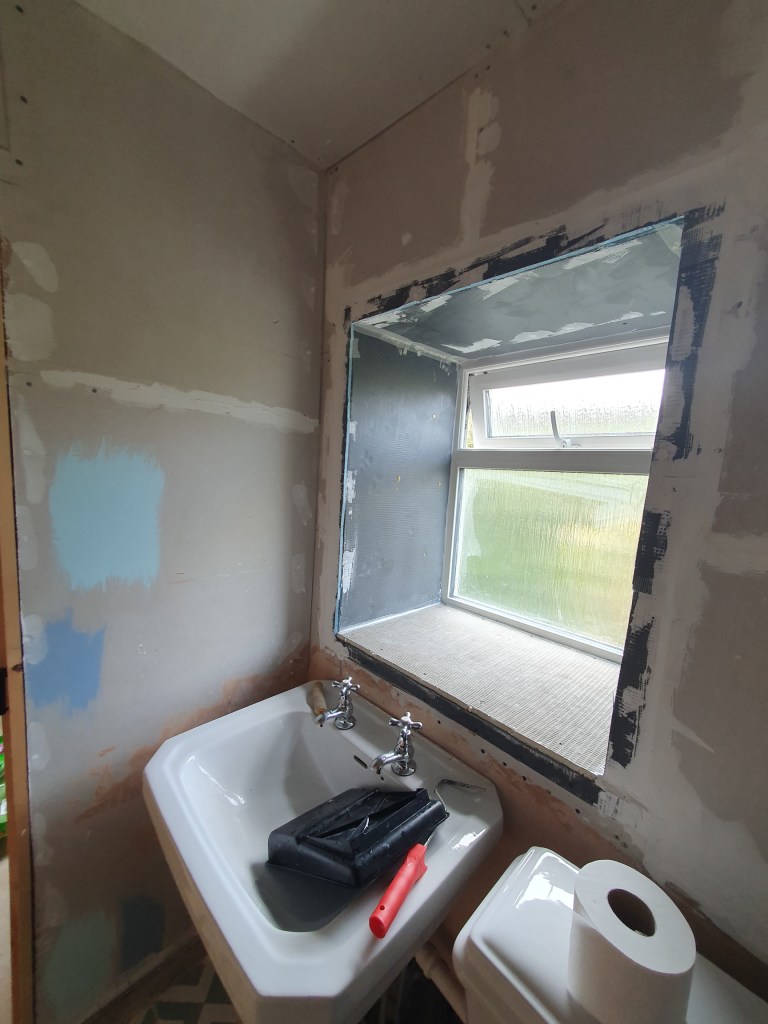
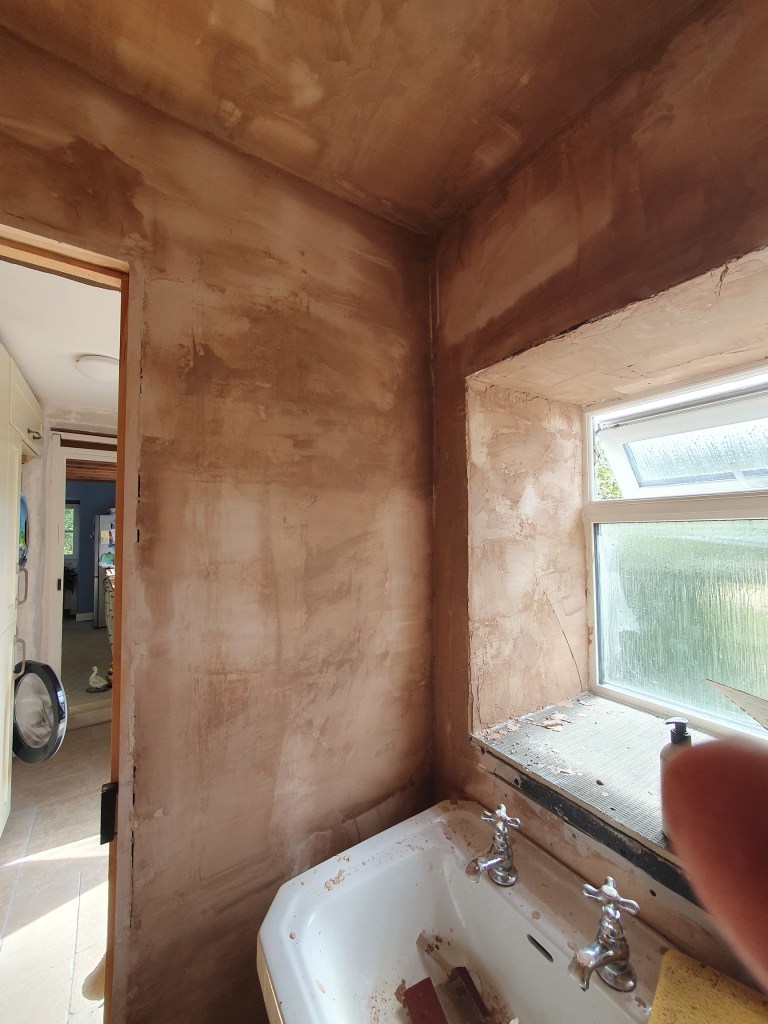
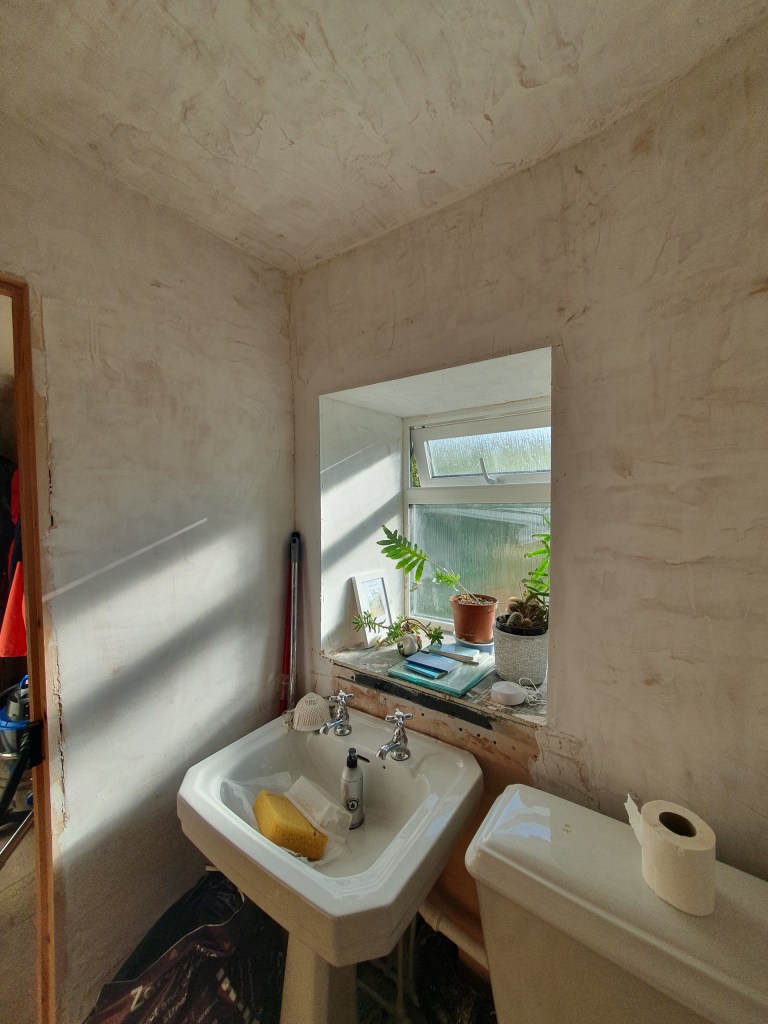
Having taped and PVAed the downstairs toilet walls, I set to work on plastering. I knew it would be a horrible job as it’s a small, awkward space, with lots of odd angles. What I didn’t realise when I started, was that the plaster was too old and had gone off. This meant that it went hard far too quickly, and was difficult to smooth out on the walls. I made do, making tiny batches at a time, not ideal.
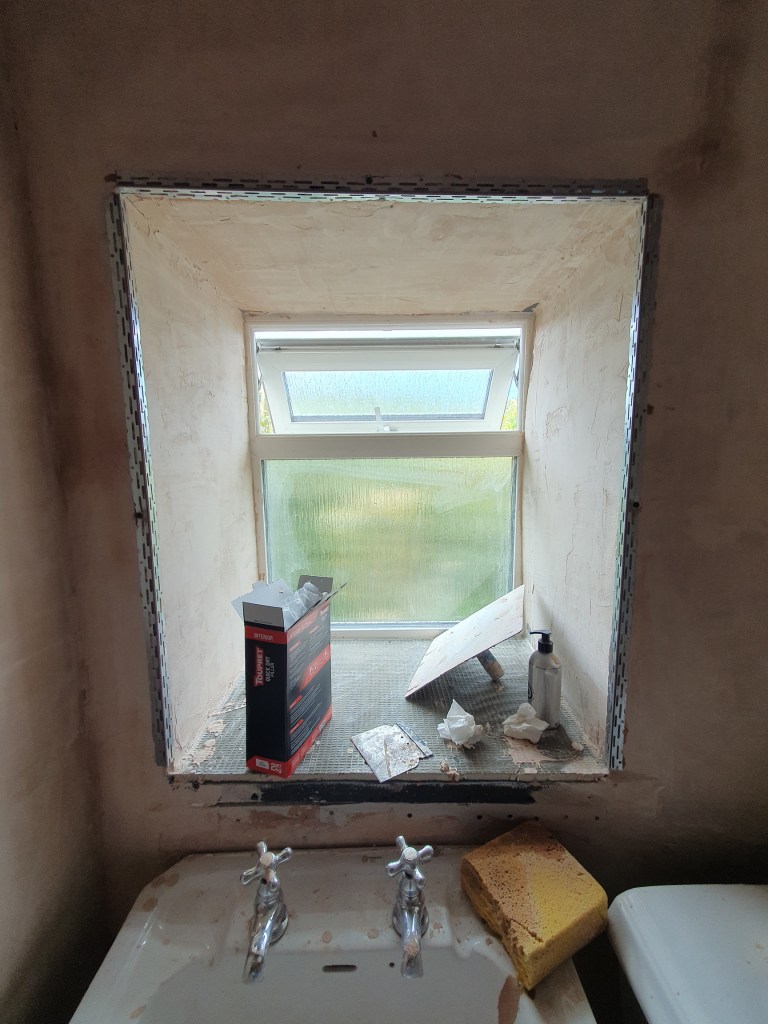
Taking a lot longer than it should have, it also left a terrible finish. To fix things I then sanded it down as best I could and used filler to smooth things out. Annoyingly I also forgot to add the trim around the windows, so I attach this and used filler to cover the error. Very much a bodge-job, but once it’s painted no one will ever notice.
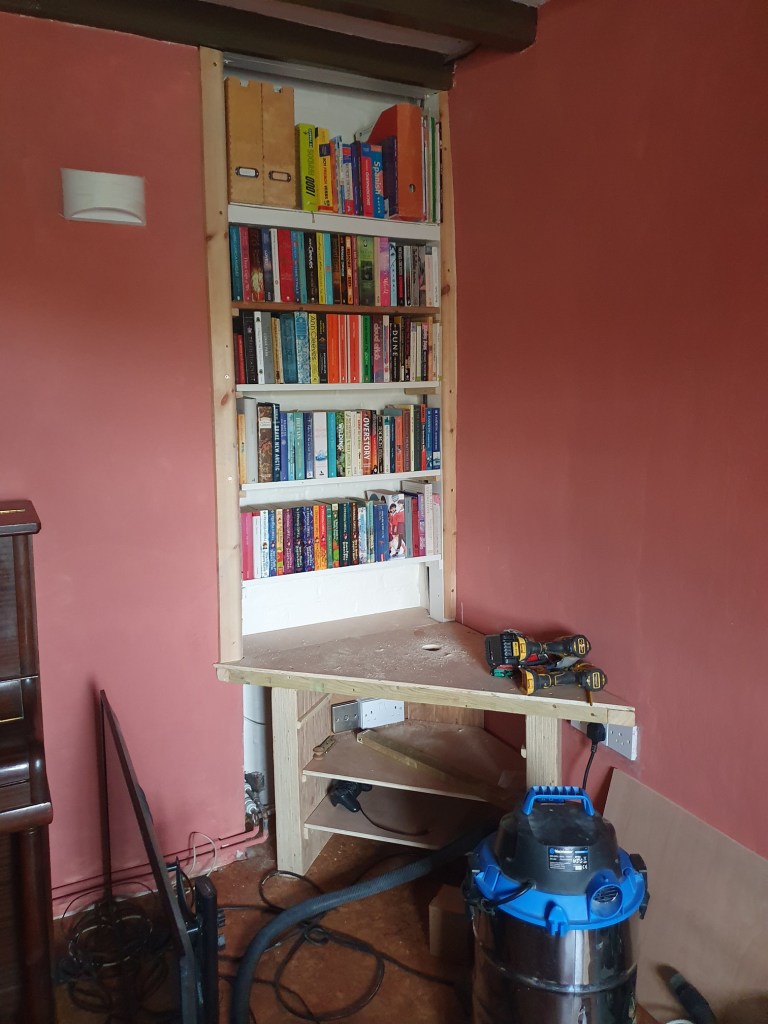

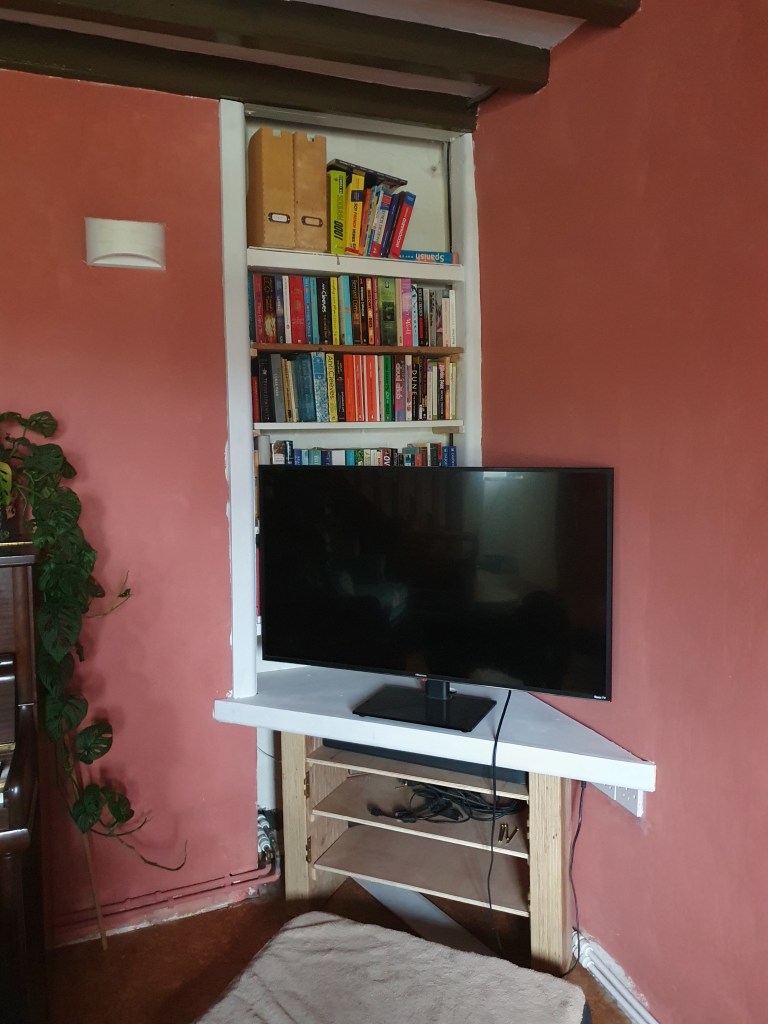
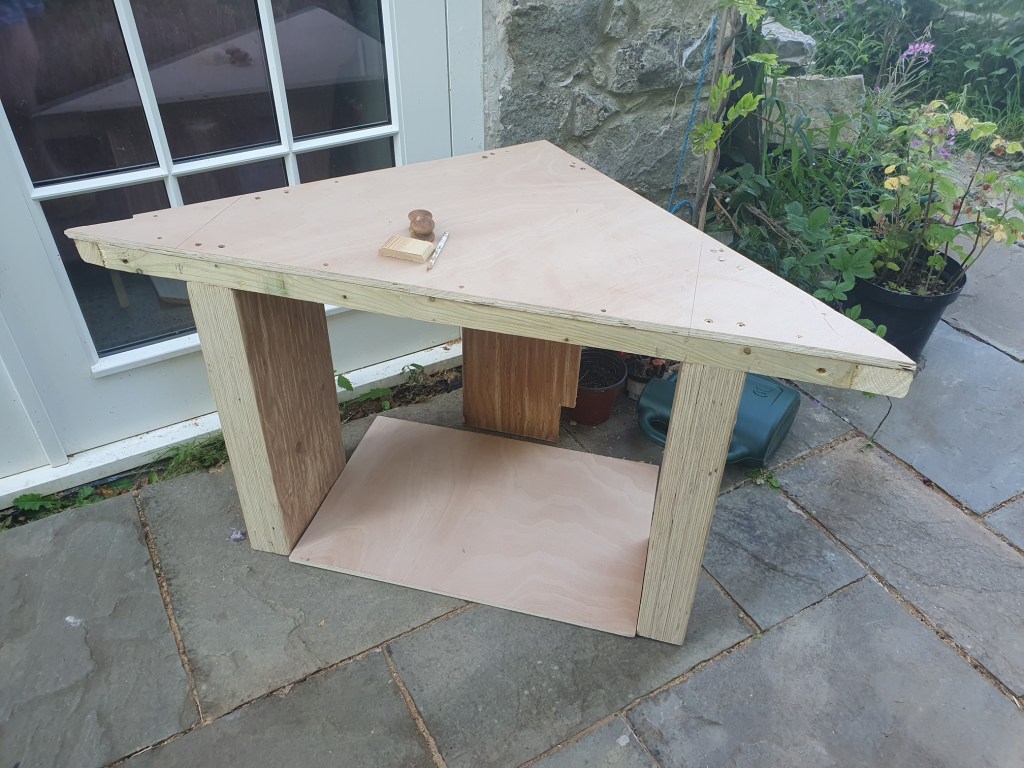
Chris worked on a rather more satisfying job, installing his TV table below the bookshelf. I’d told him a while back that we could only have as many books as would fit on the bookshelf, so of course he reshuffled the shelves to fit another one in.
He added a trim to the bookshelf and table, as well as doors. Inside the table he installed the plugs that had temporarily been attached to the bookshelf.
There’s still some finishing touches left, but it’s certainly getting there.
We’d installed and treated most of the floor, but the company that delivered the floor had accidently left out one packet. While it wasn’t a big area, it took quite a while as every piece bar one needed cutting to fit into the wall. Once installed, it got three treatments to match in with the rest of the floor.
We had hoped to have a day off on the long weekend, but in the end we got too involved in our projects to step away. So not much rest, but worth being tired at the end of it to have moved things along.
-
Cork
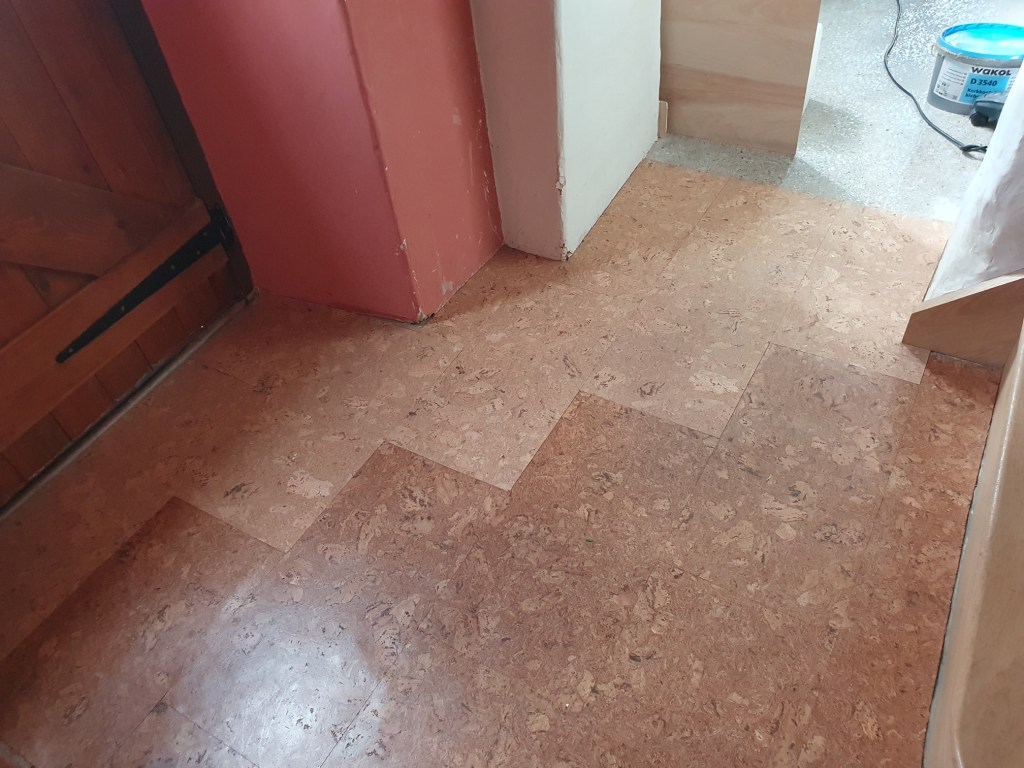
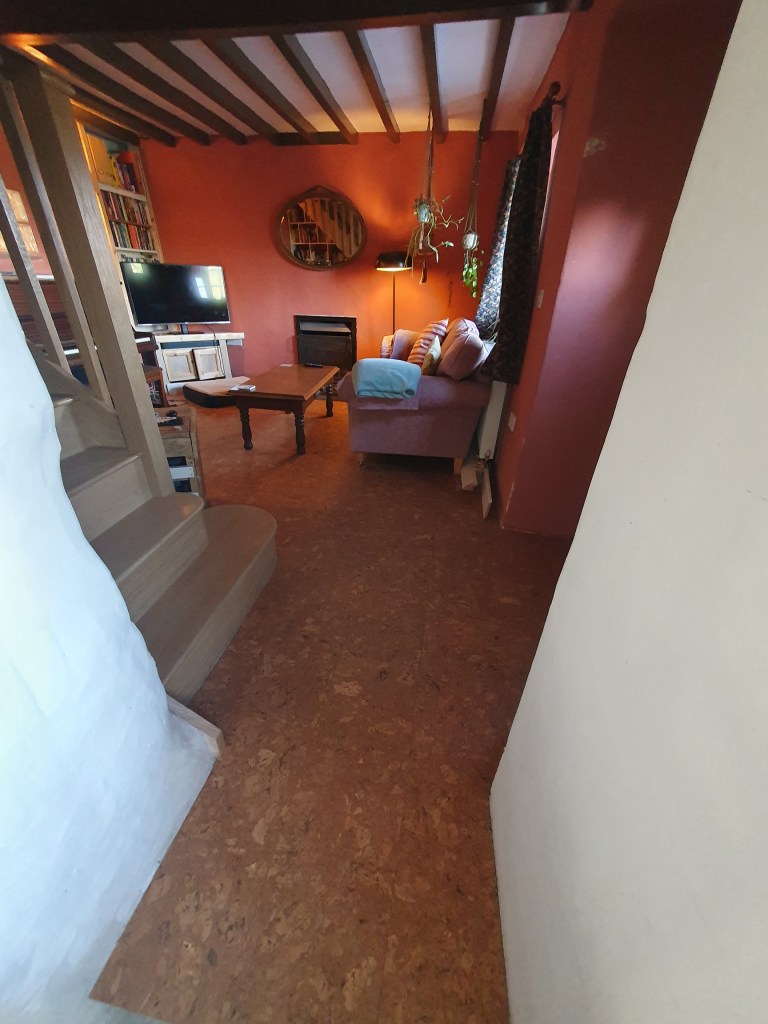
We’d ummed and ahhed about the lounge floor for a long time. My preference would have been carpet, but Chris wanted hard flooring. While I’m happy with wood or tiles in other rooms, the lounge is a room where I like to lie on the floor and I wanted something warm. In the end we compromised on cork, which is very insulating material, and therefore warmer than wood. It’s also very sustainable, and I’d been keen to try it out somewhere if possible.
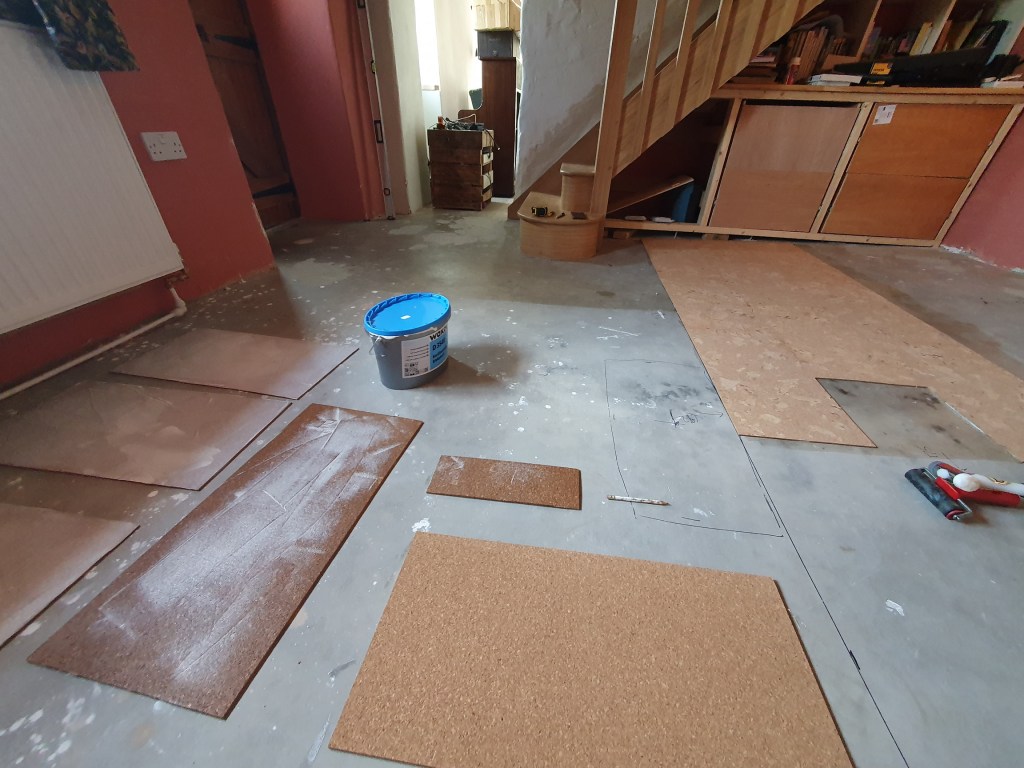
The cork comes in retangular tiles. To prep them they needed to be painted with adhesive and left to dry for 30min, with the same adhesive also being painted on the floor. We found the most efficient thing was to have one person preping tiles, while the other laid a previous batch.
The nice thing about cork is it’s flexible, allowing a little give and take on our very wonky floor.

The biggest challenge was keeping the dog out of the room, as he naturally headed straight for the glue.
We started in the center of the room, and cut the tiles to shape once we reached the walls.
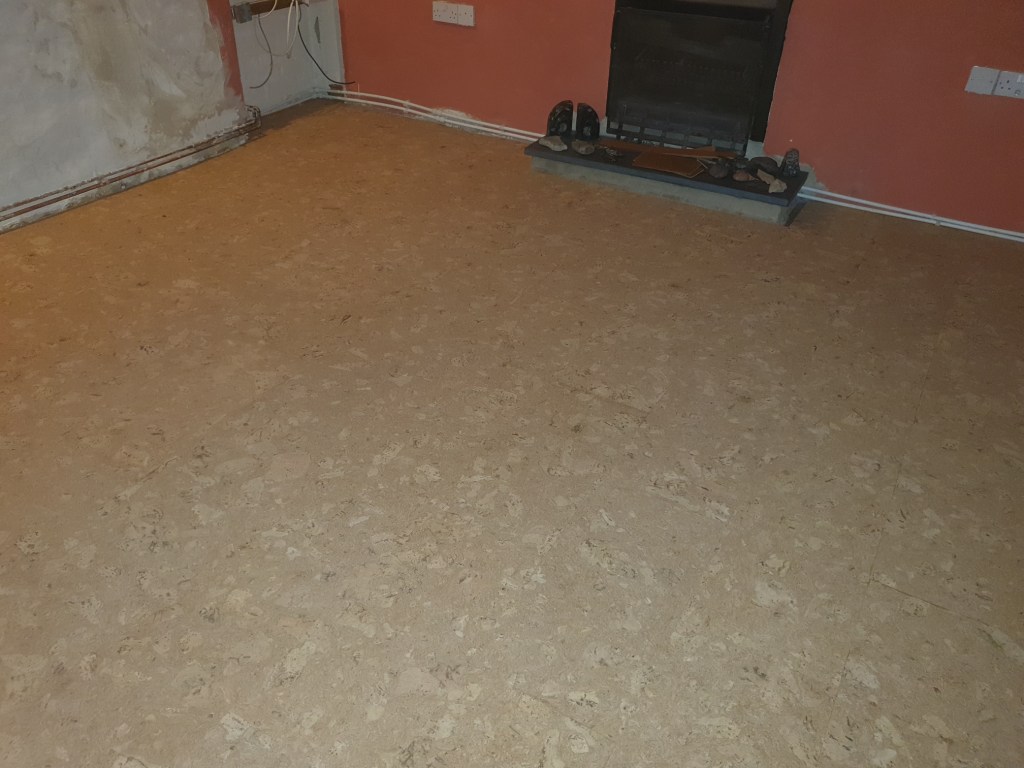

It was a very late night by the time the last tile was laid, however, the floor needed three coats of hardener, with four hours to dry between each coat, so we were keen to get one coat on before bed.
In the morning, Chris got up early for a second coat, and I lightly sanded the floor before applying a third coat at lunchtime. It will be nice to move the furniture back in from the crowded kitchen, but the advice is the let the floor bed in for a while before heavy use begins again.
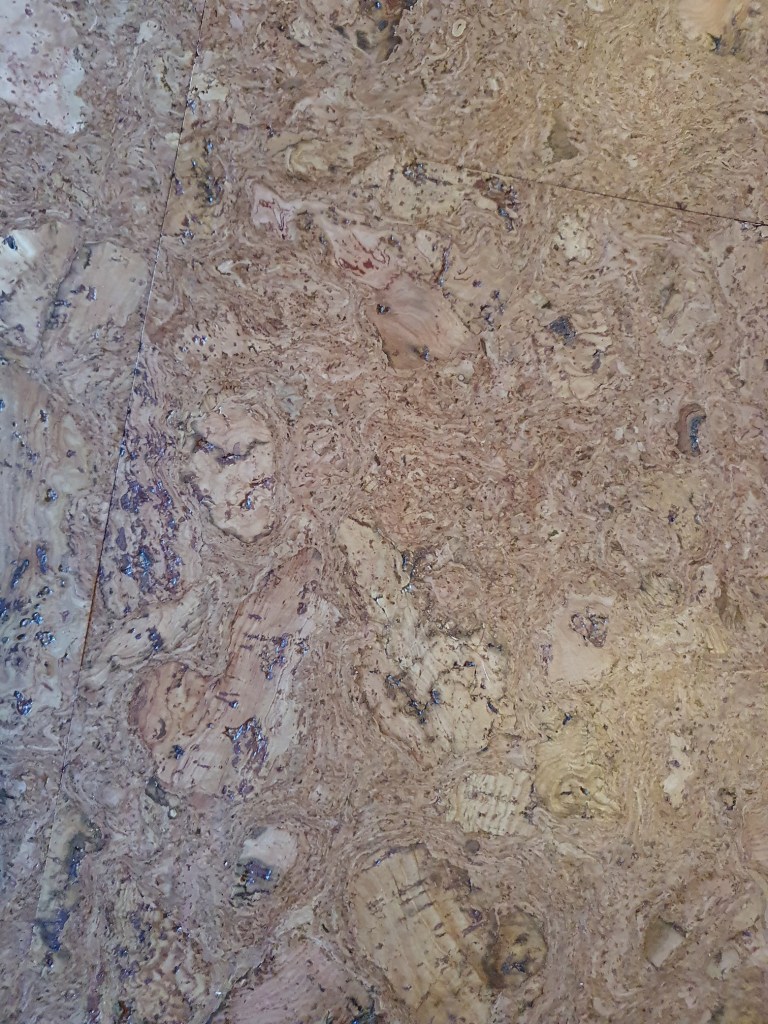
I quite like the finished look, though we need the furniture back in to really see how the room will feel. We chose quite a large grained cork, which I think looks quite like wood.

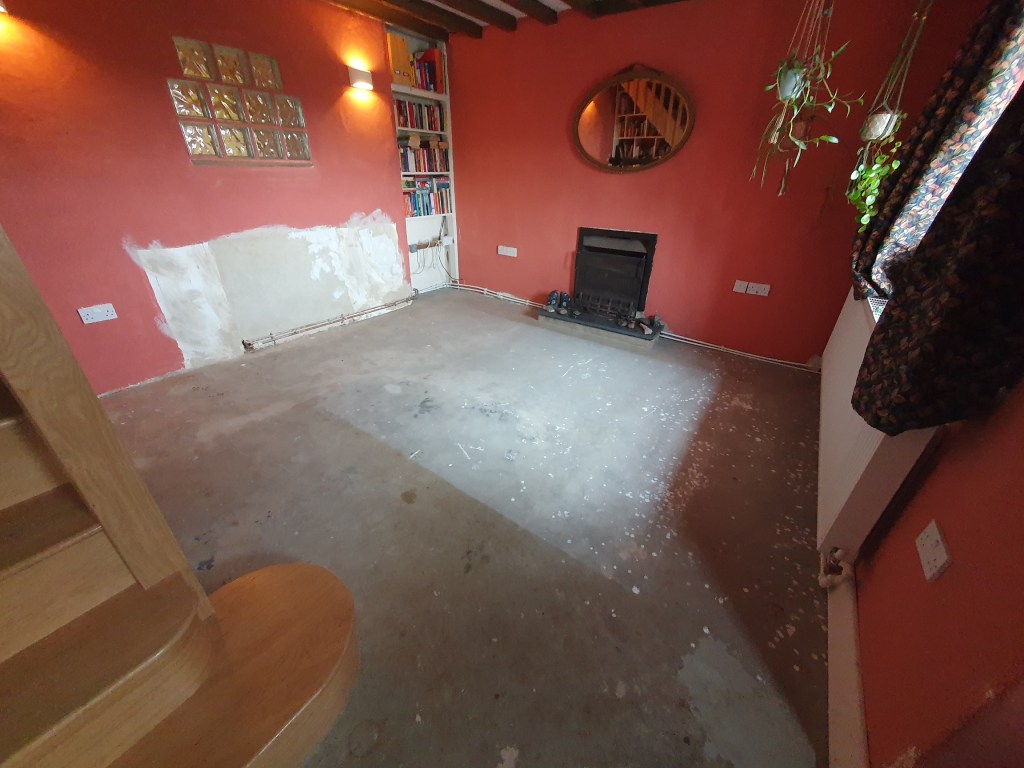
While the furniture was out of the way we tried to get a few more jobs done, including filling, sanding and painting where the radiator used to be, and painting the water pipes with primer ready to be painted the same colour as the walls.
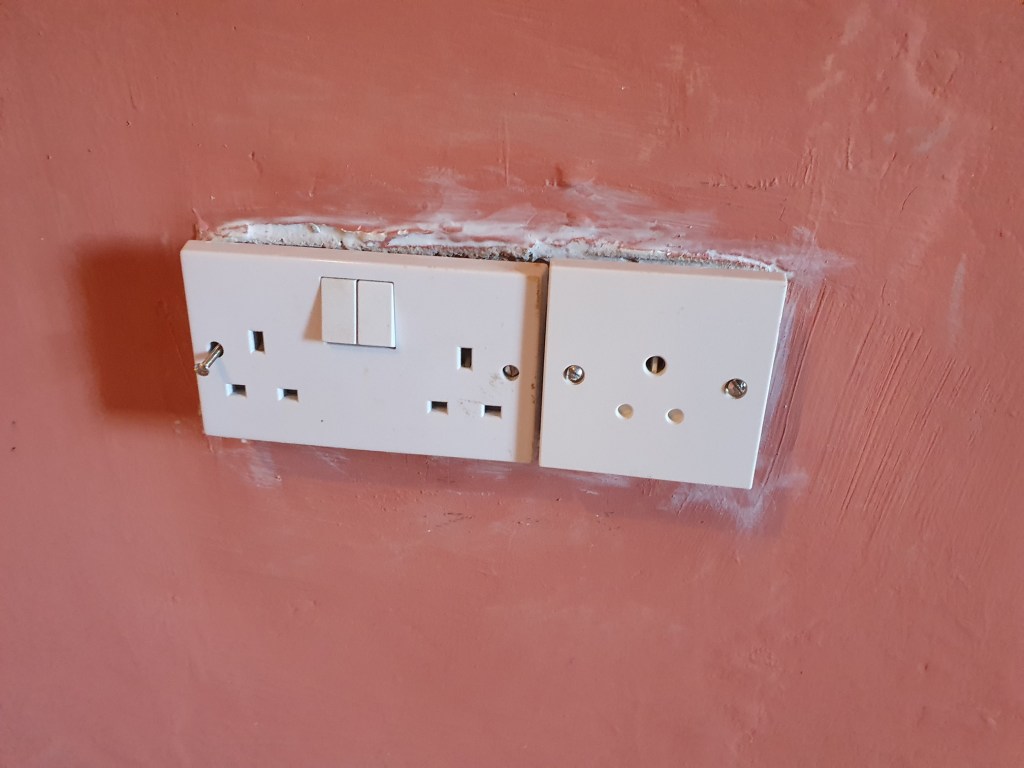
Very boringly I took the sockets off the walls to clean them and run caulke along the outside edges.
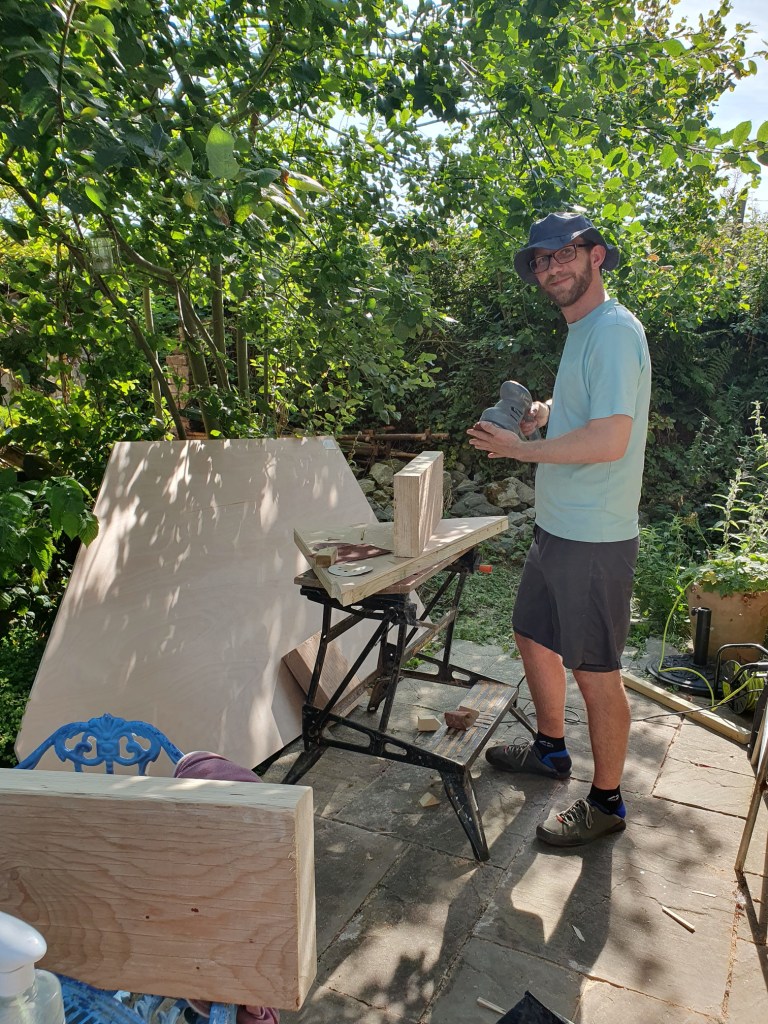
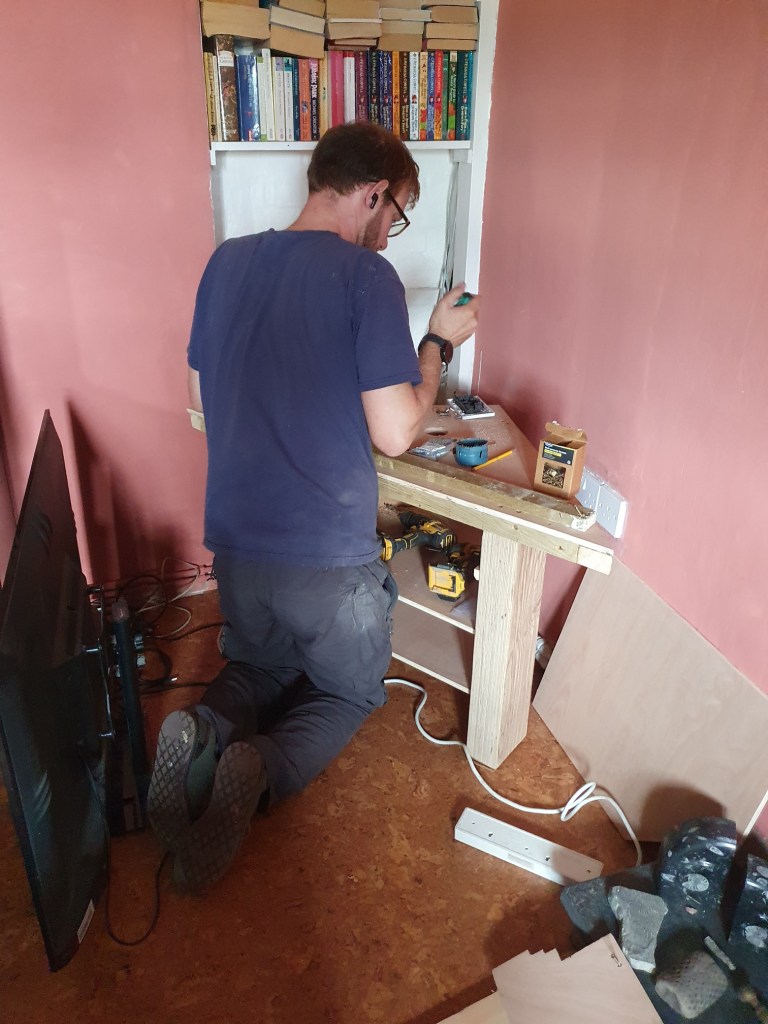
Chris opted for a more interesting job of building the TV unit he decided long ago would sit at the base of the bookcase.
These more interesting jobs can feel like a time drain when we have lots of boring little jobs we could quickly tick off, but with the list getting shorter by the day it’s OK to have a few detours.
-
Doors and Drawers
Chris was full of energy the other night, and cracked on with building the study door. Having accidentally sold too many doors, we didn’t have a door to fit this doorway. We wanted to match the other doors, but couldn’t find anything suitable second-hand or new for less than £70. The wood to make one wasn’t much cheaper so Chris ummed and ahhed before going for the build your own option.
I, unfortunately, didn’t get many photos of the door coming together as I was curled up on the sofa, however, I think Chris rather regretted opting for the traditional technique of using long nails and bending them back round into the wood to pull everything tight. Traditional but a pain.
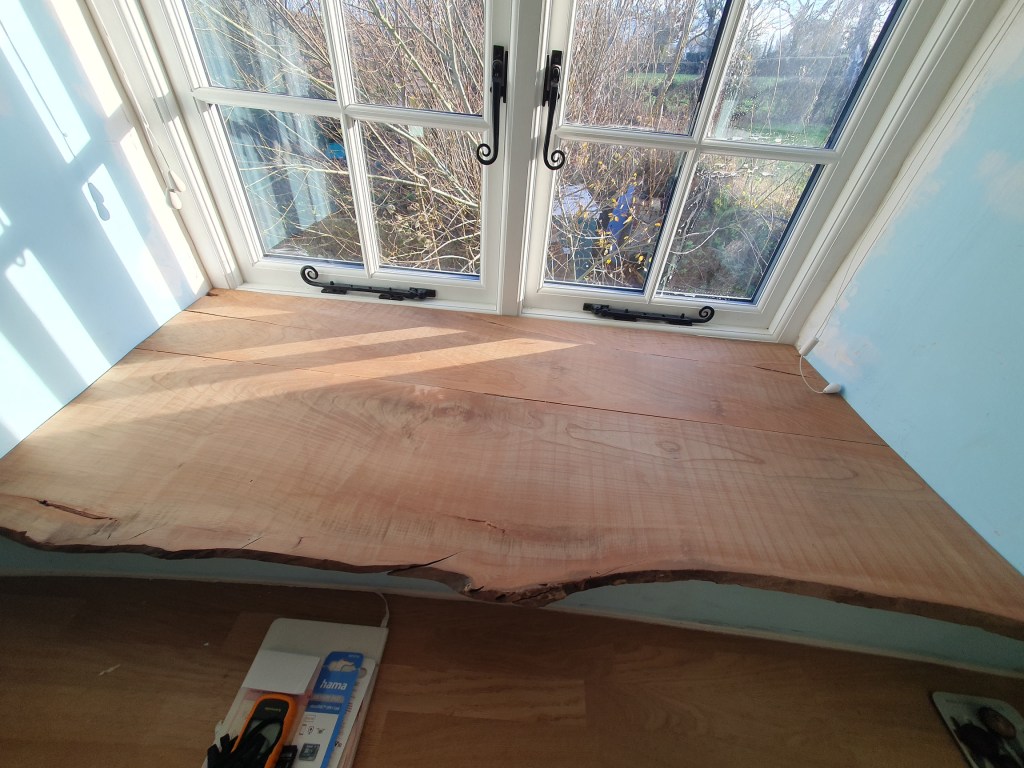
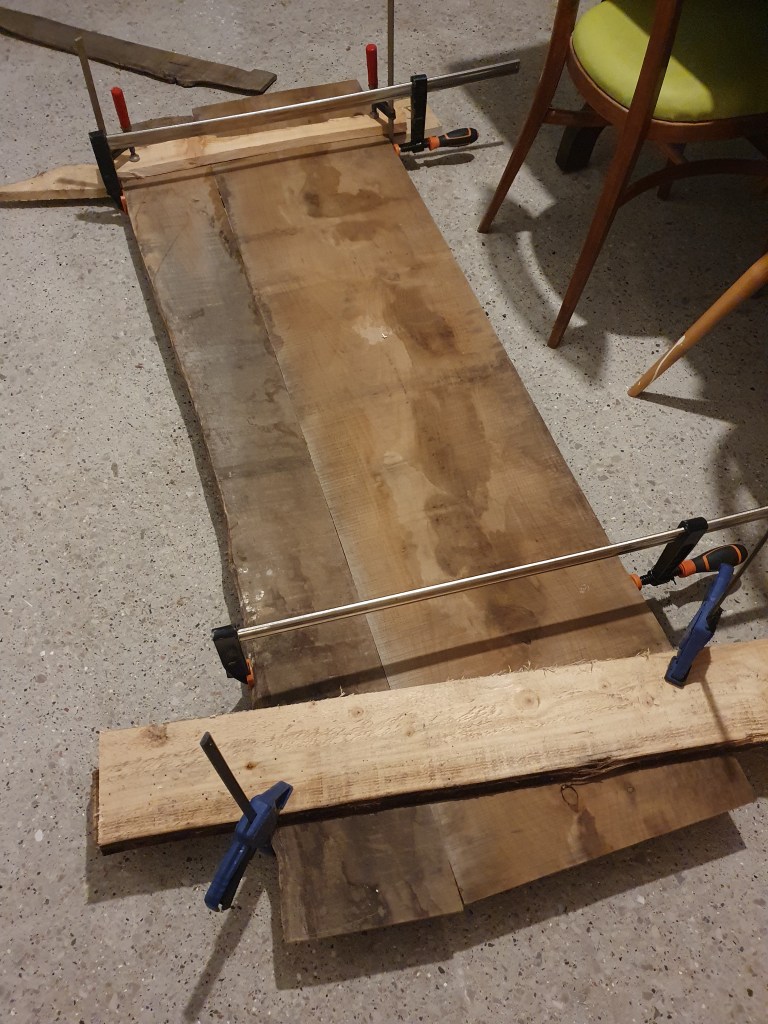
During his burst of enthusiasm, he also glued and clamped the boards for the Windowsill. These then dried, ready for further work at the weekend.


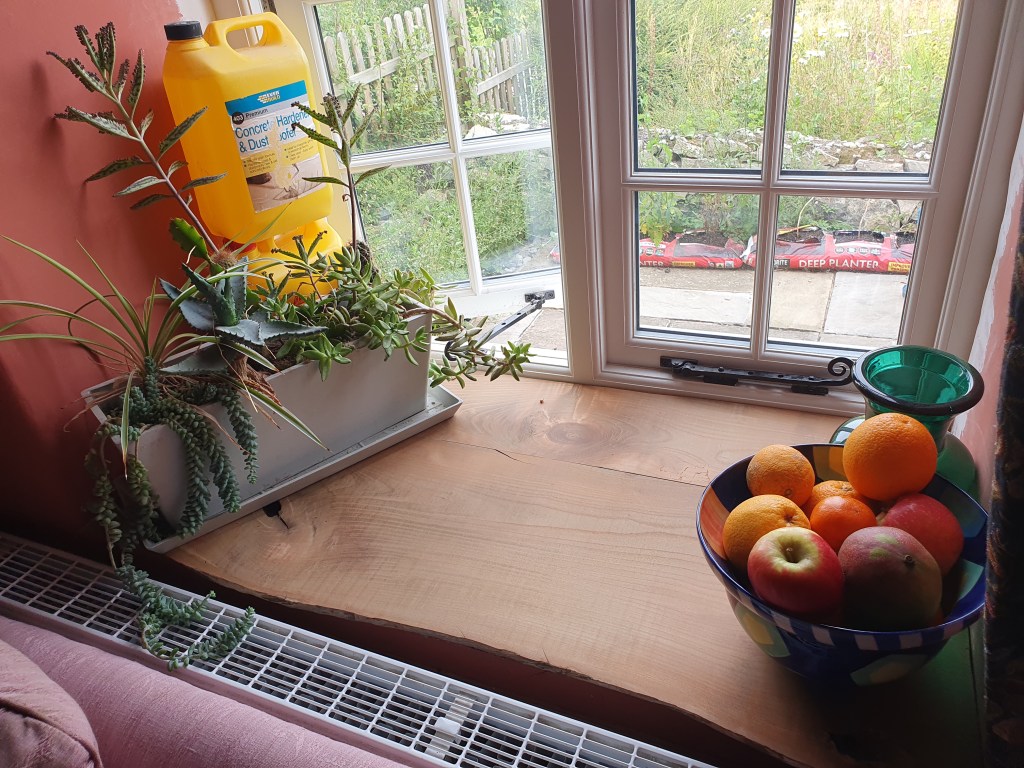
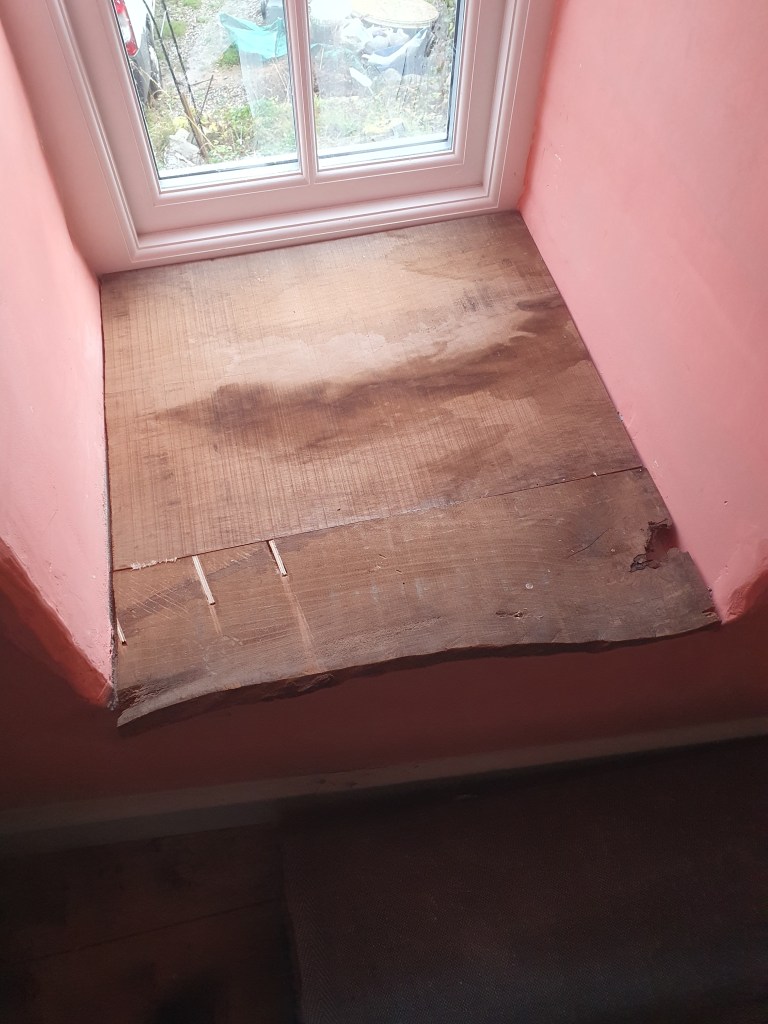
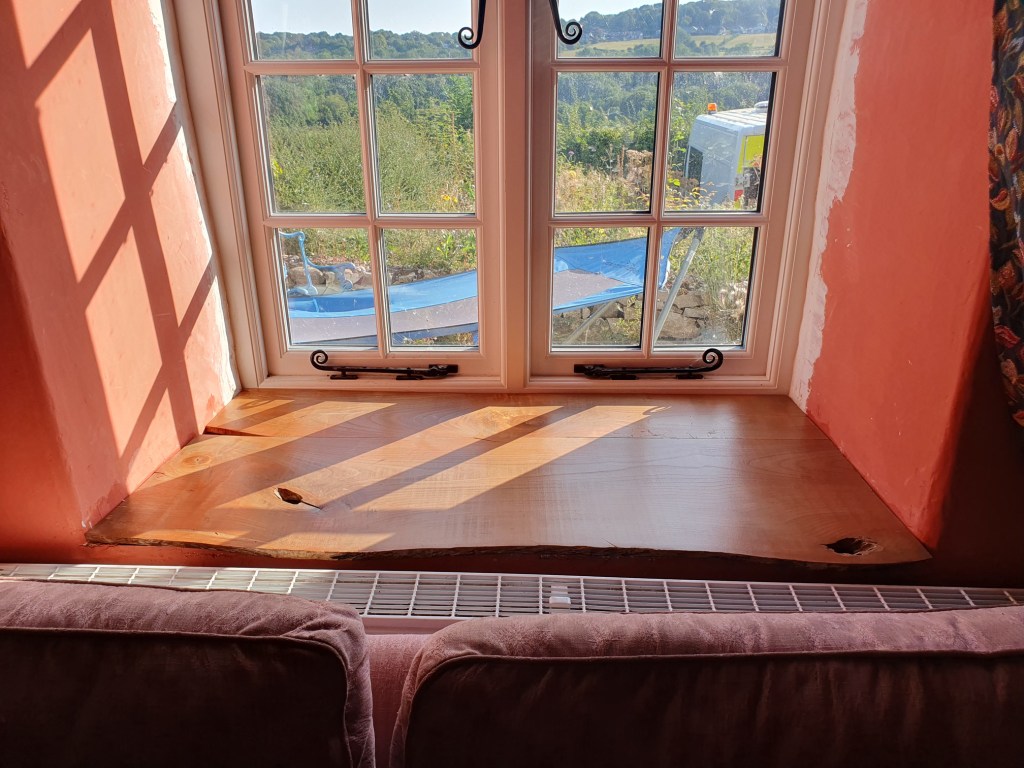
Finally, with some energy back myself, I took over on the Windowsill at the weekend. Cutting it to size using my template and then spending an age sanding it. Chris was keen to keep the wavy natural edge.
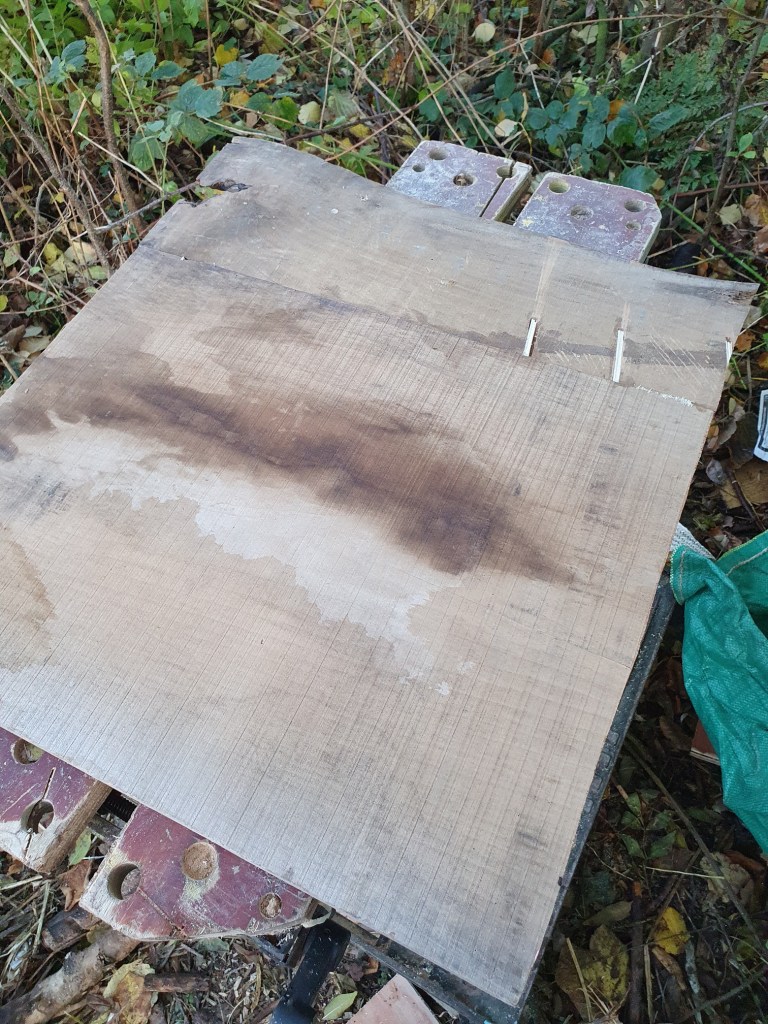
Sanding all done, the remaining issue is that boards are a little warped. Chris suggested I try steaming the wood over a boiling pan and then weight it down. Although things seemed hopeful when I used my own body weight to press it down, I don’t think it’s done the job. We might try again with a wallpaper steamer, and if that doesn’t work just go for screws.
My other job was putting the door jam on the spare bedroom door, a small job, but satisfying to sort out. We’d brought enough wood to do another three doors, but realised we still didn’t have latches on any of them, so the door jams will have to wait.

After his very successful evening, Chris spent a frustrating day trying to sort out the sliding draws under the bookshelf. While everything seems to come together fine, the draws keep sticking or pulling away from their runners. Chris assumes it’s something to do with the runners not being completely straight, but after hours of fiddling he’s at a loss and very frustrated. Worst comes to worst I keep telling him we can put in shelves, but he’s determined to get there in the end.
Out in the garden it’s nearly time to cut back our mini-meadow, so I spent some time chopping down the ragwort. Ragwort has a terrible reputation, which is entirely undeserved, and is brilliant for a wide range of invertebrates. But, it does like to spread, so while I’m very happy to have it flowering in the meadow, I’m cutting it back before it seeds to prevent it crowding out the other plants. The good news is some new wildflowers have appeared, including self-heal, bird’s-foot-trefoil, cut-leaved cranesbill and yarrow, so hopefully this is a sign the meadow will continue to improve with management. There’s also a lot of young scrub, which I’ll have to get on top of in the winter.

-
Working it out
While in theory building the windowsills shouldn’t be too complicated, we’ve been delayed by lack of the right tools. Having held off on buying a biscuit cutter (which cuts holes for the small wooden biscuits that help join the wood together) in the hopes of borrowing one, we finally gave up and purchased one second-hand.

The first job was to plane the two edges that would join together to make sure they meet properly. Next Chris used the biscuit cutter to cut the holes. The final step to join them will be inserting the biscuits and gluing the edges, then clamping them till the glue sets. Unfortunately, it turns out the clamps we have aren’t big enough for this step, so another order needs to be made. However, at least having gone through most of the process once, we know a little better what we’re doing.
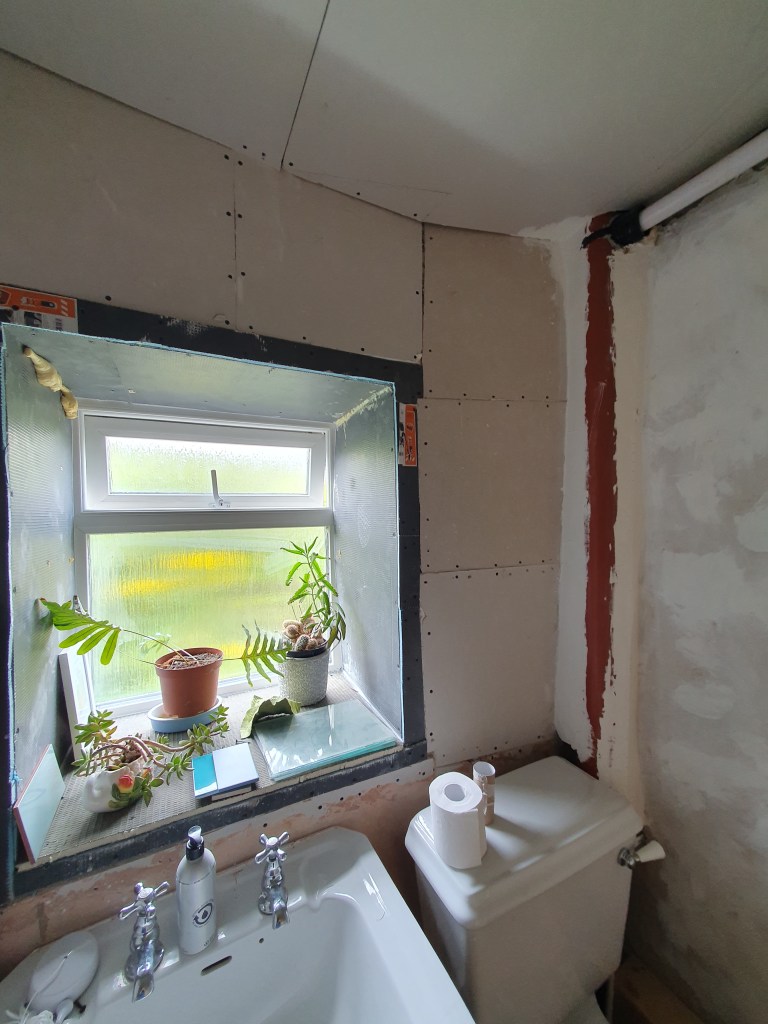
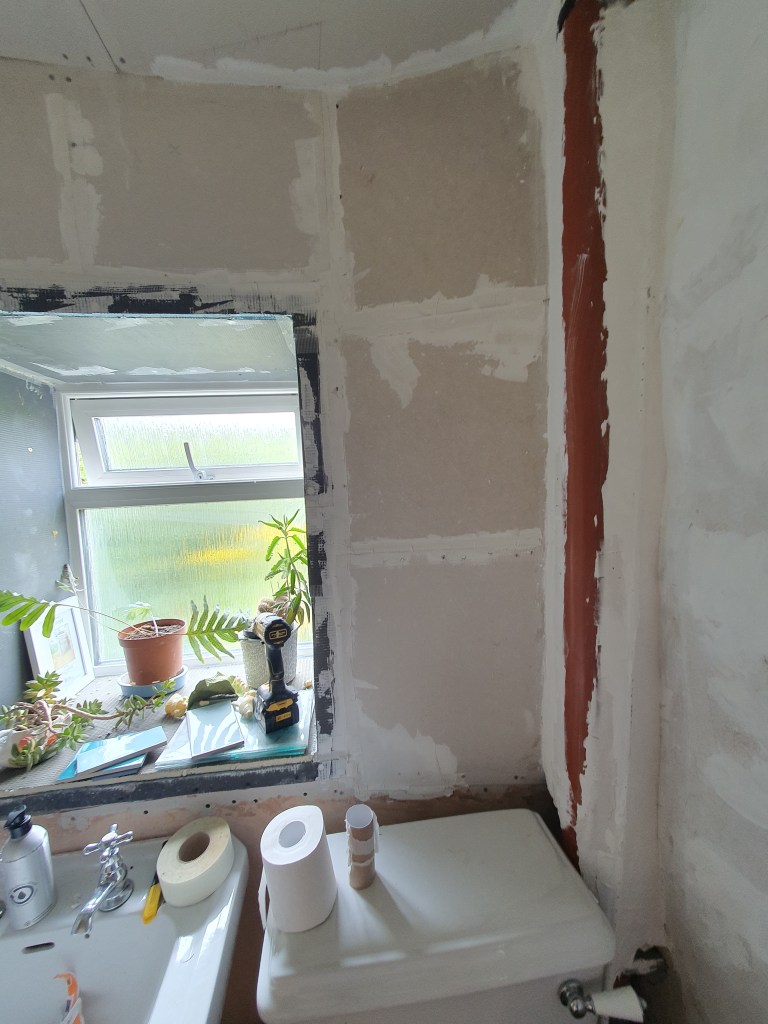

We’ve both been avoiding plastering the downstairs bathroom, as though it’s small, the tight space and odd angles will make it a pain to do. Still getting near the end of your list means working on the more annoying jobs.
To prep the walls I taped the joins, and filled any screw holes. Because of the uneven wall I also tried to smooth out the edges between the boards with filler, which will make things a little easier when it comes time to plaster.
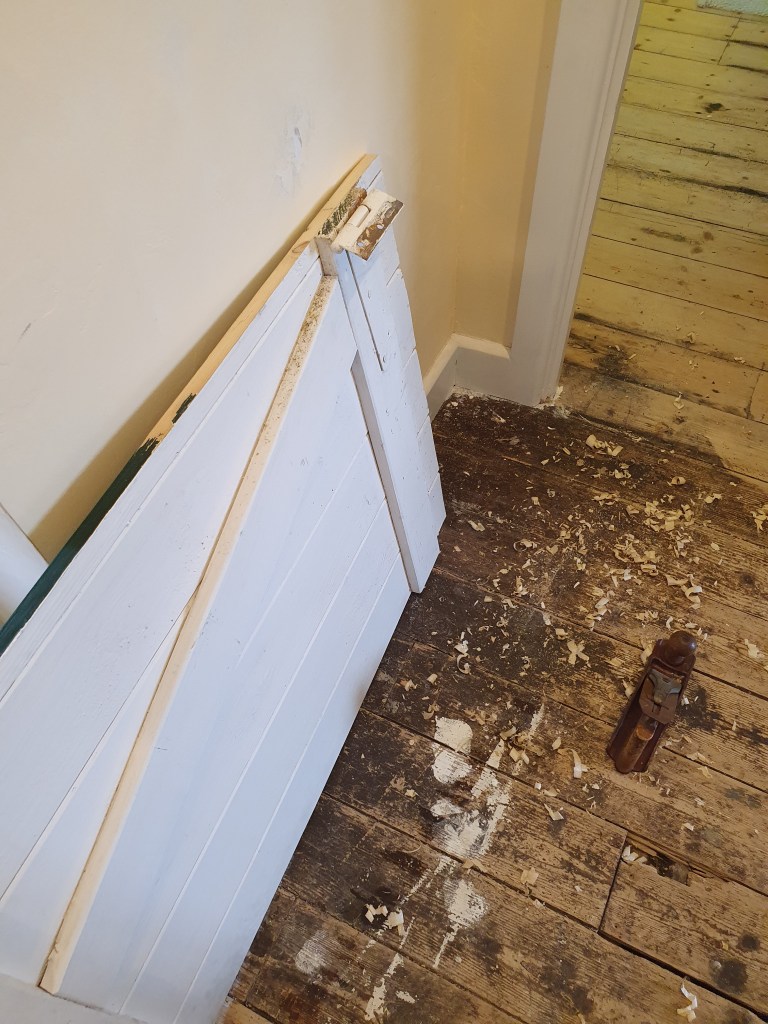
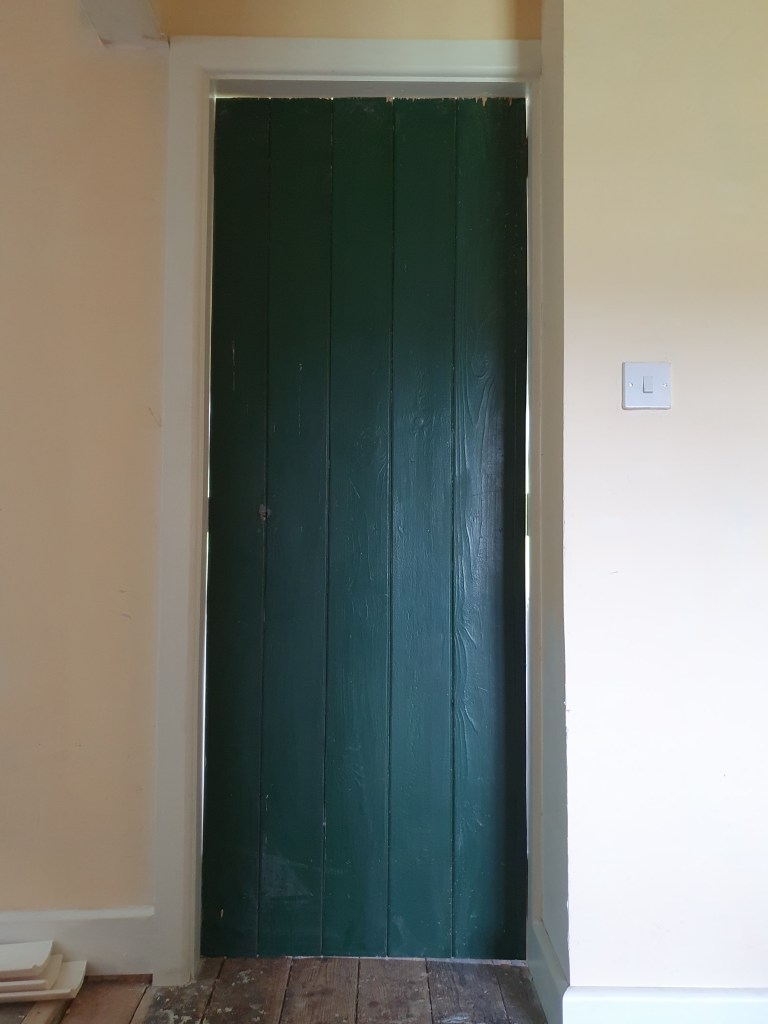
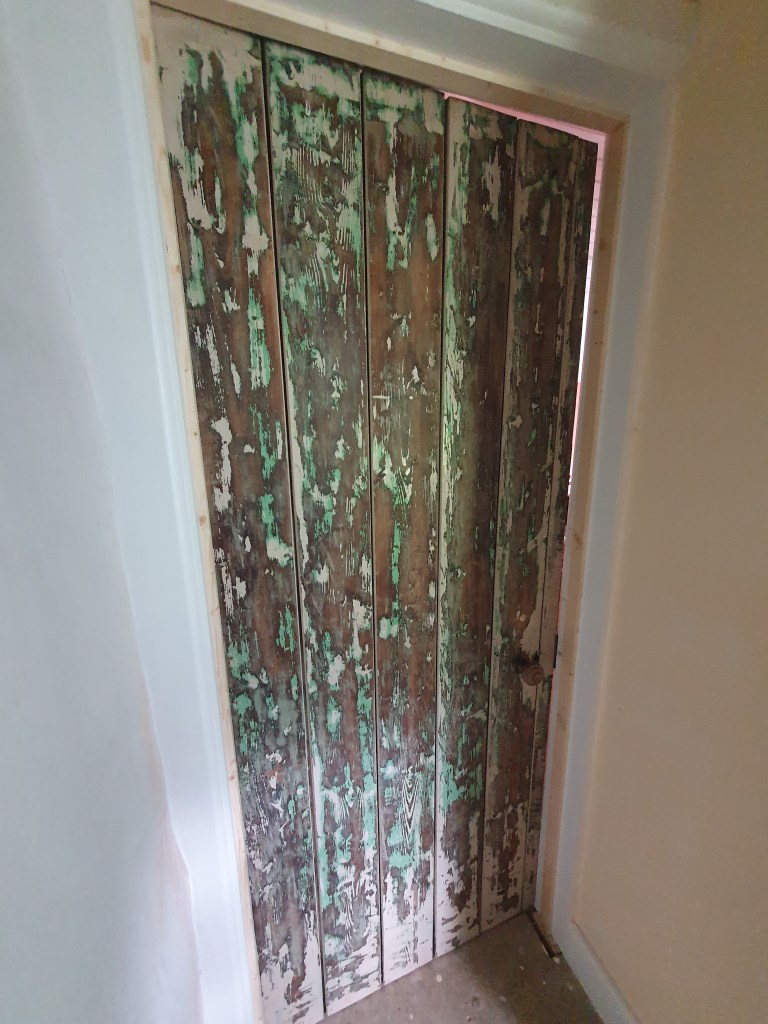
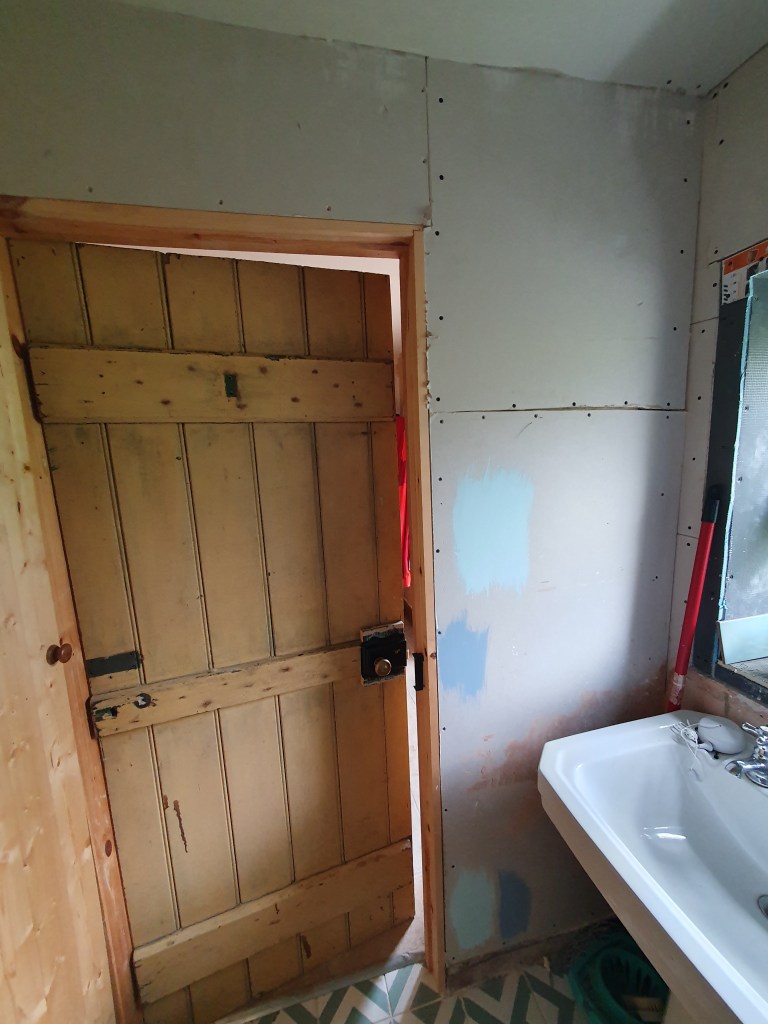
Having marked where the door needed trimming down I planed and cut a few key areas before attaching it to the frame. We can now close the door on the mess that is the showerroom/tool store, but unfortunately it also means a little less light in the stairwell, reinforcing the idea of putting in a sun tunnel. The next step will be to strip the door to match the others.
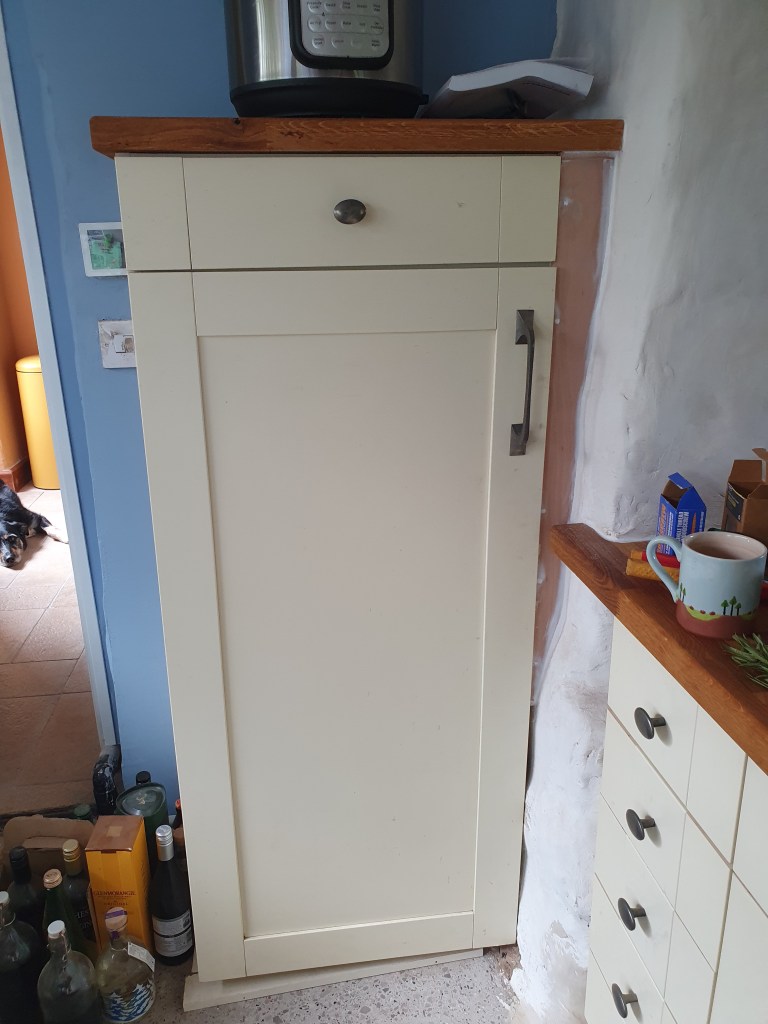
In the kitchen, Chris attached the top to the cupboard, and decided to cut a panel to fill the side, which is a reservoir for dust and spiderwebs. Once painted with the matching paint it should disappear.
Having put in a big order of wood for a number of remaining jobs, I’m hoping we can tick off a few more bits soon, including finishing off the windowsill.
-
Subscribe
Subscribed
Already have a WordPress.com account? Log in now.
