-
The Last Wall Standing
It’s much more pleasant working in the house now things are warming up, though there’s still the occasional chill in the air.

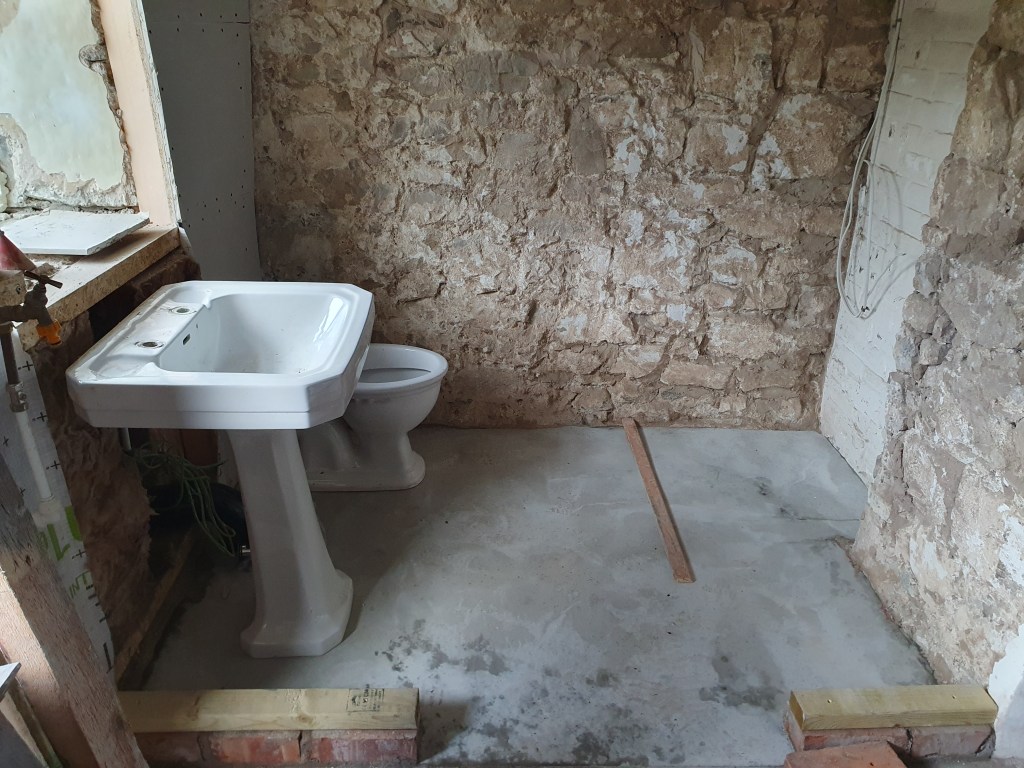
In order to get the house ready for the mortgage inspector we need to get the downstairs toilet ready. We set it out with the sink and toilet to check the spacings, marking out where the washing machine and drier would go. Chris was worried the sink was too large but I think it’ll work well. Plus it was free, always a bonus.
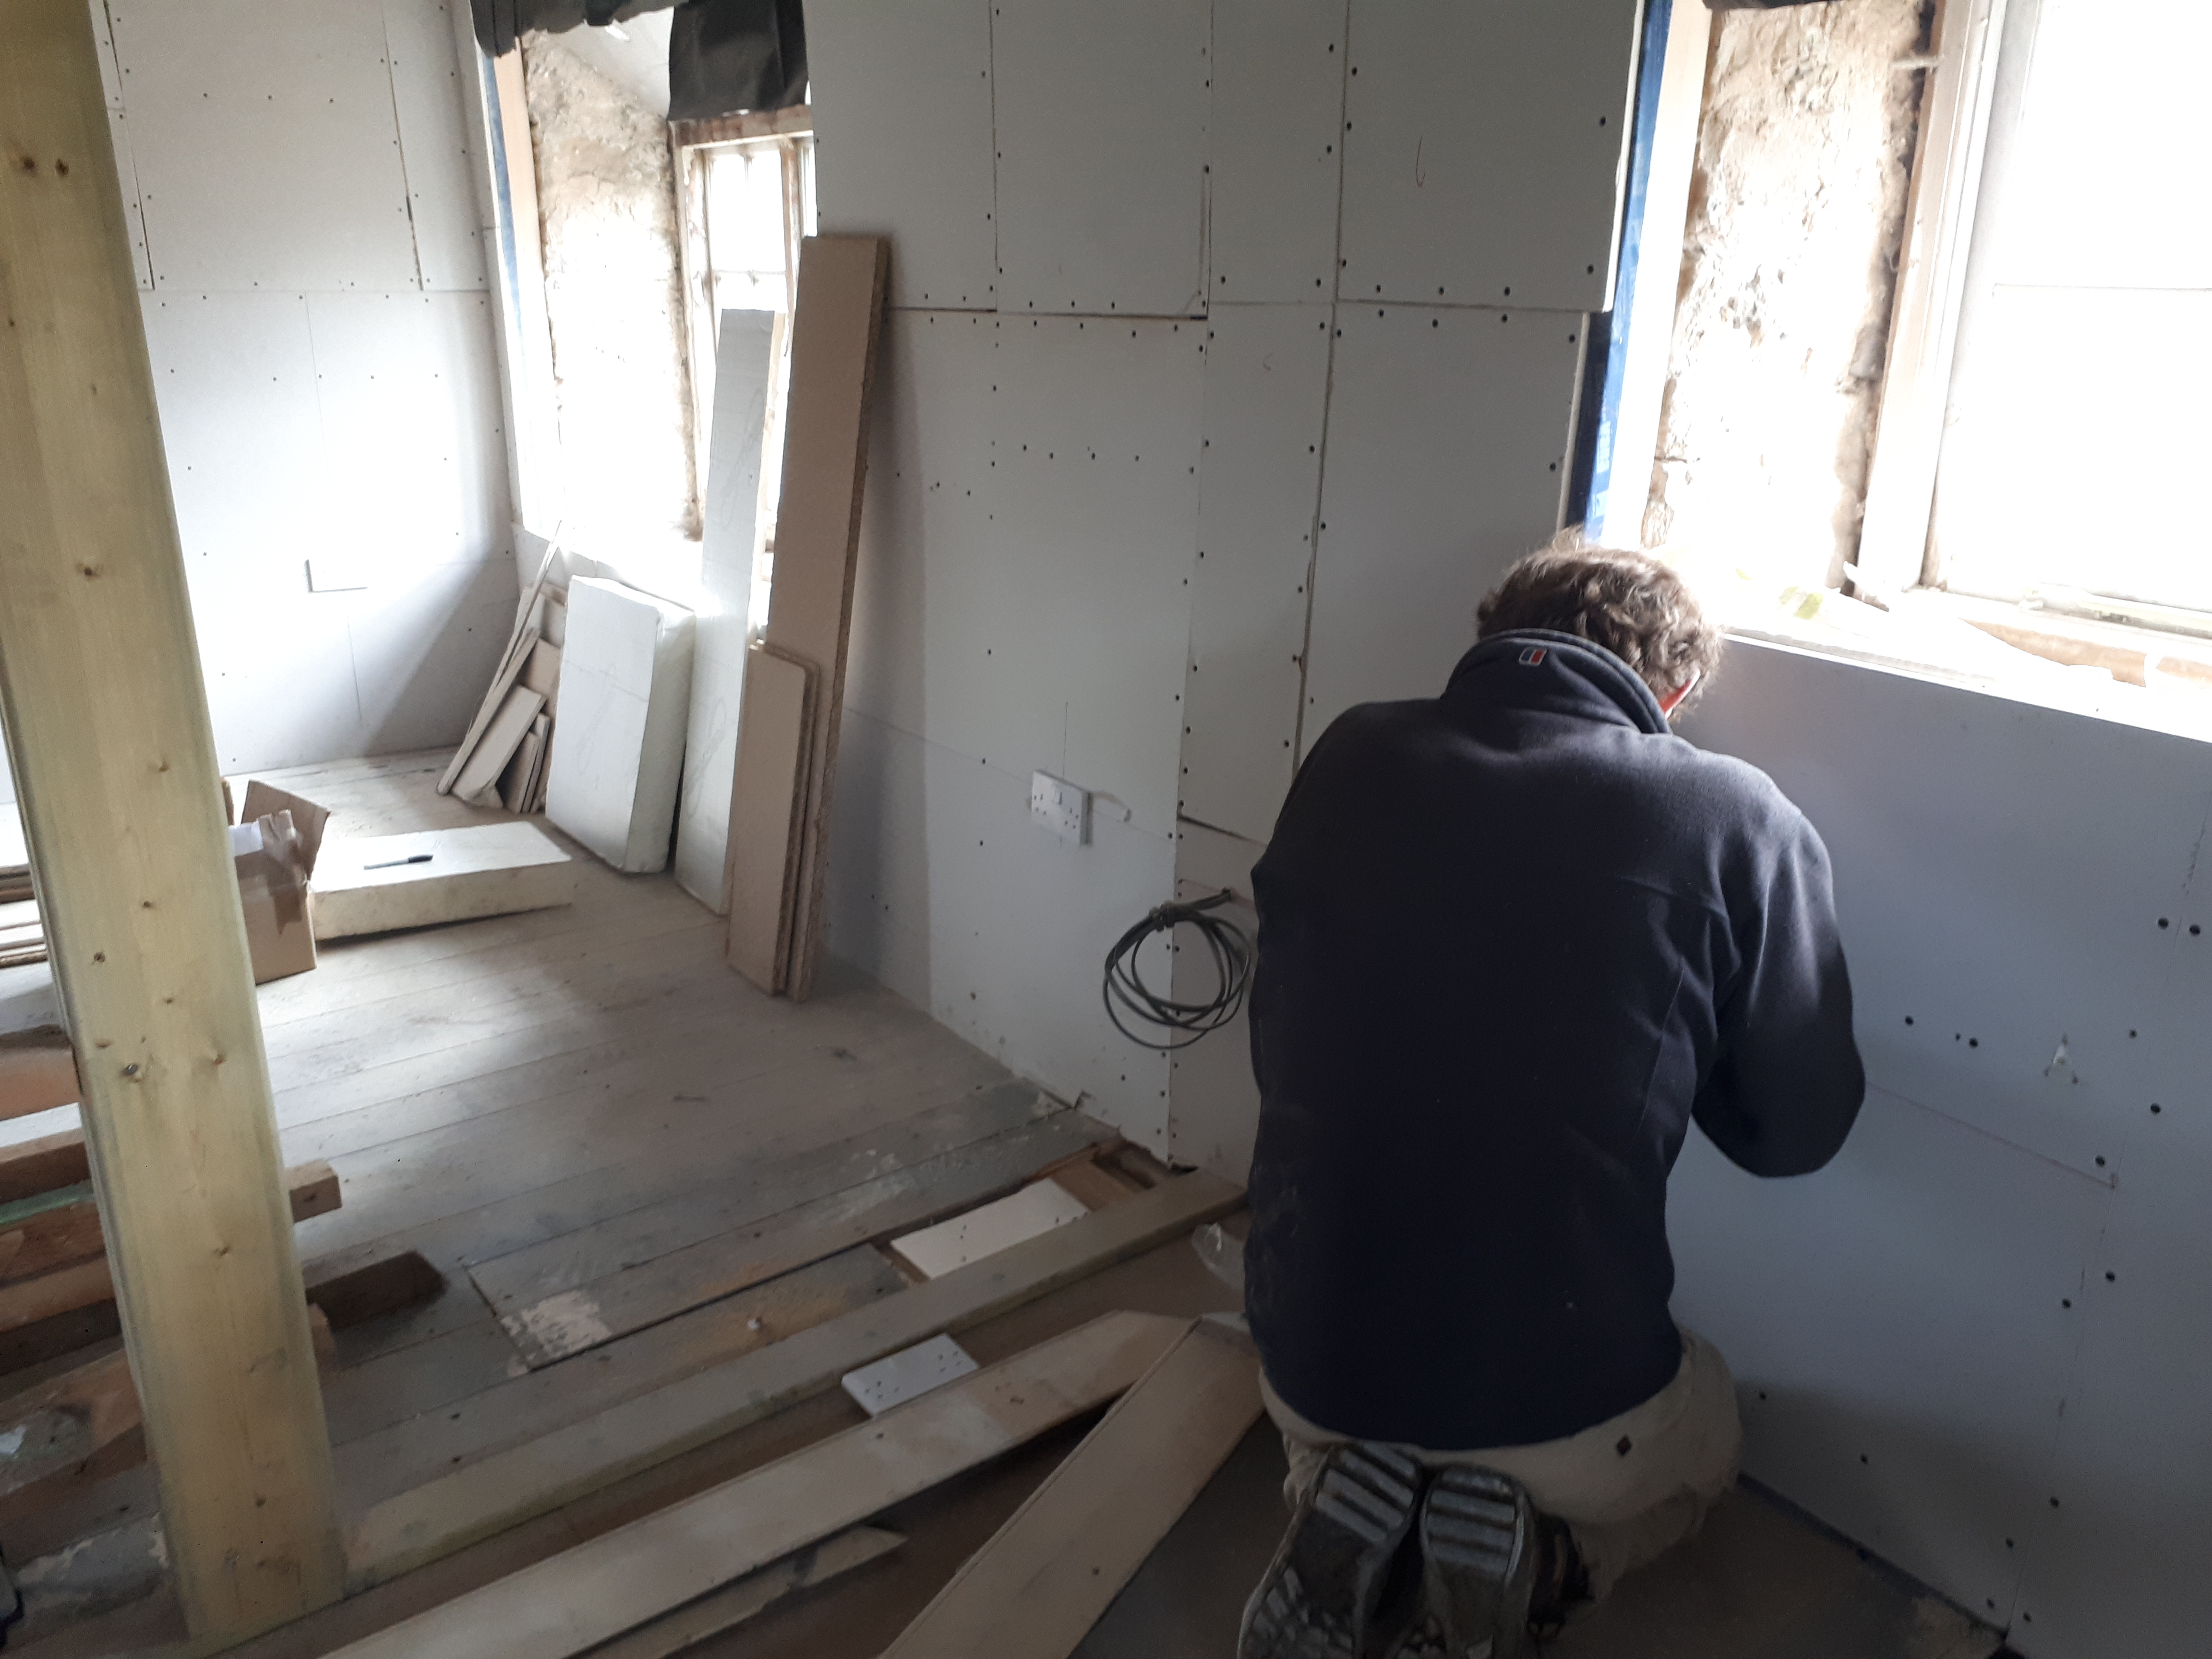
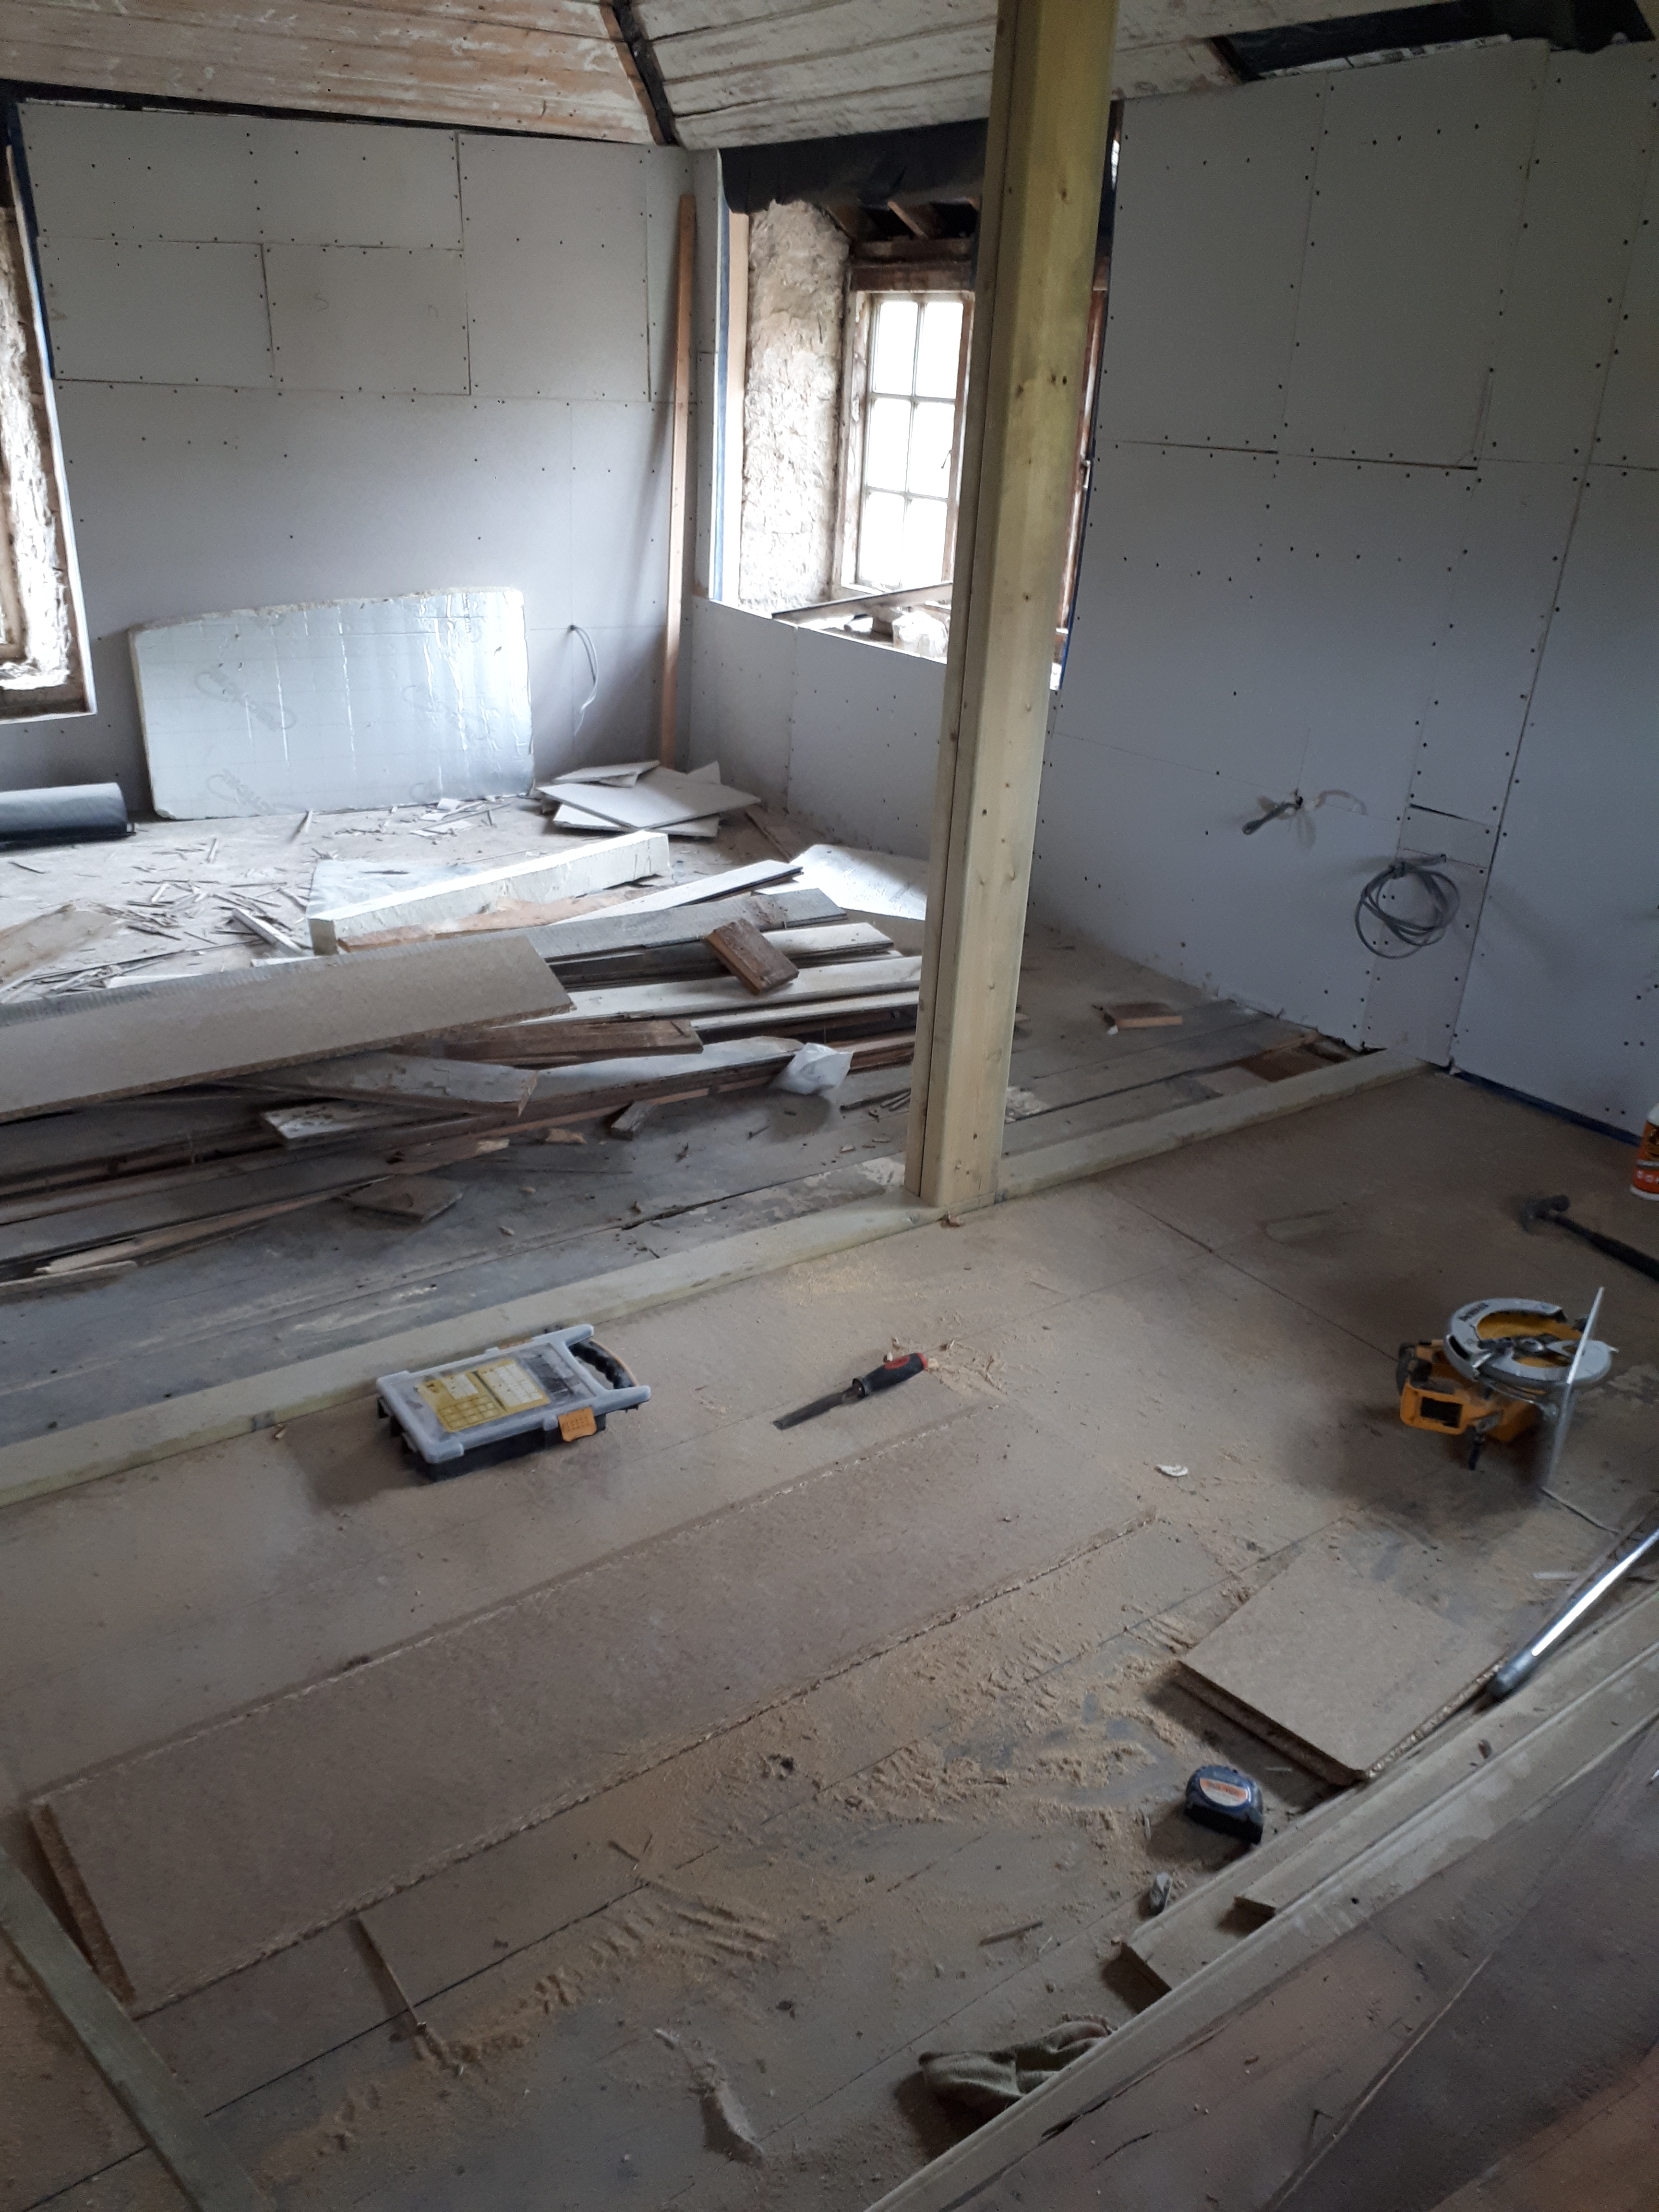
I set to work filling the gaps in the wall by the stairs. Chris had already filled the easy to reach holes, but in order to reach those further up we placed scaffold boards across the stairs, a slightly precarious but workable platform.
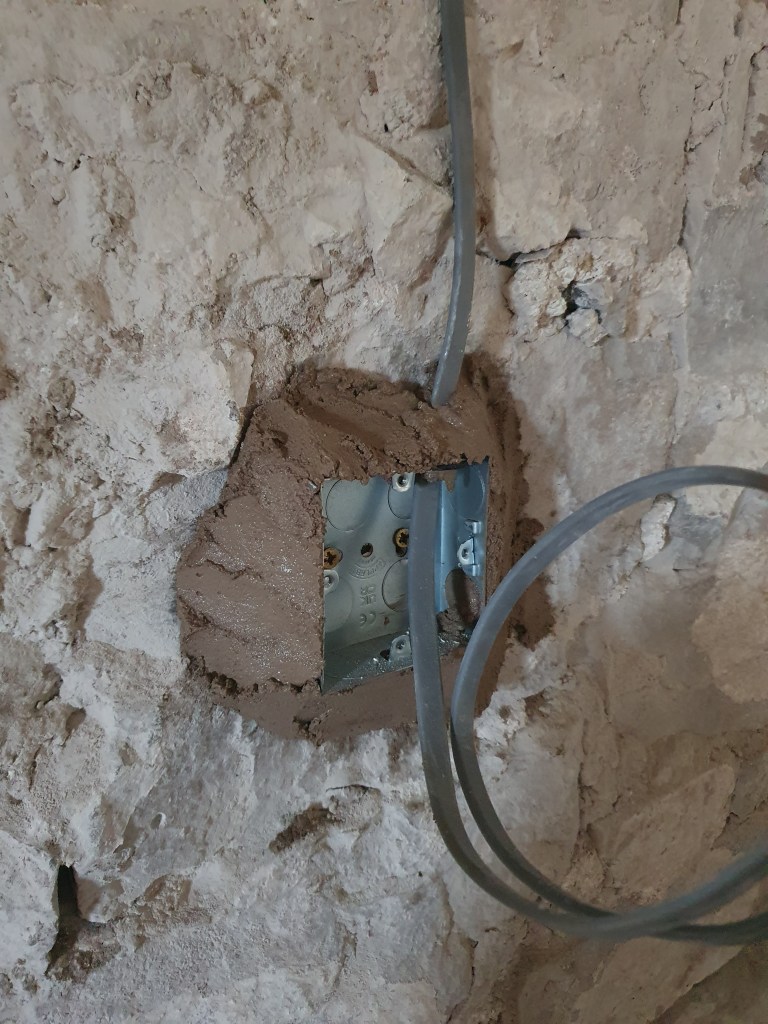
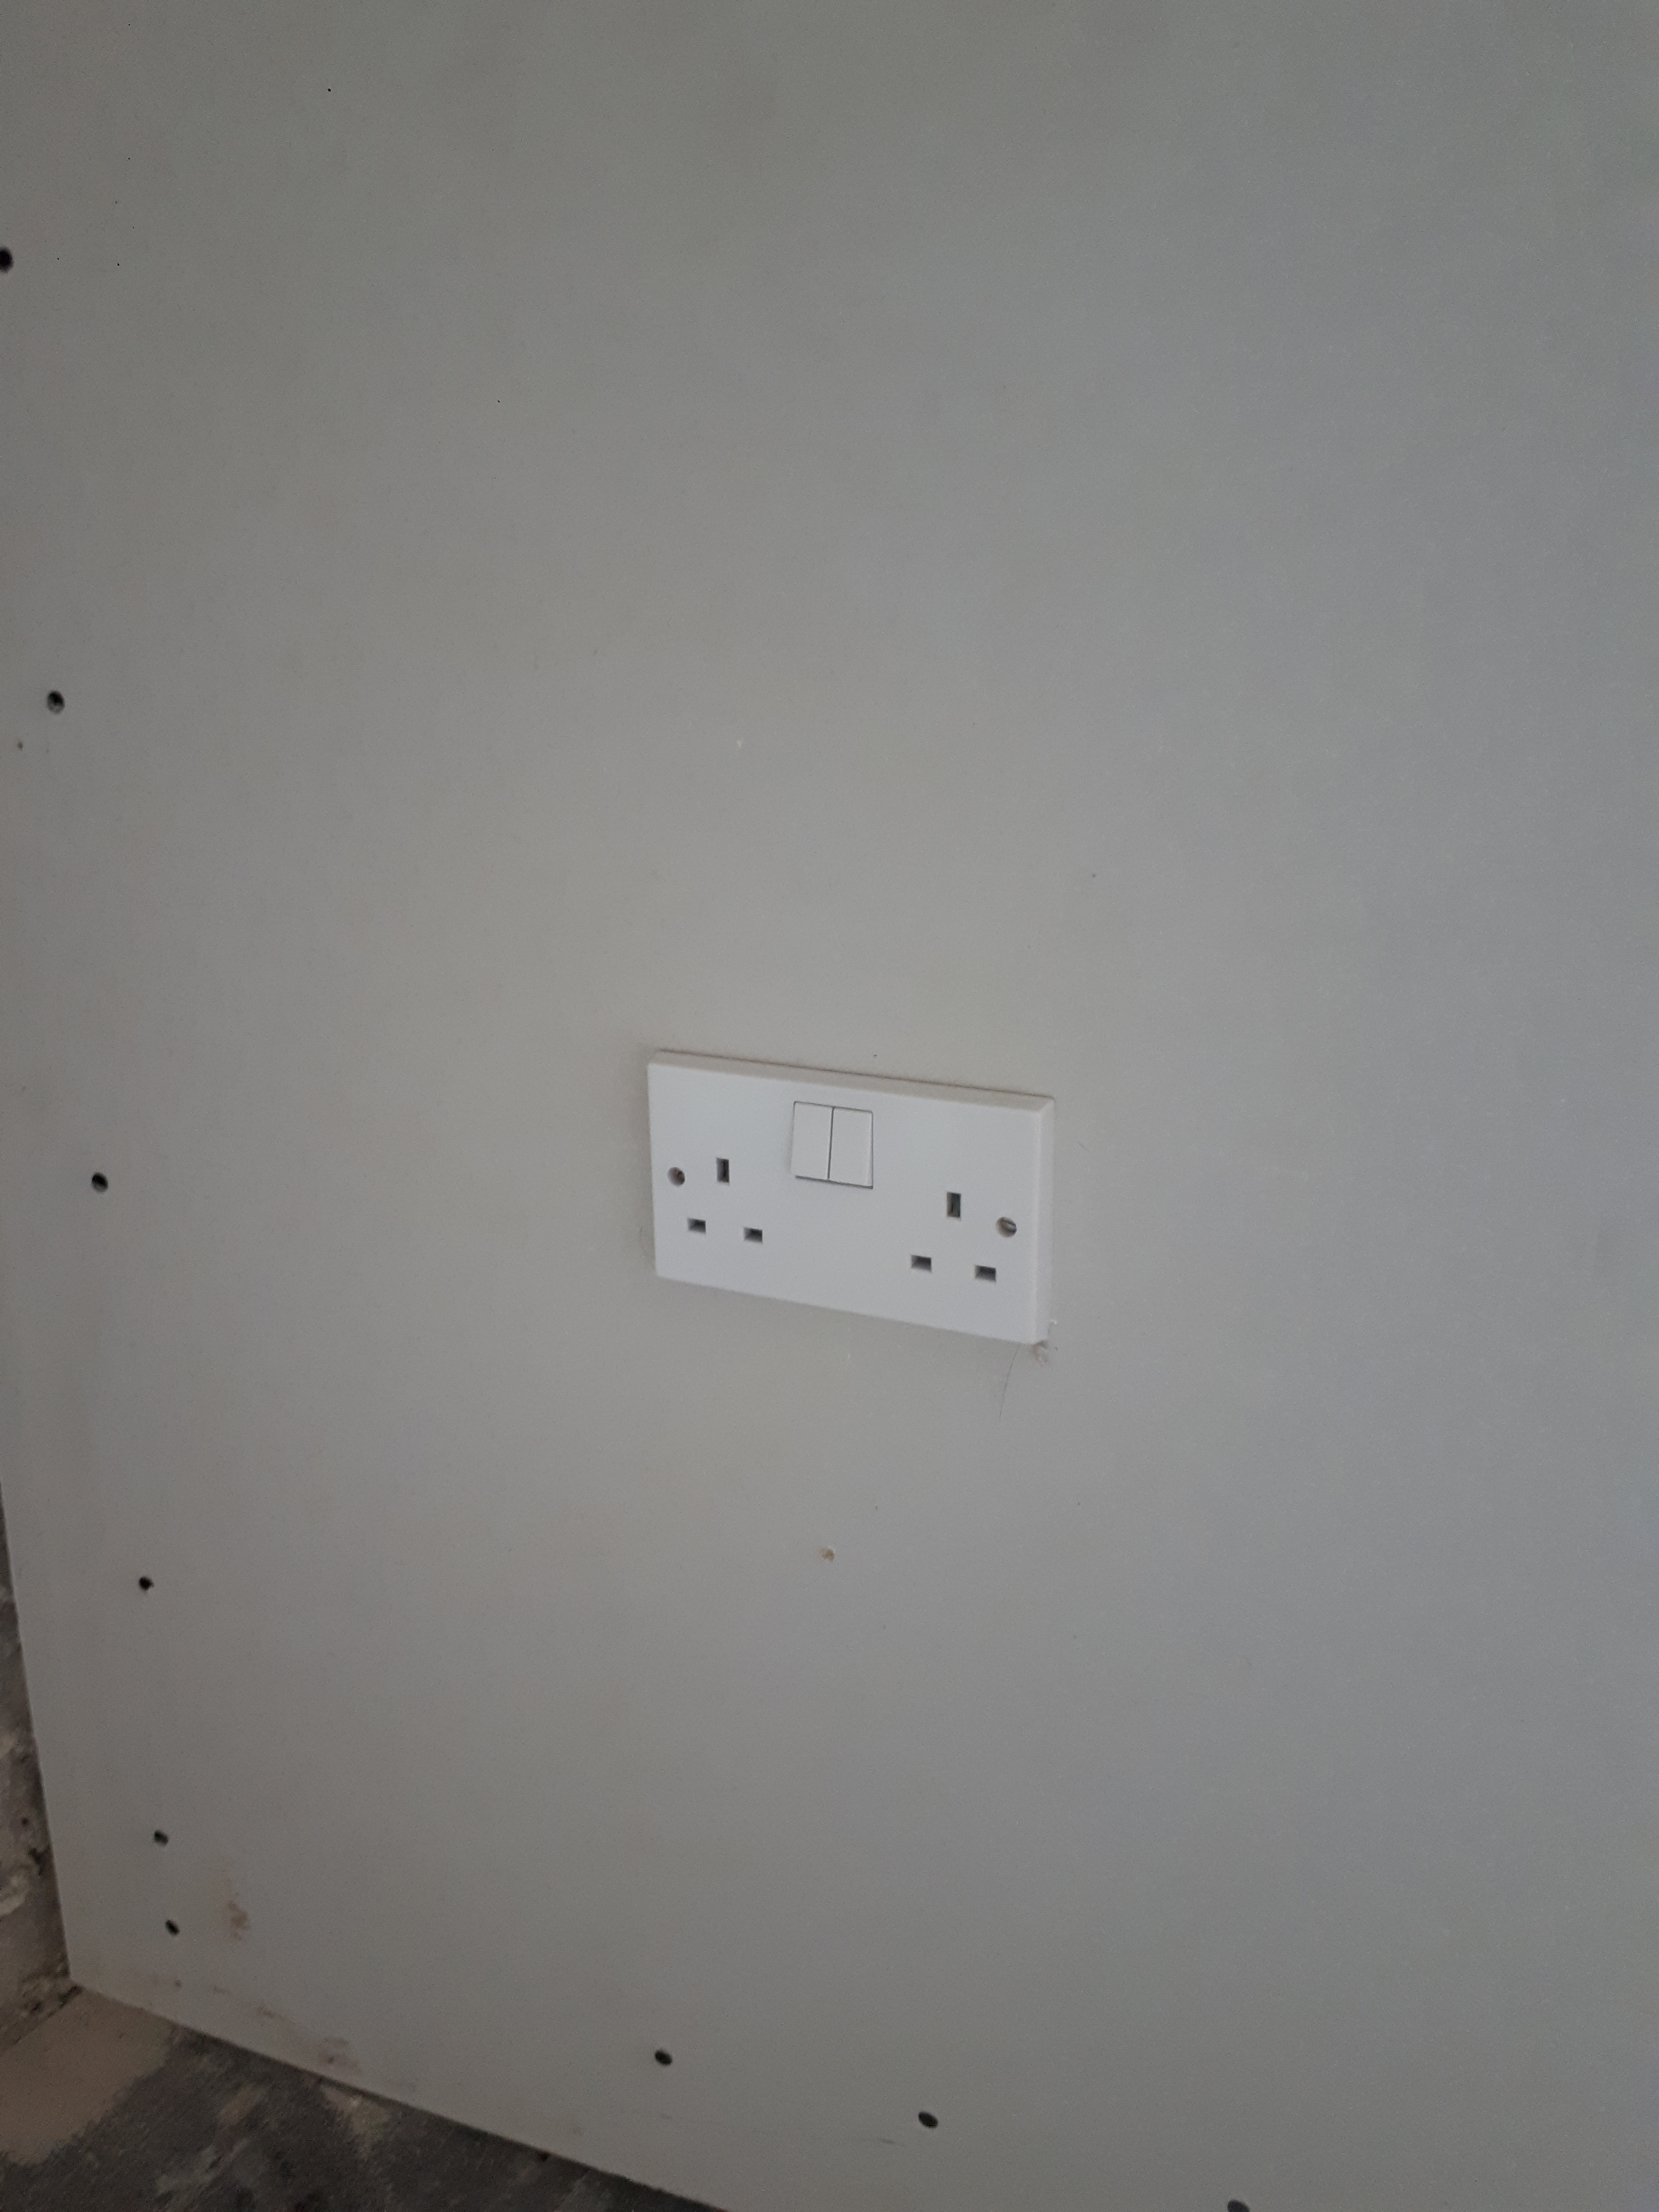
With the holes filled I used the remaining mortar around some of the switch boxes.
To make things more precarious on the platform I had to add a stepladder to reach the top of the plasterboard to add a few more screws.
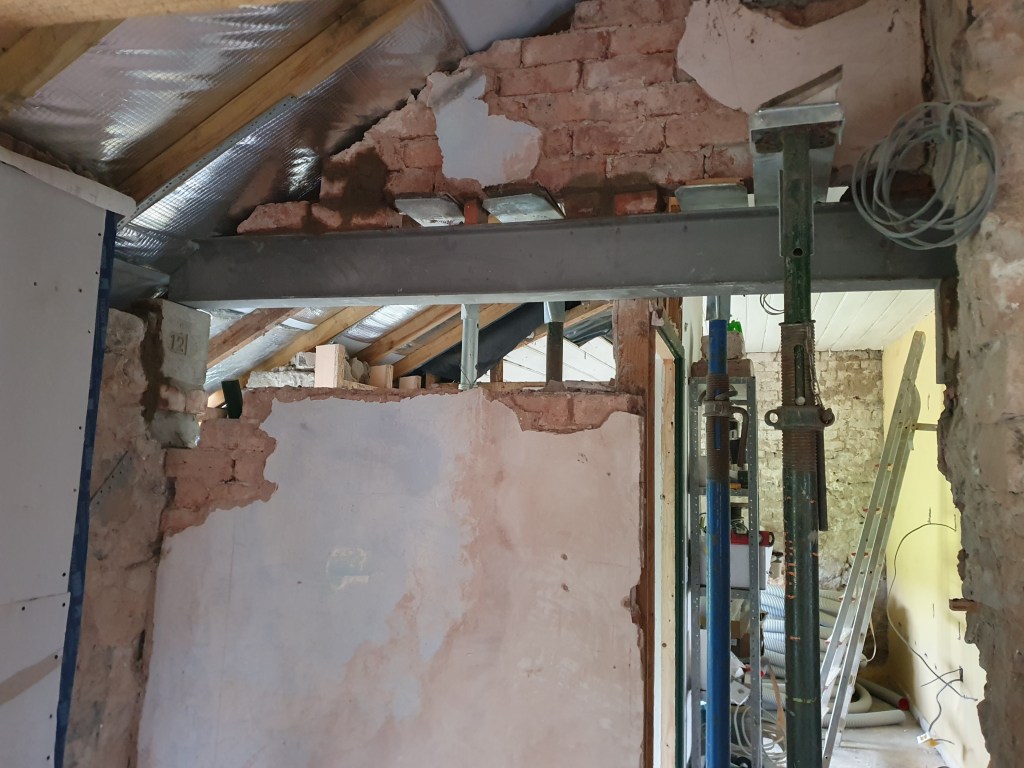
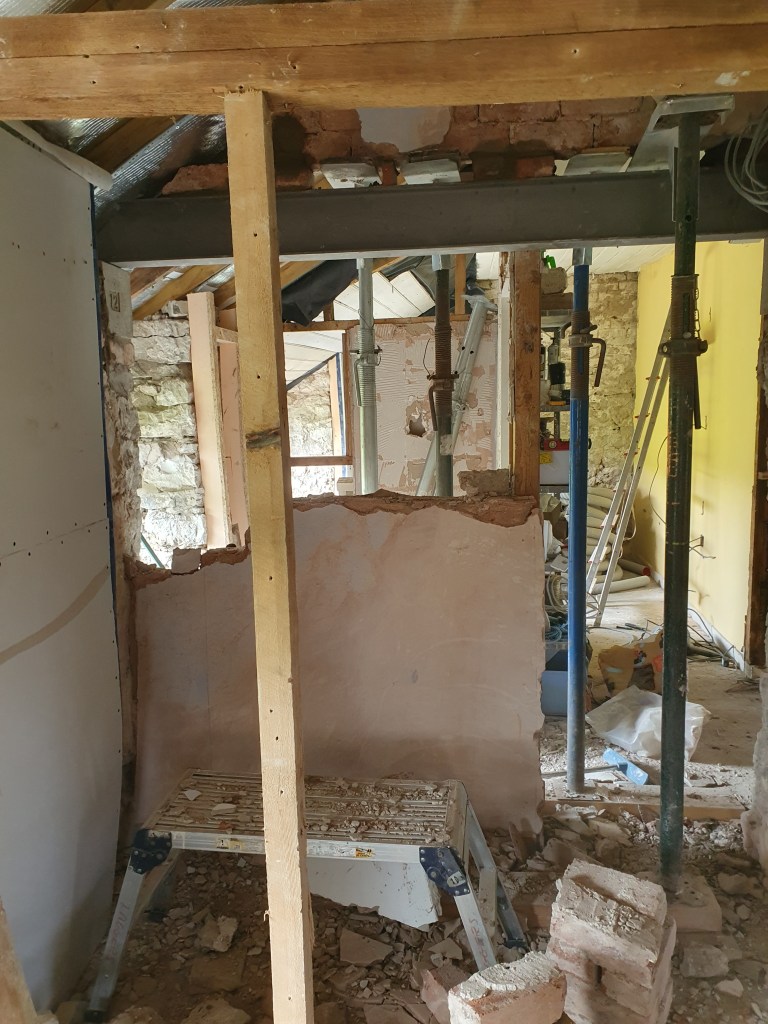
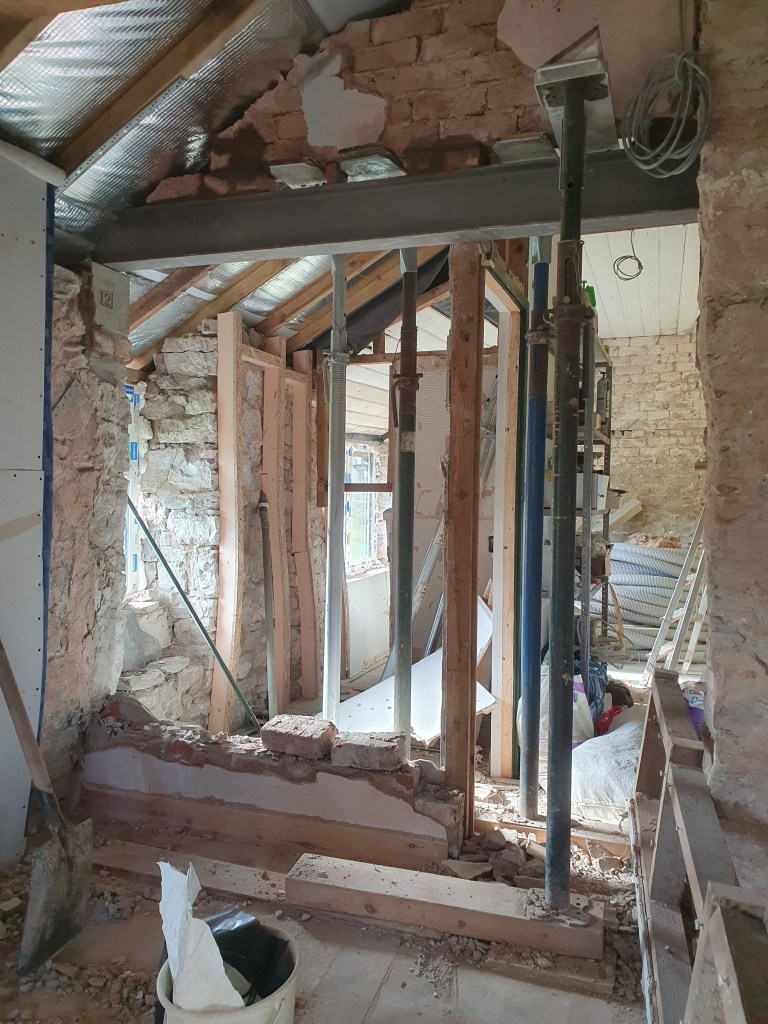
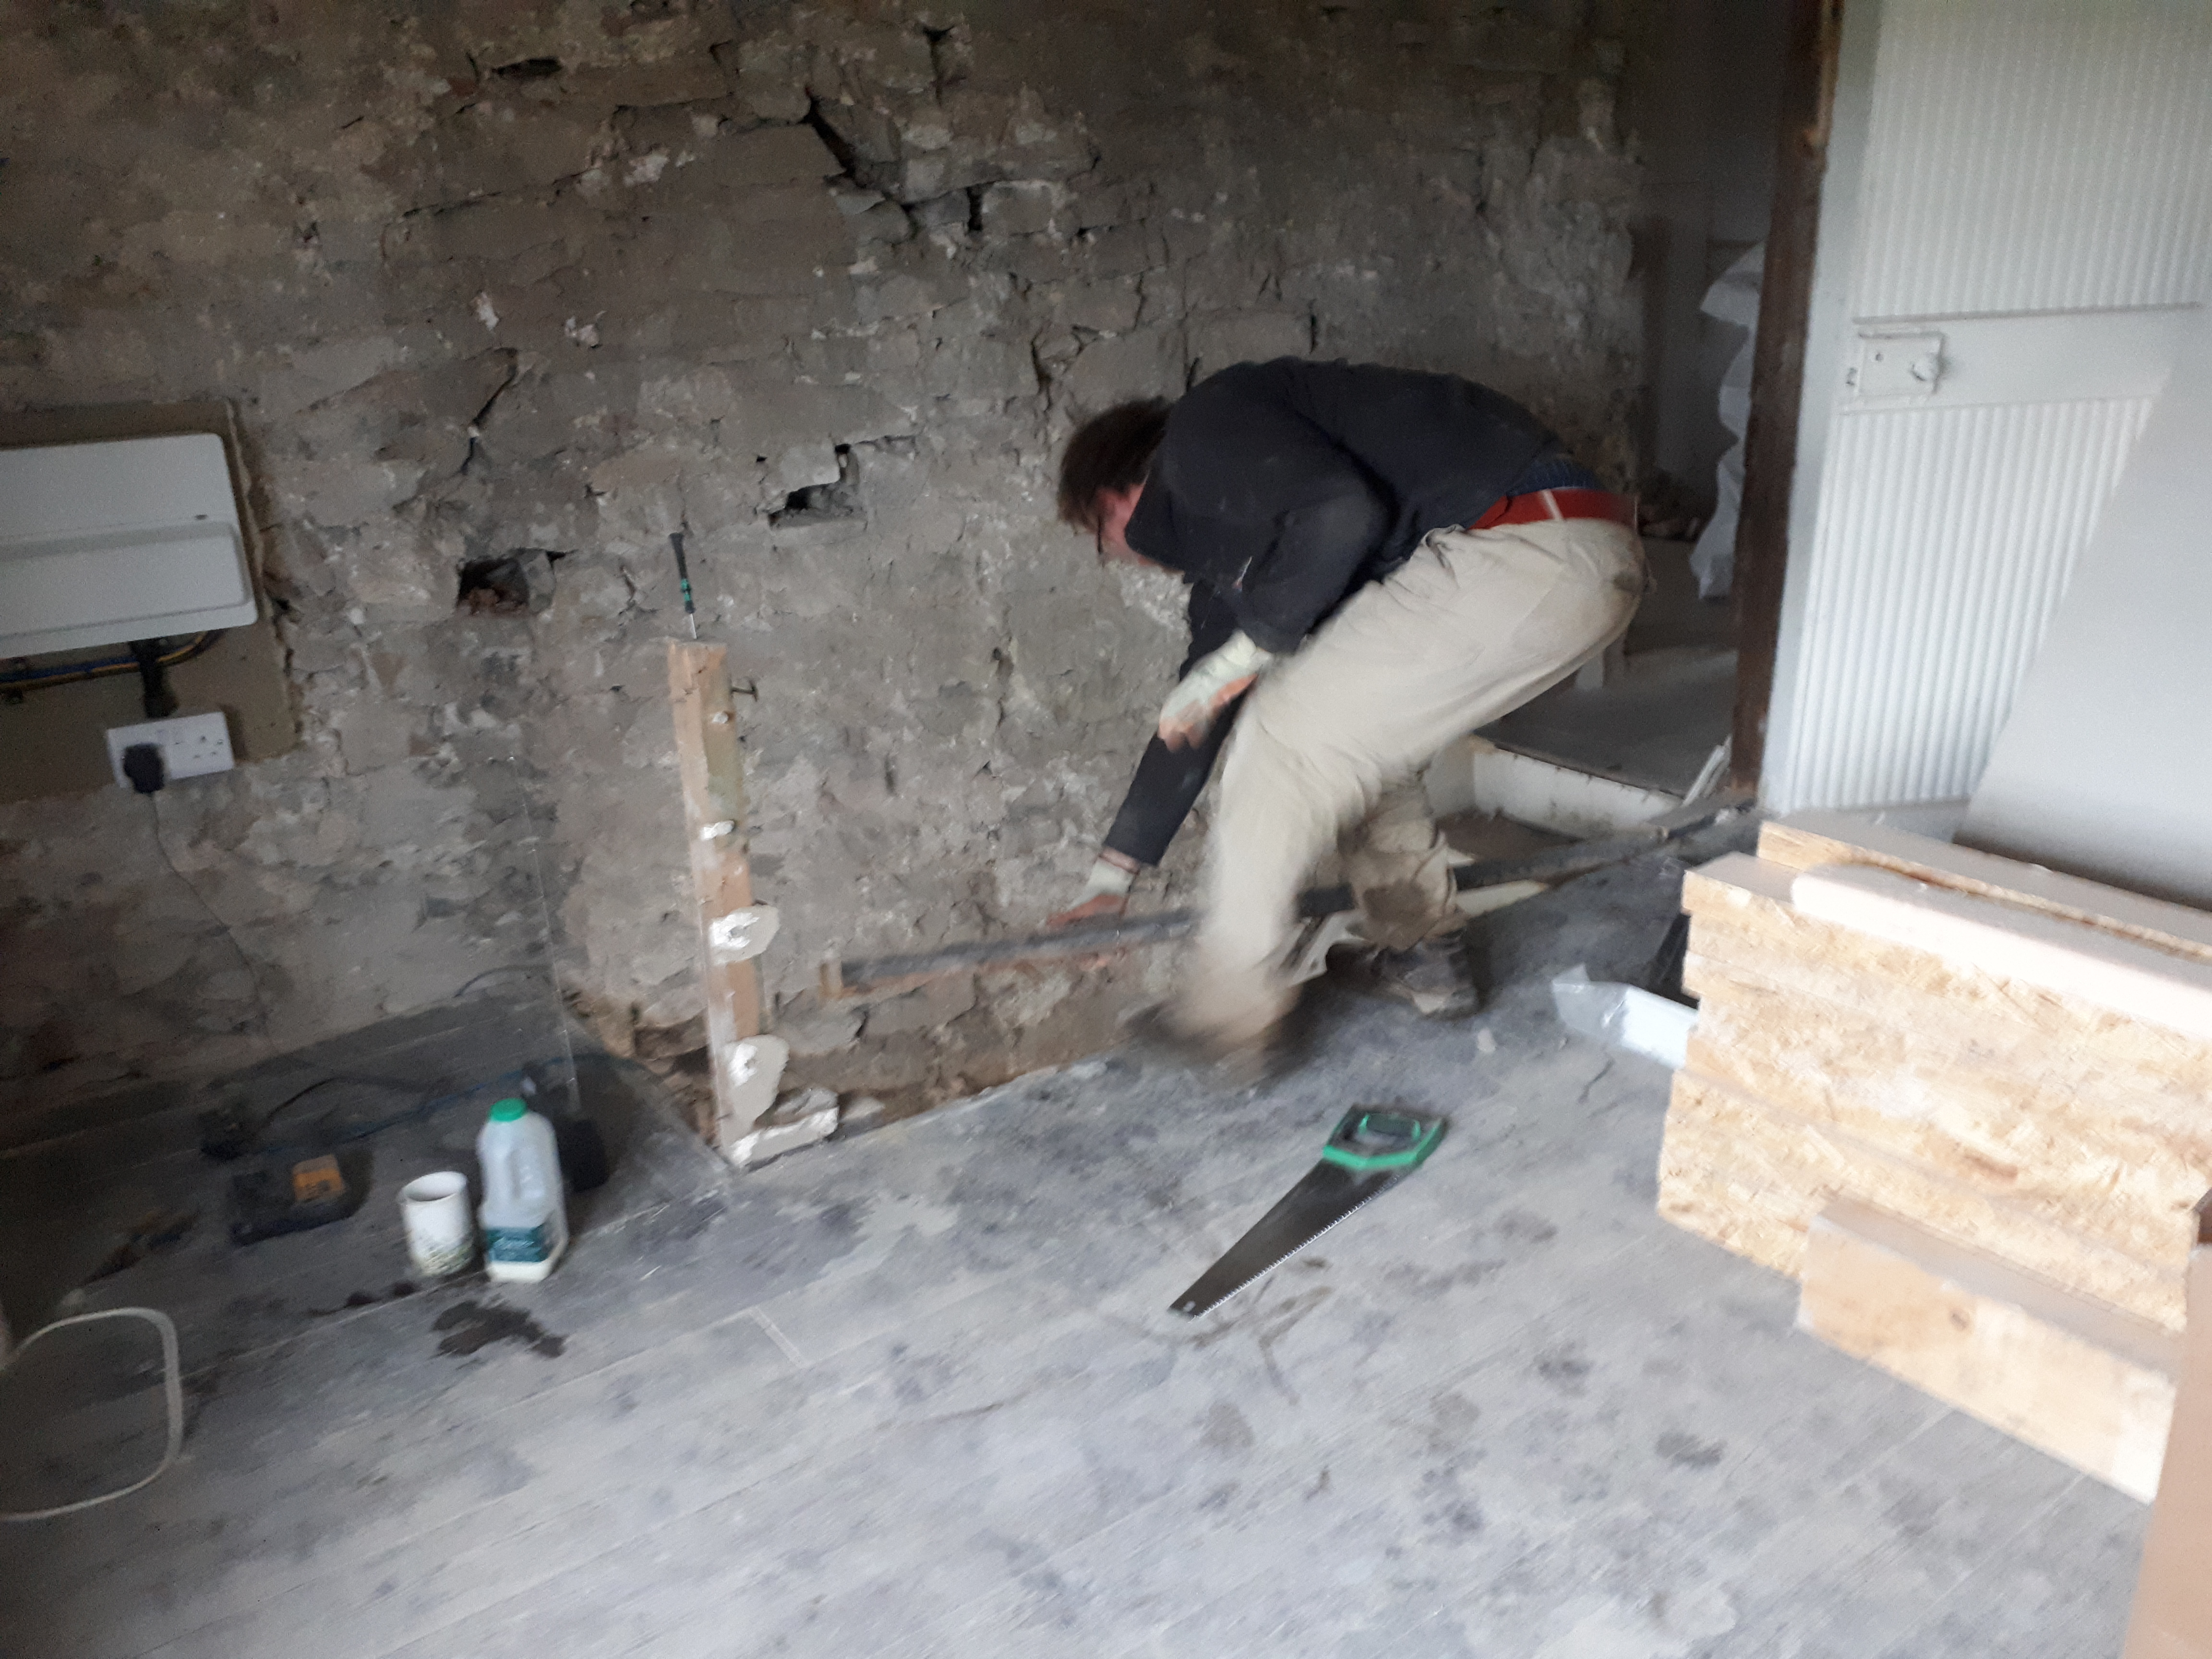
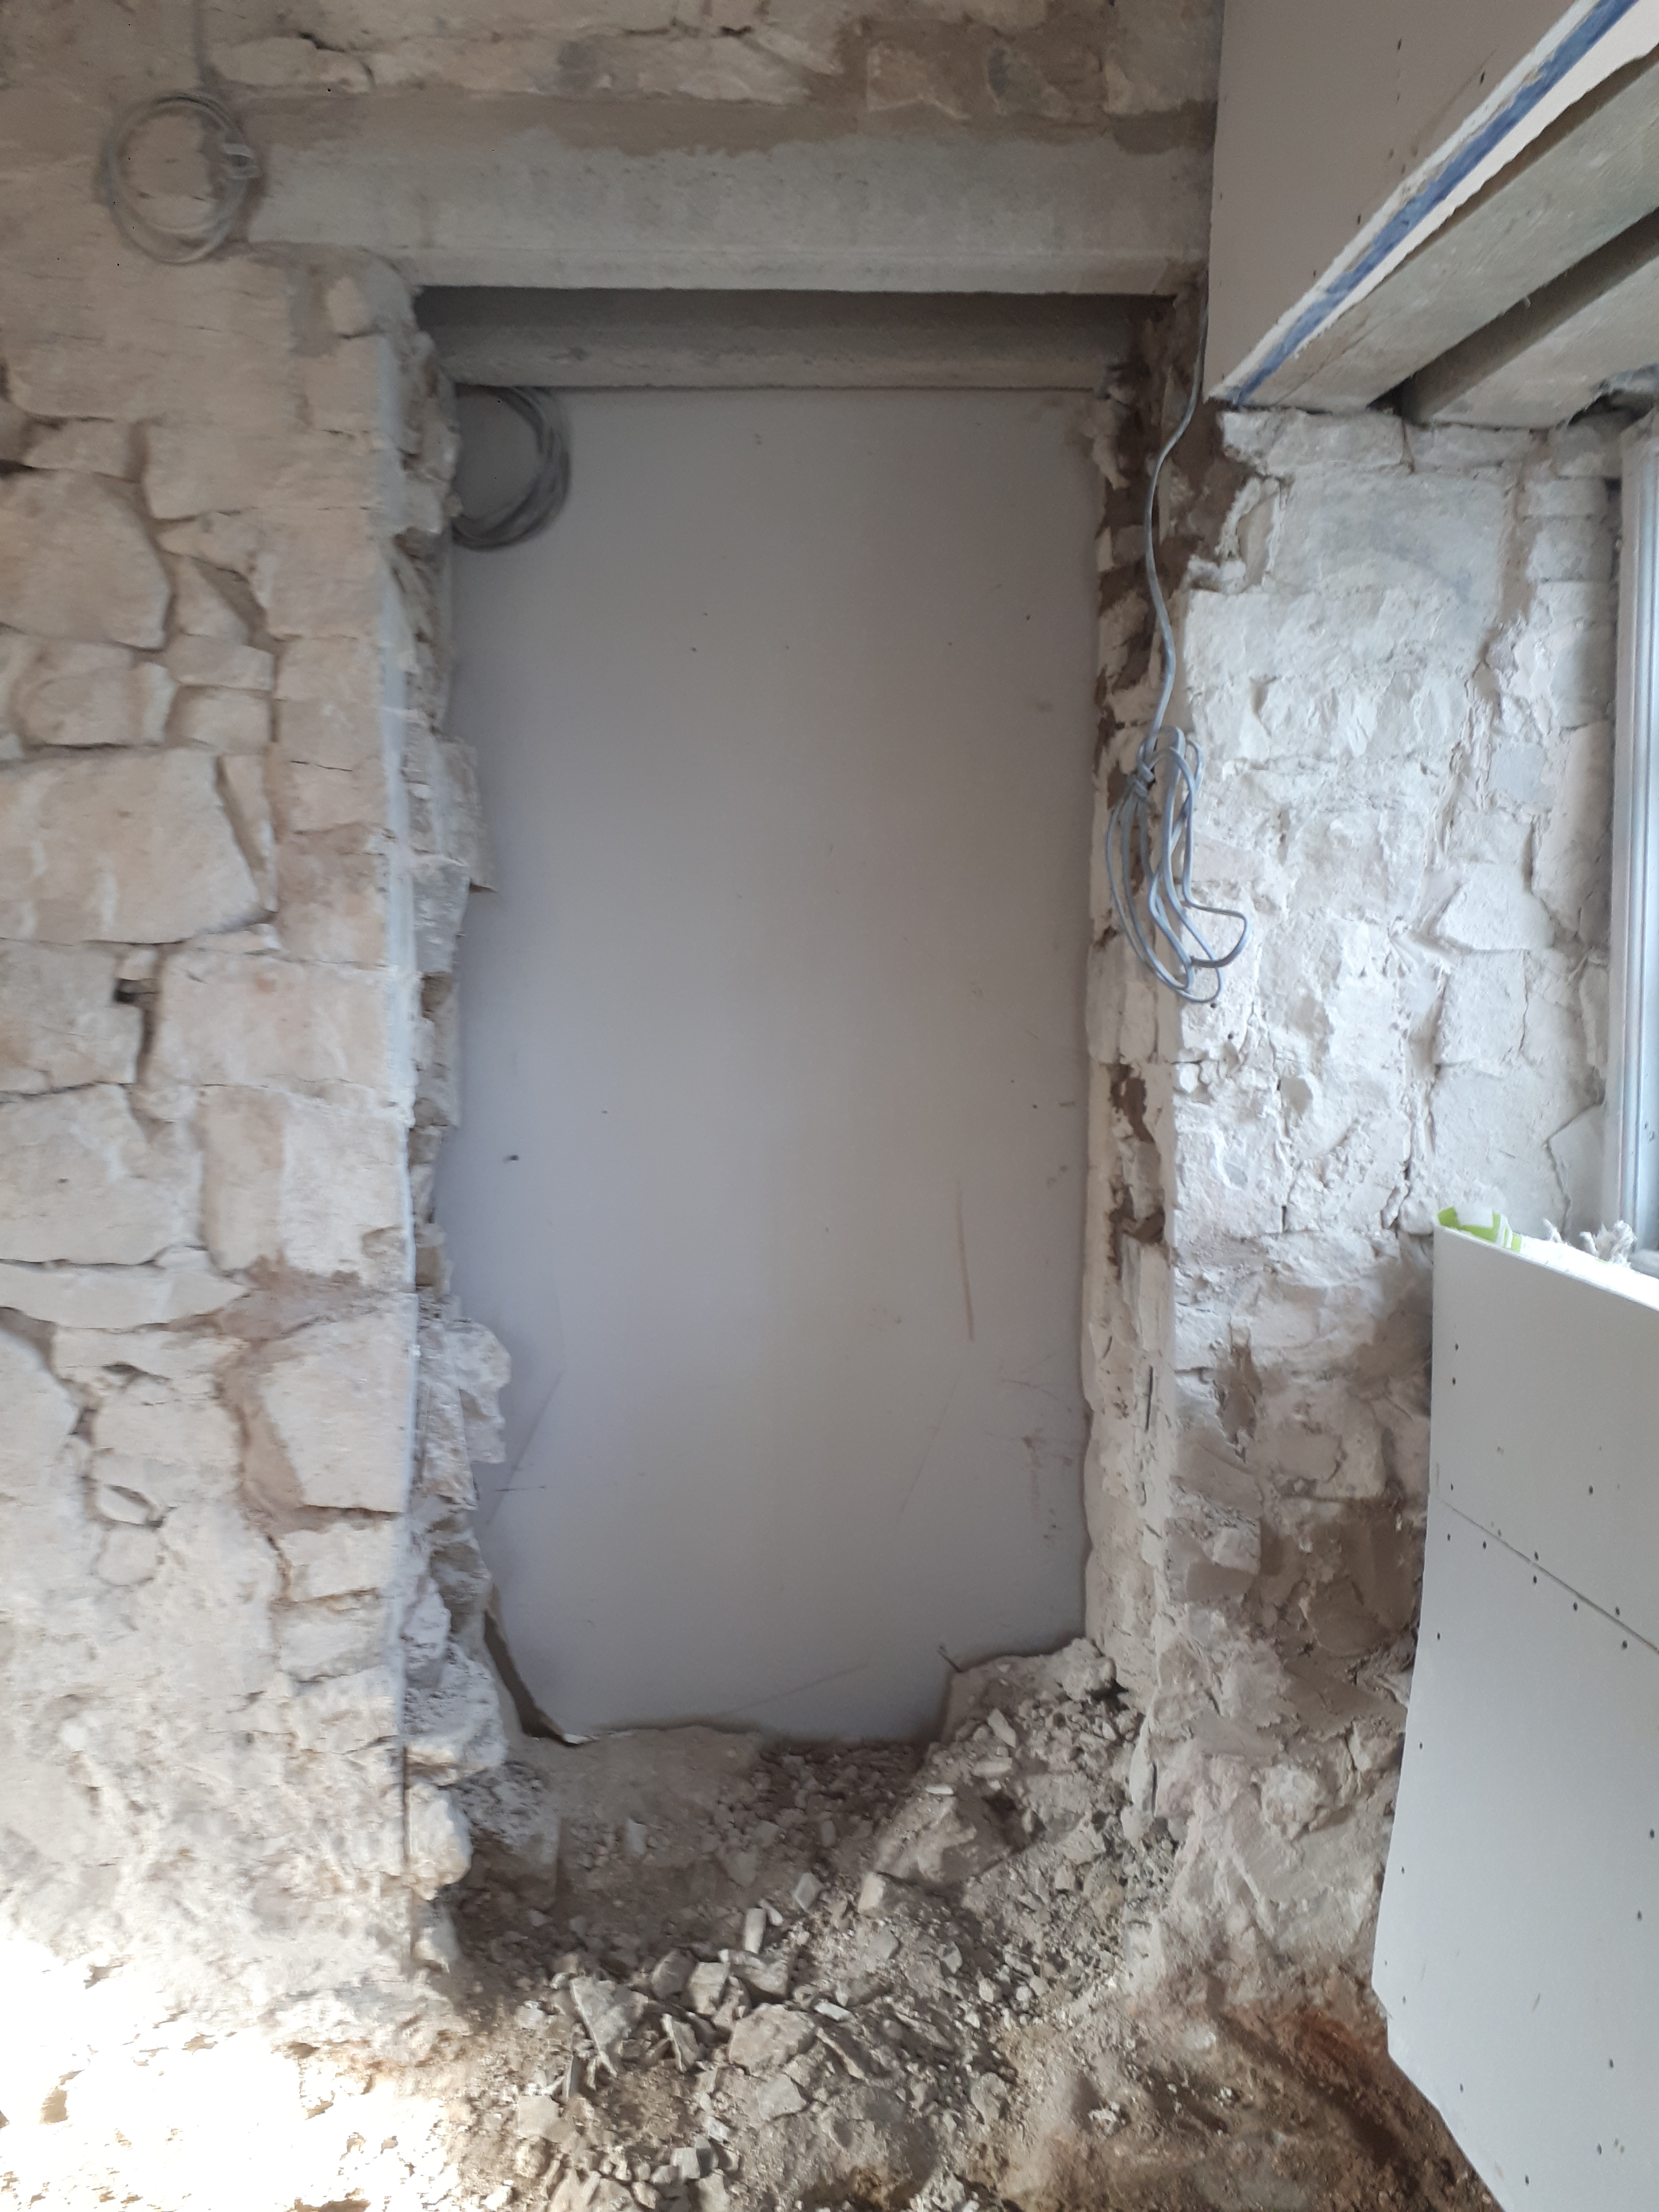
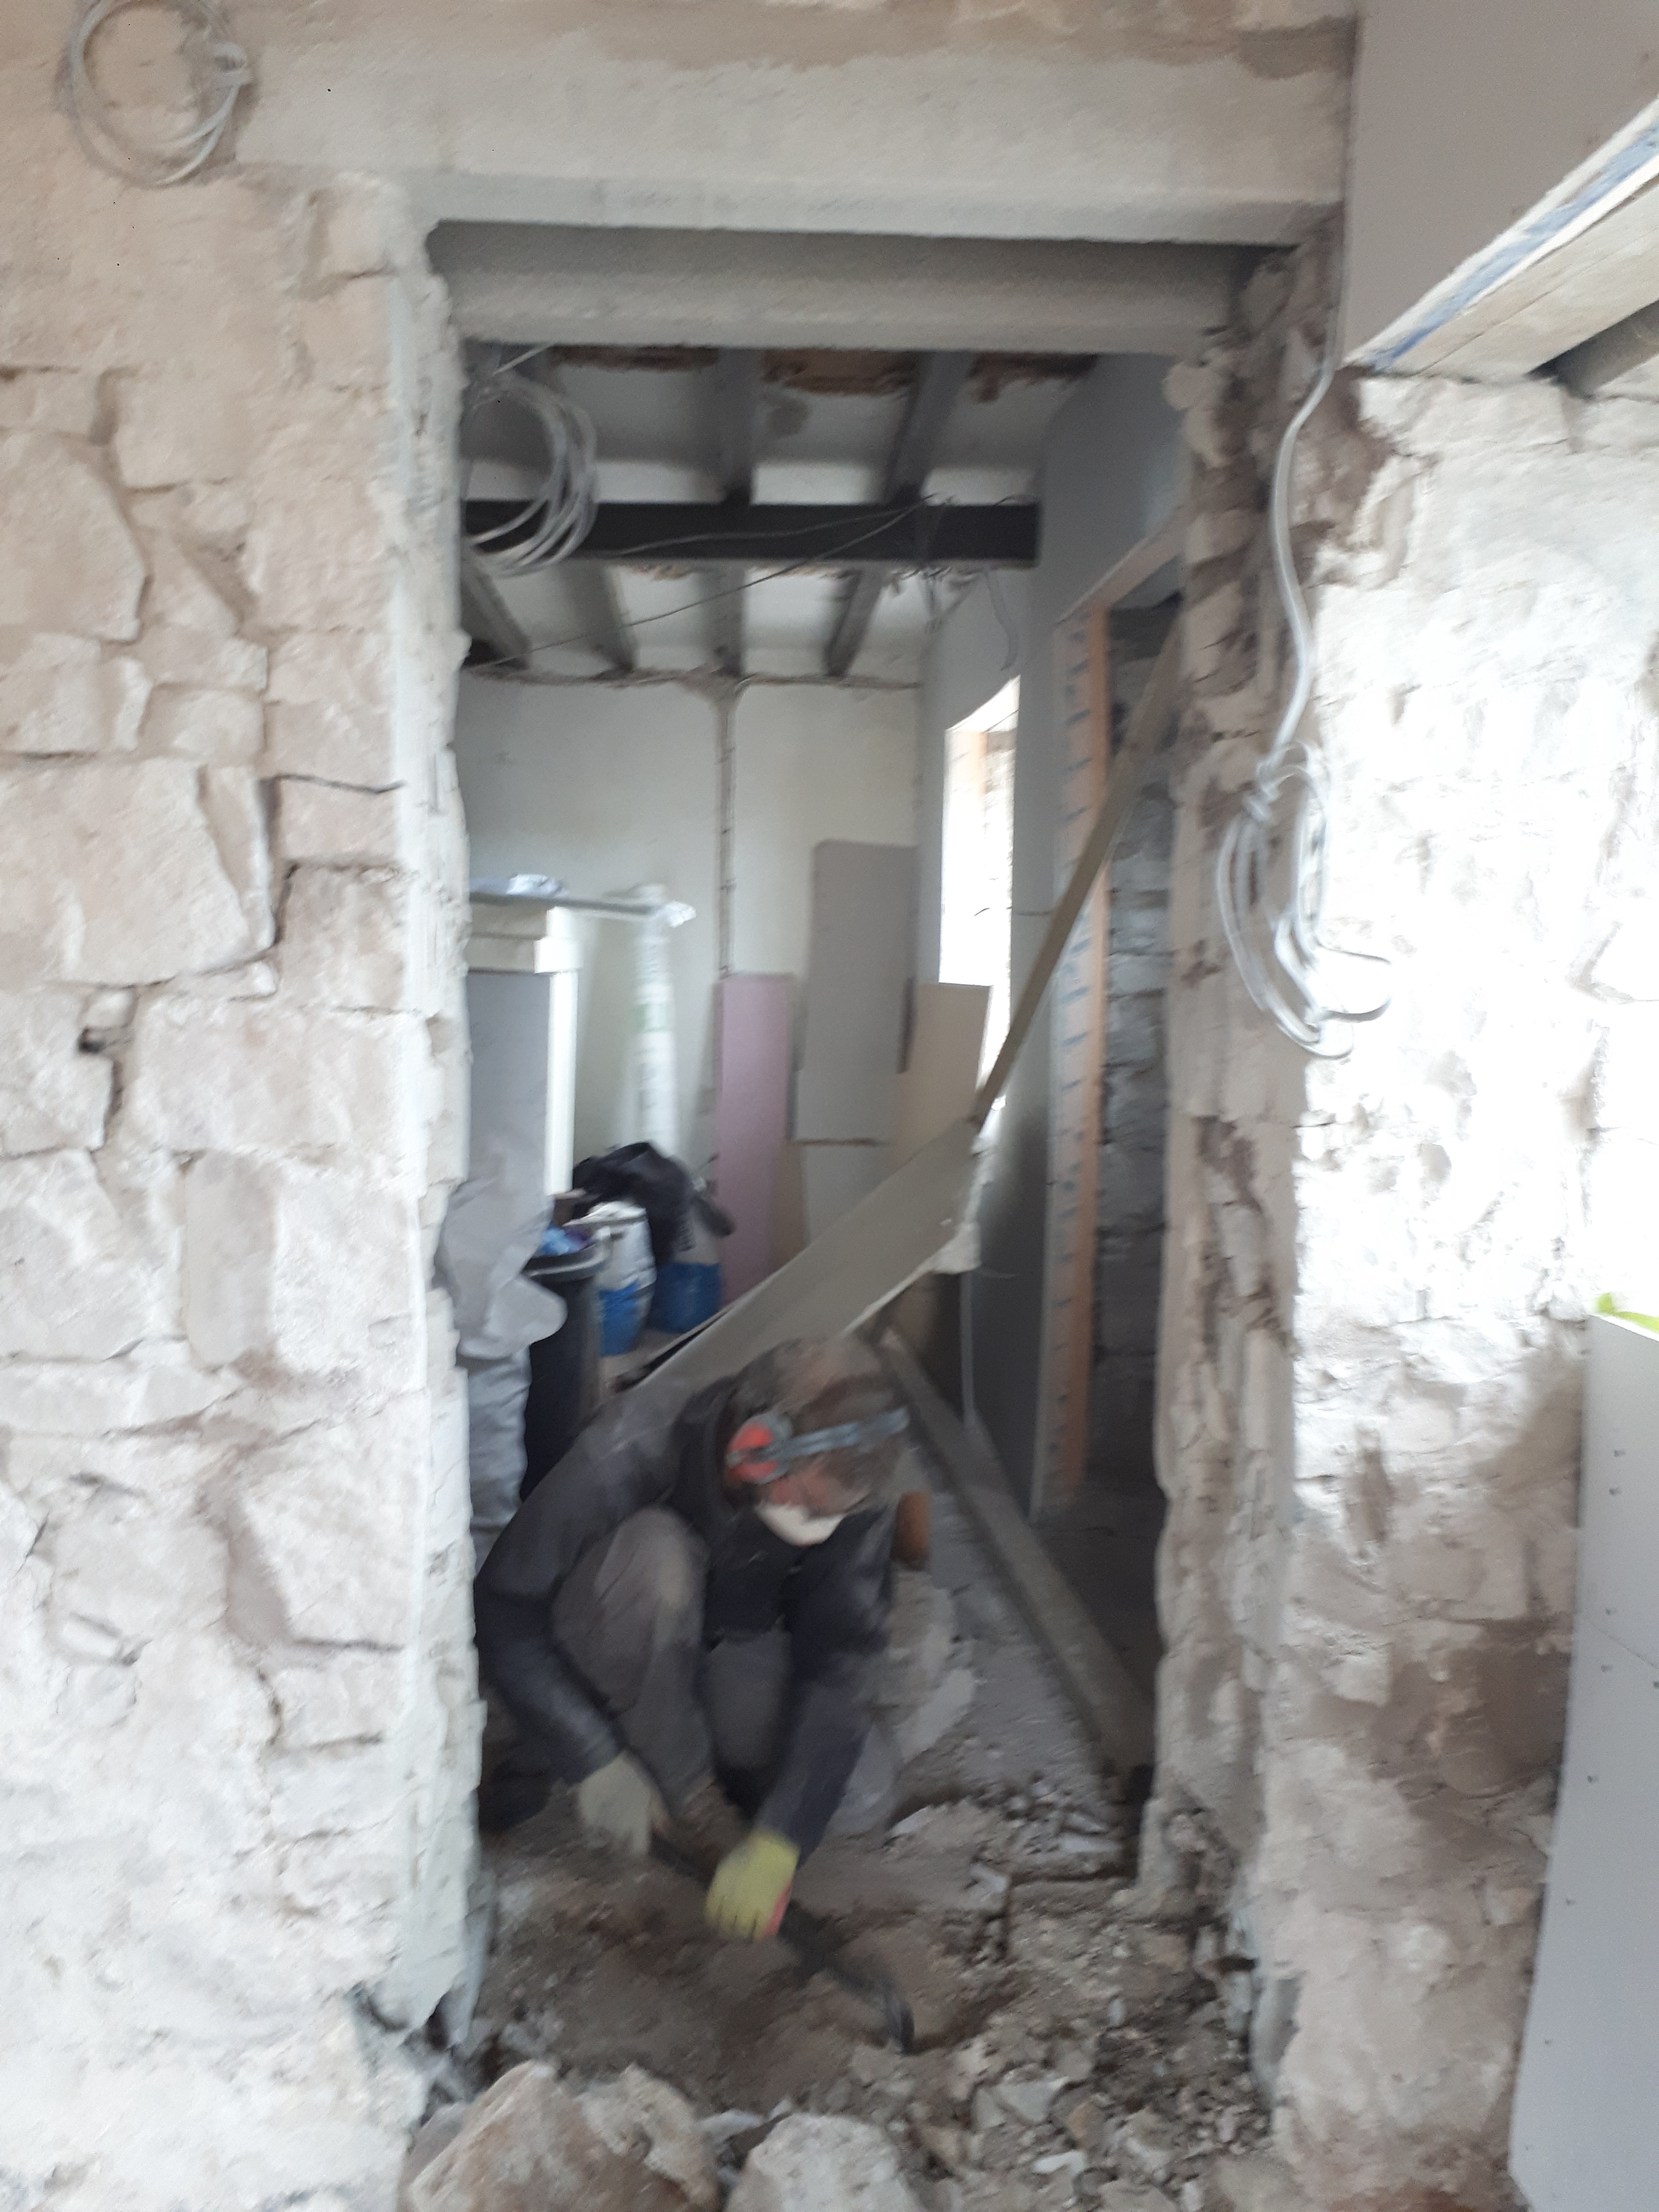
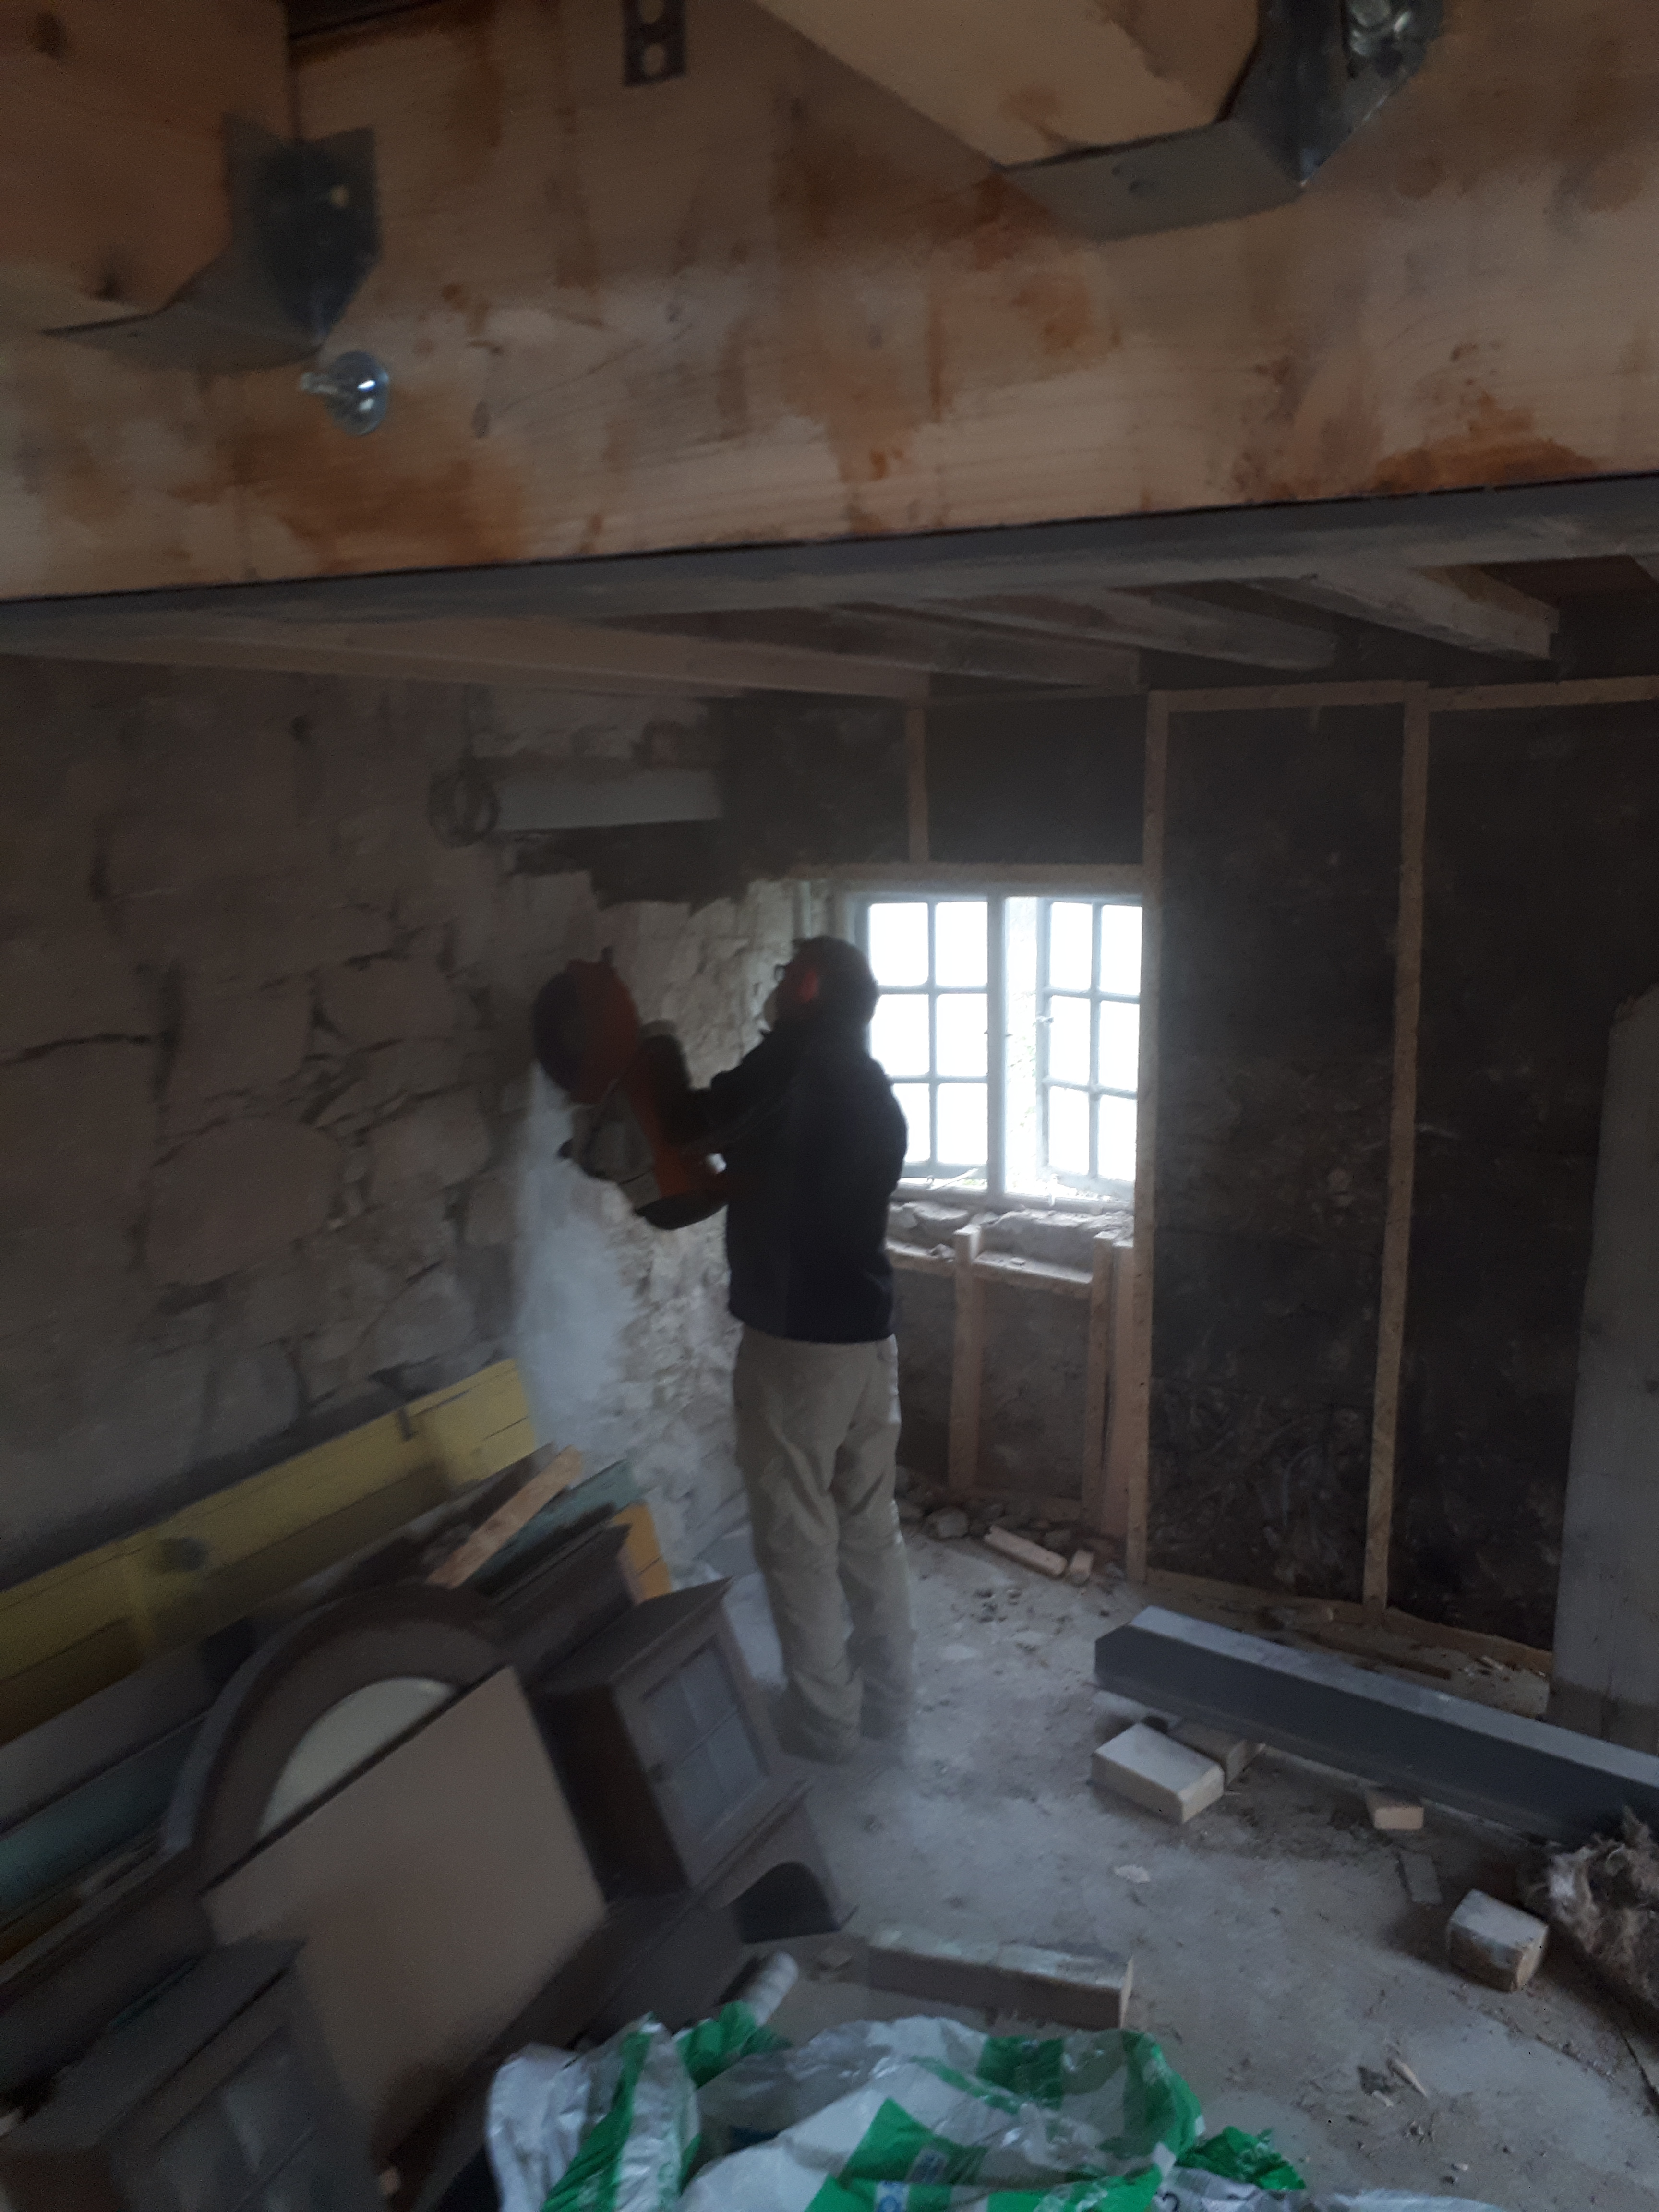
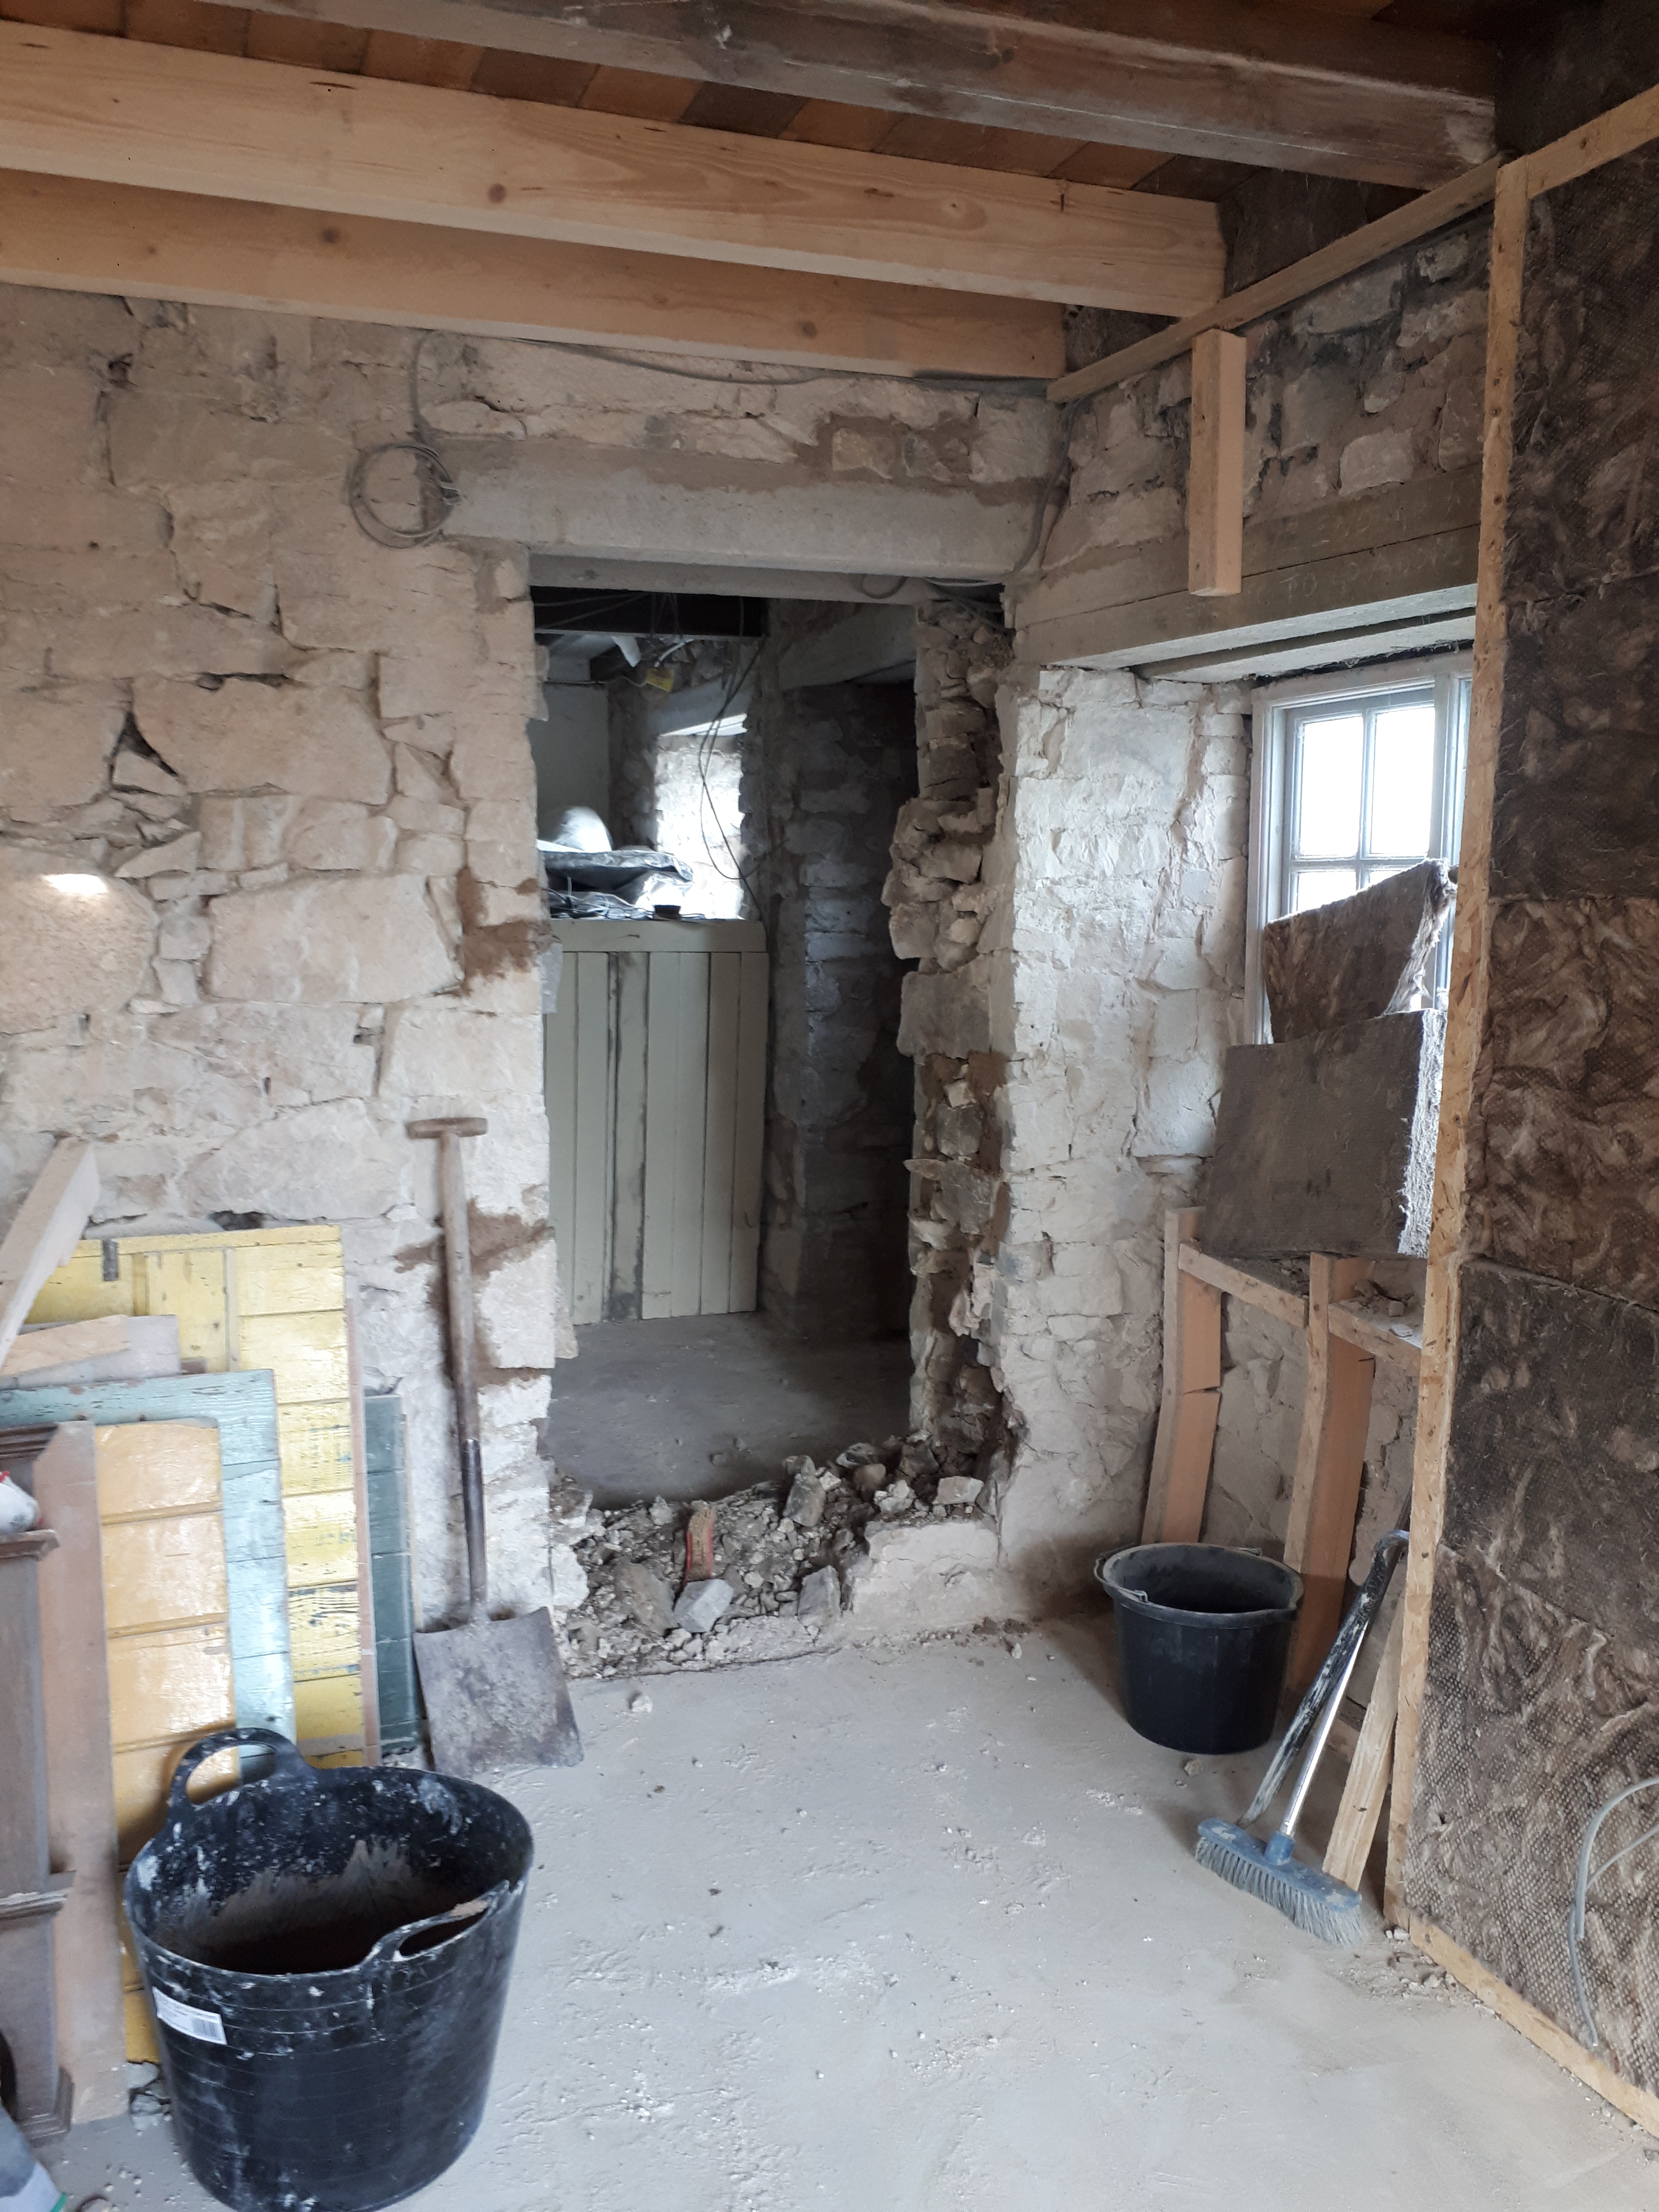
Chris in the meantime got to work setting the padstones in place for installing the final steel. We had decided the remove this small section of wall to join together the tiny bathroom with a pointless section of corridor that had no useful purpose. However, as the purlins sit on the wall we couldn’t simply take it down.


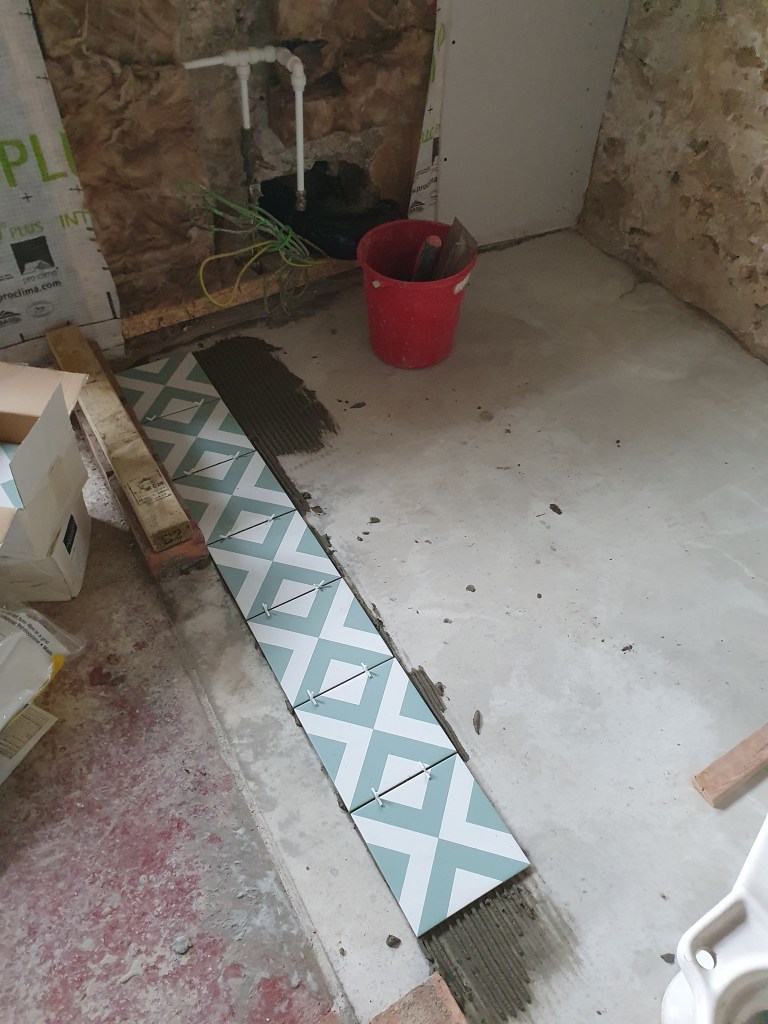
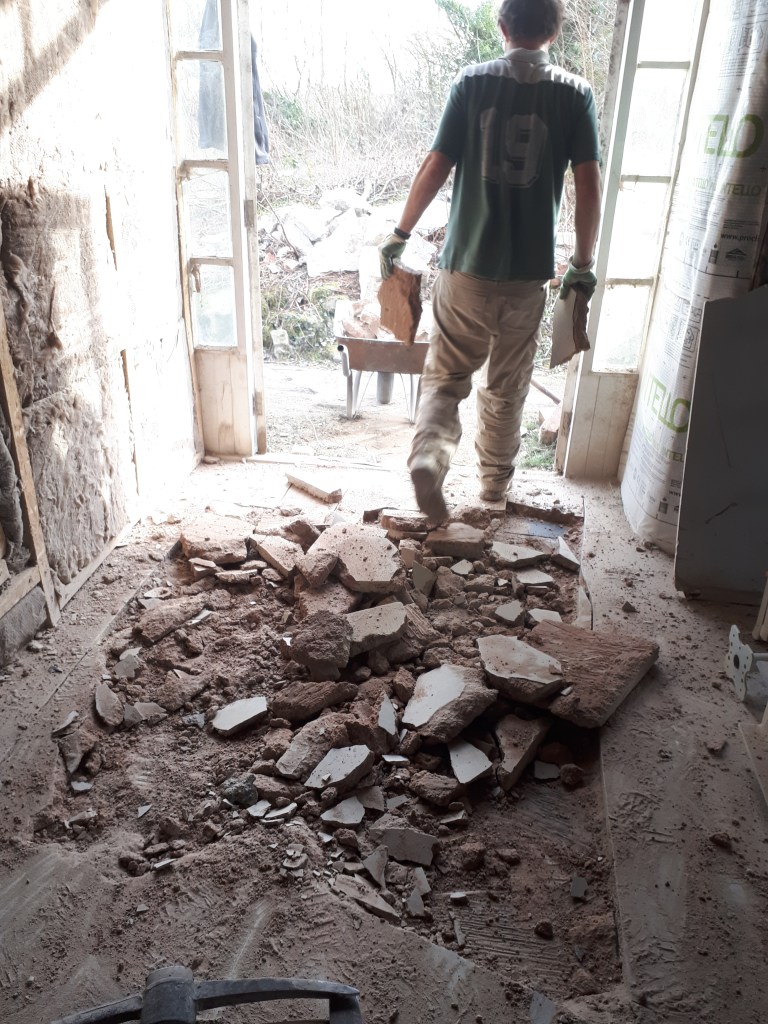
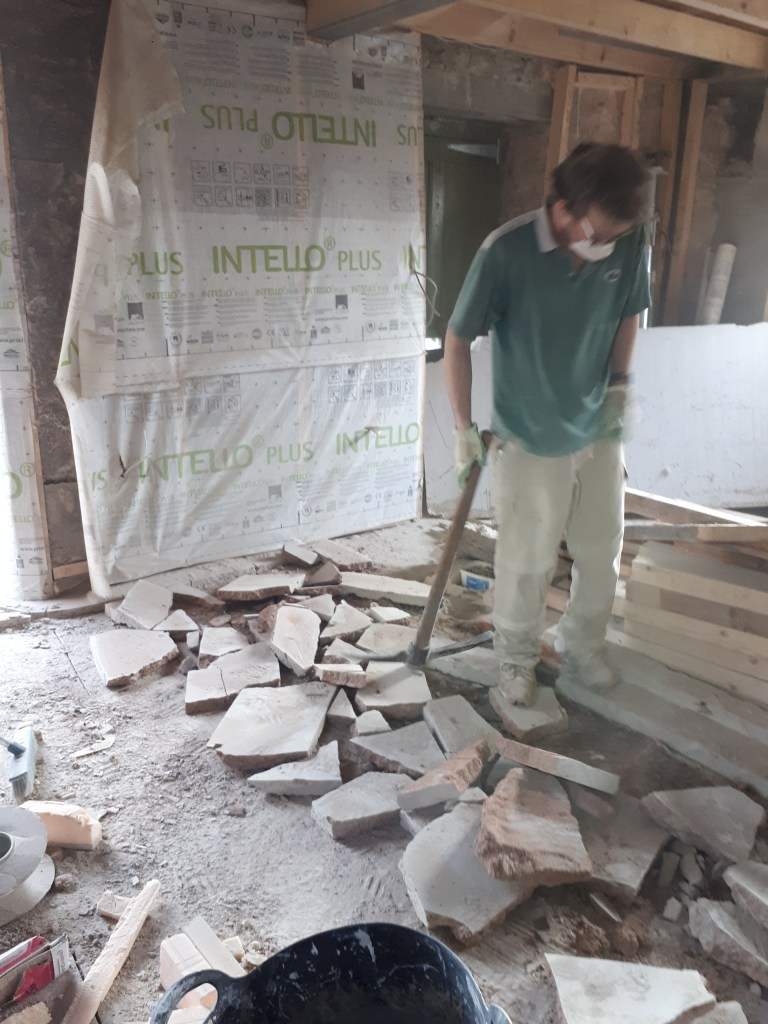
Downstairs I started laying our new floor tiles. It’s a little out of order decorating at this point, but it made sense to tile before installing the sink and toilet, and we needed these in so we could move the mortgage. We’d expected not to have enough tiles for the full floor, as the person selling them had said there was only enough for 2.2m2 and the floor was 2.8m2. However, the seller had actually given us more tiles than expected, making it exactly enough for the full floor.


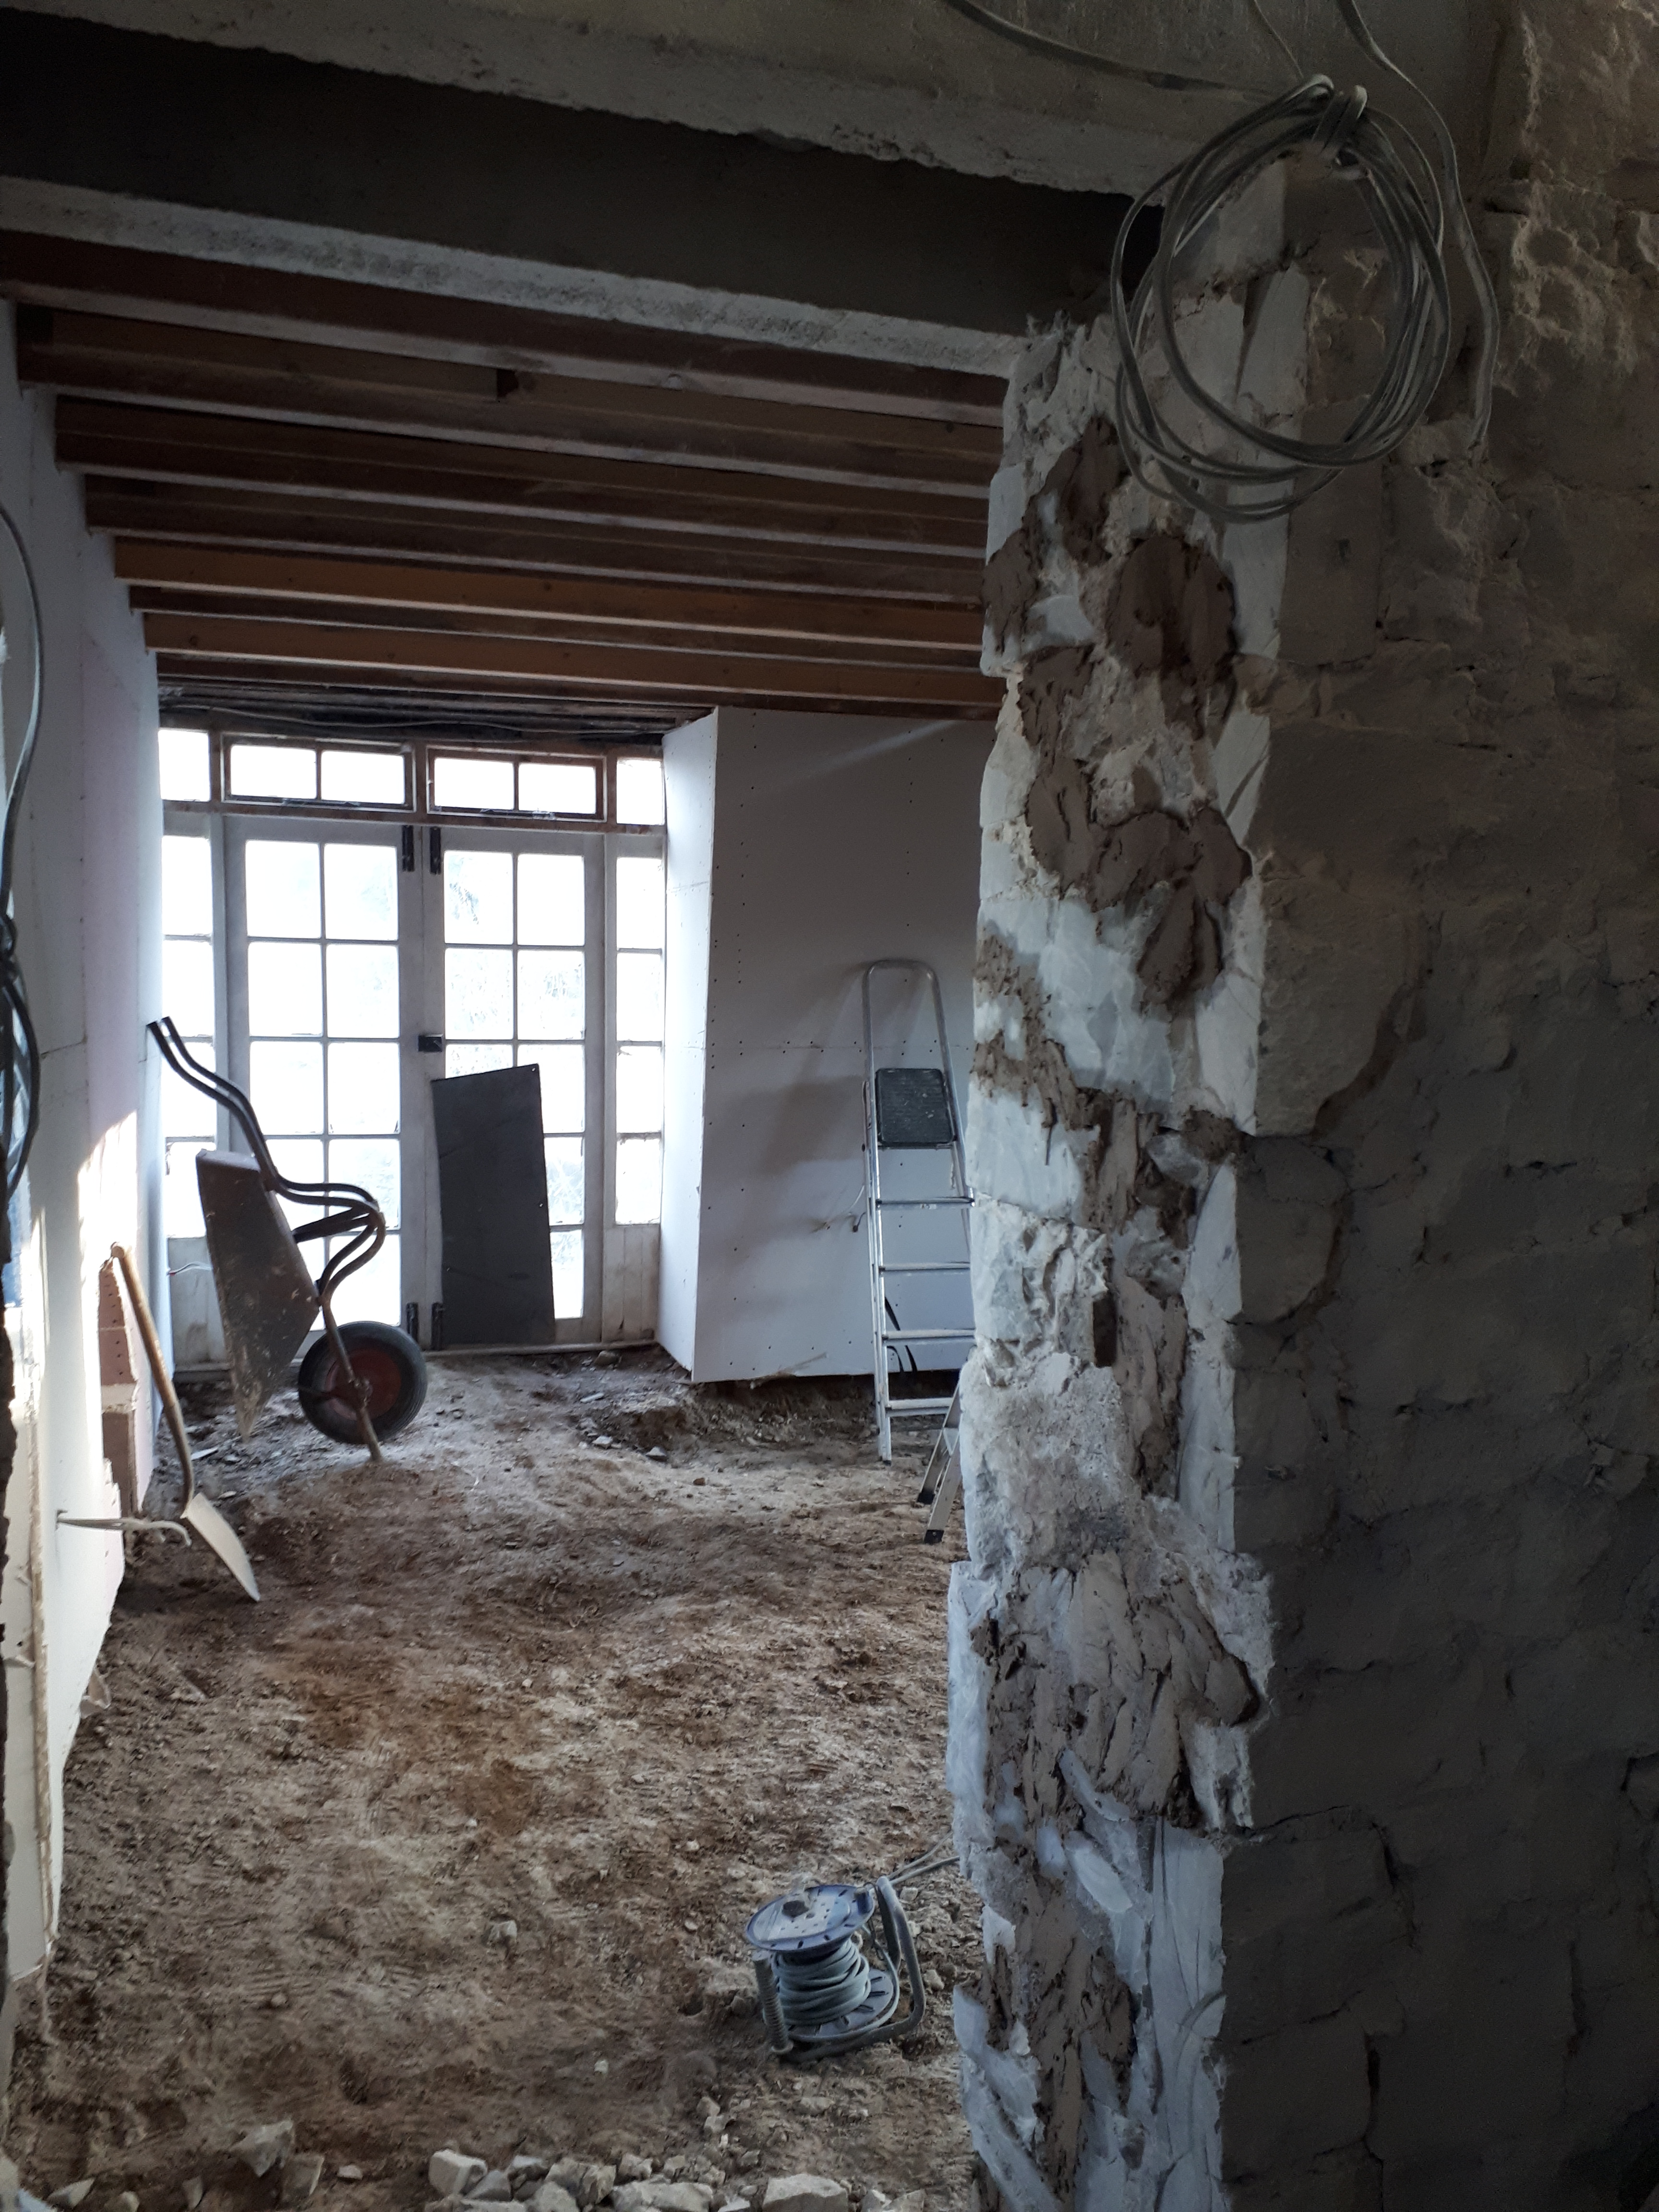
The padstones having set, we lifted the steel into place, and Chris began to fill in the gaps, and dismantle the wall. With the space opened up we were both surprised how big the room looked. Eventually this will be a shower room. It feels extravagant for us to have both a bathroom and a shower room for just the two of us, but we’re planning ahead for when the house will be fuller and busier.

Having finished his work Chris started on some tidying. Despite having cleaned and tidied the whole house only a little while ago it’s already a mess again. It’s difficult to keep any sense of order when things are changing so quickly.
With the wall down we’re finally ready to have the plasterers back, which will be exciting to see the rooms look like rooms again for the first time in months. Maybe soon the house might even be liveable.
-
Part-timer
This Saturday I had my monthly volunteer day, meaning Chris had to head to the house alone. Luckily, Jay had once again volunteered some free labour.

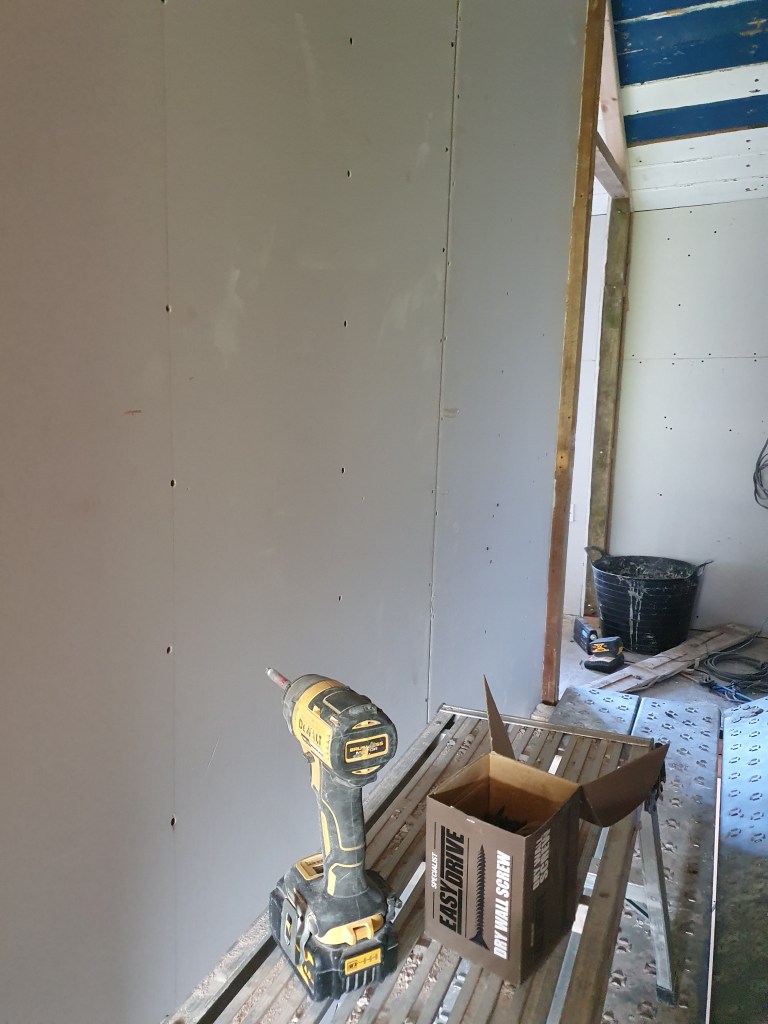
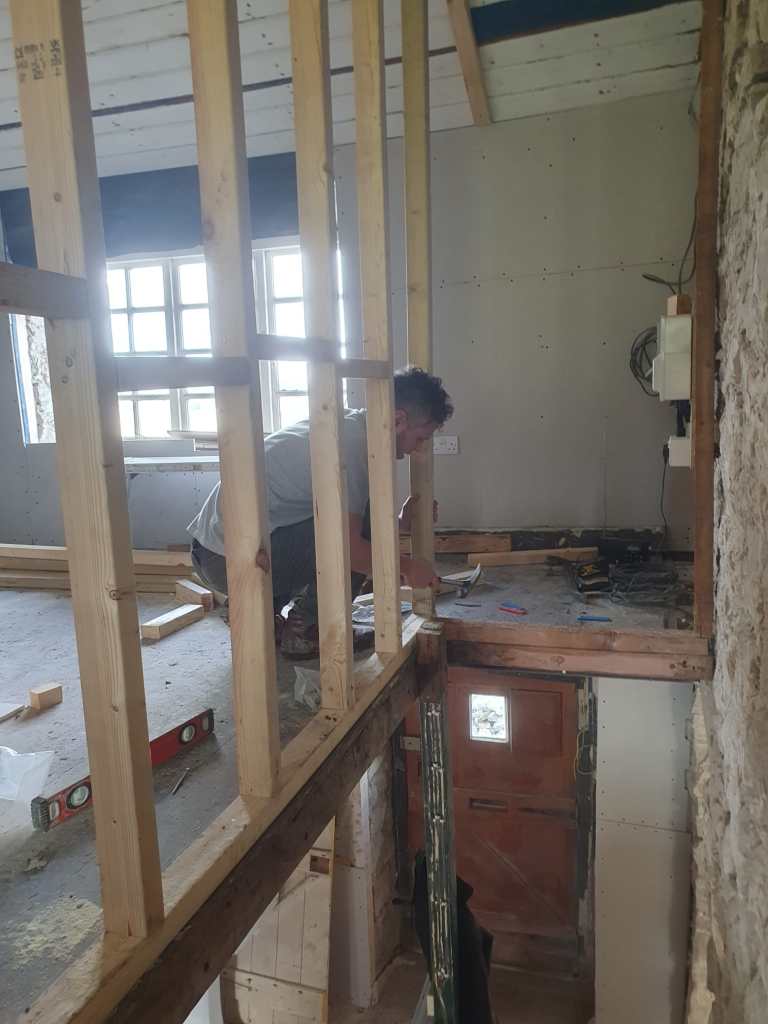
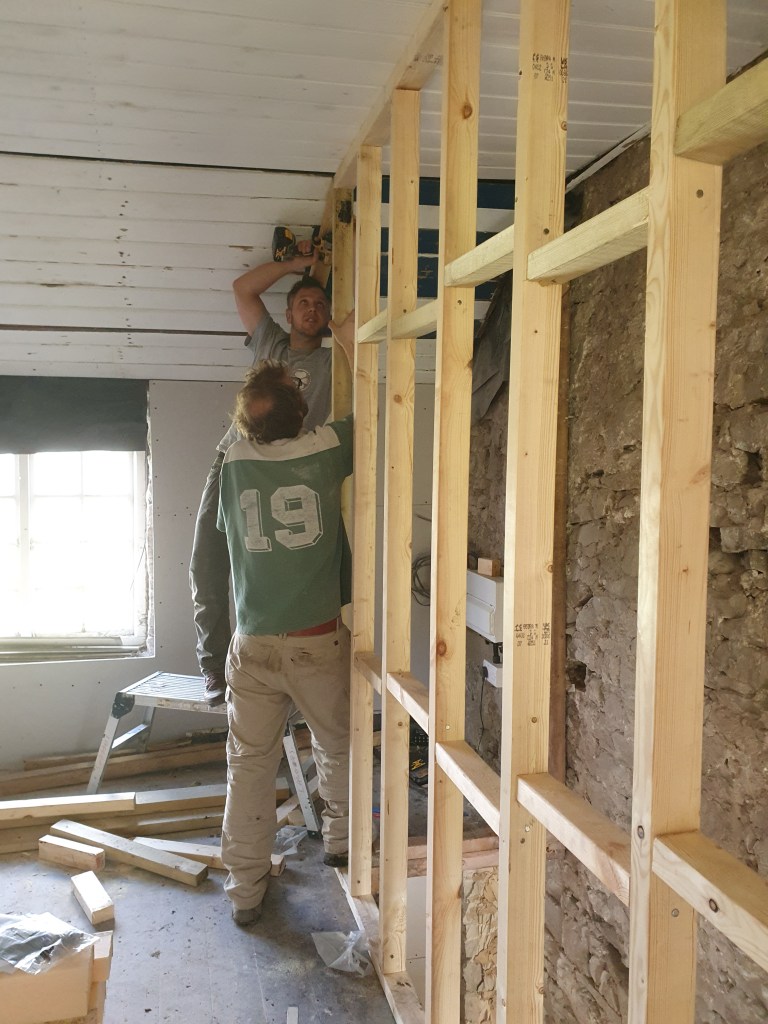
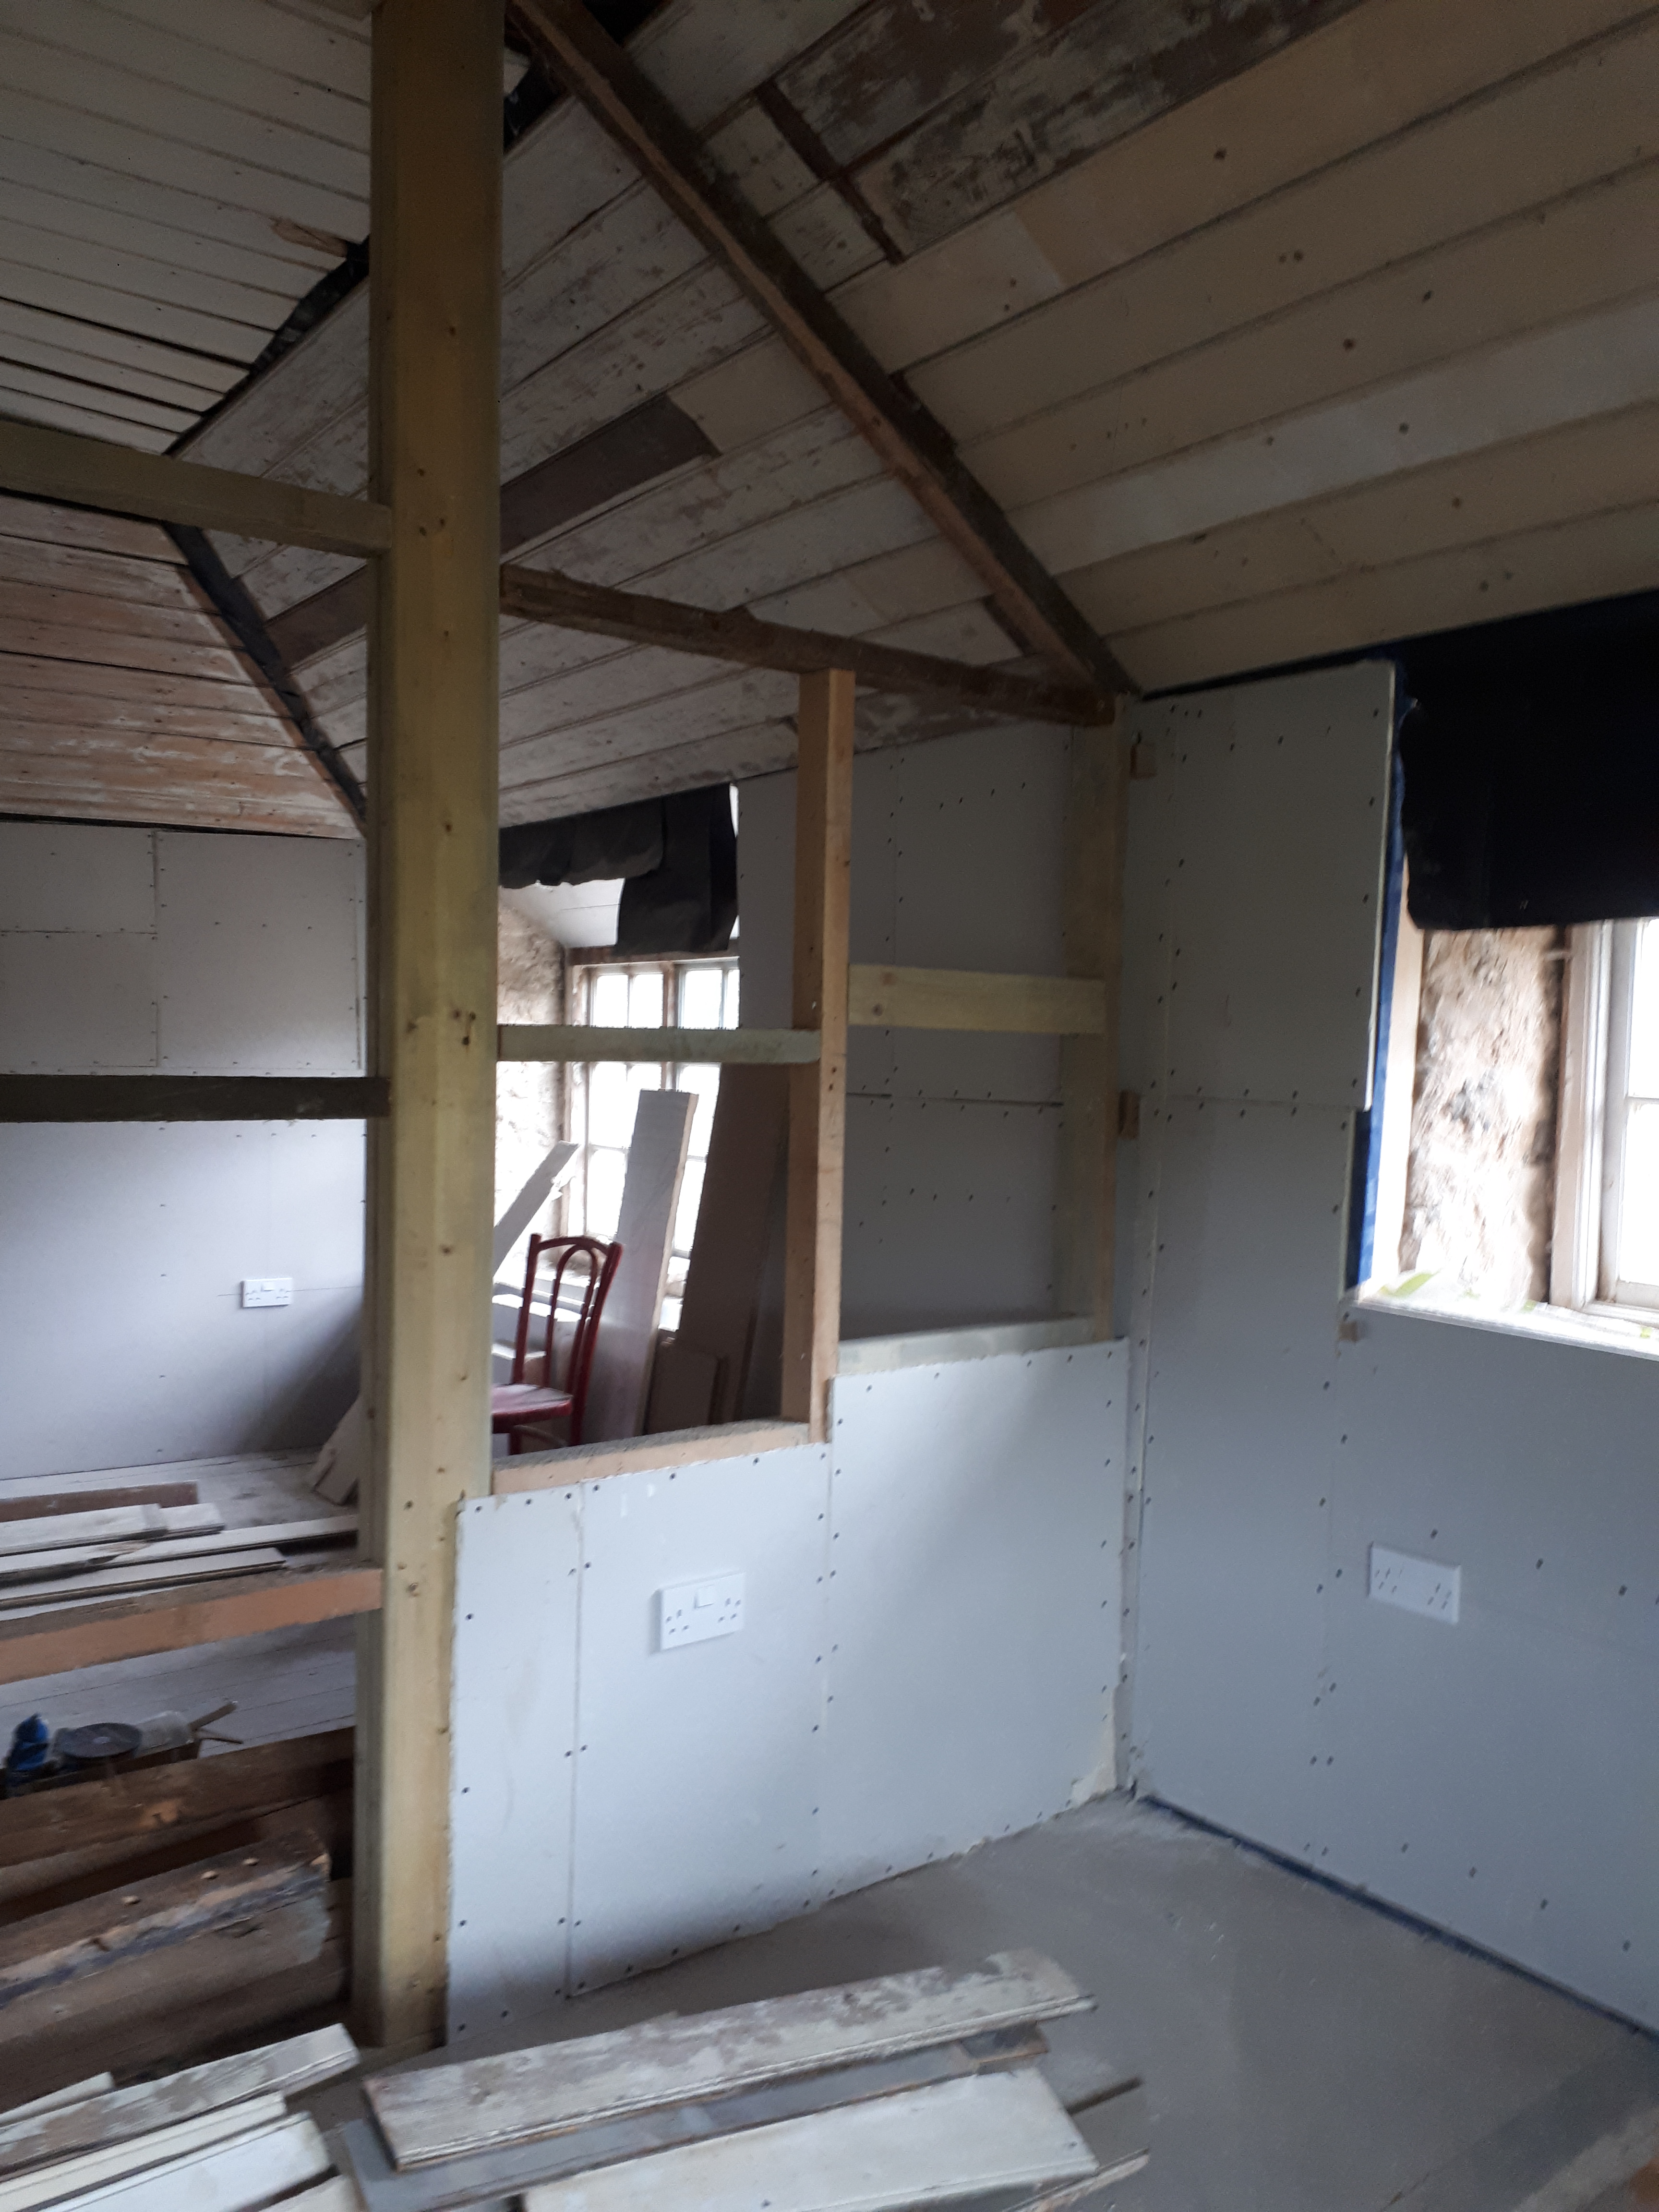
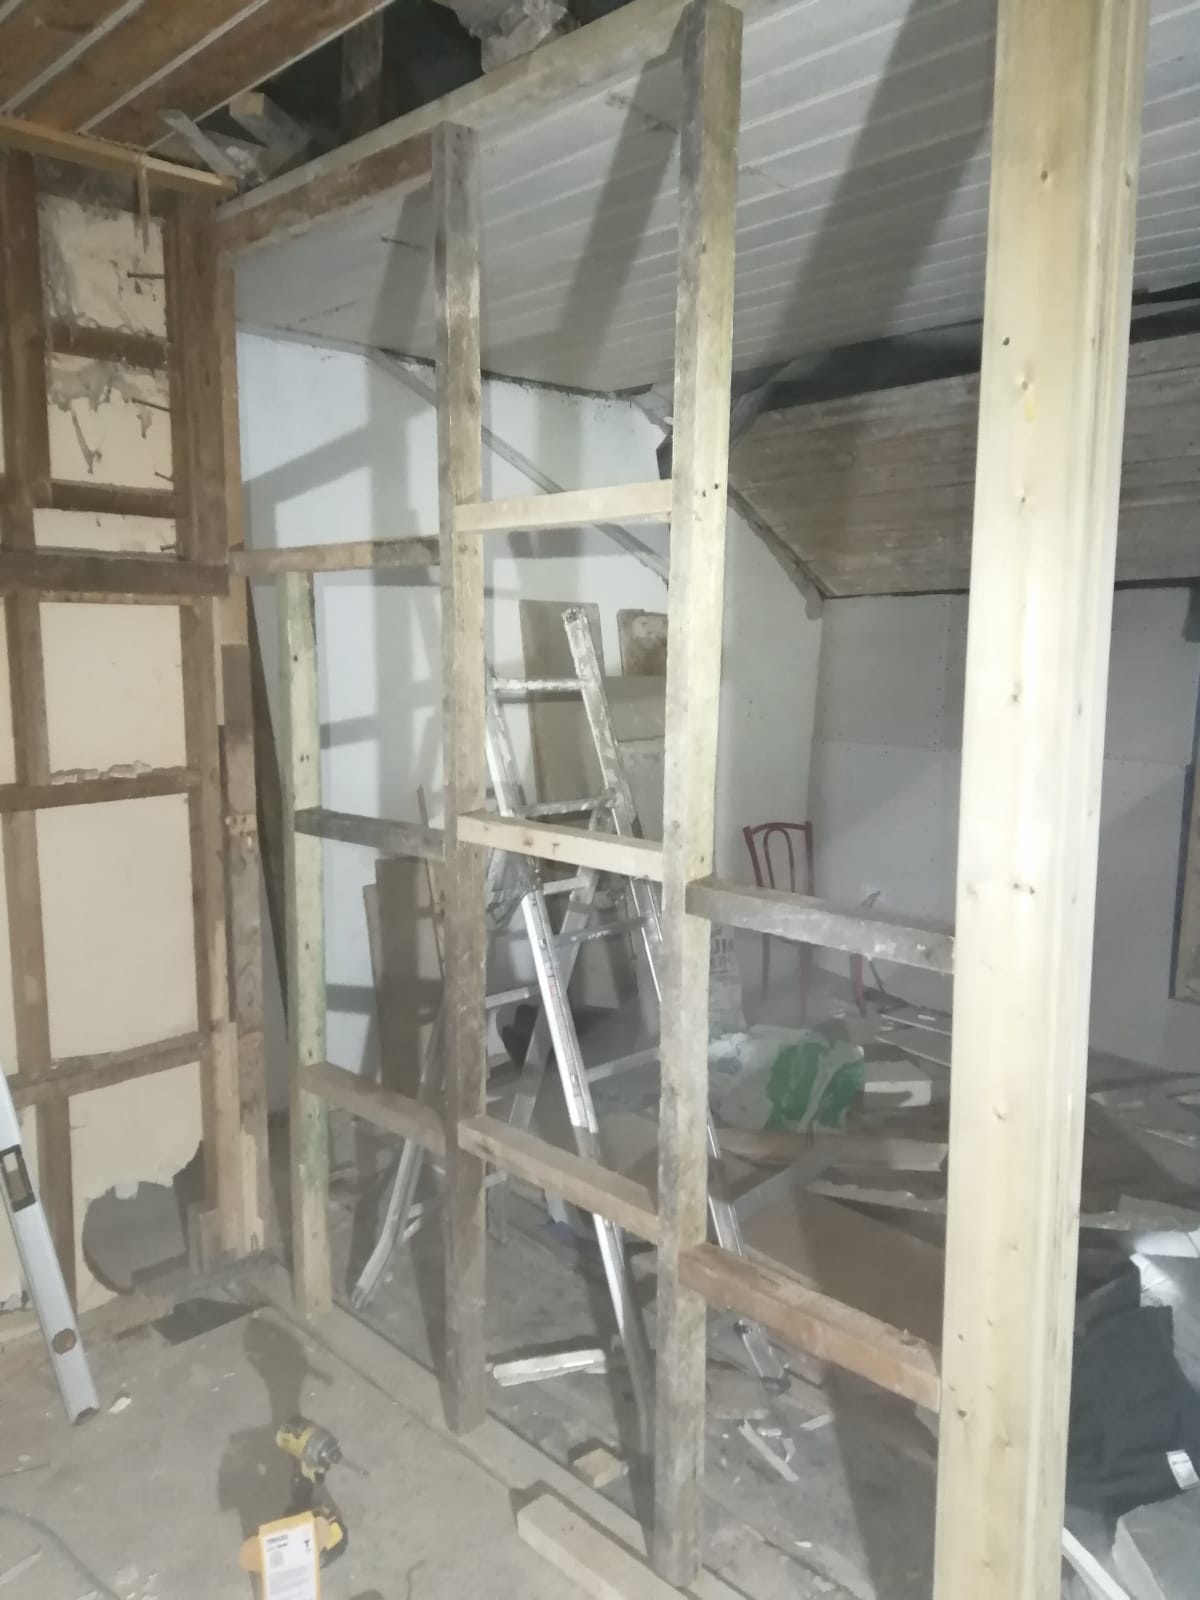
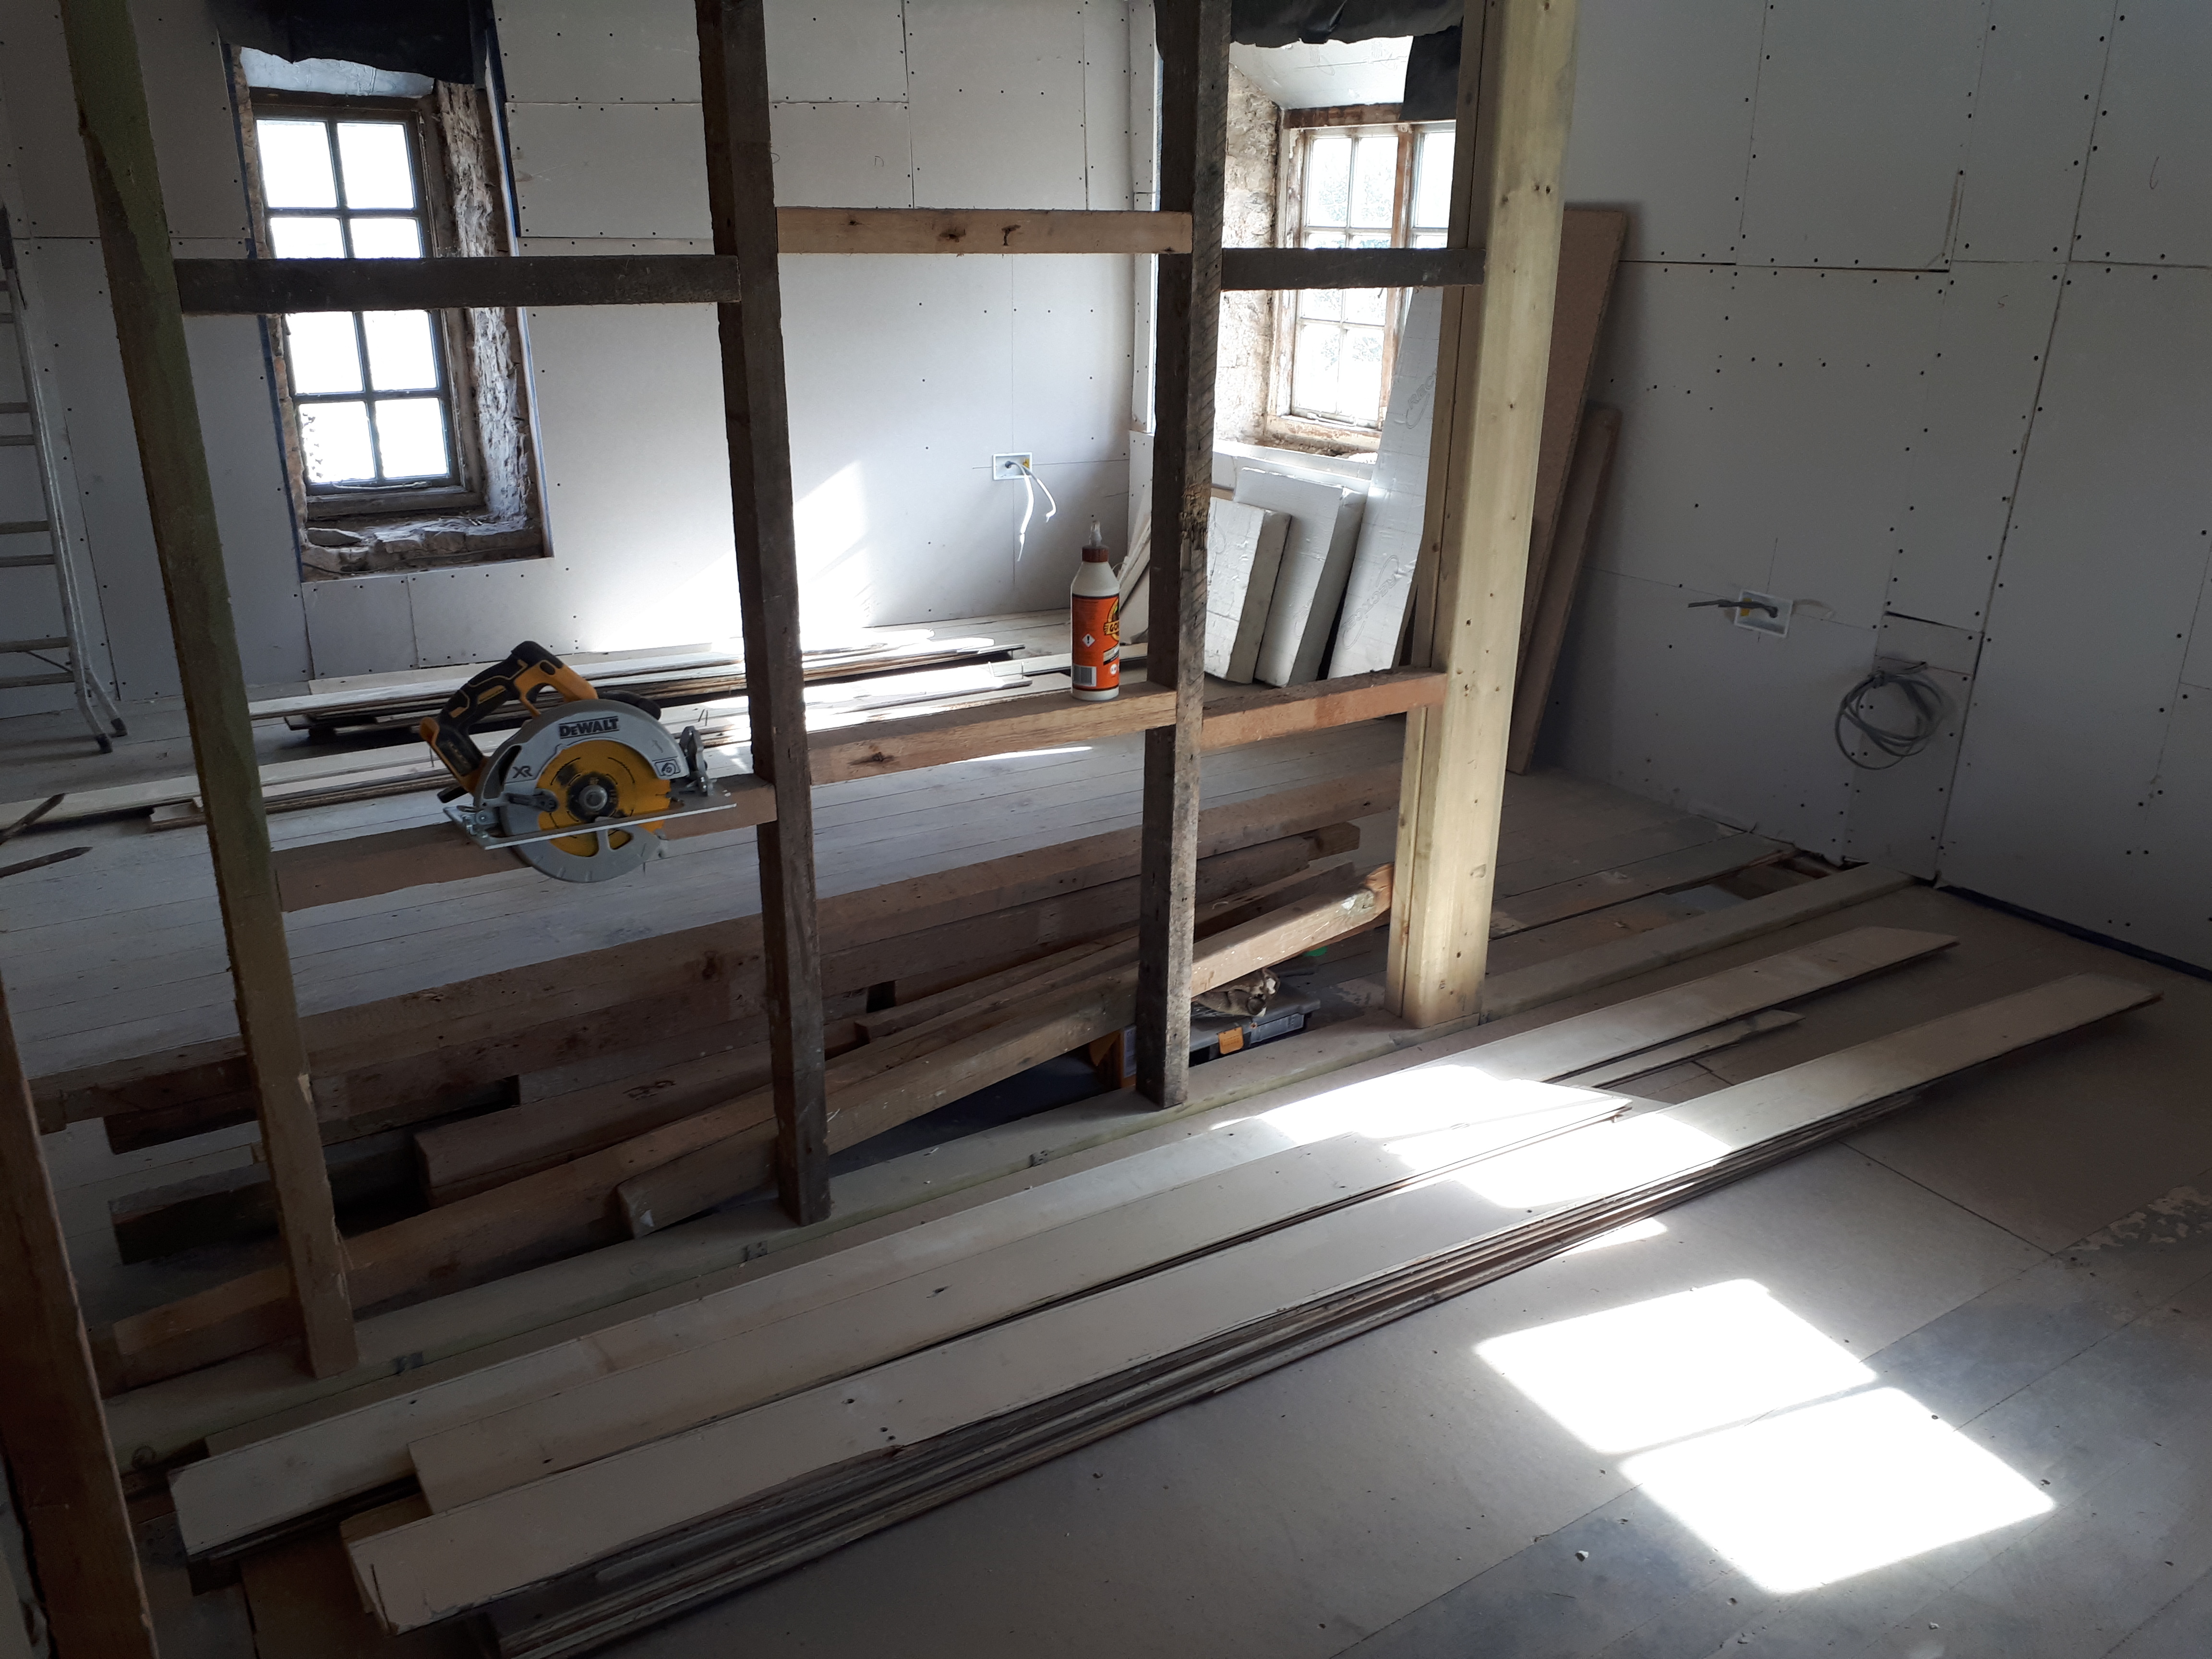
Having spent a busy evening getting plasterboard up on the study wall, Chris was in the mood for more partition wall building. The boys set to work creating the wall encasing the staircase.
Chris isn’t much of a photo taker, so this is the only picture he took of the wall building pre my arrival…
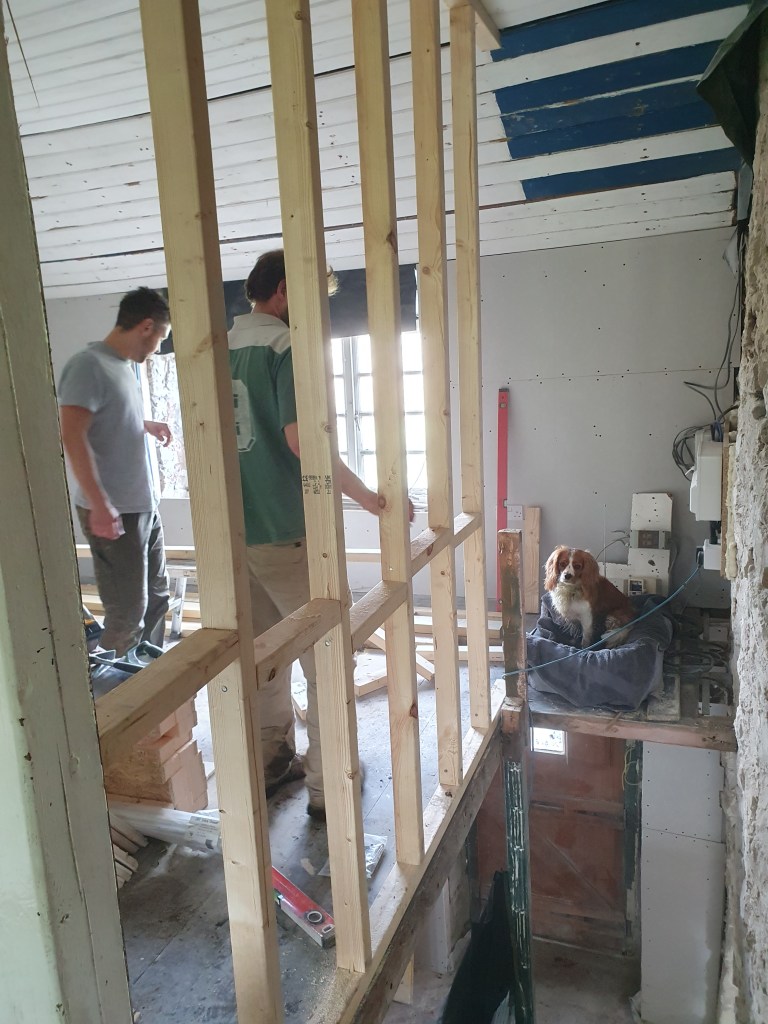
Rosie supervising the work. Previously the area above the stairs had been a huge set of shelves. A sensible use of space, but it also made the staircase feel small and cramped. We’re opting to have the full height above the staircase open.
Sadly almost all of our recycled wood has been used up, meaning Chris had to order new wood for this bit of building.
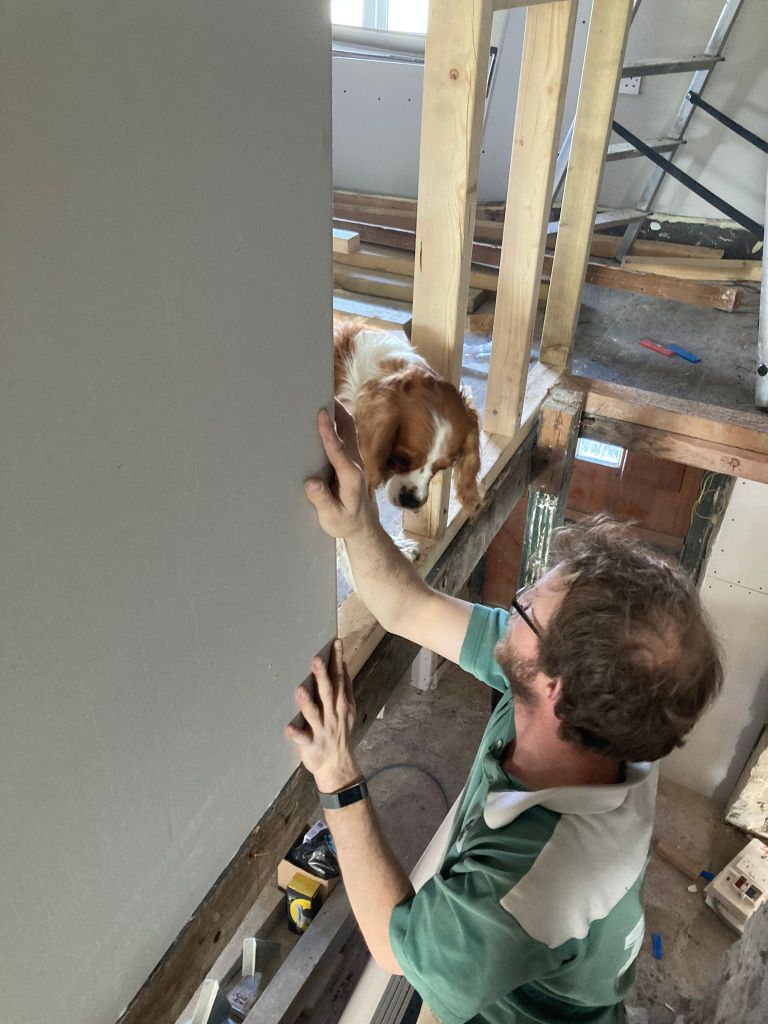
Jay’s photo offering. Chris receiving professional guidance.
Having built the frame and attached the plasterboard it was amazing how dark the staircase looks. We had wondered about adding a high thin window between the room and the staircase, to let light through, but we decided a sun-tunnel in the roof is probably a better option, though slightly more expensive.
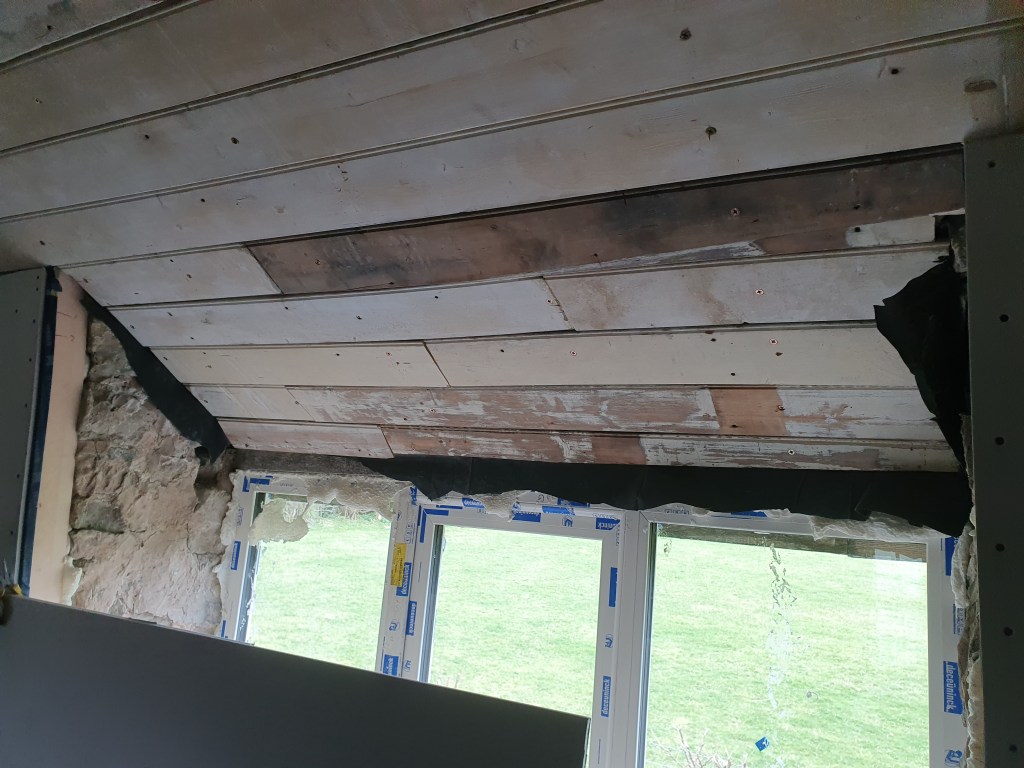

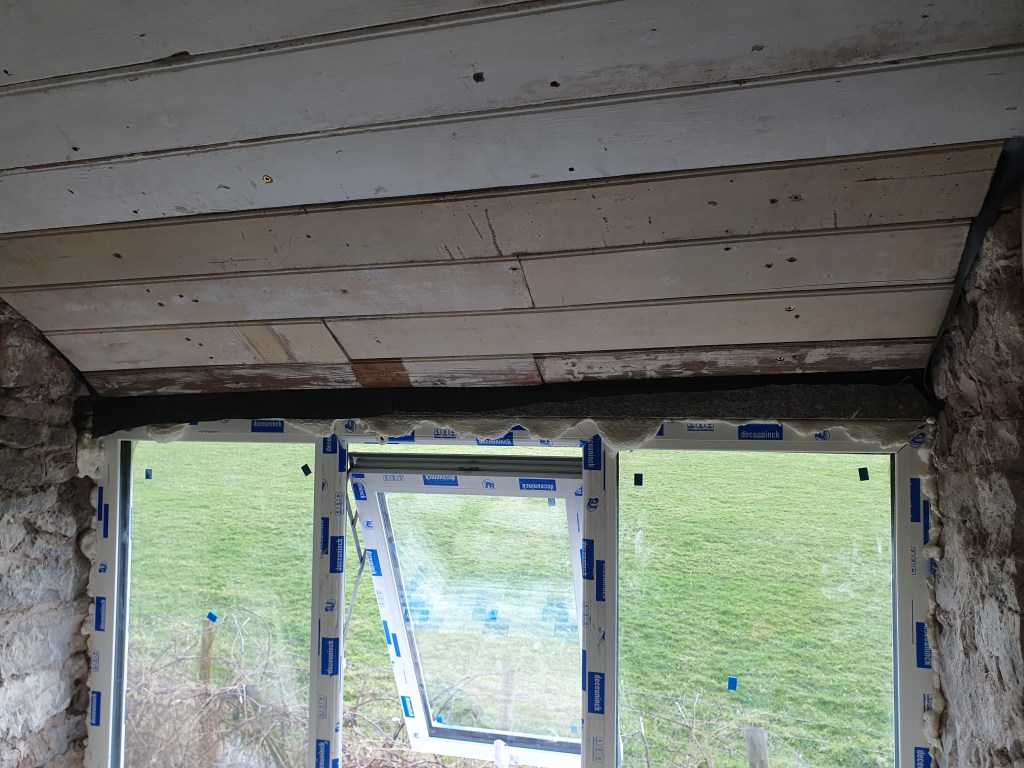
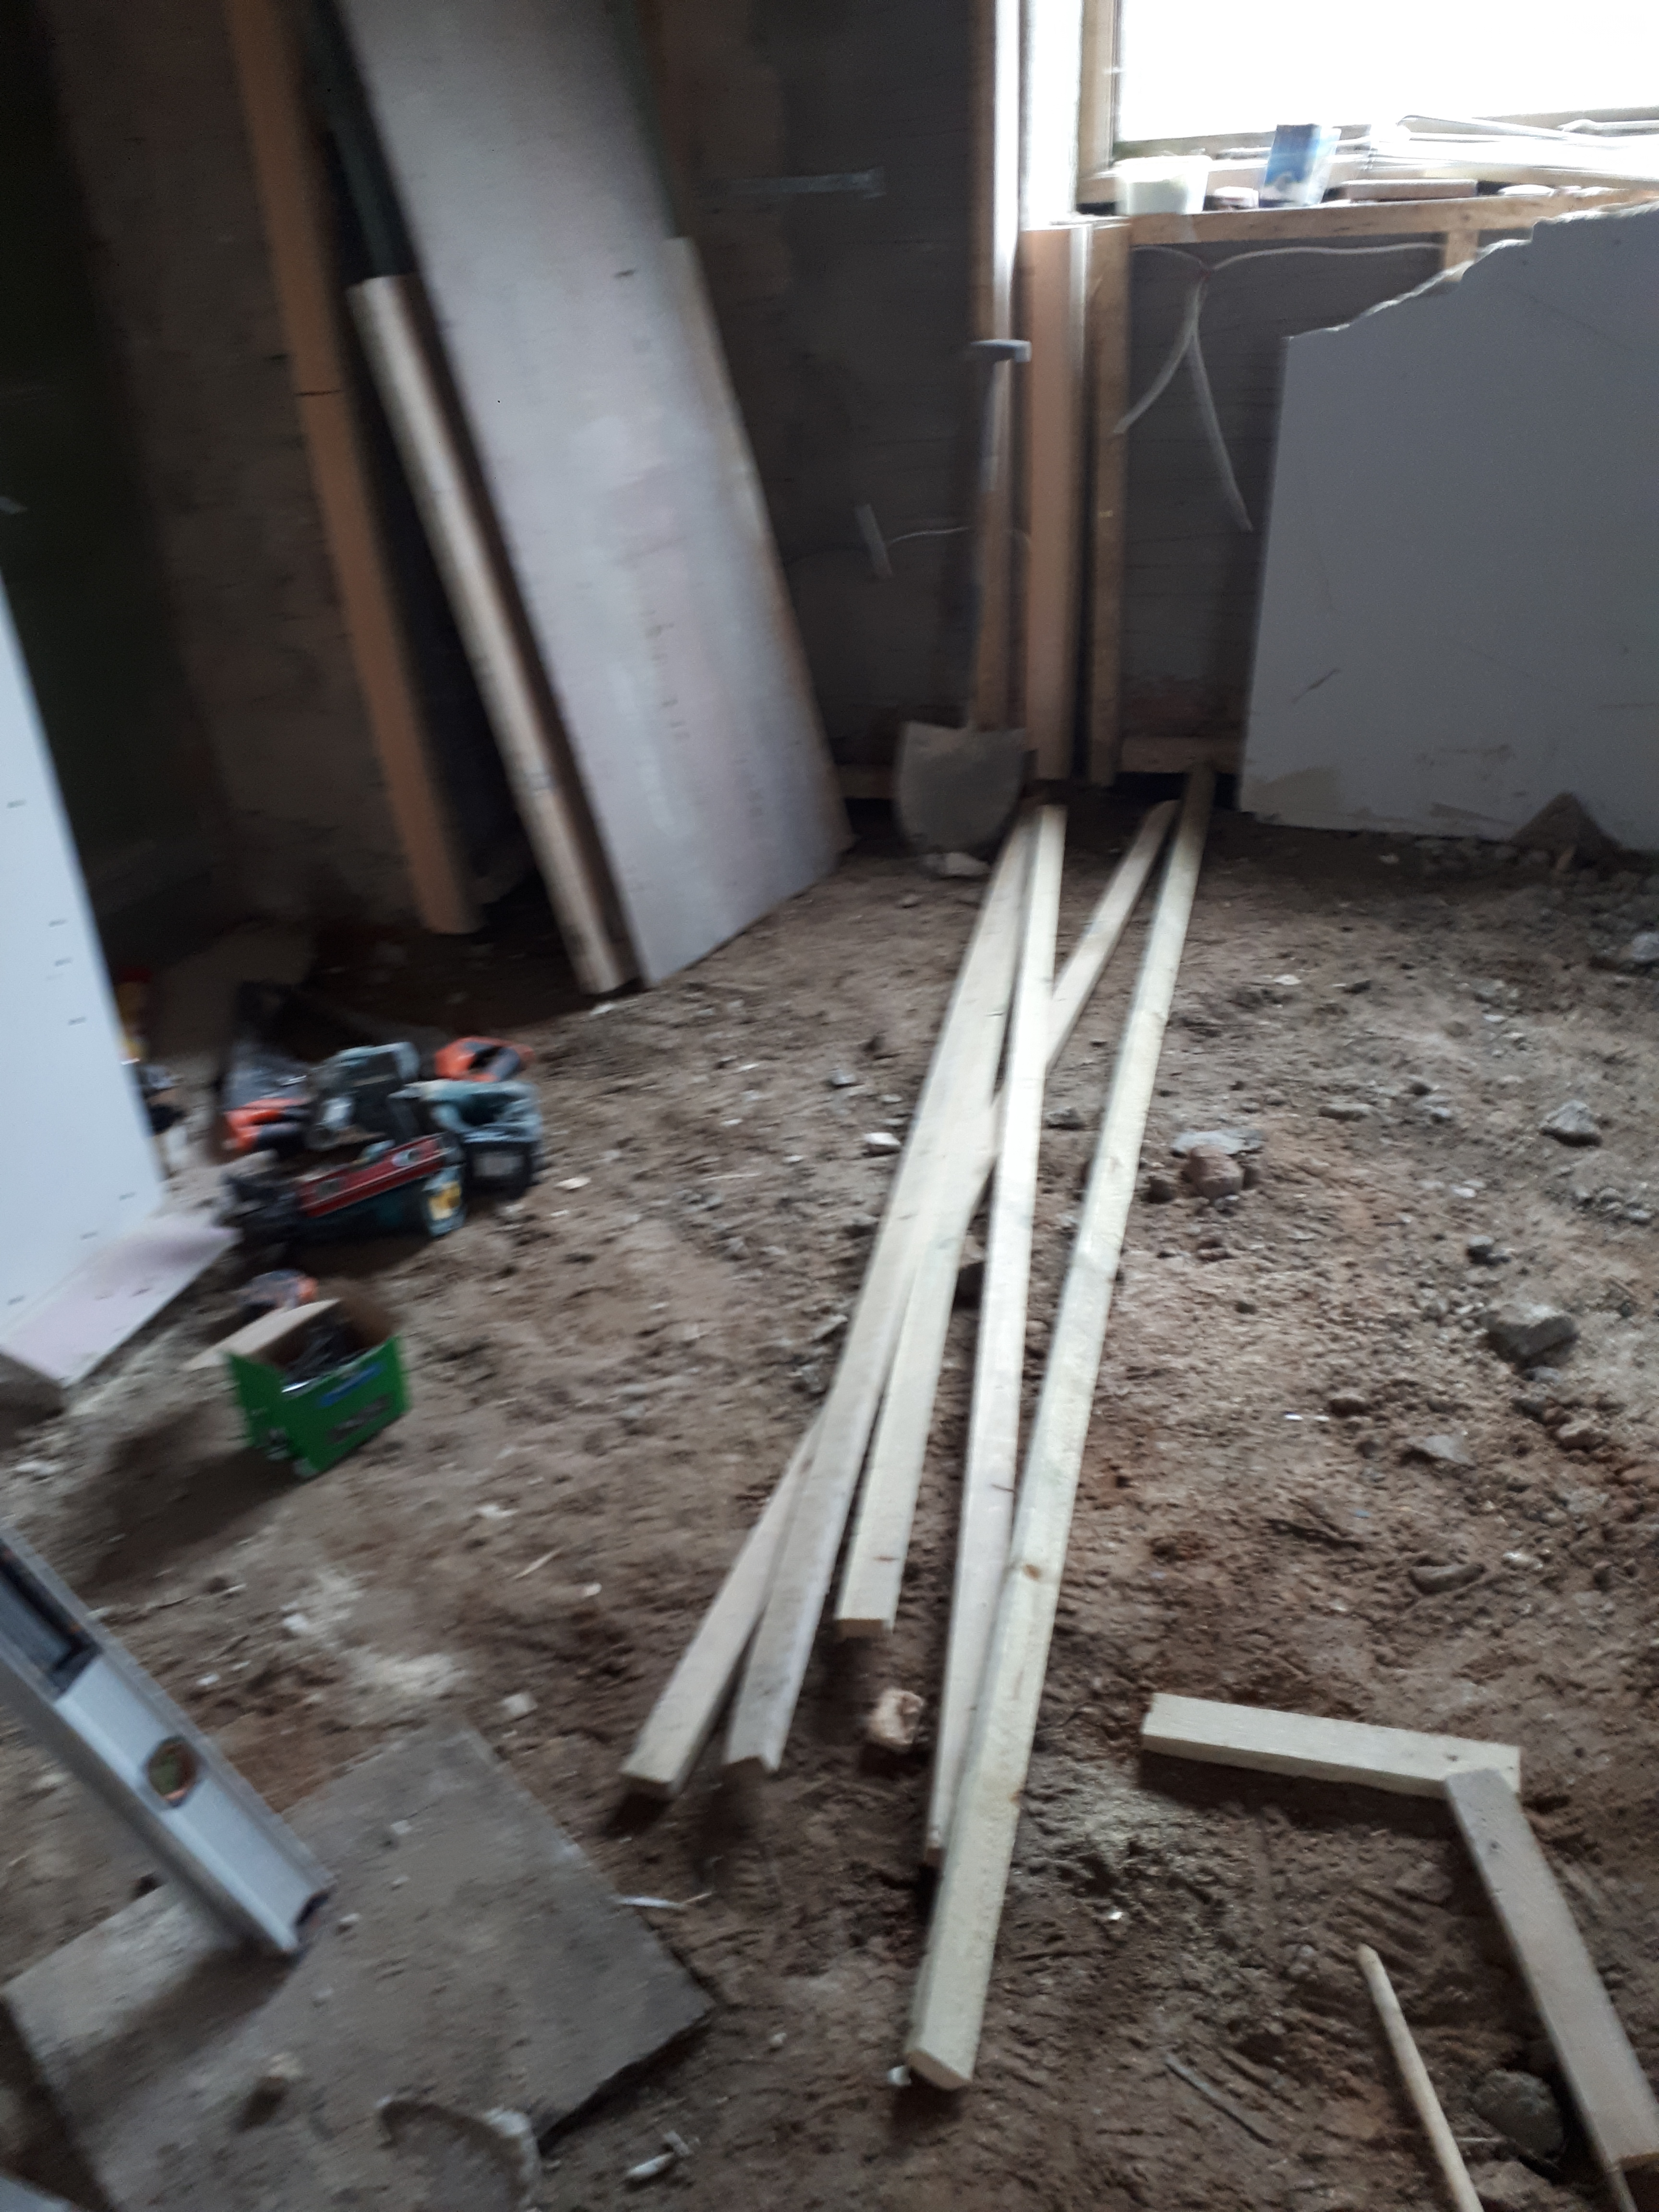
With my volunteers disappearing at lunchtime to attend a football match, I was able to join Chris and Jay (and supervisor Rosie) at the house in the afternoon. Leaving them to their construction project, I started on the jigsaw puzzle of filling in the wooden boards above the windows. As we were getting low on wooden boards to reuse I tried to utilise the smaller pieces that would be no good elsewhere. As always, finding the rafters to screw them into, under layers of plastic and insulation, was fun and games.


On Sunday, with Jay returning to more sensible weekend activities, I carried on with the windows while Chris set to work on levelling the downstairs bathroom floor.
Our inspection by the house valuers had ended up as a flop. The valuer had told us he couldn’t value the house until it has a kitchen sink, a toilet and bathroom sink, and electricity. Apparently we don’t count as habitable just yet. Therefore getting the toilet and sink in in the downstairs bathroom is now a priority. Unfortunately, the kitchen needs to wait till we can polish the floor, which won’t be for a few weeks yet. The electric, Chris assures me, isn’t far off.

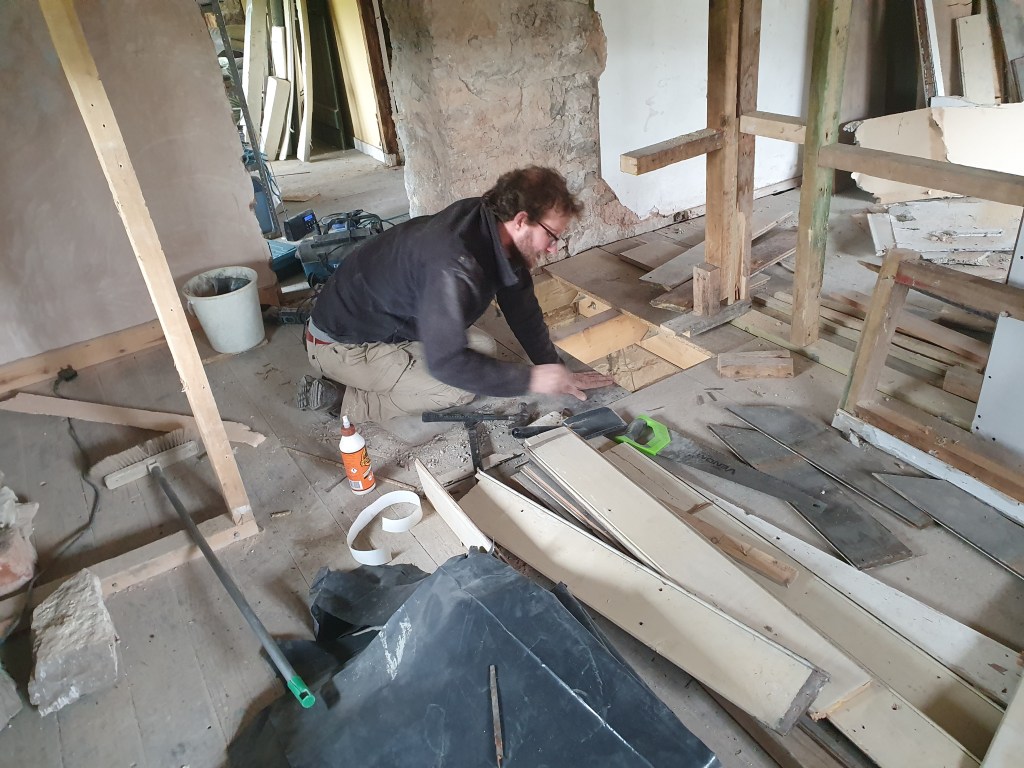

Self-leveller left to set, Chris got to work filling the final two gaps in our study floor.
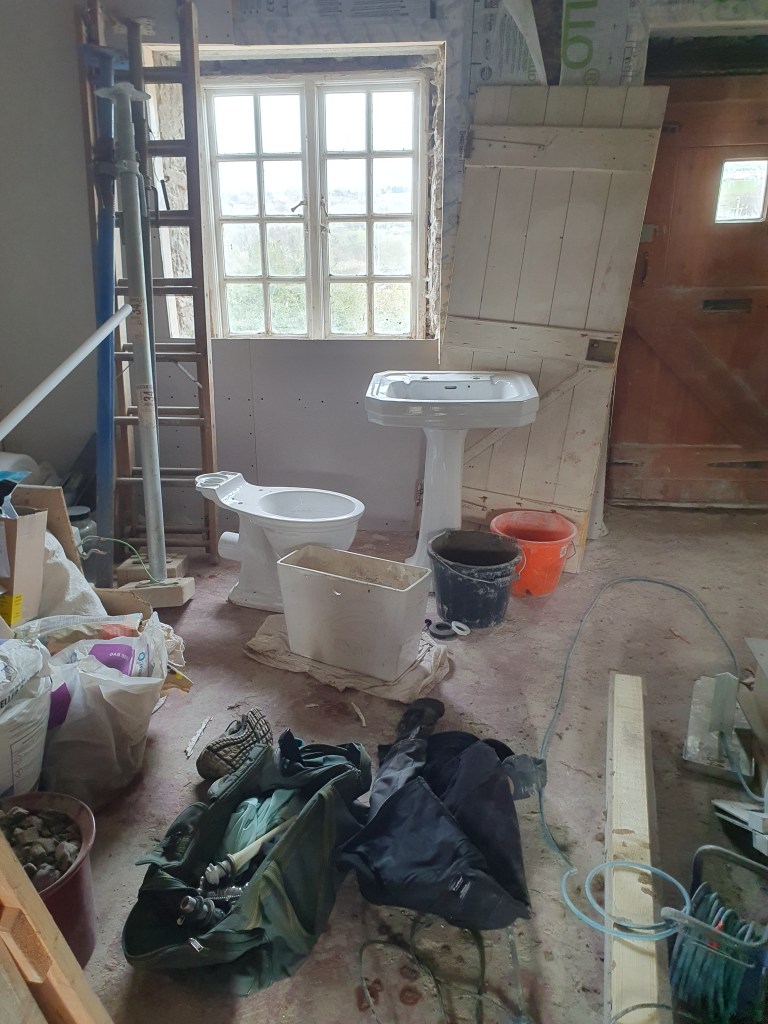
And then busied himself on sprucing up the secondhand toilet and sink (yes I was still messing around with window boards).
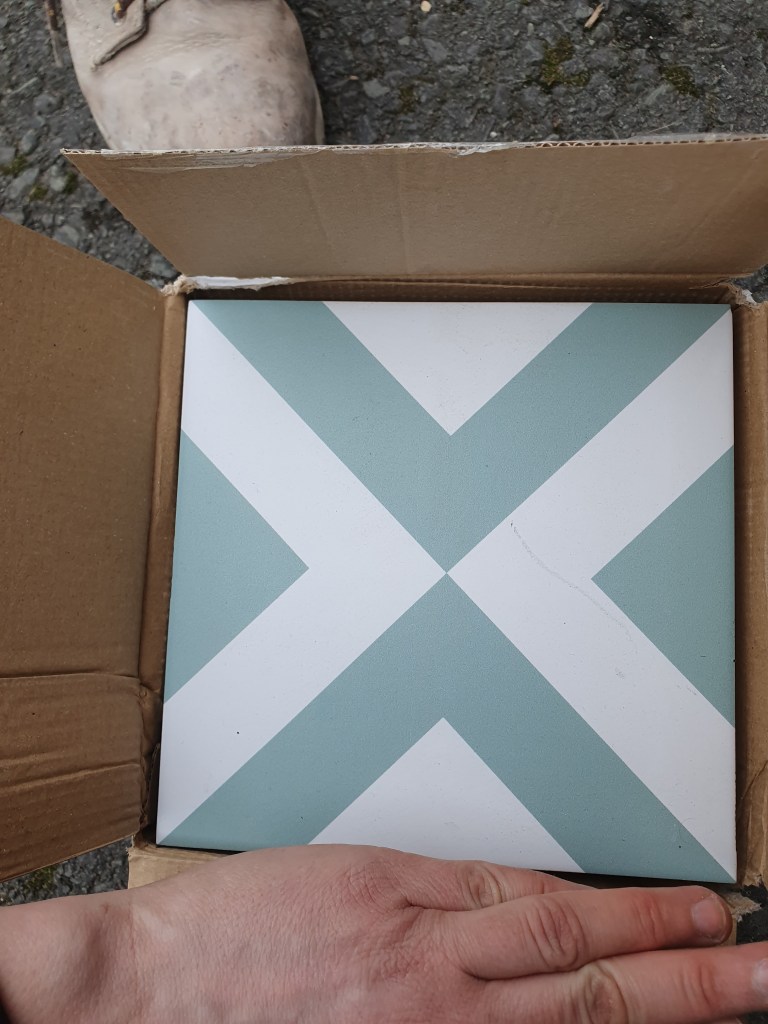
On our way home we stopped to pick up some second-hand new floor tiles. Far too expensive for us to consider buying them new, someone had over ordered and was selling them on cheap. Unfortunately there isn’t quite enough for our downstairs bathroom (2.2m2 vs 2.8m2). However, something we did in our current house was placing the nice tiles in the visible areas, and plain tiles where machines and cupboards were going to sit, so the plan is to do similar again.
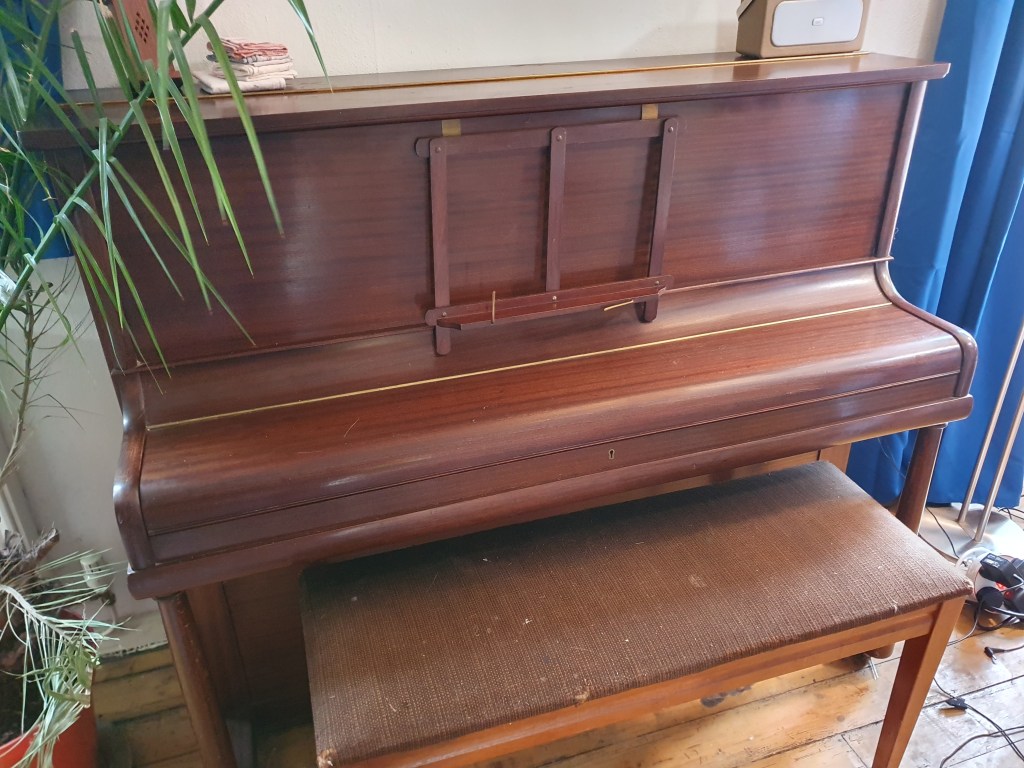
Another stop was to go and view a piano. Someone local had offered it up to a new home for free. When planning out the design for our new house I’d immediately earmarked a spot for a piano. I’ve had an electric piano for most of my adult life, but have always wanted a real one. This one is now on hold, the owner happy for us to collect once we’re ready. Another reason to hurry up and get the house ready to move into.
-
Inspection time
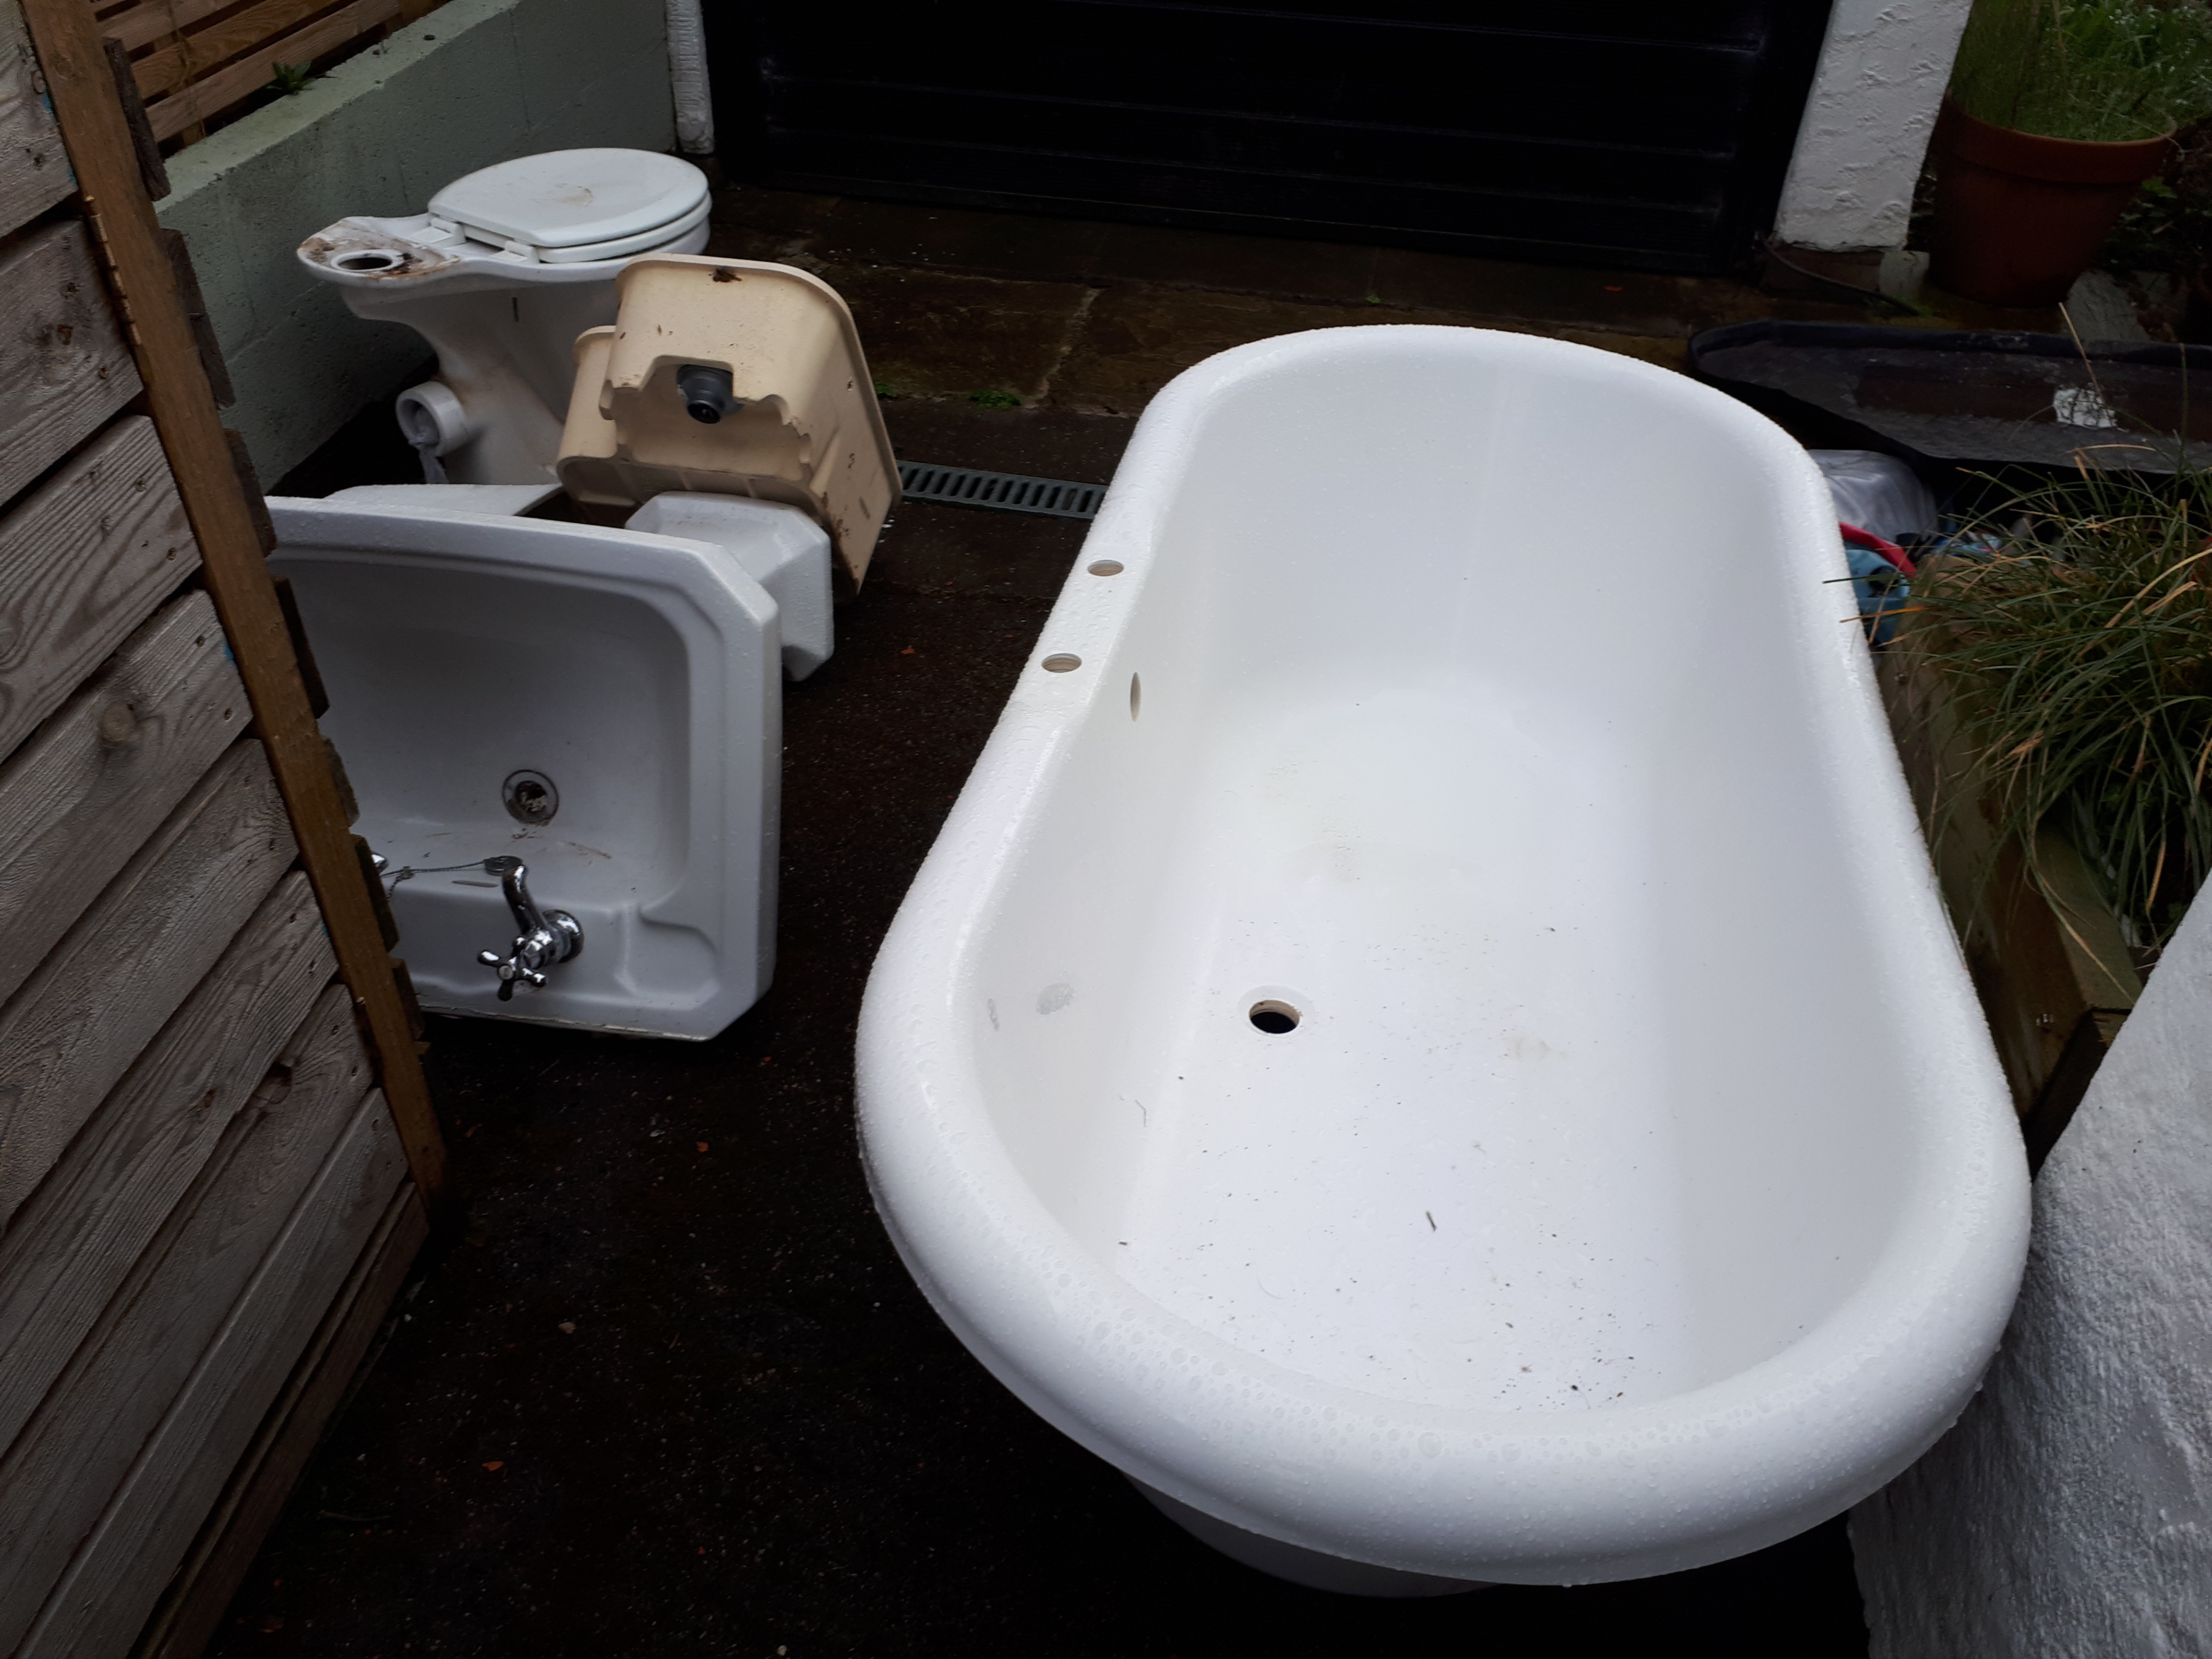
We’ve been busy shopping this week, and so far have a complete bathroom suite biding its time in the garden. The roll top bath was something I was keen on from the start, but we’ve struggled to find one cheaply second-hand. Eventually, one appeared at a suitable price. The toilet and sink came up even more cost-effective, being completely free. Our final purchase was actually round the corner from my parents, and my dad kindly collected it for us, with a friend’s parents getting rid of a nearly new dishwasher.
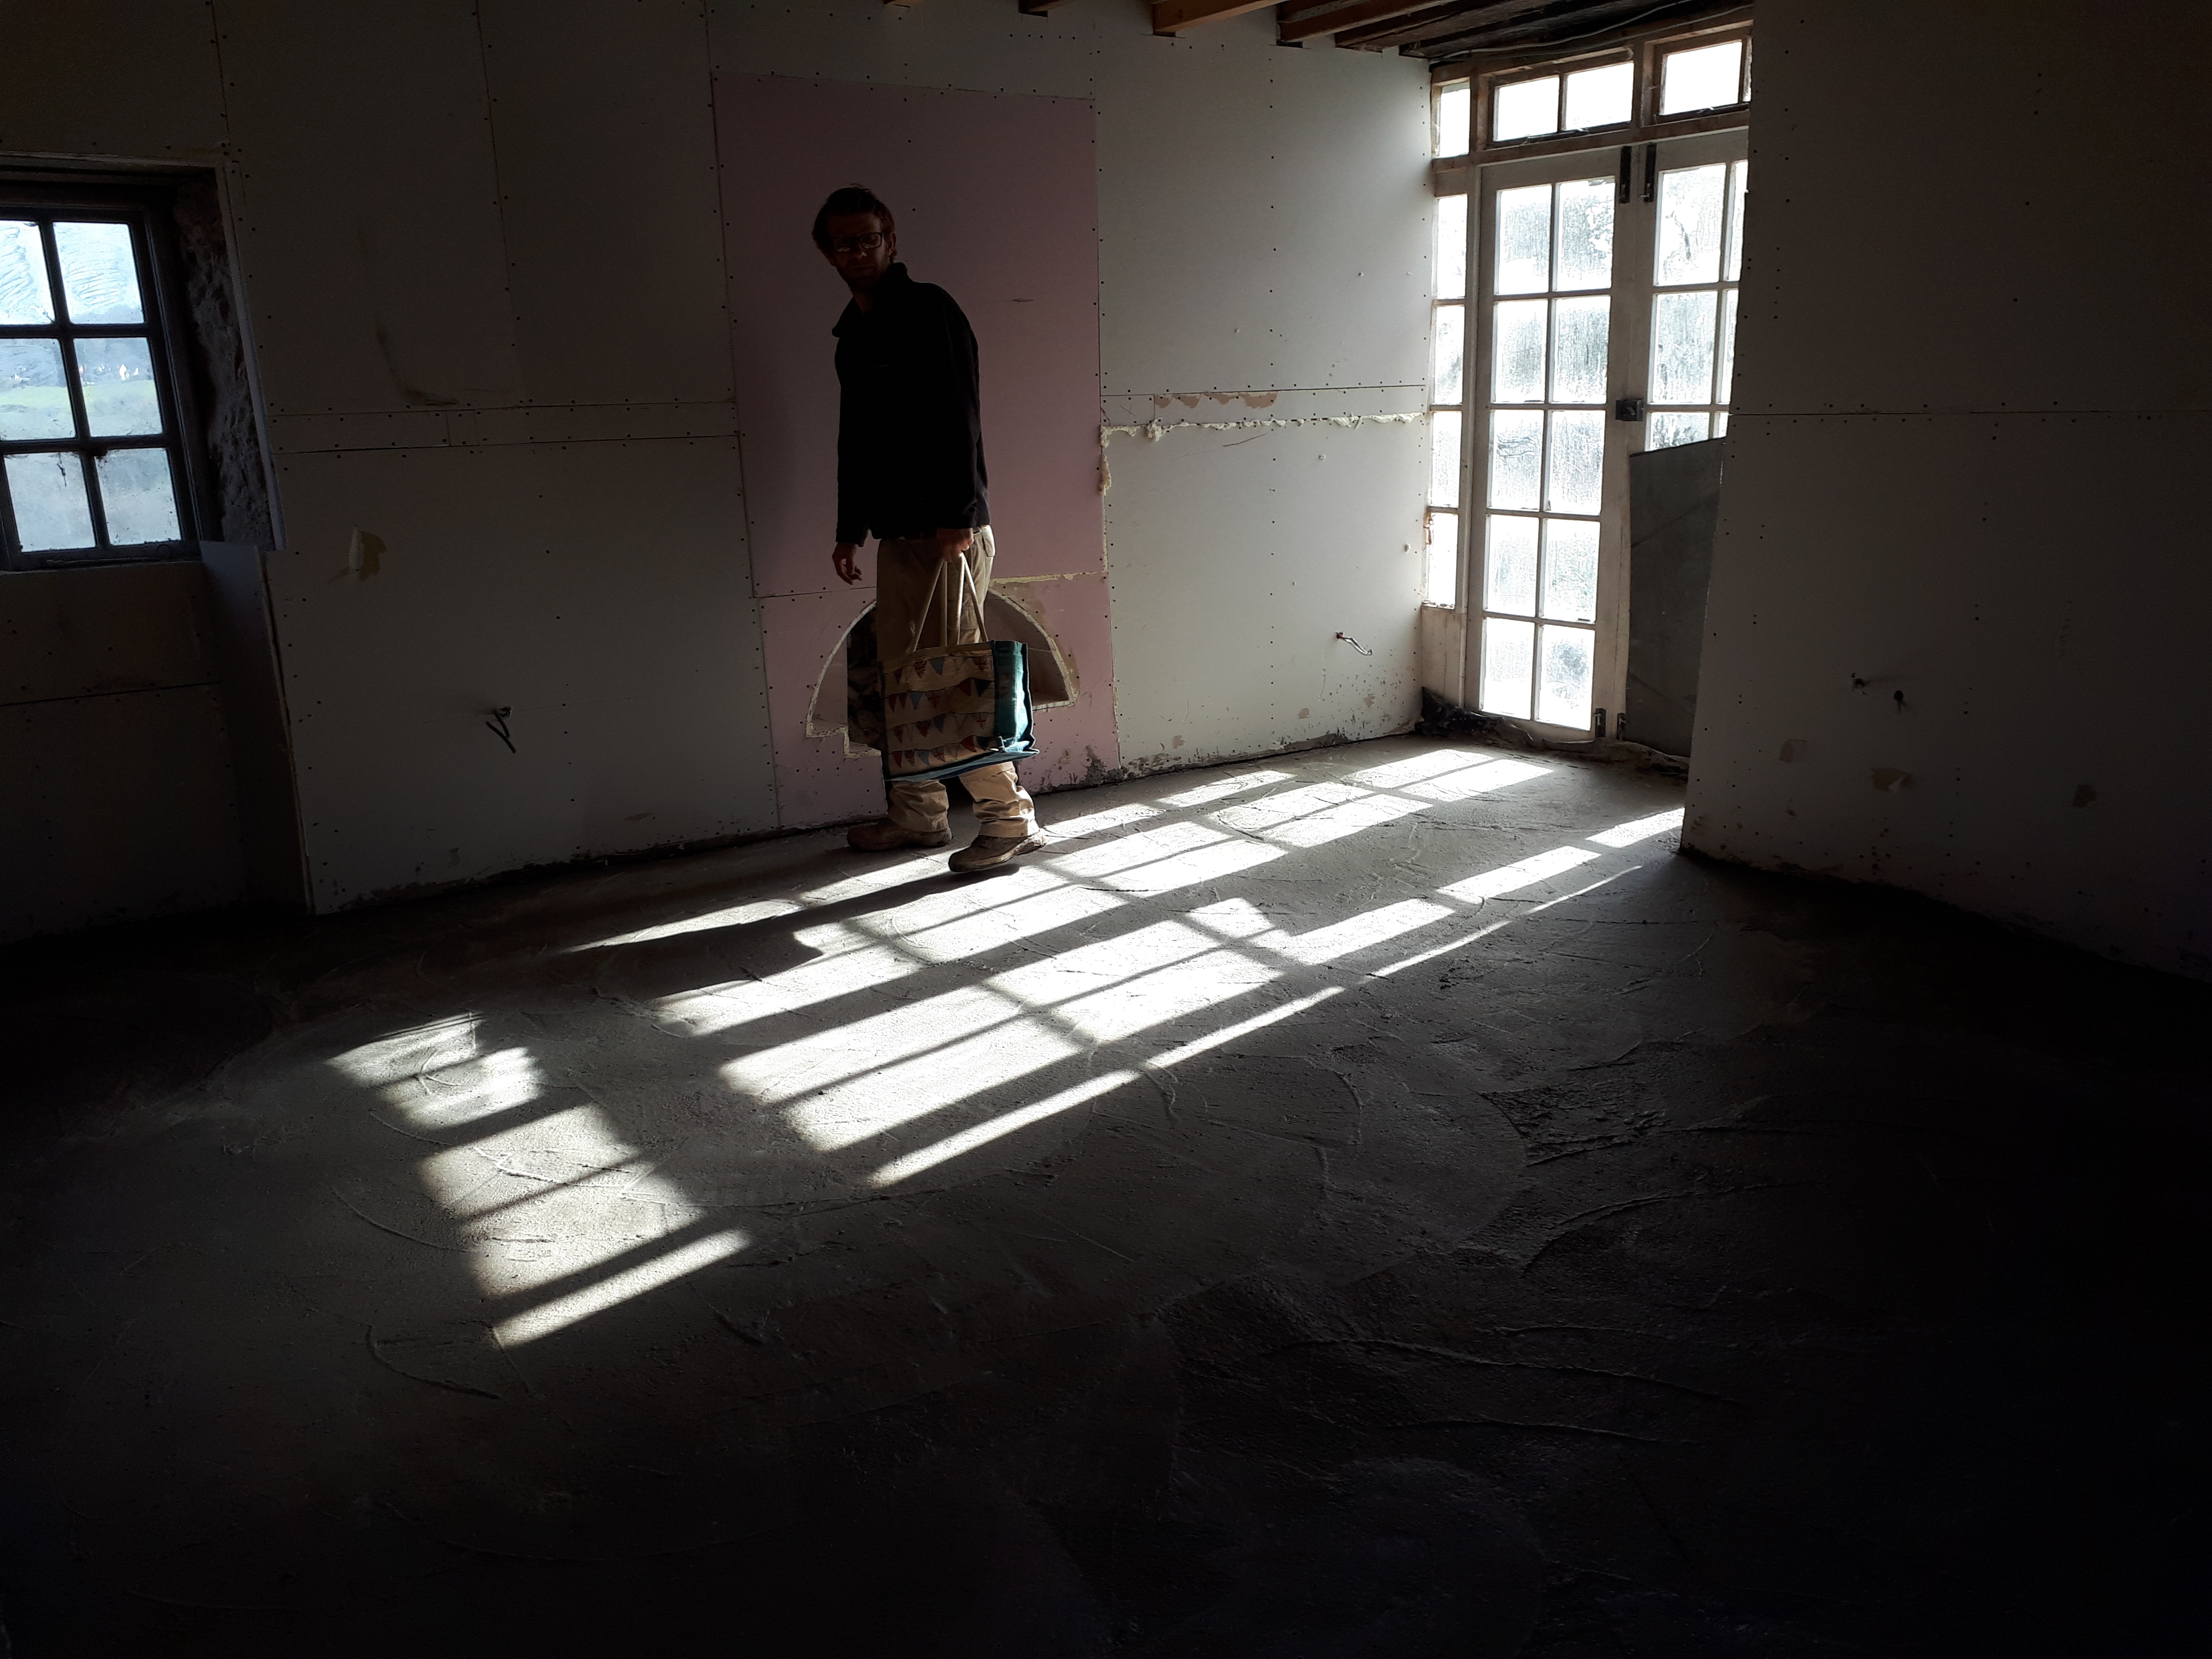
Back at the house we were pleased to see the floor had set. A little lumpy, but it should flatten out as we grind it down. Firstly though it needs to dry for another month.
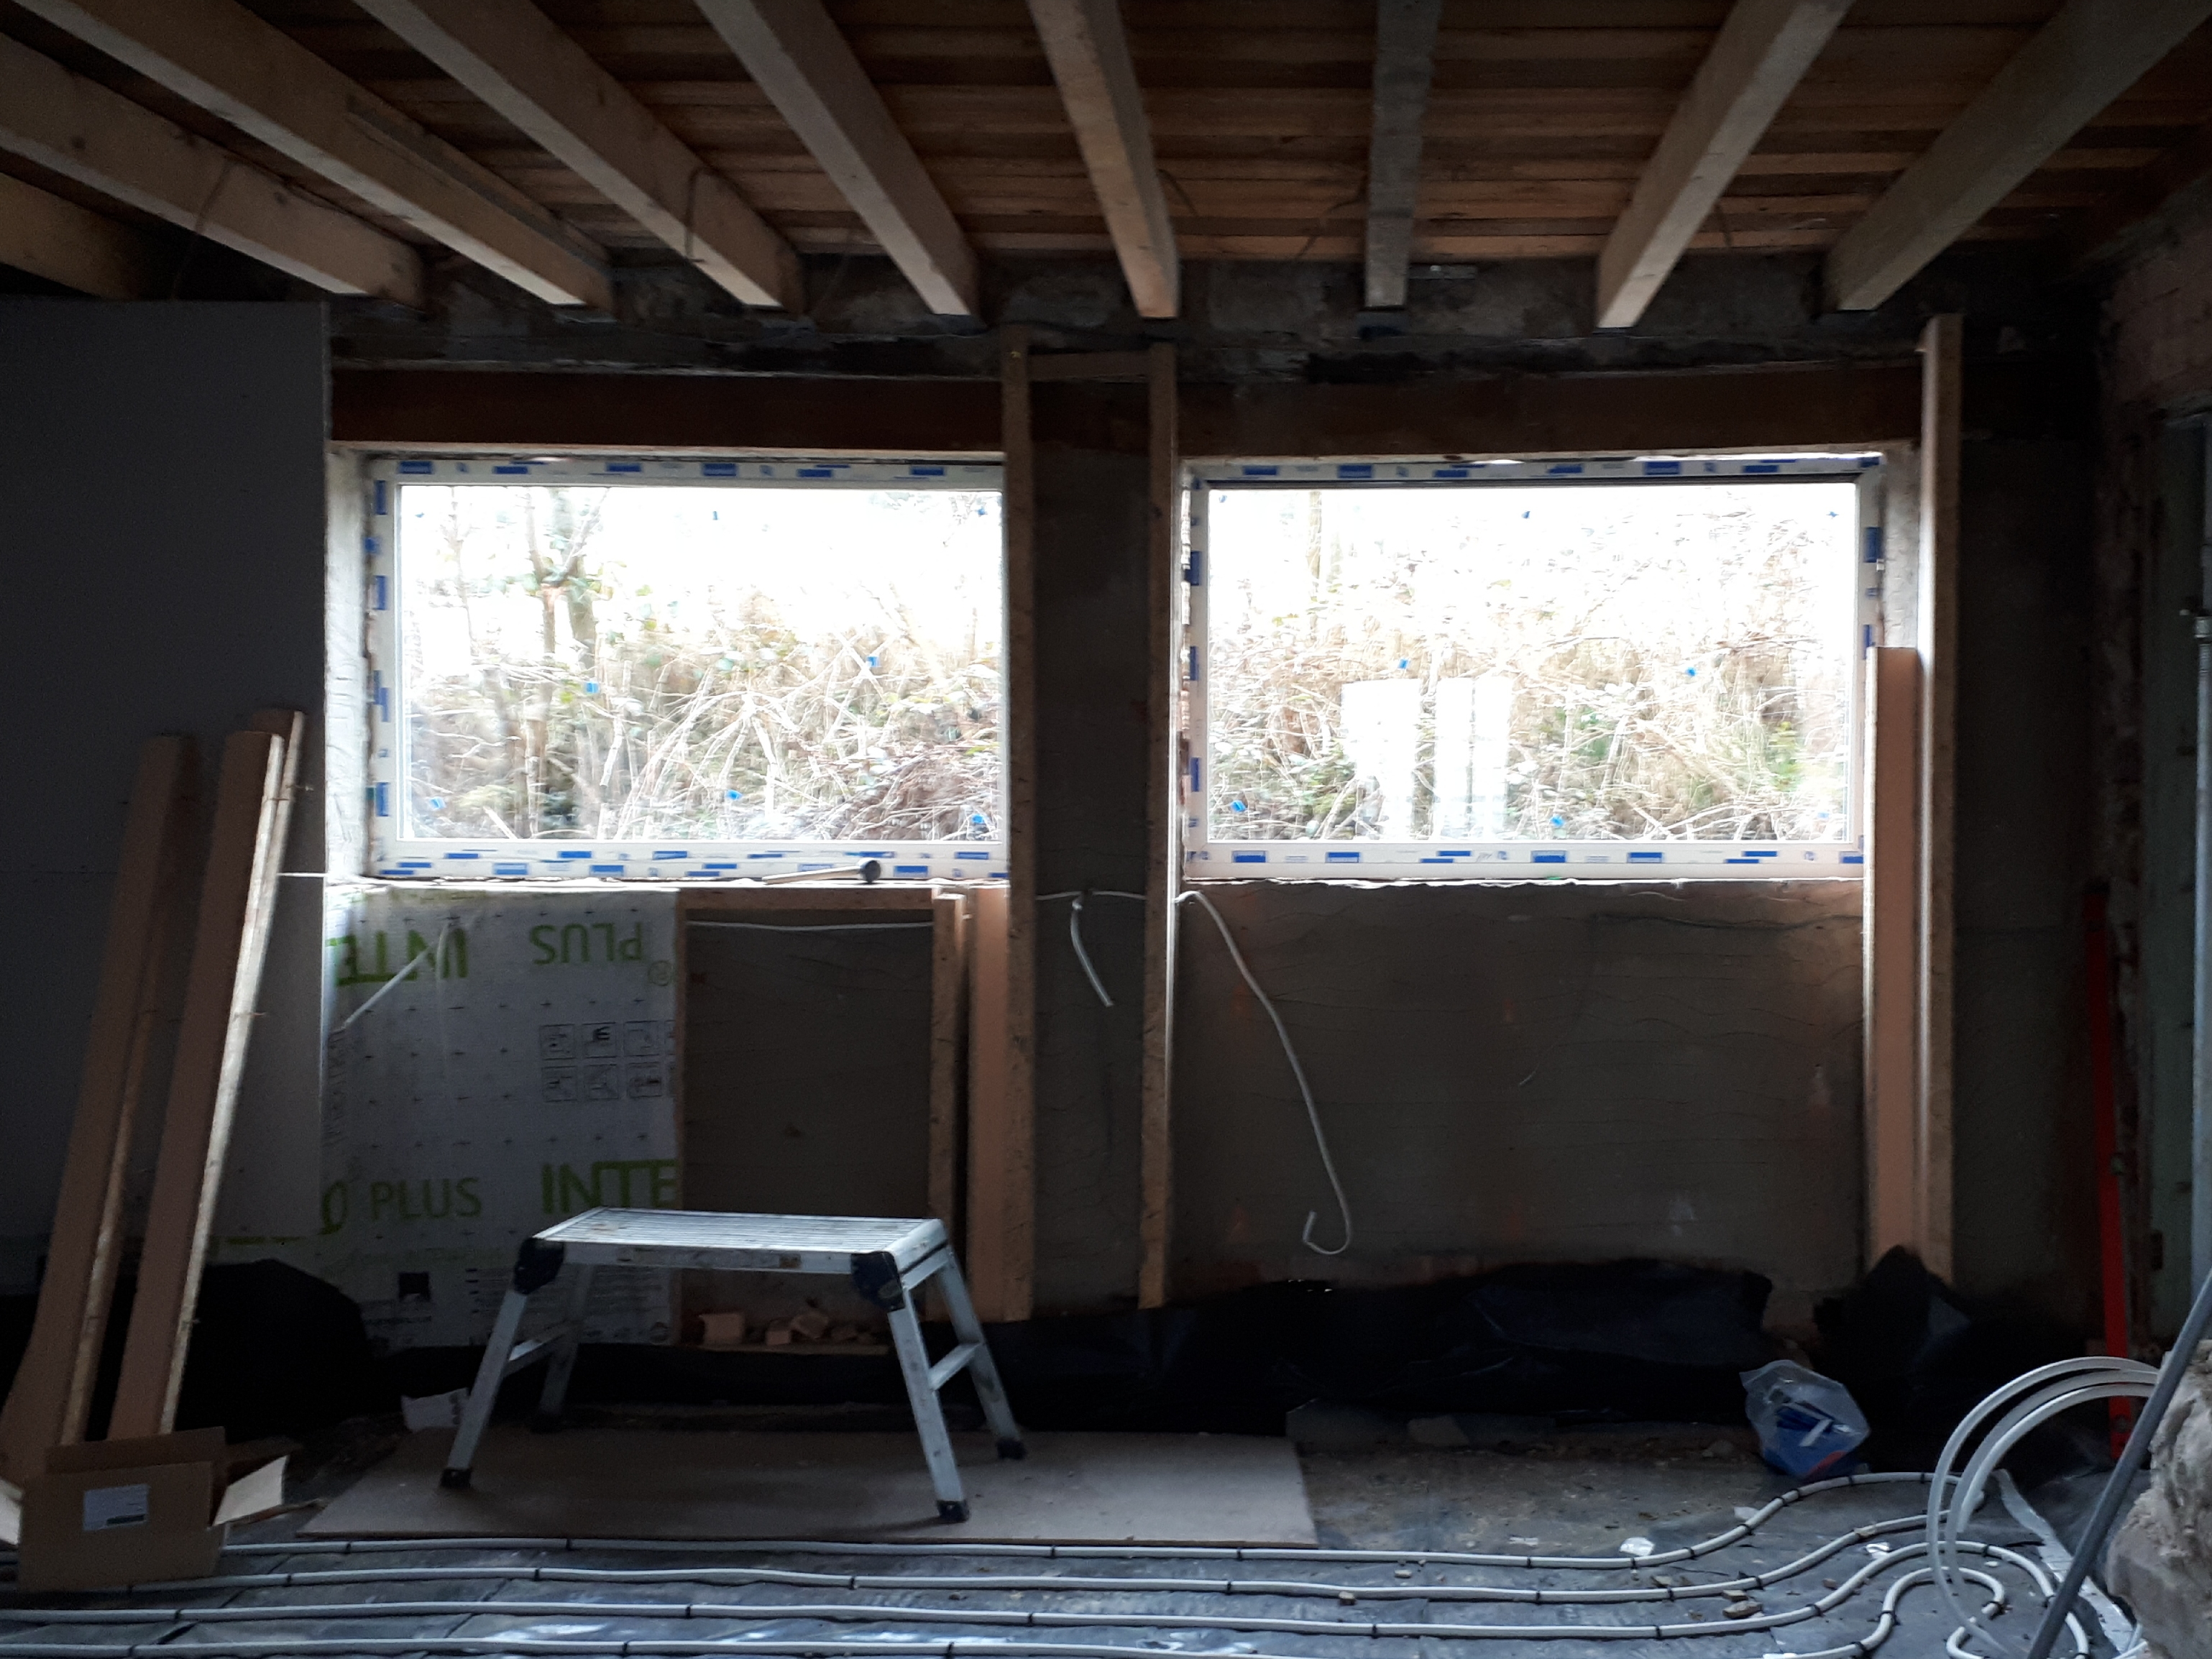
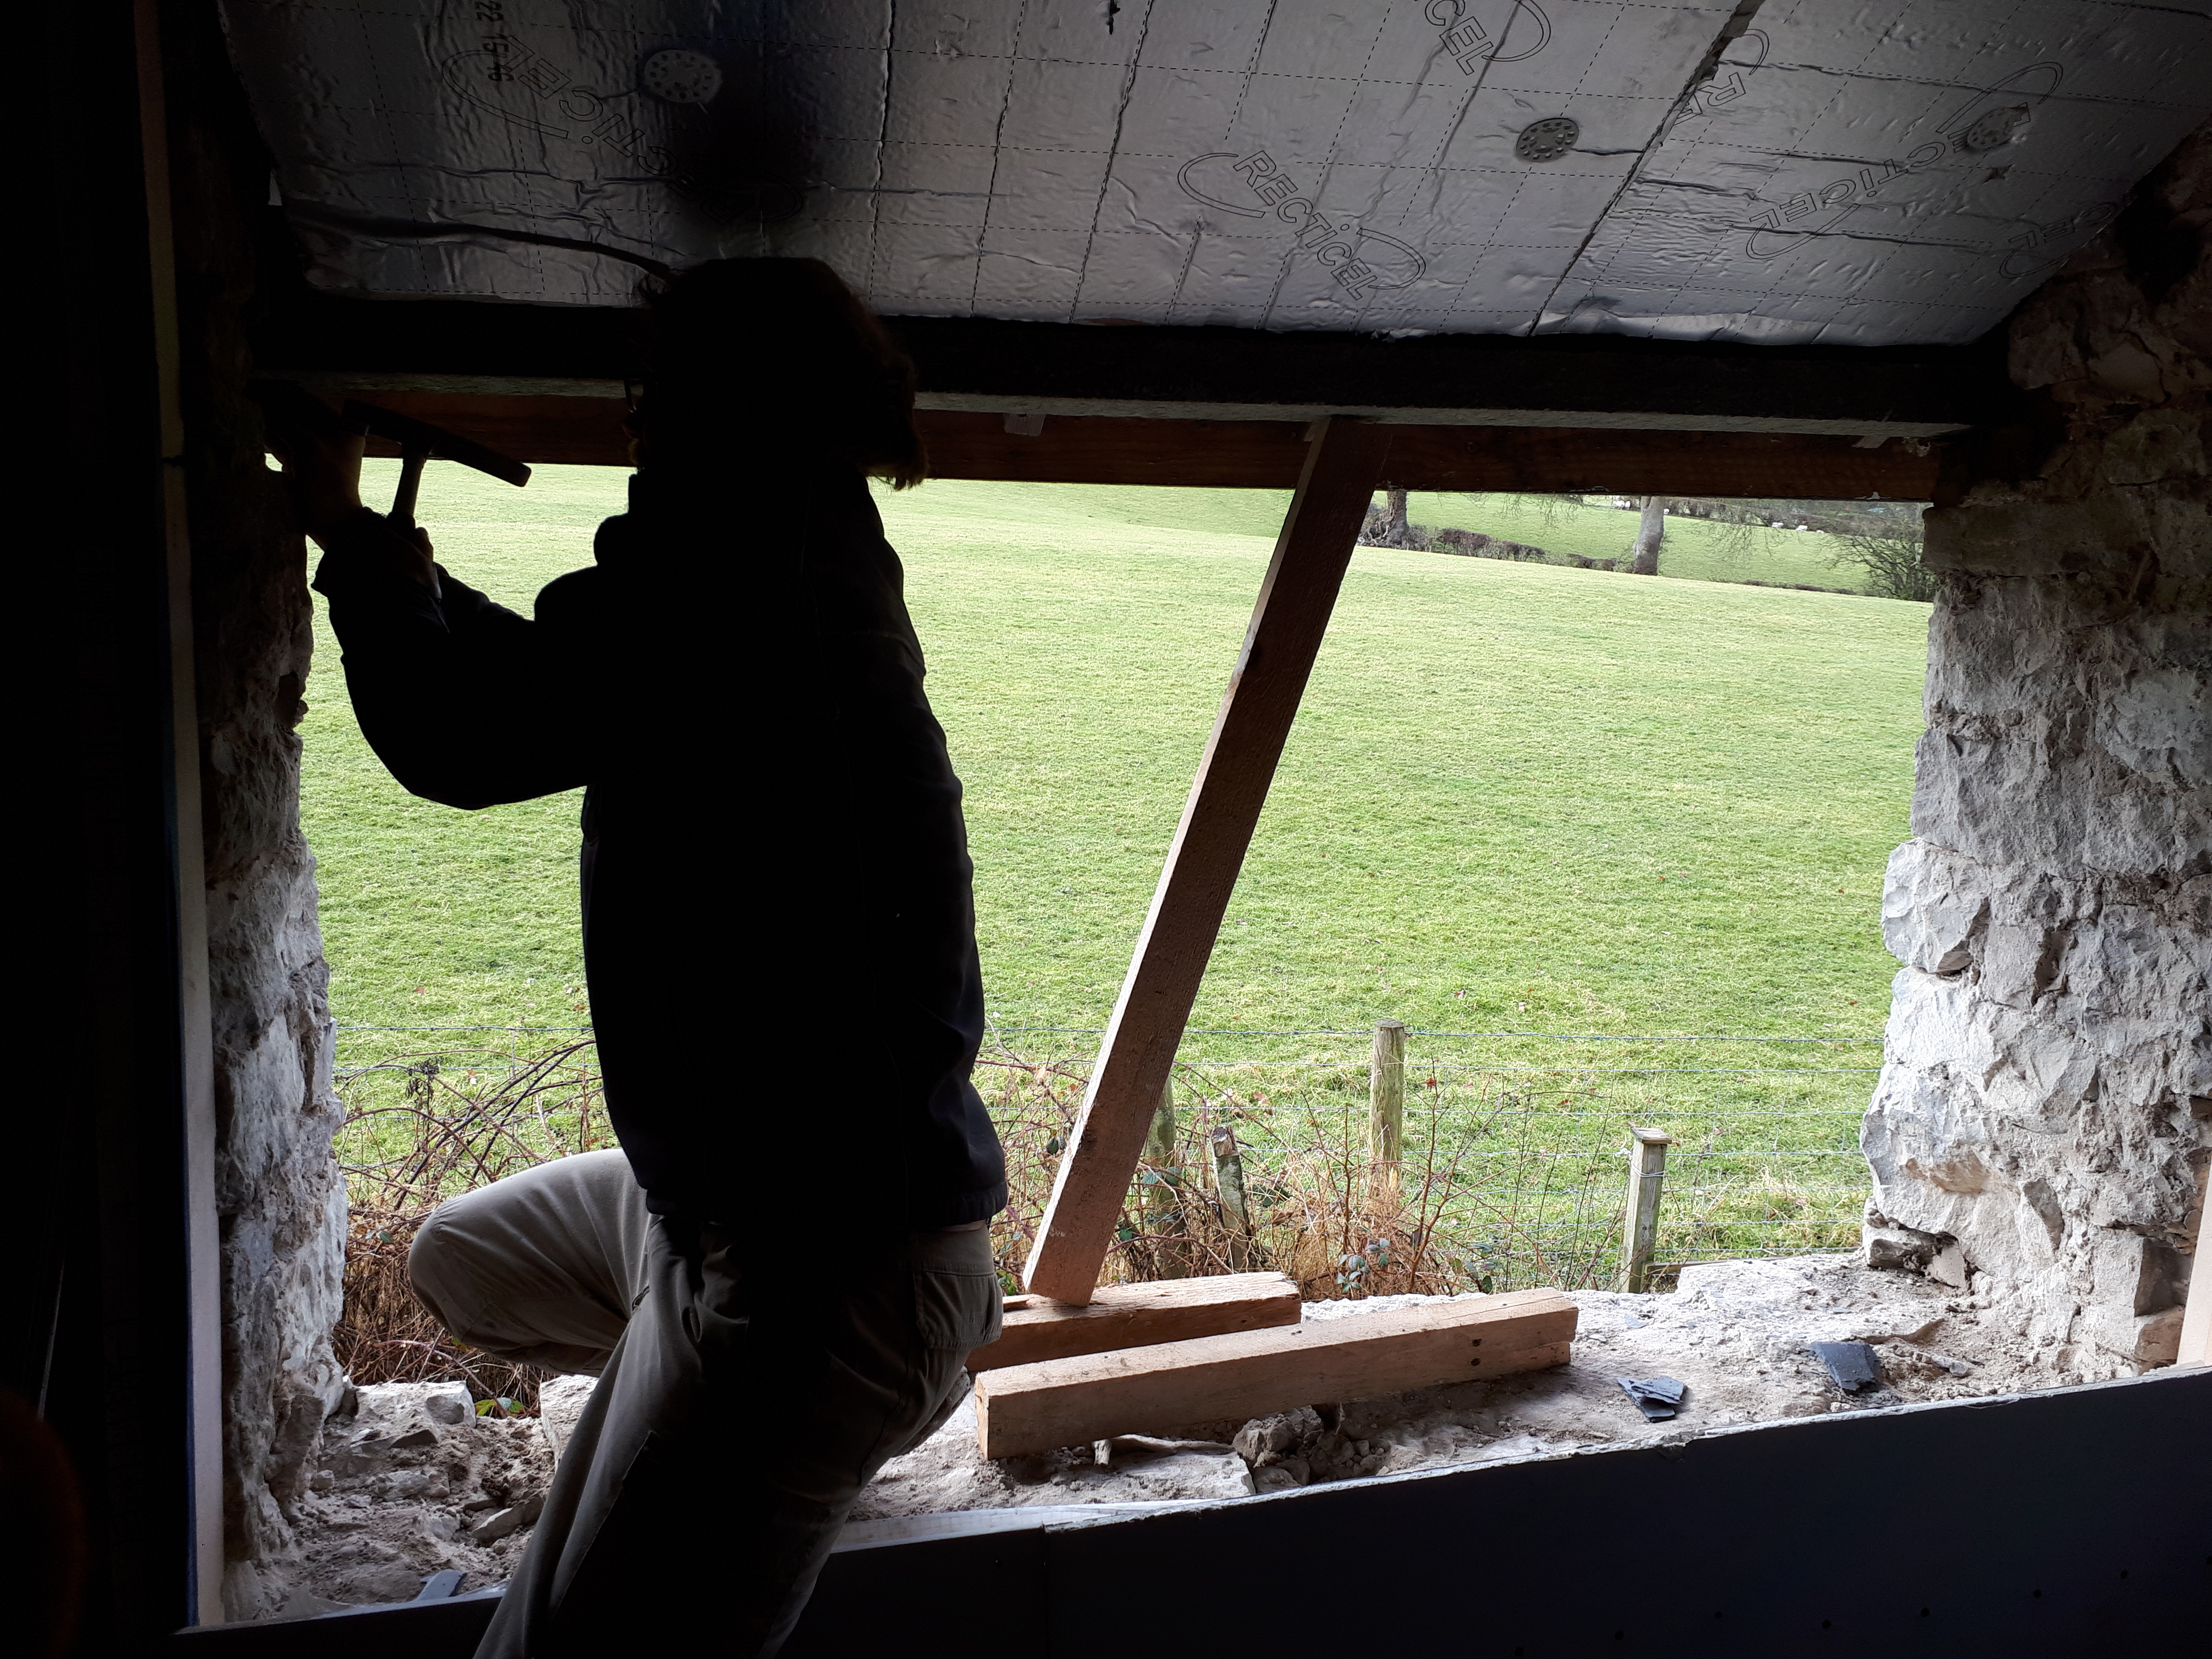
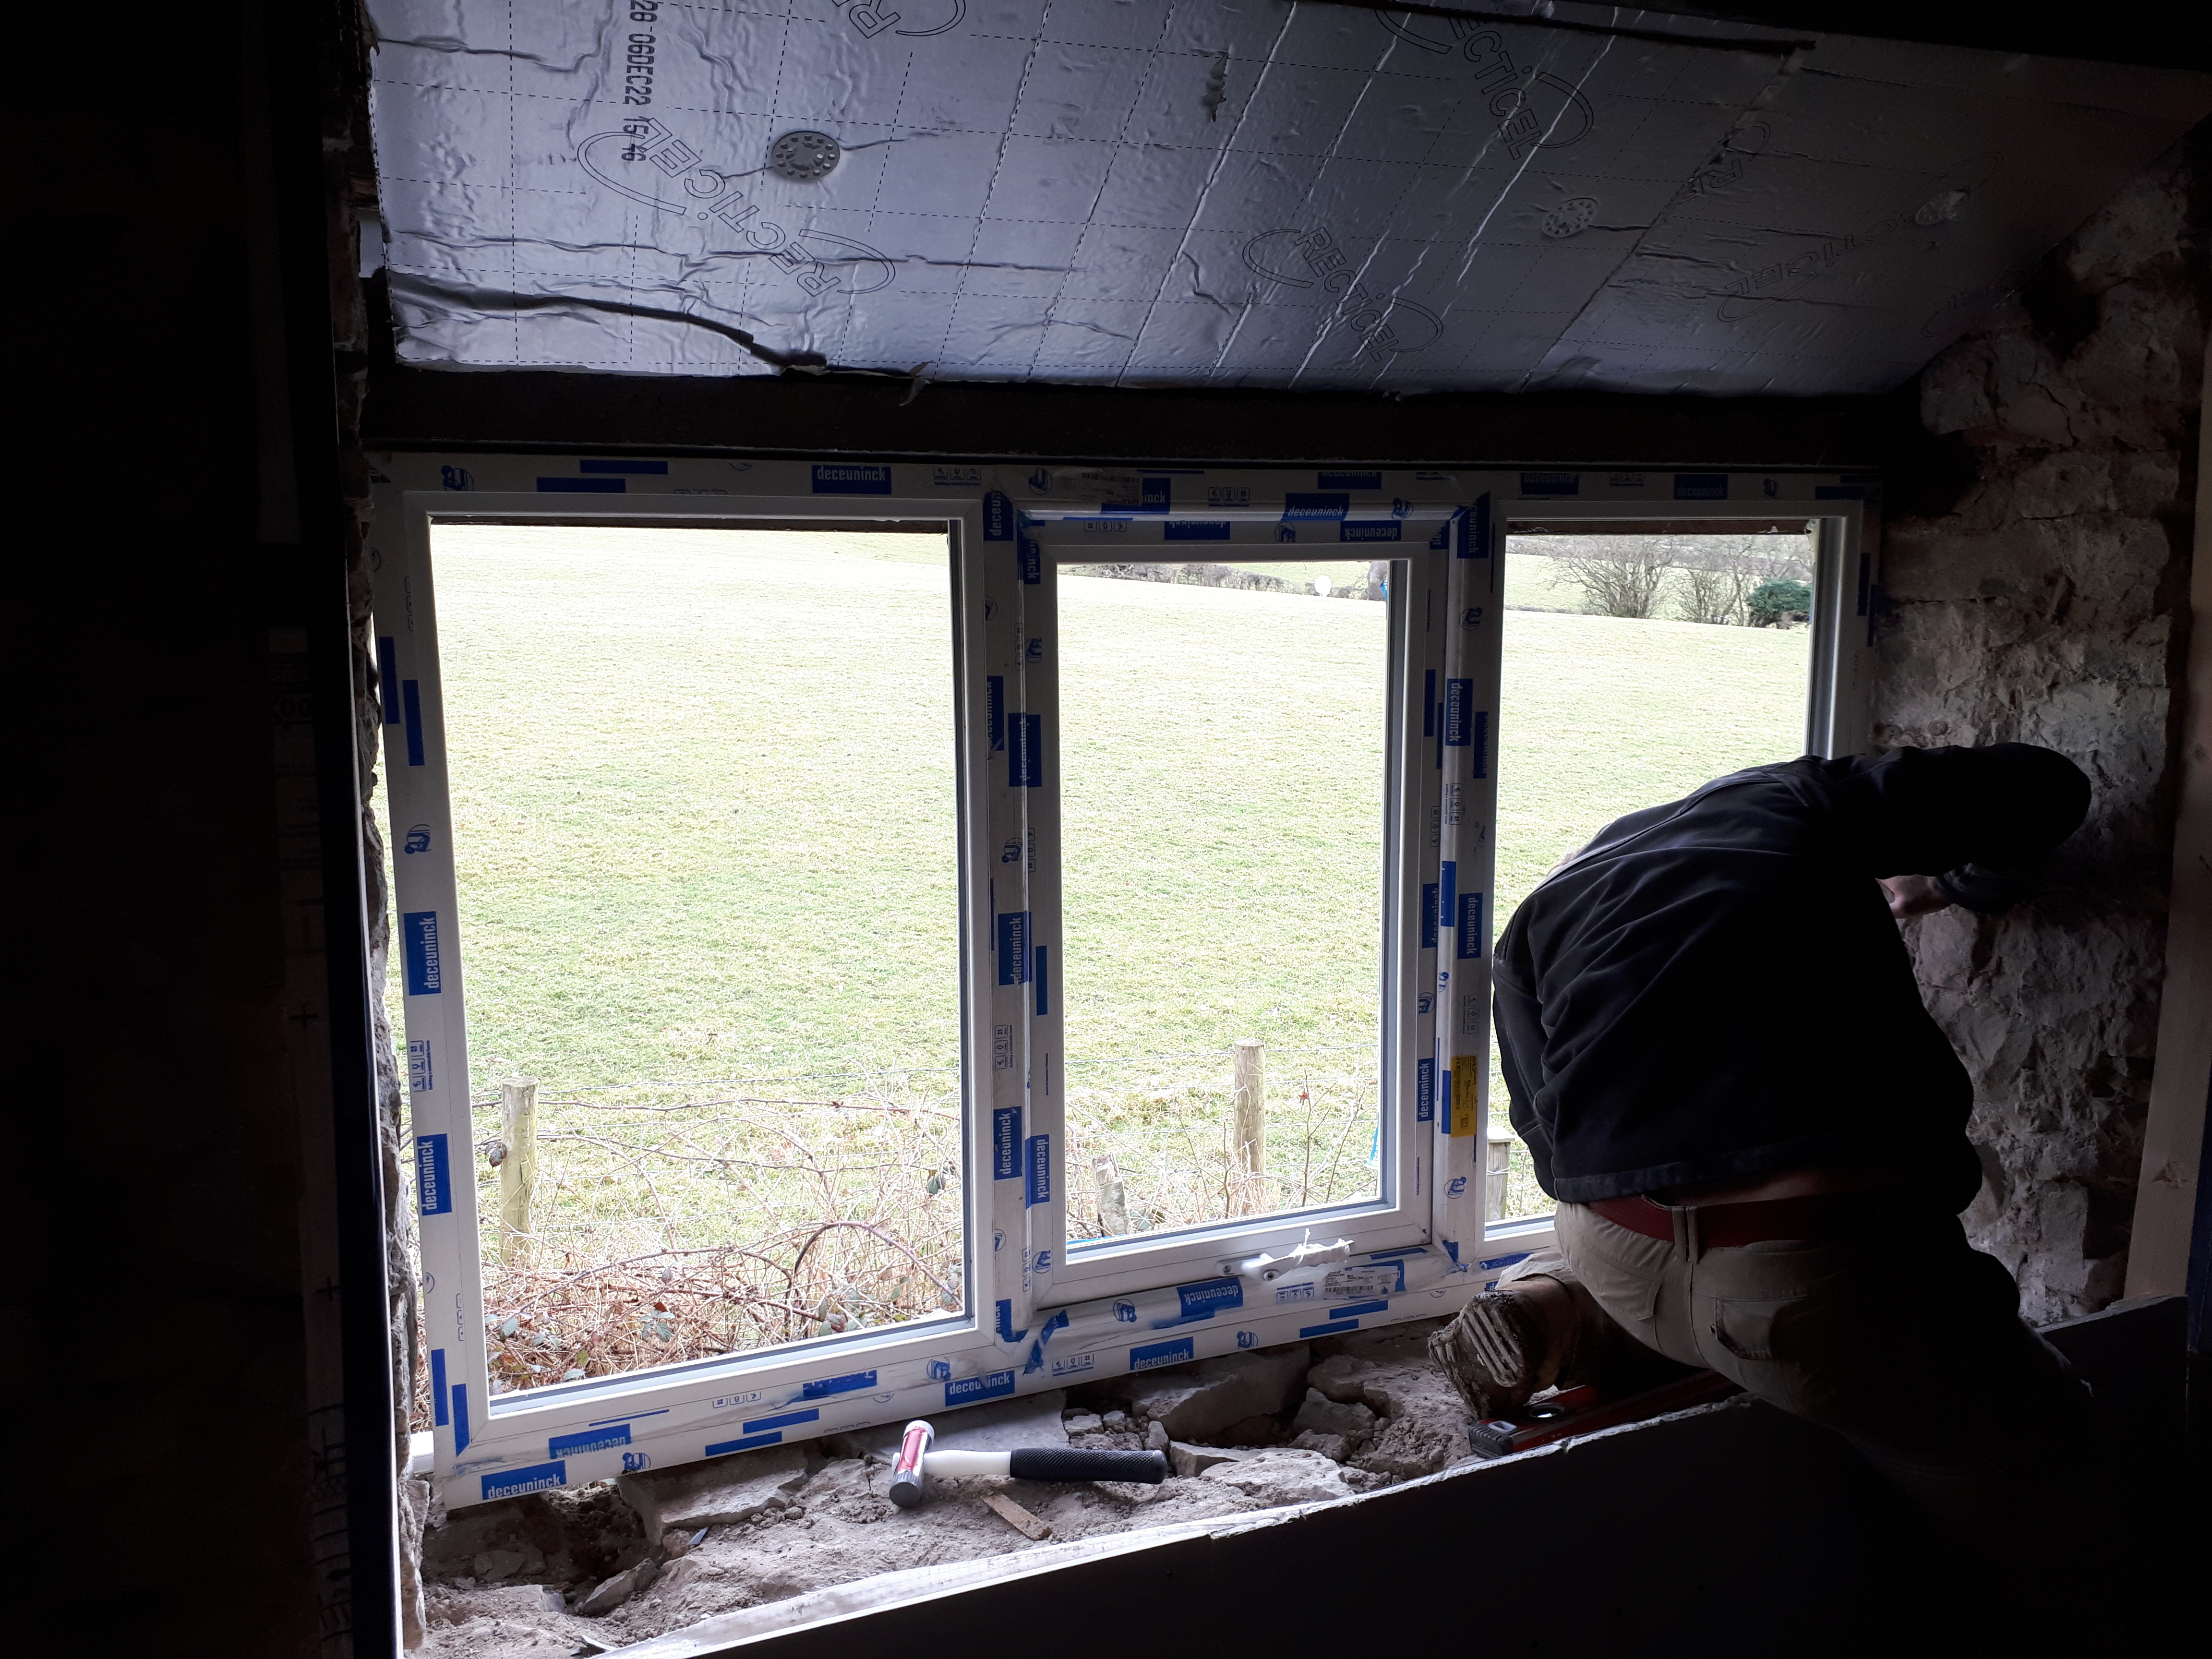
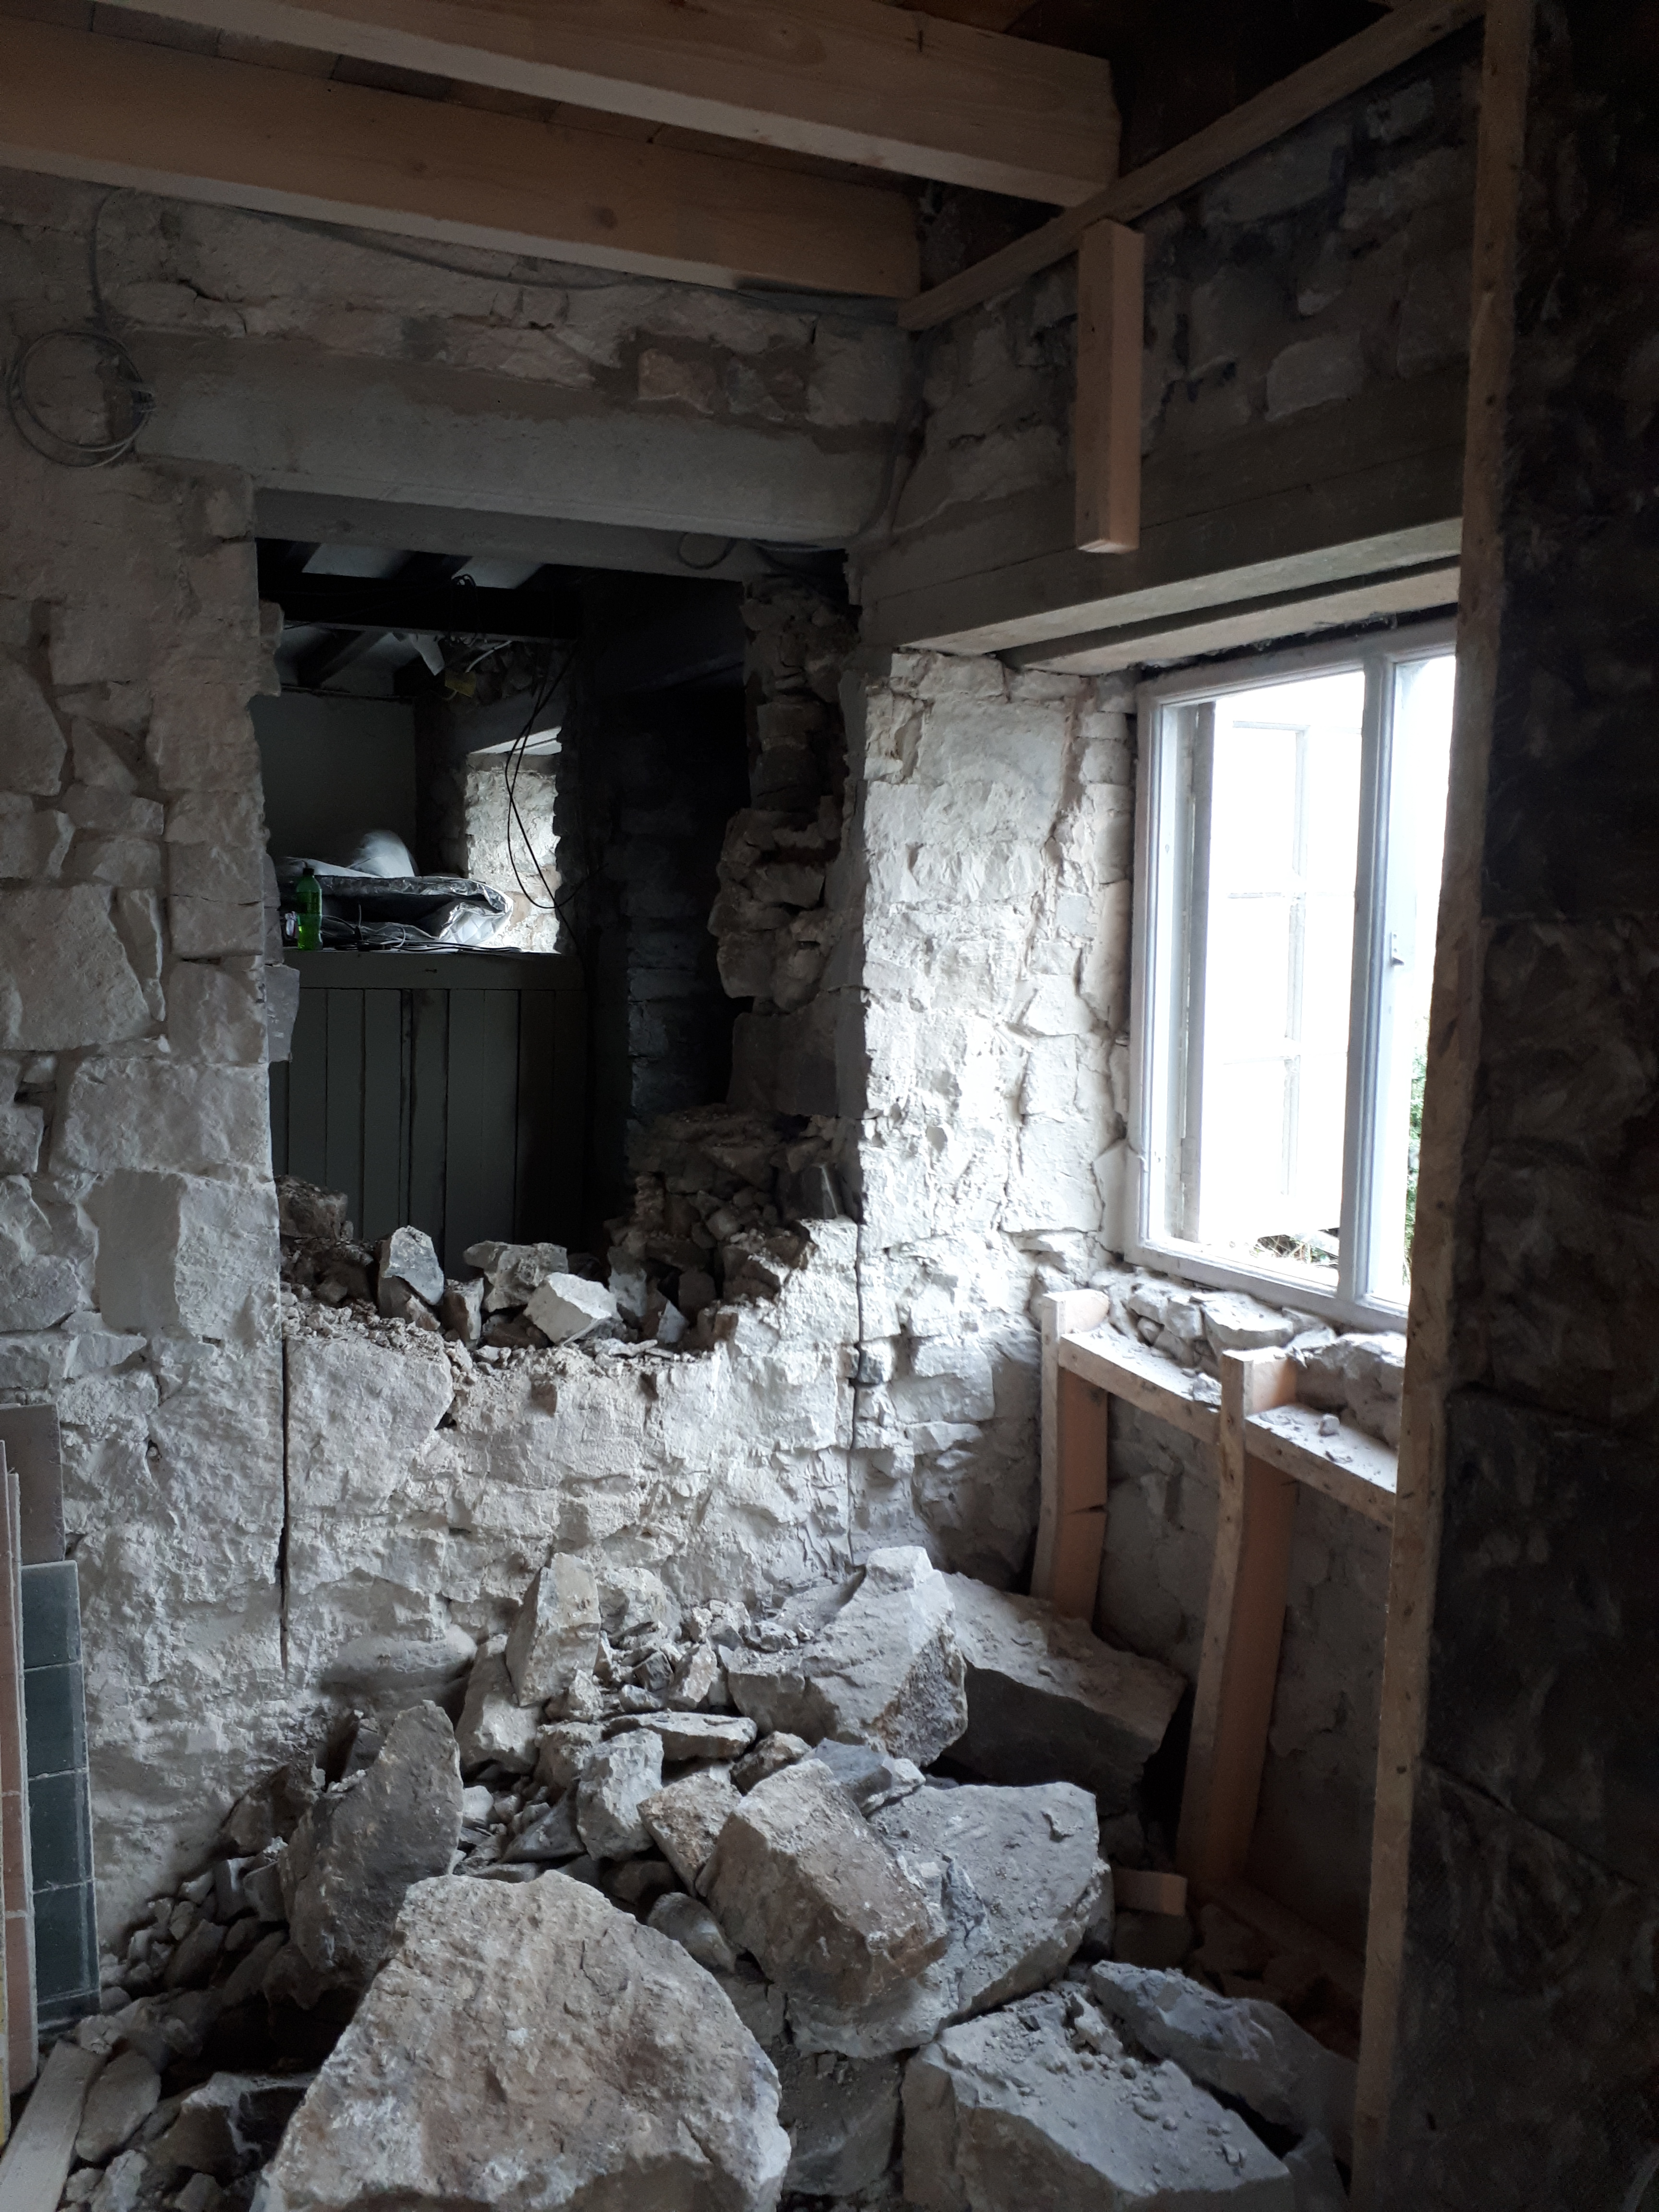
So we set about installing the last two PVC windows. The first went in relatively easily, though it took quite a while to break up the two large stones either side of it, in order to get the lintle in place.
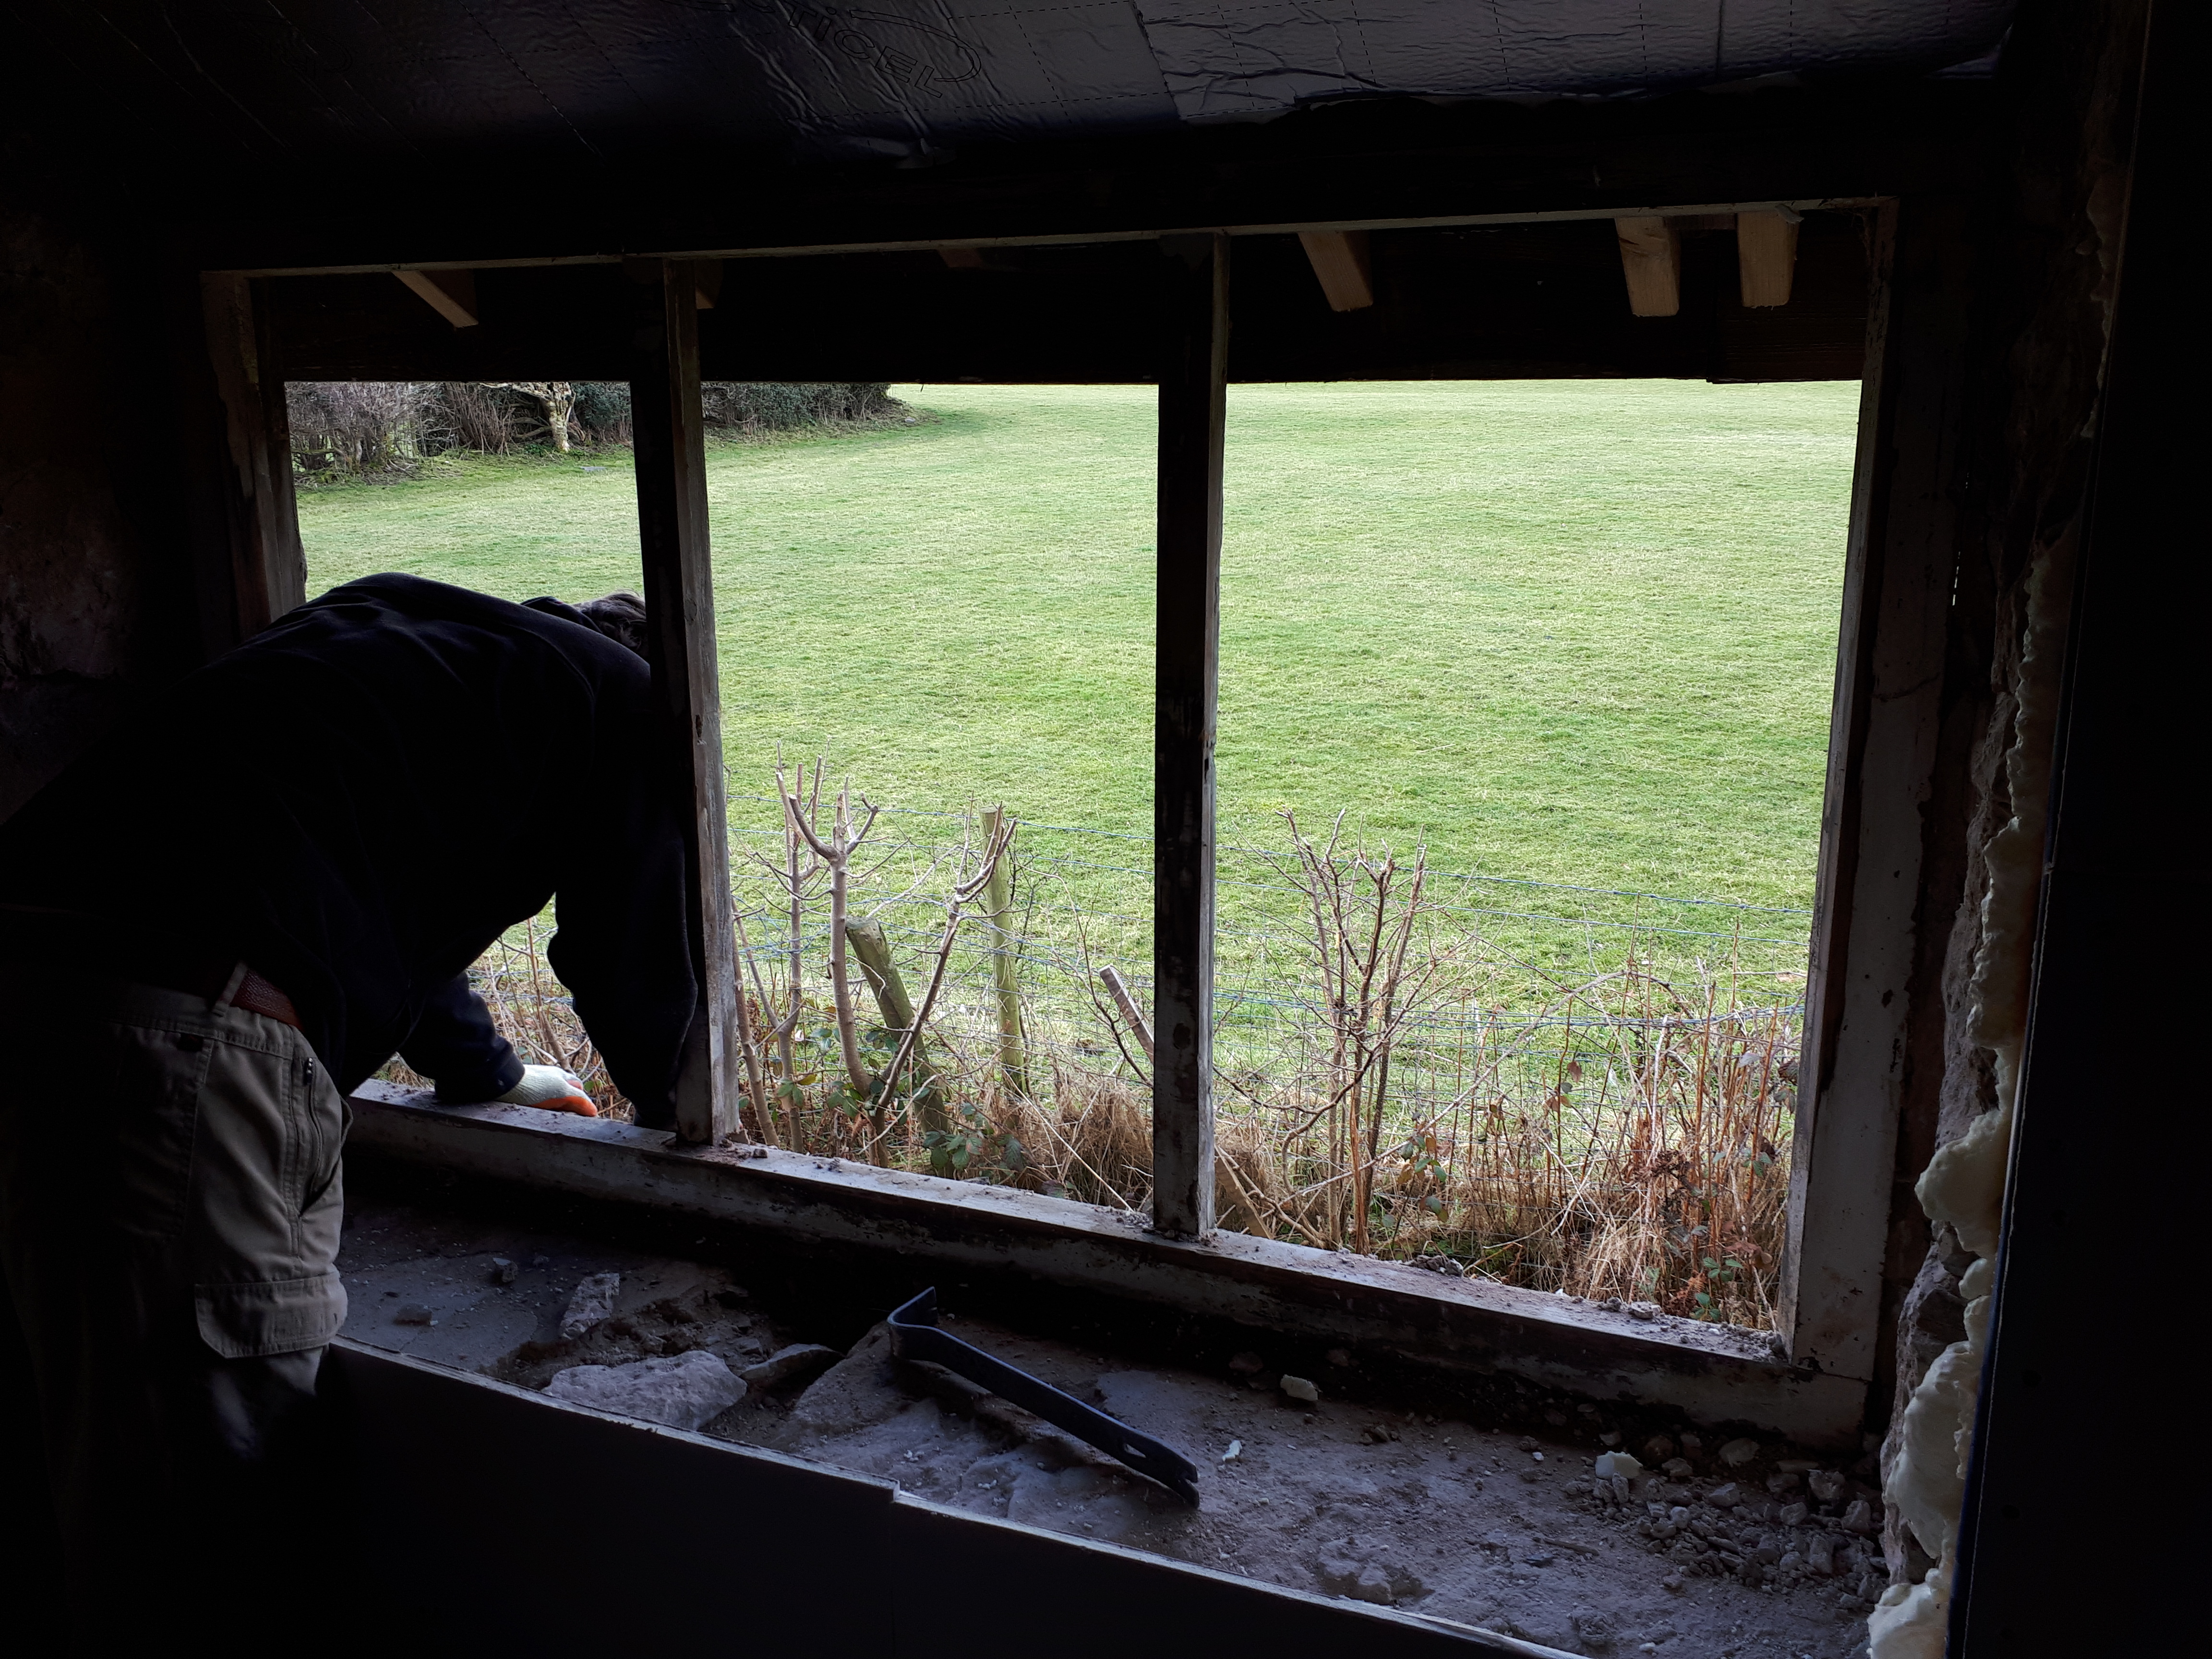
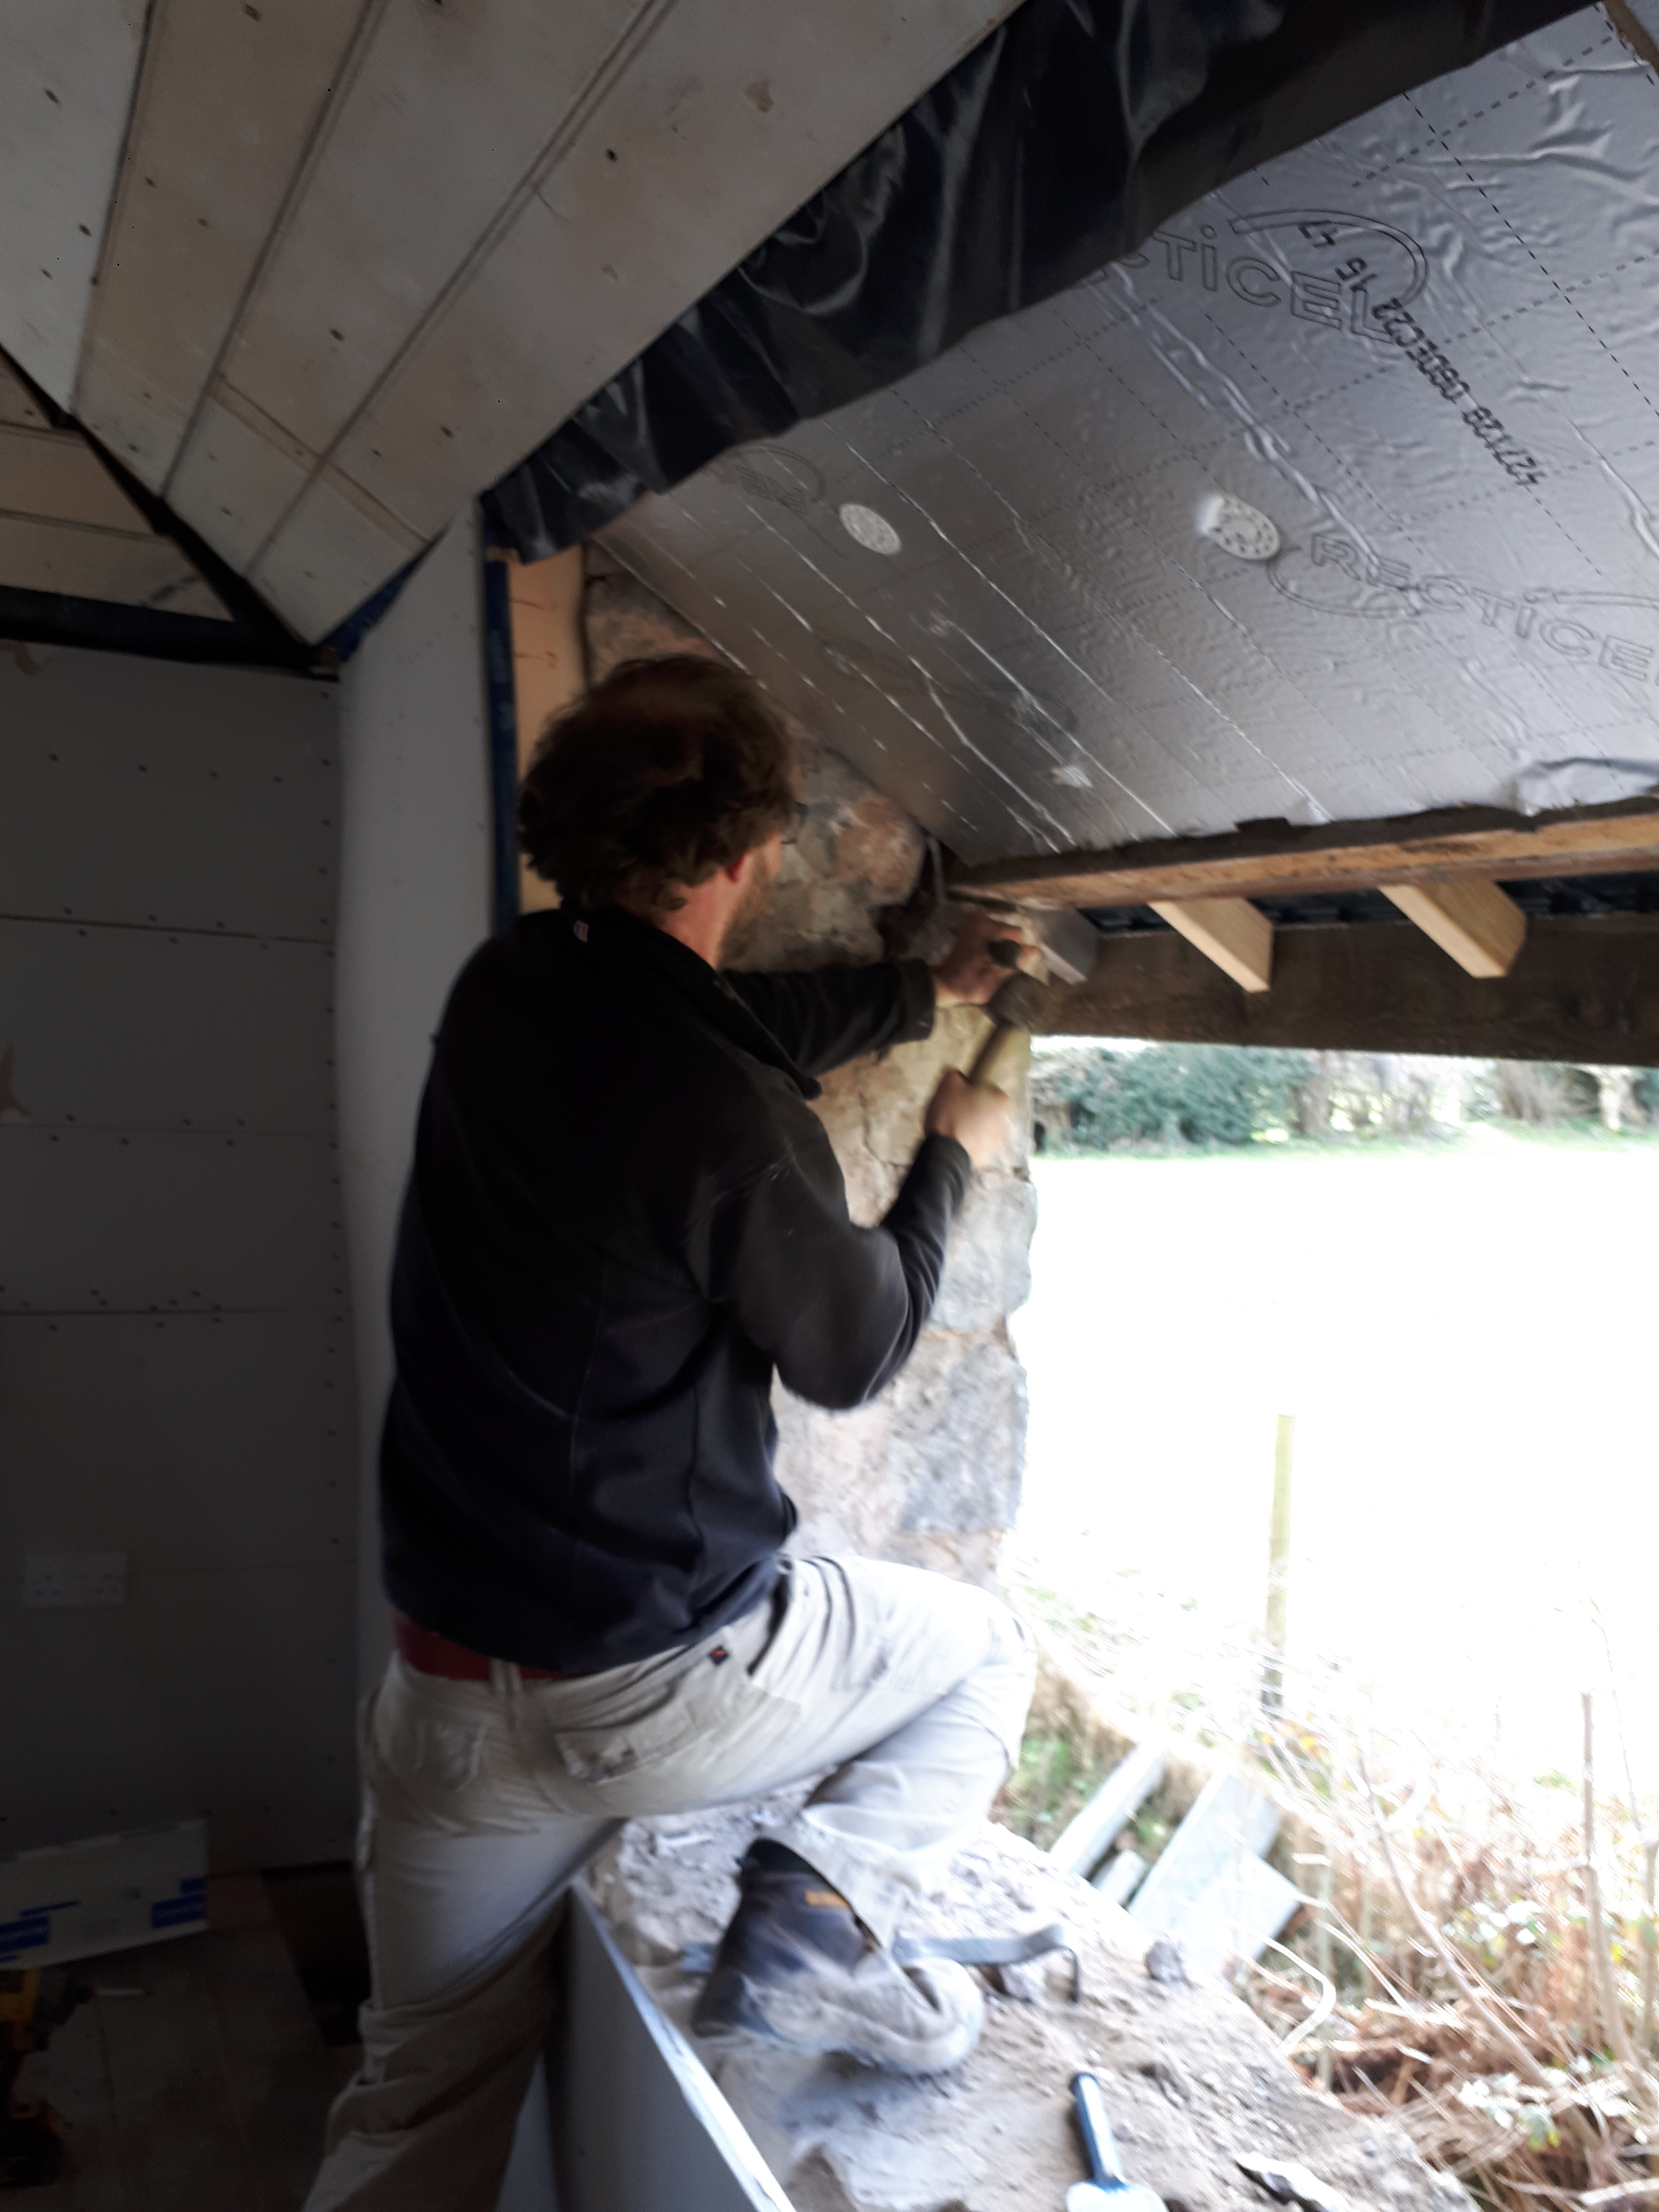
The next window was surprisingly difficult. Taking out the old window didn’t take long, as it was so rotten it fell apart in my hands. Although Chris had previous installed a new lintle on the interior of the wall, as well as in the center of the wall, we needed to replace the outer wooden lintle too. Getting acro props in place Chris started to notice the stones above slipping and had to further support them. Either side of the window, much of the stone the new lintle would sit on had dropped out, the mortar too old and weathered to hold together. It took some time to rebuild everything enough for the window to be put in place, and even then drilling into the rock risked dislodging everything. Finally, in the wind and the rain the window was secured.

Although it will have to be moved again to polish the concrete, we decided to set up the kitchen units, to check we had everything we needed and work out the best arrangement. After much juggling around, we think we’ve landed on the final design, with several units spare to use in the utility room.

Chris continued his work building the stud wall with reclaimed wood, including installing a new socket. He then carried on his electric work in the kitchen.
I continued tidying the downstairs, filling the car with another load of rubbish for the recycling center. Cleared out the house looks significantly larger. Hopefully all this cleaning will be worth it, giving the valuer the right sense of its worth so we can get our mortgage moved across.
Out in the garden the snowdrops have gone over, but in their place we have a few daffodils to enjoy. I particularly like this bizarre cultivar. No good for pollinators with all its fancy layers, but still very fancy-looking. Hopefully we’ll have a house to match it one day, although a little more wildlife-friendly.

-
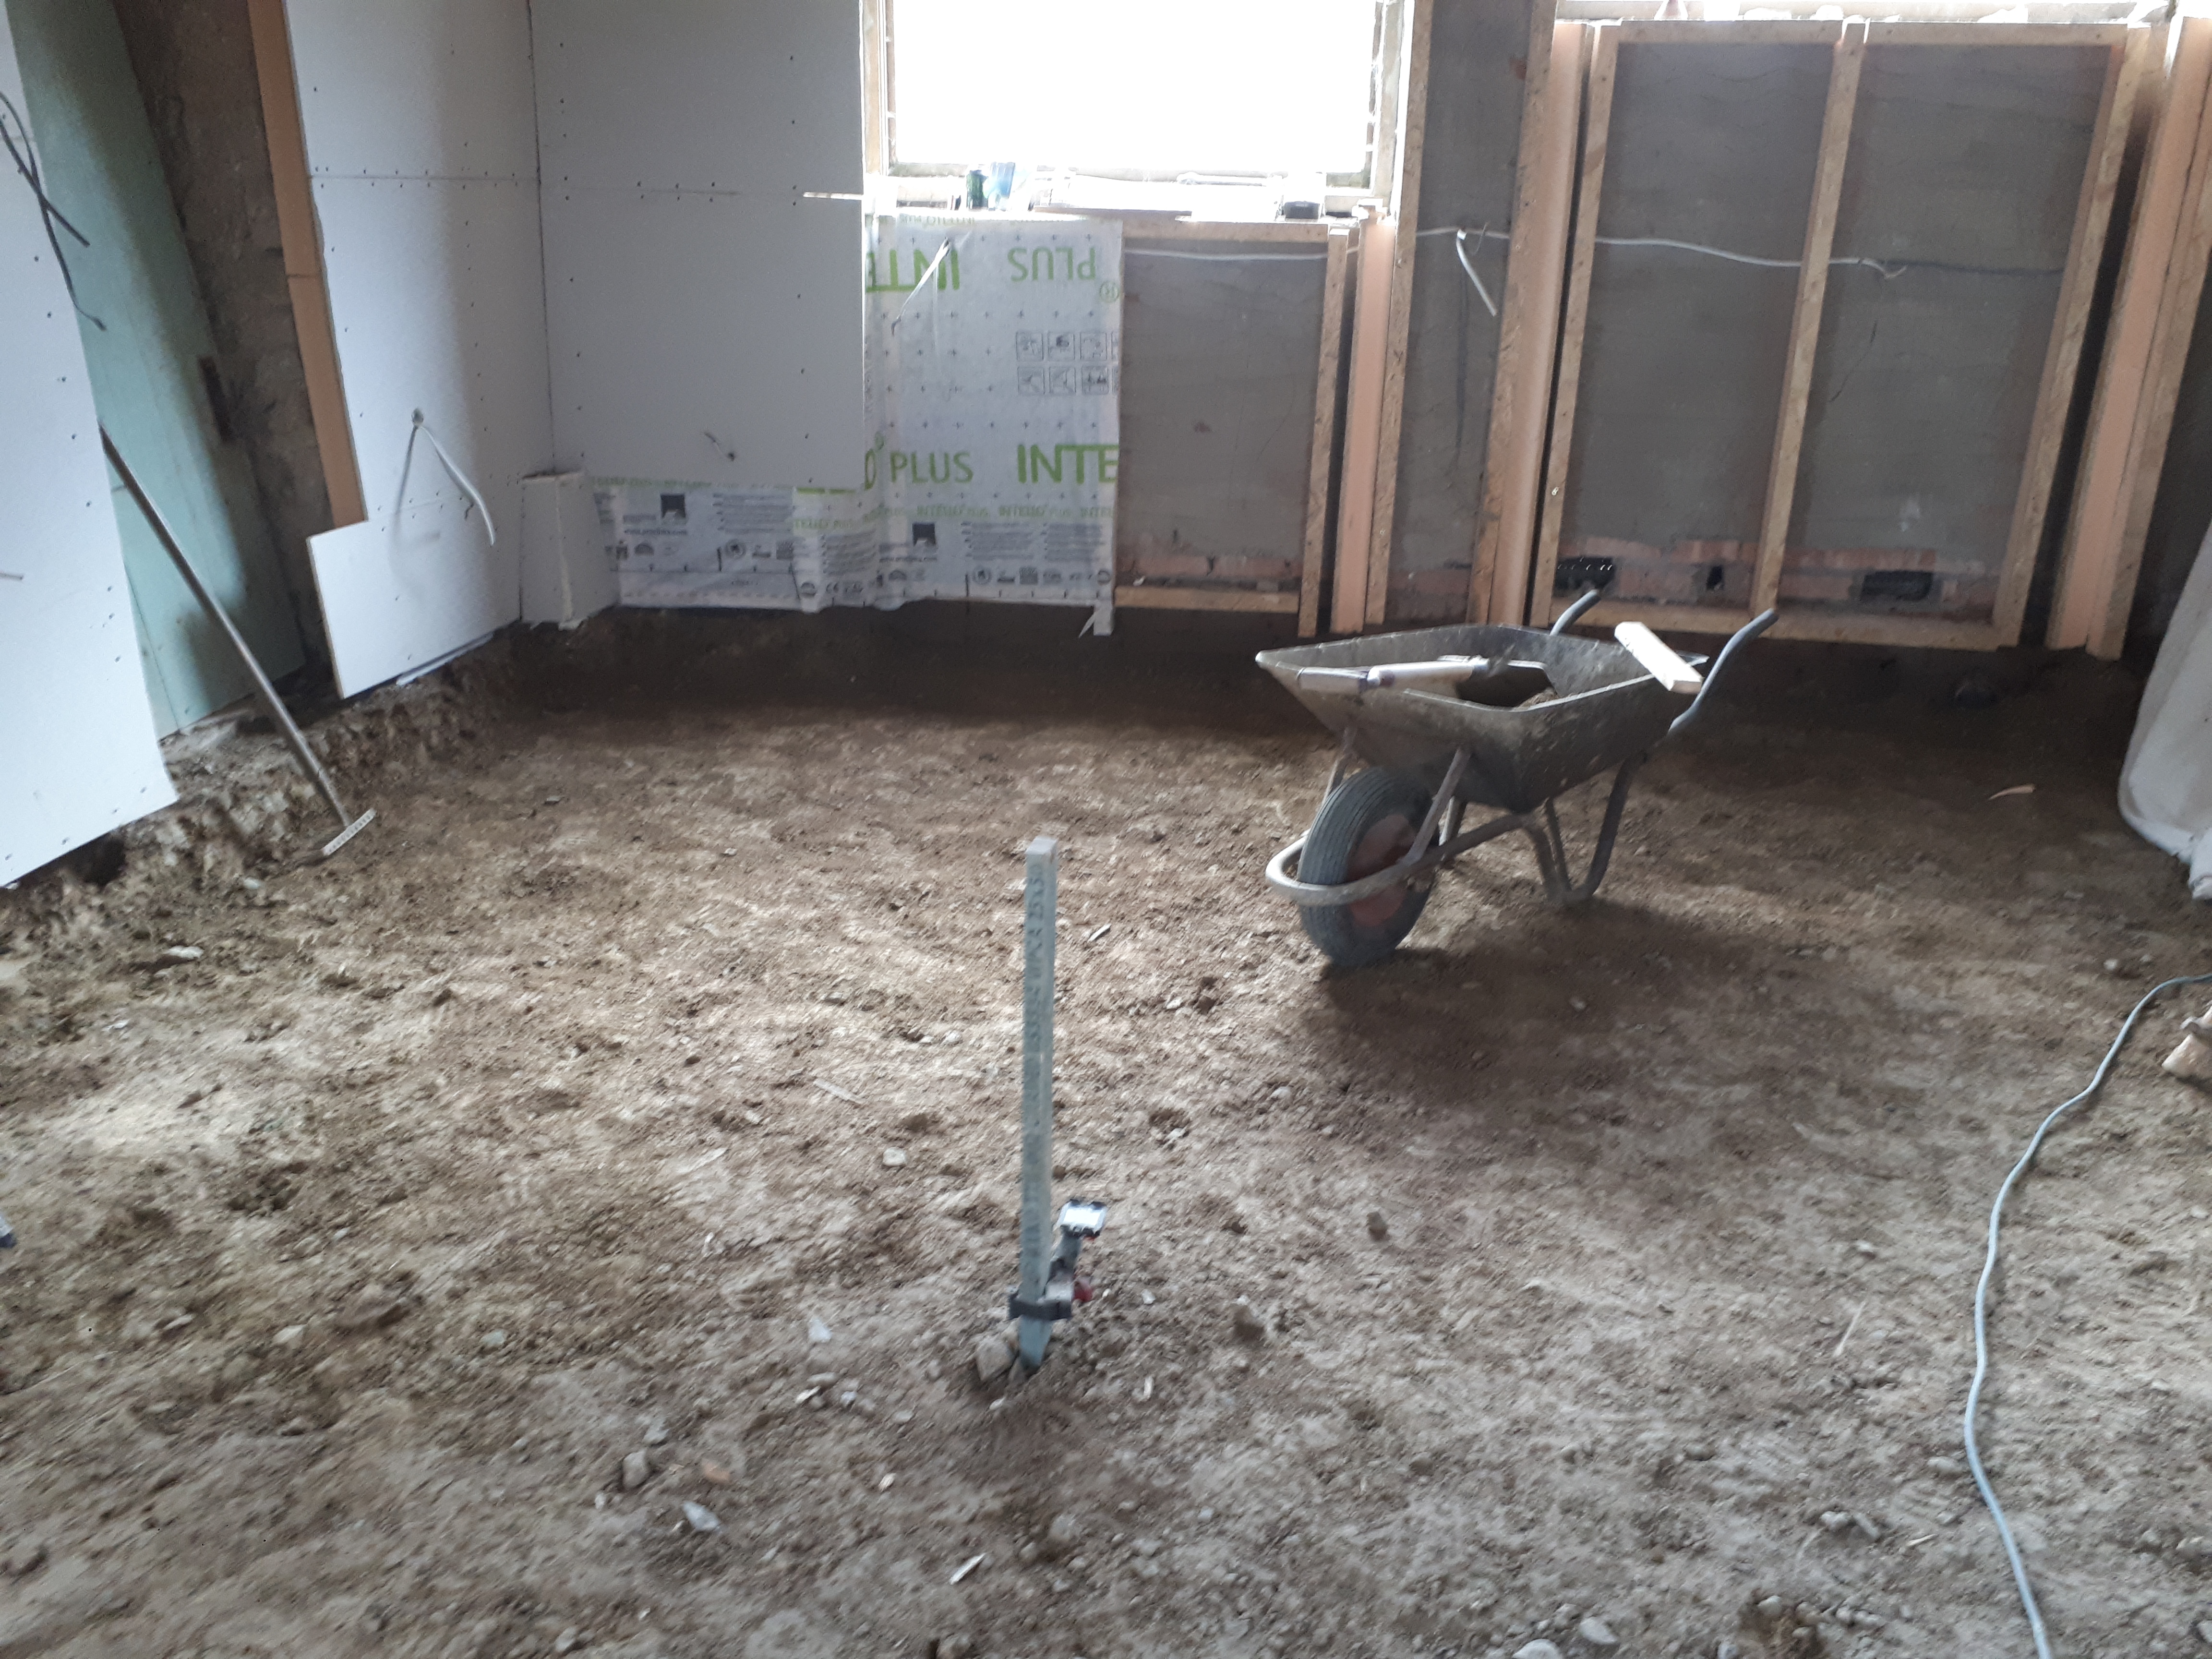
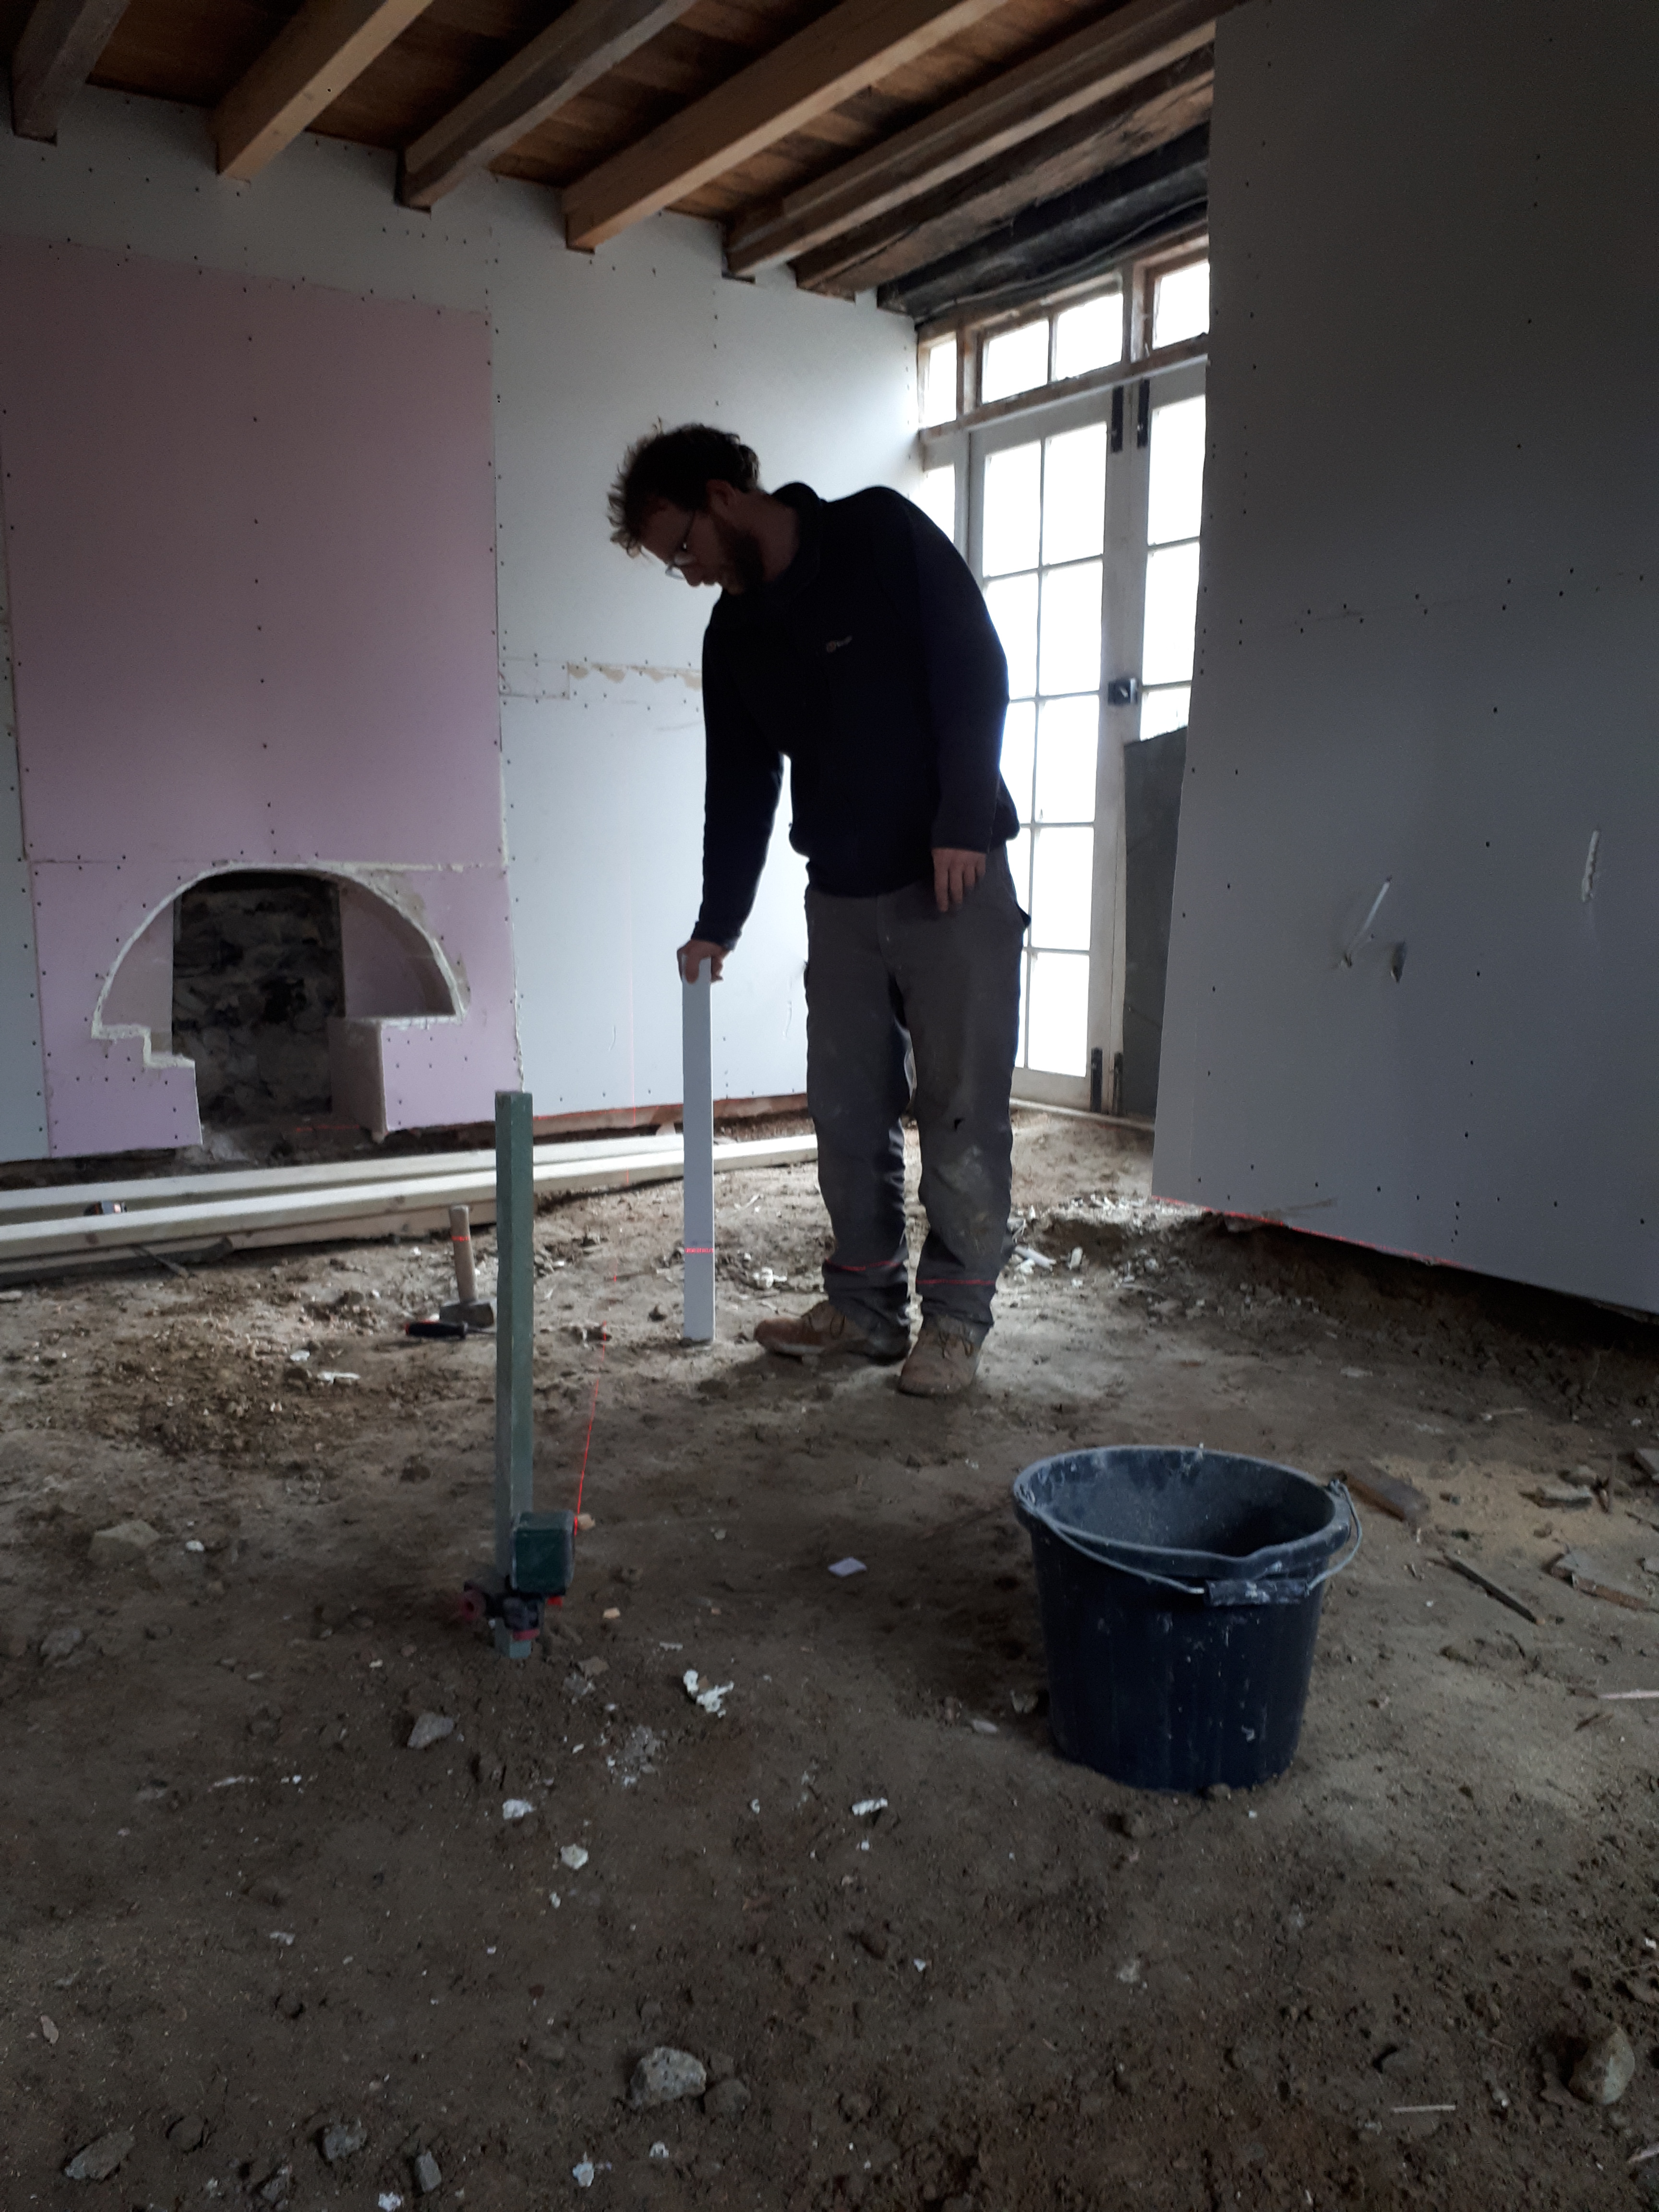
Grounded
It was an early start to get to the house to test the underfloor heating before the cement truck arrived. Unfortunately, the company delivering the cement rang as we were driving across, asking if they could arrive half an hour early. Gone was our prep time.
Arriving soon after us our cement deliverer was in a foul mood. He was clearly unhappy about the steps up to the house, the office not having passed on this information. He also told us our boards were unnecessary, and wasn’t pleased we were still fiddling around testing the heating.
Still, as he began barrowing the cement, some 2.7 m3 of it, we were pleased to have him.
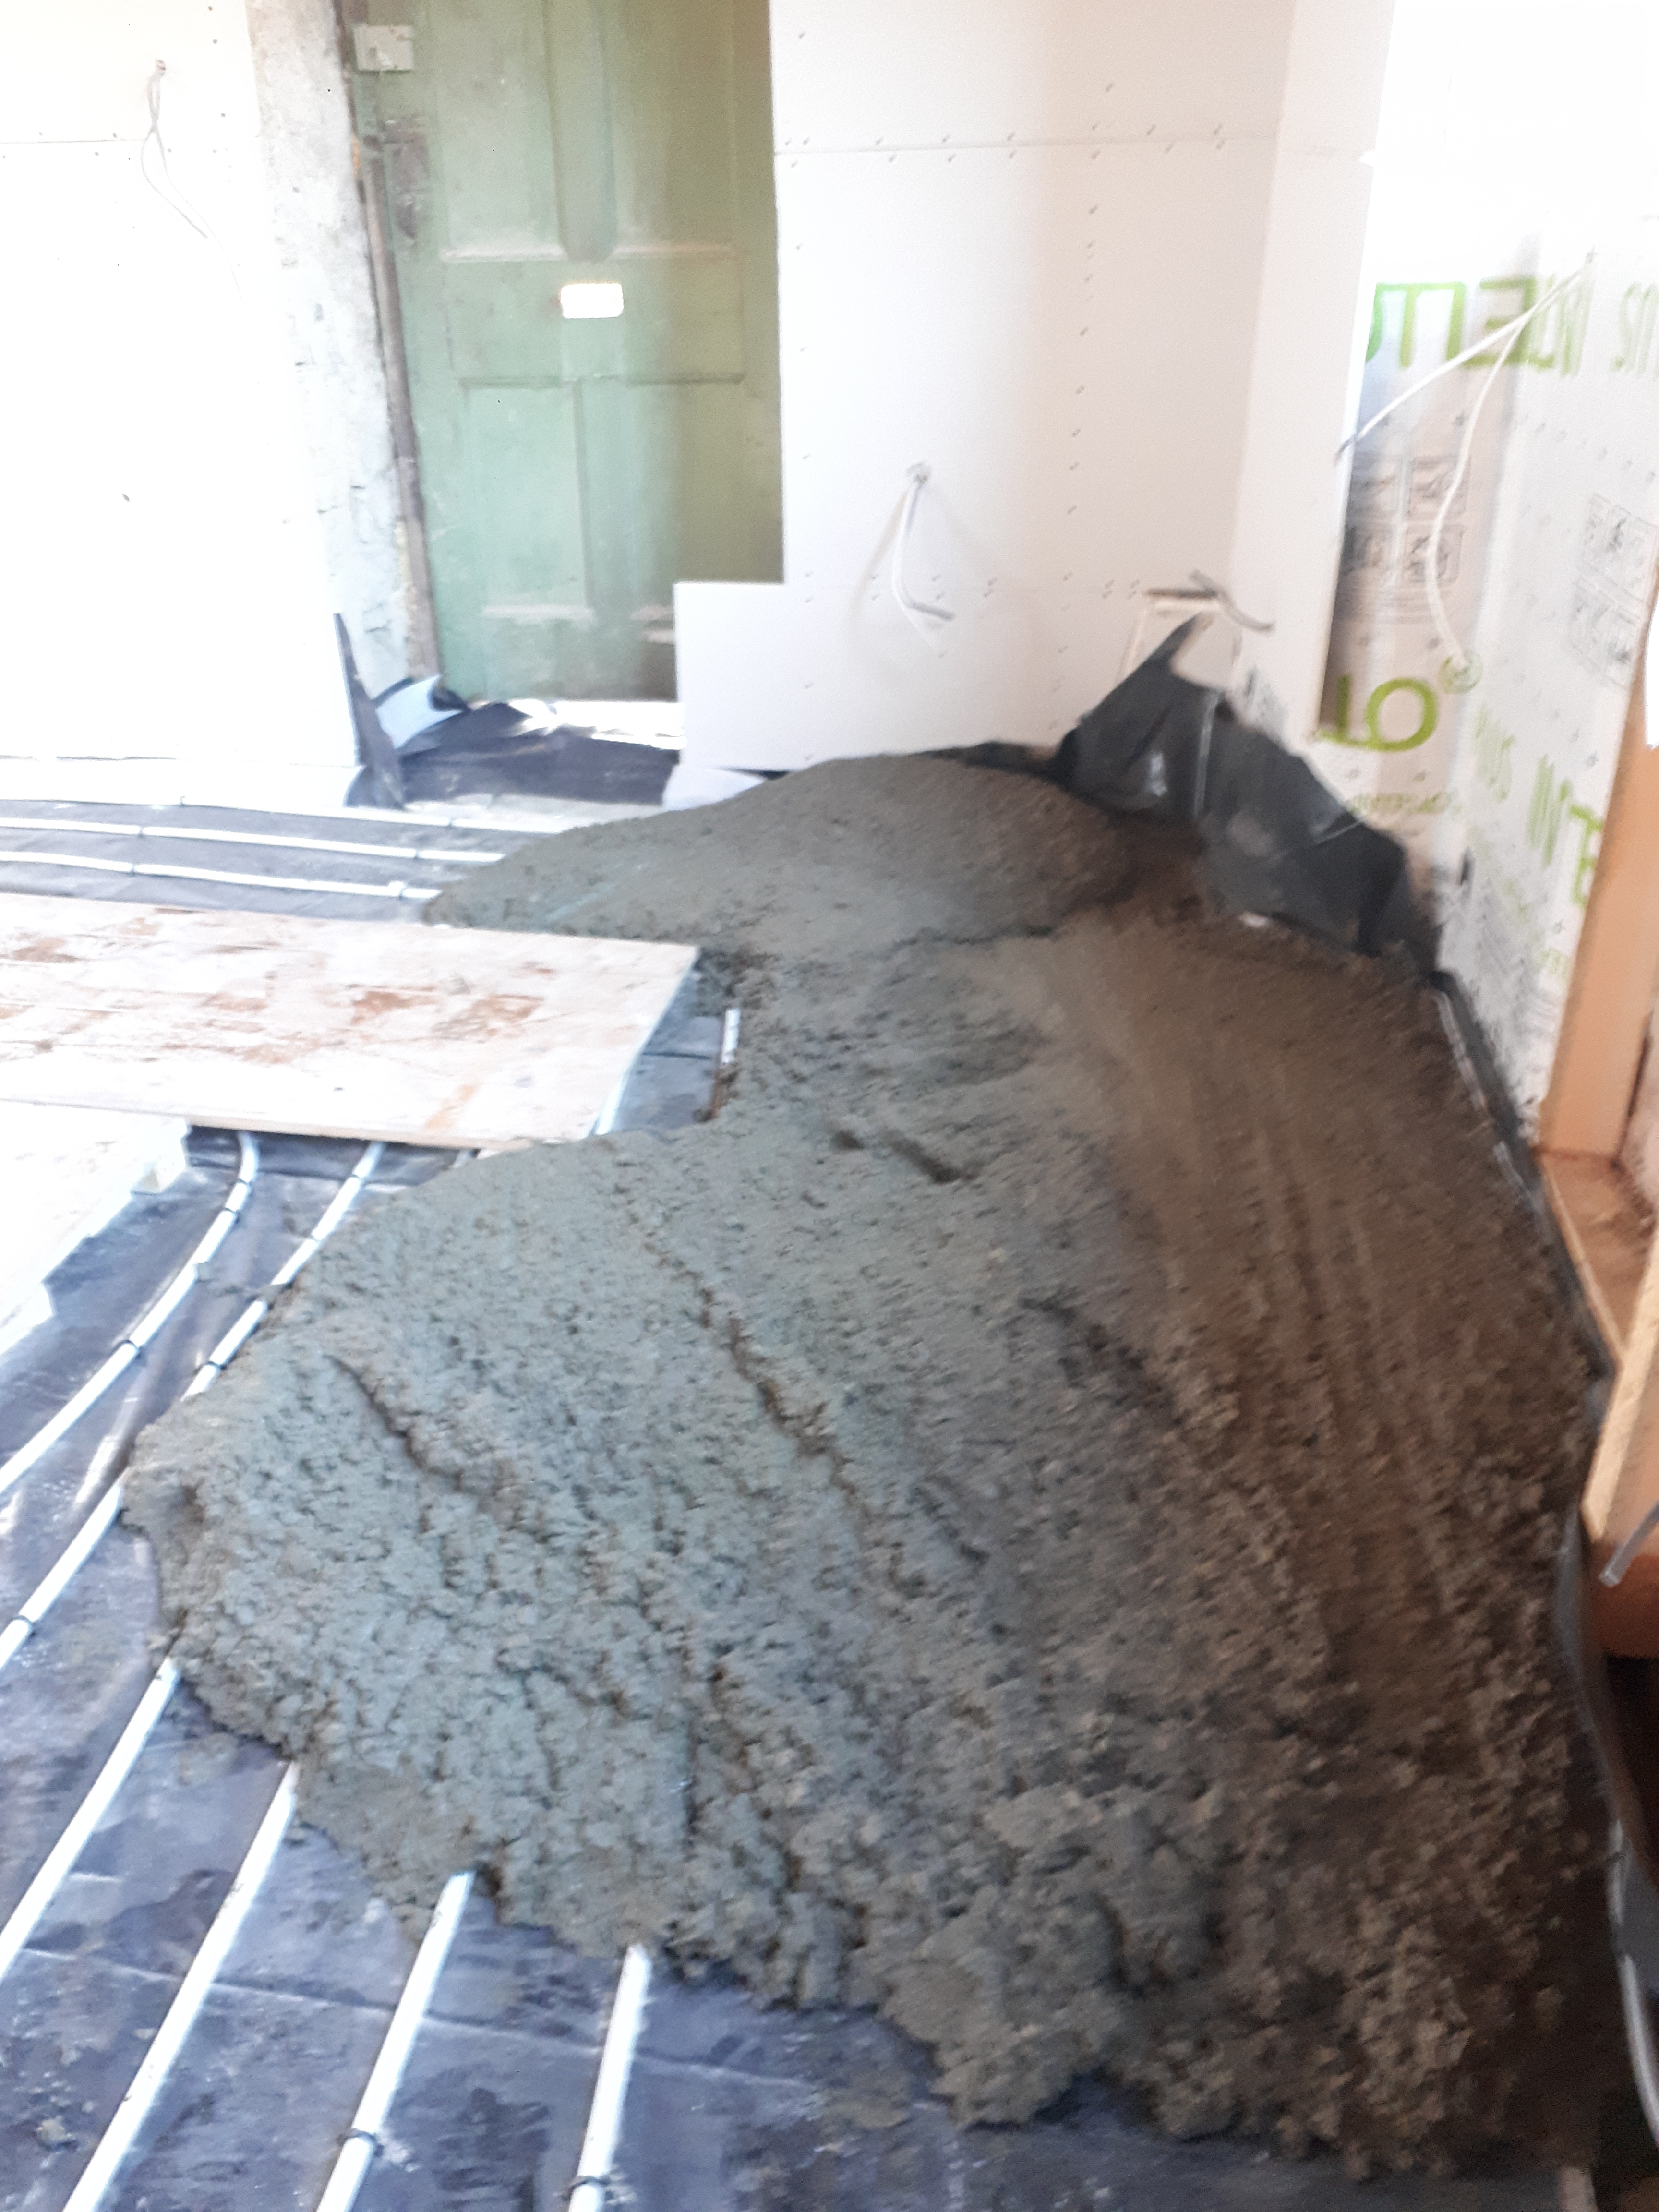

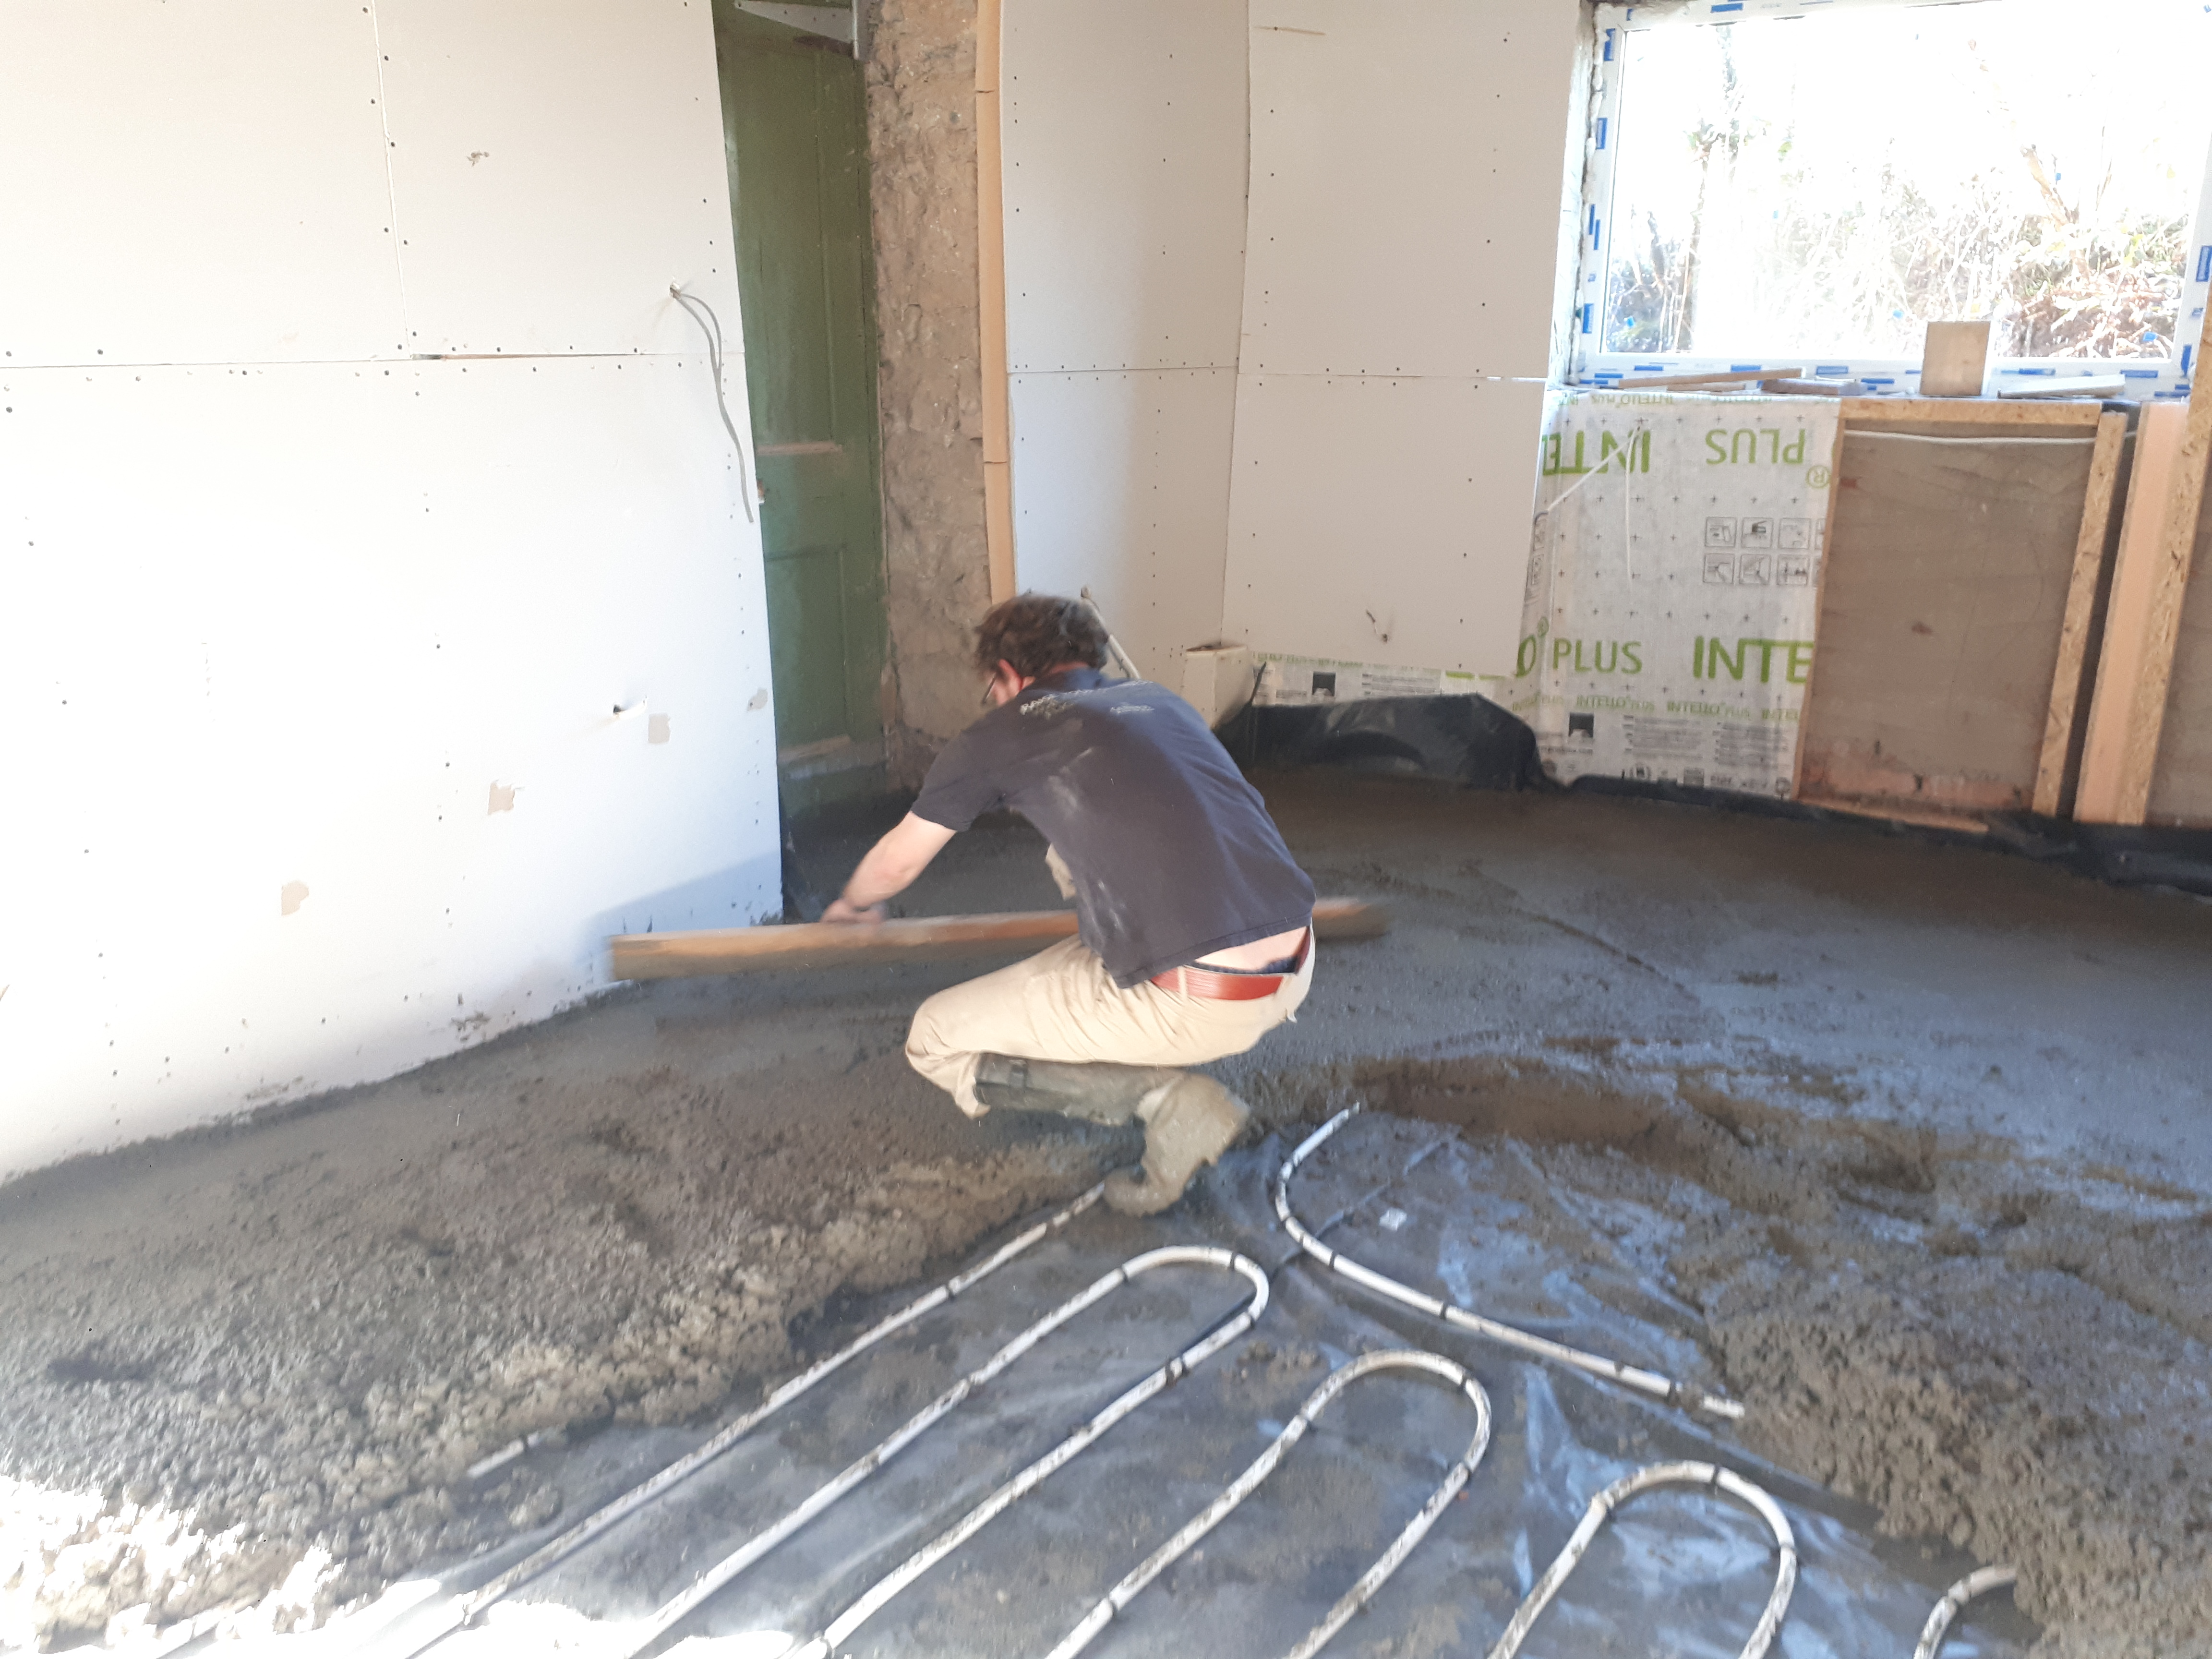
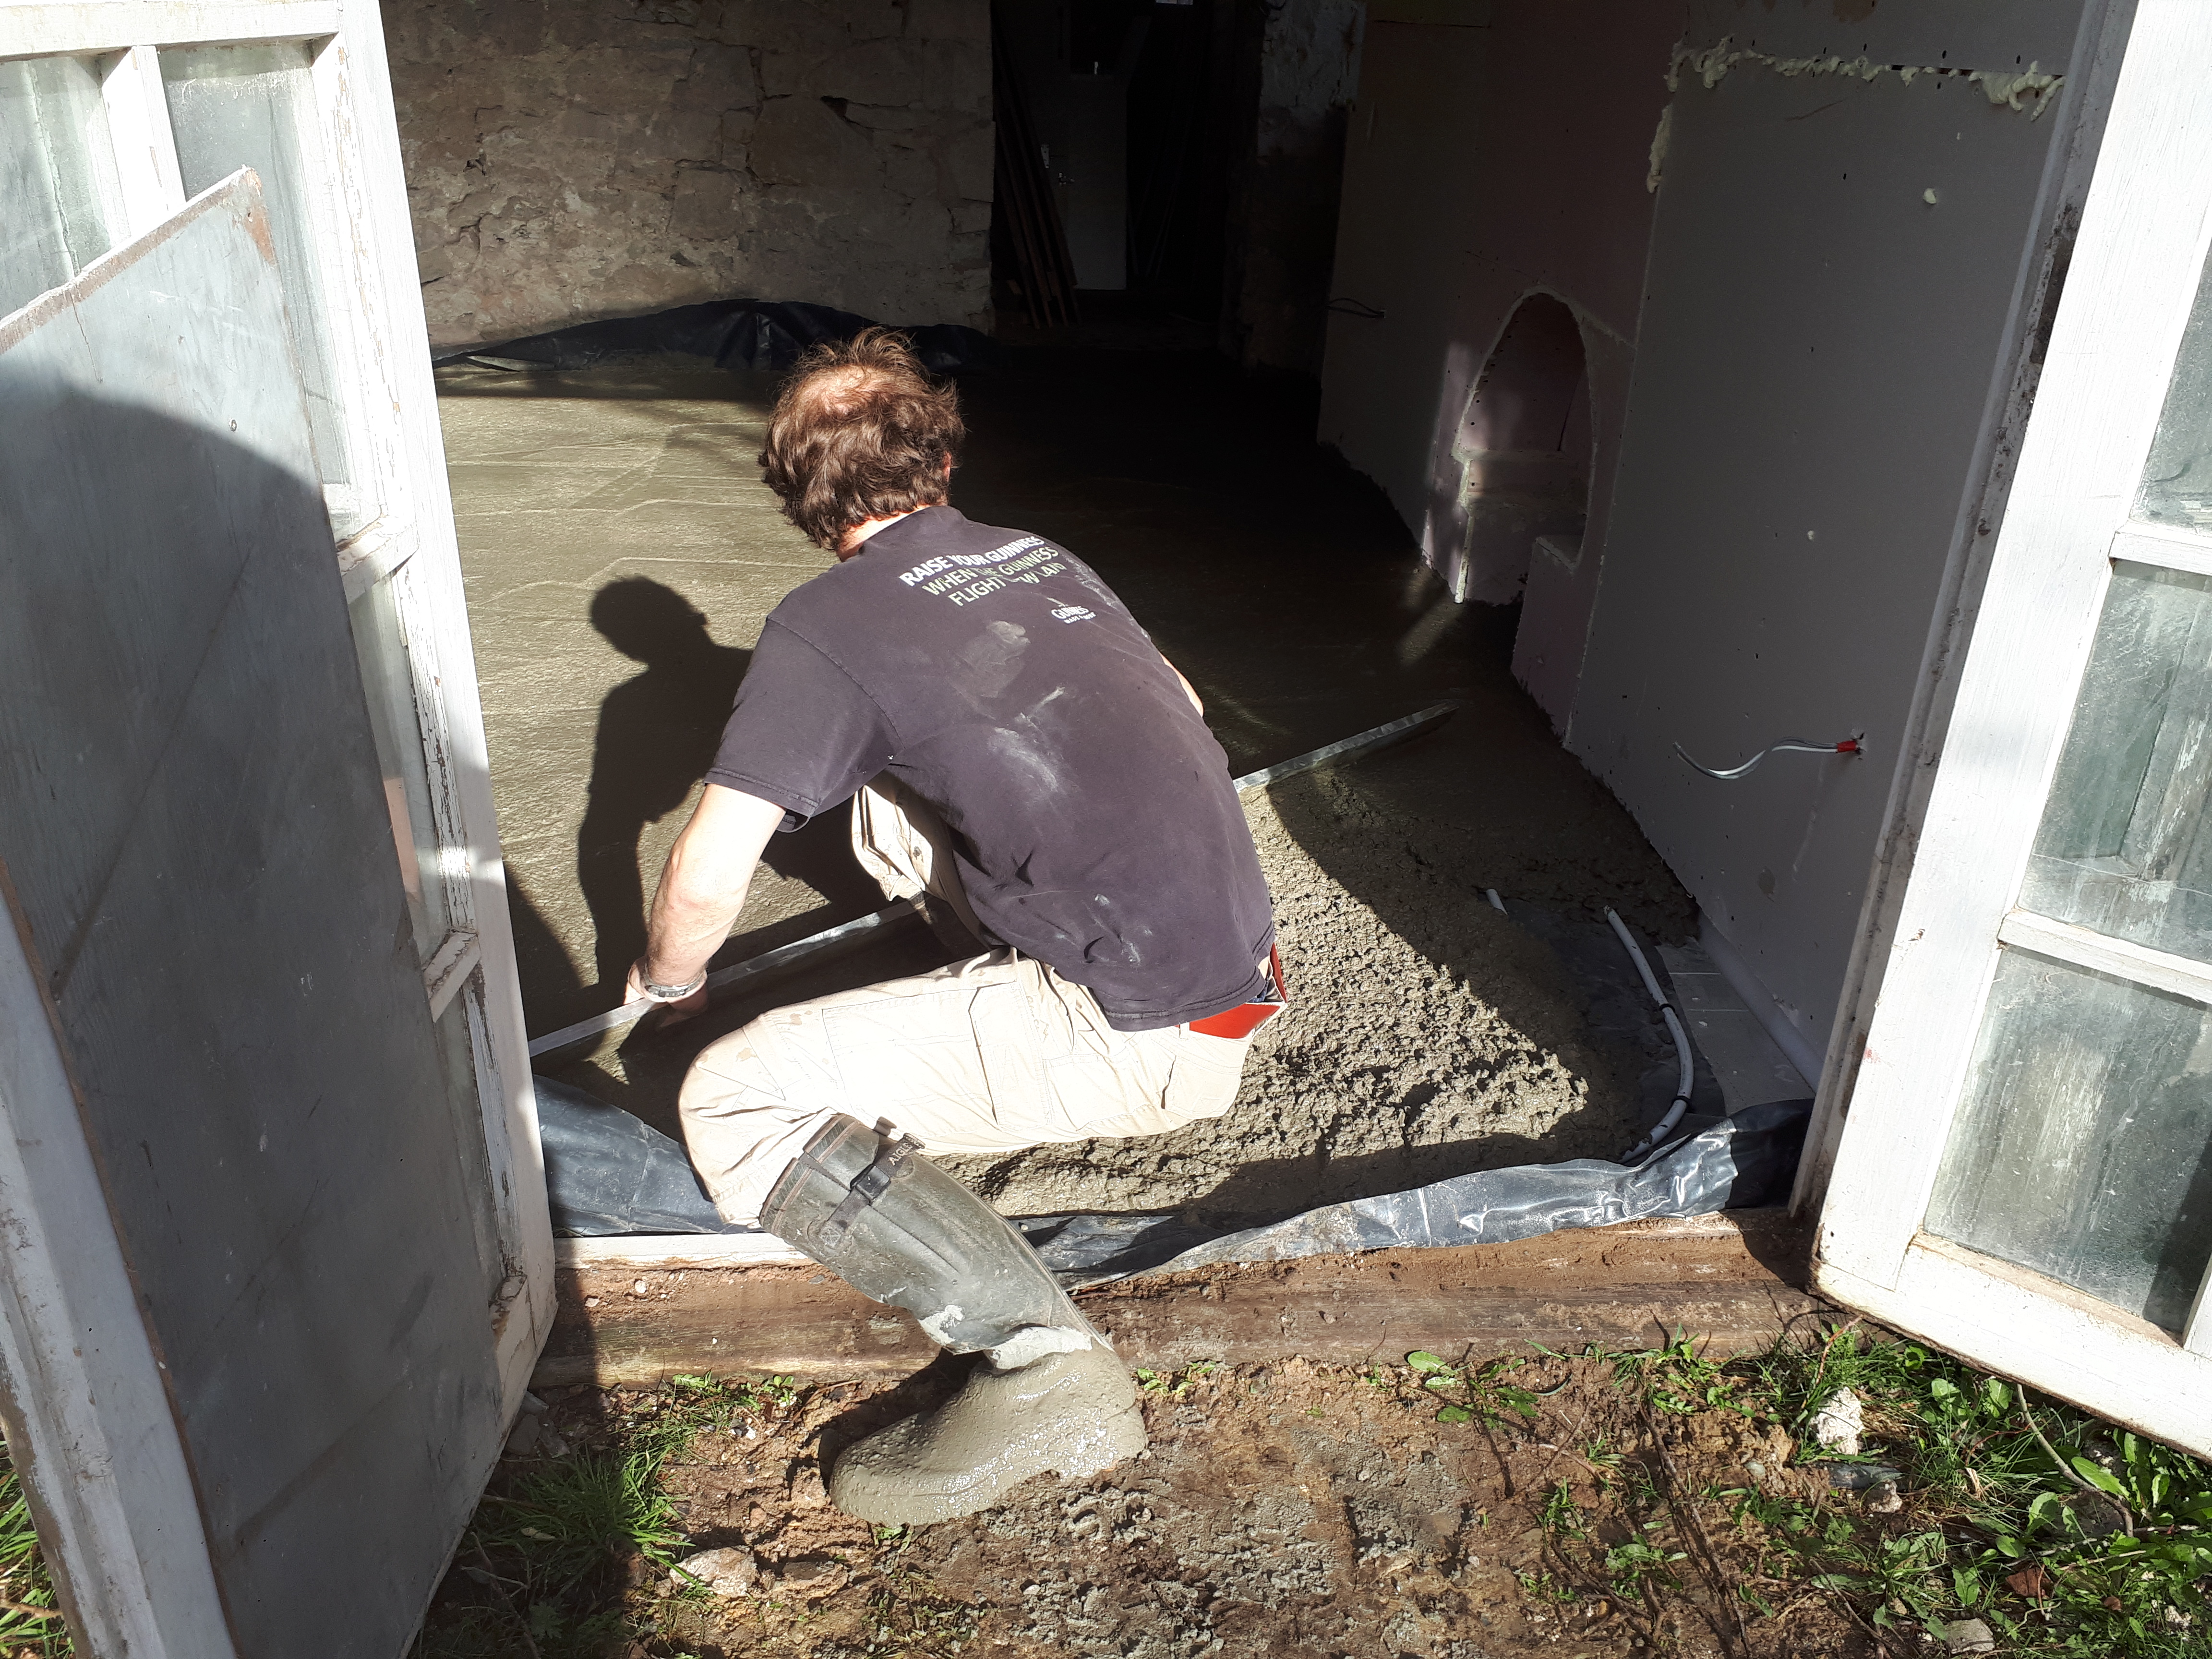
While he barrowed in and dumped the cement, we spread it out and flattened it, using the back of a rake and a long piece of wood.
Around half-way through, our cement deliverer stopped to state how impressed he was with our work. He’d been worried when he arrived, but we were clearly experienced or good at faking it. No bad thing if you can fool an expert.
Cement spread, we had to wait for it to set a little before compacting it. Upstairs Chris continued installing sockets.

I meanwhile continued clearing the other rooms of rubbish and tidying.

Sockets and tidying done we carried on with boarding the ceiling.
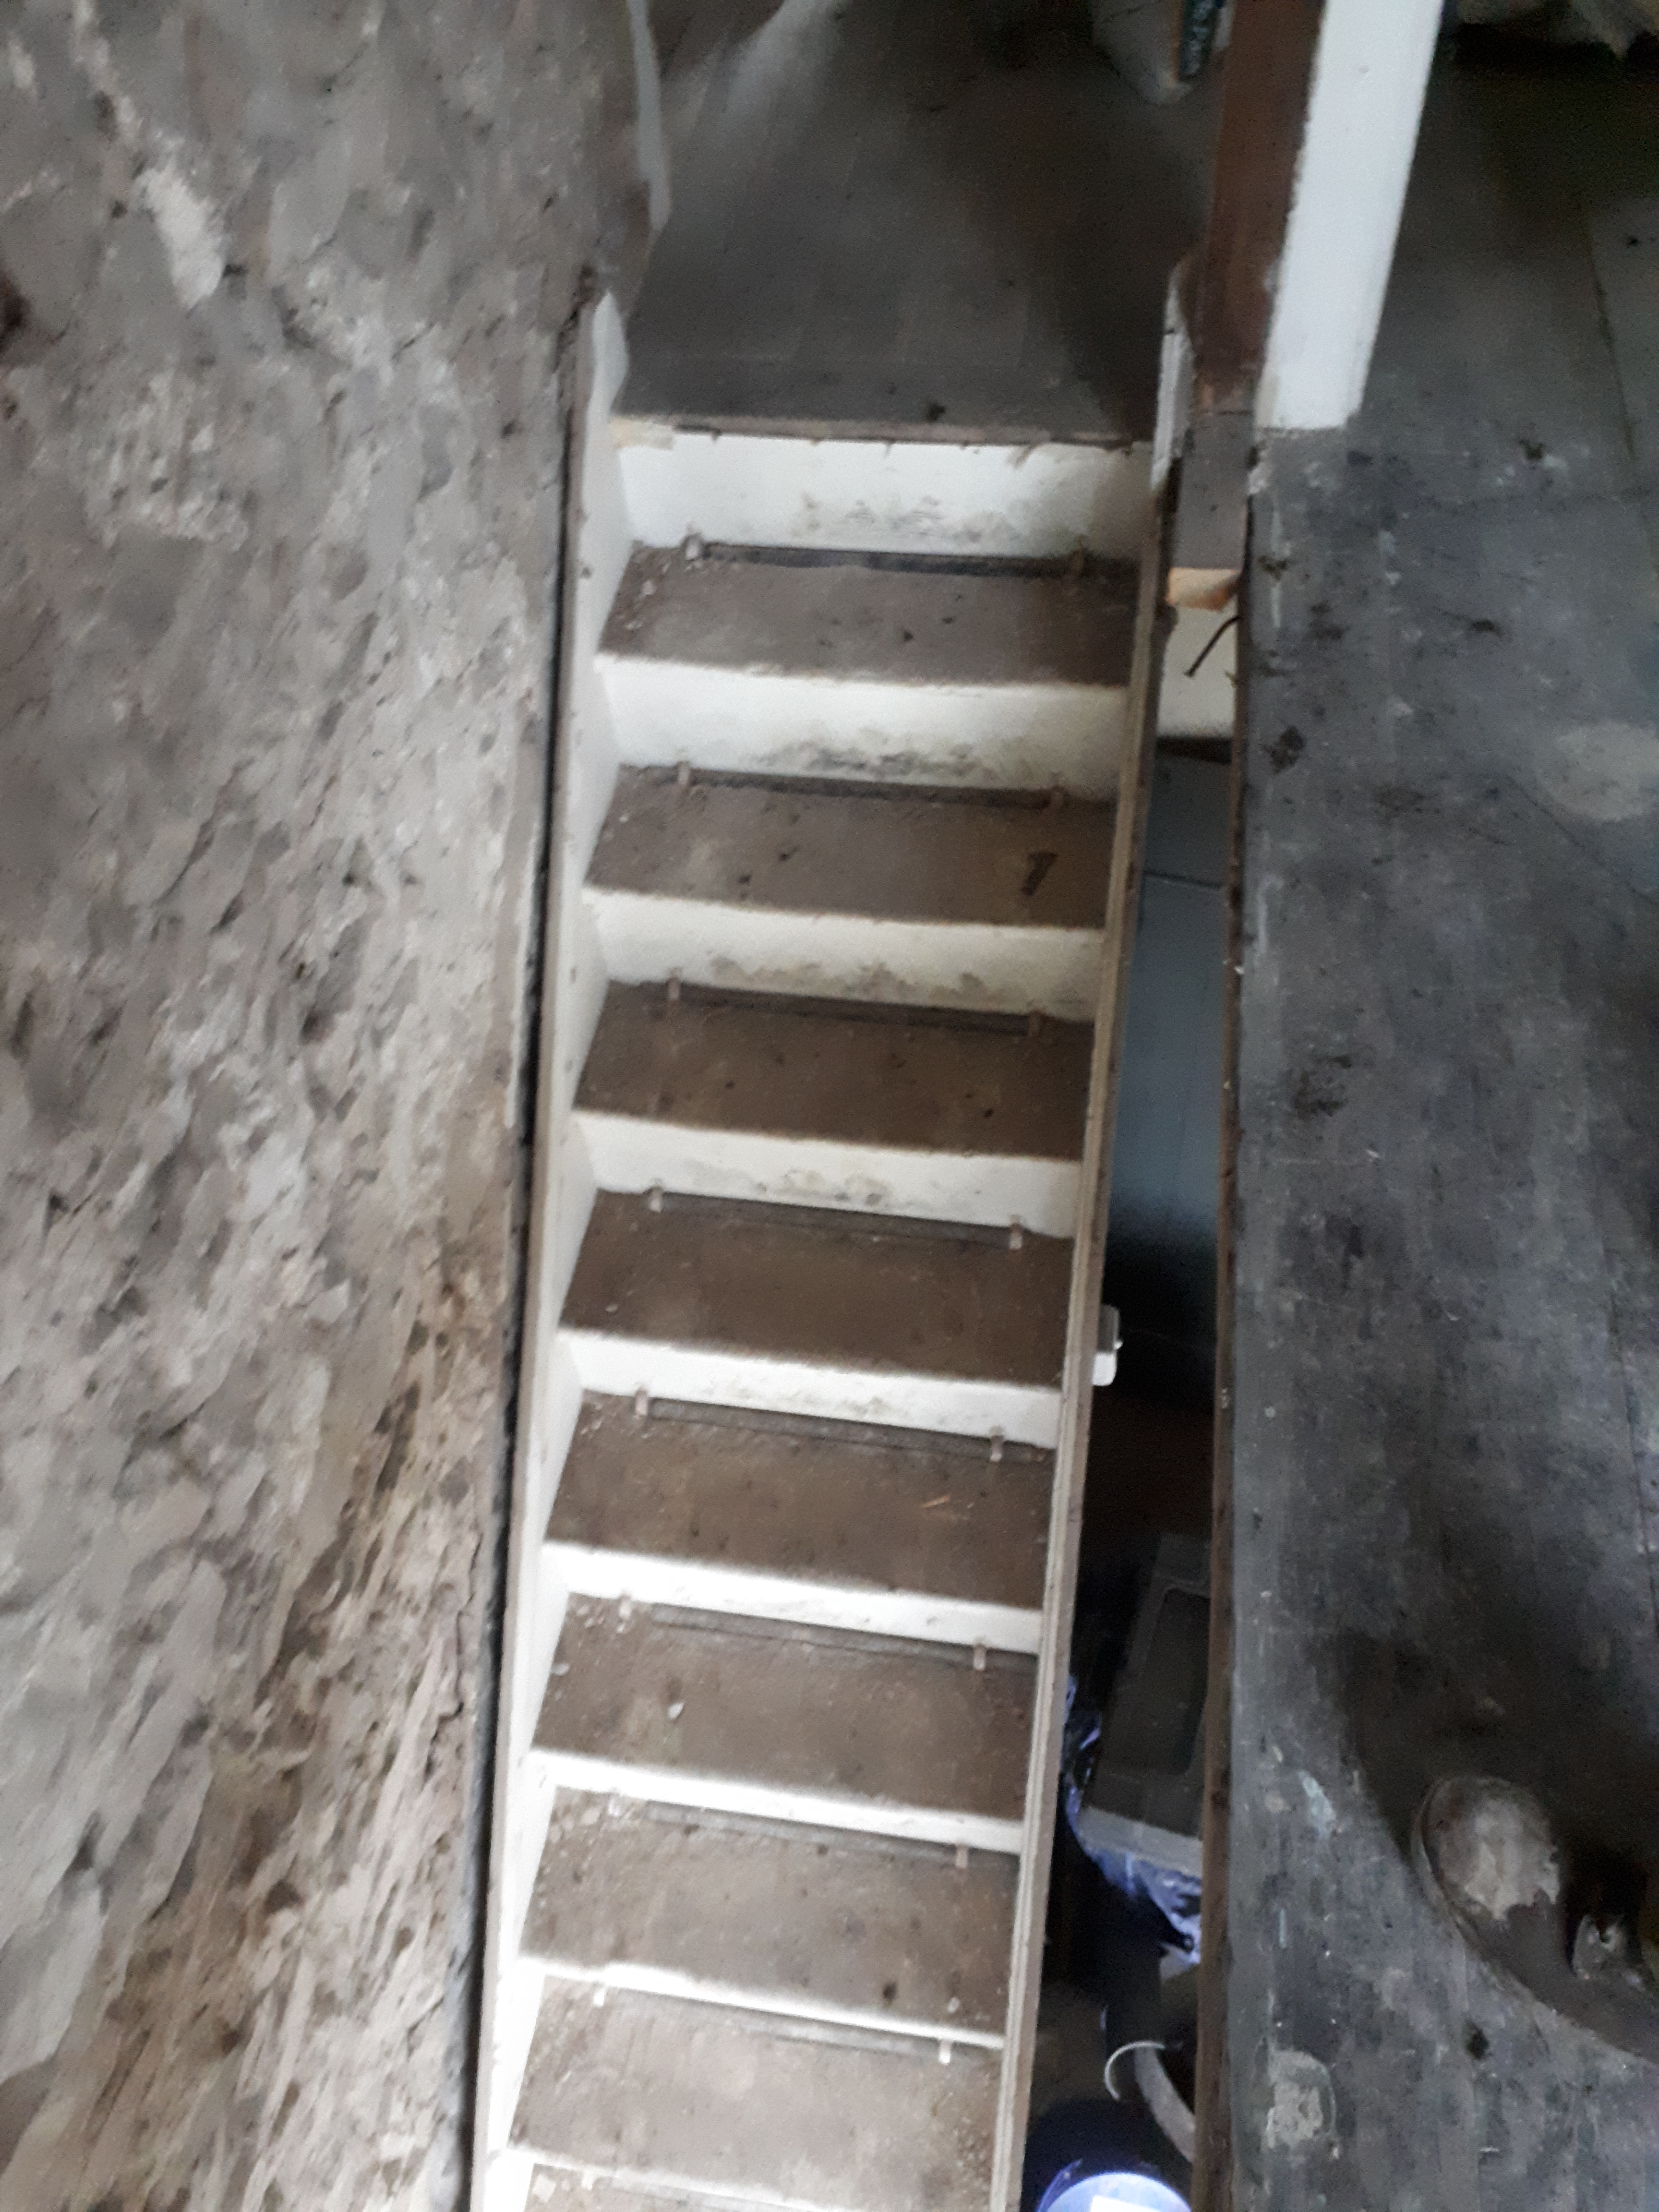
And lastly Chris removed a large piece of wood beside the stairs. With this gone we have space for significantly wider stairs without having to start cutting into the floor, something we only realised fairly late in the day.


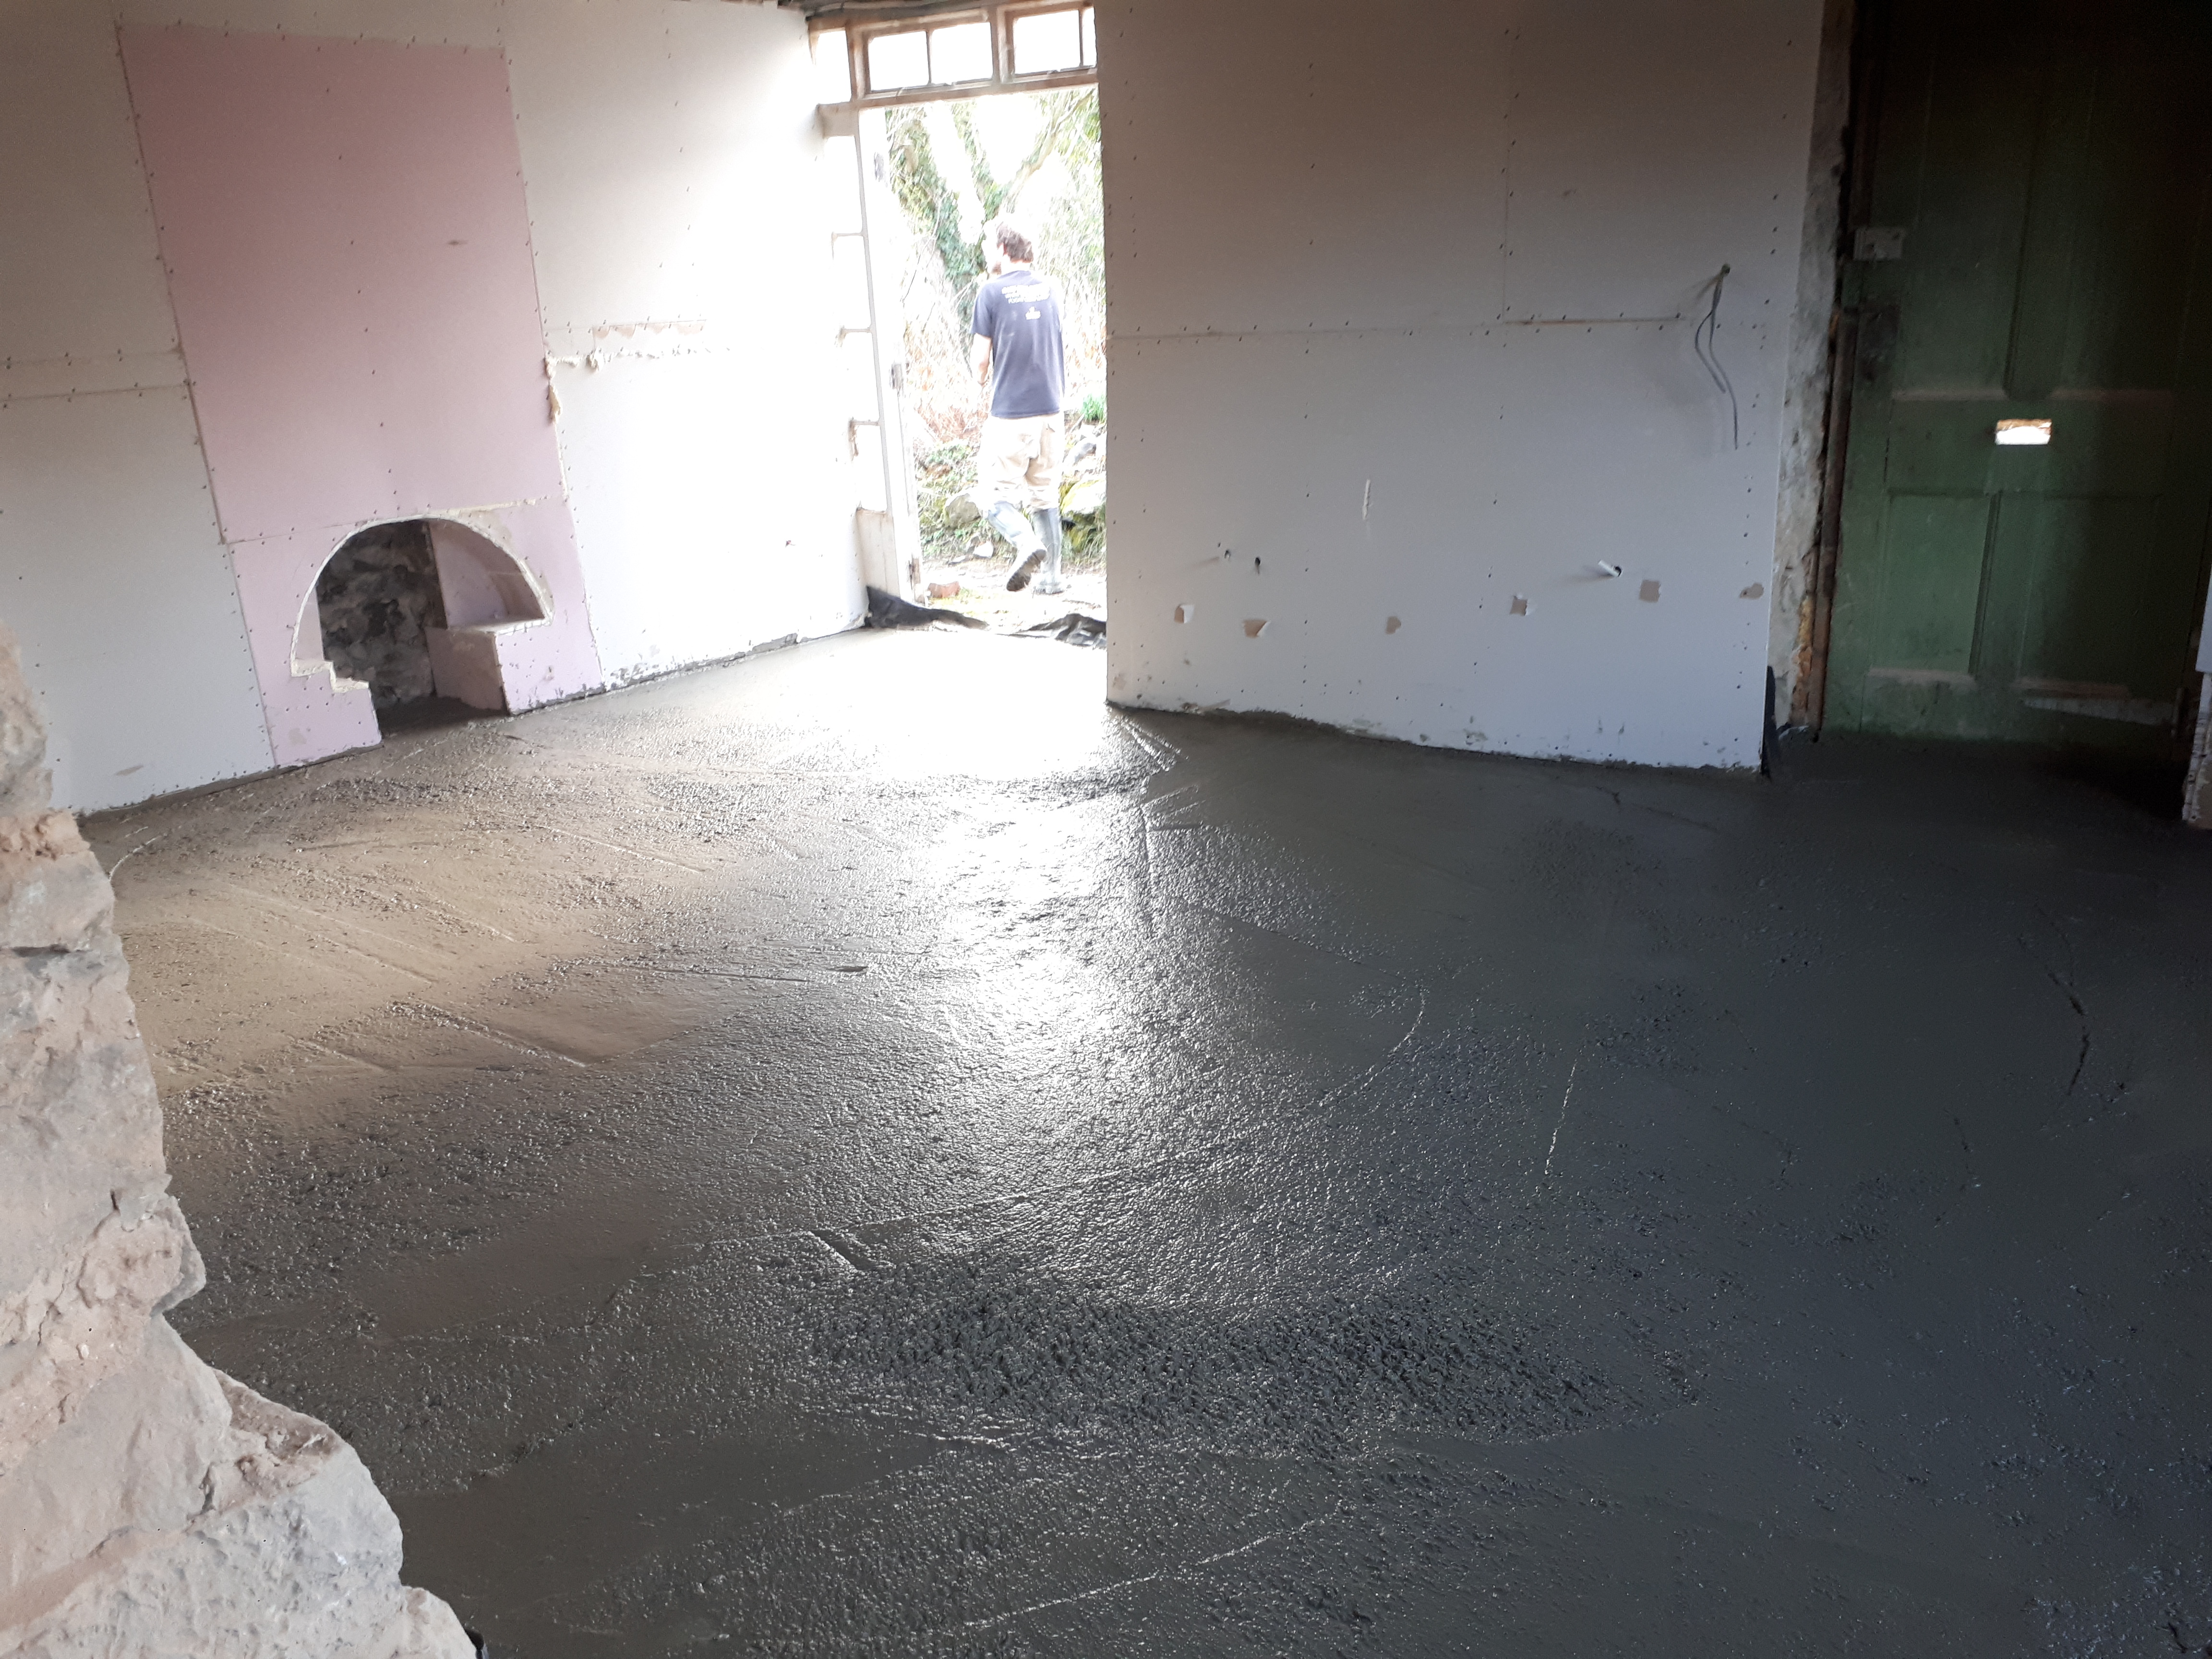
The cement finally set enough, we used left over pieces of insulation to move across the floor and smooth the surface with a trowel. It will take a month for the floor to dry enough for it to be polished. In the meantime, we look forward to having something solid to walk on.
-
A ‘new’ kitchen
There’s something magical about snow, particularly thick, fresh snow. Yet, while I was excited to see the snow come down heavy on Thursday, we were a little worried when it kept going on the Friday. Having booked a van to go collect our kitchen on Saturday, we didn’t fancy skidding around on the ice. Luckily, while day 1 was traffic chaos, by day 3 the gritters and snow ploughs had gotten things under control.

Having collected the van and headed to the house and we tried to get on with a few small jobs before heading out to collect the kitchen.
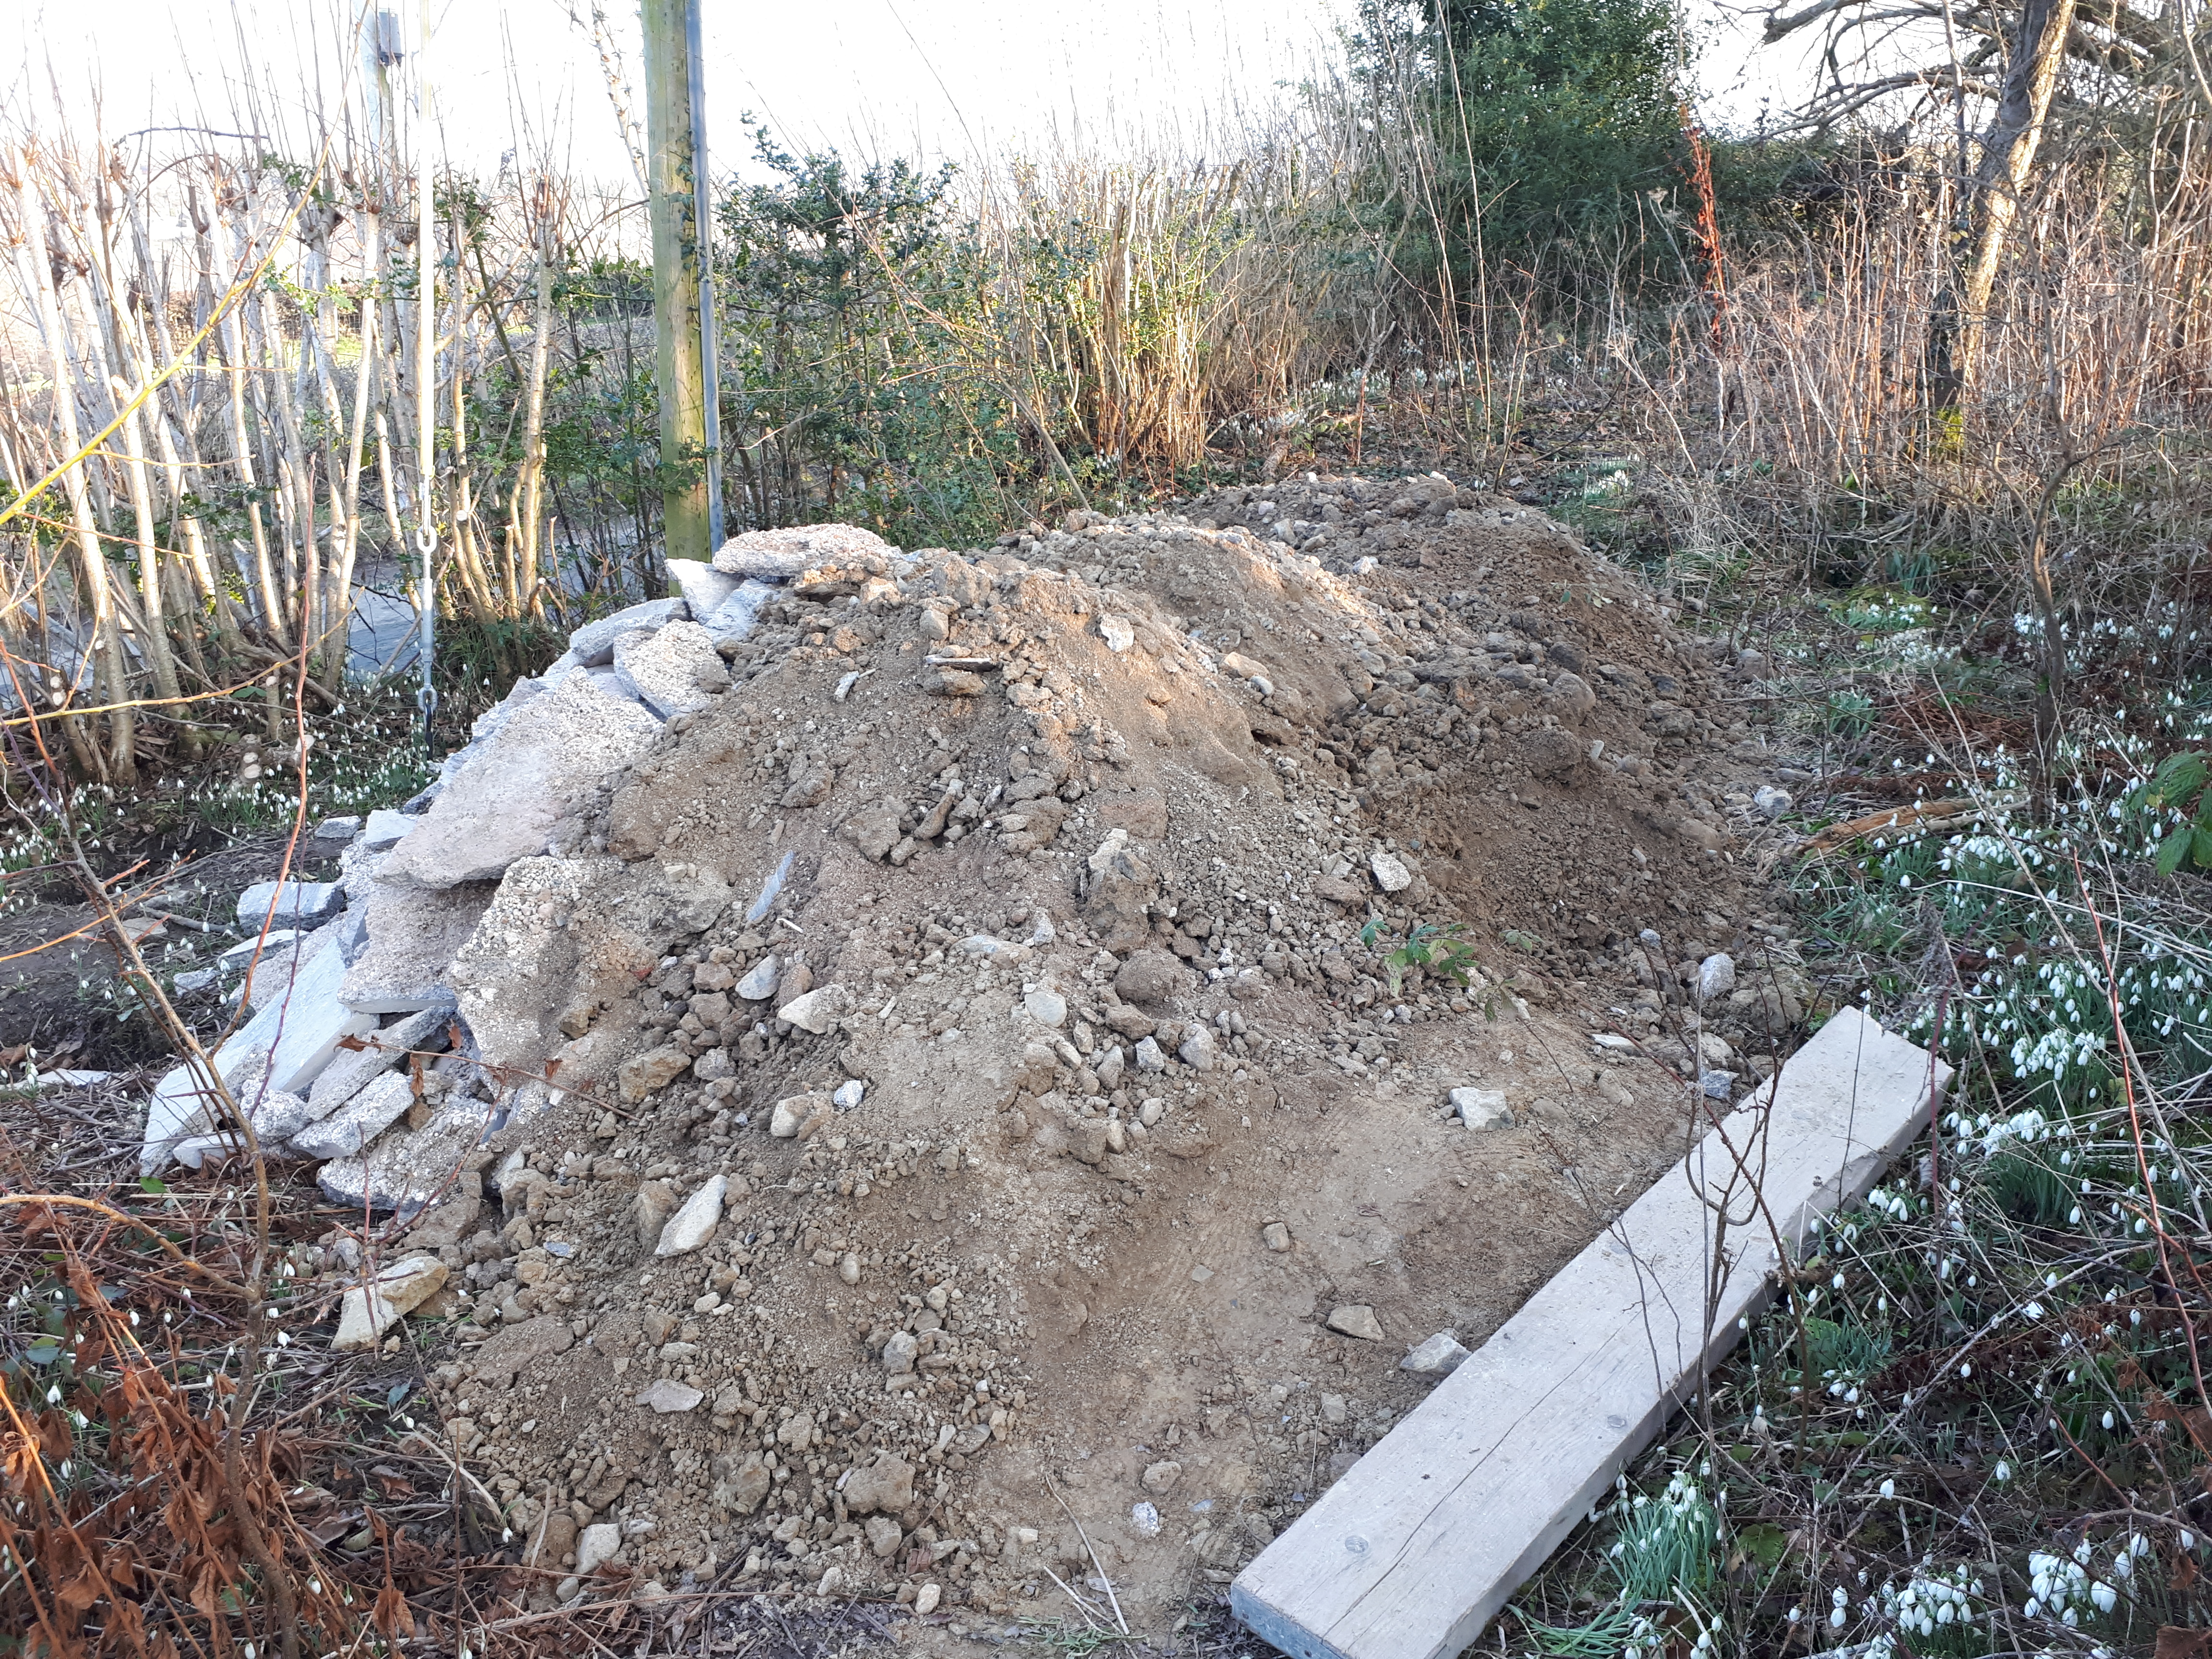
Gathering up some of the accumulated rubbish I headed to the recycling center. Sadly, a lot of the rubbish we’re now producing isn’t recyclable, such as expanding foam and insulation board. I always feel like I’ve lost somehow when waste can’t be separated and sent off to a new life. But restoring a house, quickly and to budget, just isn’t possible without creating a good deal of waste.

While I was gone Chris continued with some of the more fiddly bits of lighting electrics he had to sort. Leaving him to it I started to tidy some of the upstairs. With our mortgage inspection coming up in a few weeks we want to get the house a little more orderly, so as to make it look more appealing. Plus it’s nice not to have to step over piles of wood and scattered debris to get everywhere.
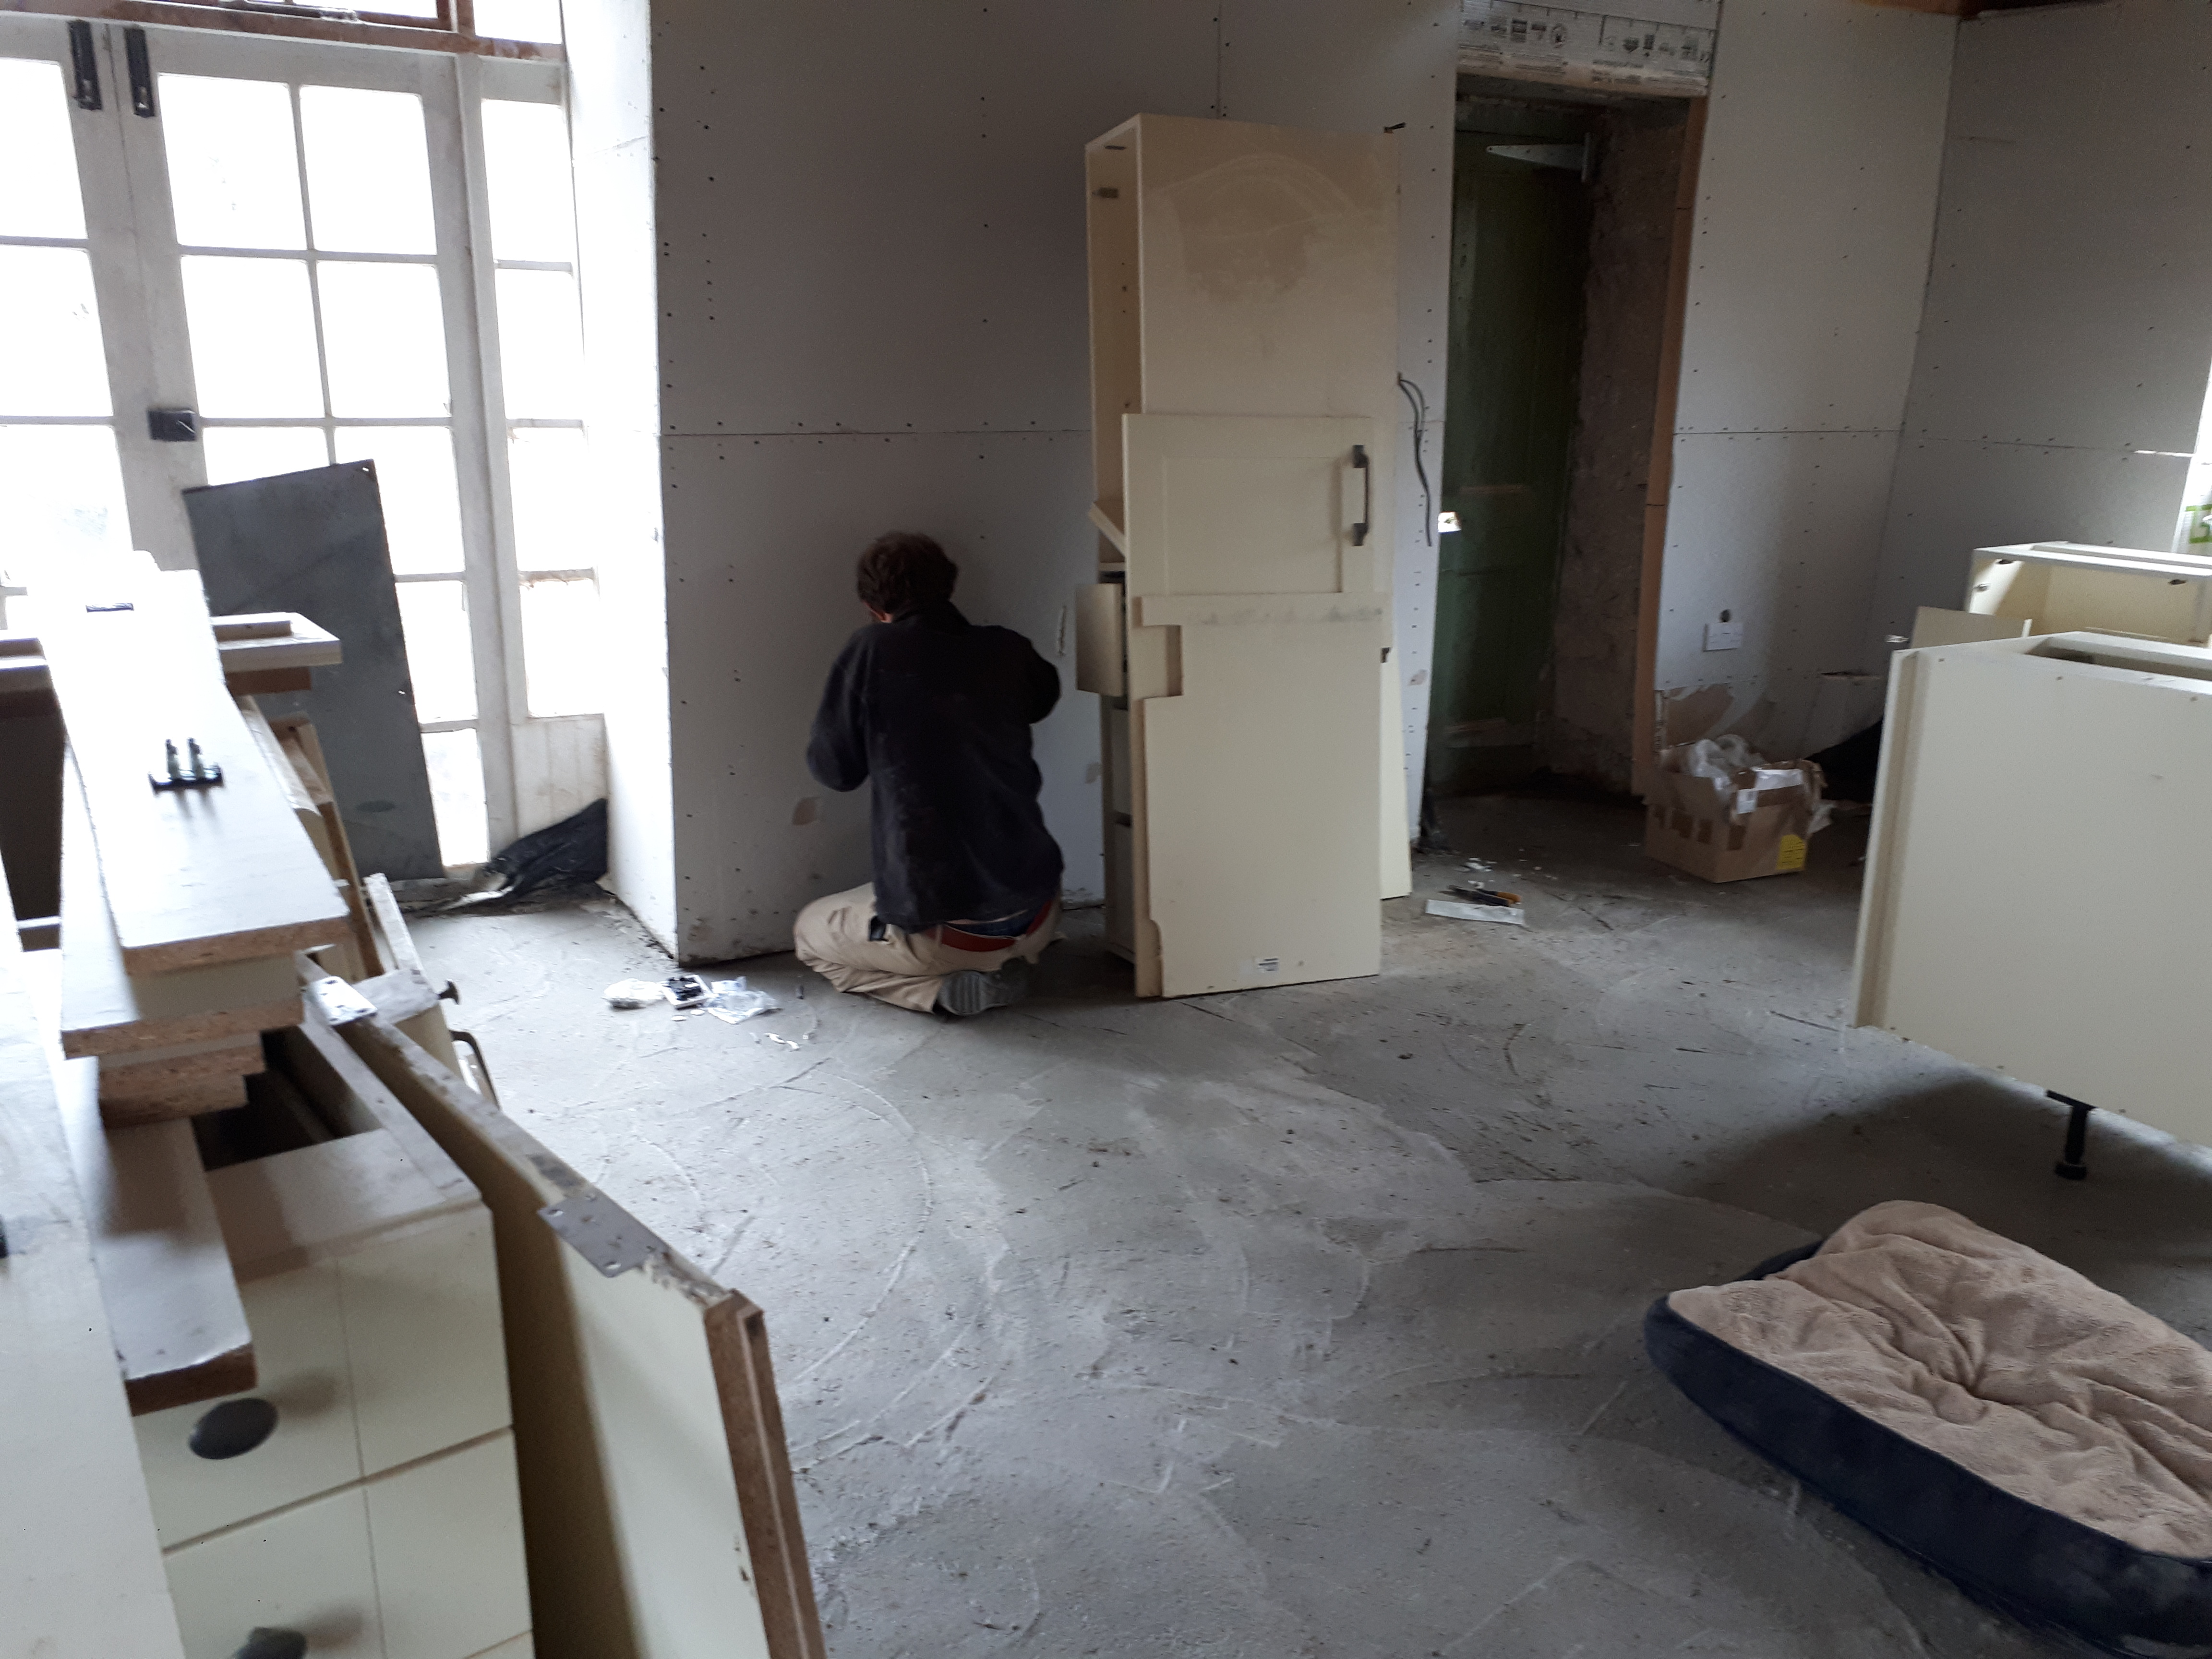
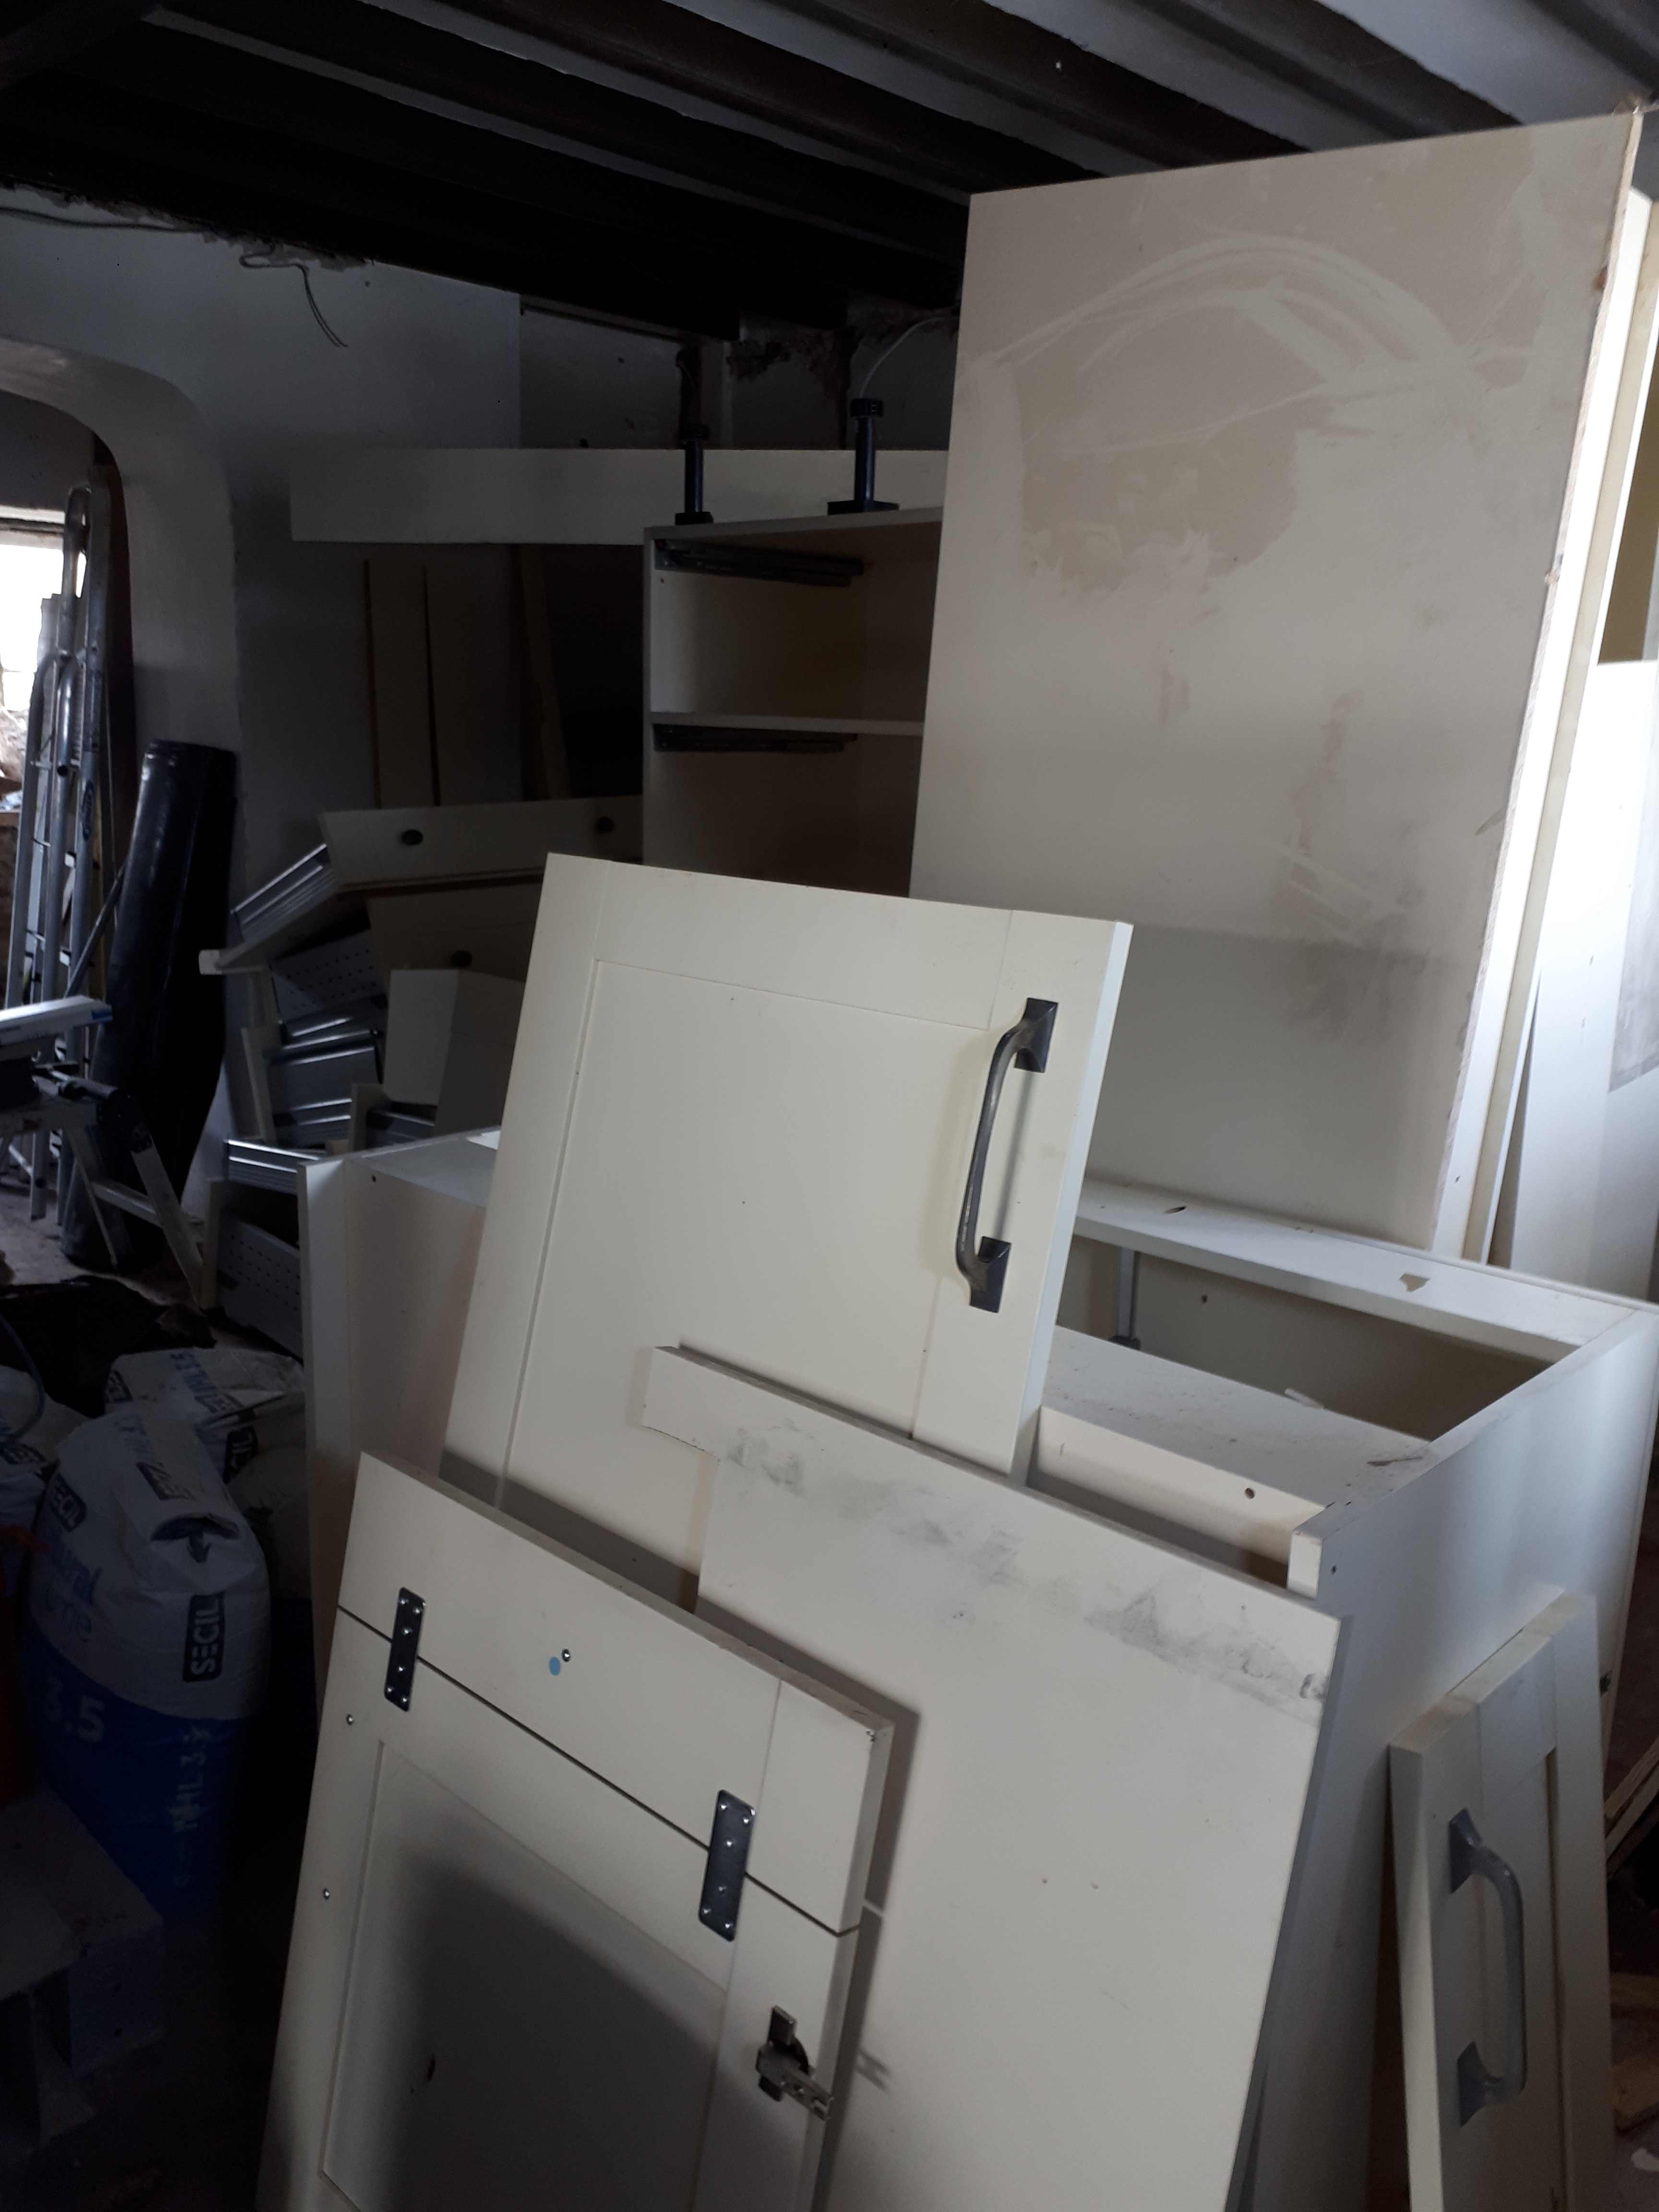
With the morning gone we headed out to collect our kitchen. Rather than buy a new kitchen we’d bid for a second-hand one on eBay. The previous owners had removed it from its previous location and it was already in pieces for us to collect. Chris had made sure we’d have enough units to rearrange into the island and floor units we wanted. The kitchen had originally been handmade by a local company, meaning it was a much higher quality than we could have afforded if buying new.
Part of the package were several massive slabs of granite. Although we knew we weren’t going to use them we decided we could take them for resale. As we would never have been able to lift them ourselves, Chris asked his brothers to lend a hand. Rich helped load them into the van at one end and Phil to unload them at the other. Hopefully someone will want them, as it seems such a shame to waste such incredible stone.

Finally, we made our way to the house to unload the kitchen units, made more difficult by the slippery snow on the path. With no floor in the kitchen yet we had to fill the lounge with the units. Hopefully it won’t be long before they can move into their proper place. It’s likely we won’t need all of the units in the end, so we’re planning to sell on whatever doesn’t suit our plans.
Dropping off the van we’d driven around 130 miles in a long day of lugging things to and fro. Exhausting.
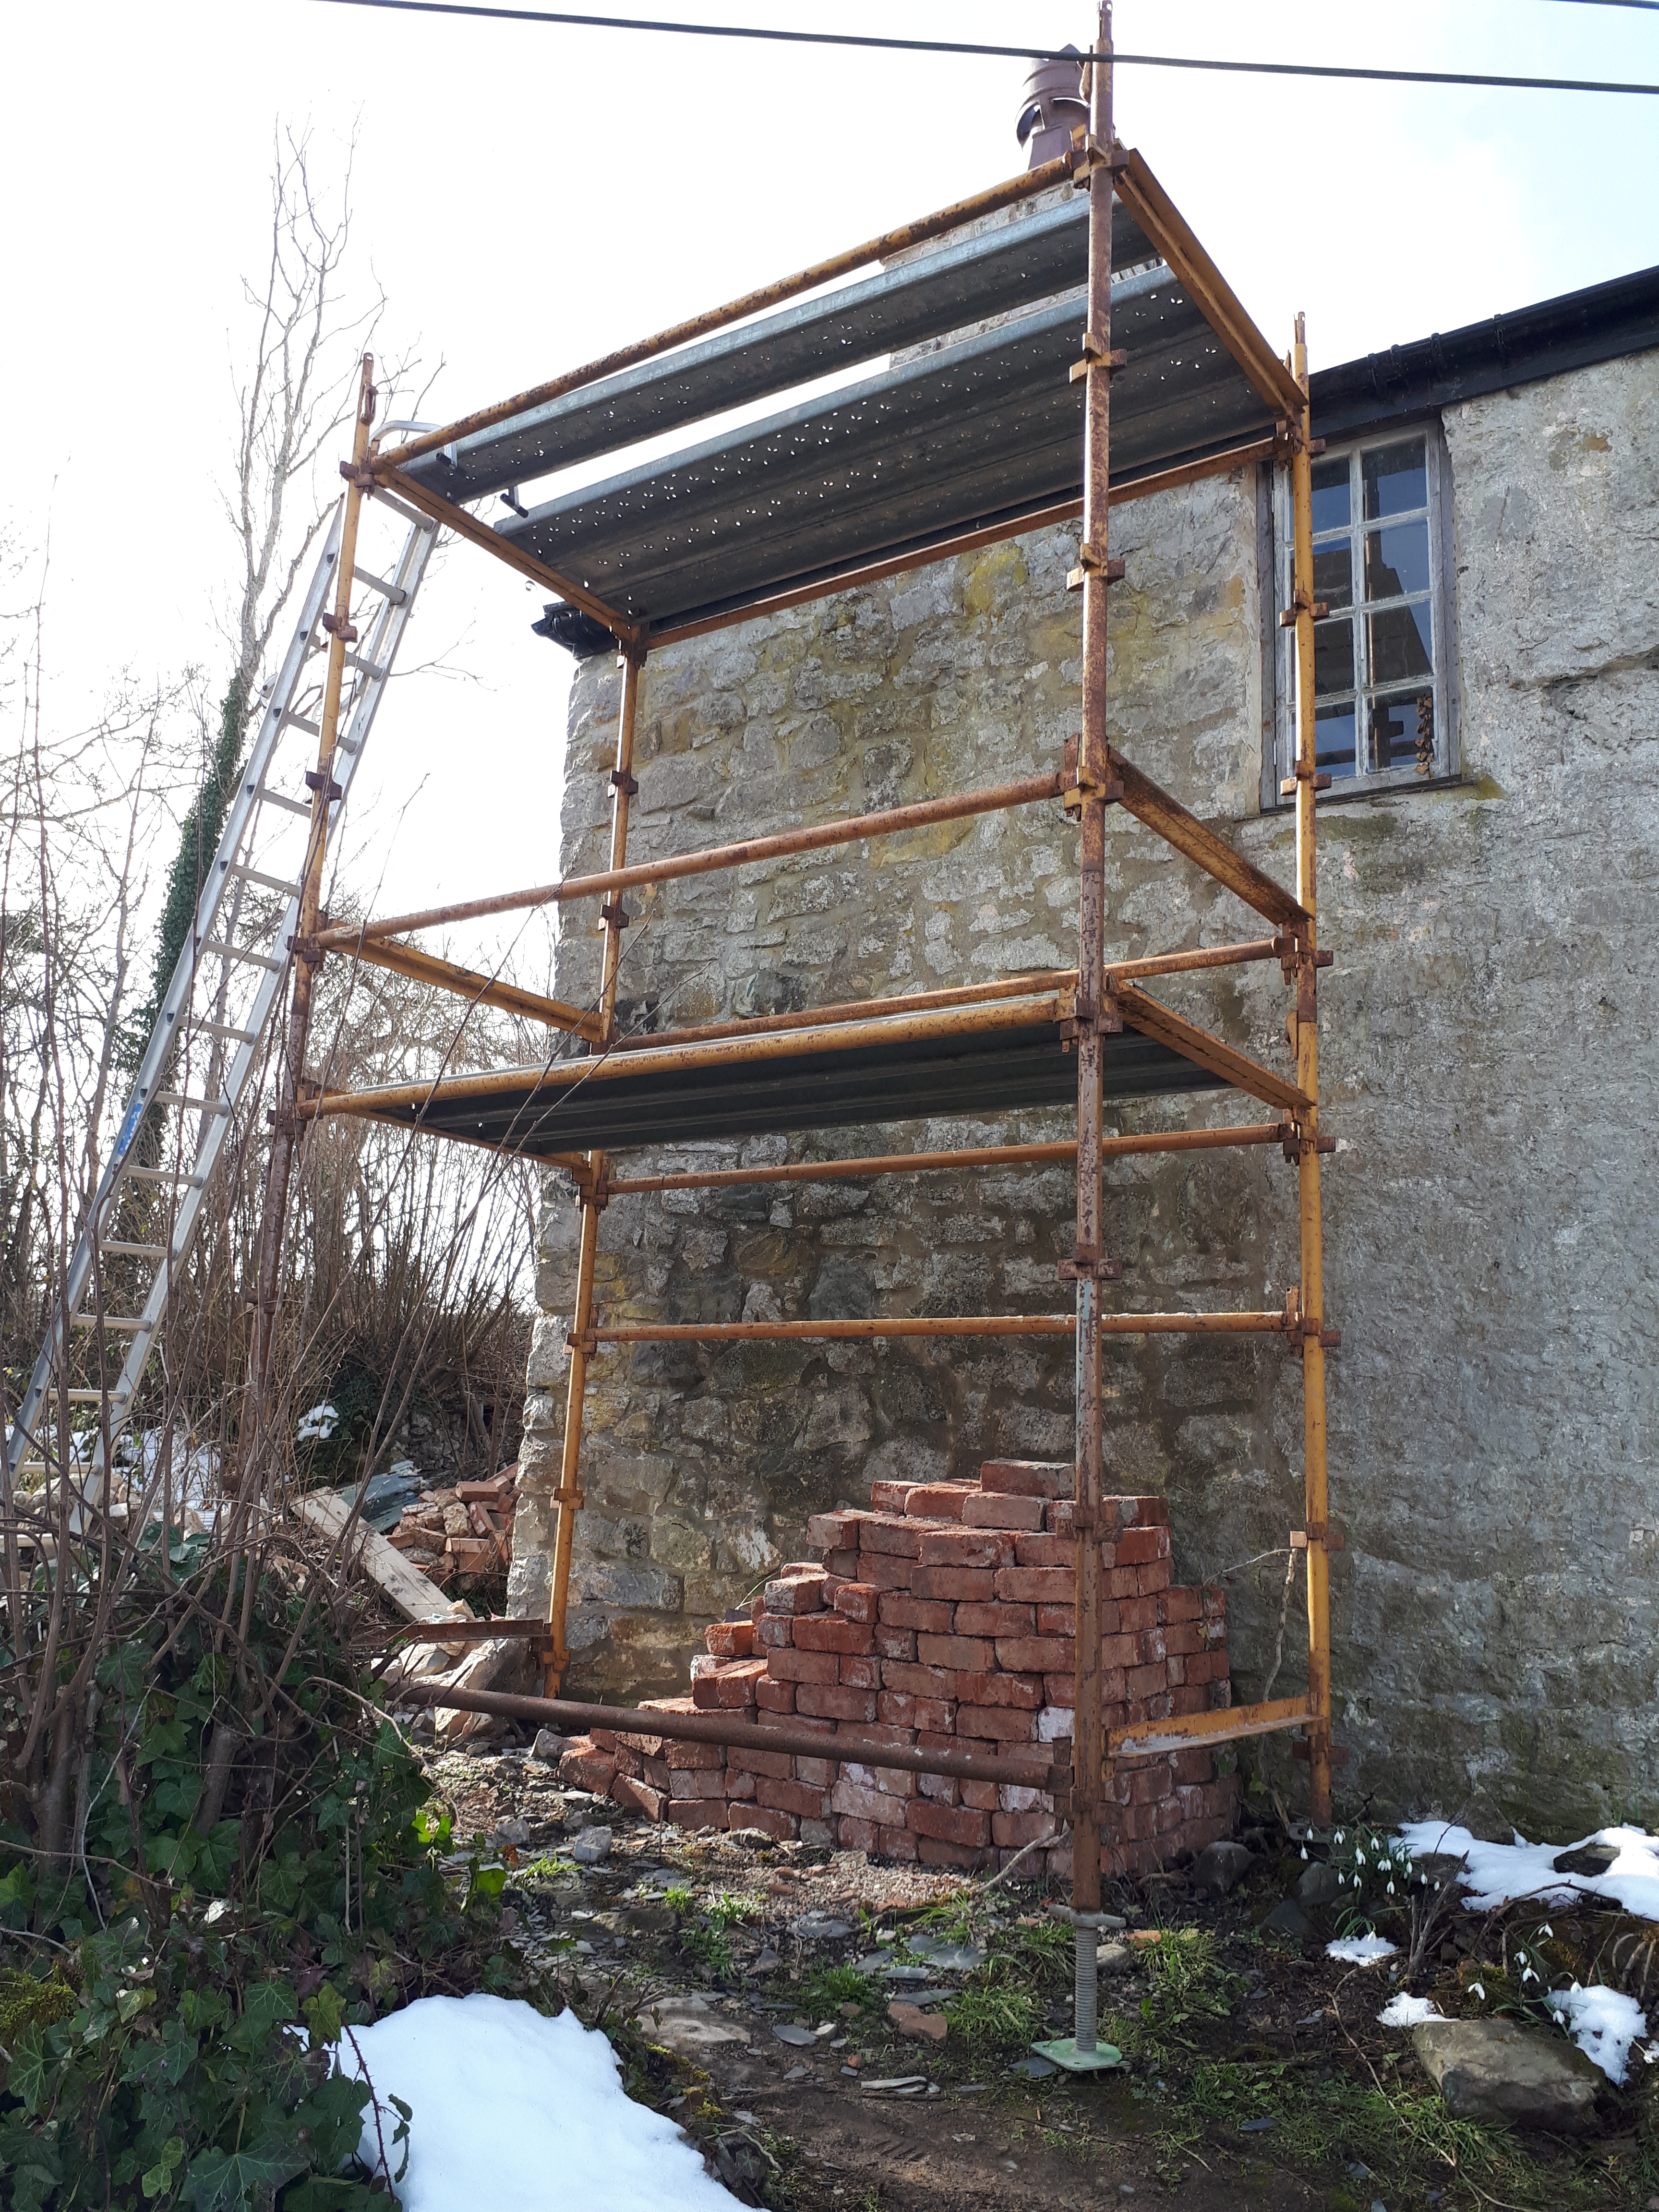
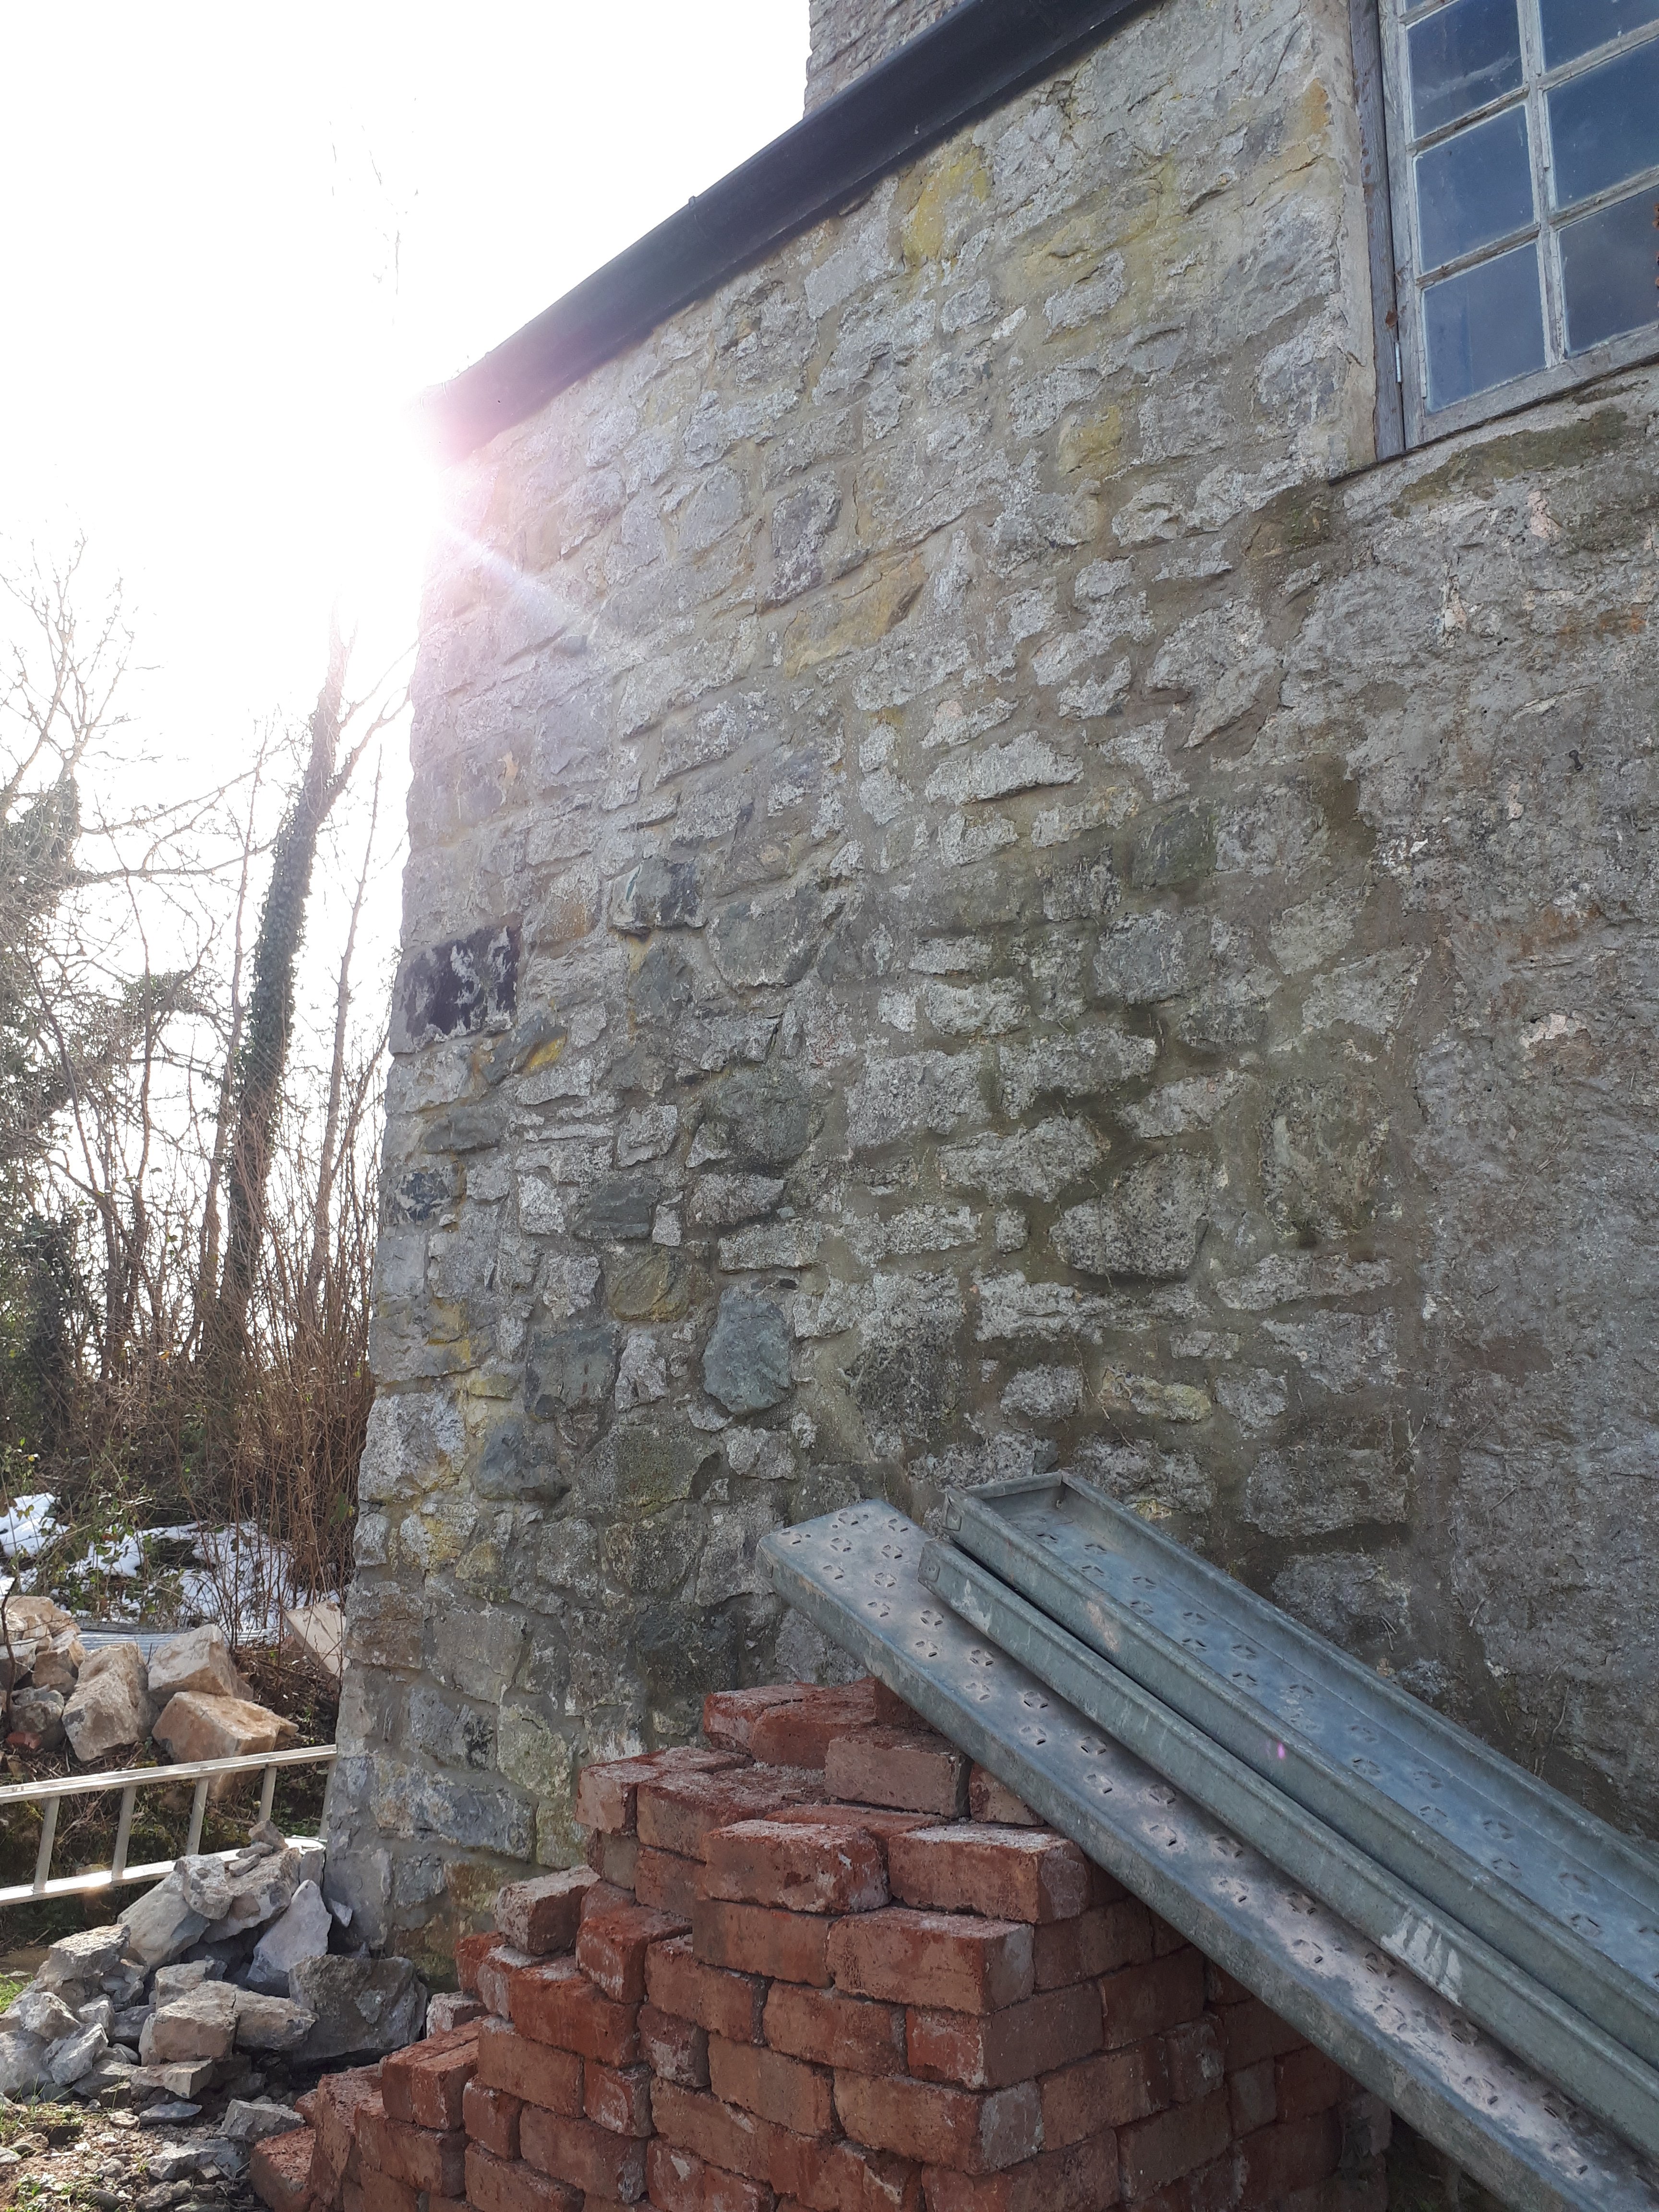
Arriving at the house on Sunday we found the winter wonderland gone, with almost all the snow vanished. Our first job was to take down the scaffolding. On Tuesday we’ve booked a concrete delivery, which provides a barrowing service. While we were happy to awkwardly squeeze past the scaffolding we doubted they would be.
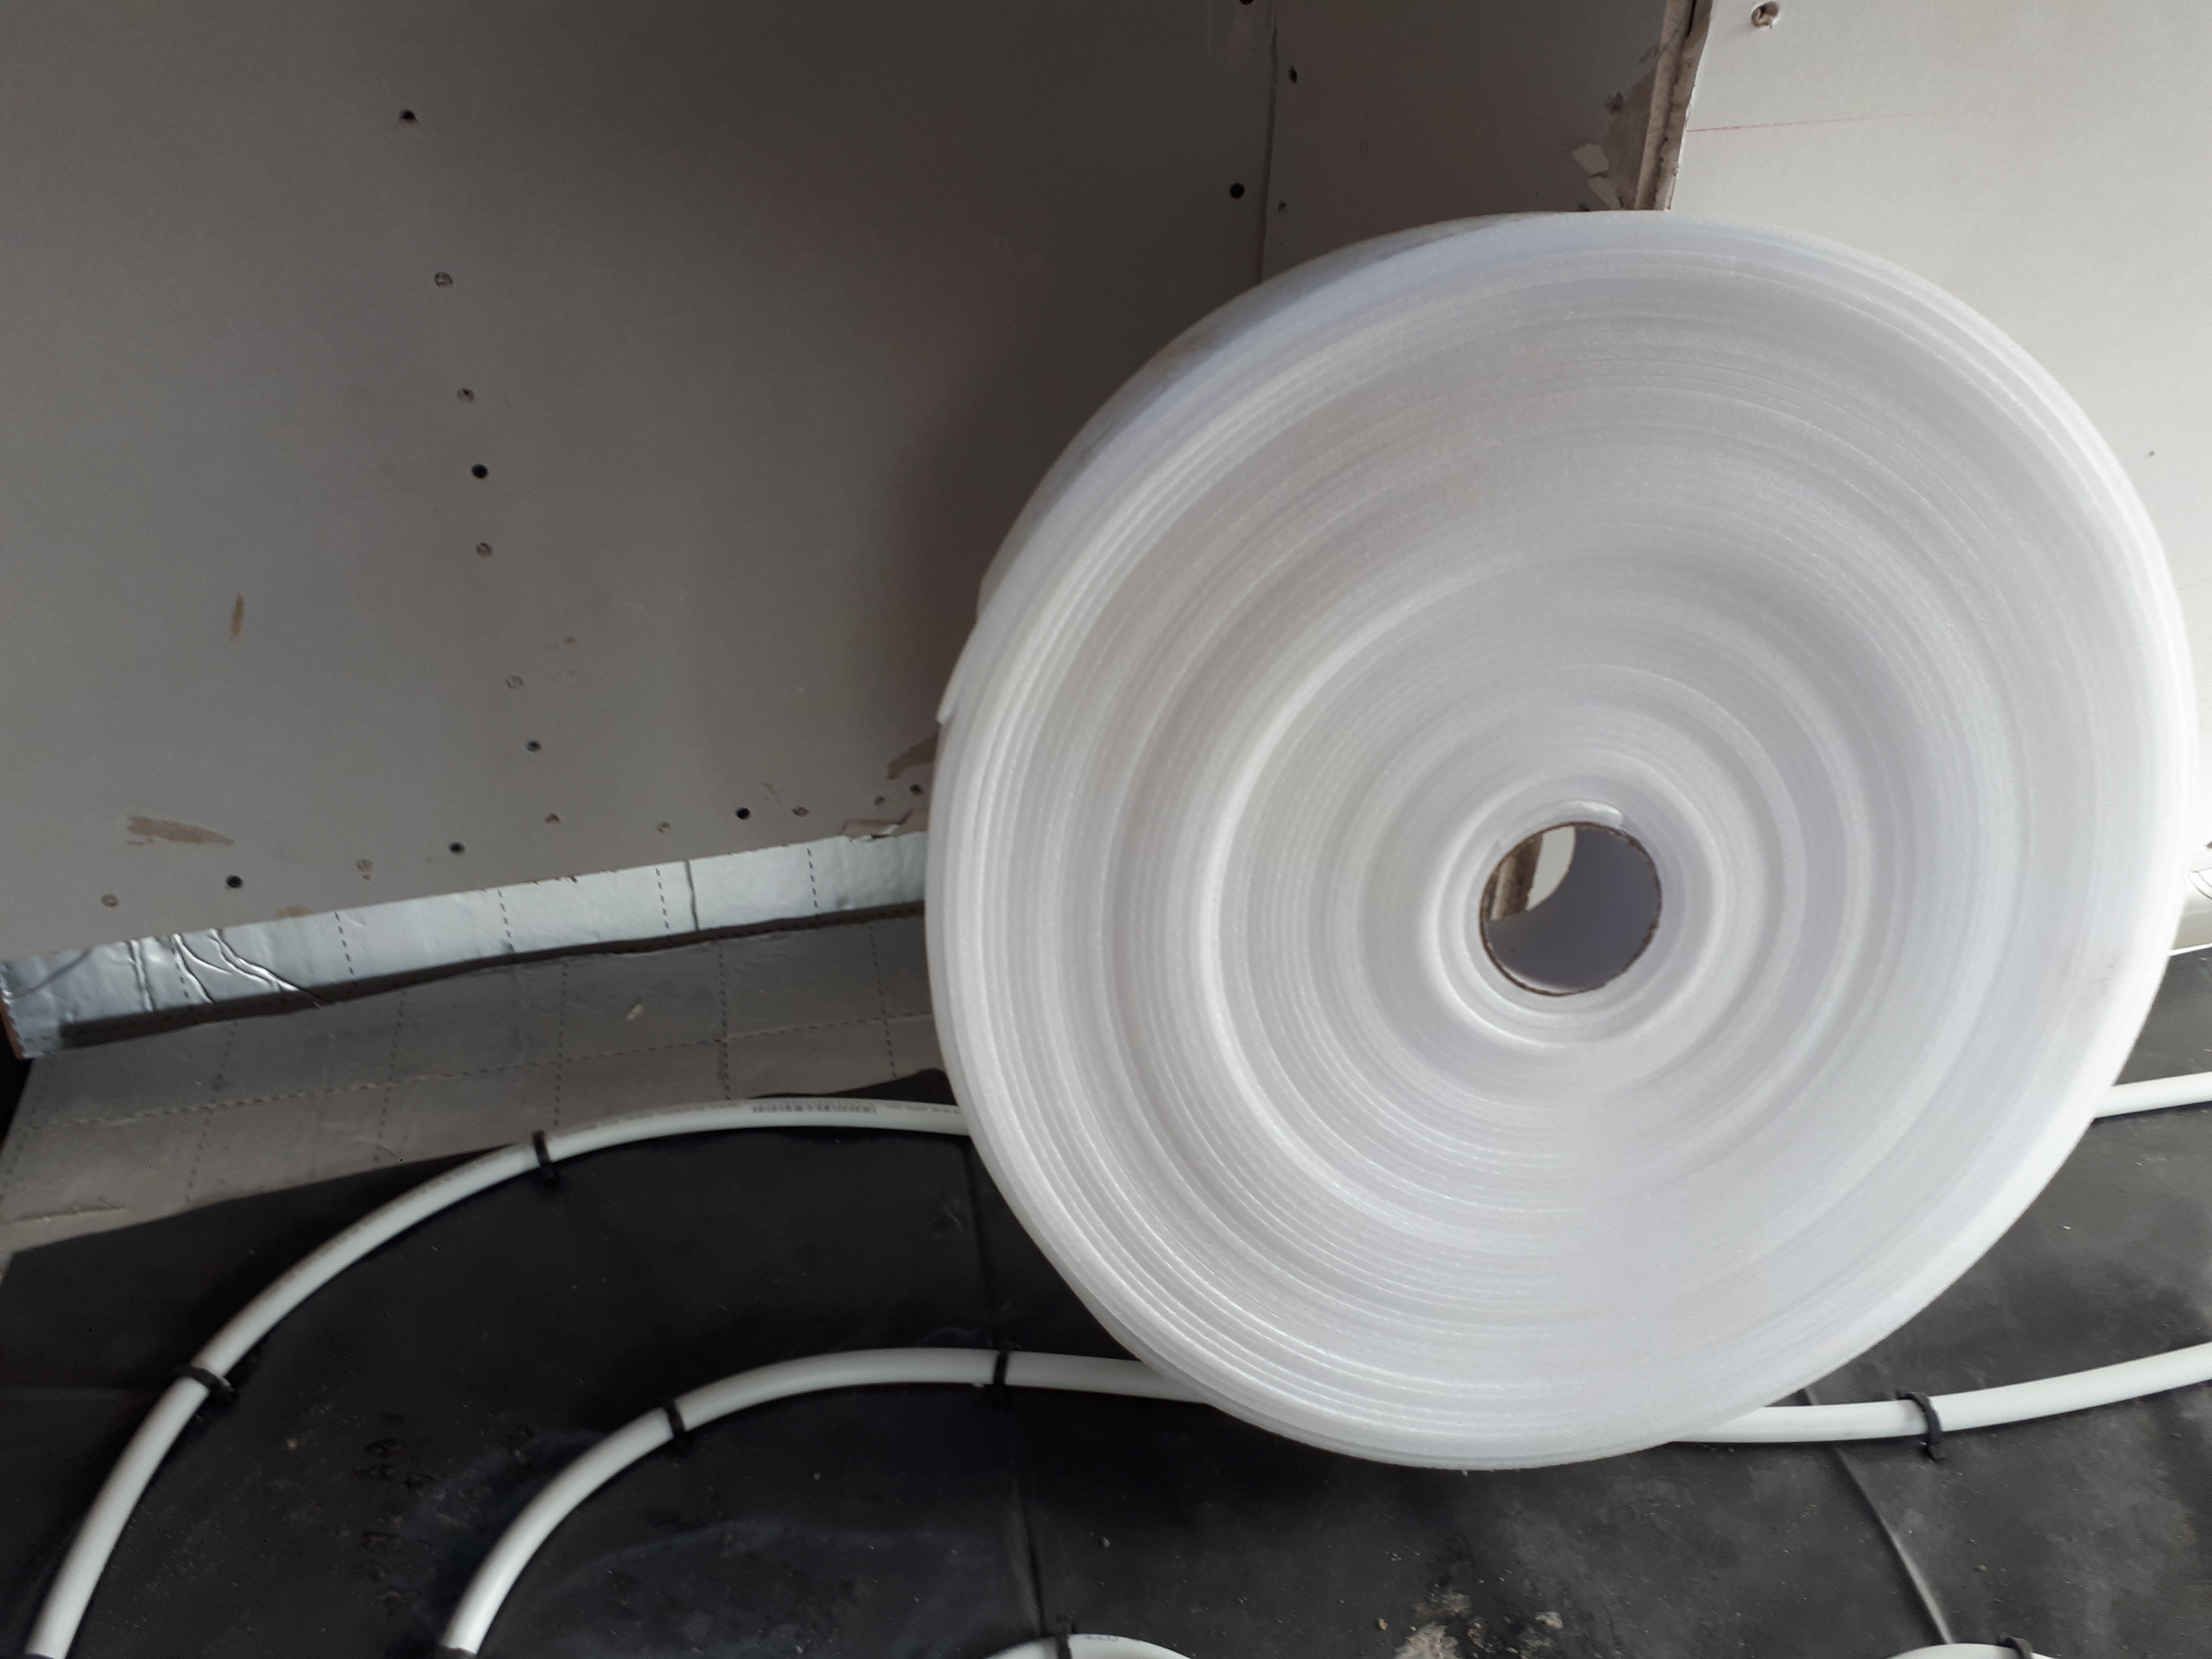
Next I installed a strip of foam around the bottom of the wall. This is to allow the concrete to expand and contract as it heats and cools, which can help prevent cracking.
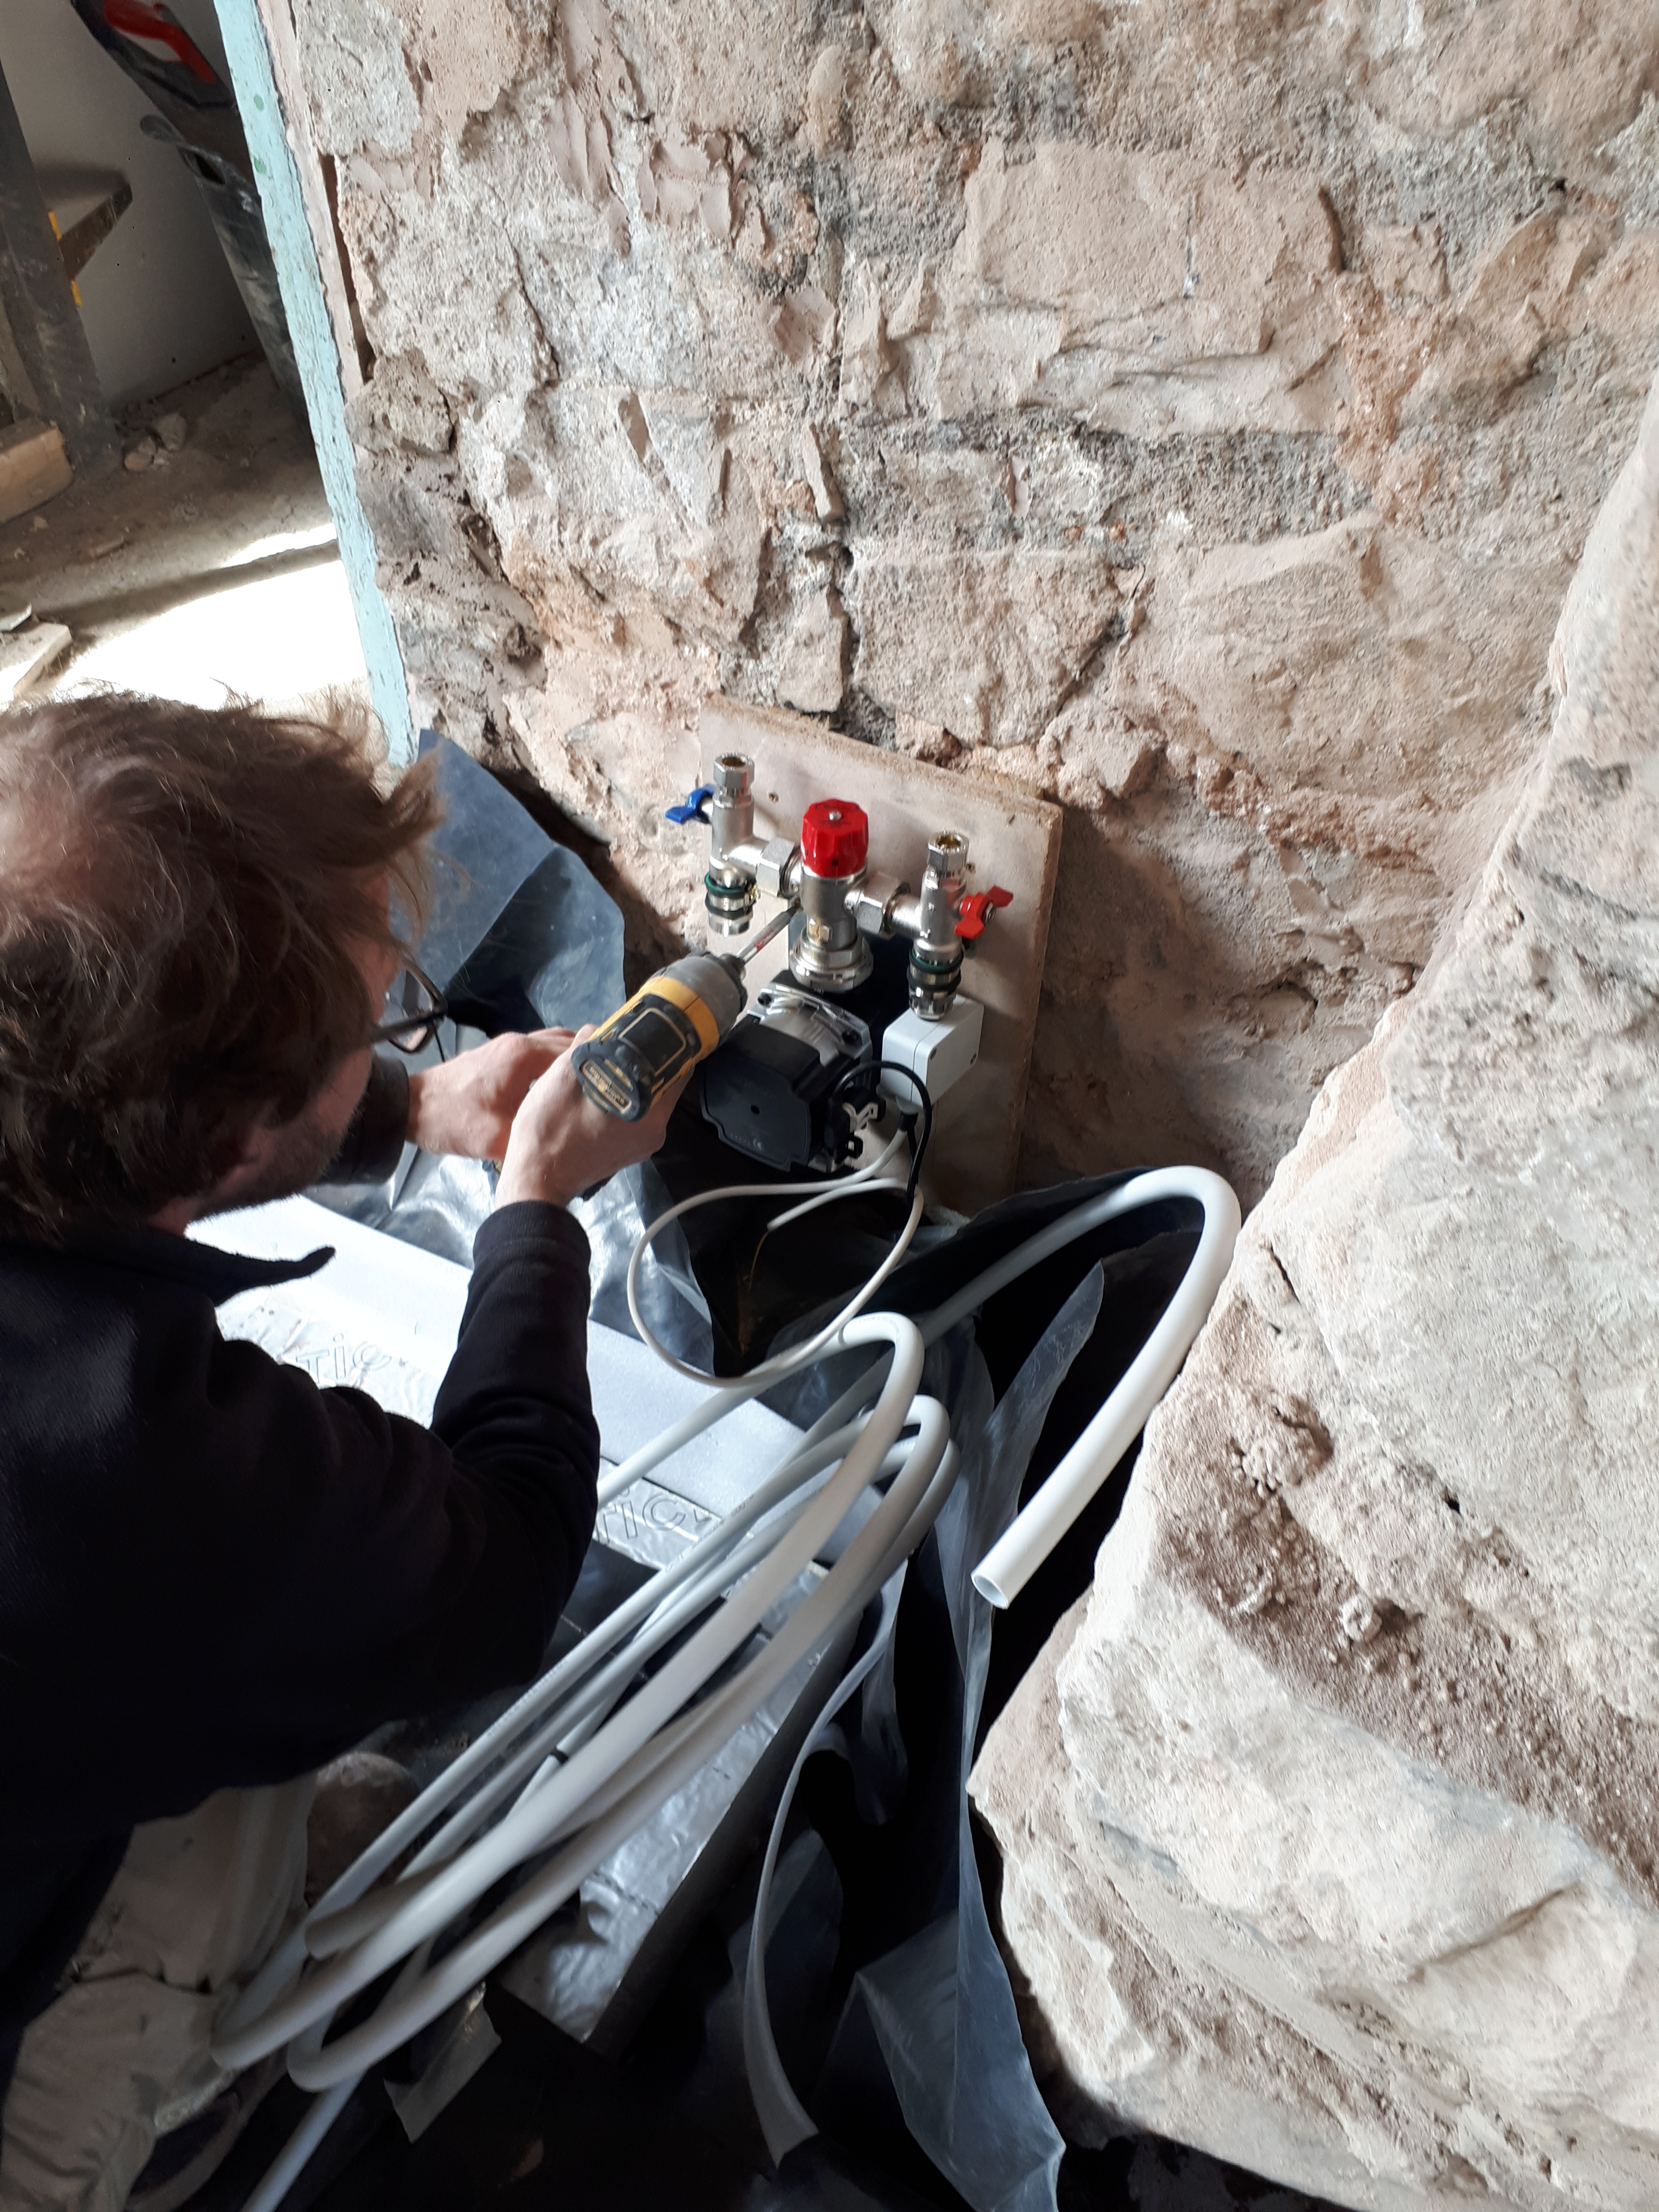
Chris meanwhile installed the manifold for the underfloor heating.


One final piece of the old concrete floor needed to be removed by the door to the garden. Chris had wanted to keep this in place till the last moment to avoid rainwater seeping into the room. Digging out the concrete and attempting to remove the hard clay soil, made me remember how soul destroying the floor excavation had been.
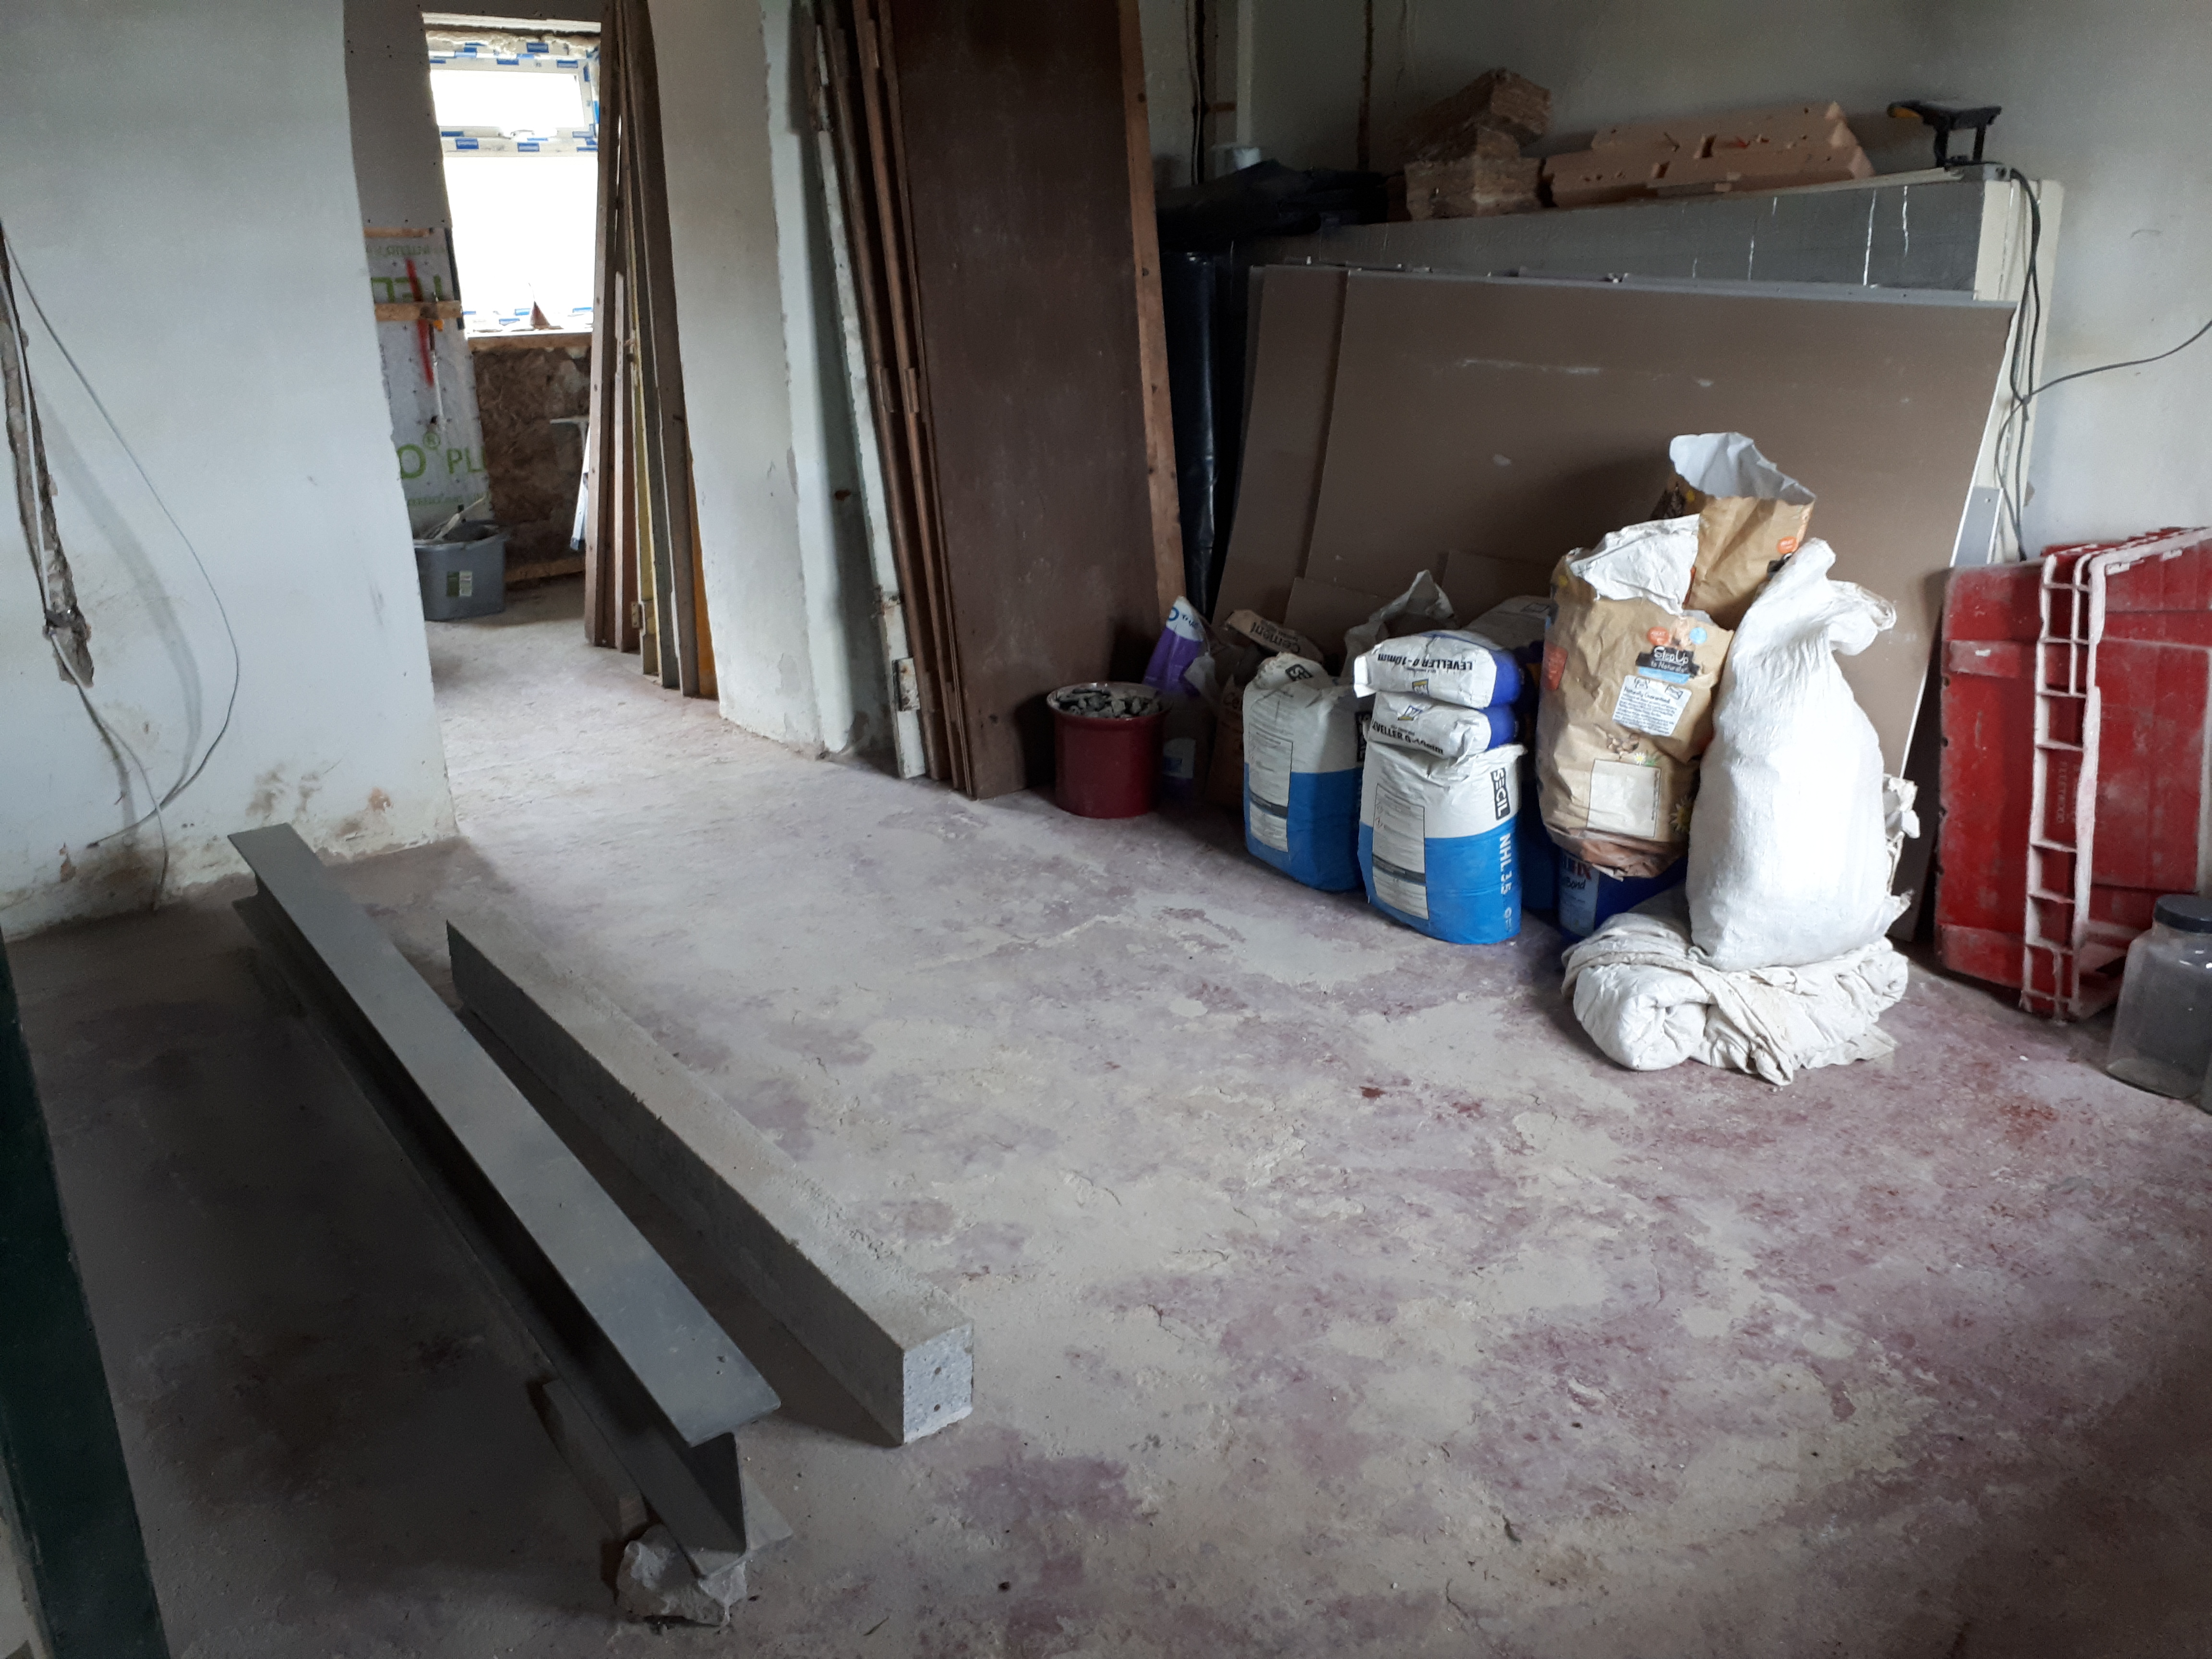
Our last task, to make the floor ready for the concrete delivery, was to lay out boards for the wheelbarrow to travel along. Luckily we have a stack of old doors which we were able to place on wooden blocks so as to protect the pipework underneath. Looking at what needs to be done it feels like Tuesday will be a long day. But hopefully, at the end of it, we’ll finally have a floor.
-
Letting in the light
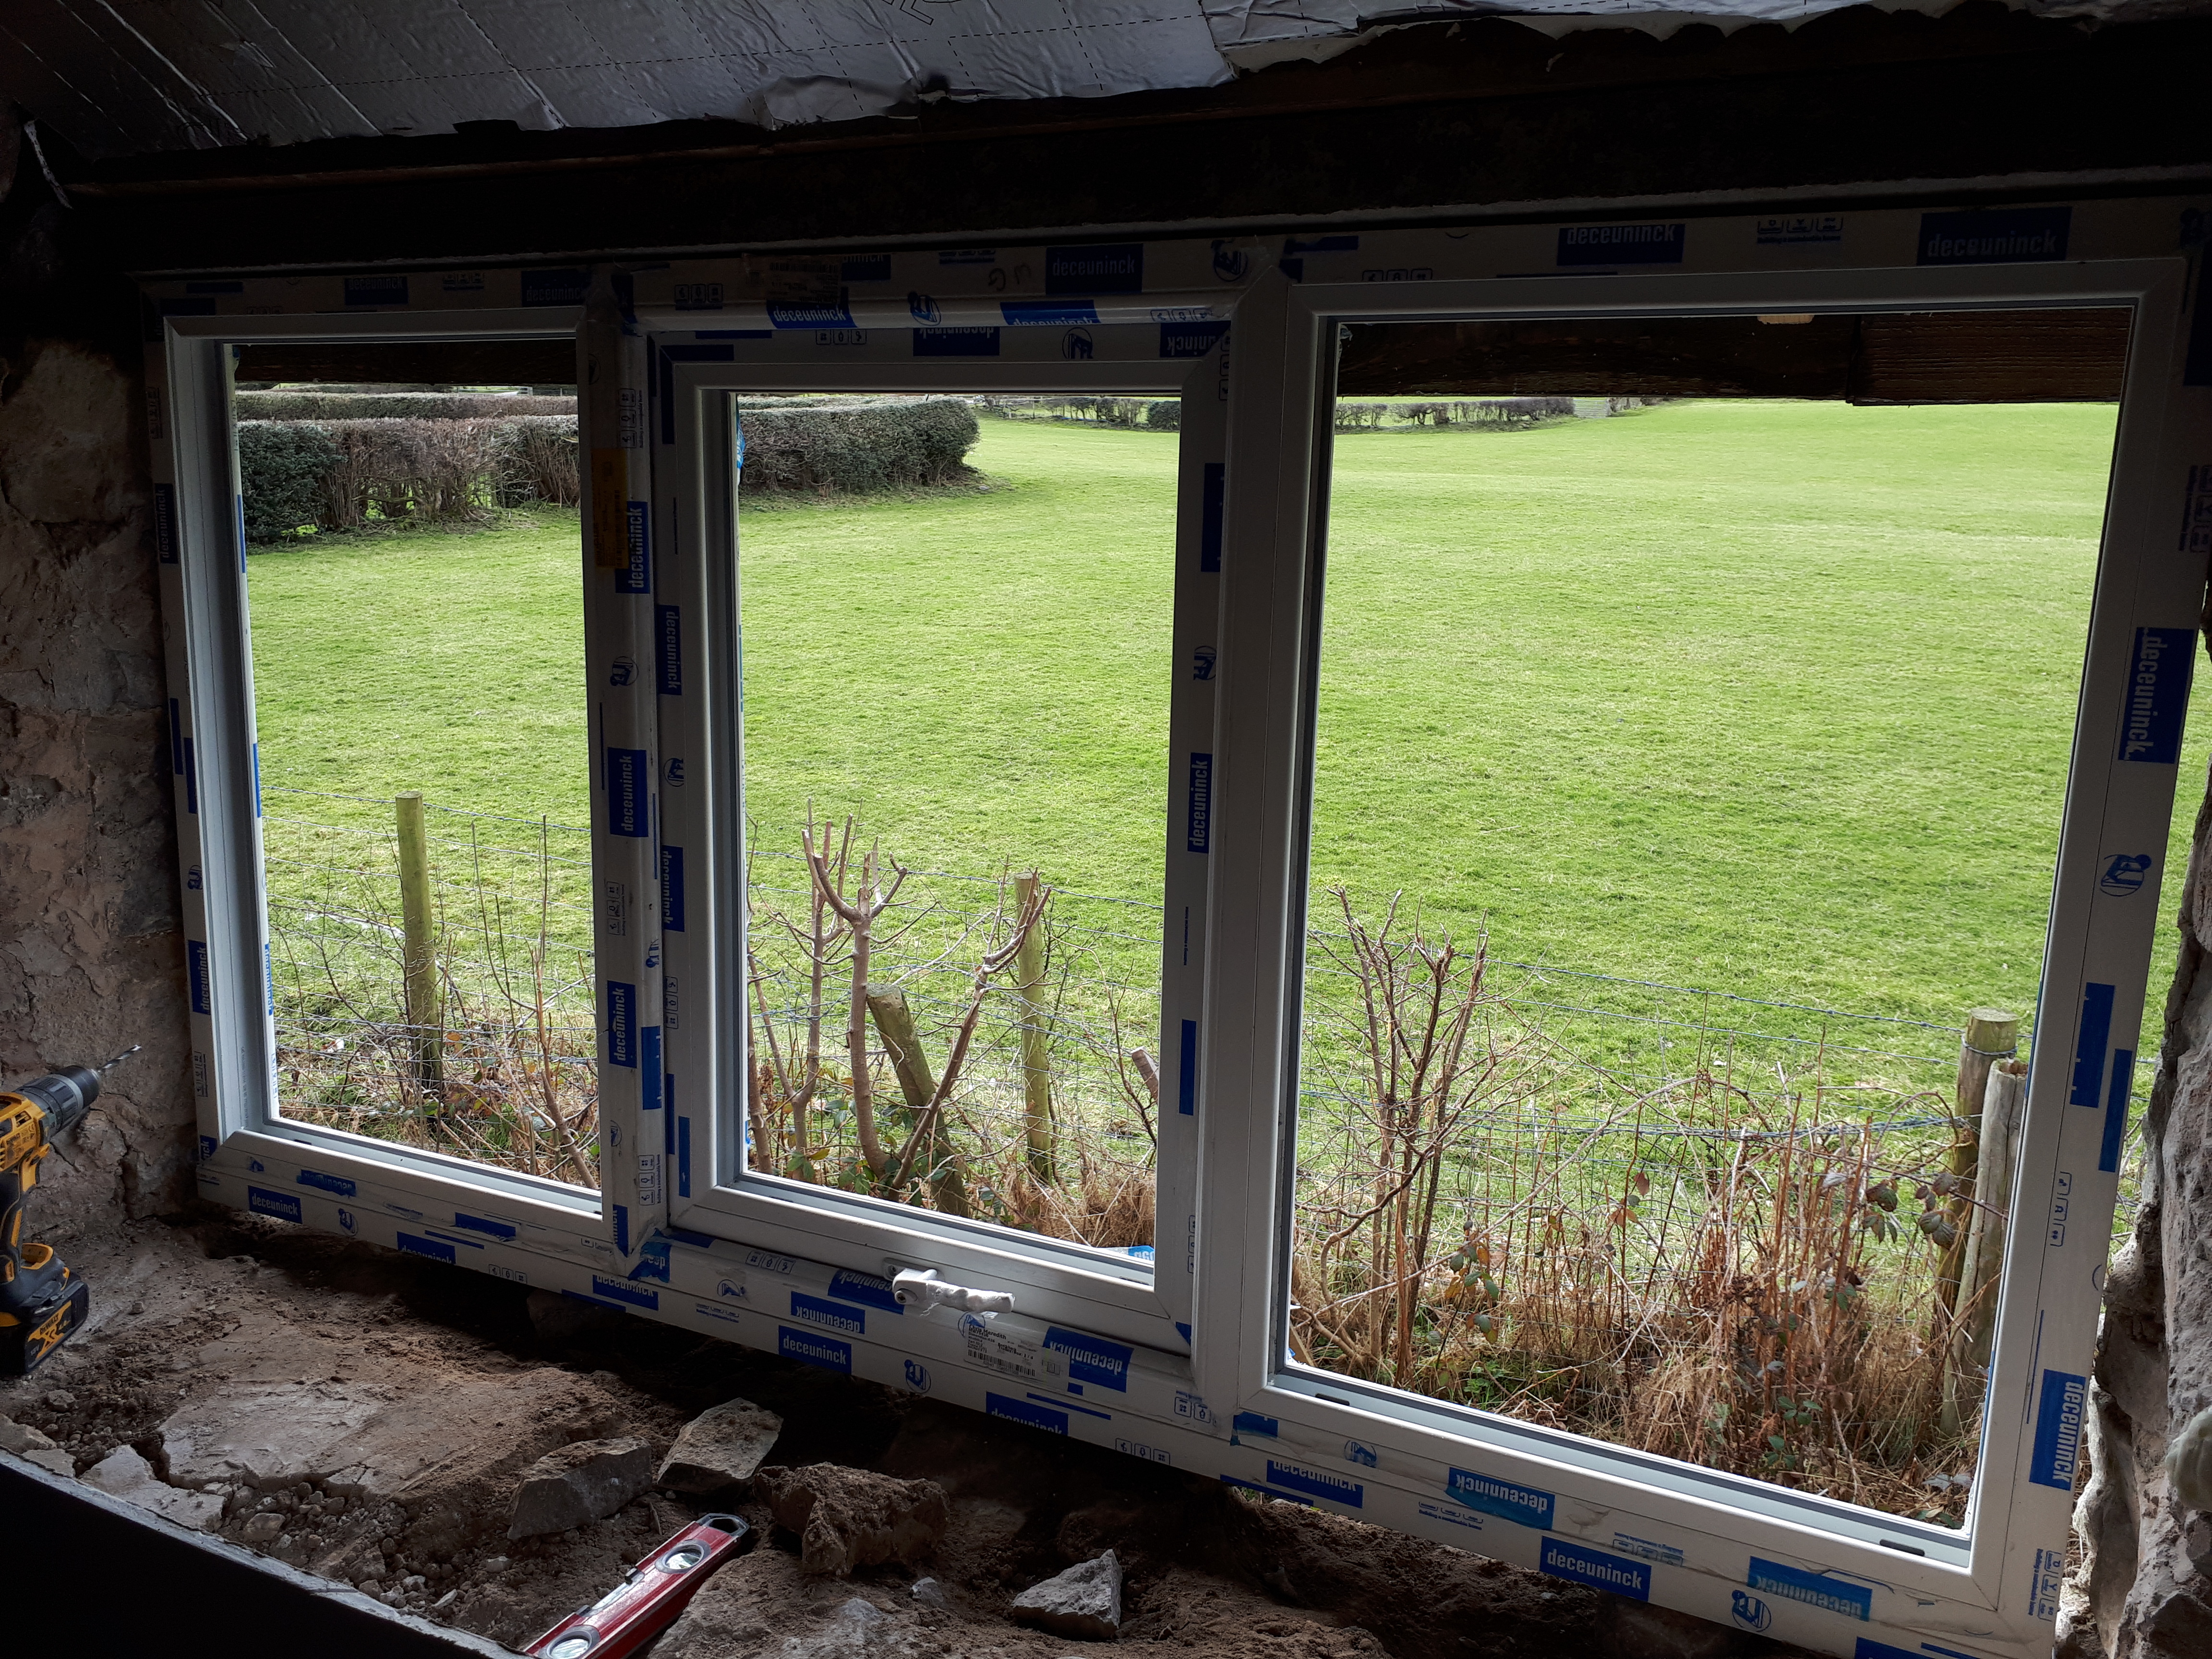
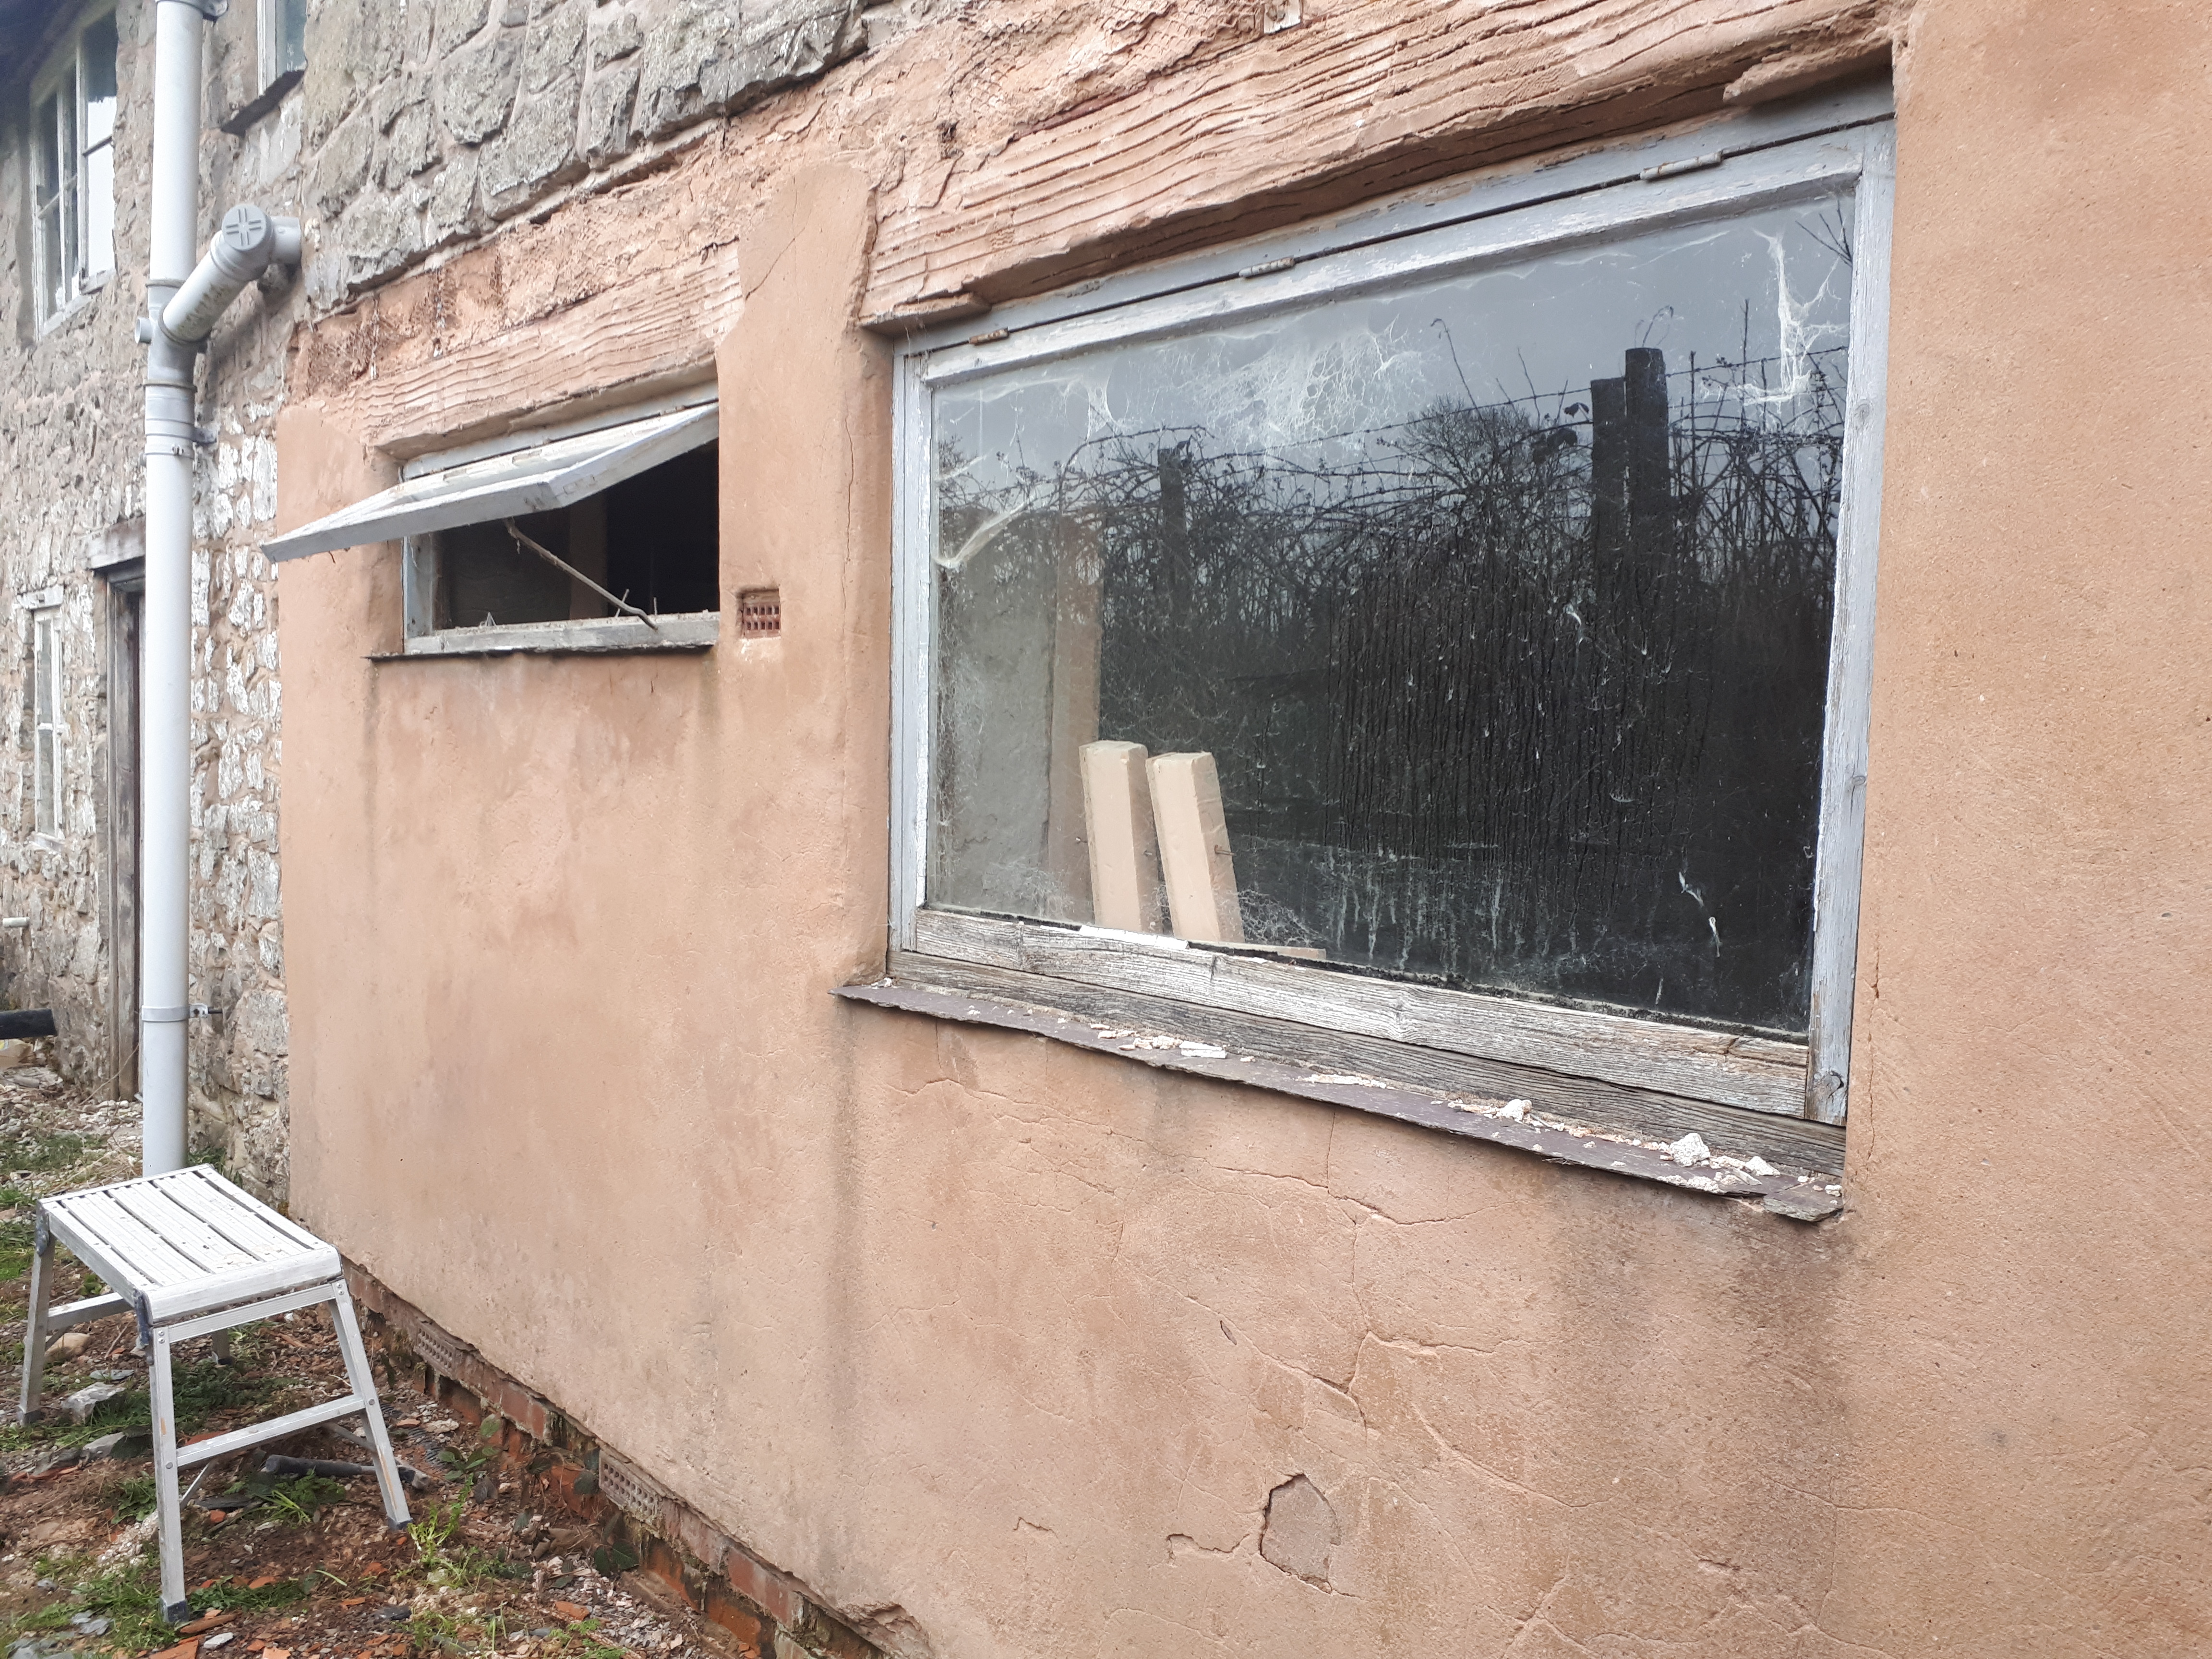
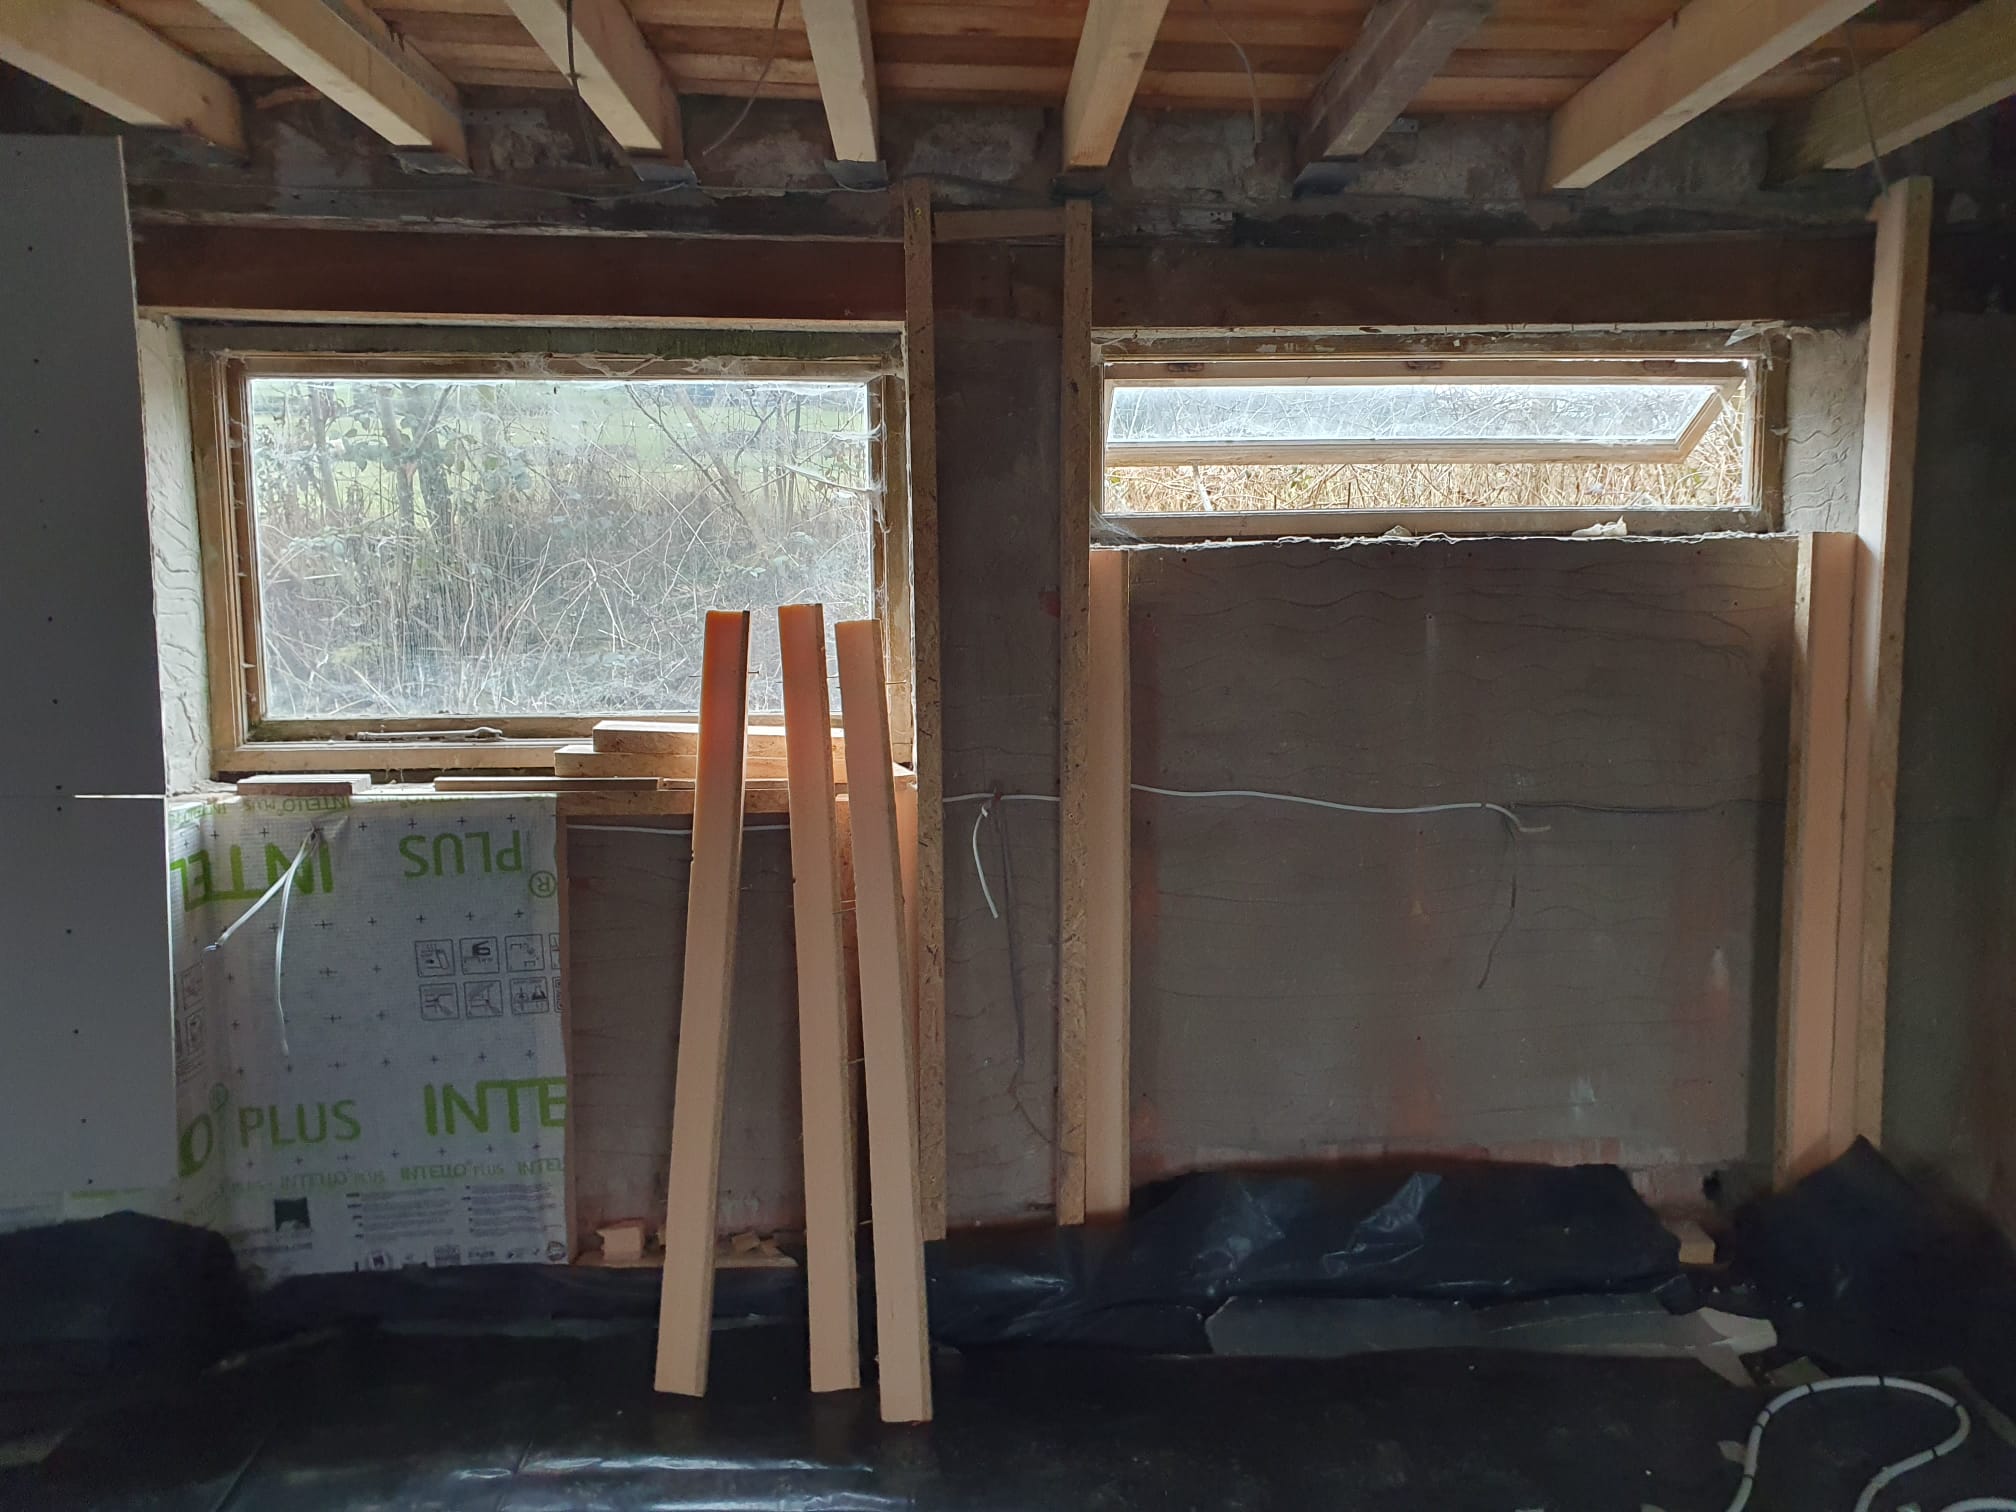
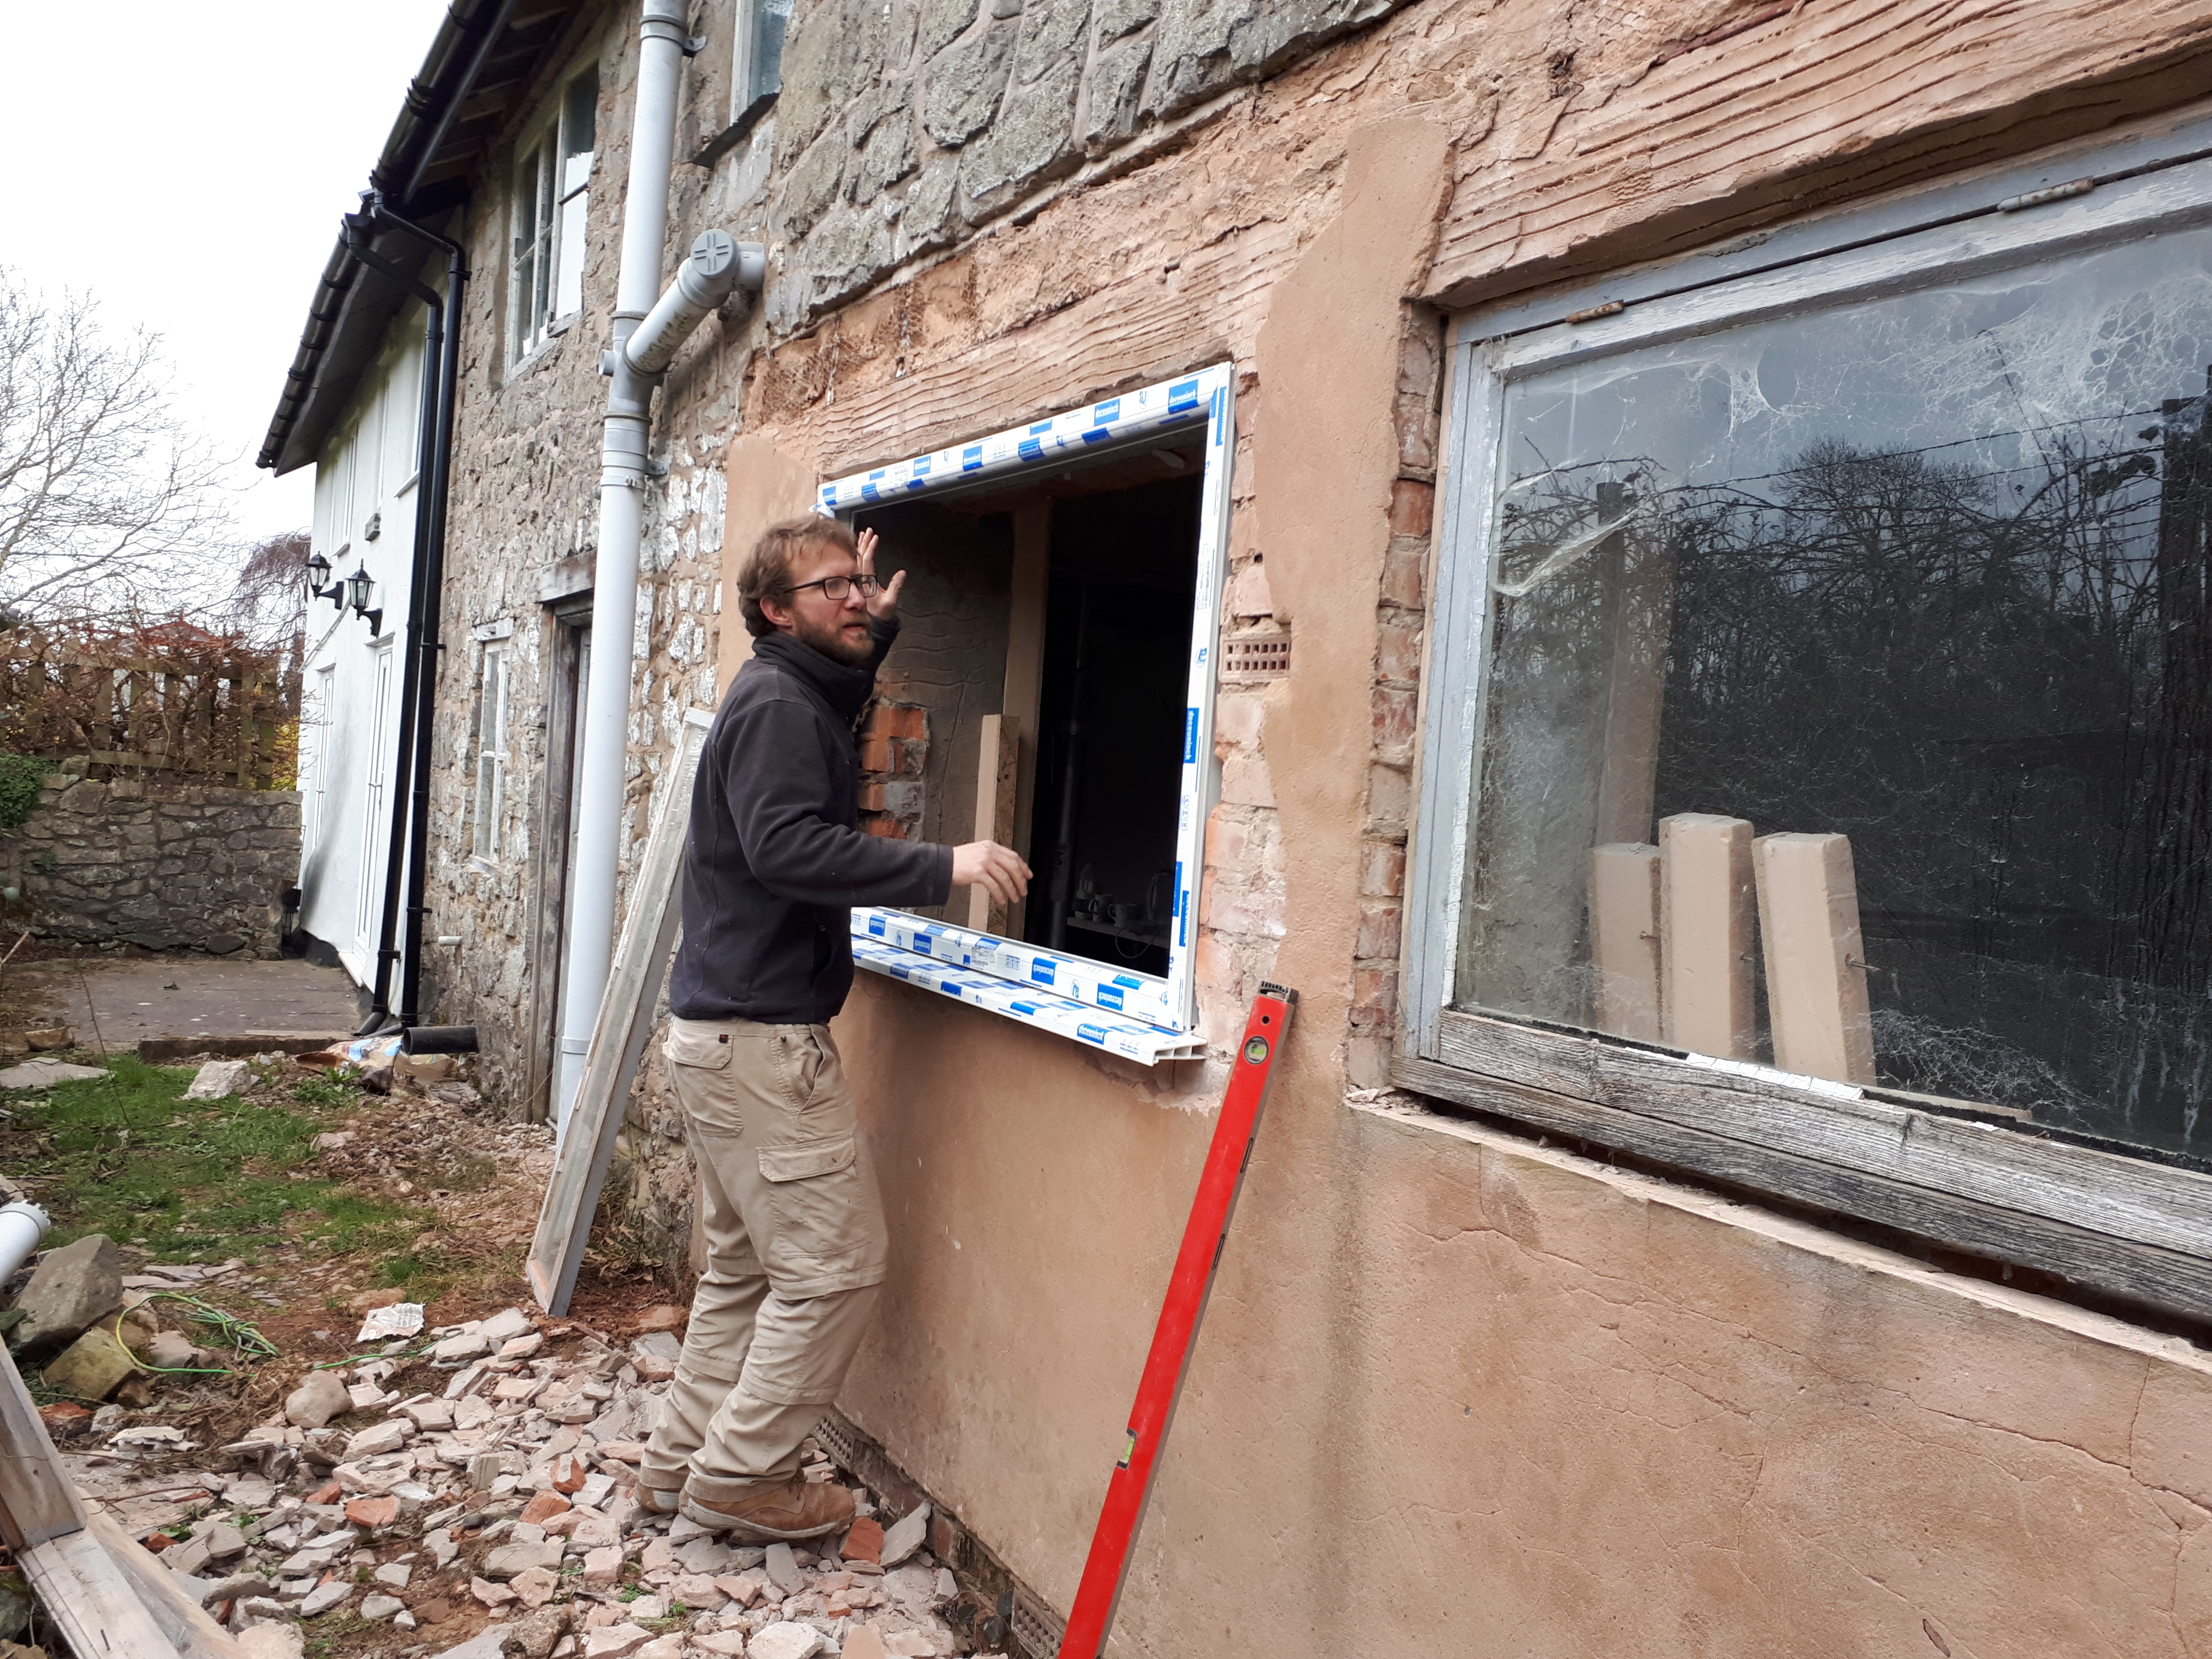
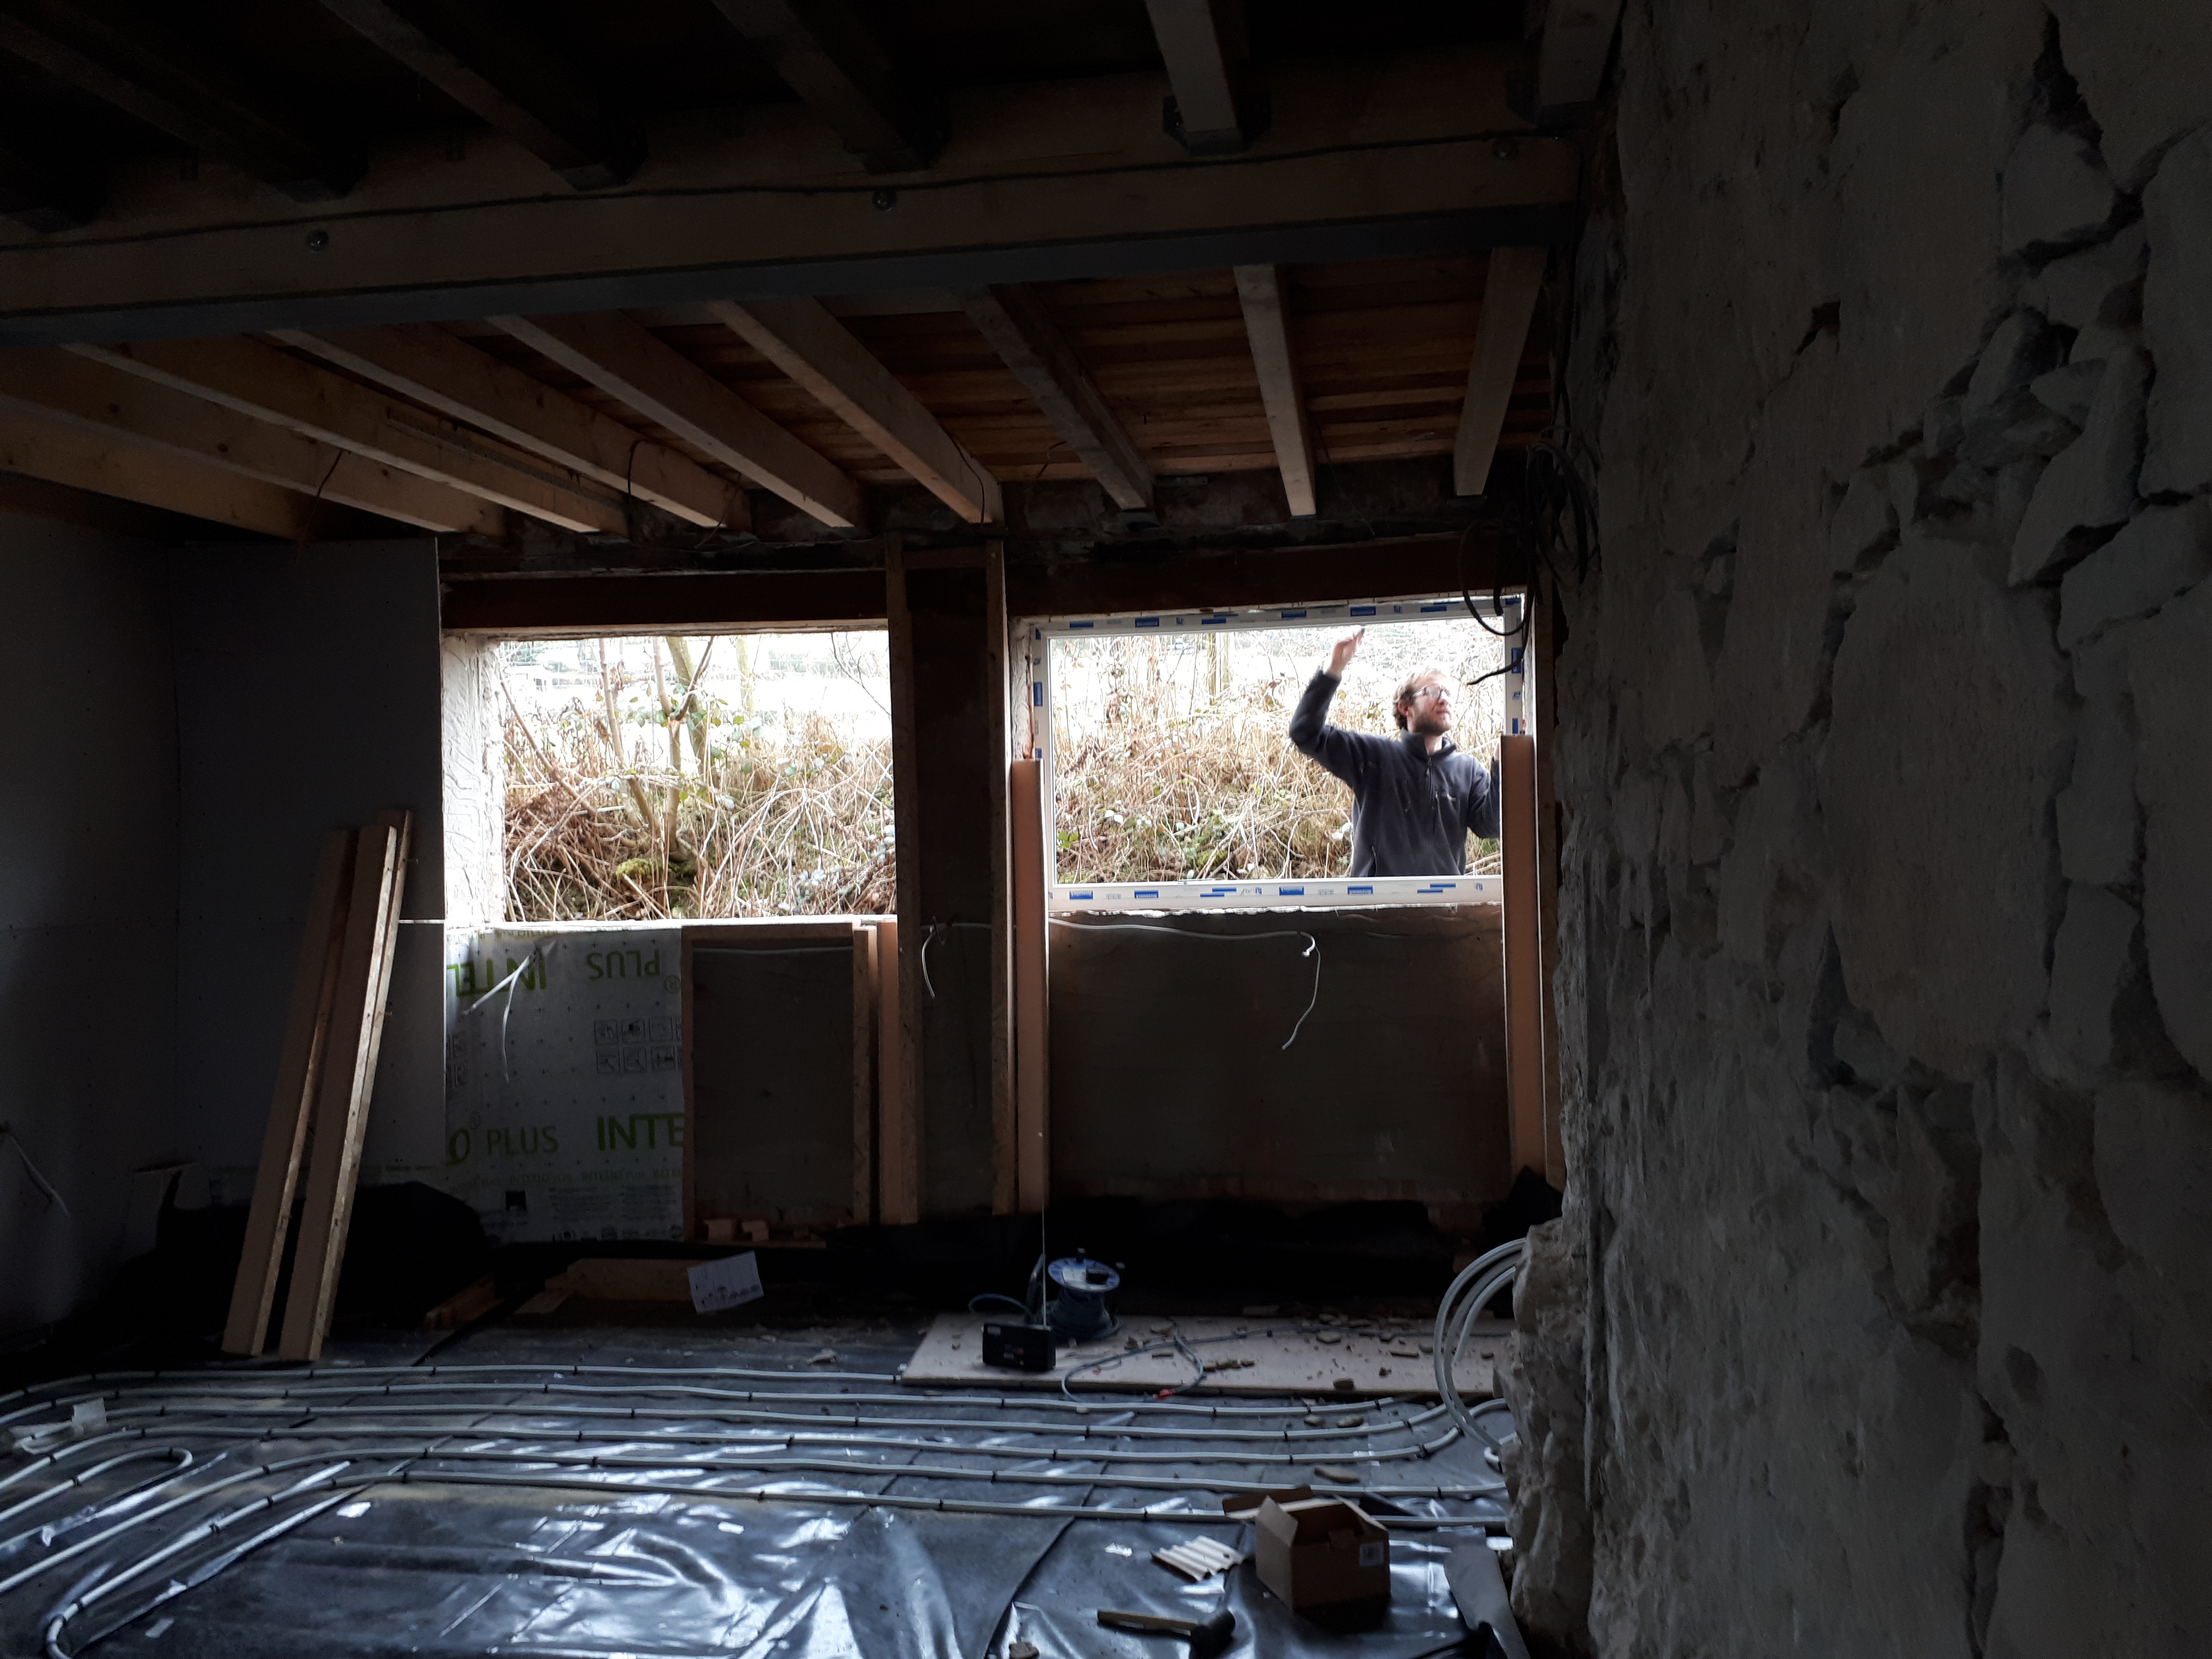
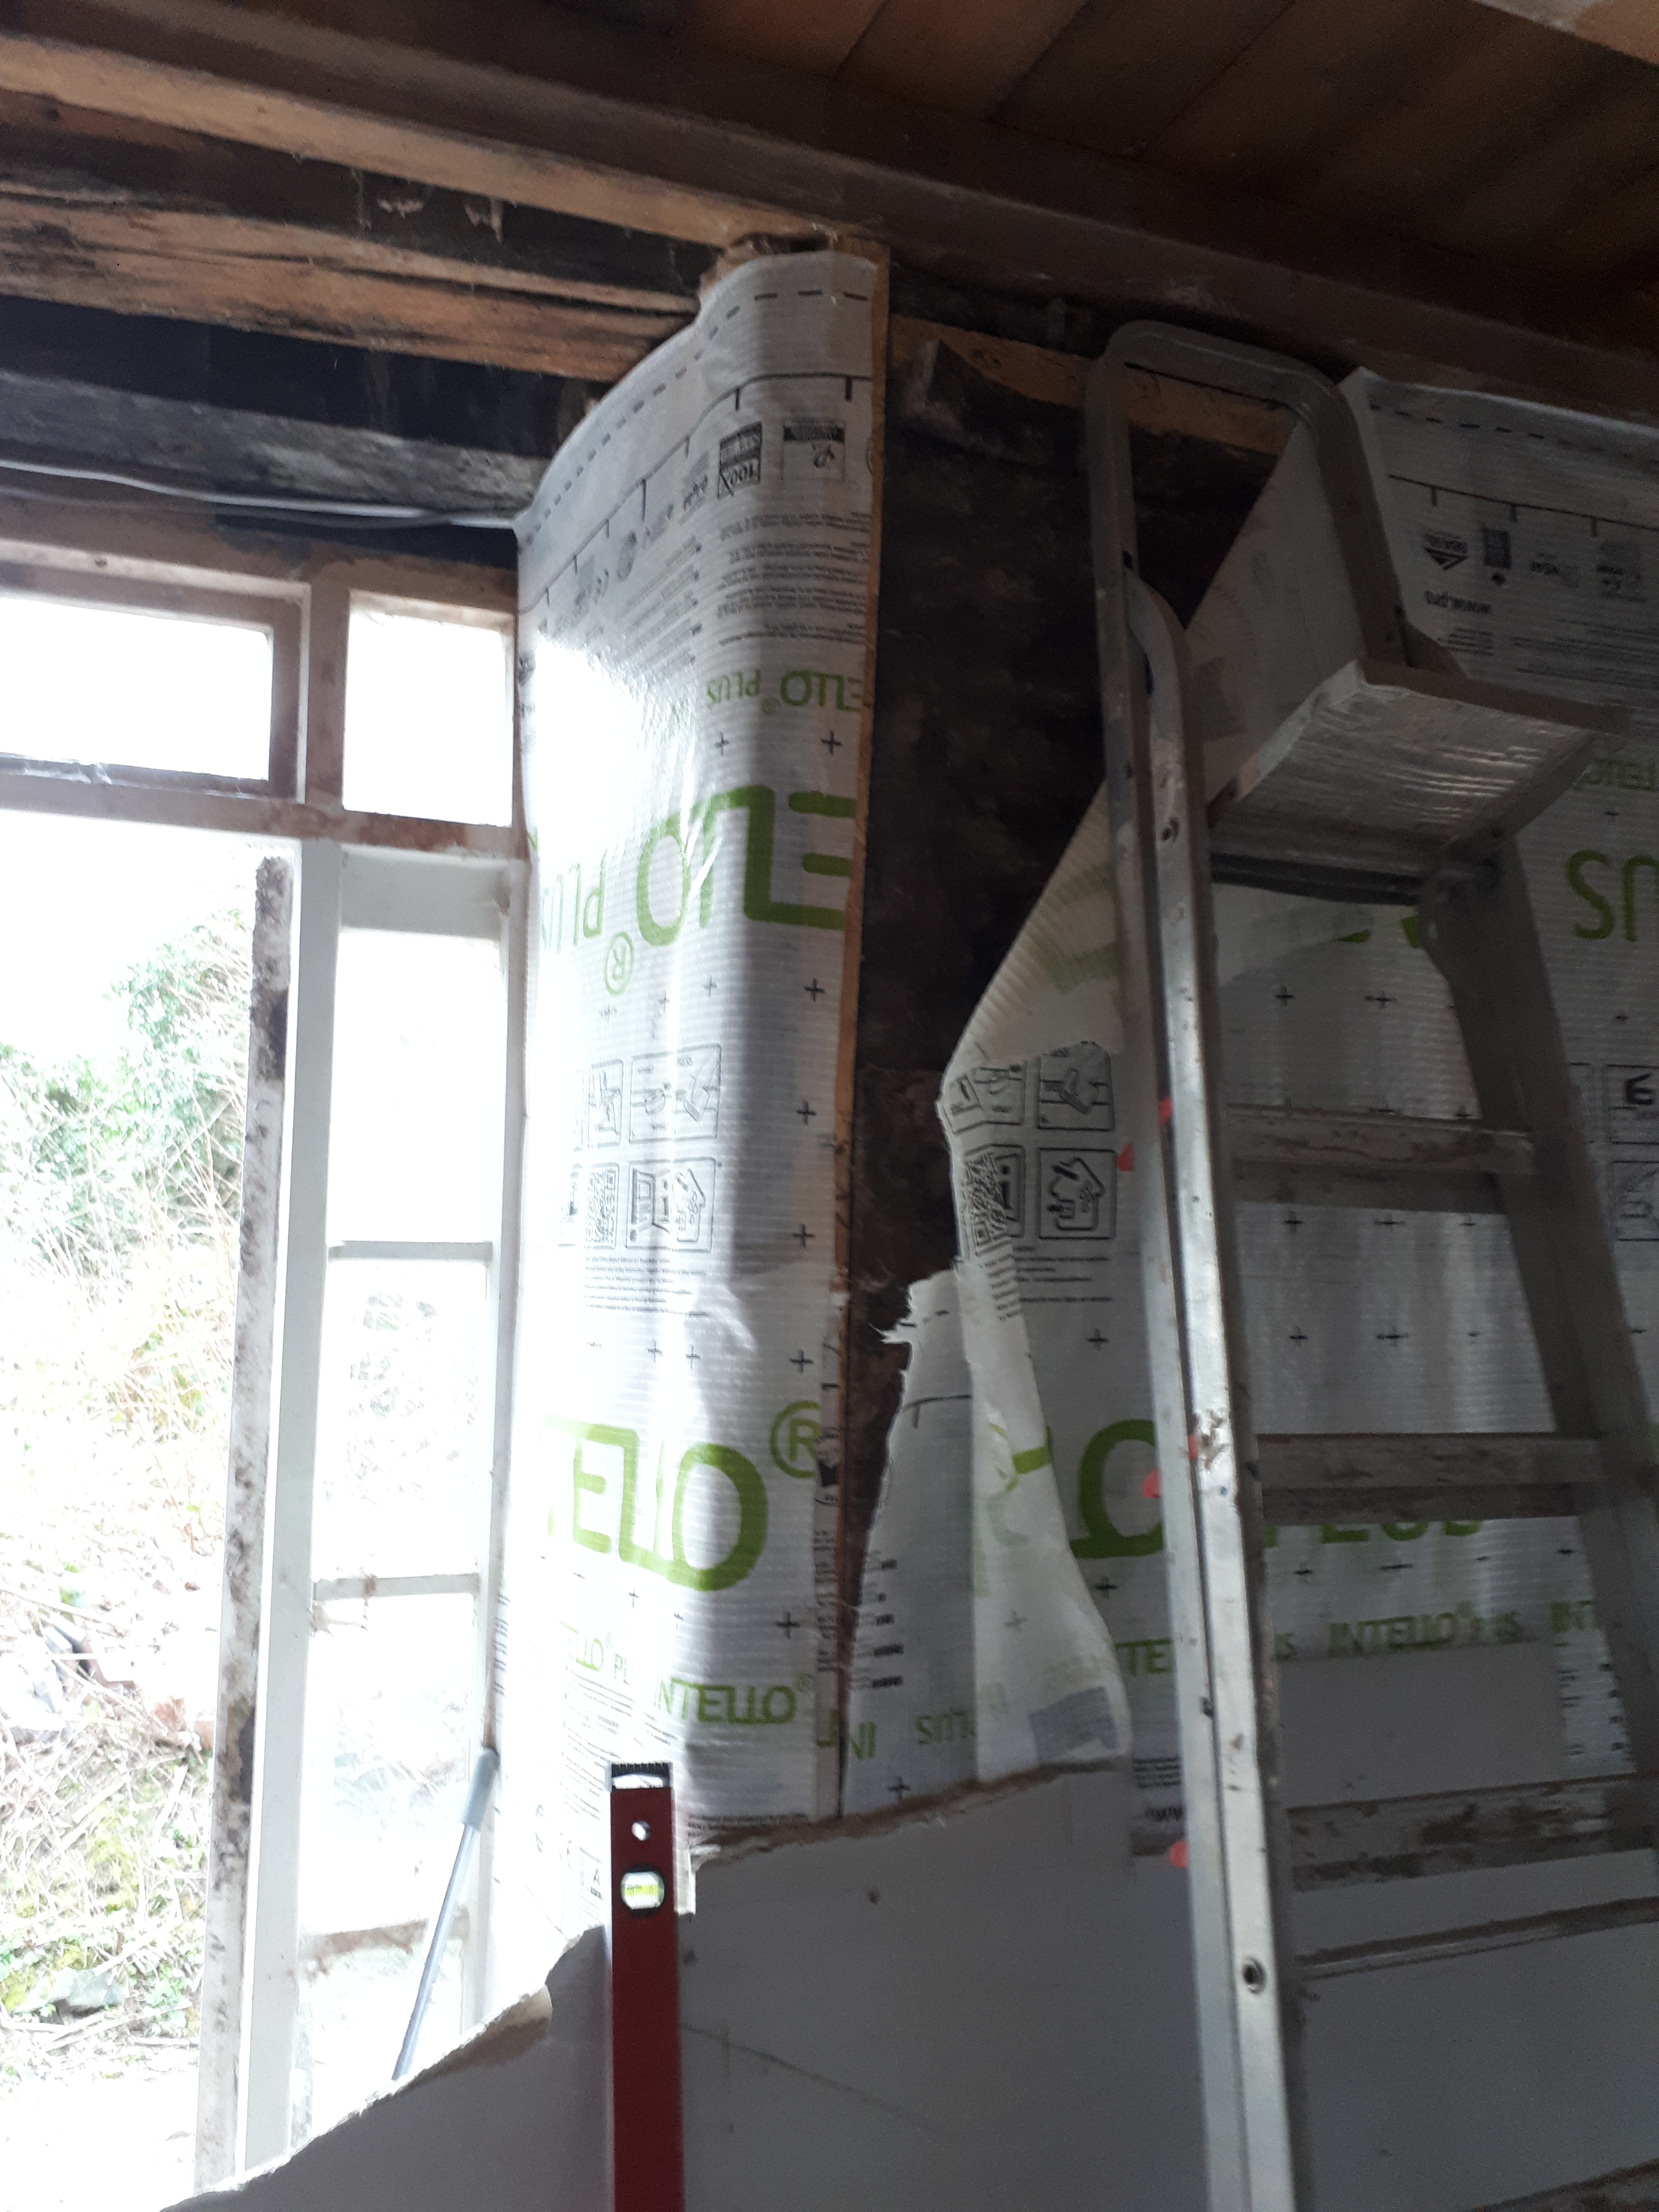
Our new house has a total of 12 windows, no two alike. While we would have liked to keep the old wooden windows they’re single glazed and in very poor condition. Replacing wood for wood had been our preferred choice, but the cost is prohibitive. Therefore we opted for PVC in the back and wood in the front and side. For our wooden windows we’ll aim to get a similar style to the existing windows, but in the back we decided for the maximum amount of light possible, without unnecessary cross beams.
We started with the two kitchen windows. When we’d first viewed the house these two windows sat in seperate rooms, one in a utility room, and one in a back storage room. Now that they’ll both be facing onto the kitchen worktop, we want them both to be the same size.
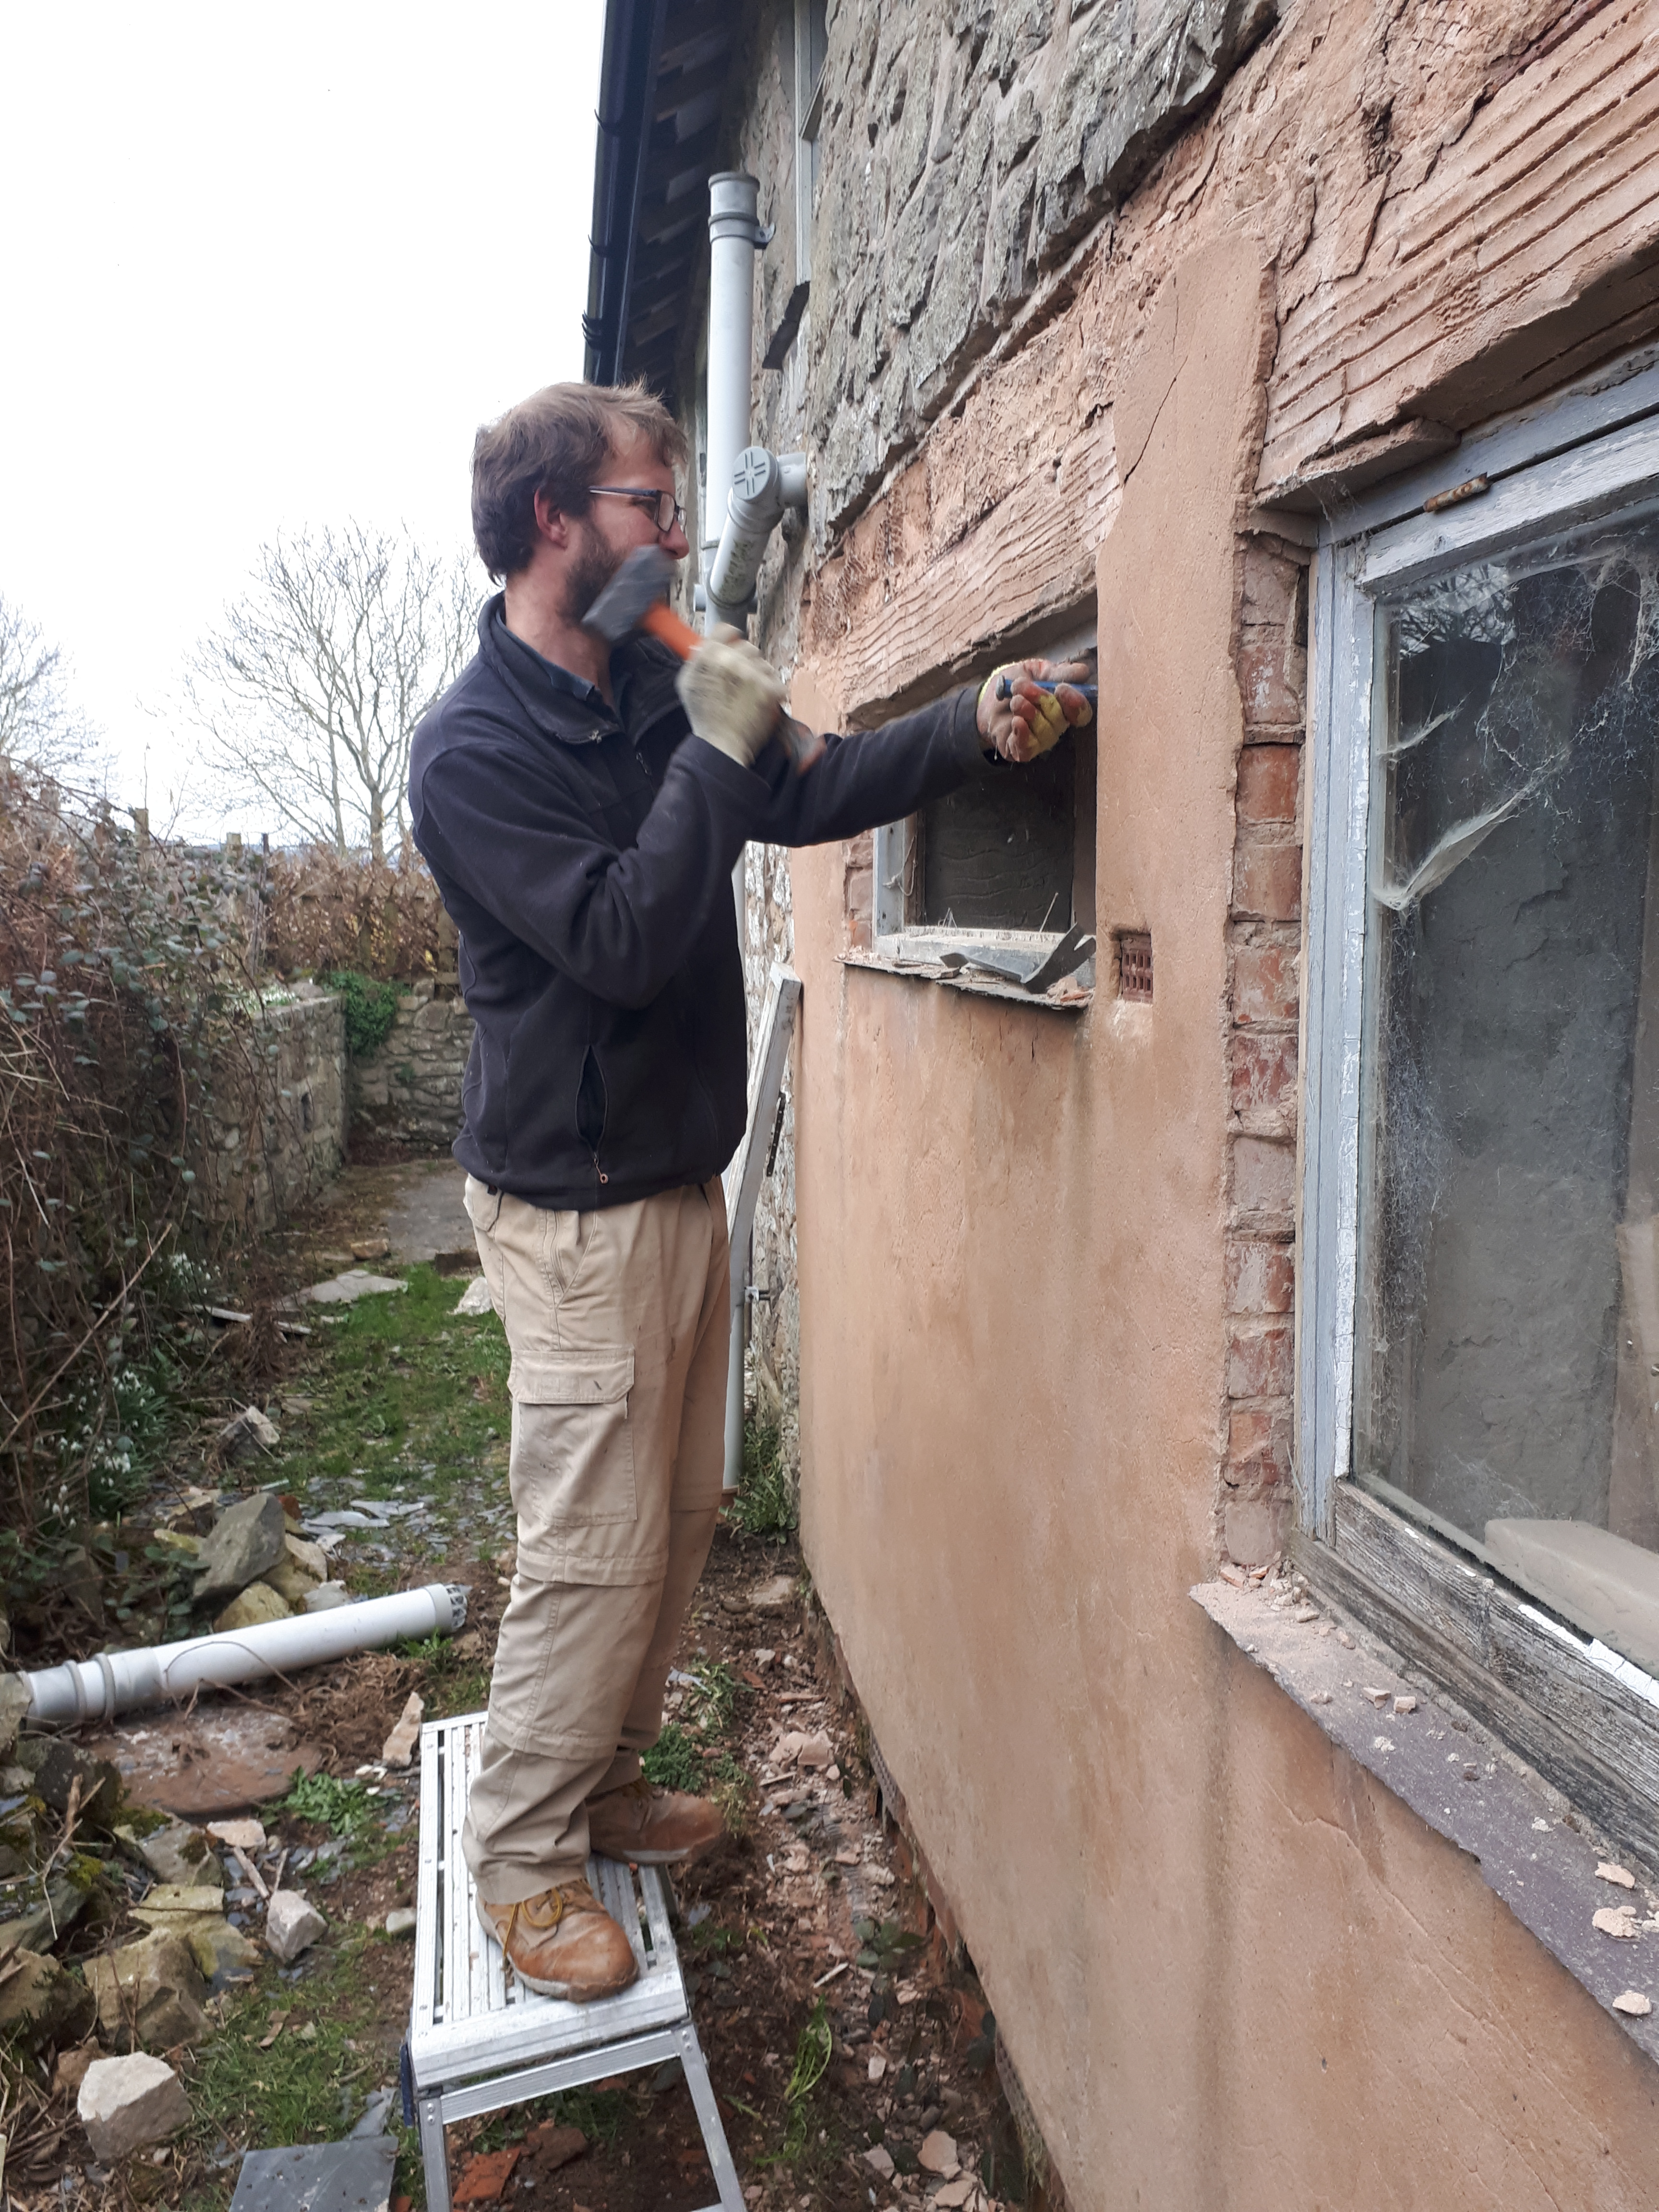
First we had to take out the old window and strip the render, in order to remove the bricks below. The work progressed fairly well, with the odd delay when Chris managed to drop first a chisel, then a level and finally the window edging, down the gap between the two faces of the wall. A bit of fishing with a loop of string managed to retrieve them… eventually.
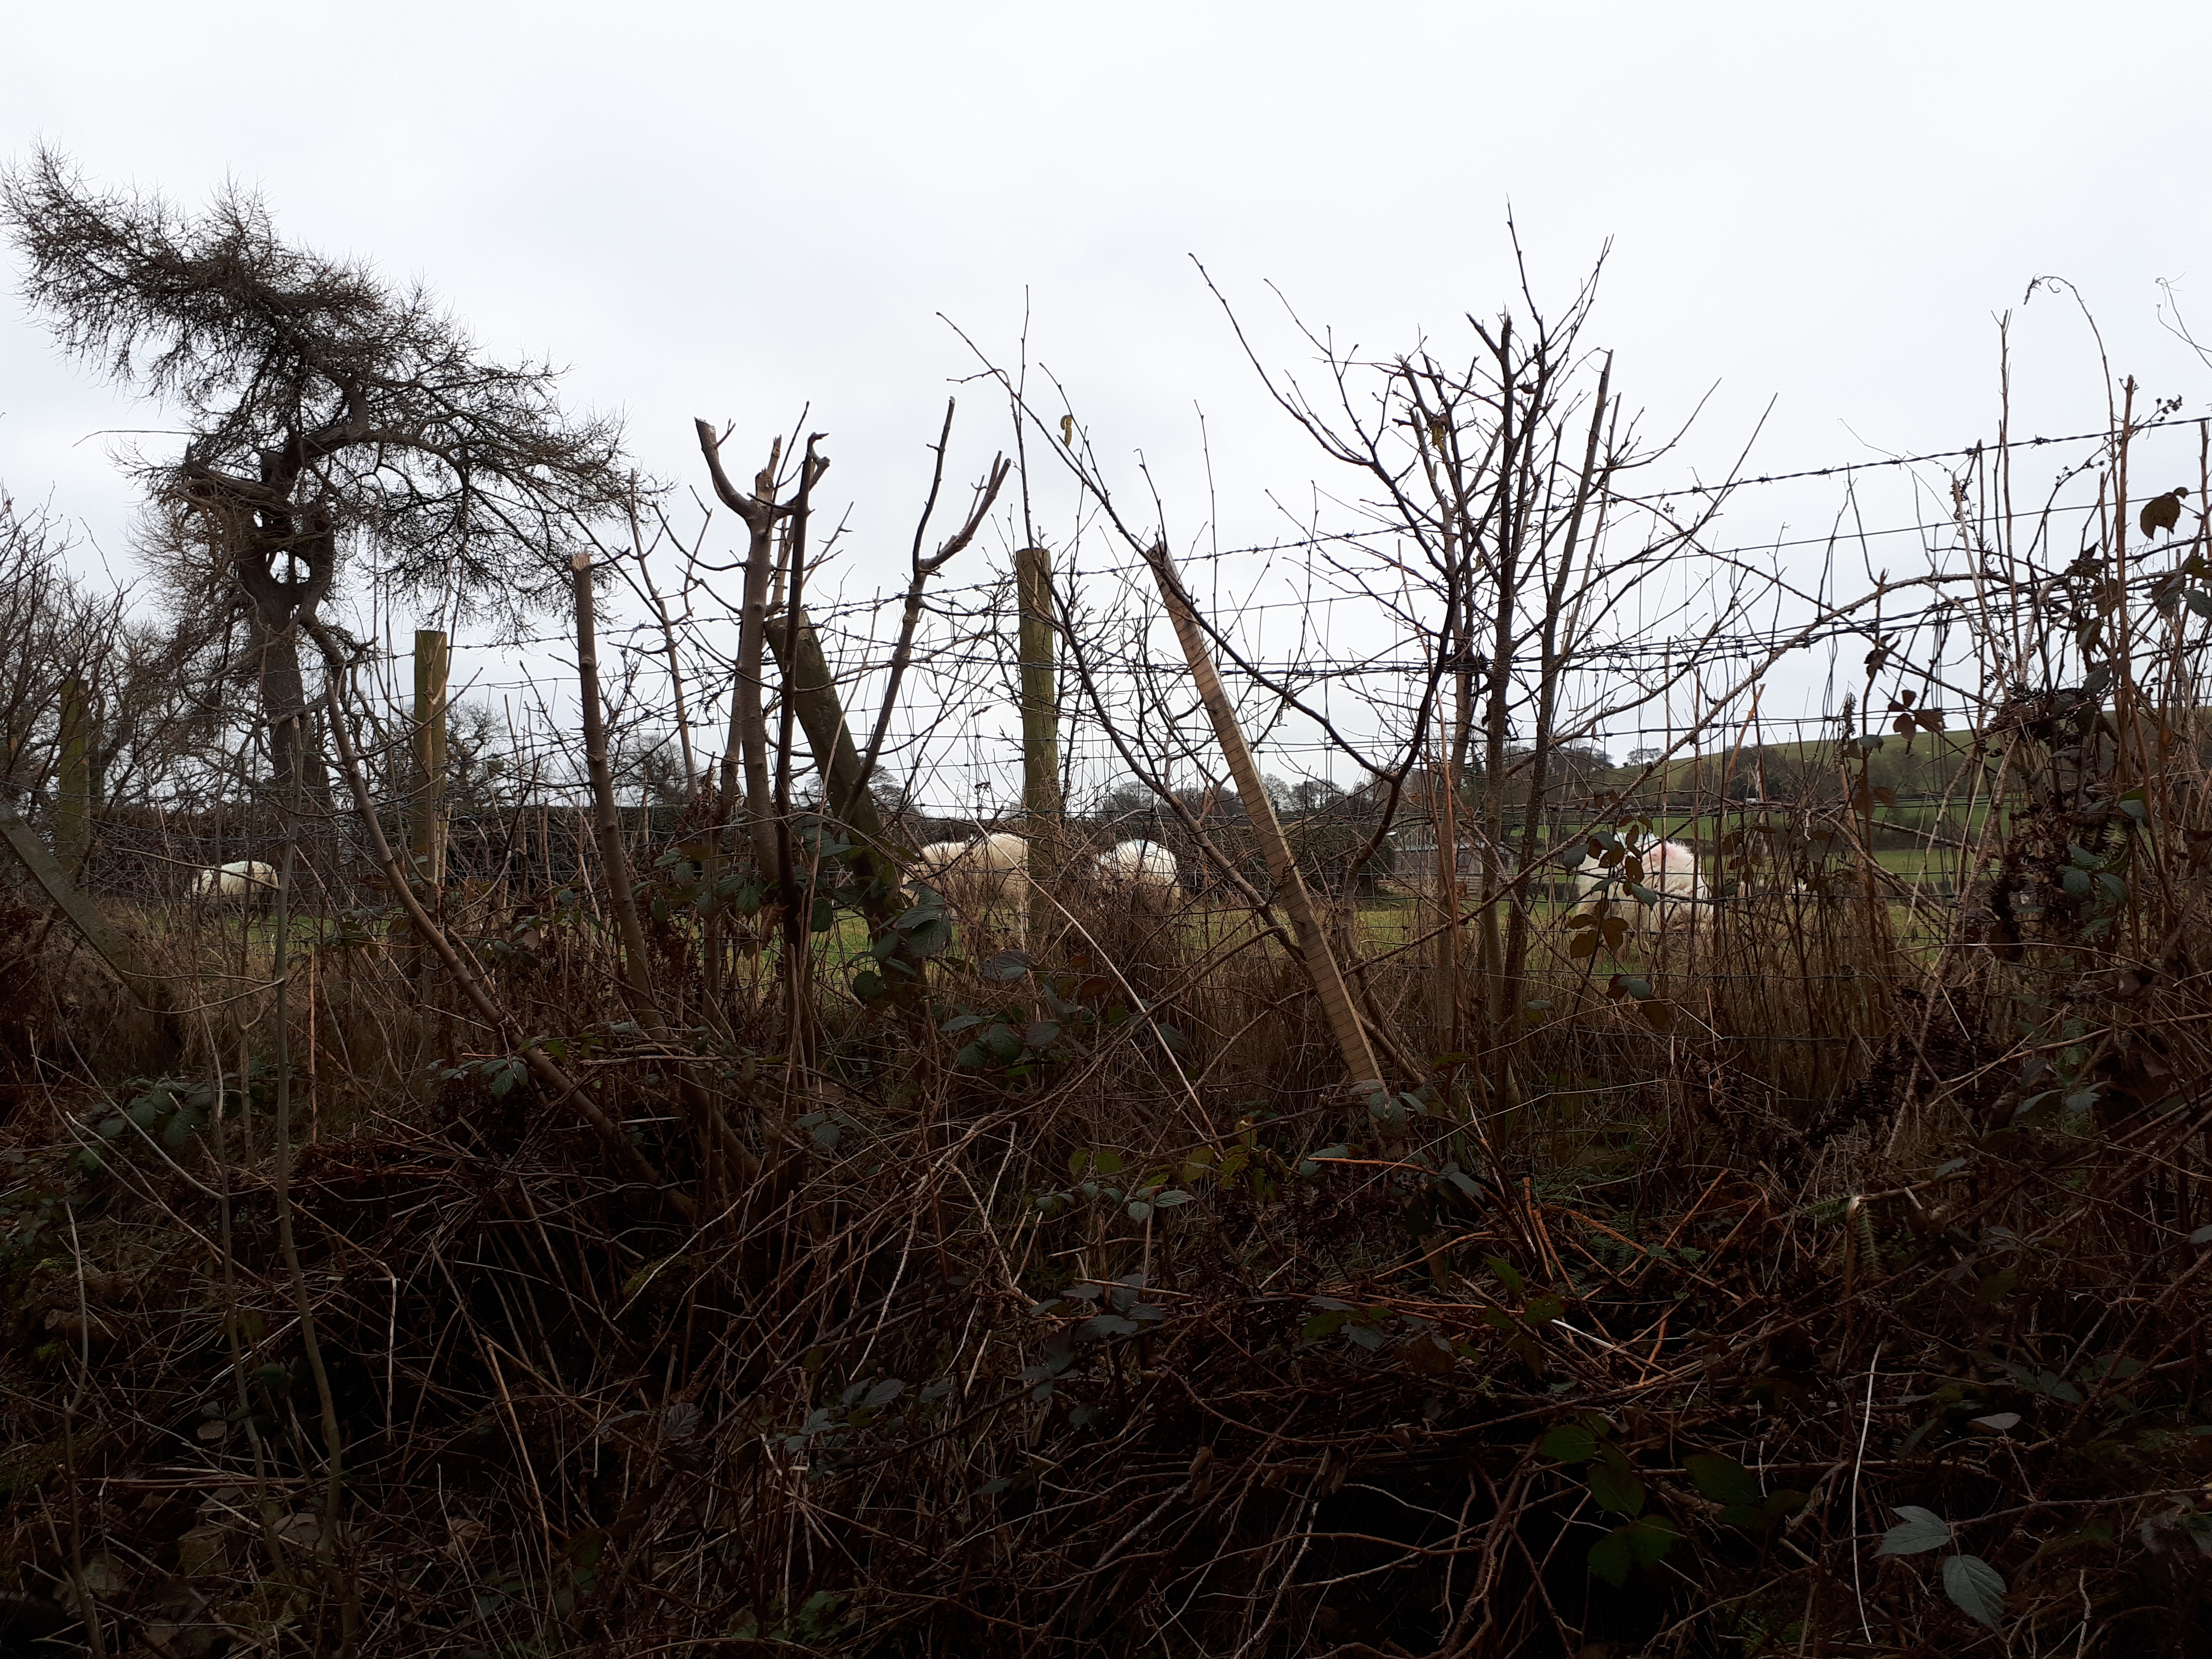
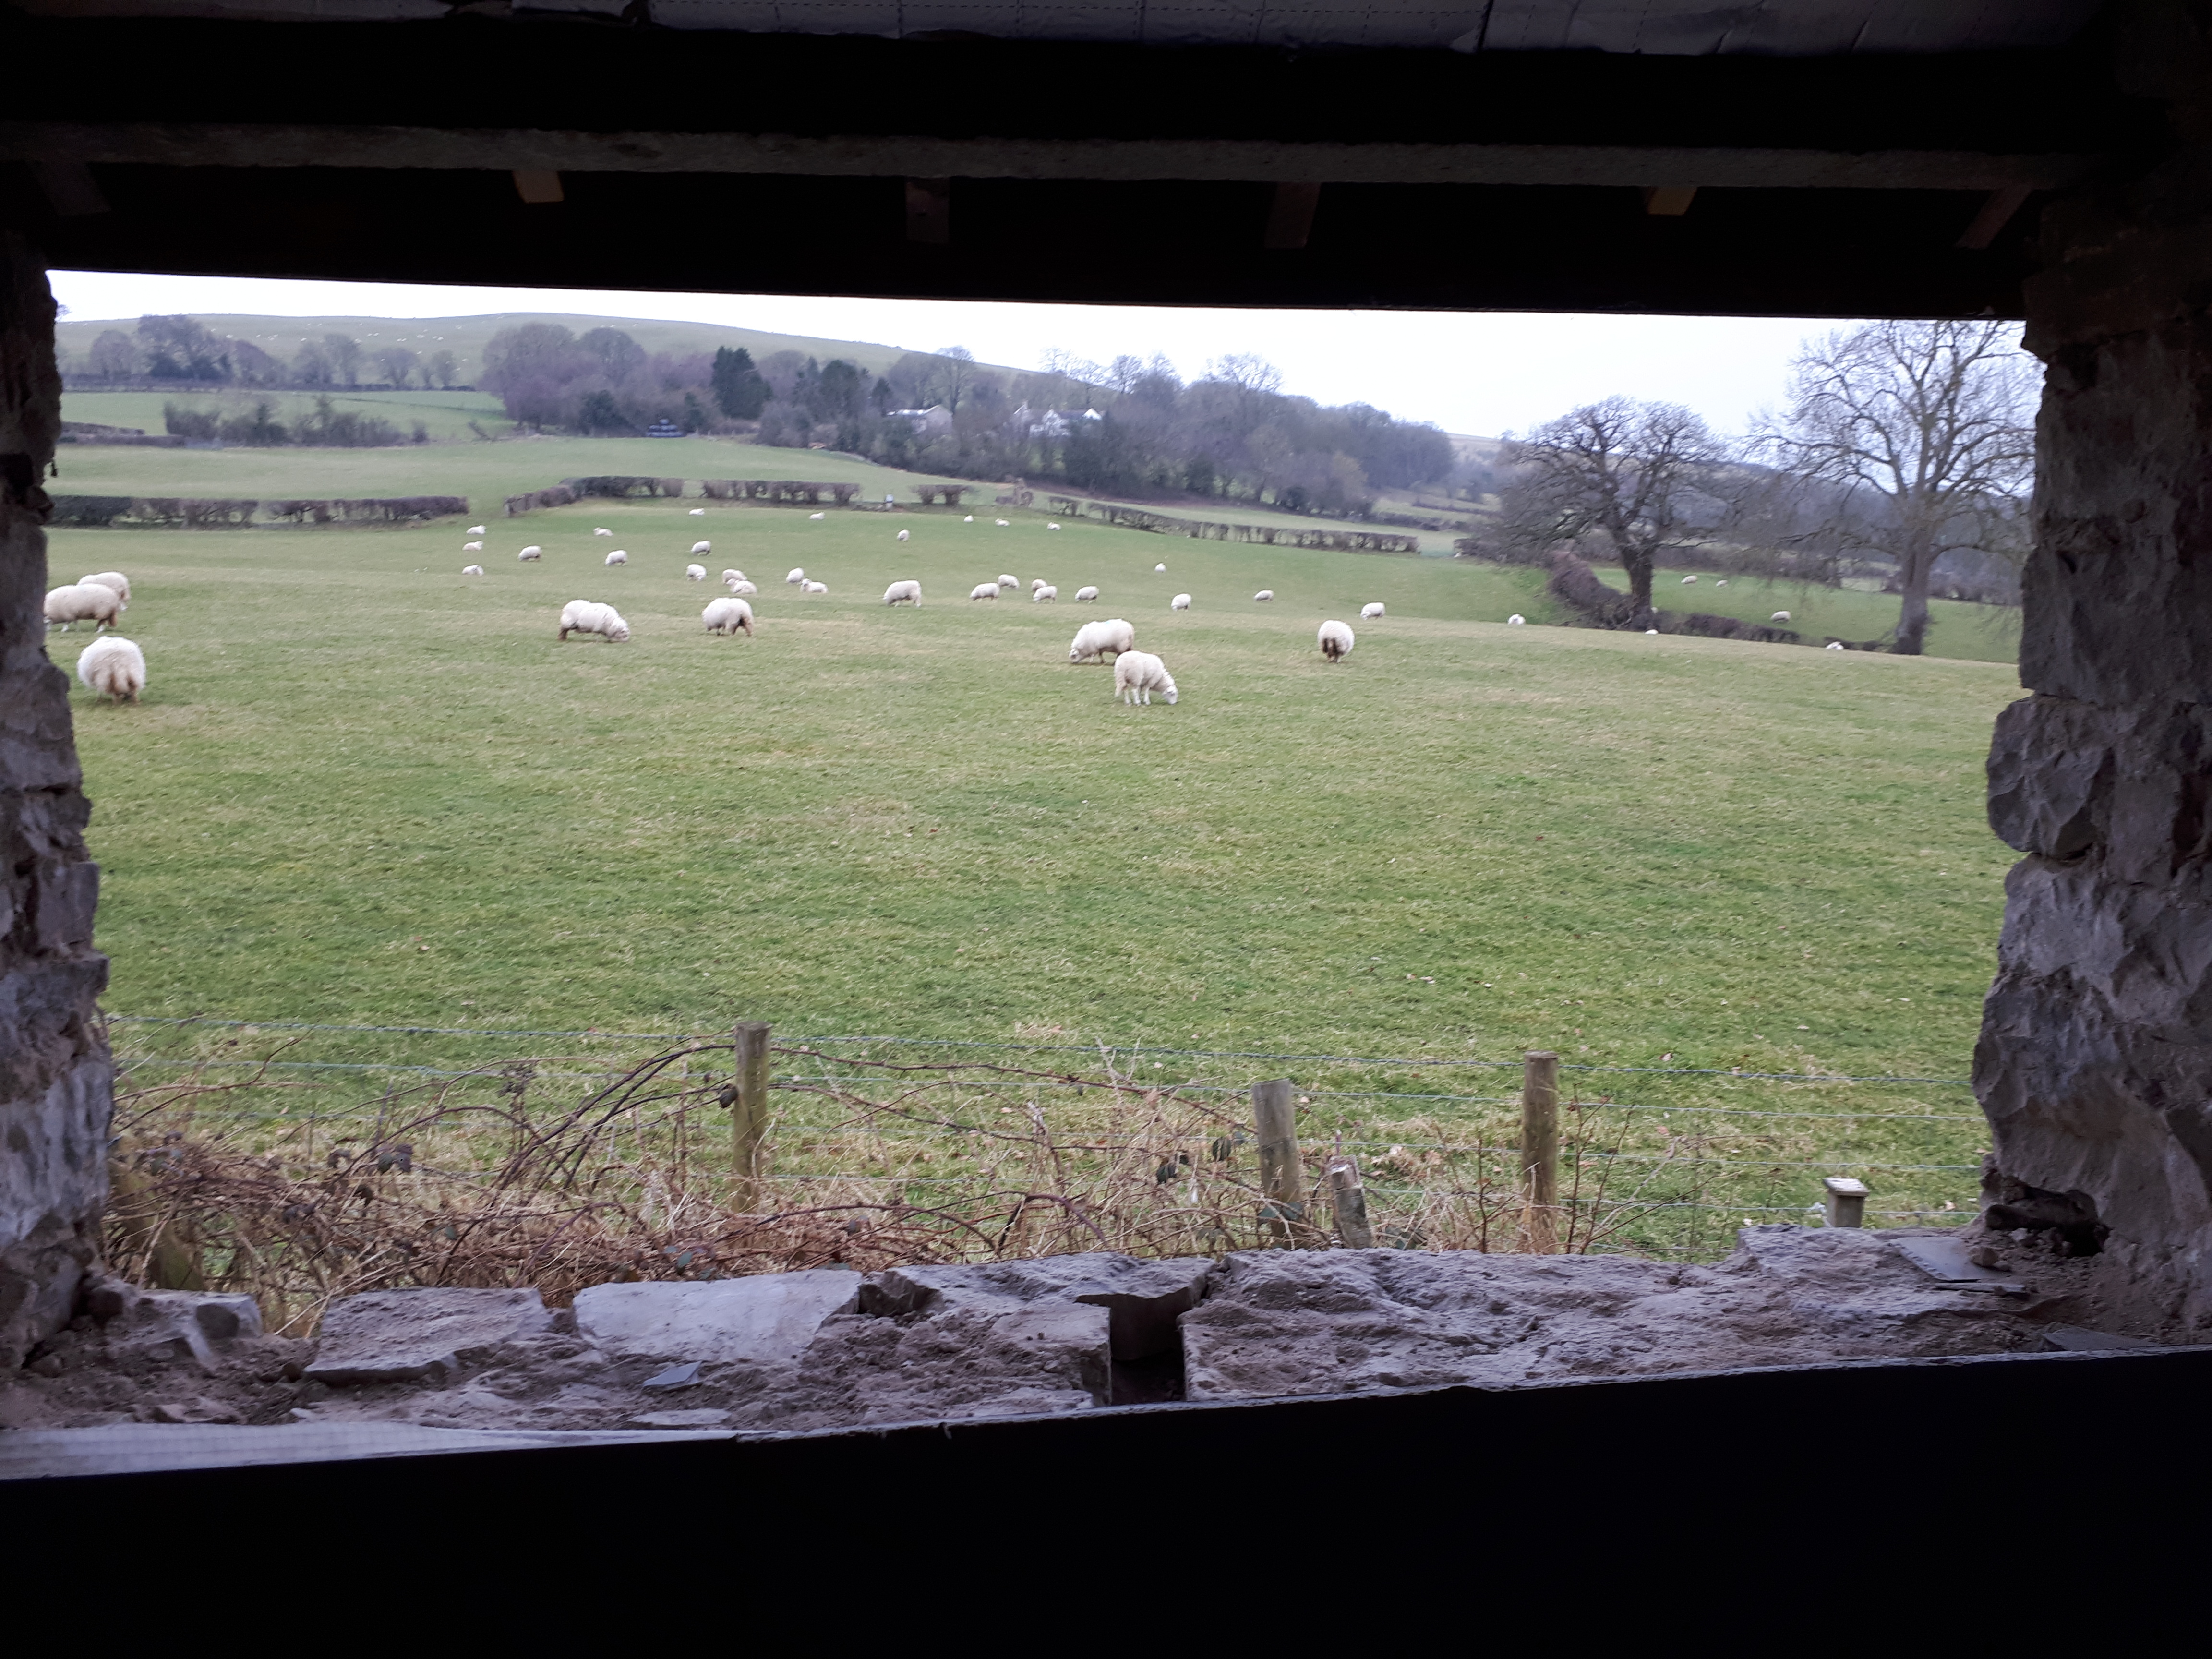
We were keen to have single panes for the kitchen windows as we look straight out onto the back field. Currently this view is overgrown with brambles, but in the future we should get a lovely view of the hill behind the house and grazing sheep, while washing up.
Our first experience of installing windows was on our current house. When Chris suggested attempting installing them ourselves I thought he was being overambitious, and that putting in windows was something only professionals could do. But after a long day of muddling through on our first window we found it really wasn’t that complicated. Now, on our new house, we didn’t even consider paying someone to install them for us.
Having removed the old frames, both of which were so rotten that they practically fell out with a bit of a shove, we readied the new frame by cutting the windowsill to size and attaching it the frame. The window was then put in place, and holes drilled through the frame into the wall to drive in screws into the wall.
Next the window panes were placed in. These are the largest panes in the whole house, and being triple glazed they were heavy to manhandle into place. Once in, the window beading that holds the panes in place, has to be tapped into place around the edge. It’s a challenge to hit the edging hard enough for it to clip in, but not accidentally smash the window, something we learnt when we smashed a window pane in our last house.
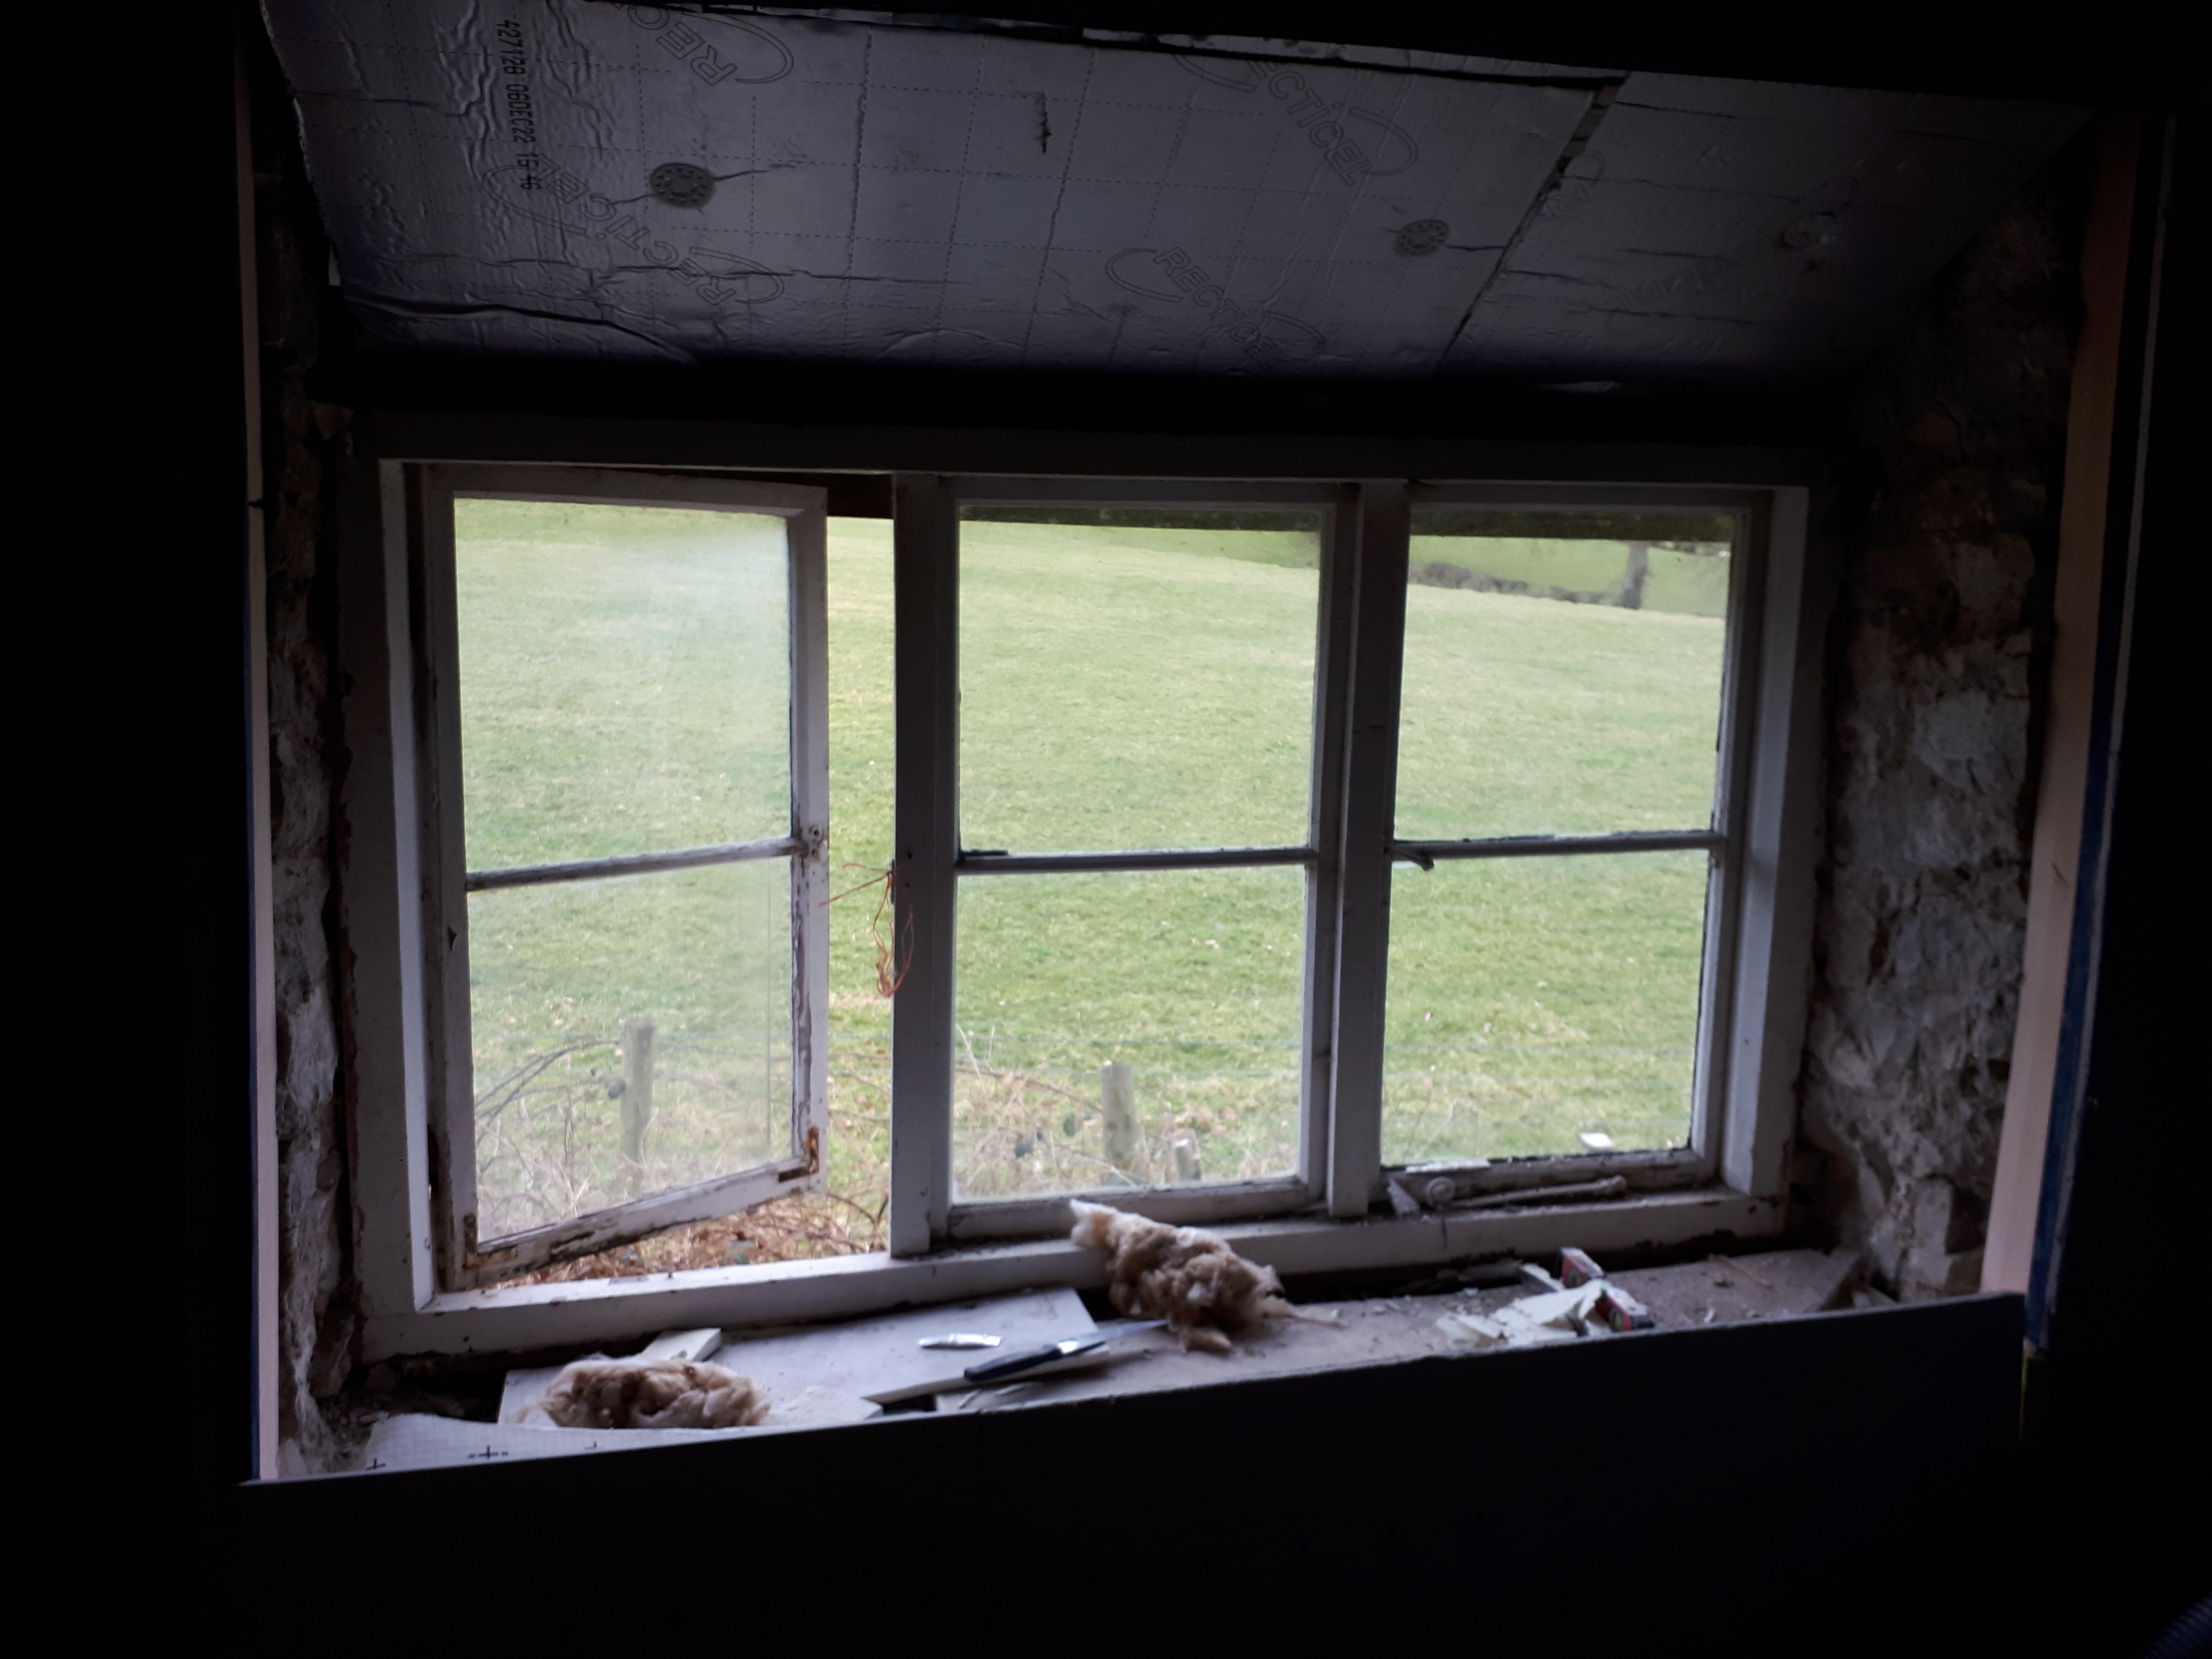
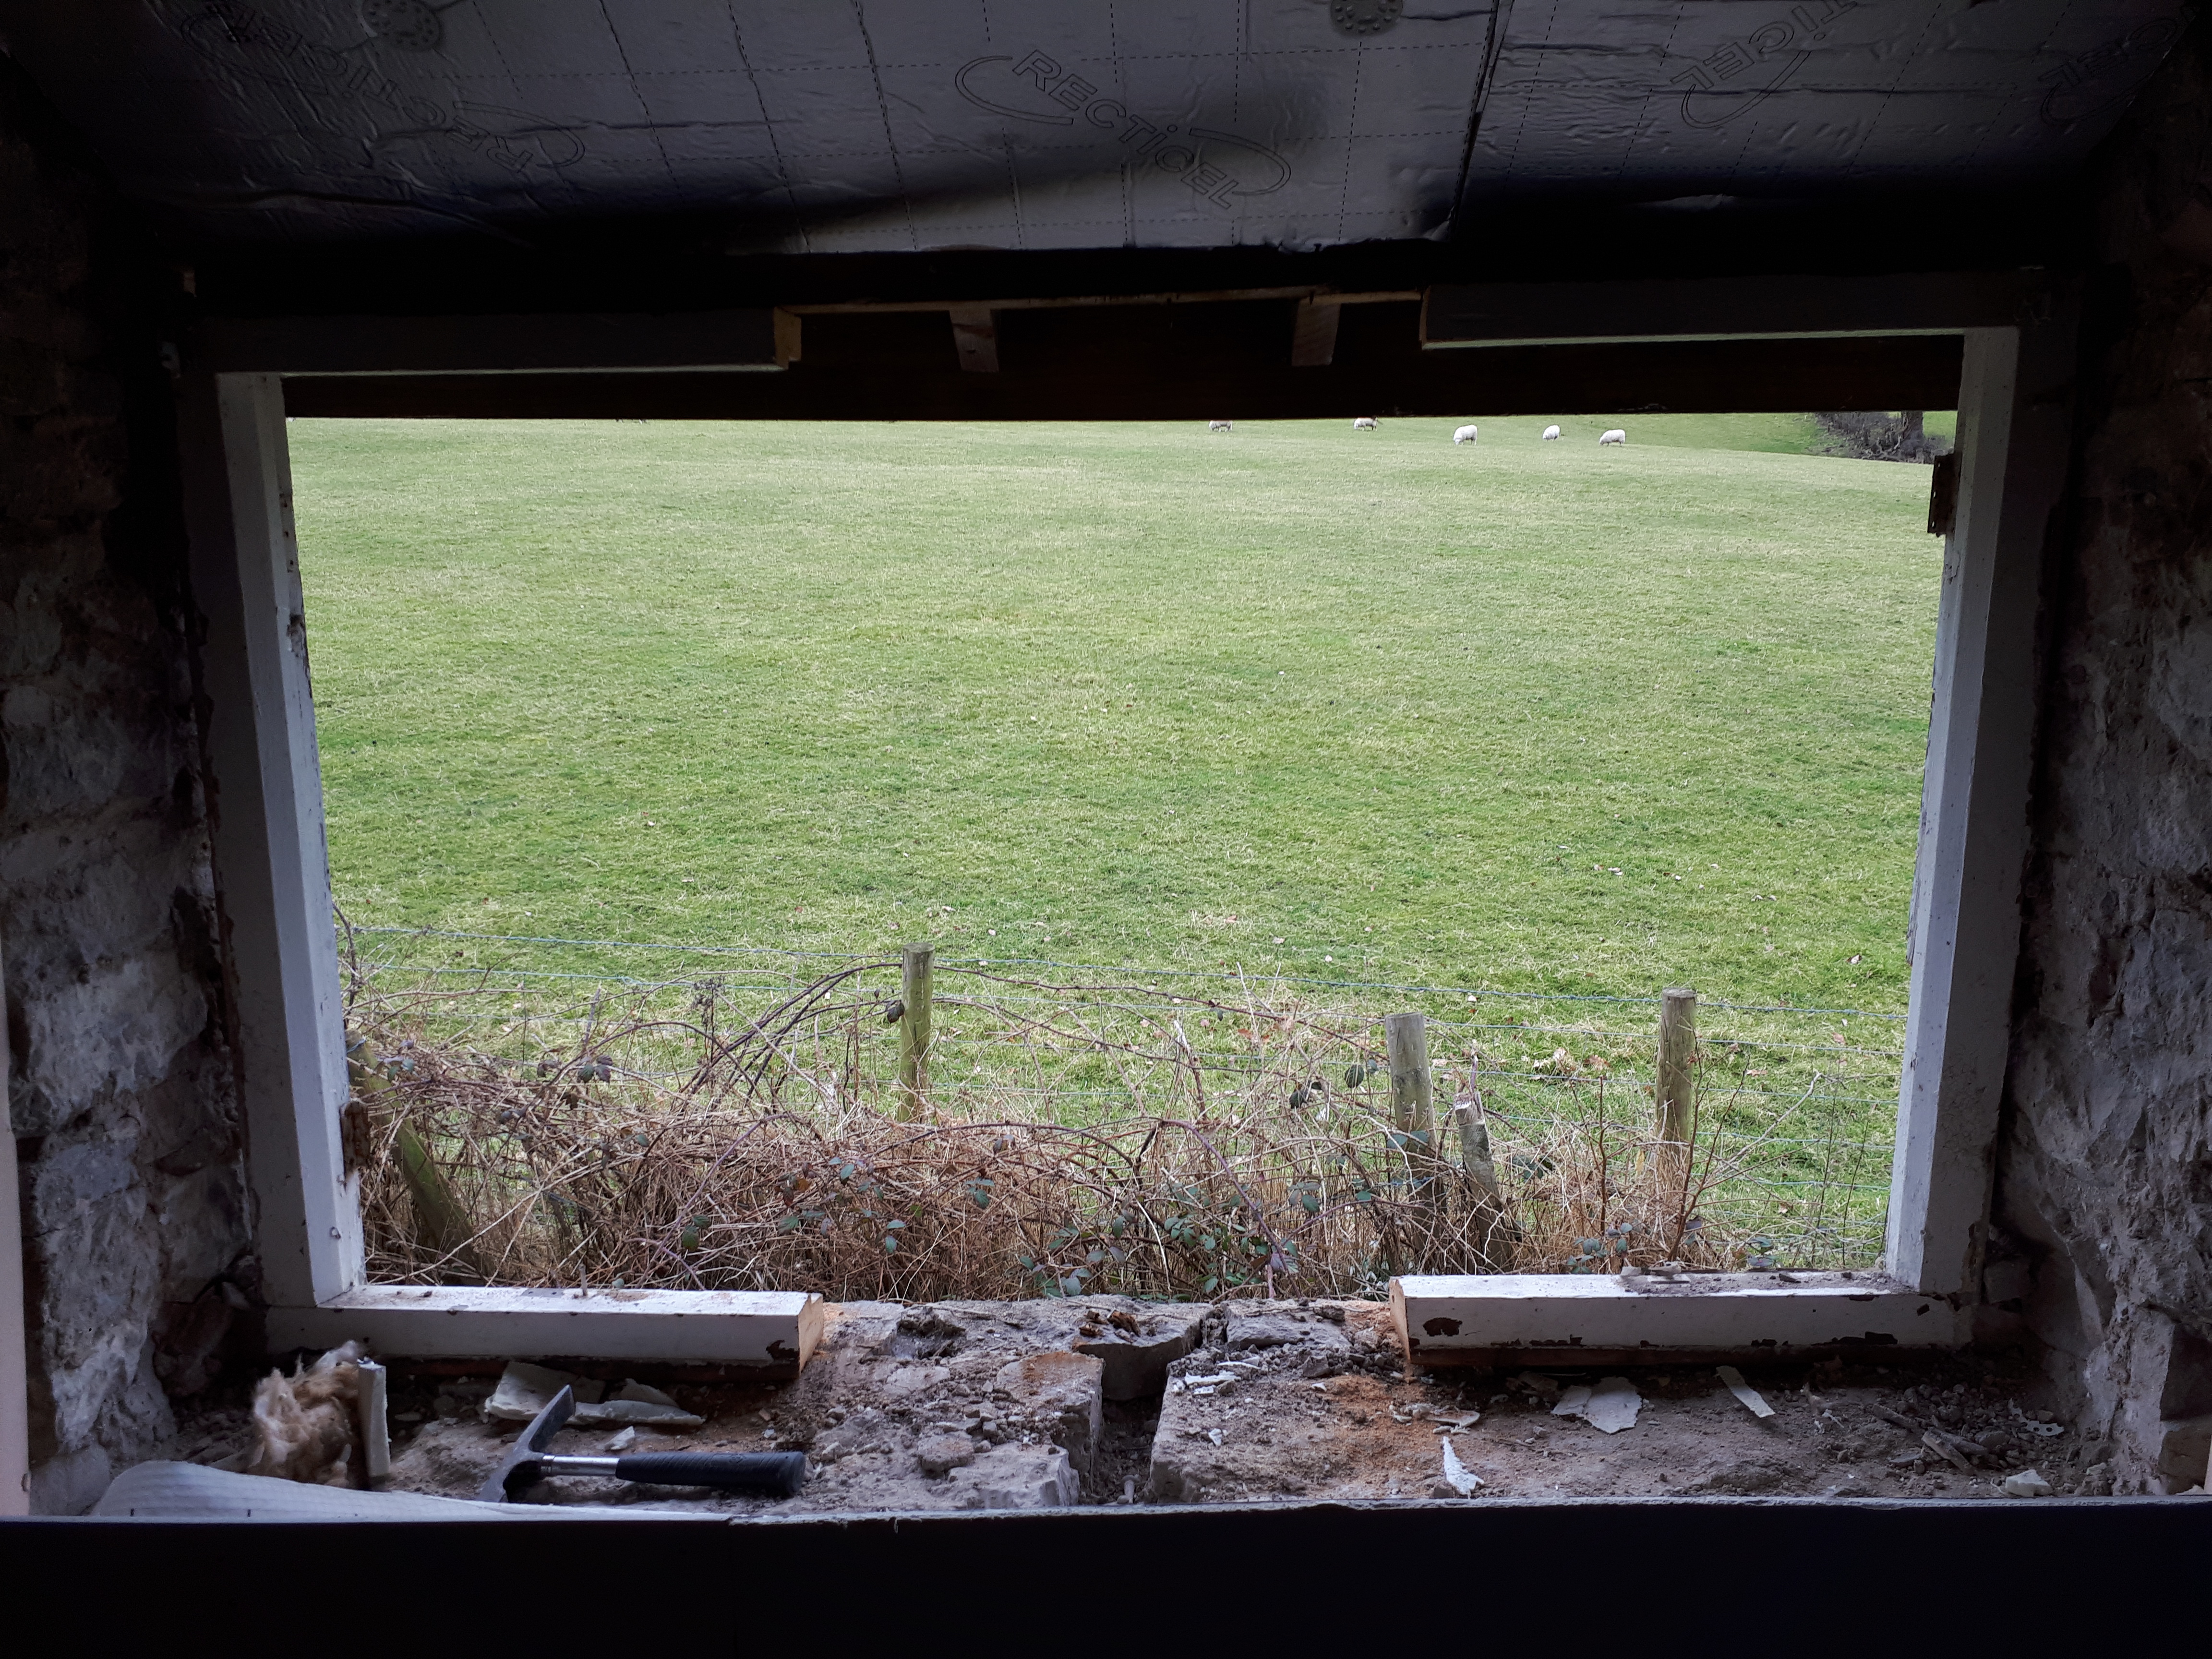
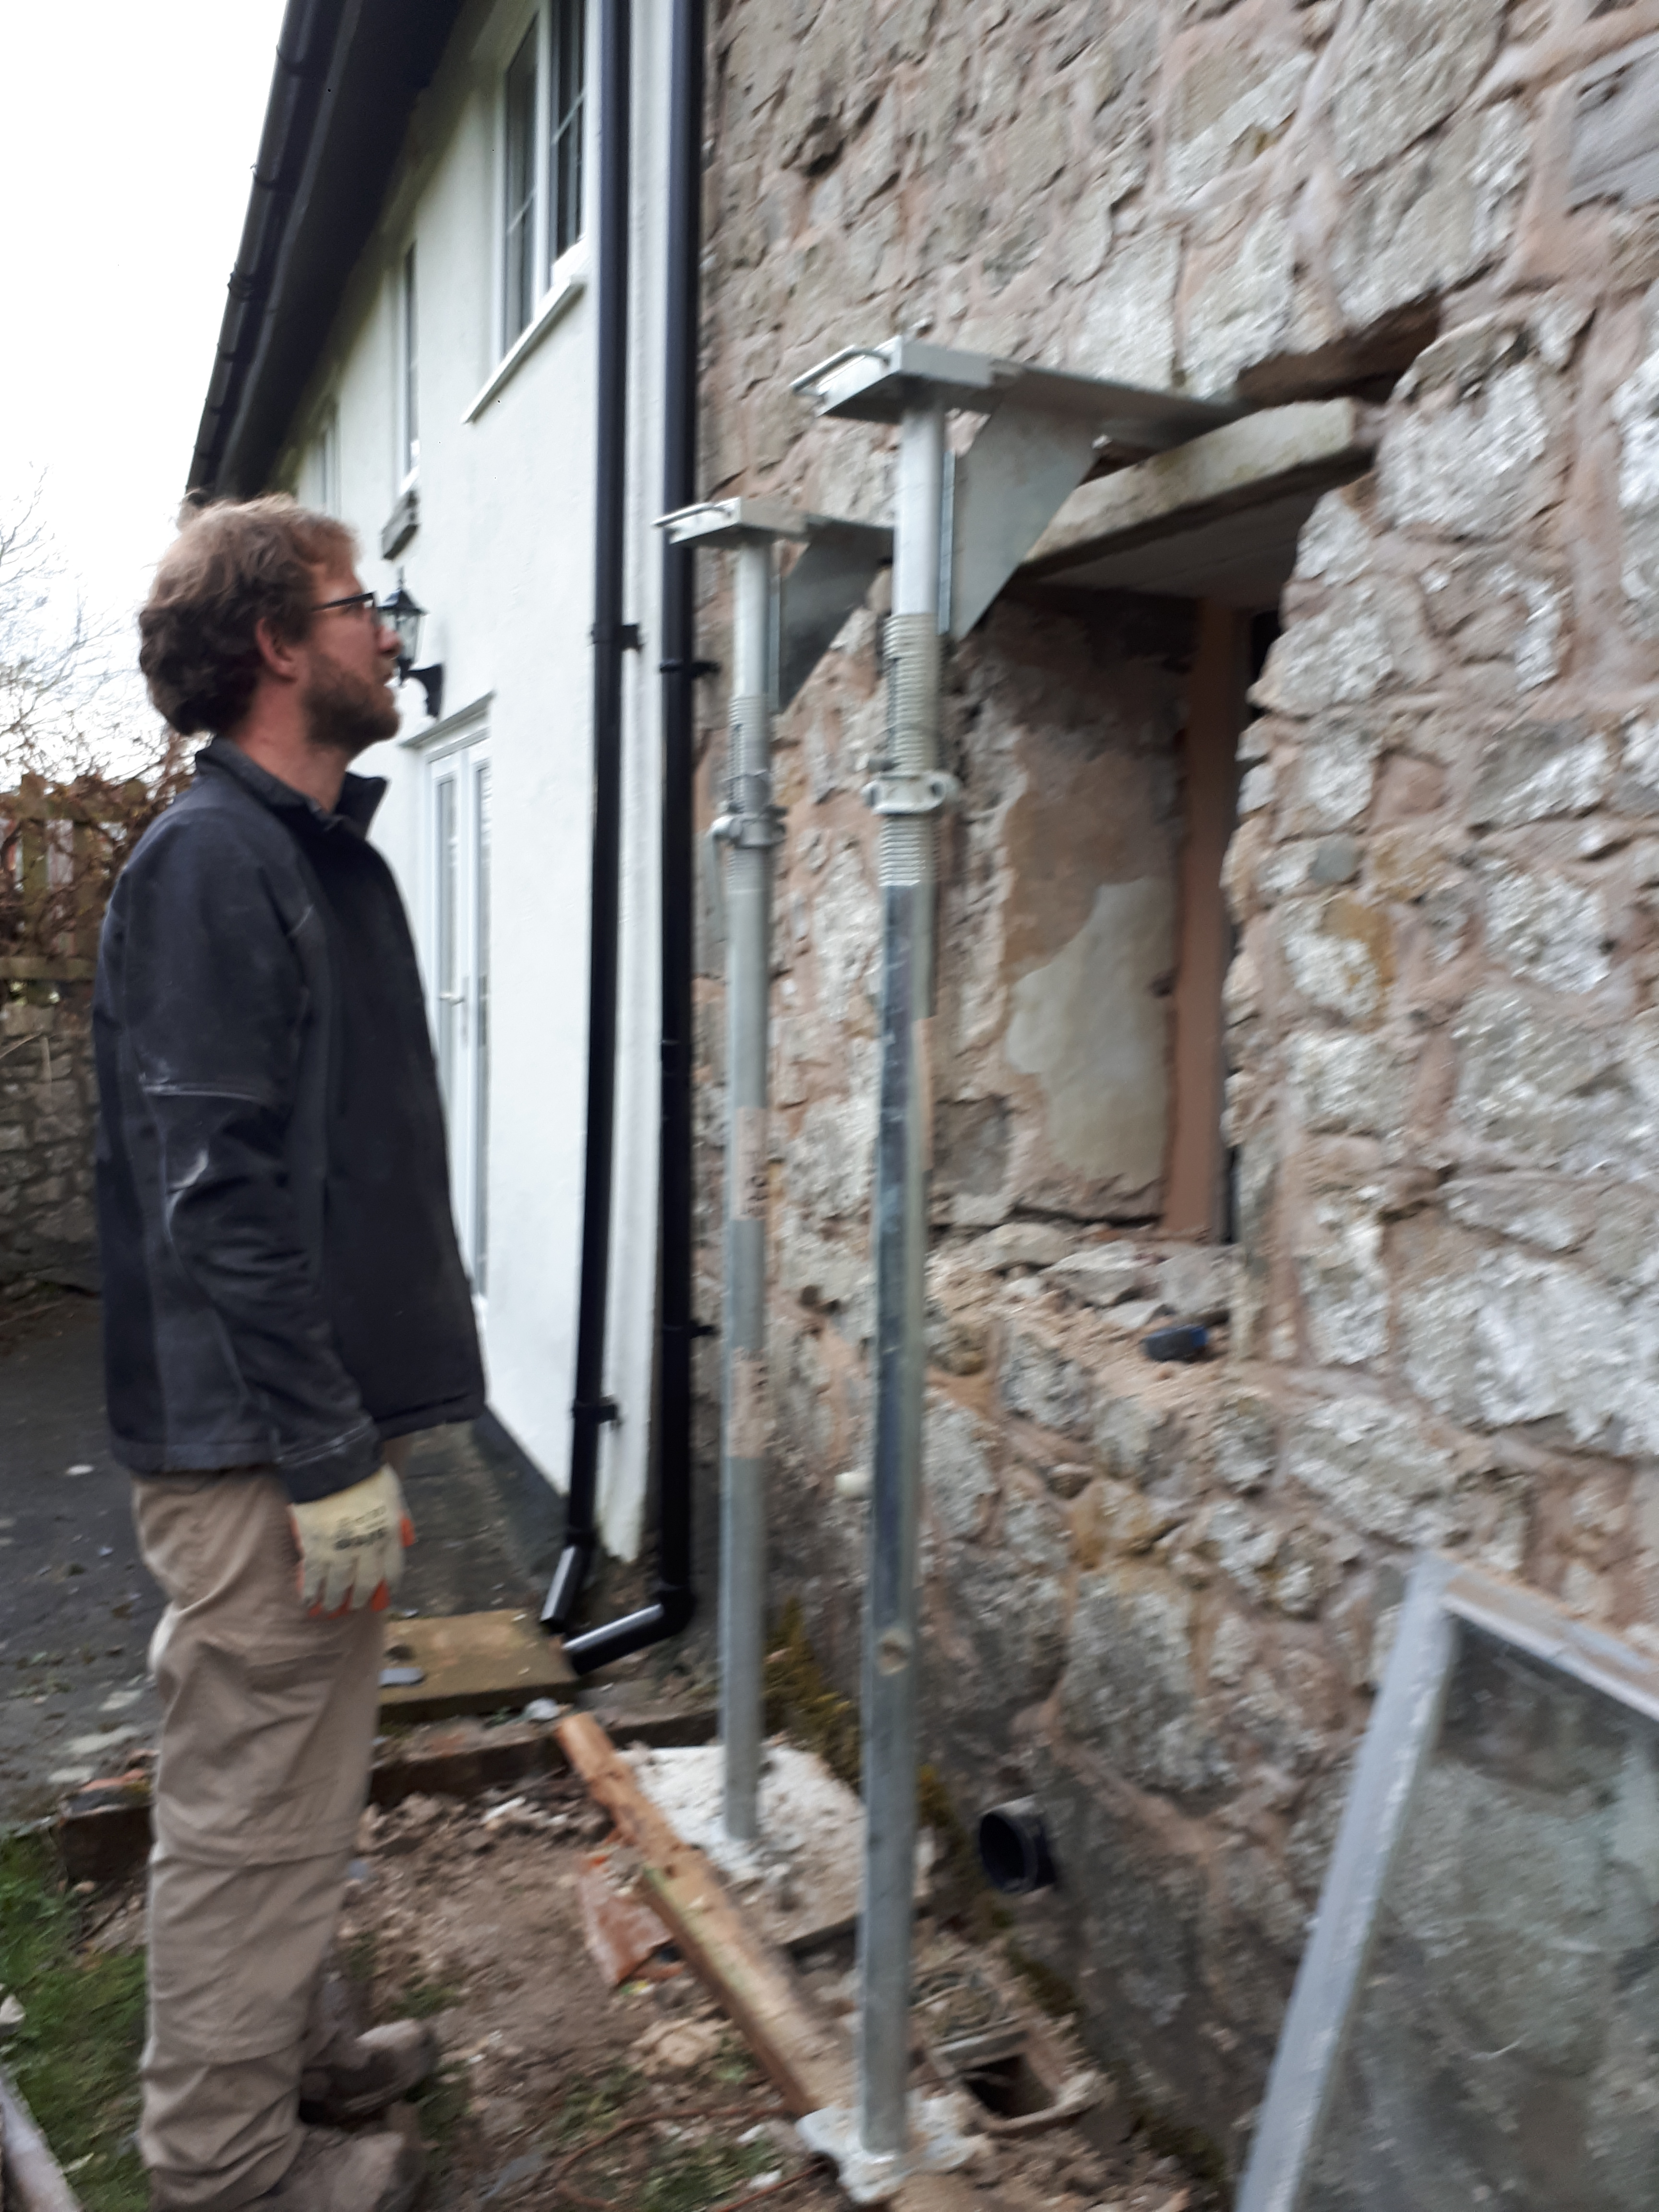
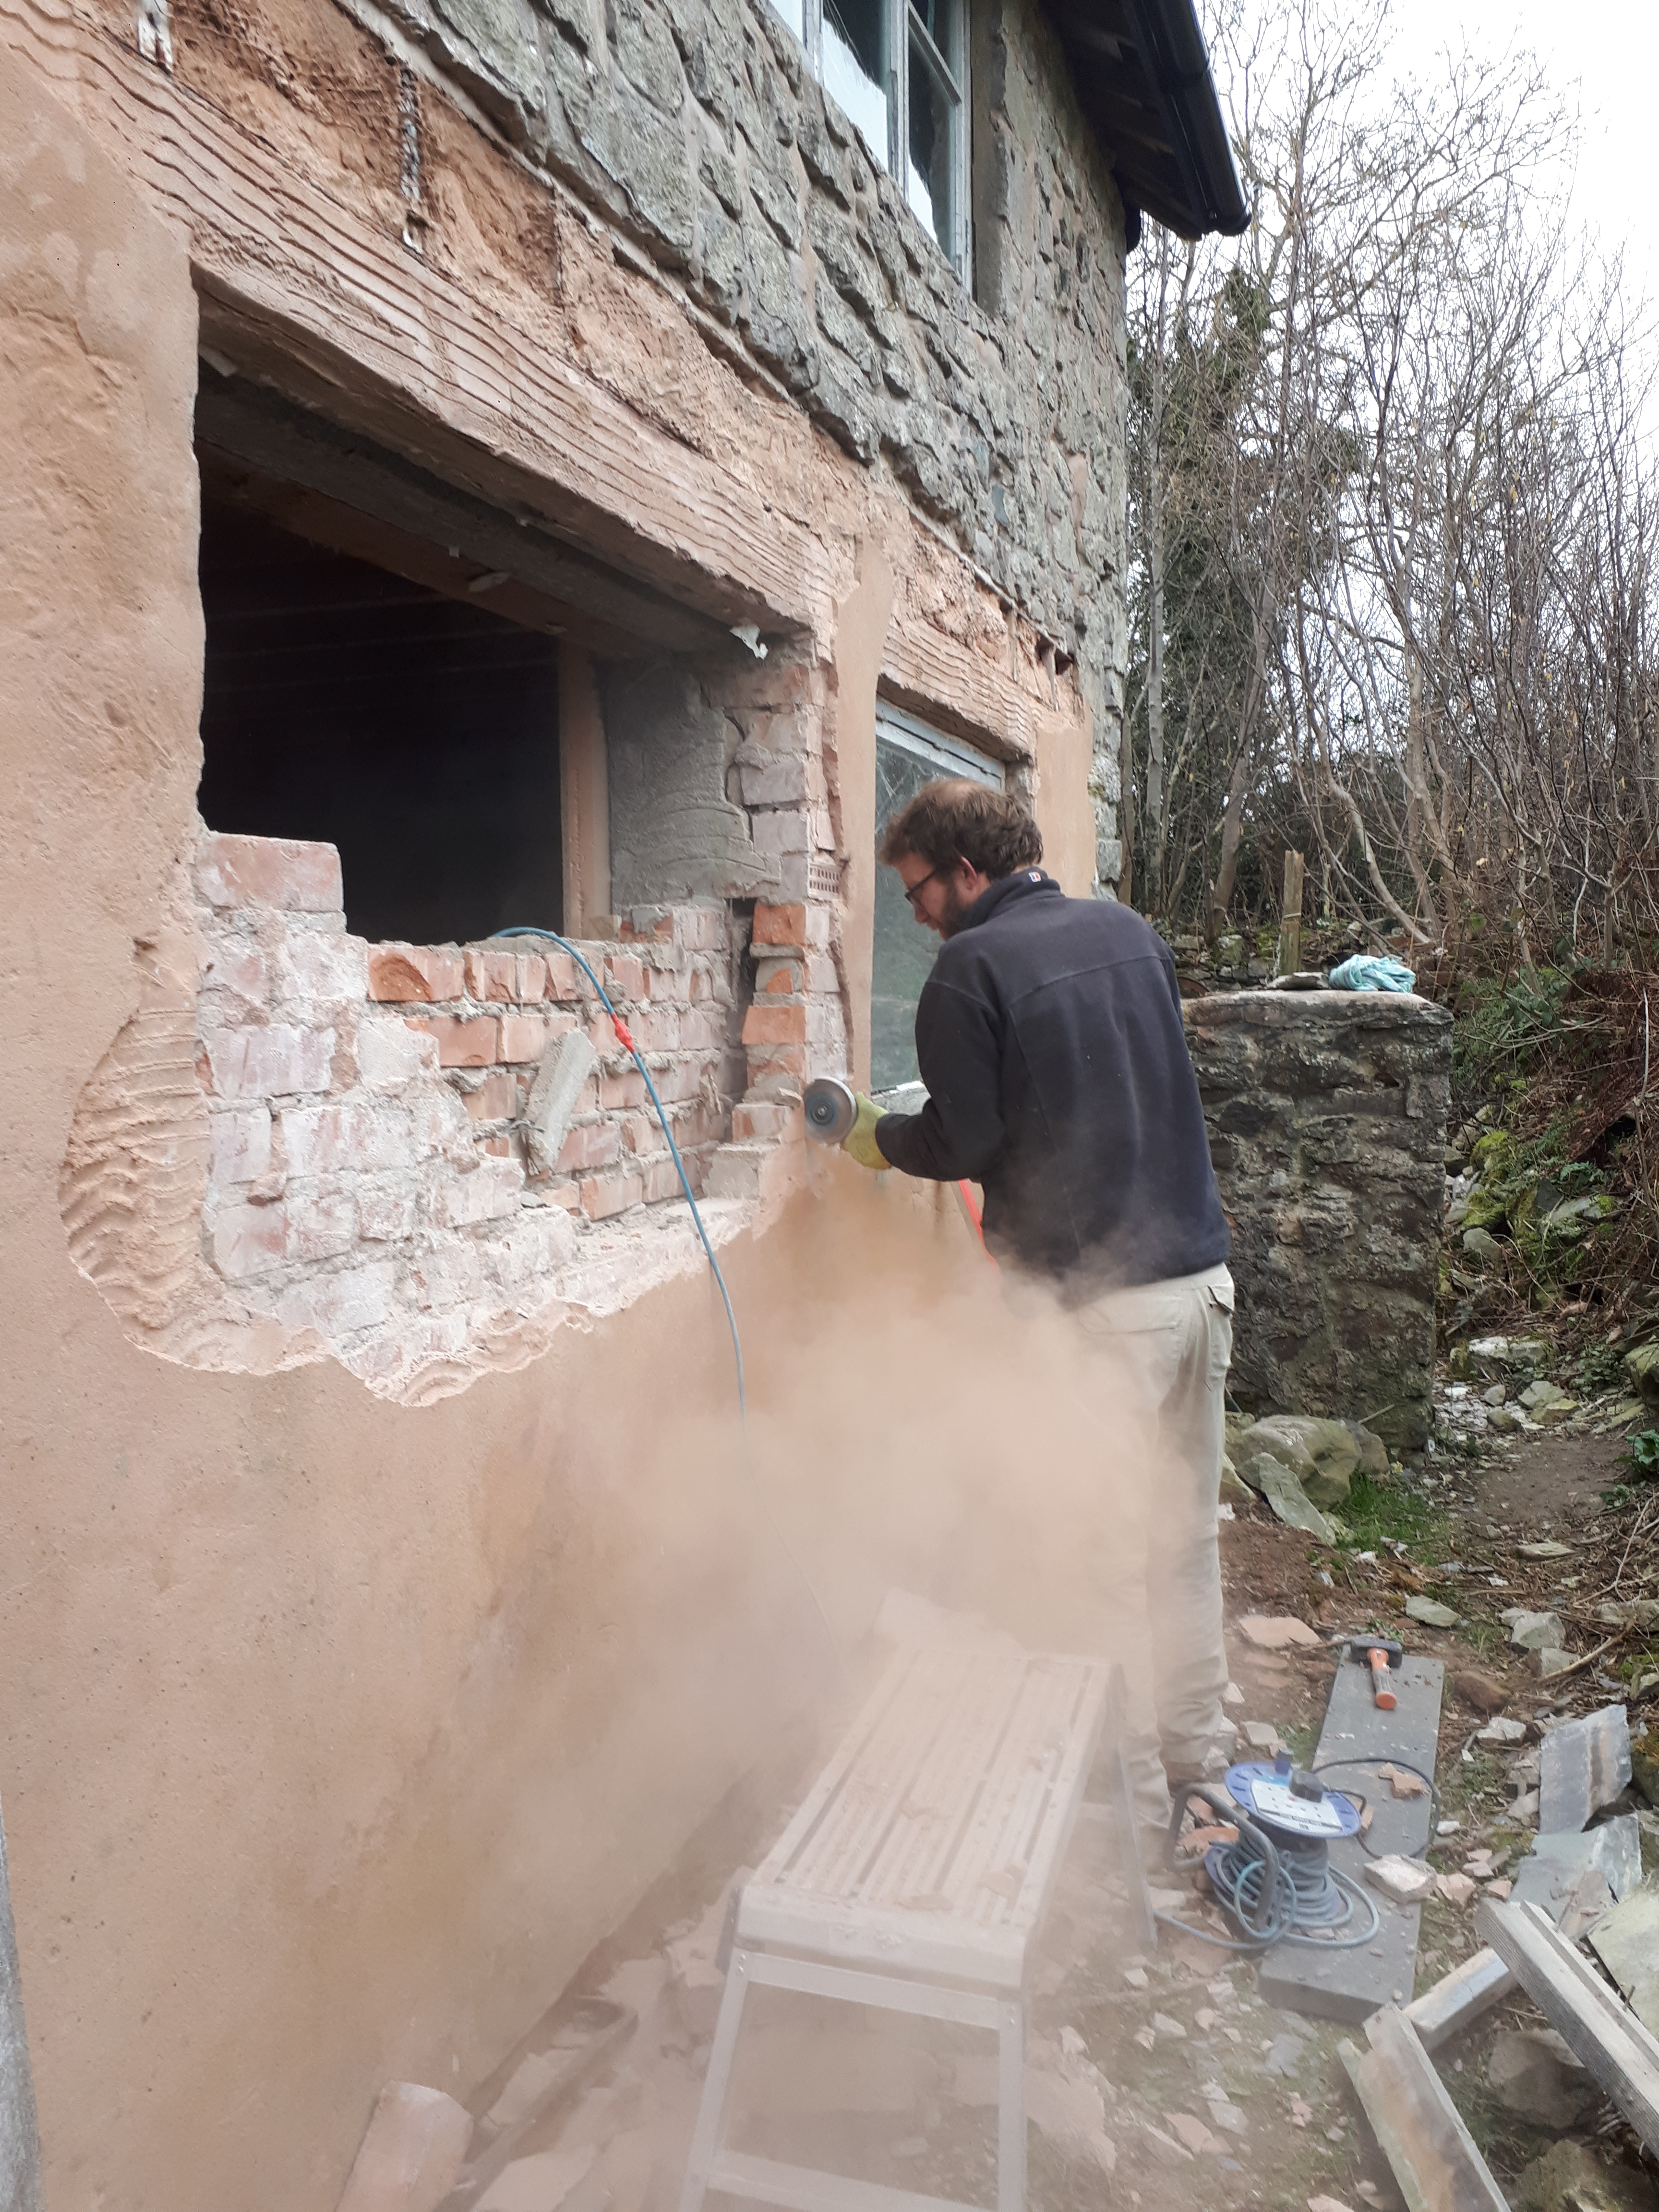
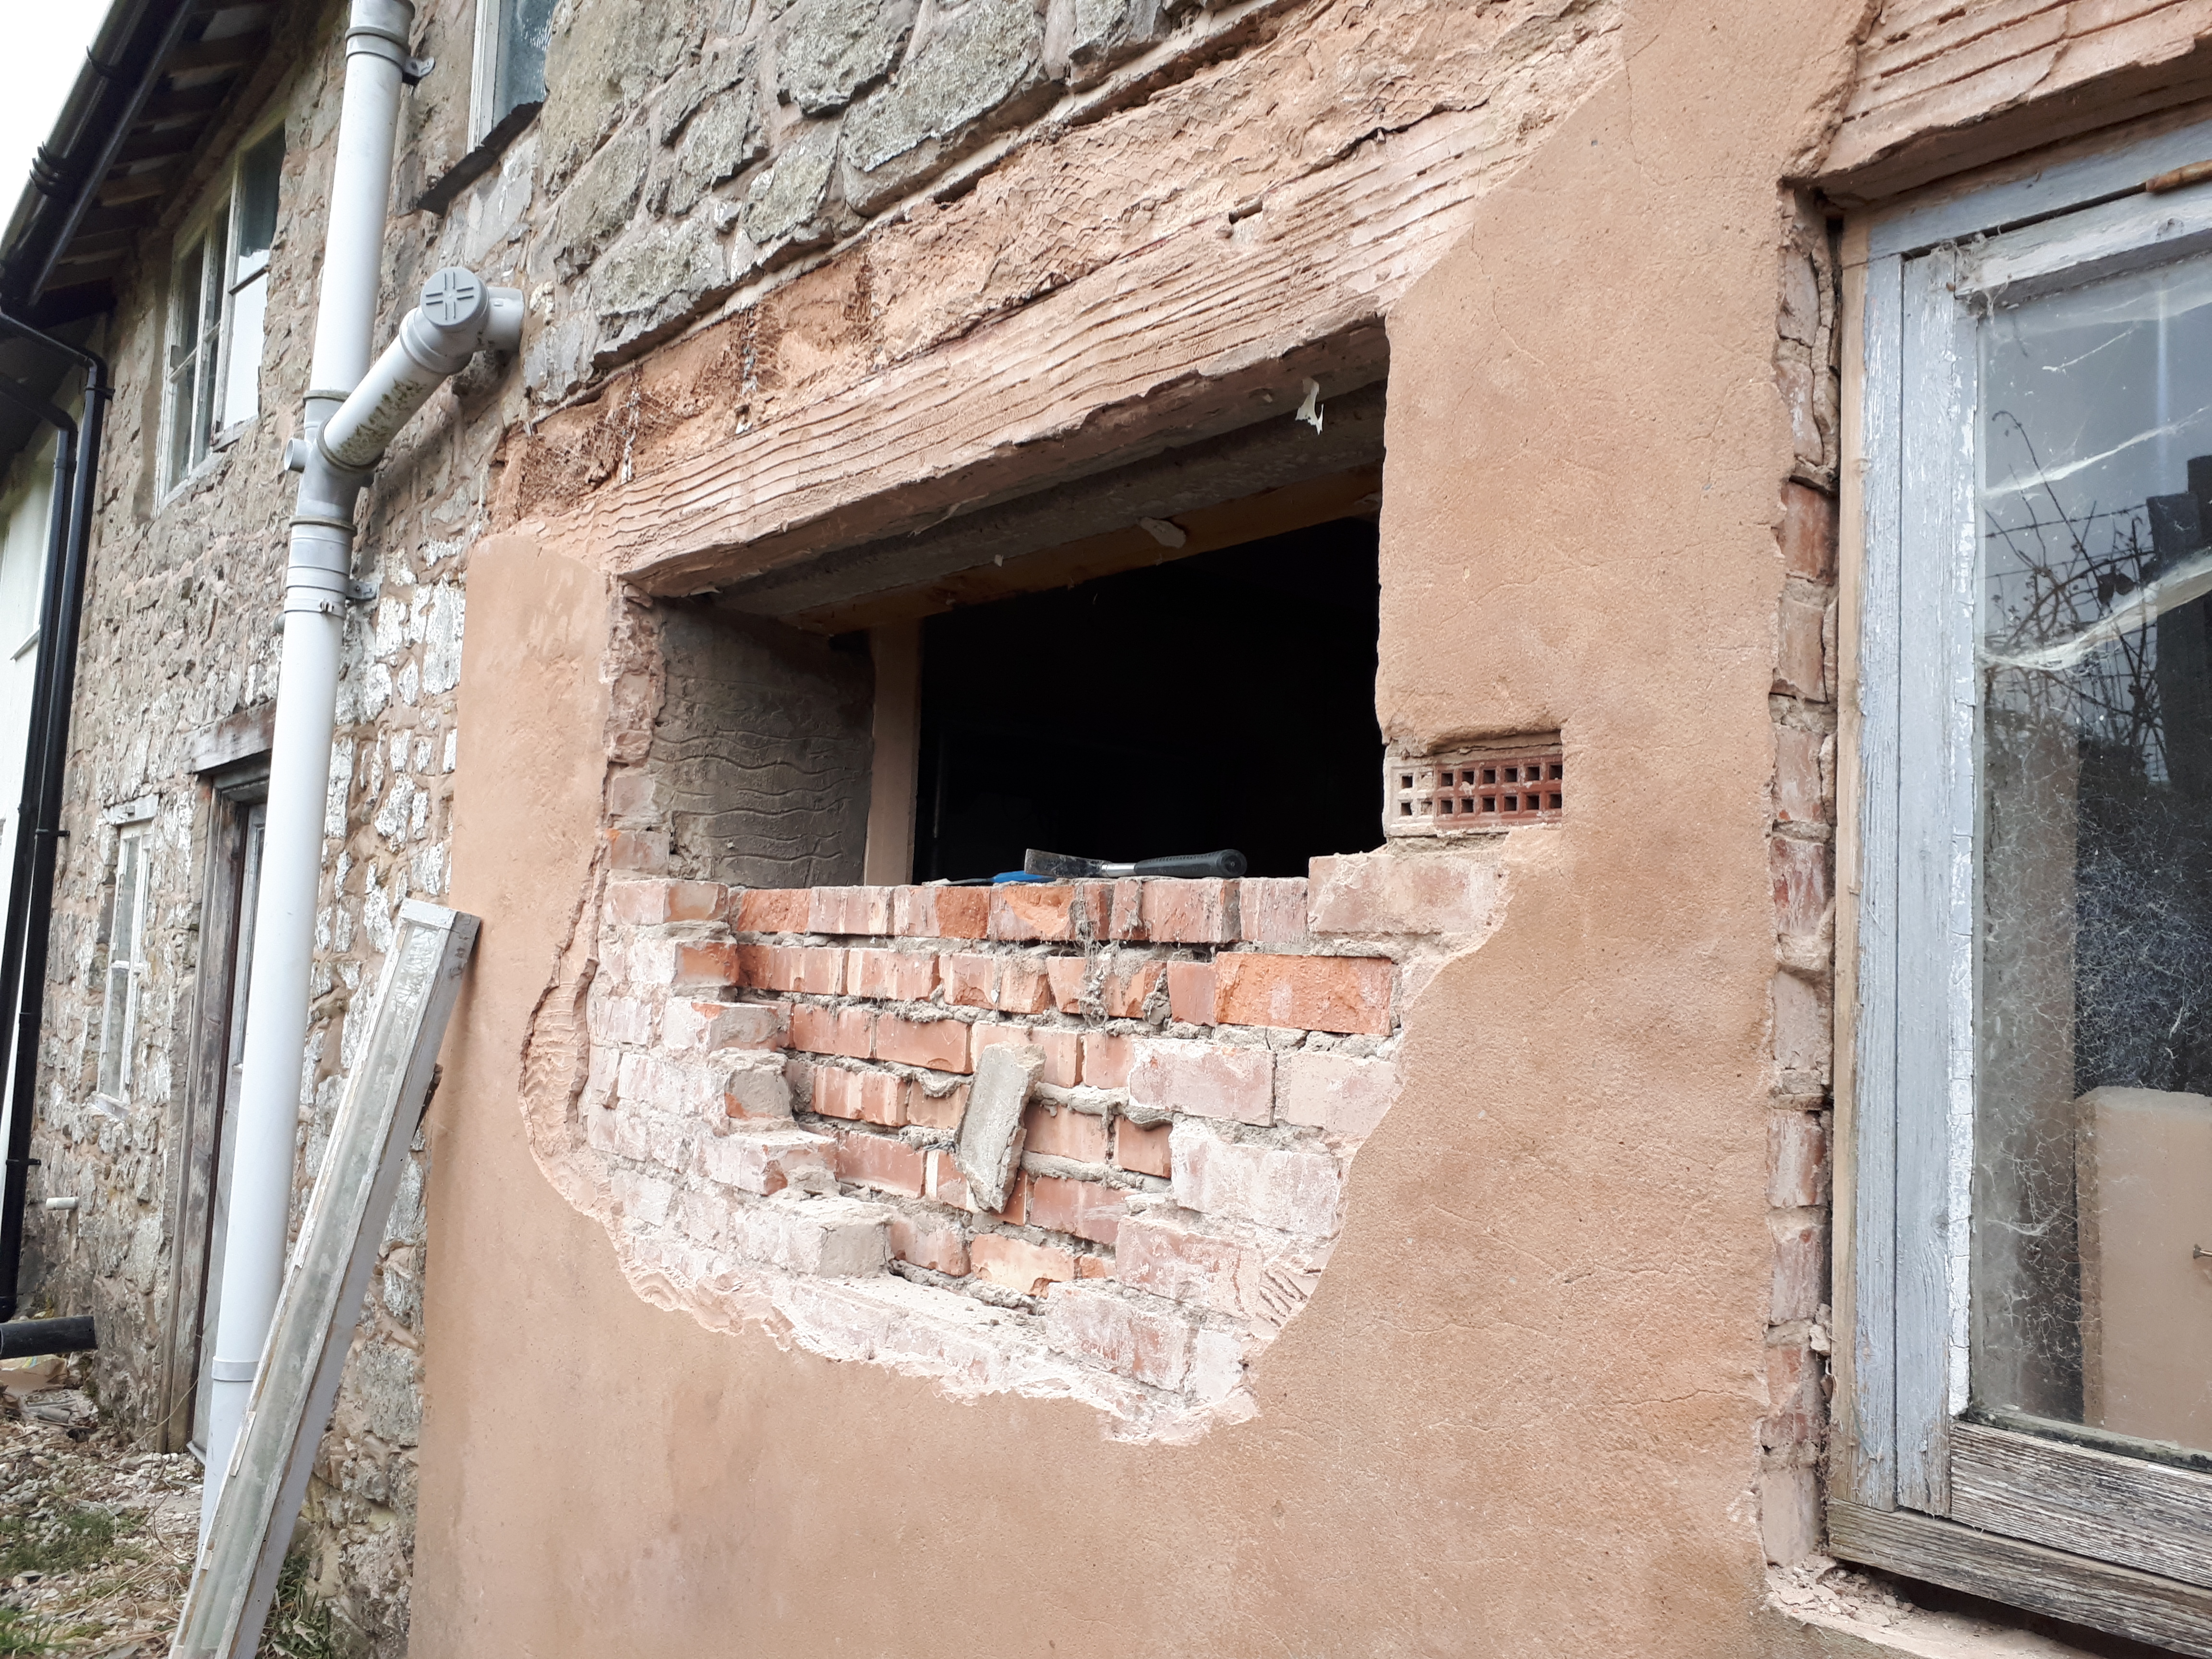
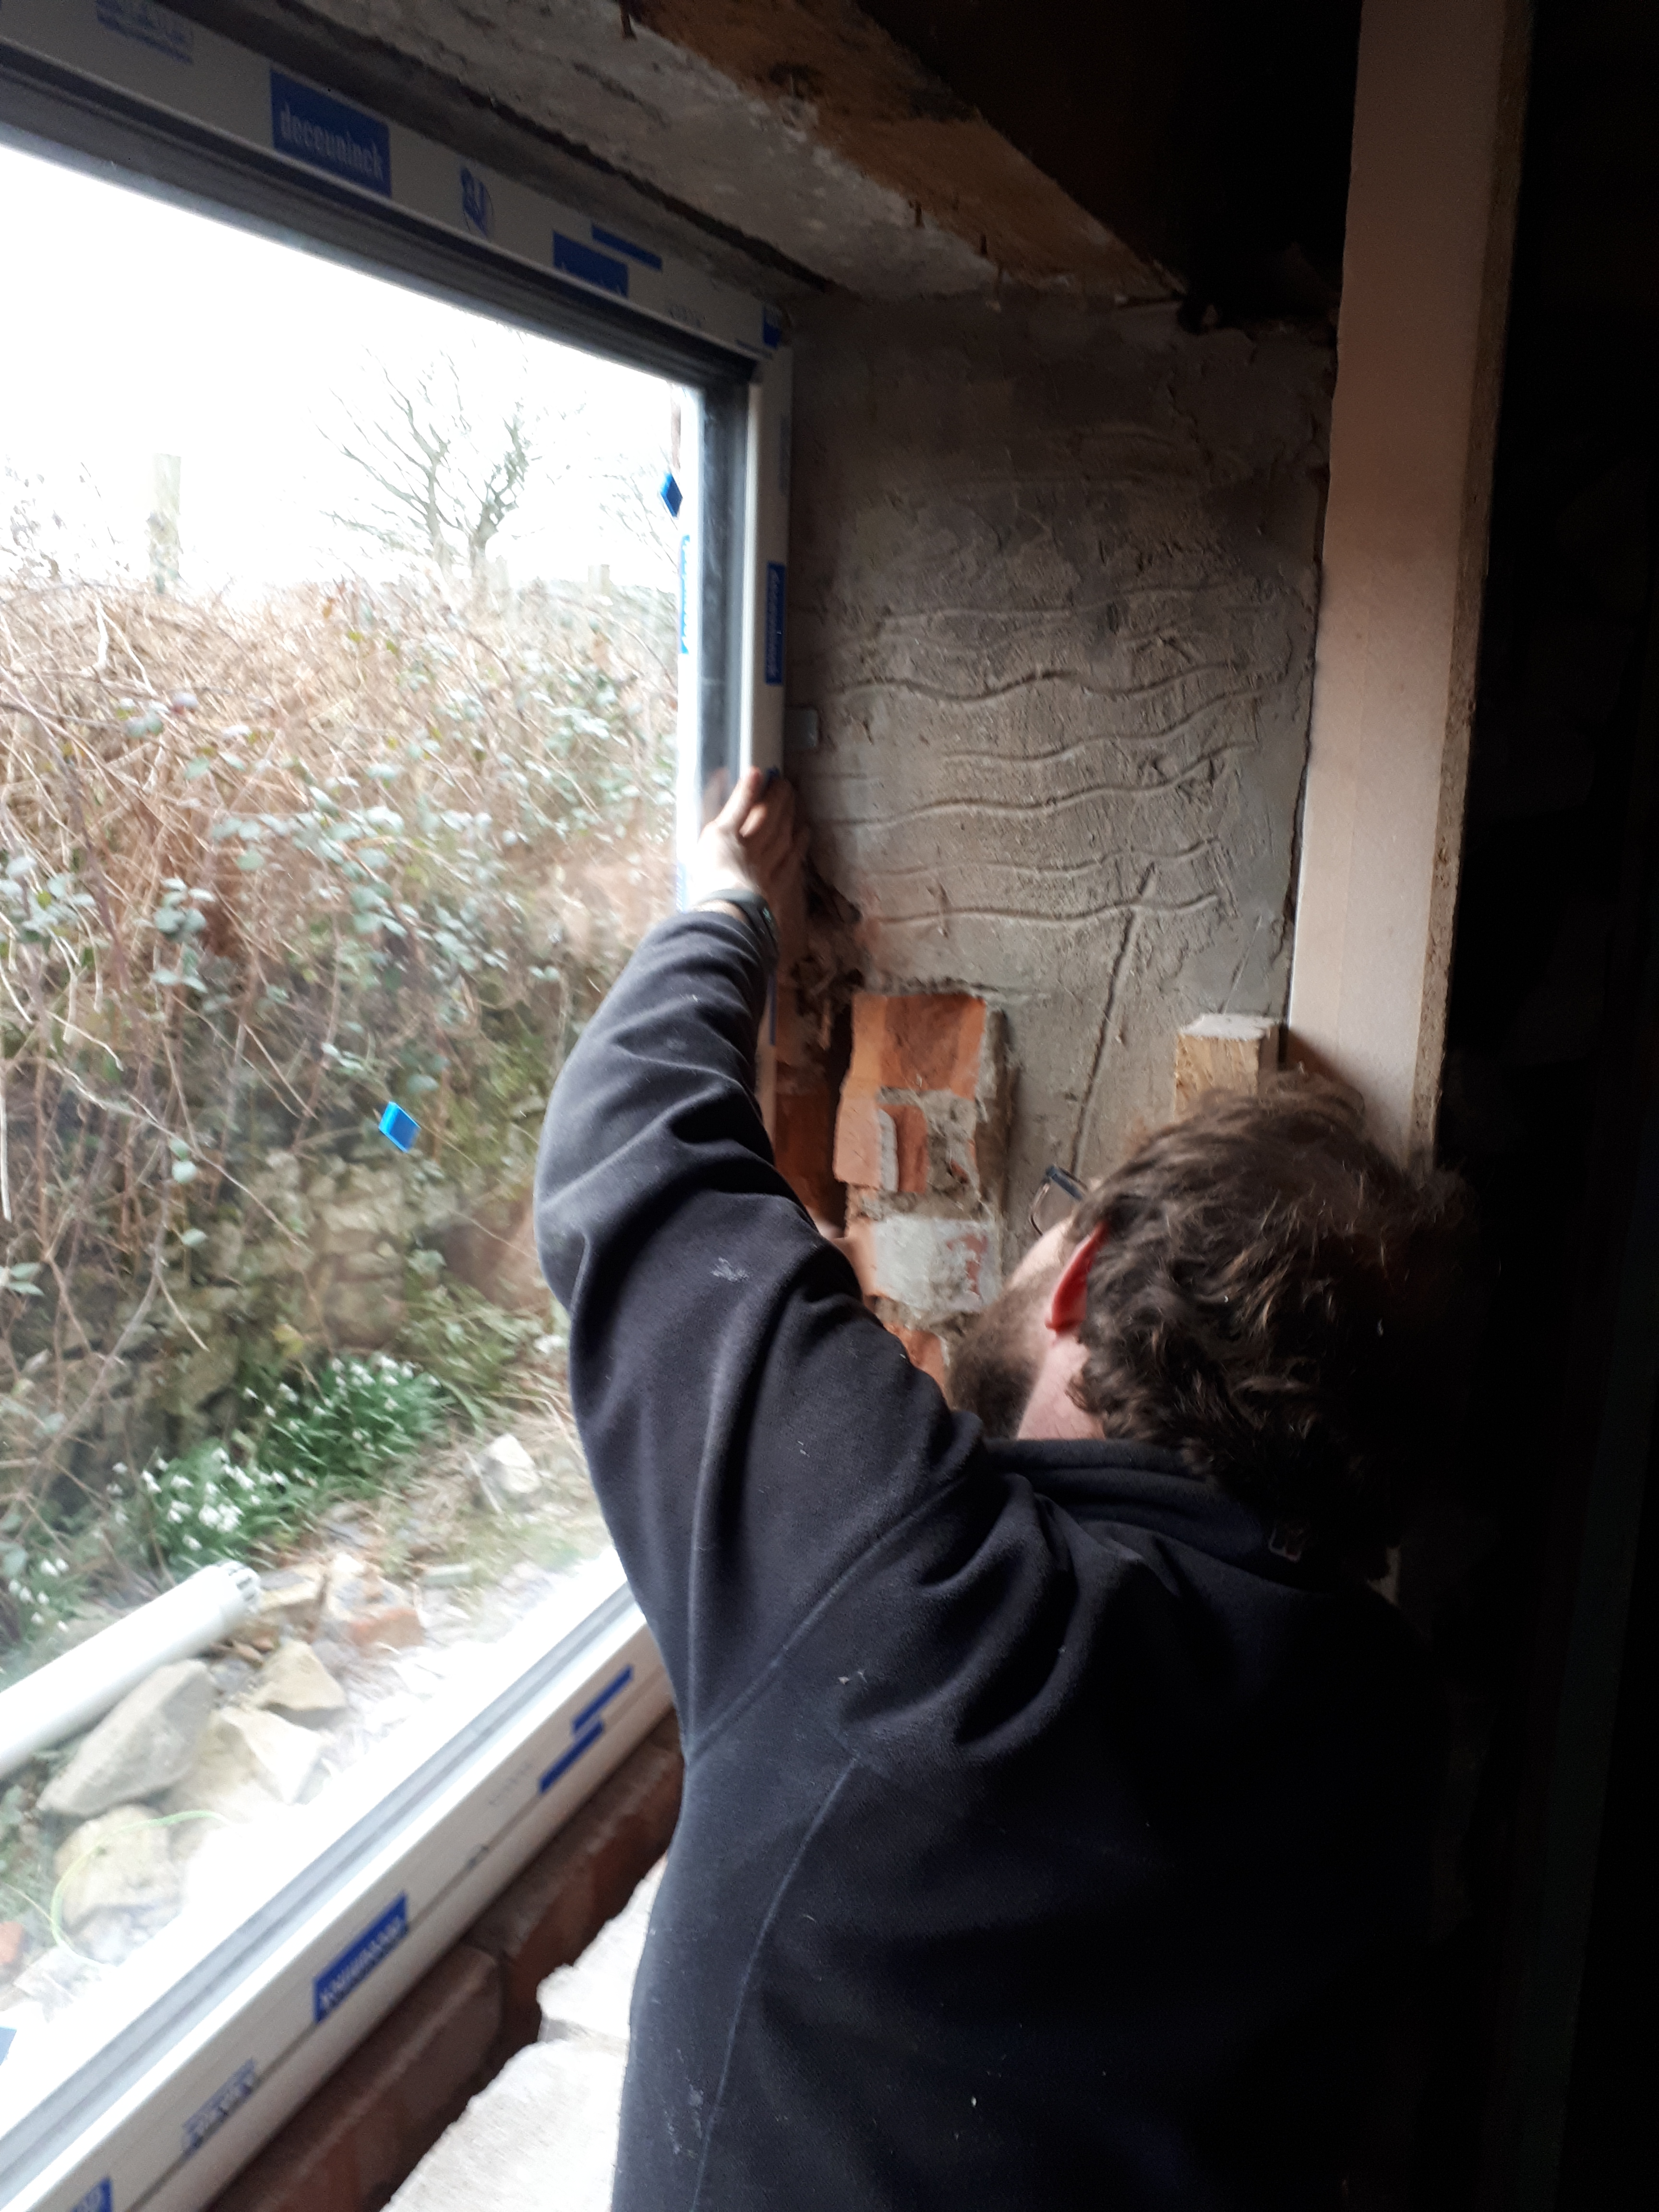
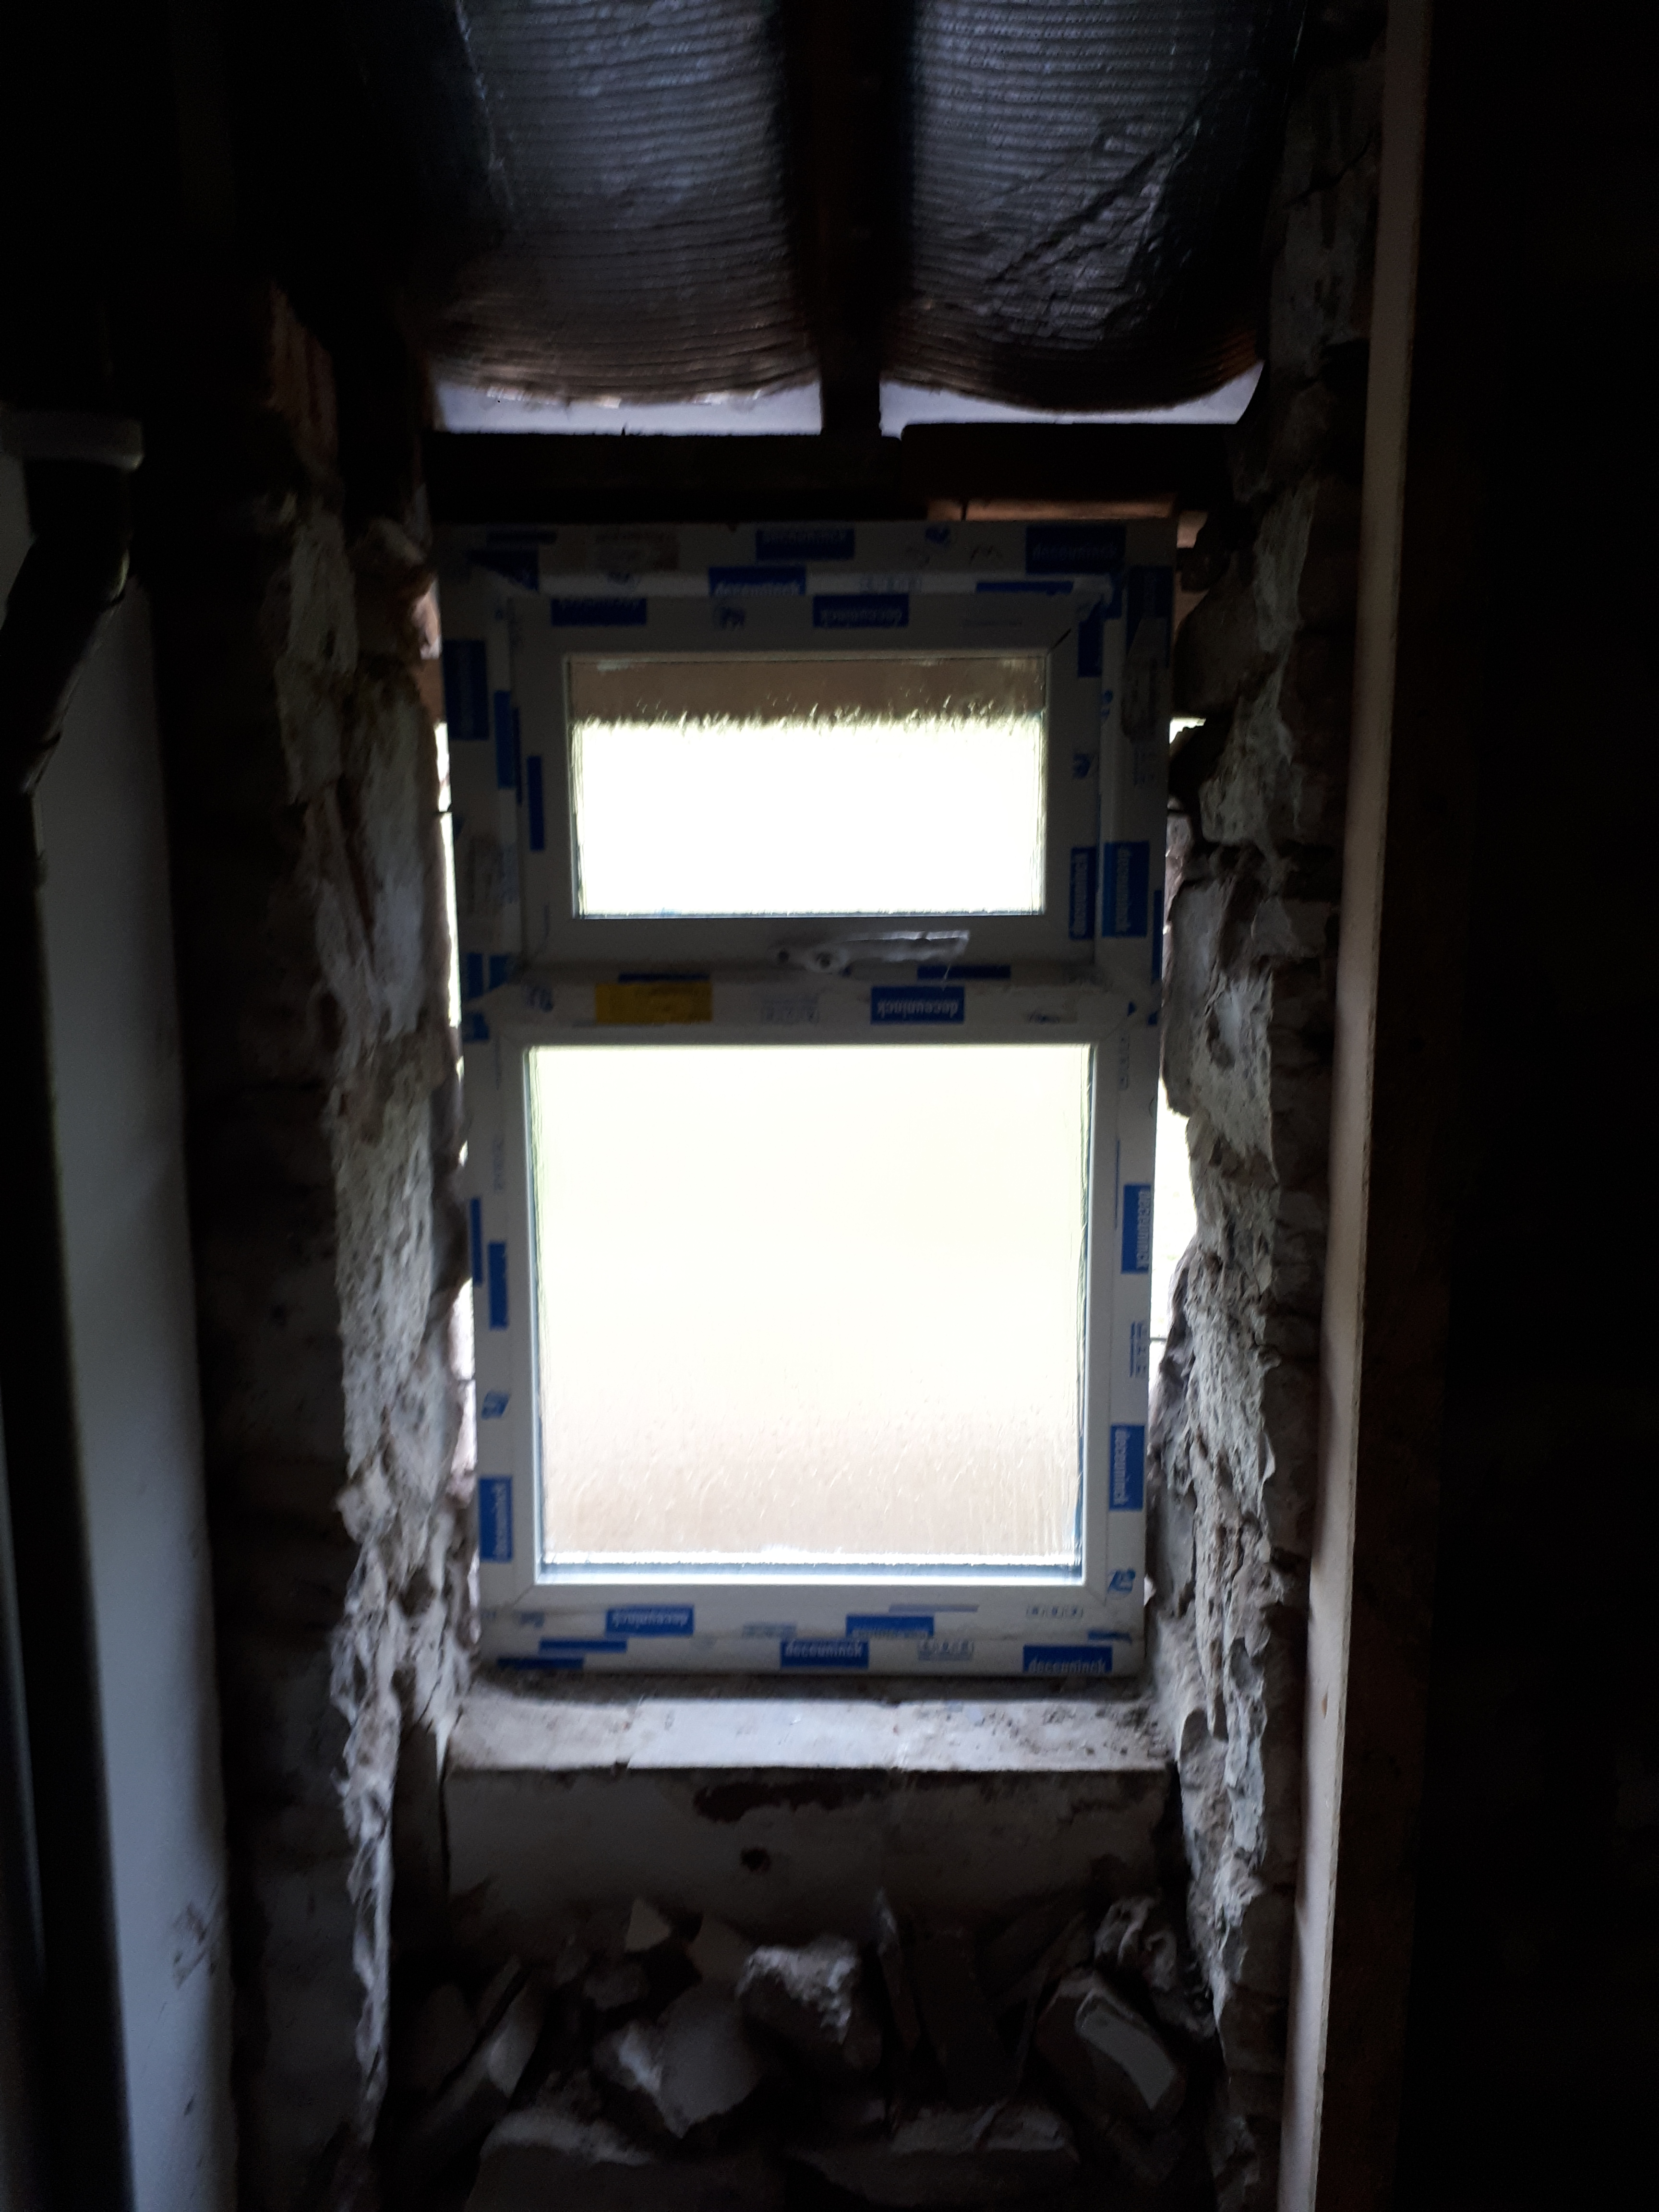
With the two kitchen windows finished we moved to the bathroom window upstairs. This window has always been the worst in the house, not closing properly, so we’ve had to tie it with string. It’s had its uses though, as we’ve used it to break into the house on a couple of occasions when we’ve forgotten our keys or locked ourselves out. Guess we’ll have to be more careful from now on.
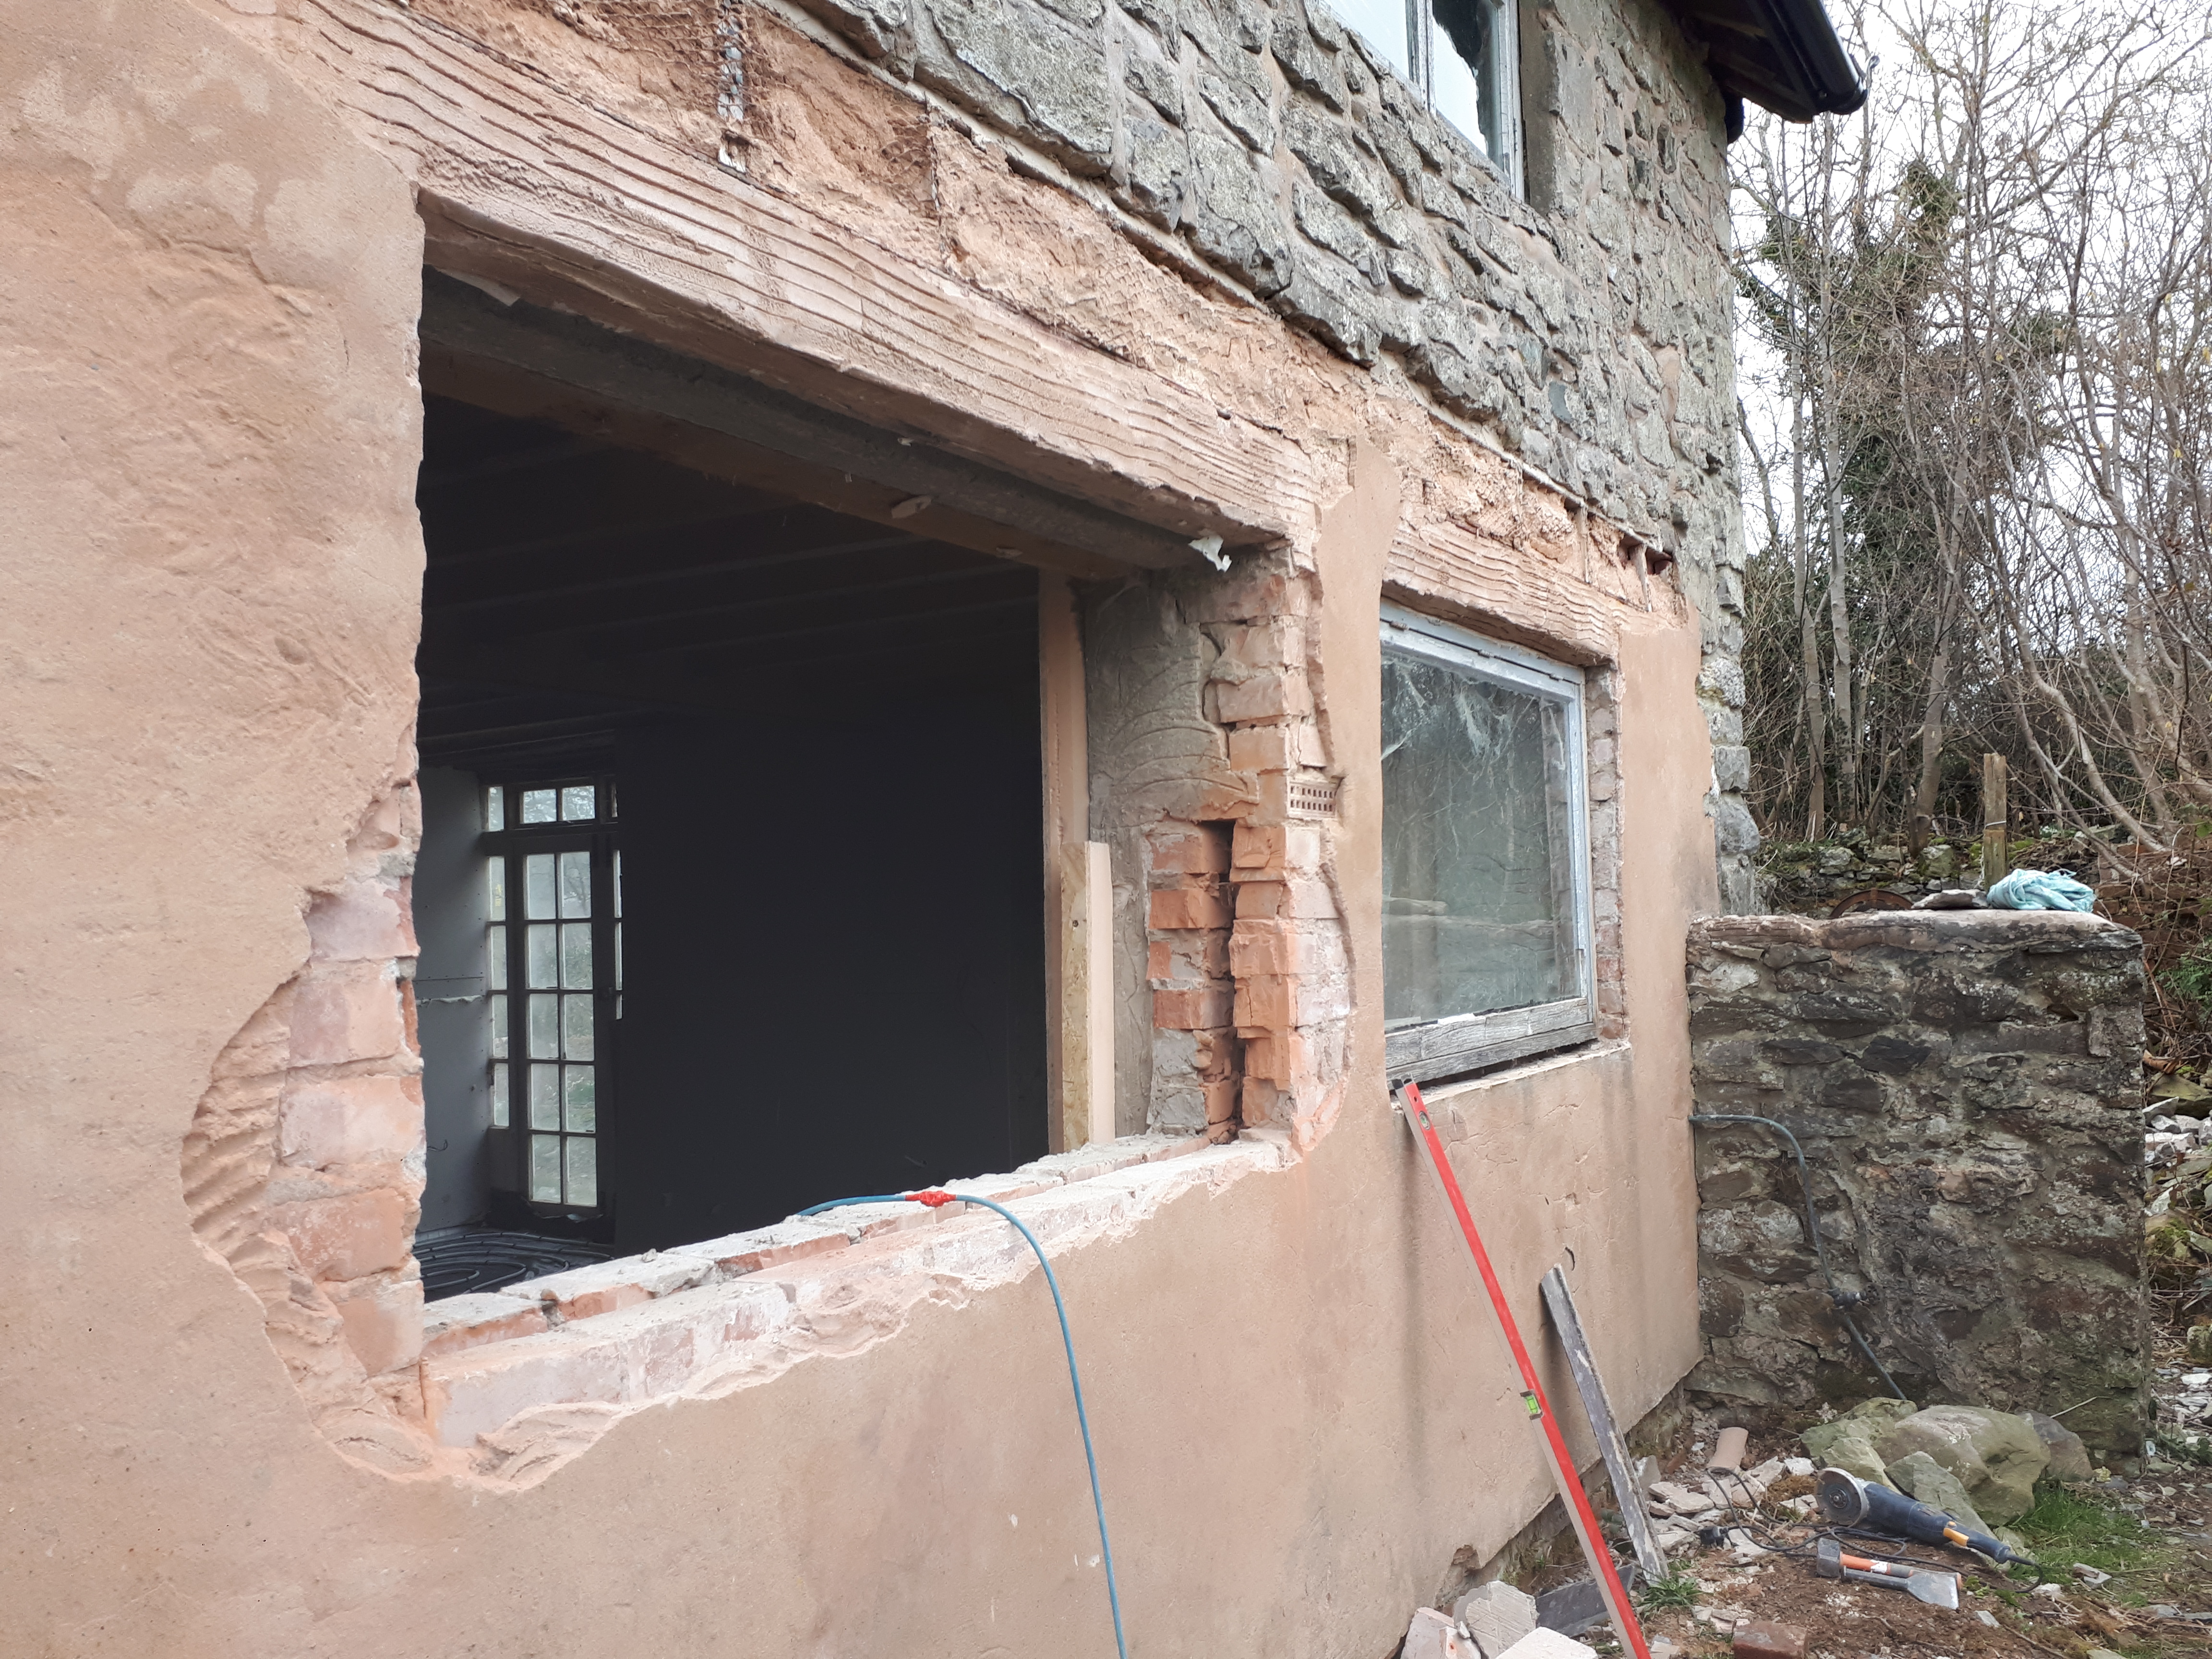
The window came out fairly easily however, in this room, as with all of the larger upstairs windows, we have the added complication of needing to add a lintle above the window. Removing the window we could even see how the lack of a lintle had caused the roof support to bow in the middle of the window. Unfortunately, this bowing meant the gap was a few millimetres too small for our new window. After a lot of head scratching Chris used a piece of wood to force the center of the lintle to lift enough for us to wedge more stones beneath it, giving us the extra bit of room we needed.

We’d decided to go with one opening panel in the middle of the window, to help air the bathroom when needed. In time we’ll have a bath sat in front of this window to enjoy the view, and I slightly regretted not have one big pane, but losing the ability to open the window wouldn’t have been practical.
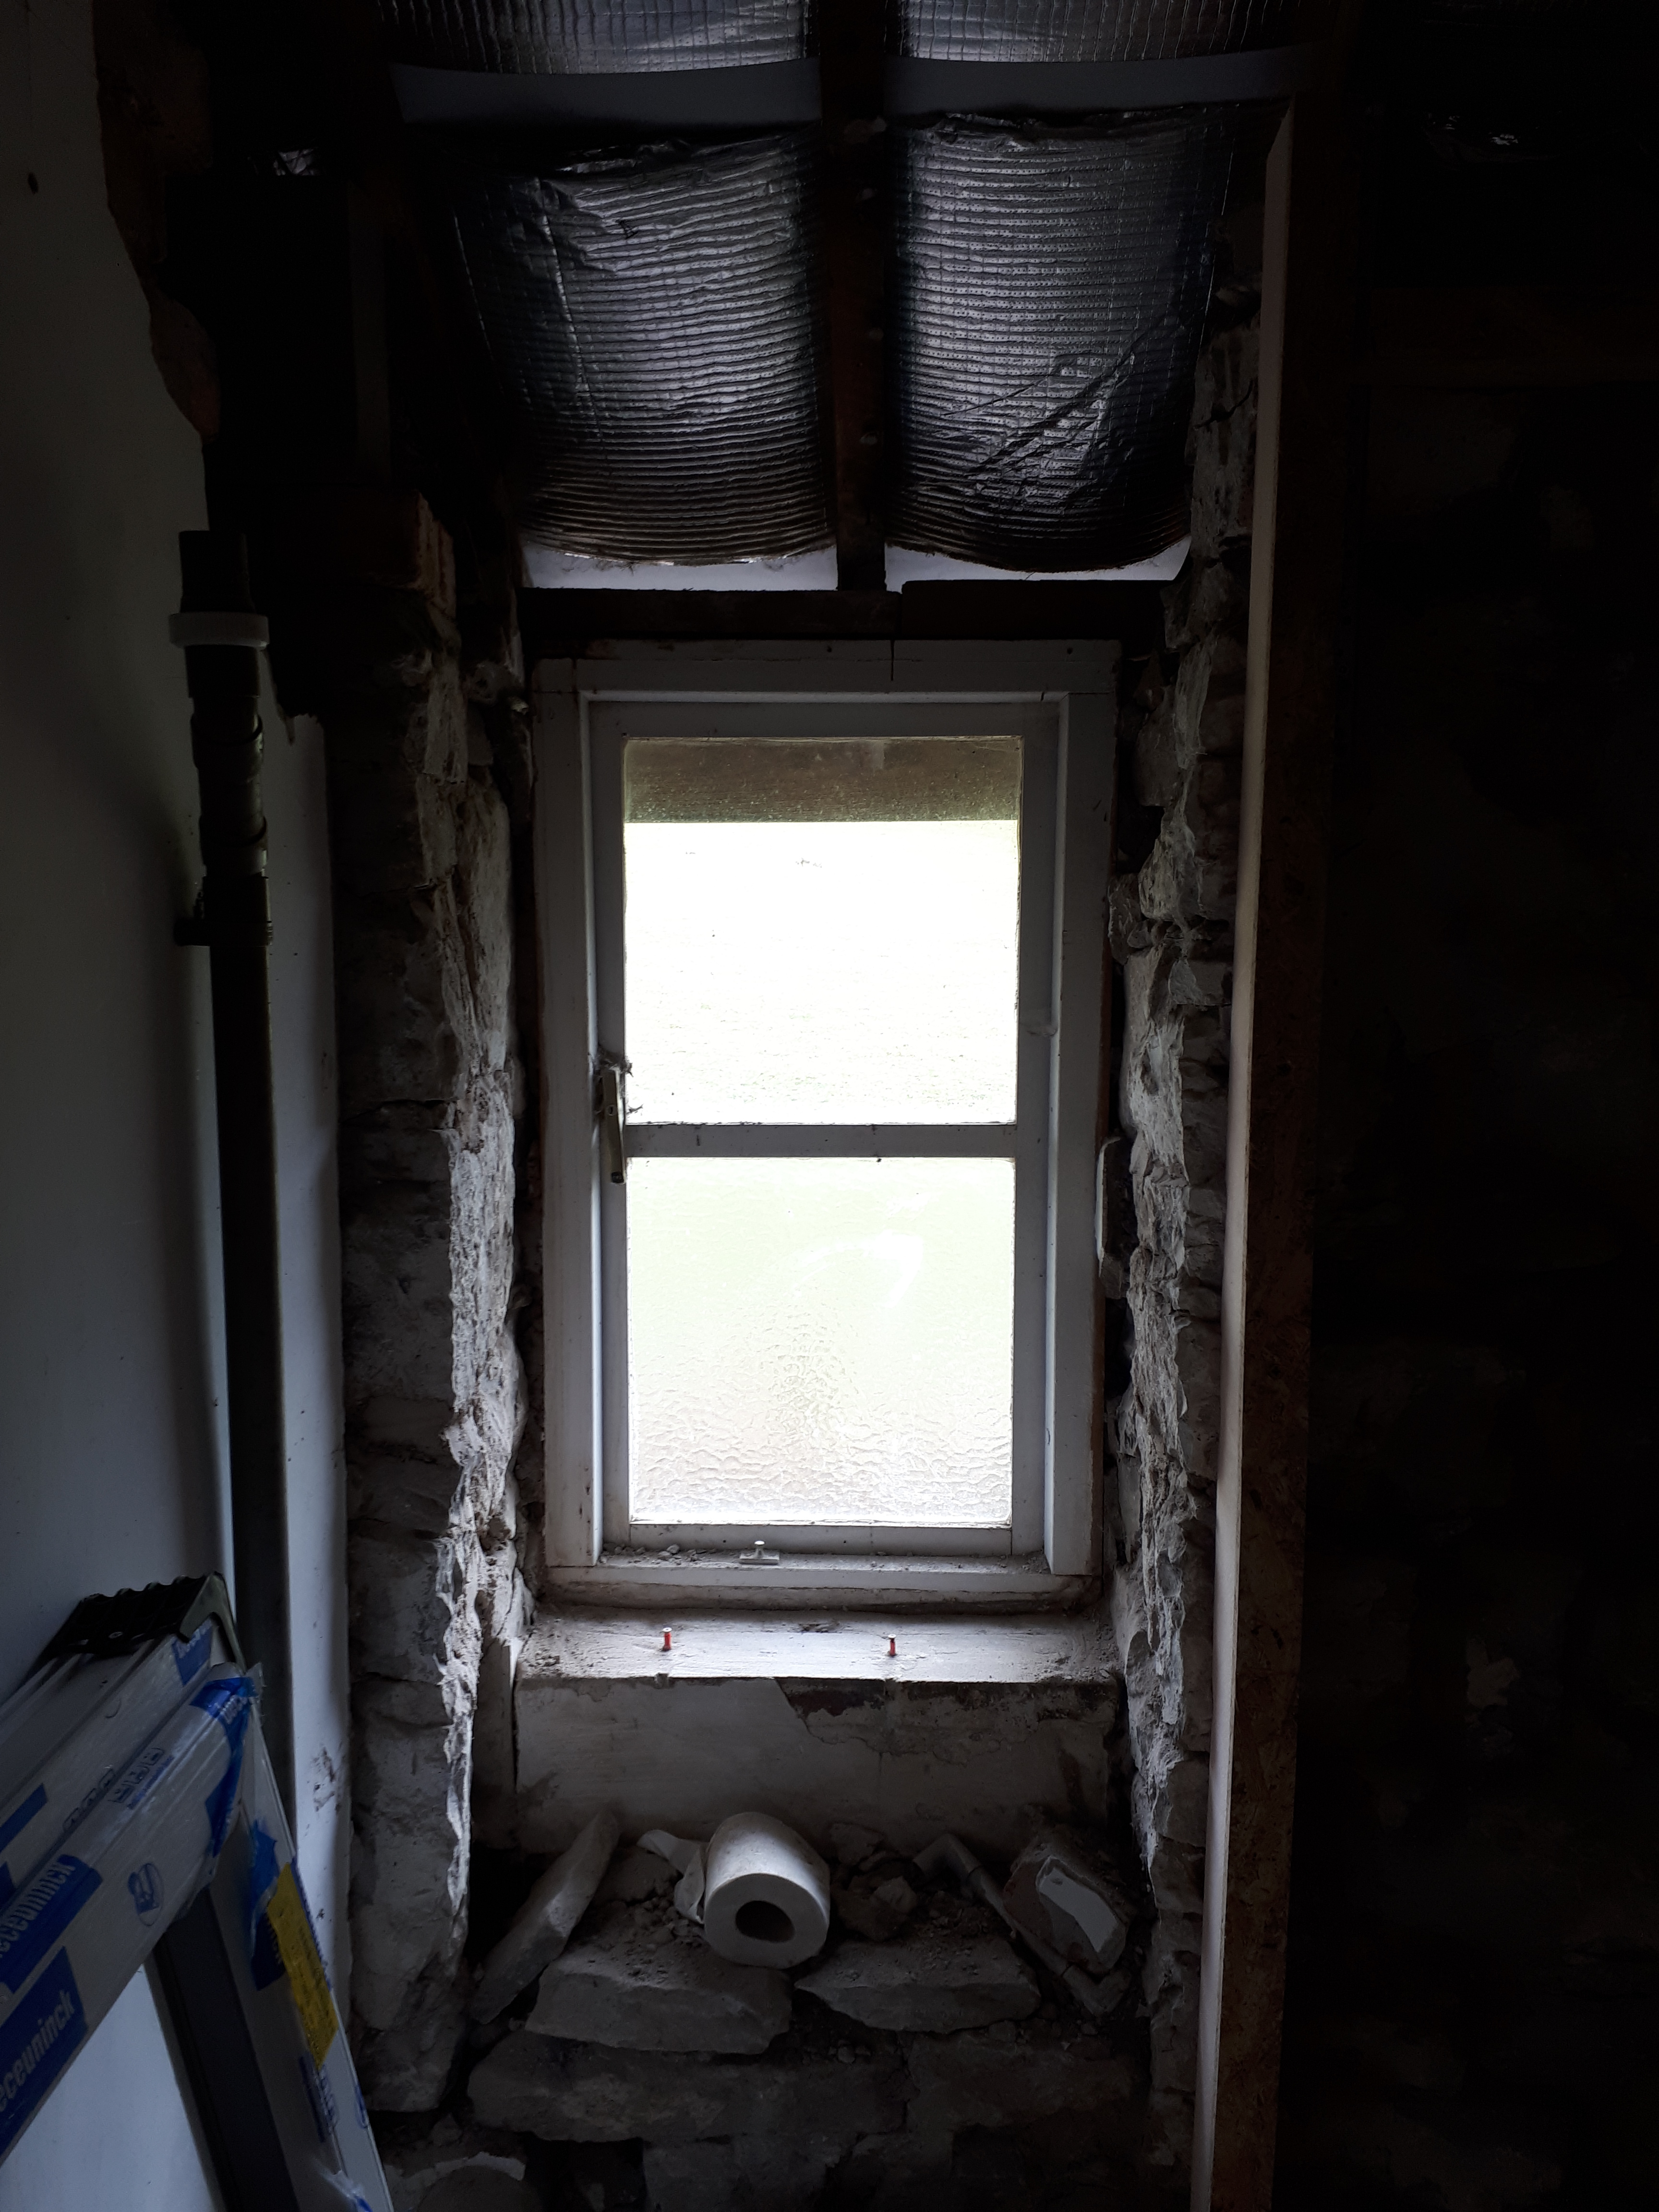
In the shower room the small window was much simplier to install, not needing a lintle above, due to its size.
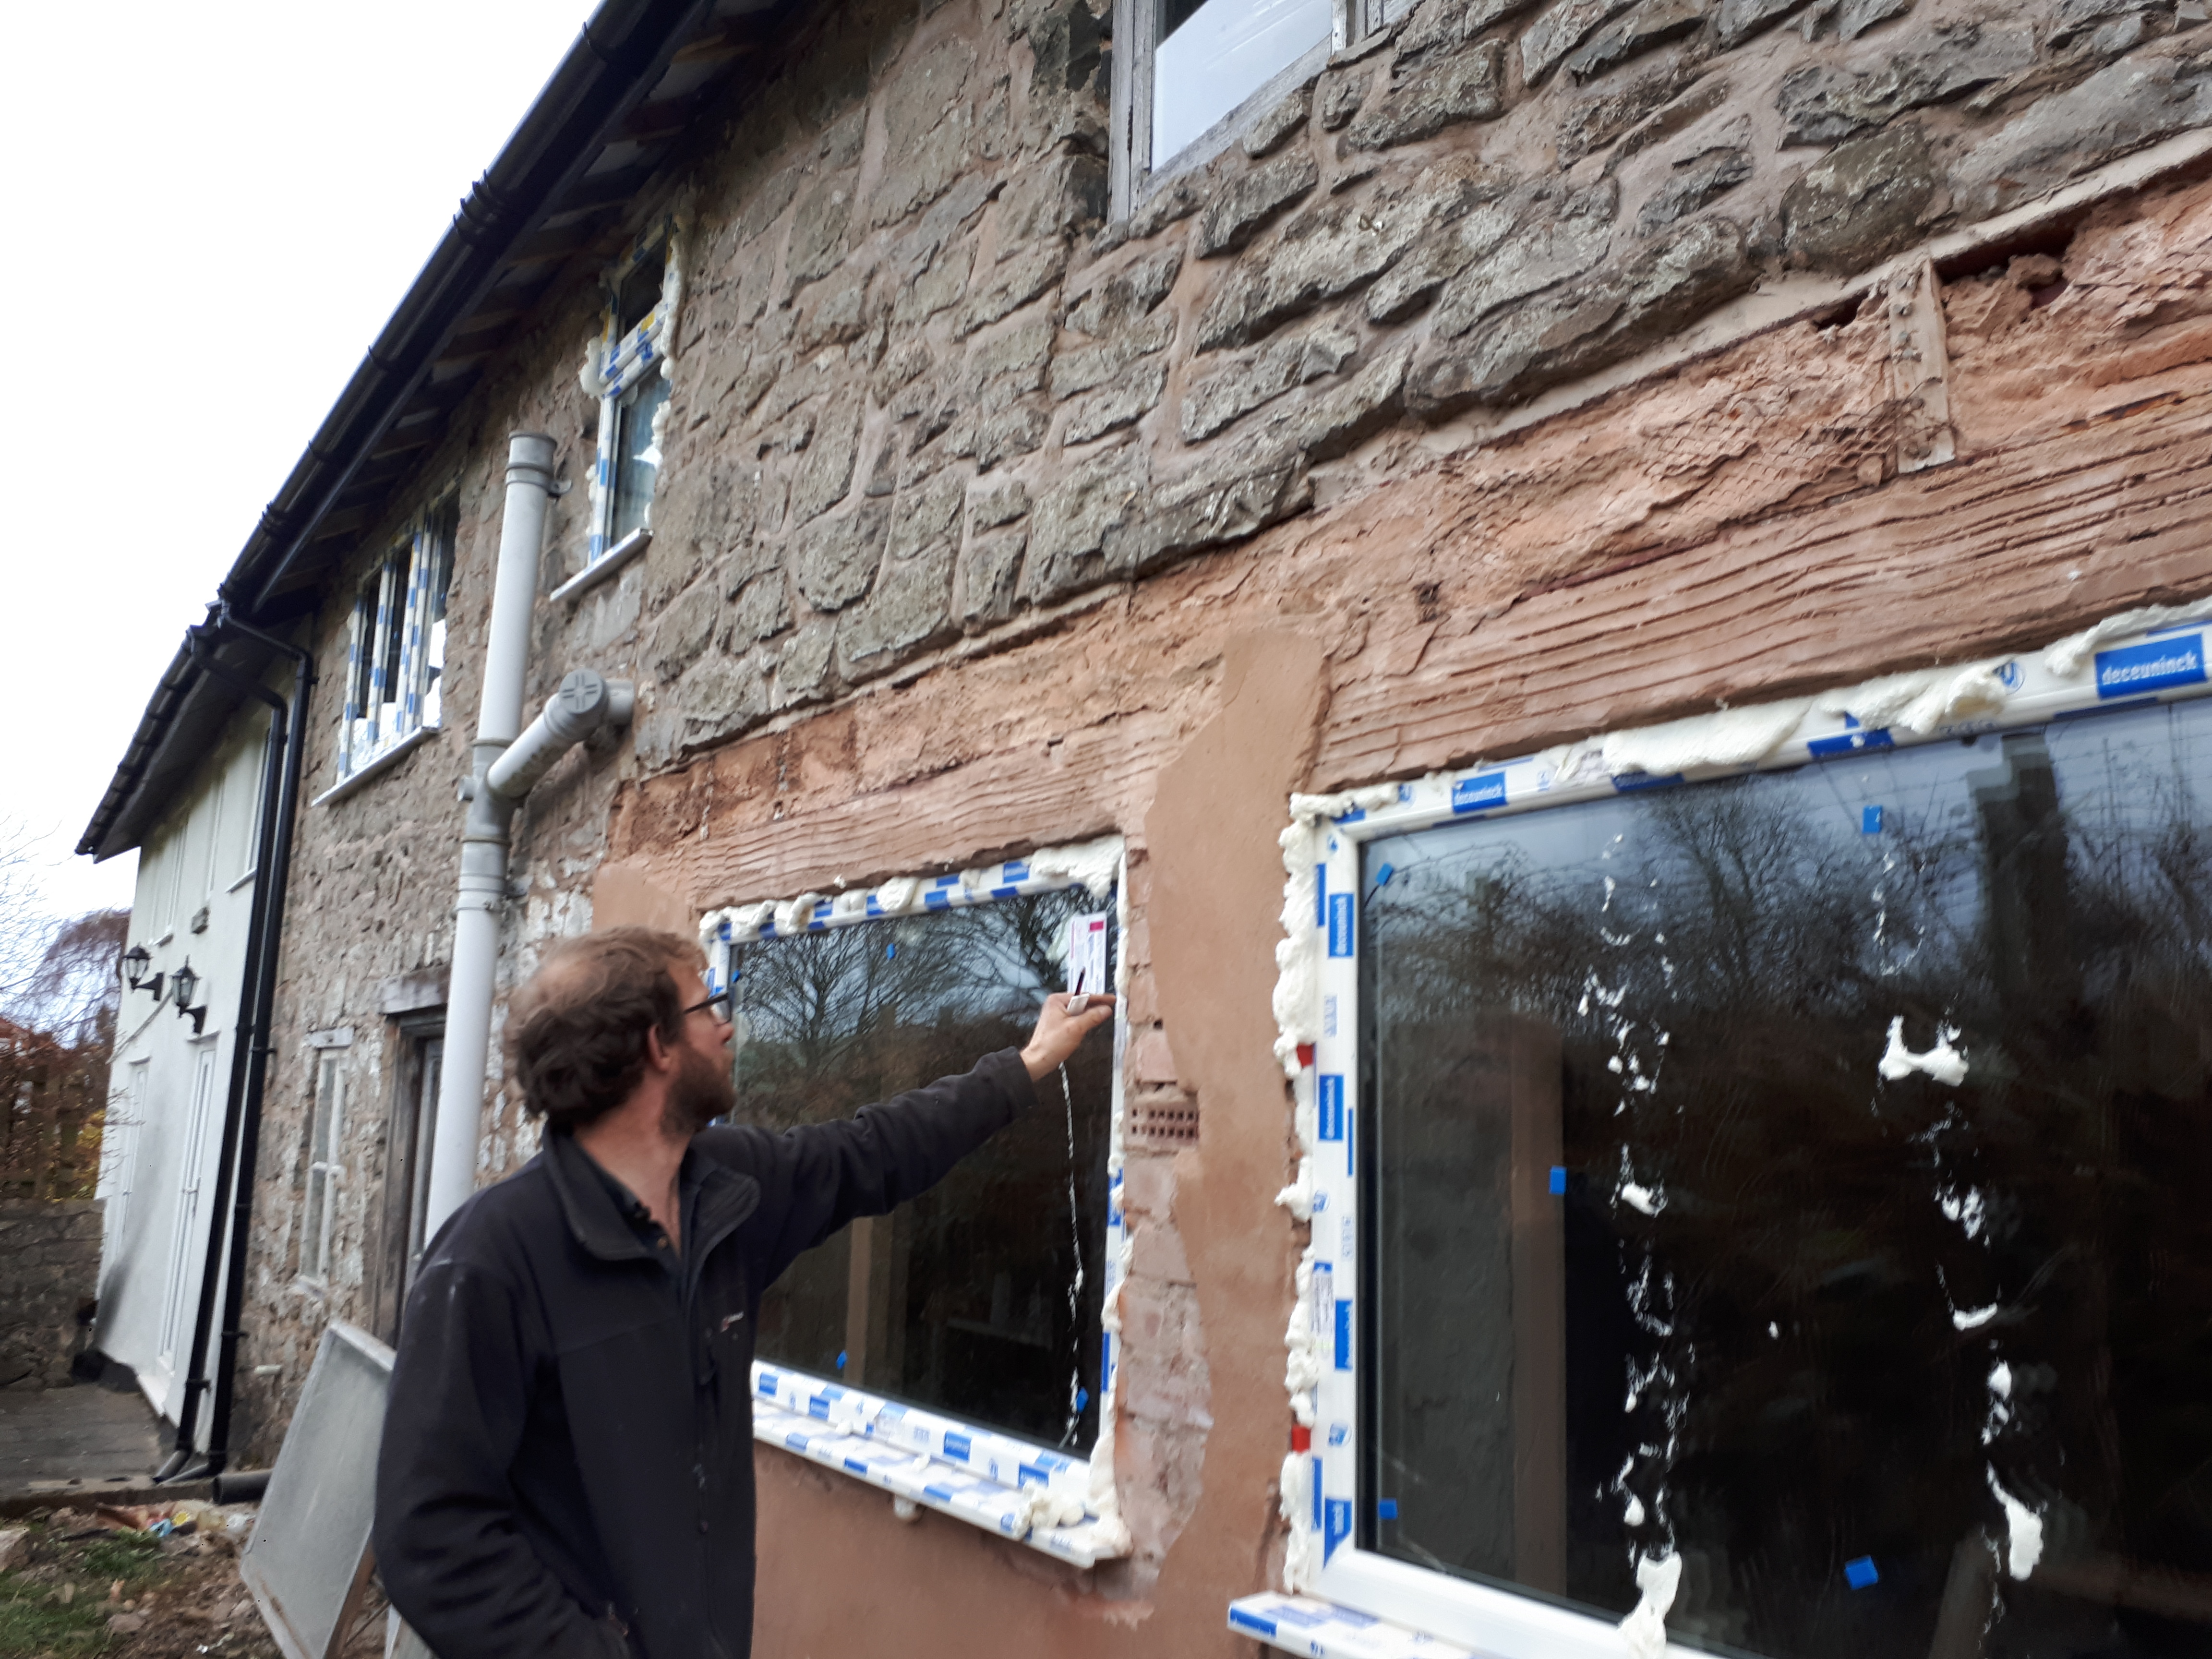
In total we managed to get four out of the six PVC windows installed this weekend. I had hoped perhaps we’d be able to get all six in, but with taking out bricks and installing lintles the time just flew. With moving day seeming ever closer we’ve decided to leave installing the wooden windows till we’ve moved in, as the back windows are in the worst condition. It’s exciting to see the views framed as they’ll be once the house is completed. We’re incredibly lucky with the beautiful views our house affords us, and what better way to do them justice than framing then with picture-perfect windows.
-
Floored
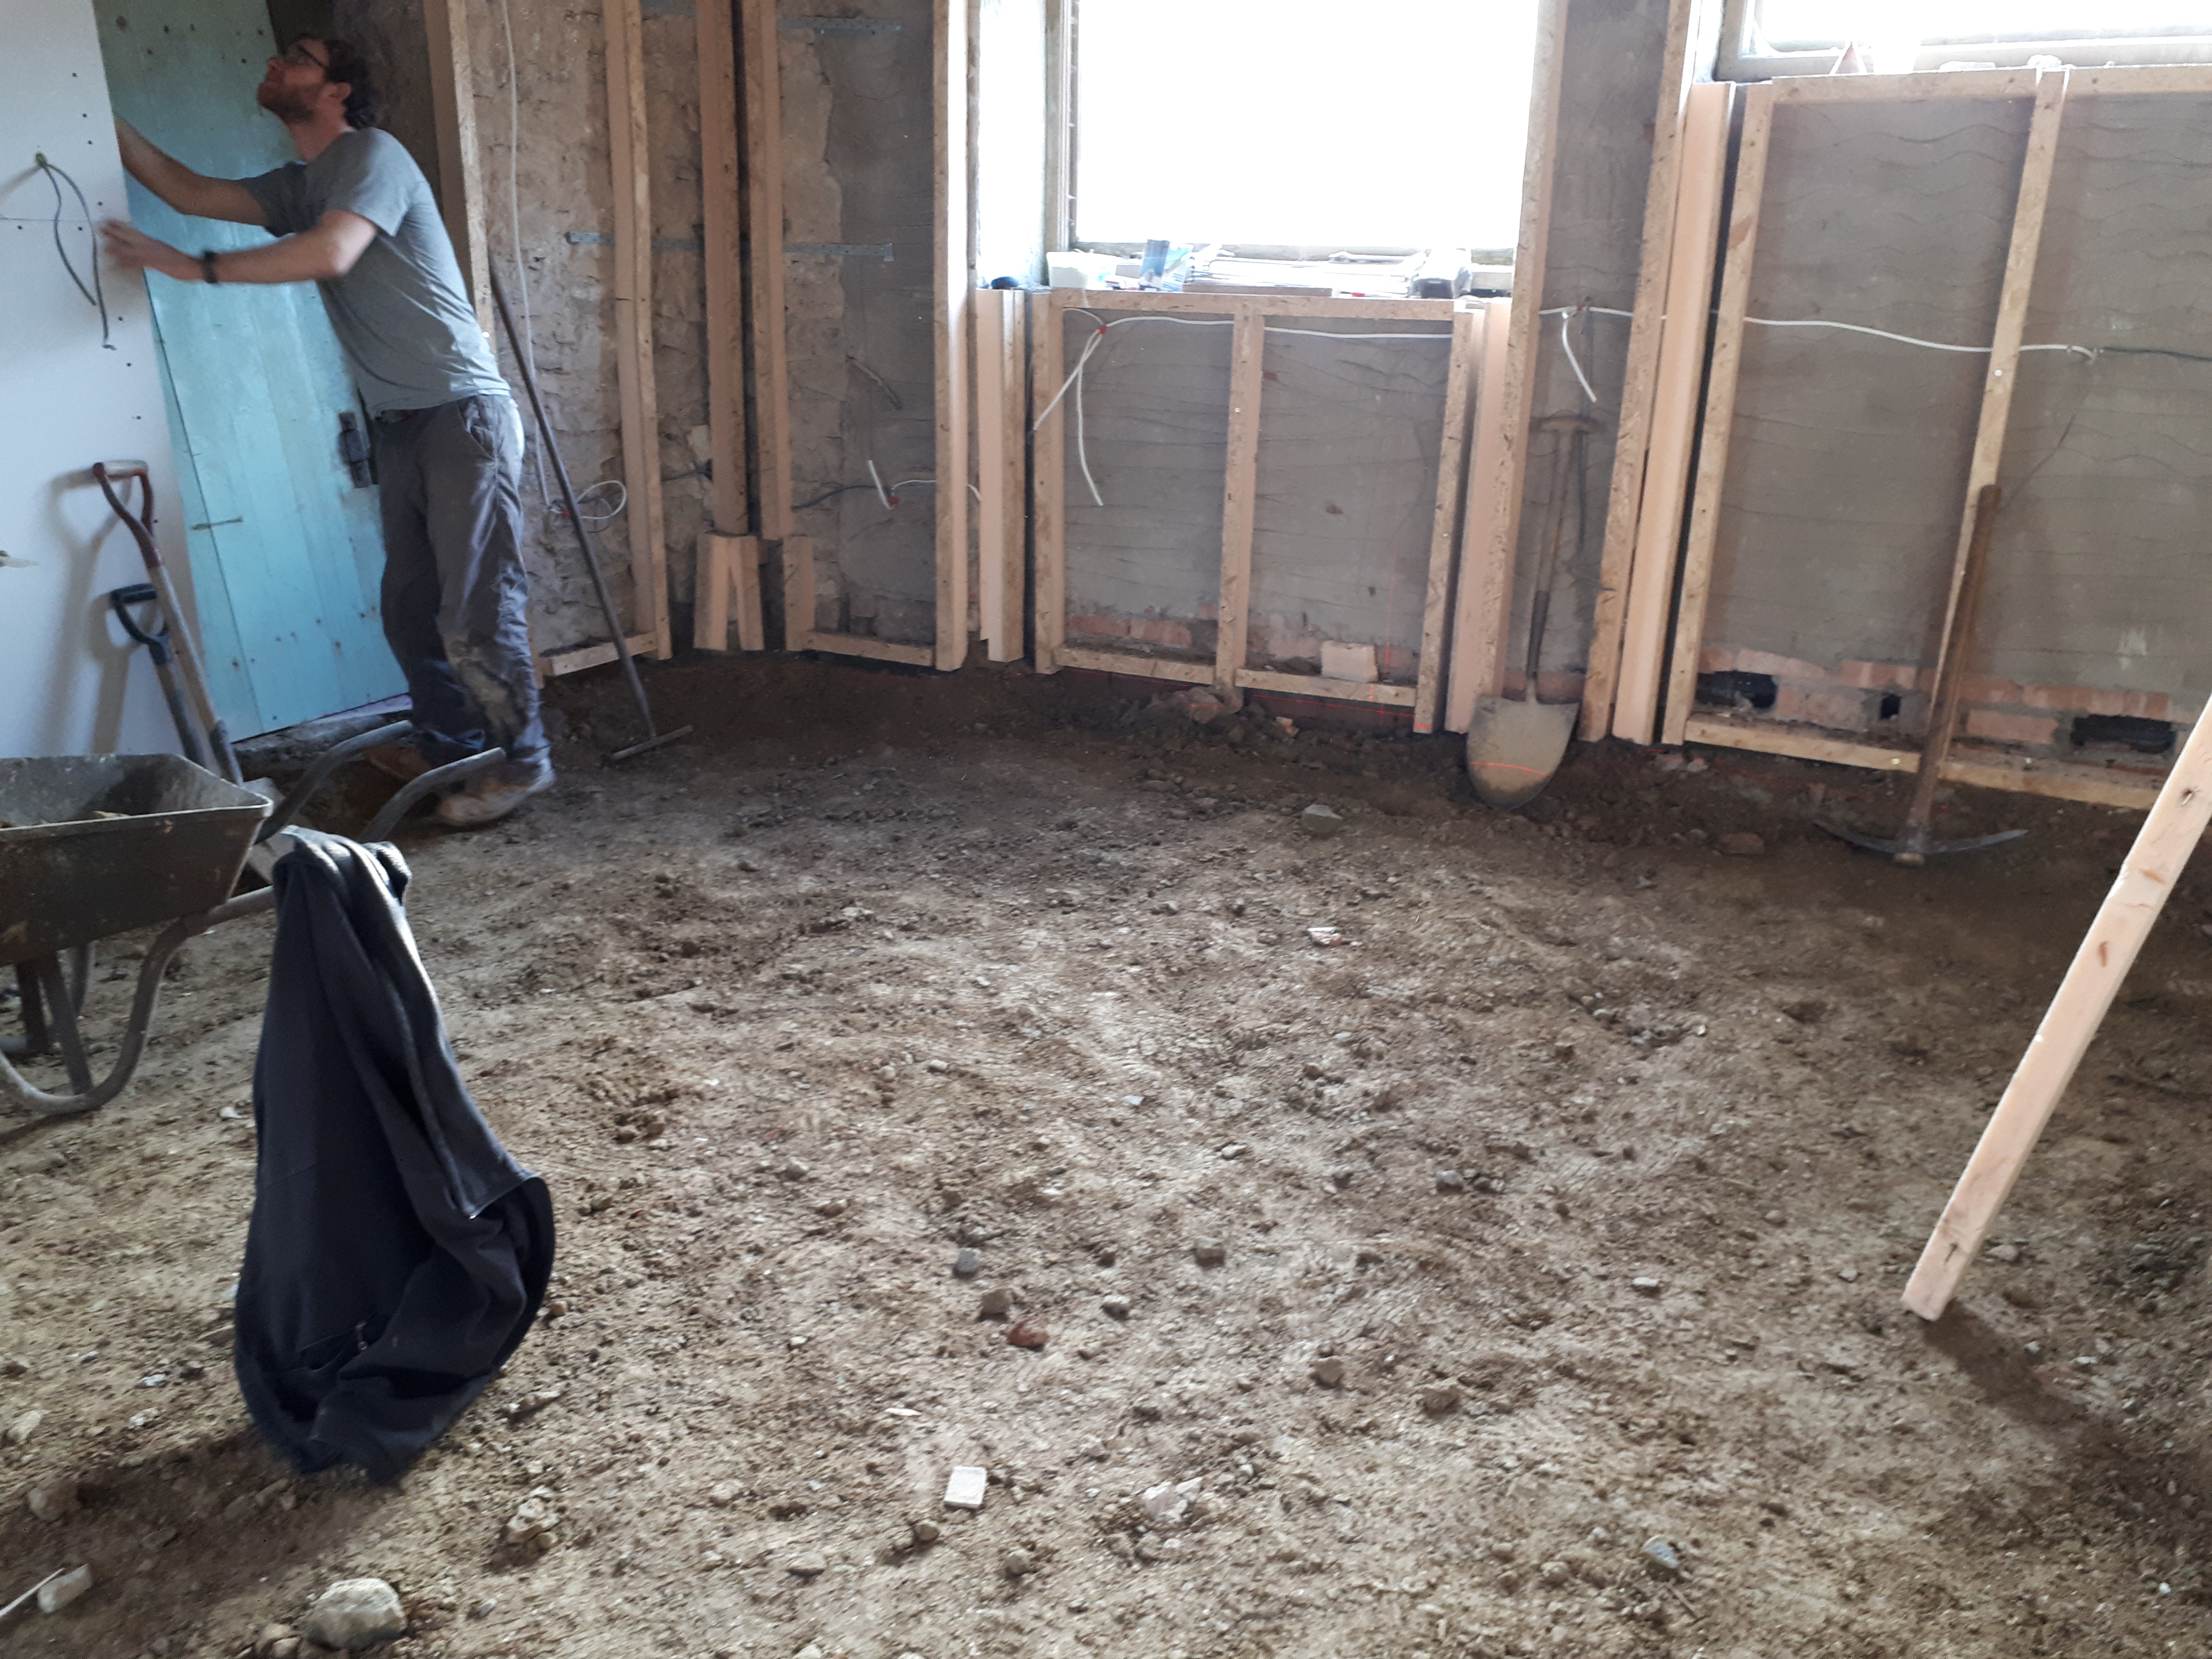
After a few weekends fighting with the floor, Chris had success evening with a rented whacker plate, which compacted the soil down to the right level. Floor finally at the right height he moved in the sand, which was also compacted down using the whacker plate till it was properly flattened.


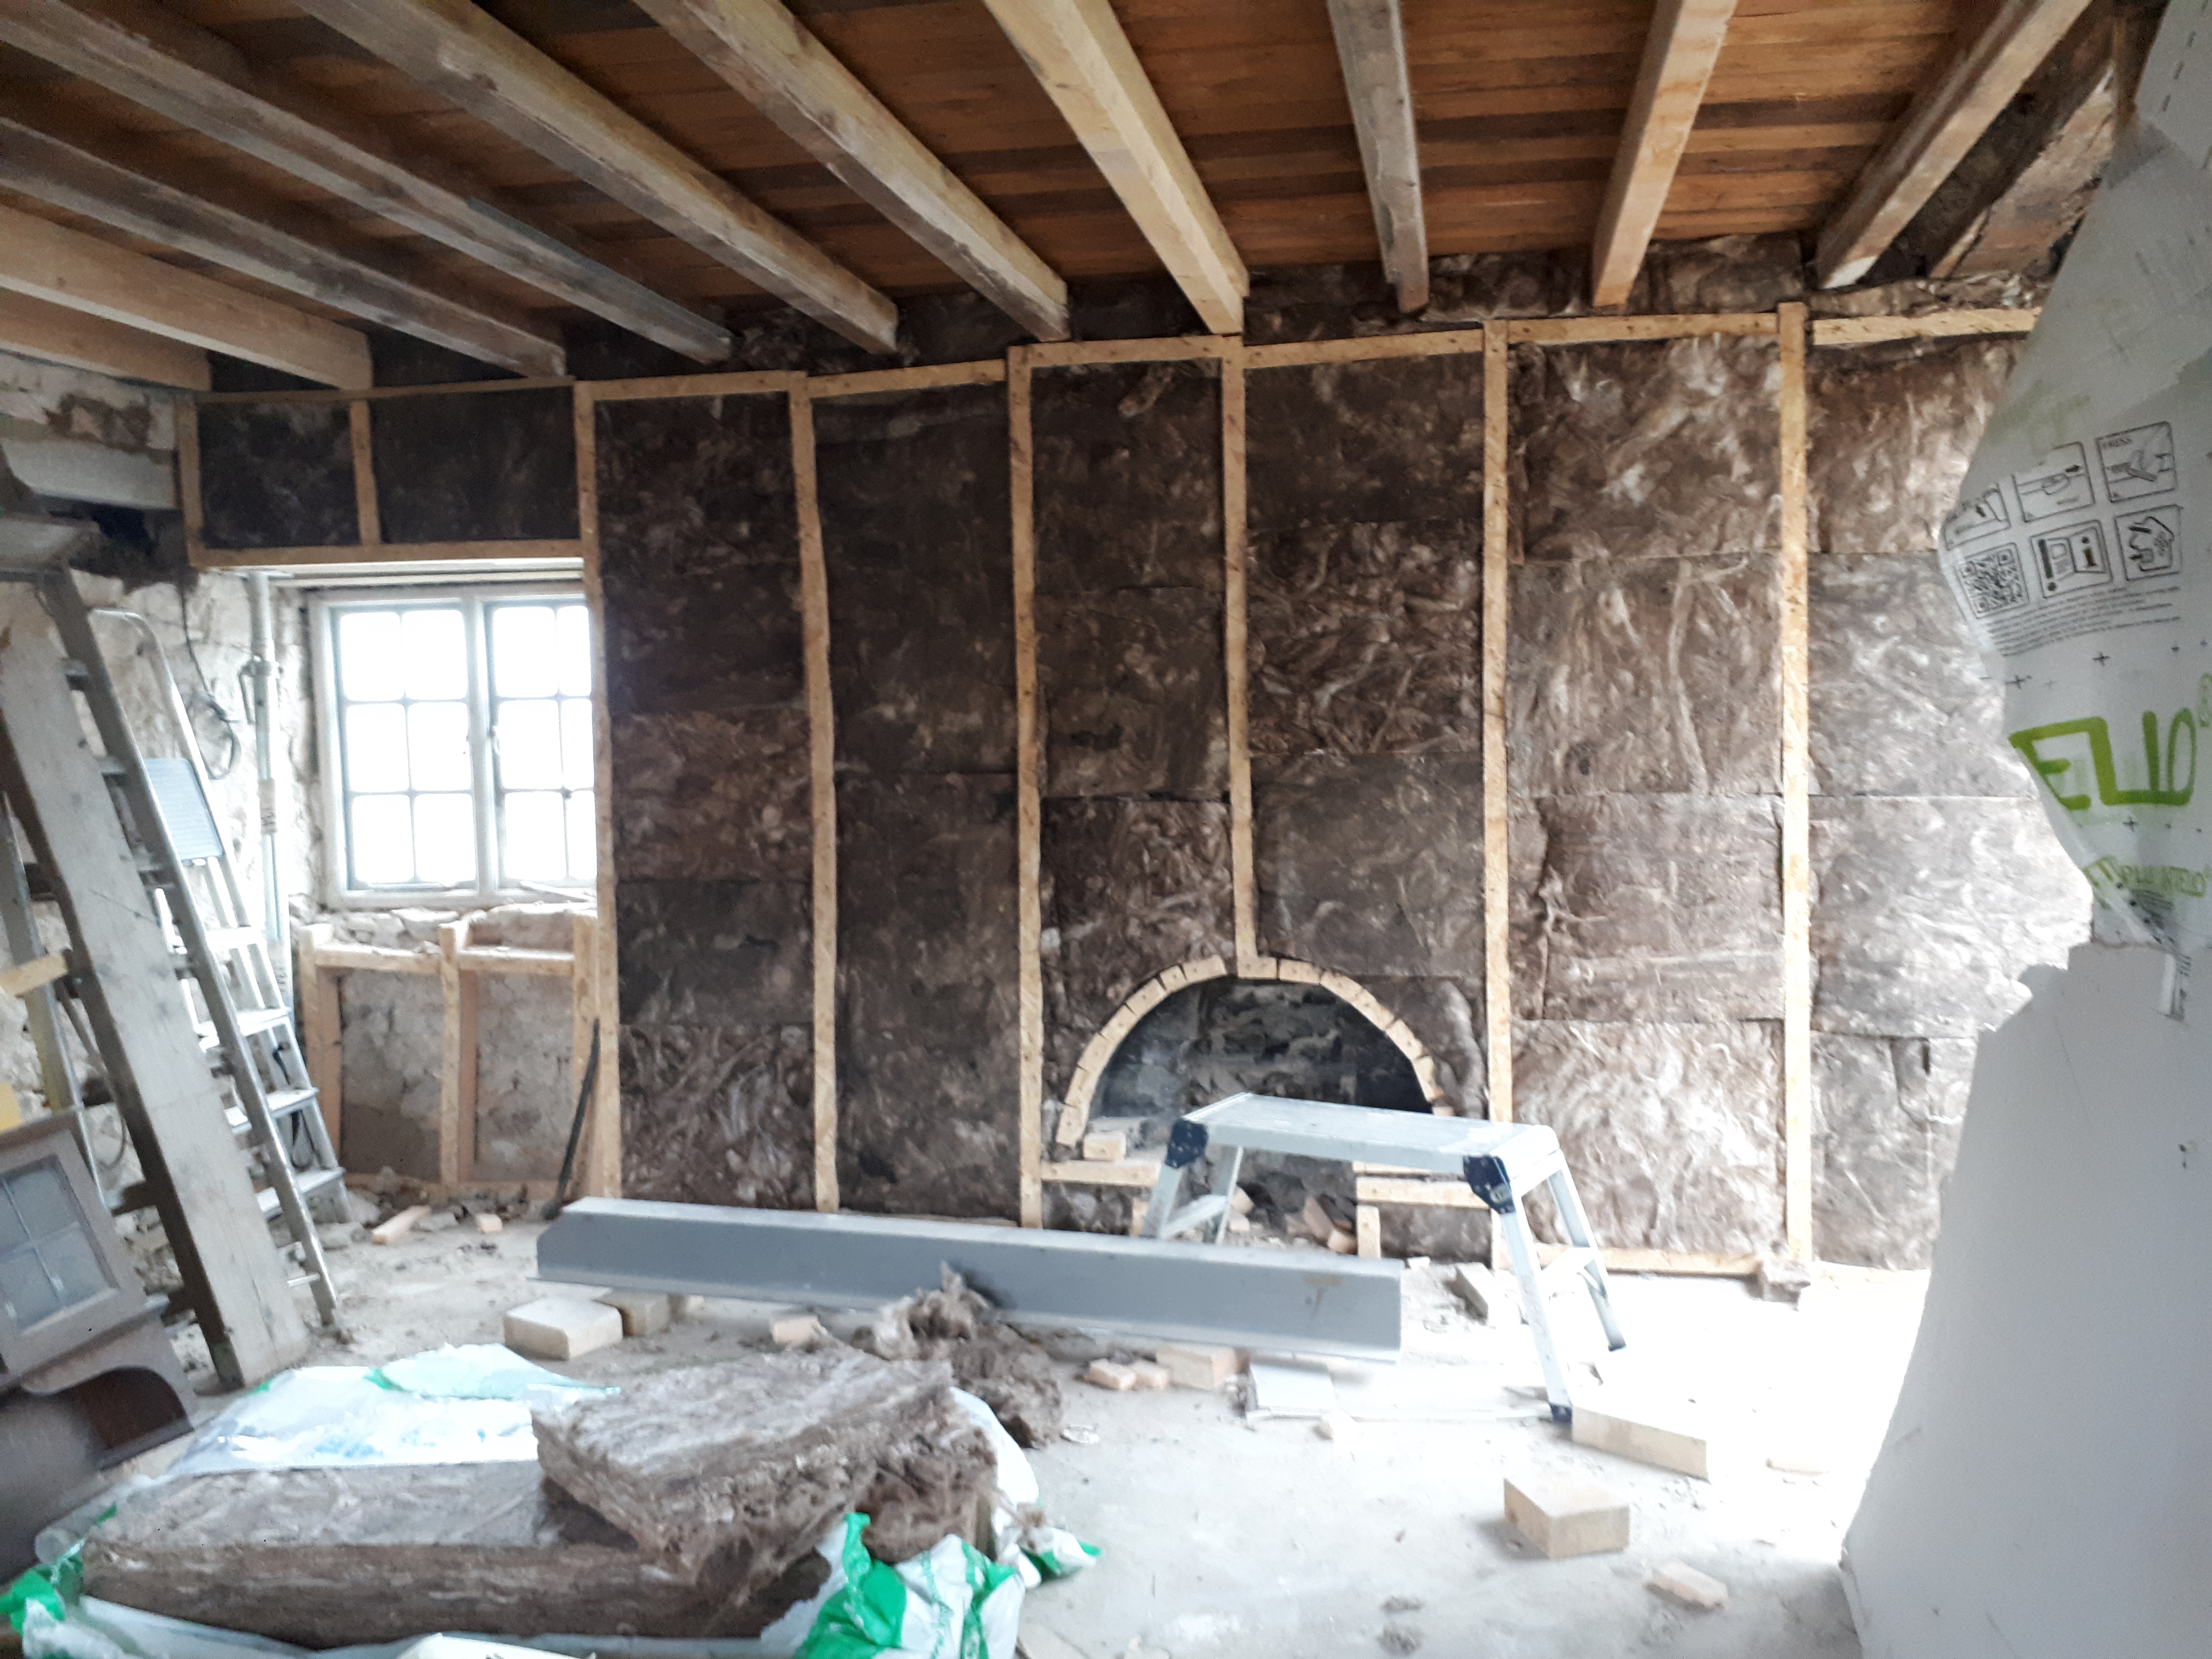
On Saturday, while I was busy running my monthly volunteer day, Chris continued his good work and got the vapour membrane down before adding insulation.


He also started installing back boxes ready to install our plug sockets.

Joining Chris on Sunday I took over on the insulation board, filling in gaps with pieces of board, before plugging smaller gaps with expanding foam. In order to stop the boards moving too much as we walked across them, we weighted them down with bricks while the foam set. All joins were then taped with insulating tape.

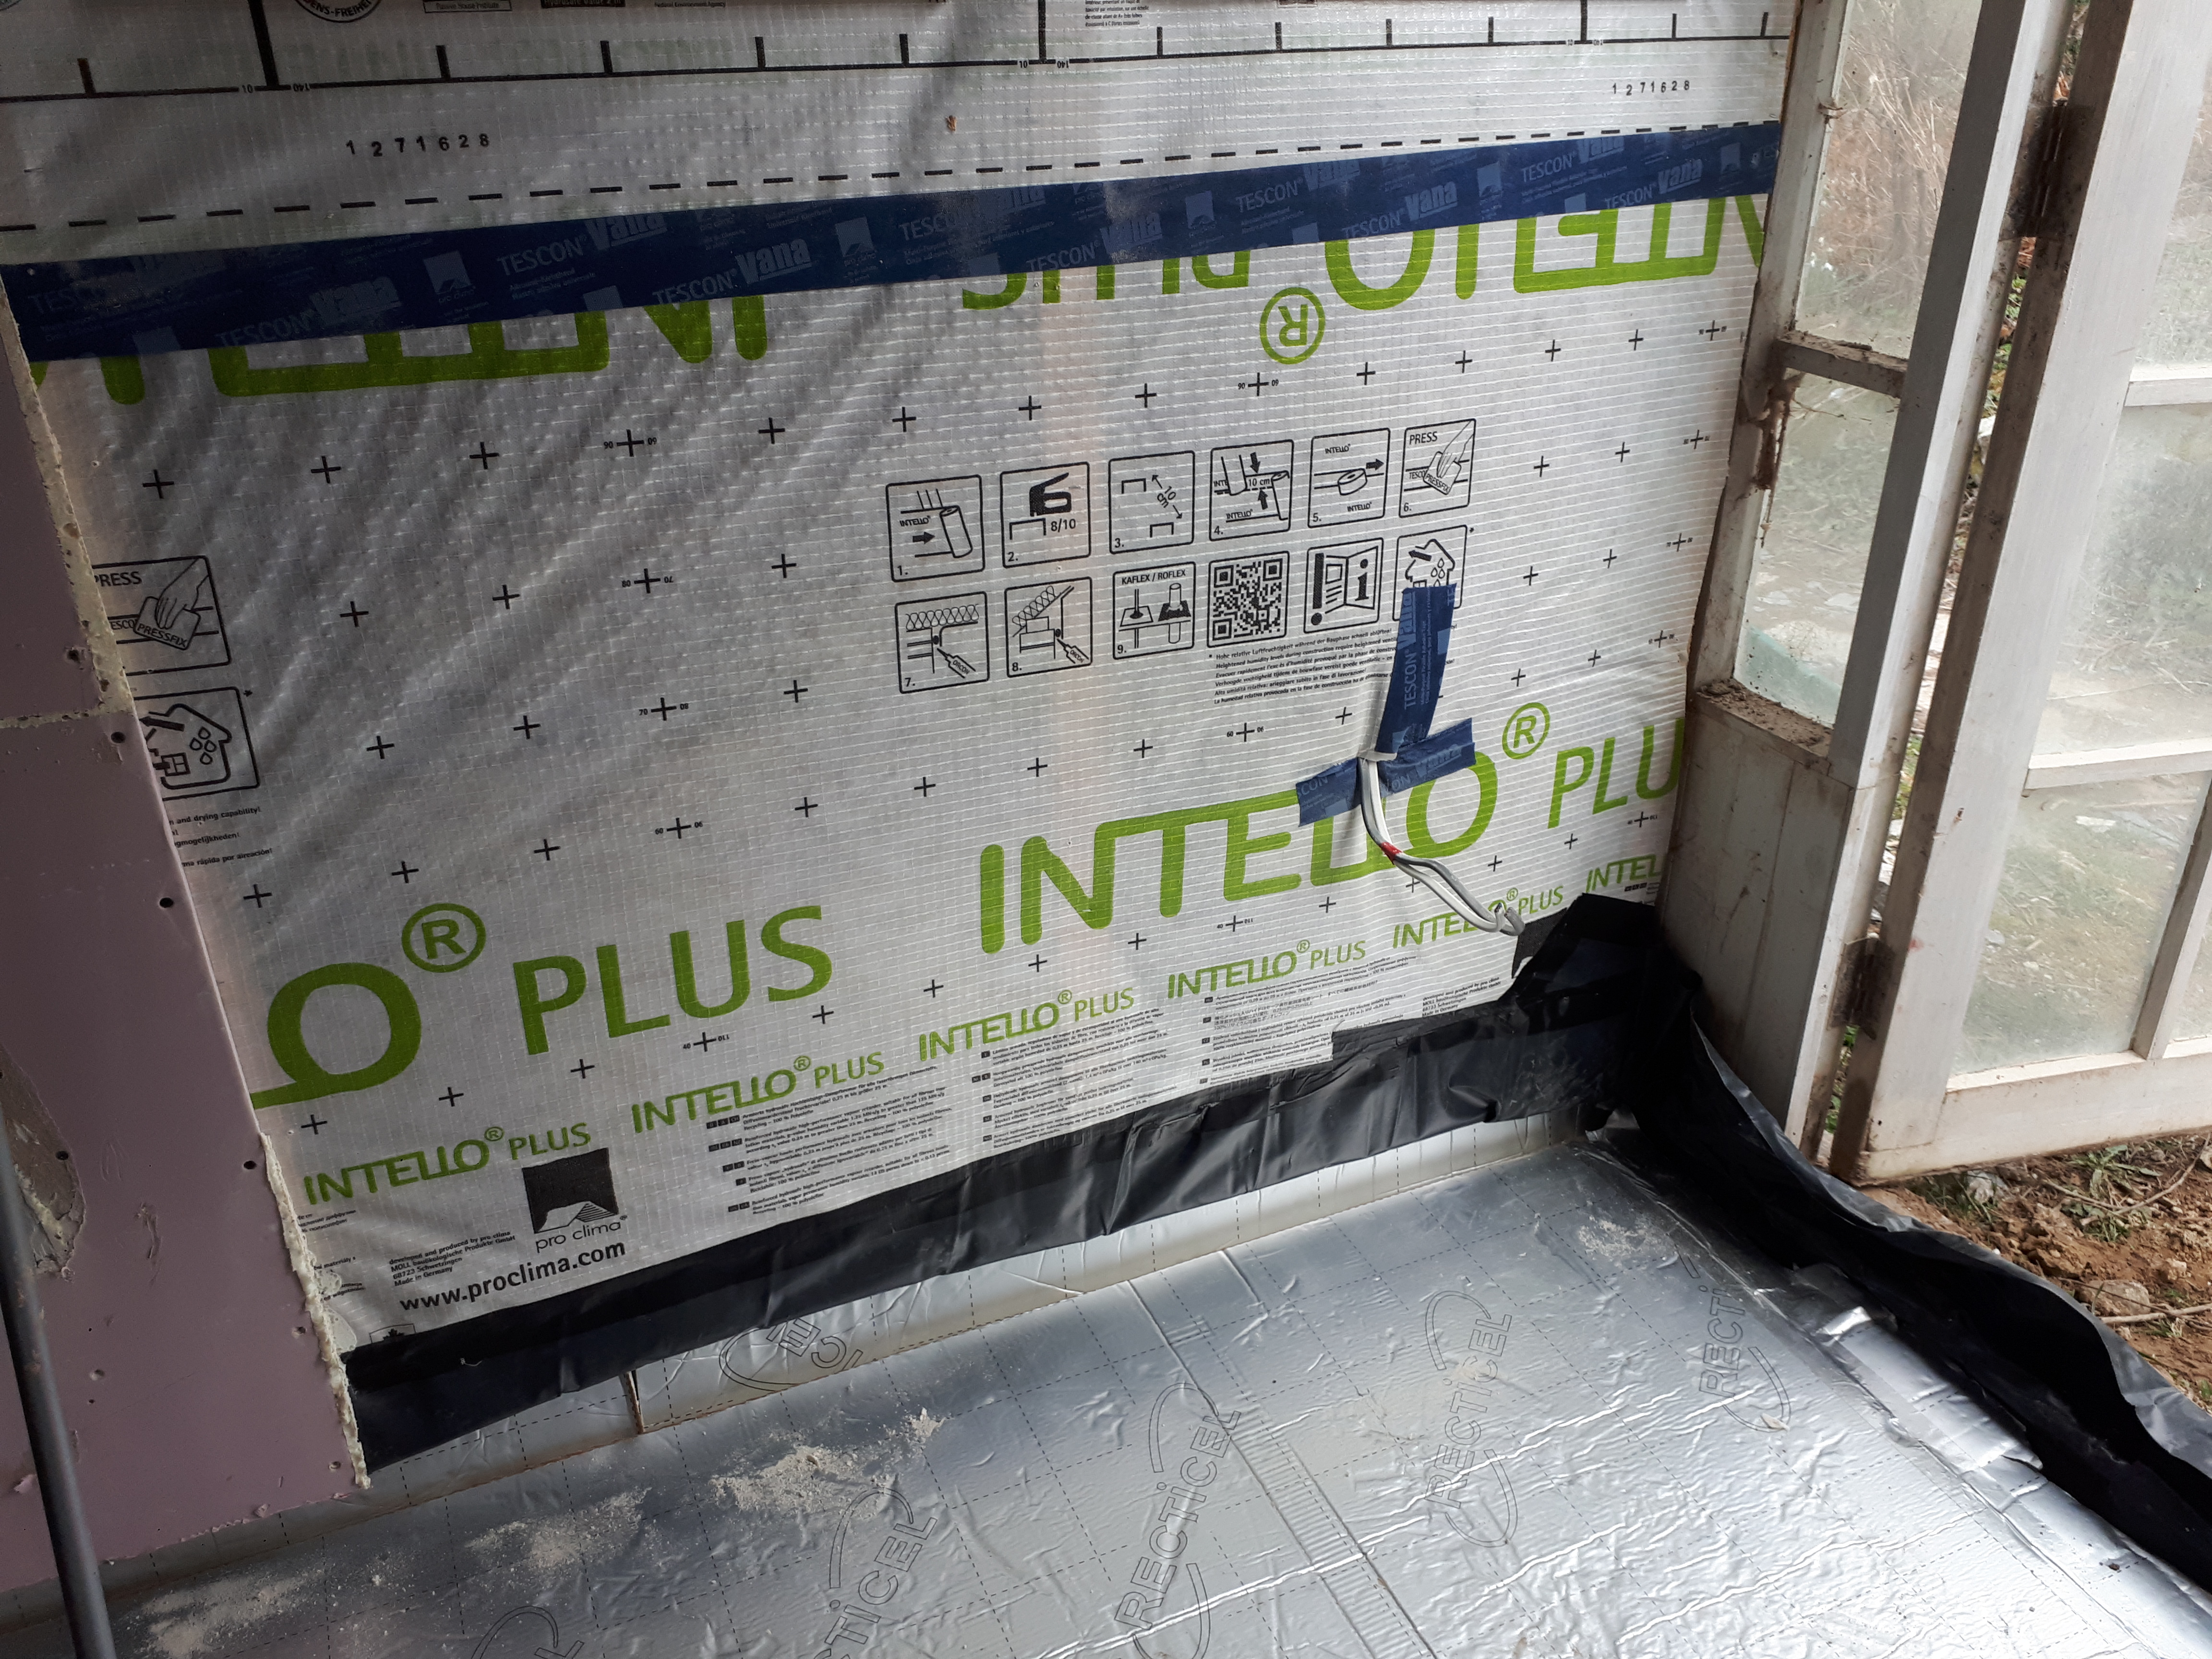
In order to properly join the vapour membrane on the floor with the membrane that had already been installed on the walls, we had to remove the lower plaster boards, so as to tape it down behind the boards.
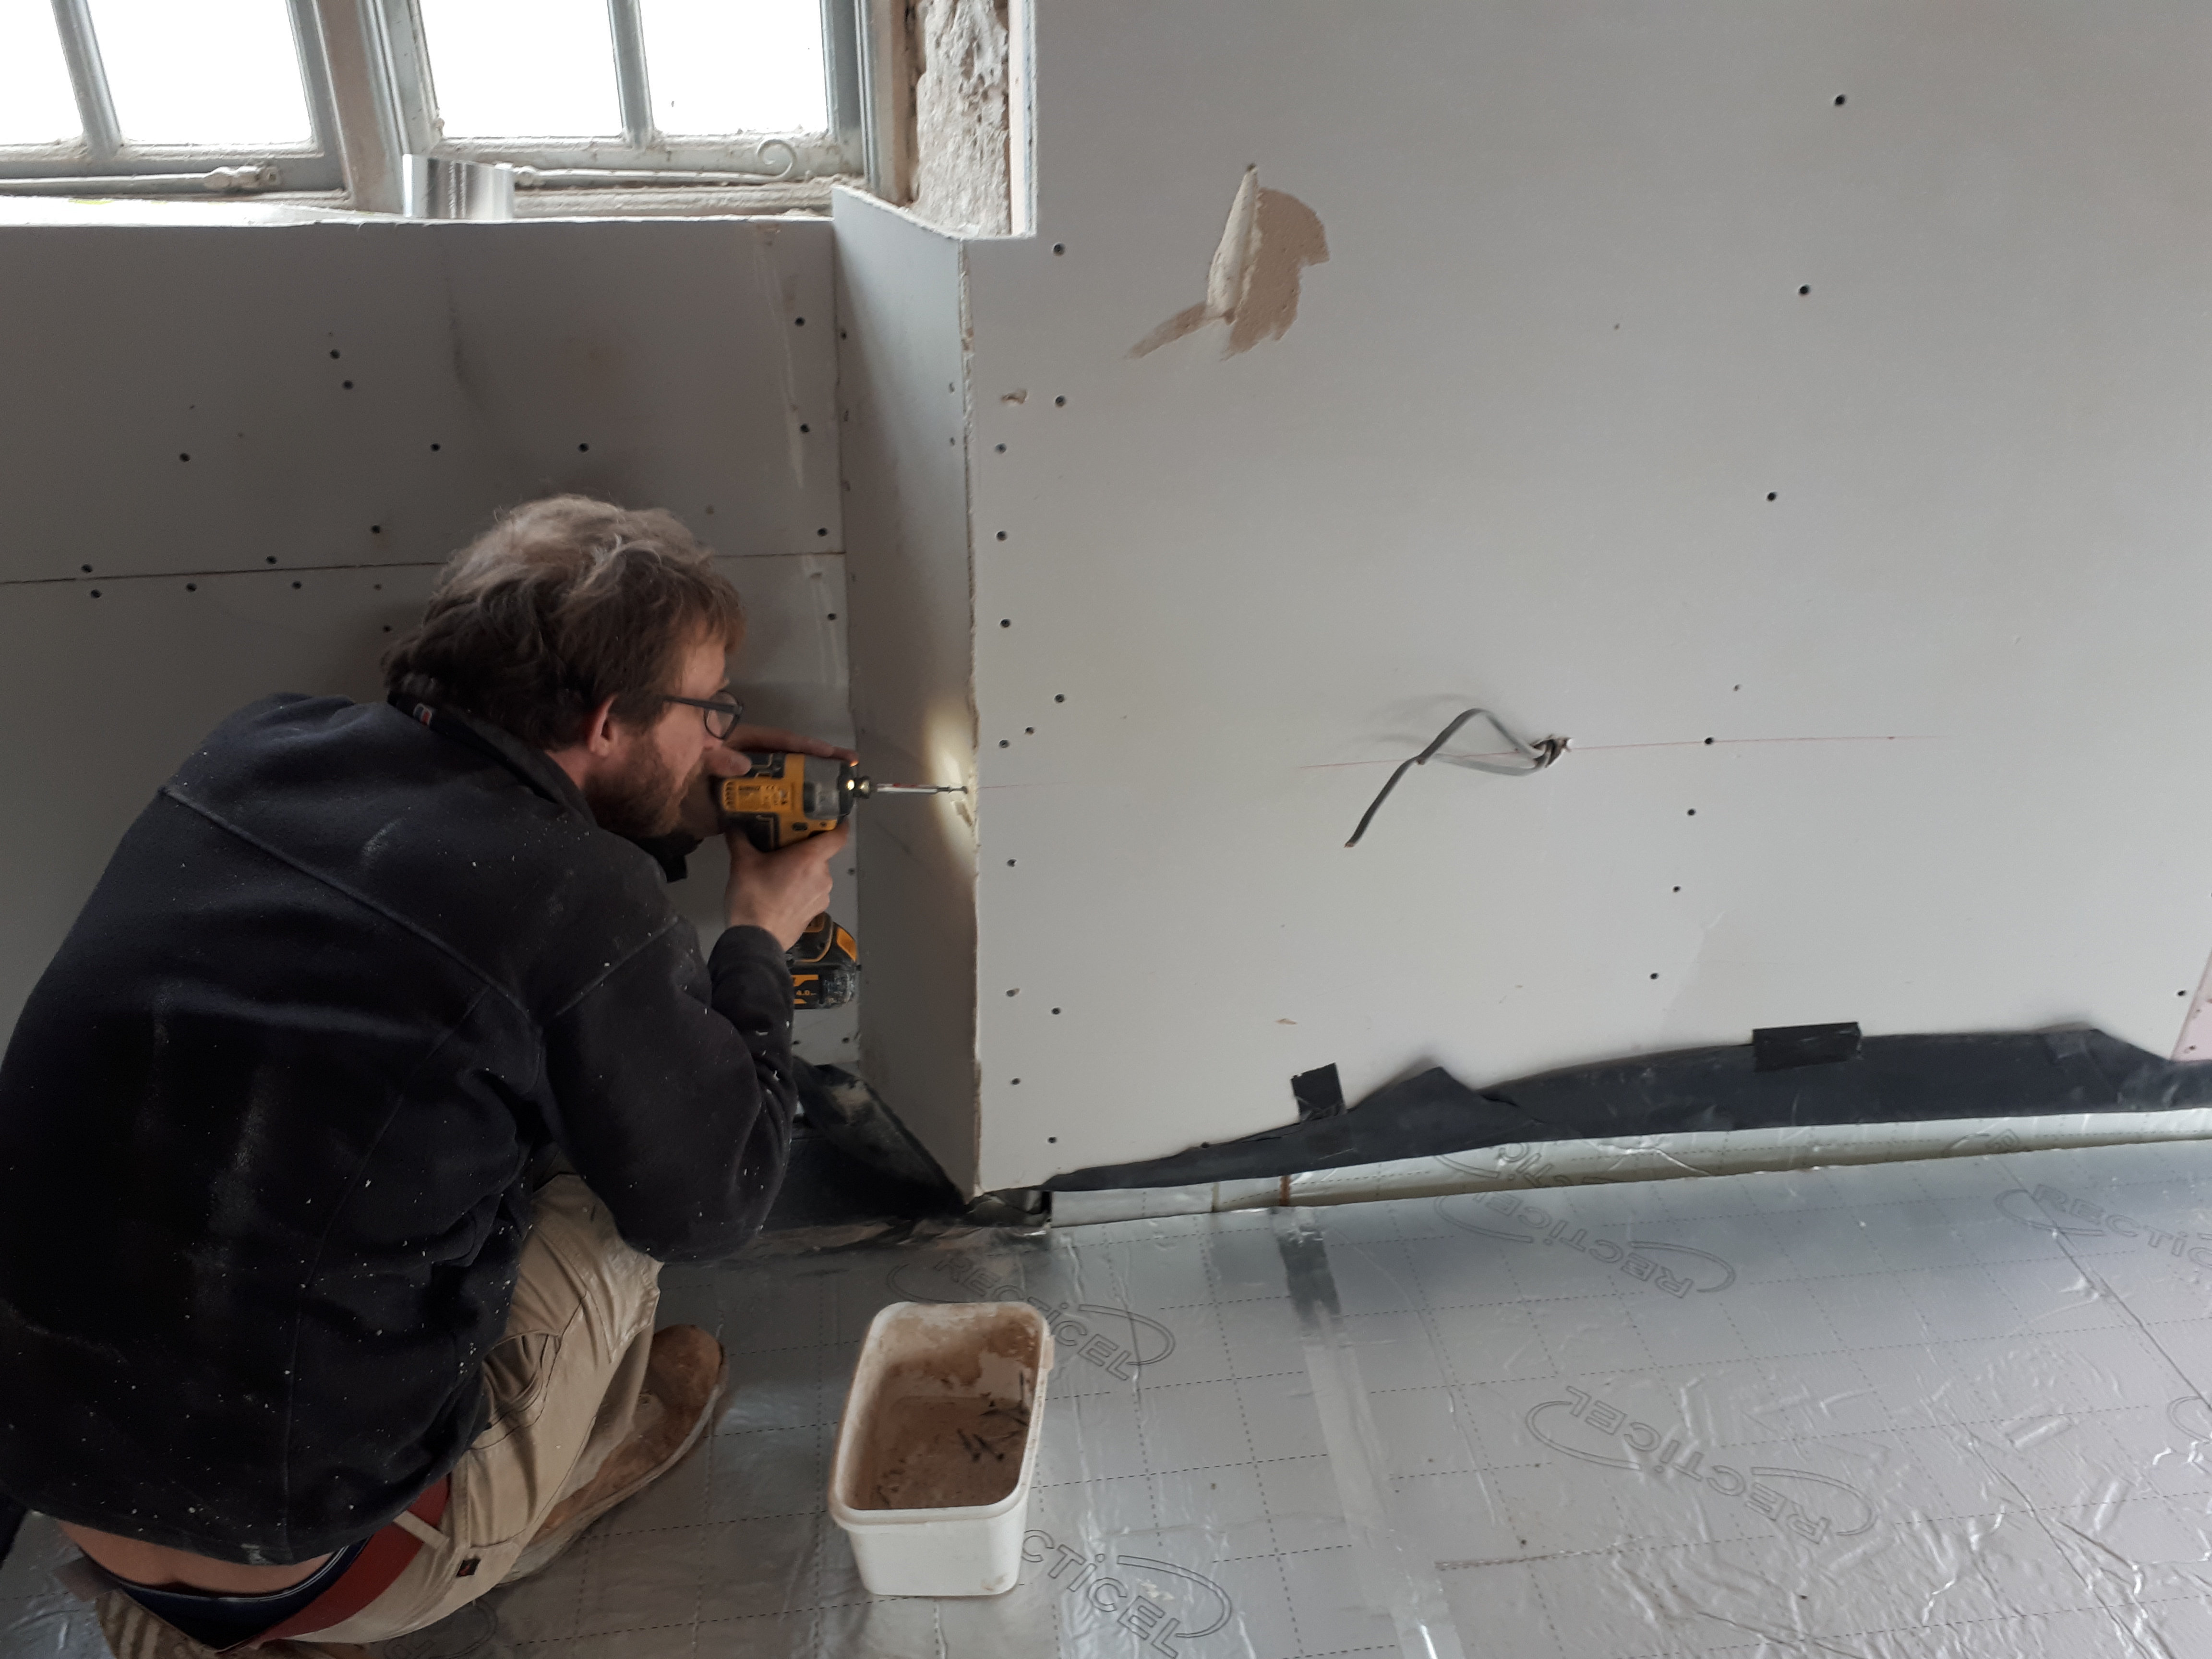
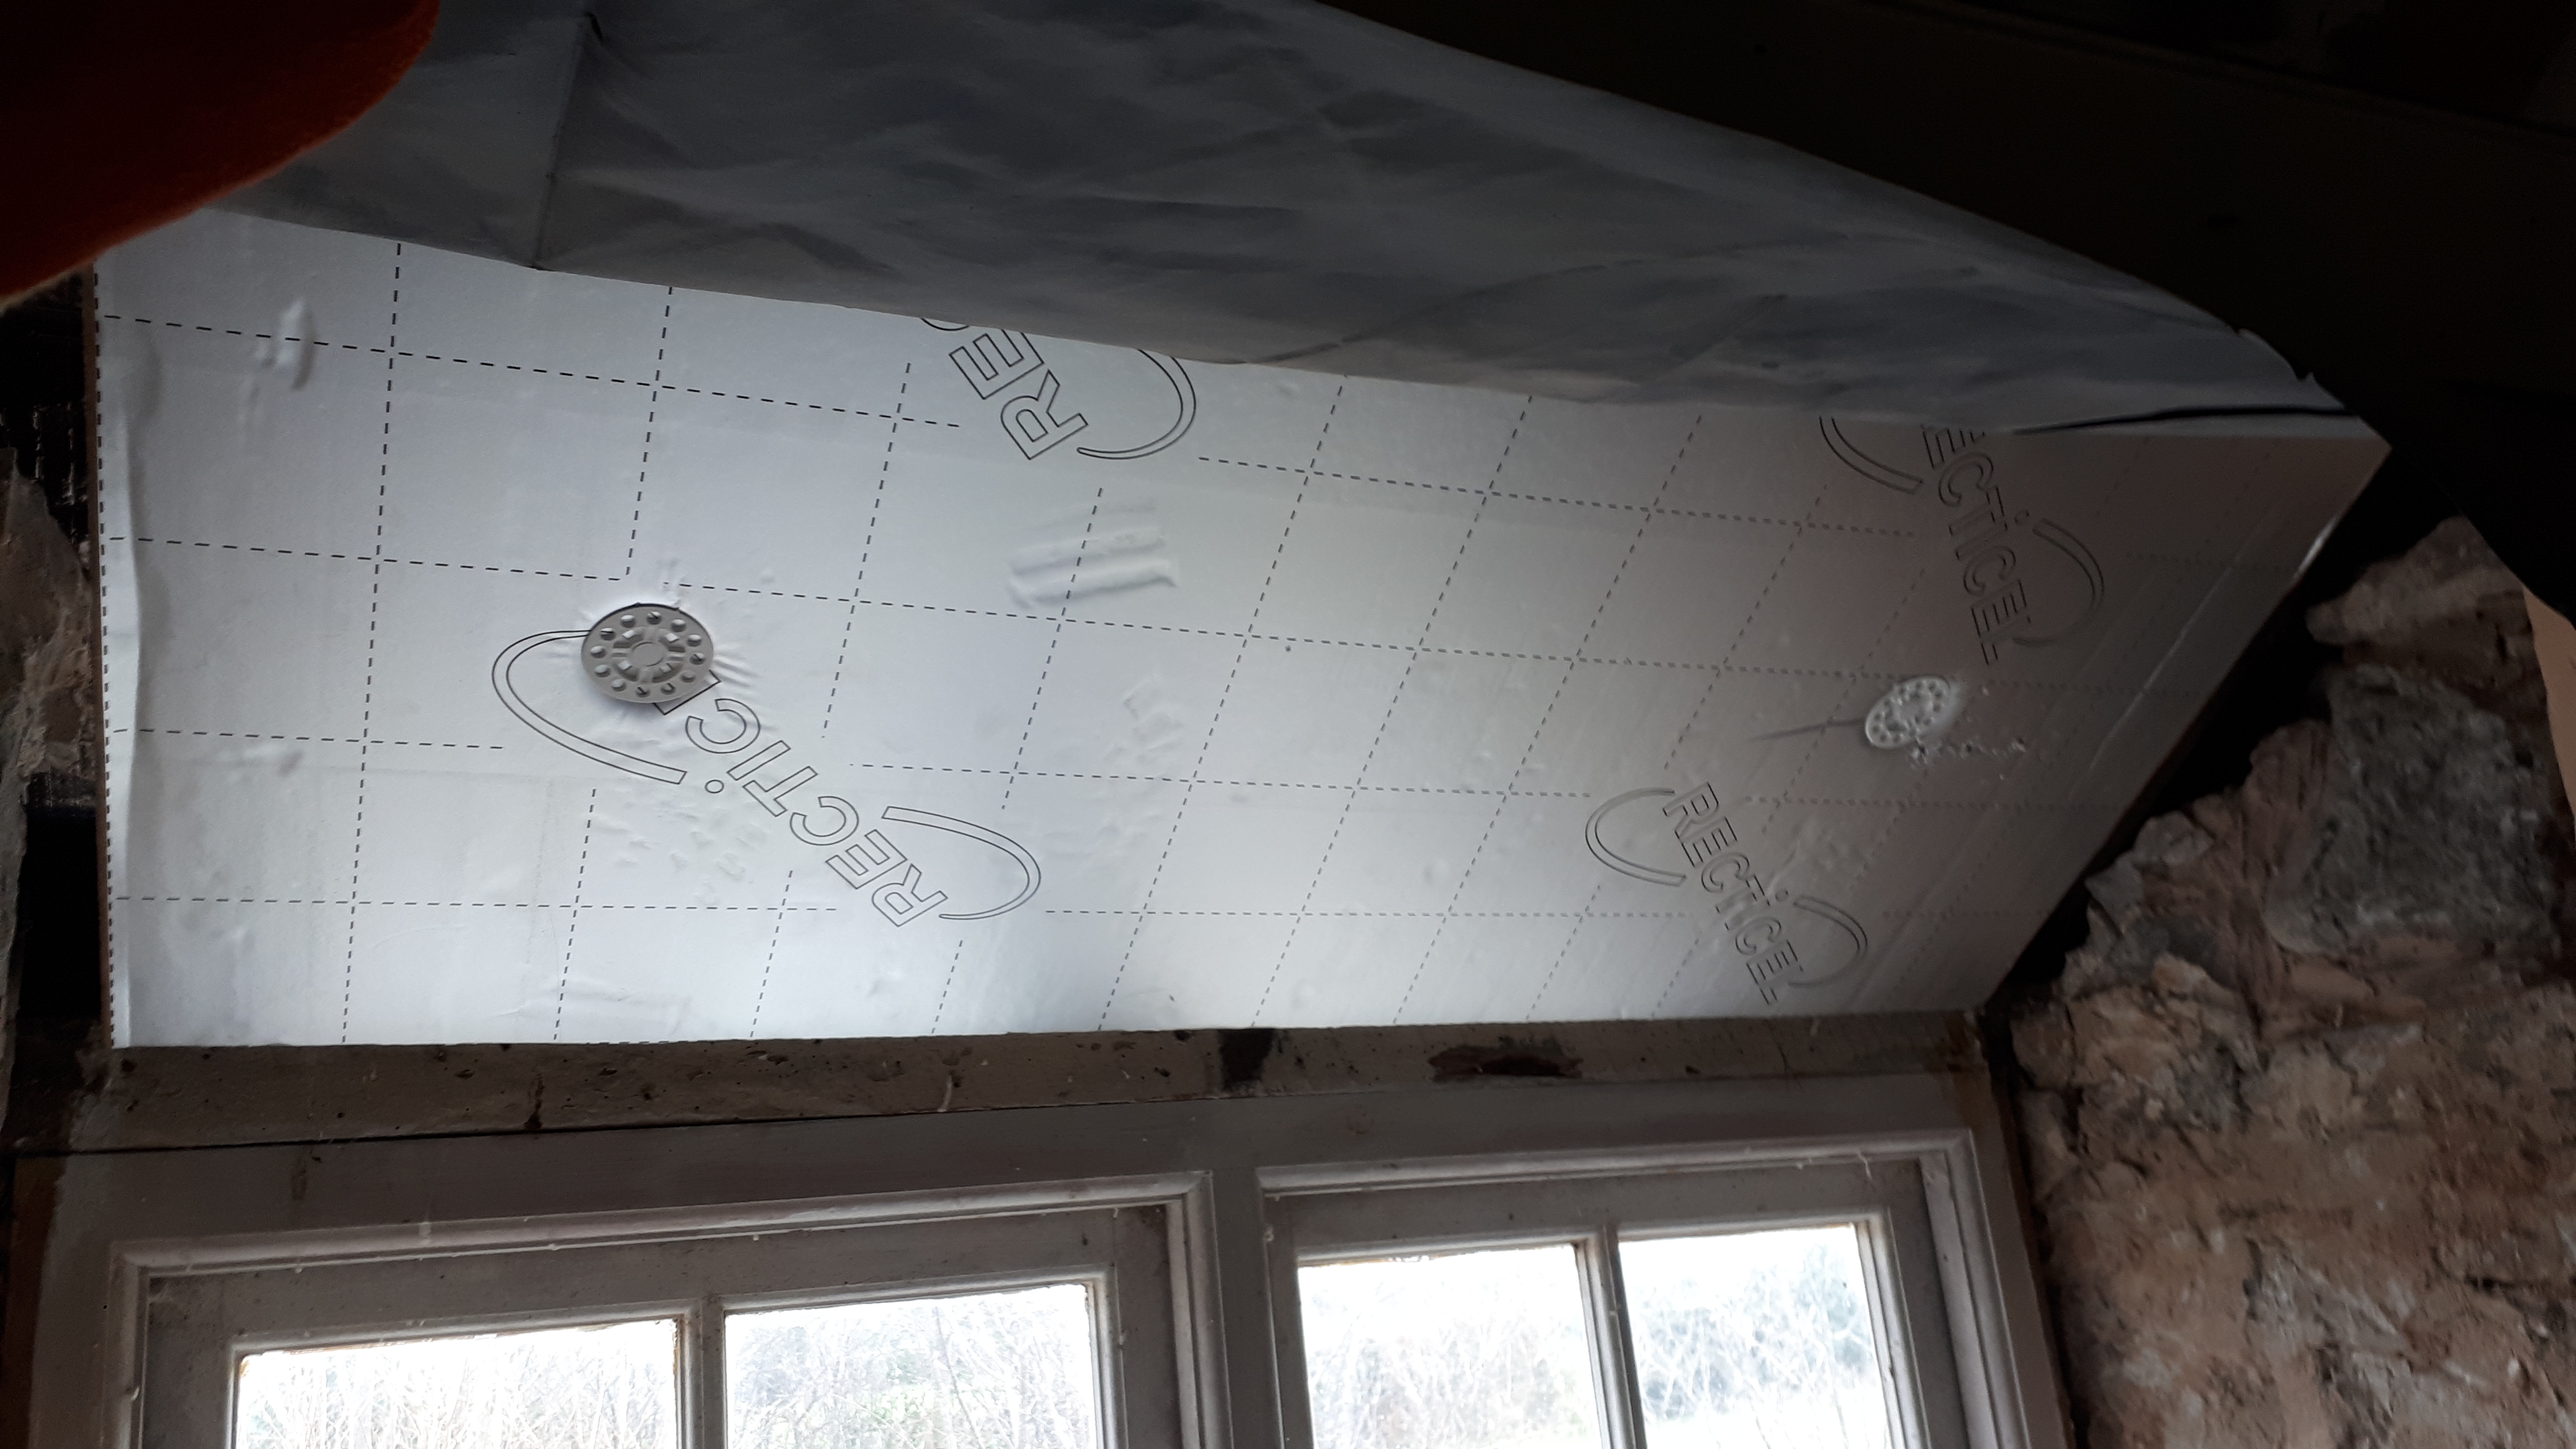
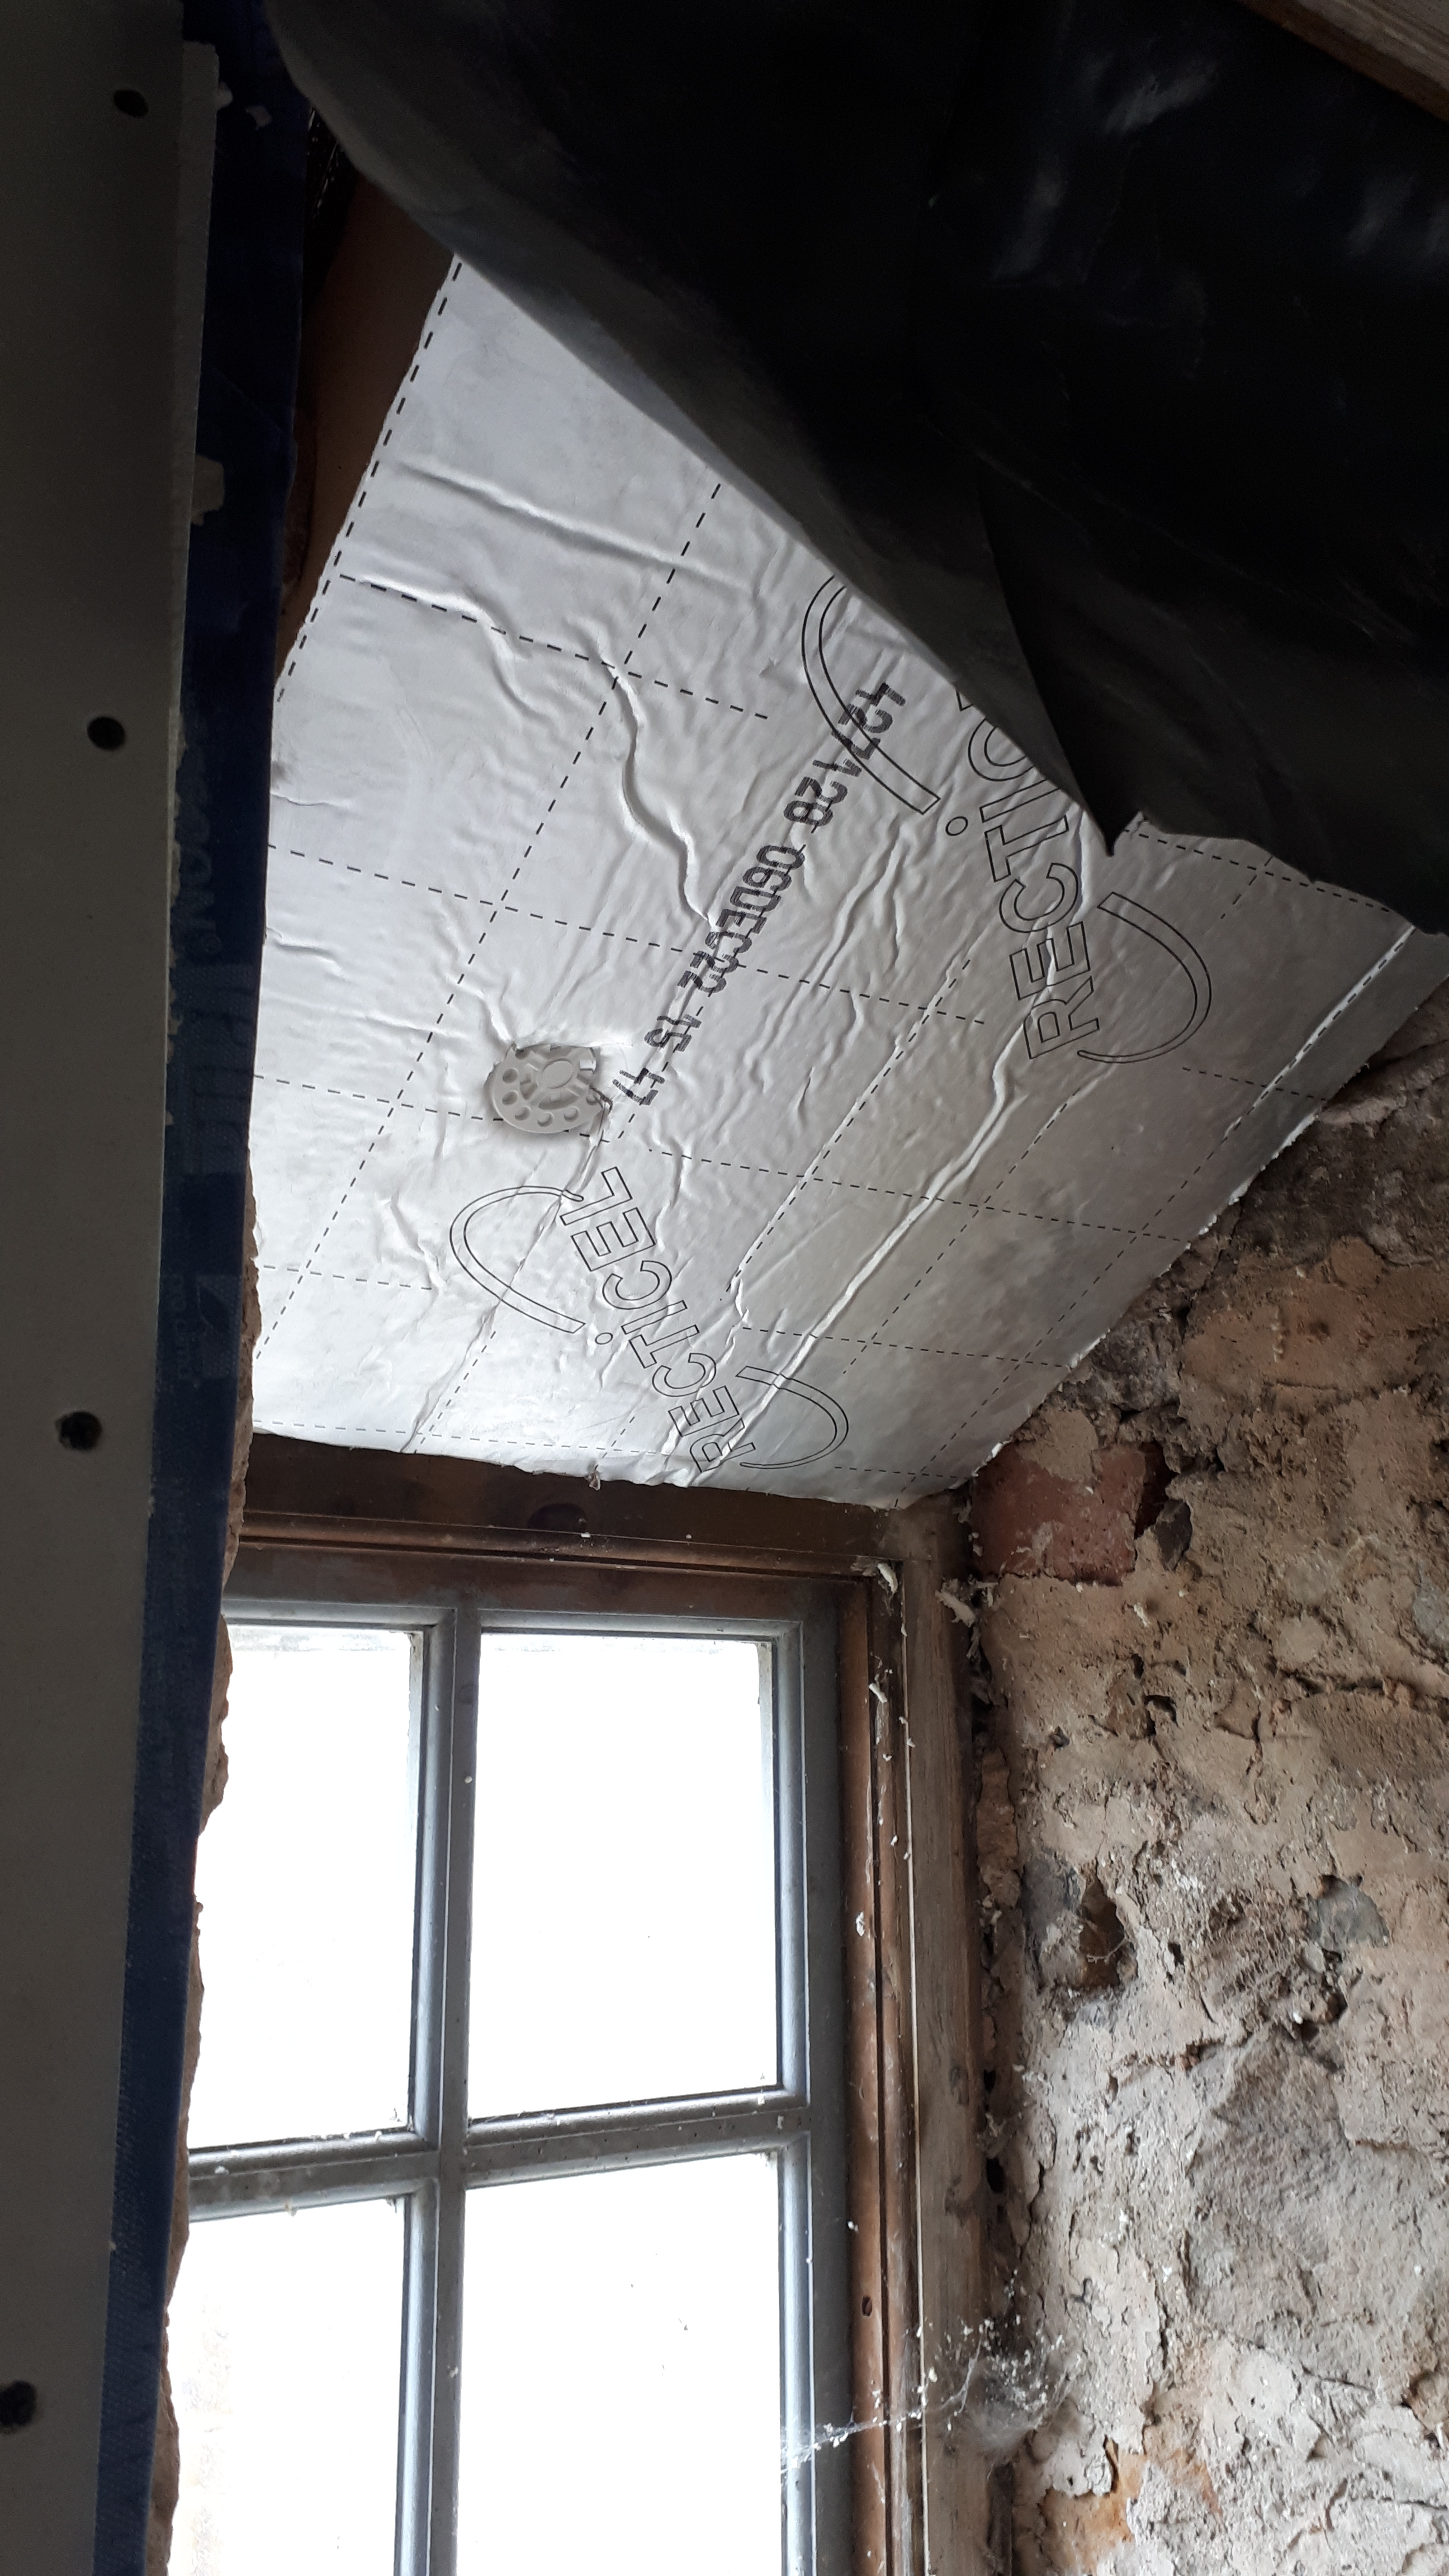
Upstairs Chris managed to complete a job that had previously annoyed us, installing the insulation board above the window recesses.
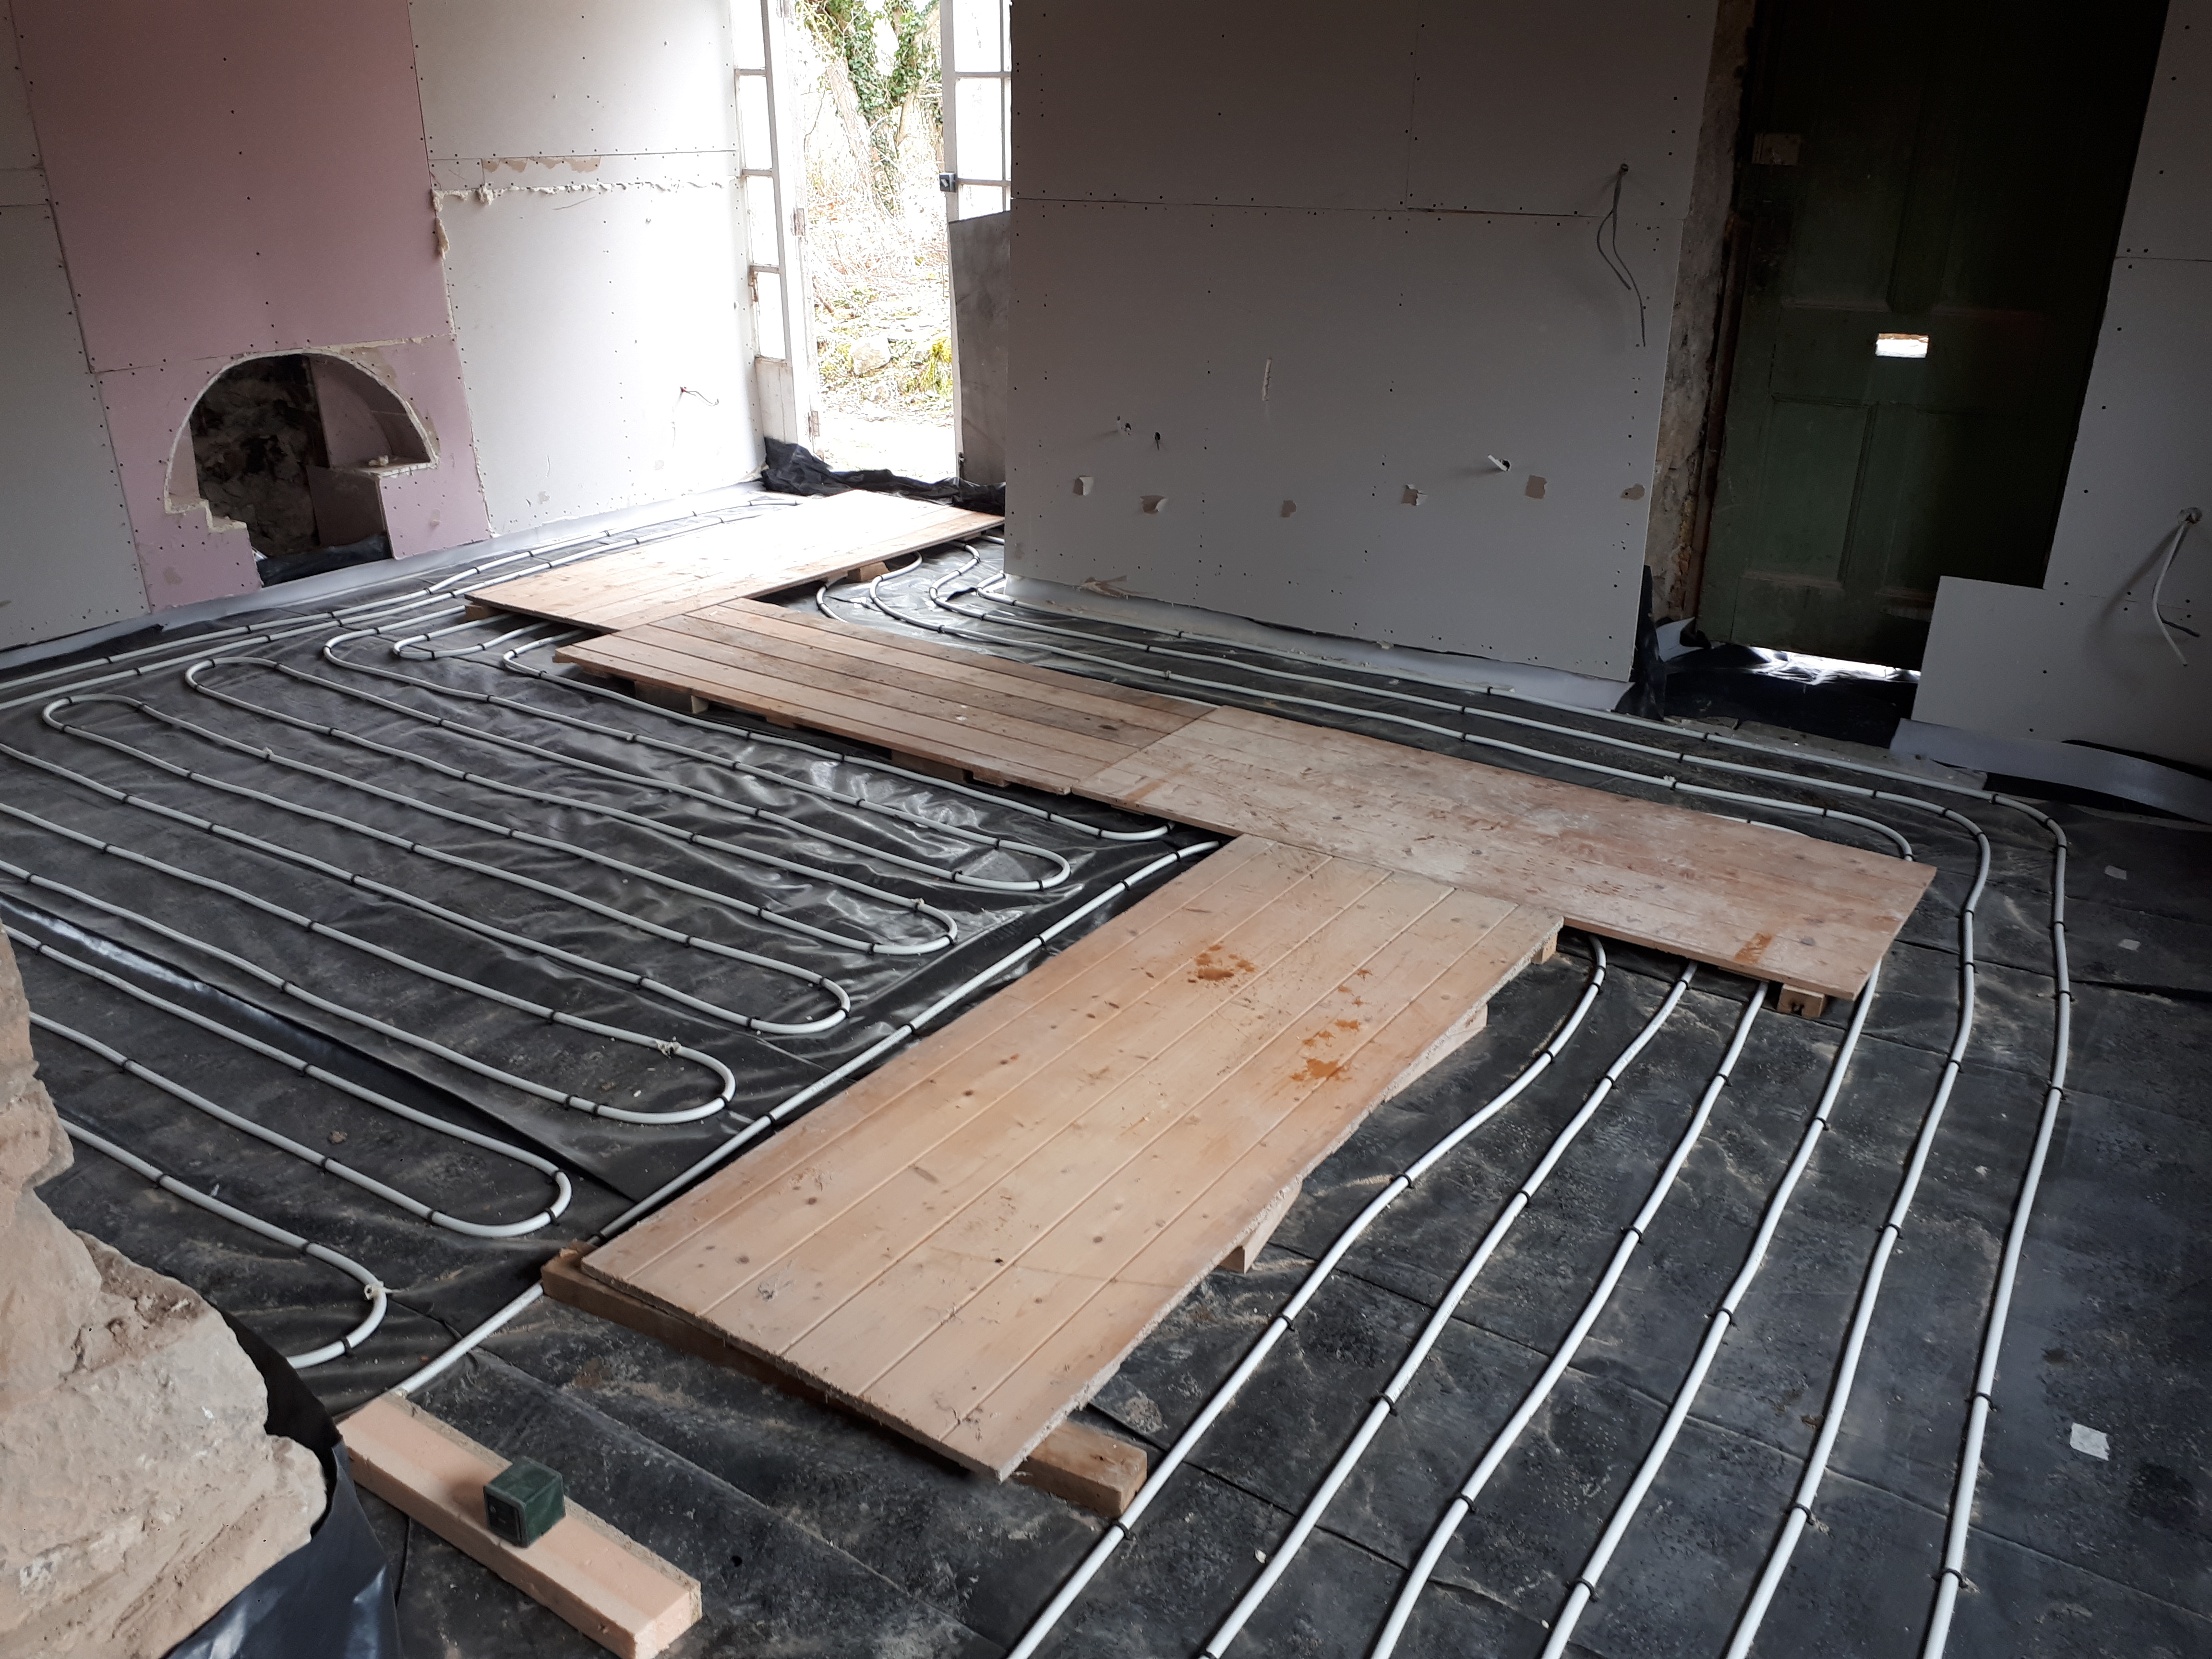
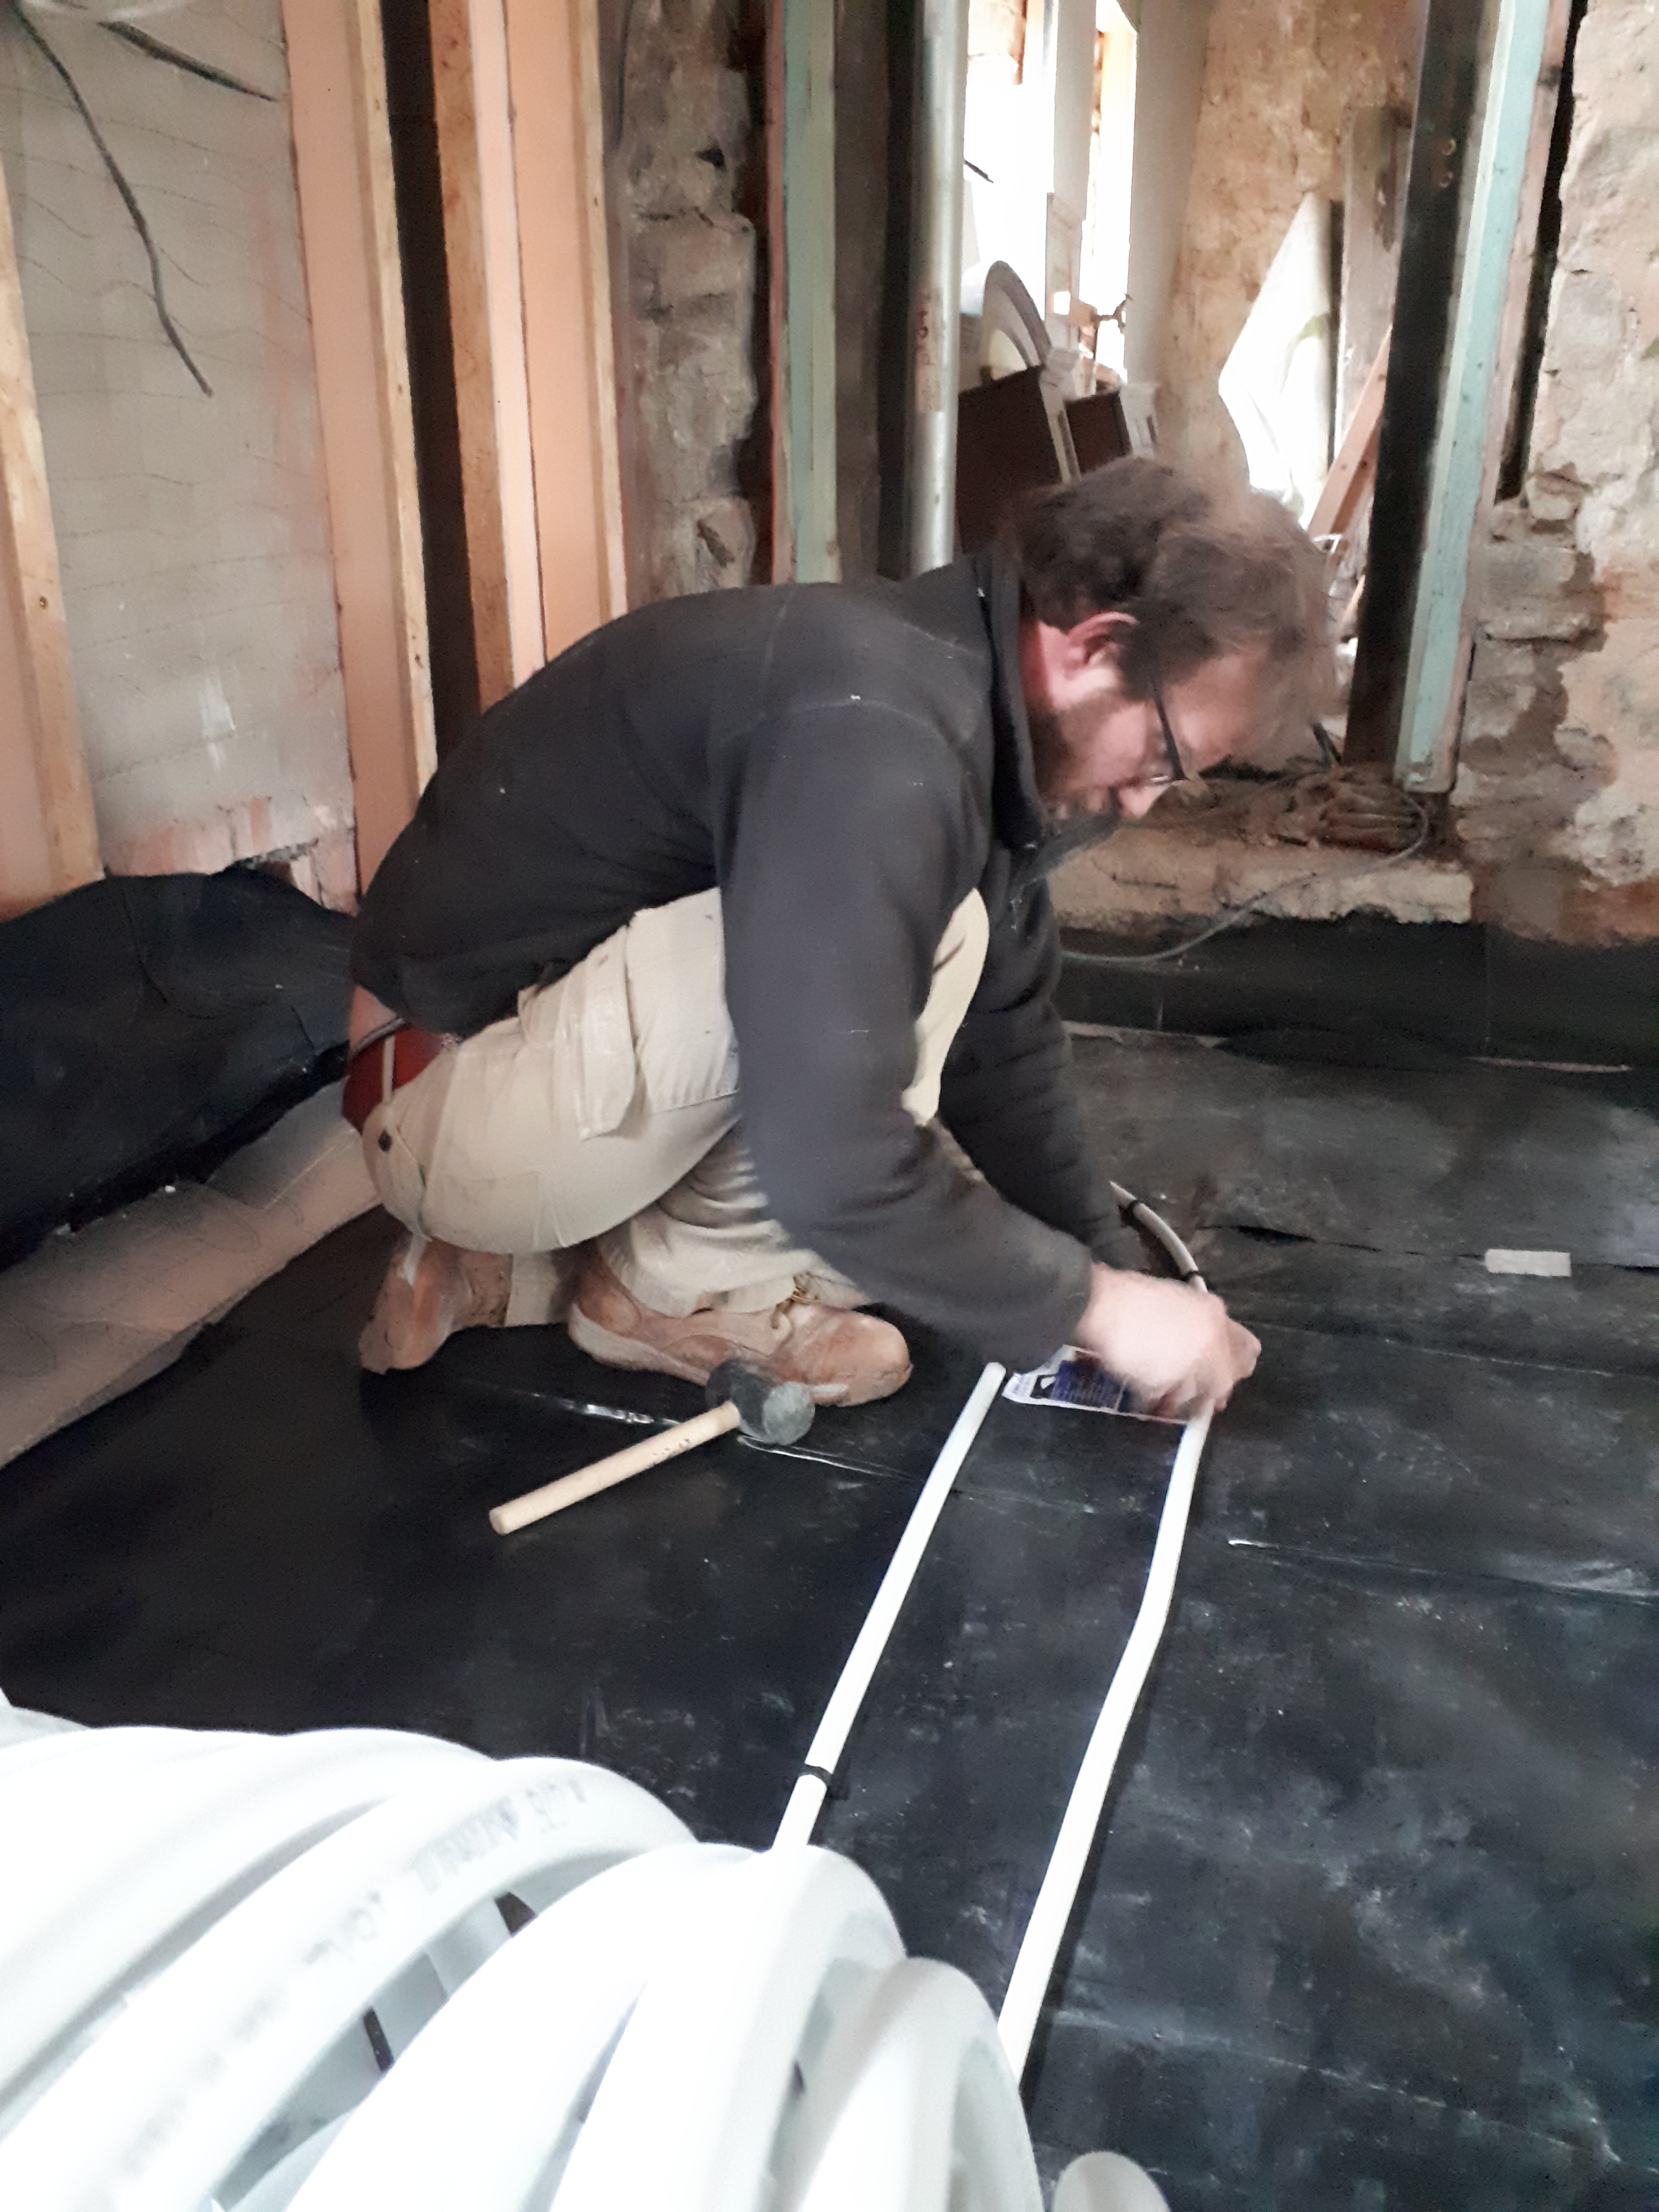
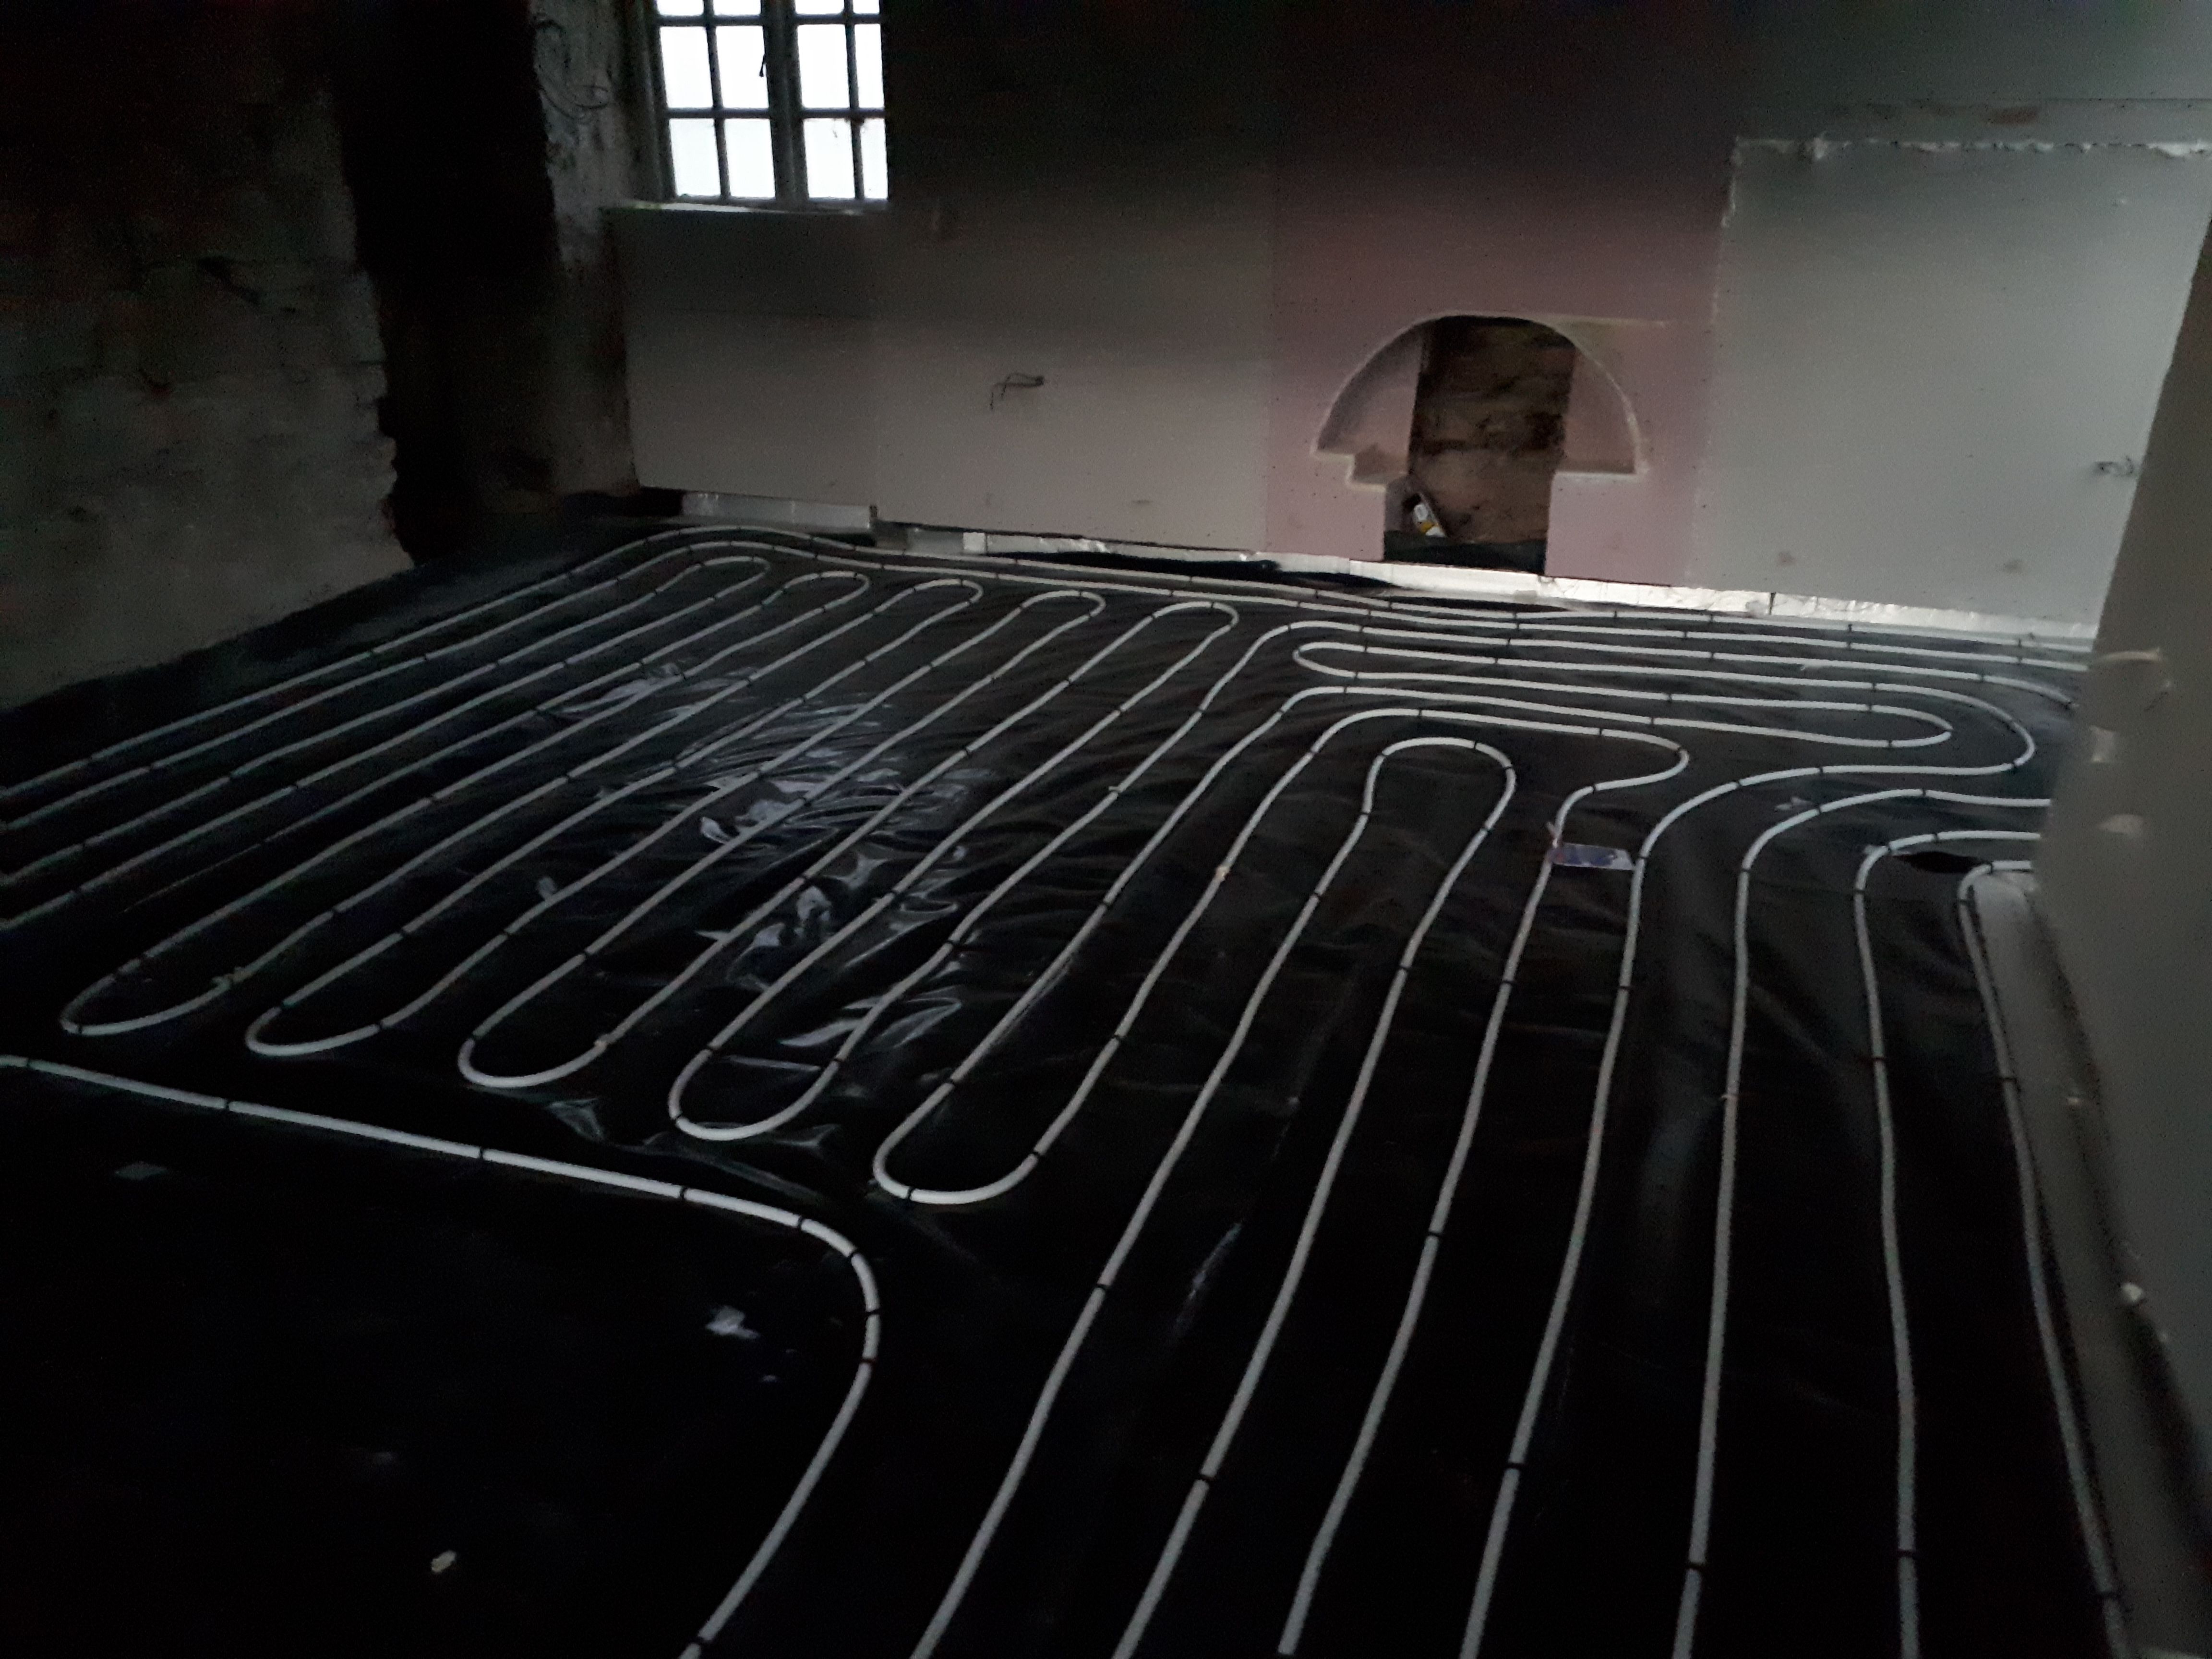
With the boards all fixed in place we laid another plastic sheet over the top, which would act as a slip sheet. Marking out where the kitchen cabinets would go we began laying out the underfloor heating pipe everywhere apart from under the future cabinets. It was surprisingly easy to install, unrolling the coil and using plastic clips to fasten it to the floor. It was important to keep the pipe around 20cm apart from the next run, and to end up back where we started, so we curved our way round the room with care.
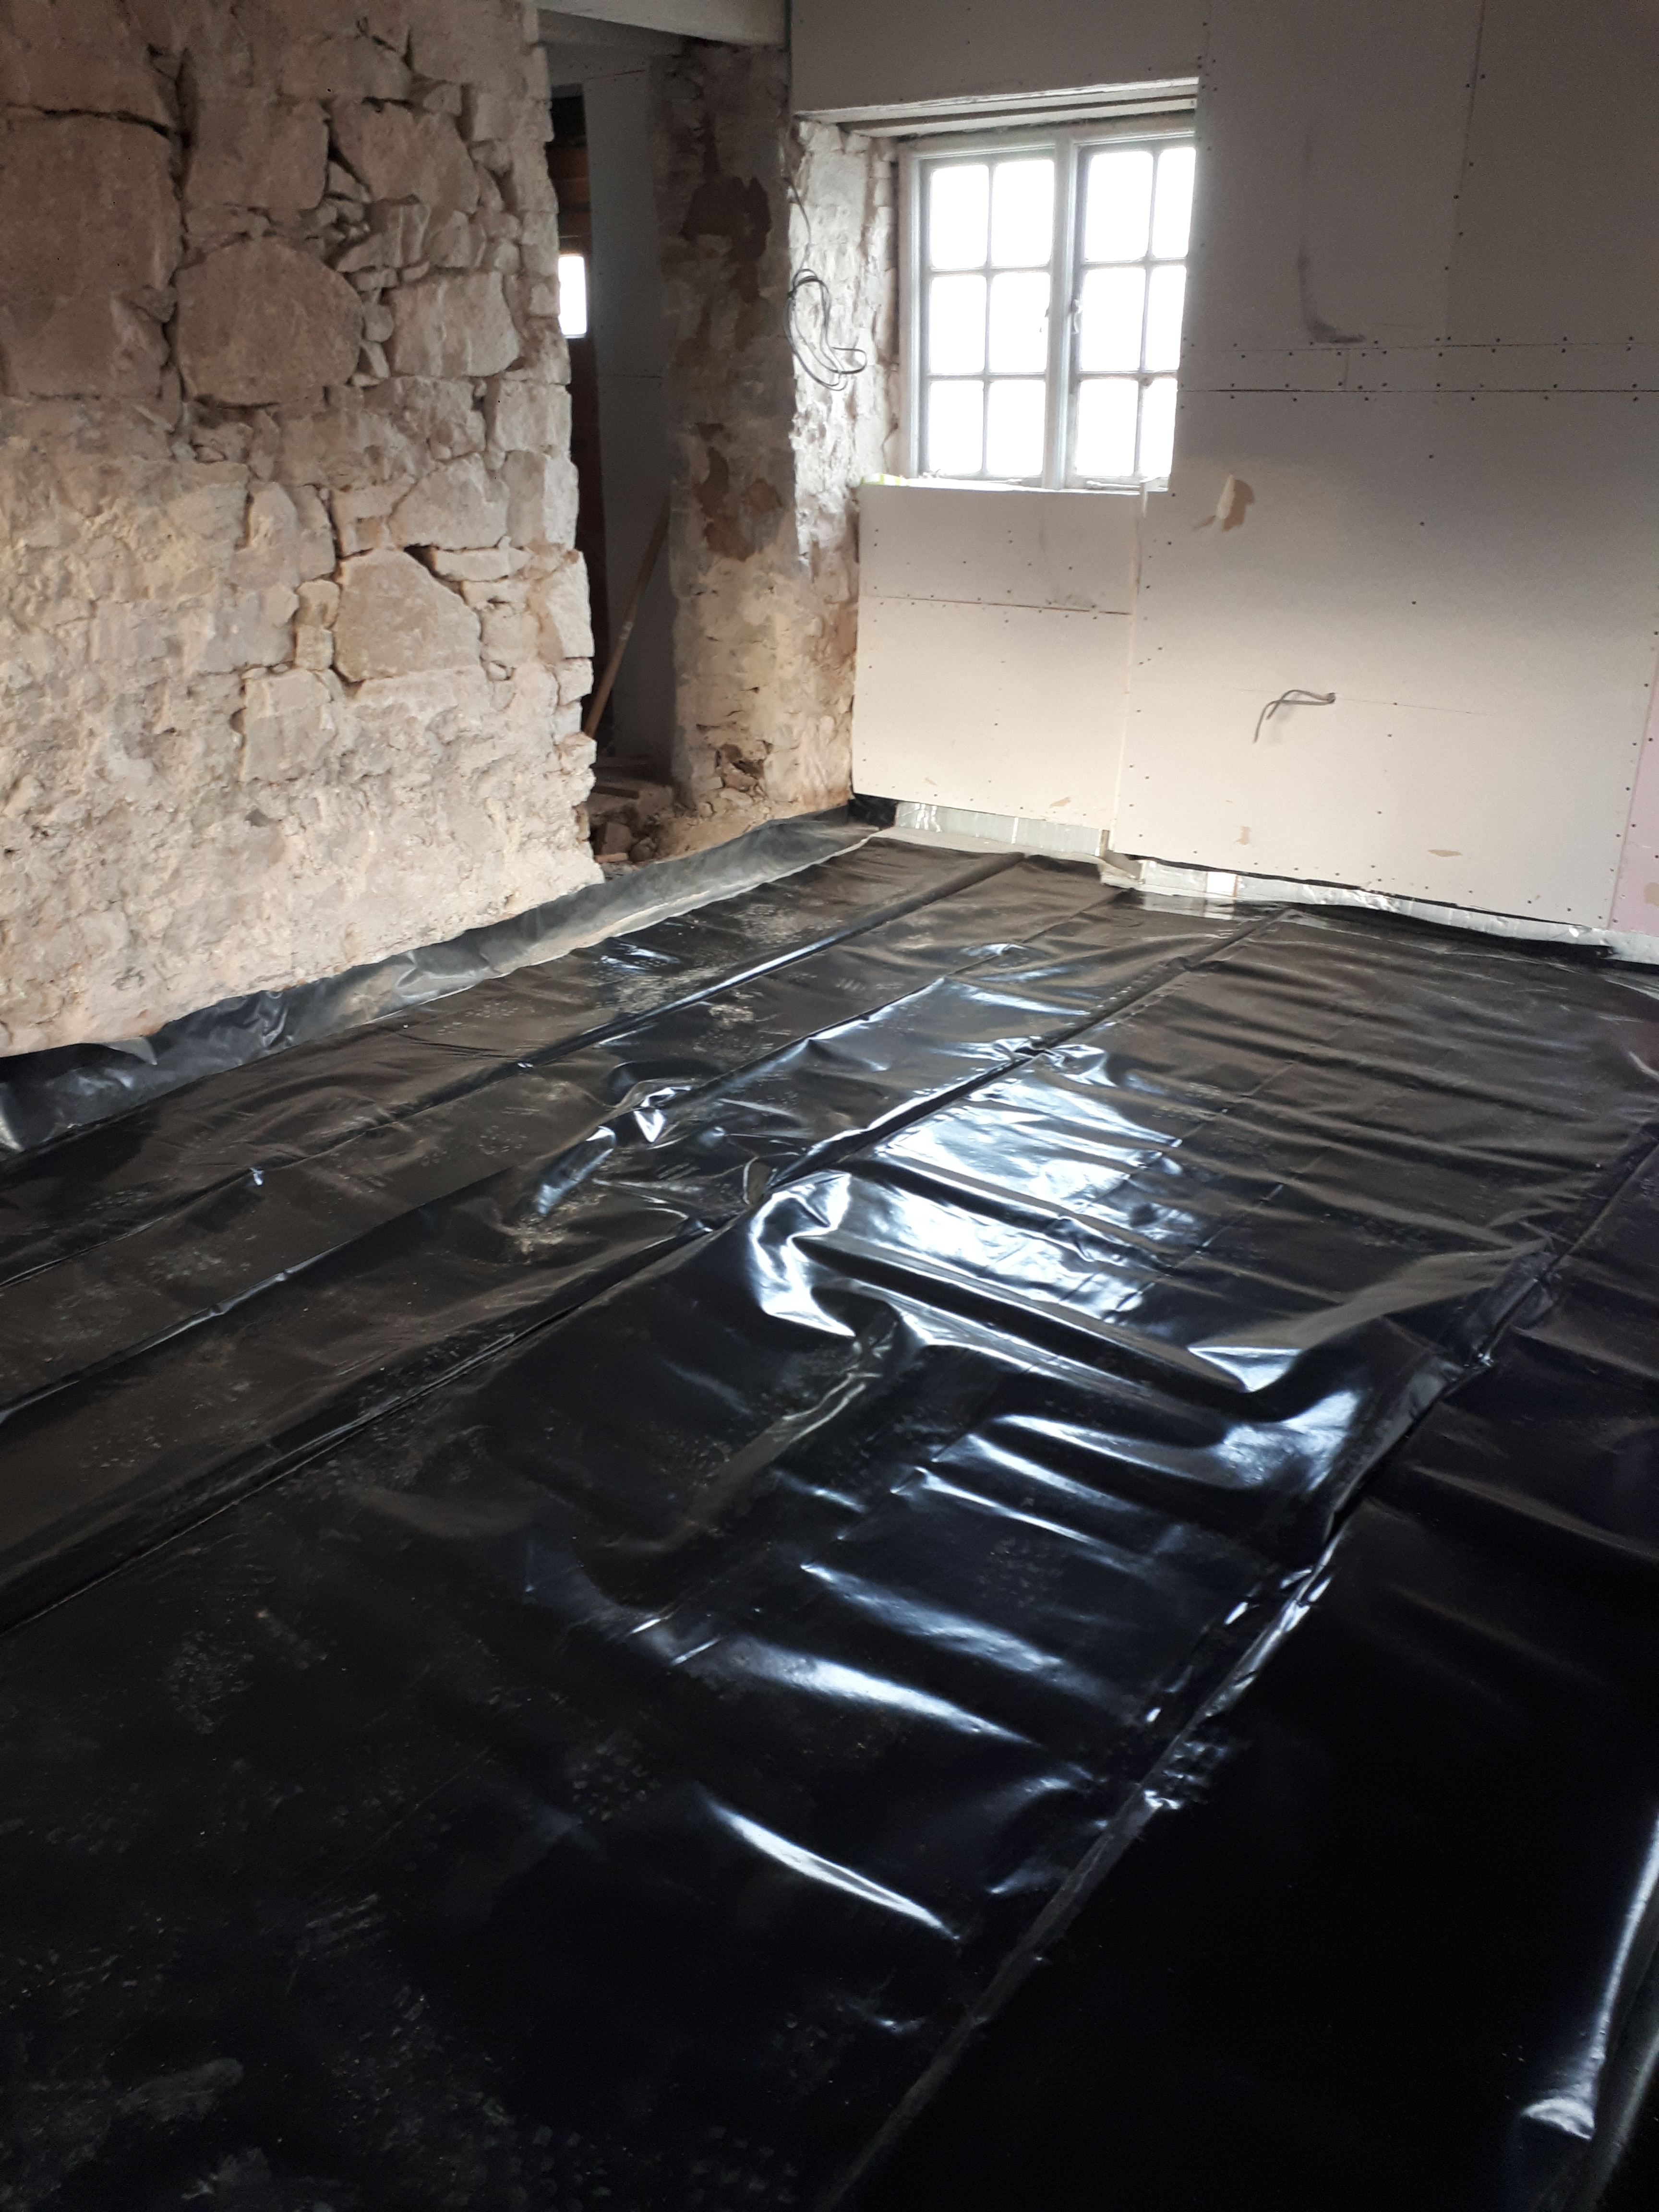
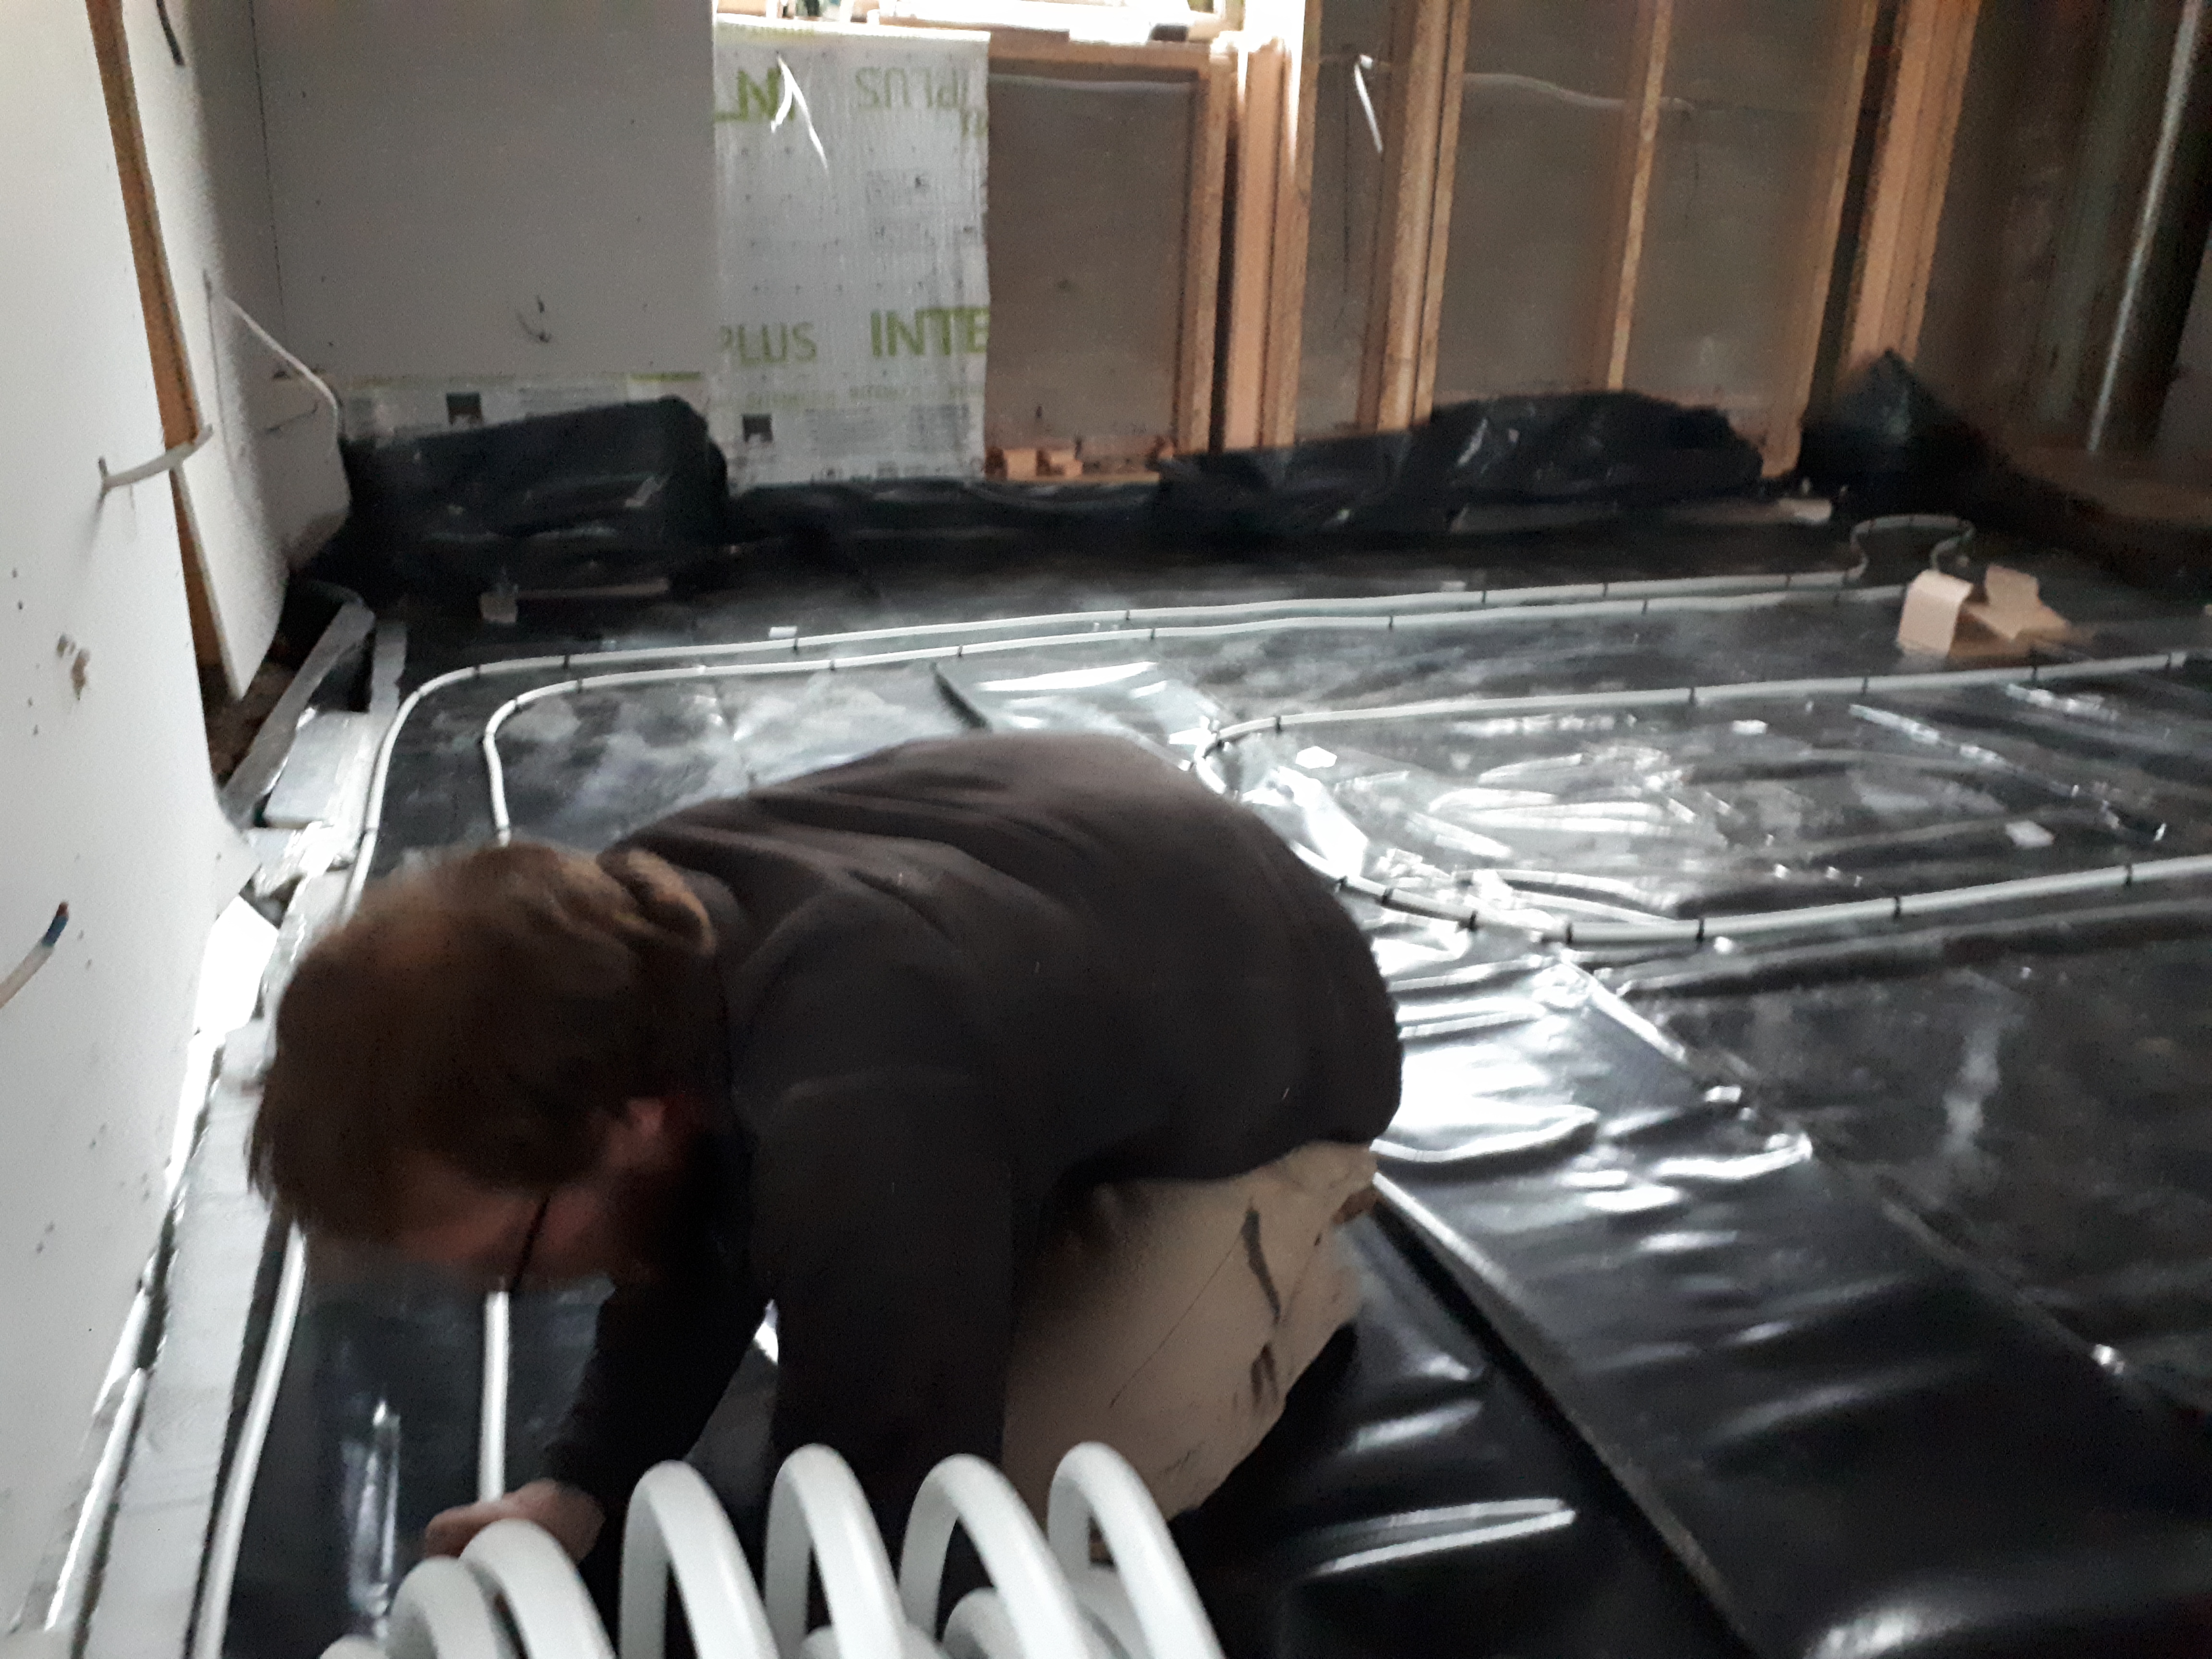
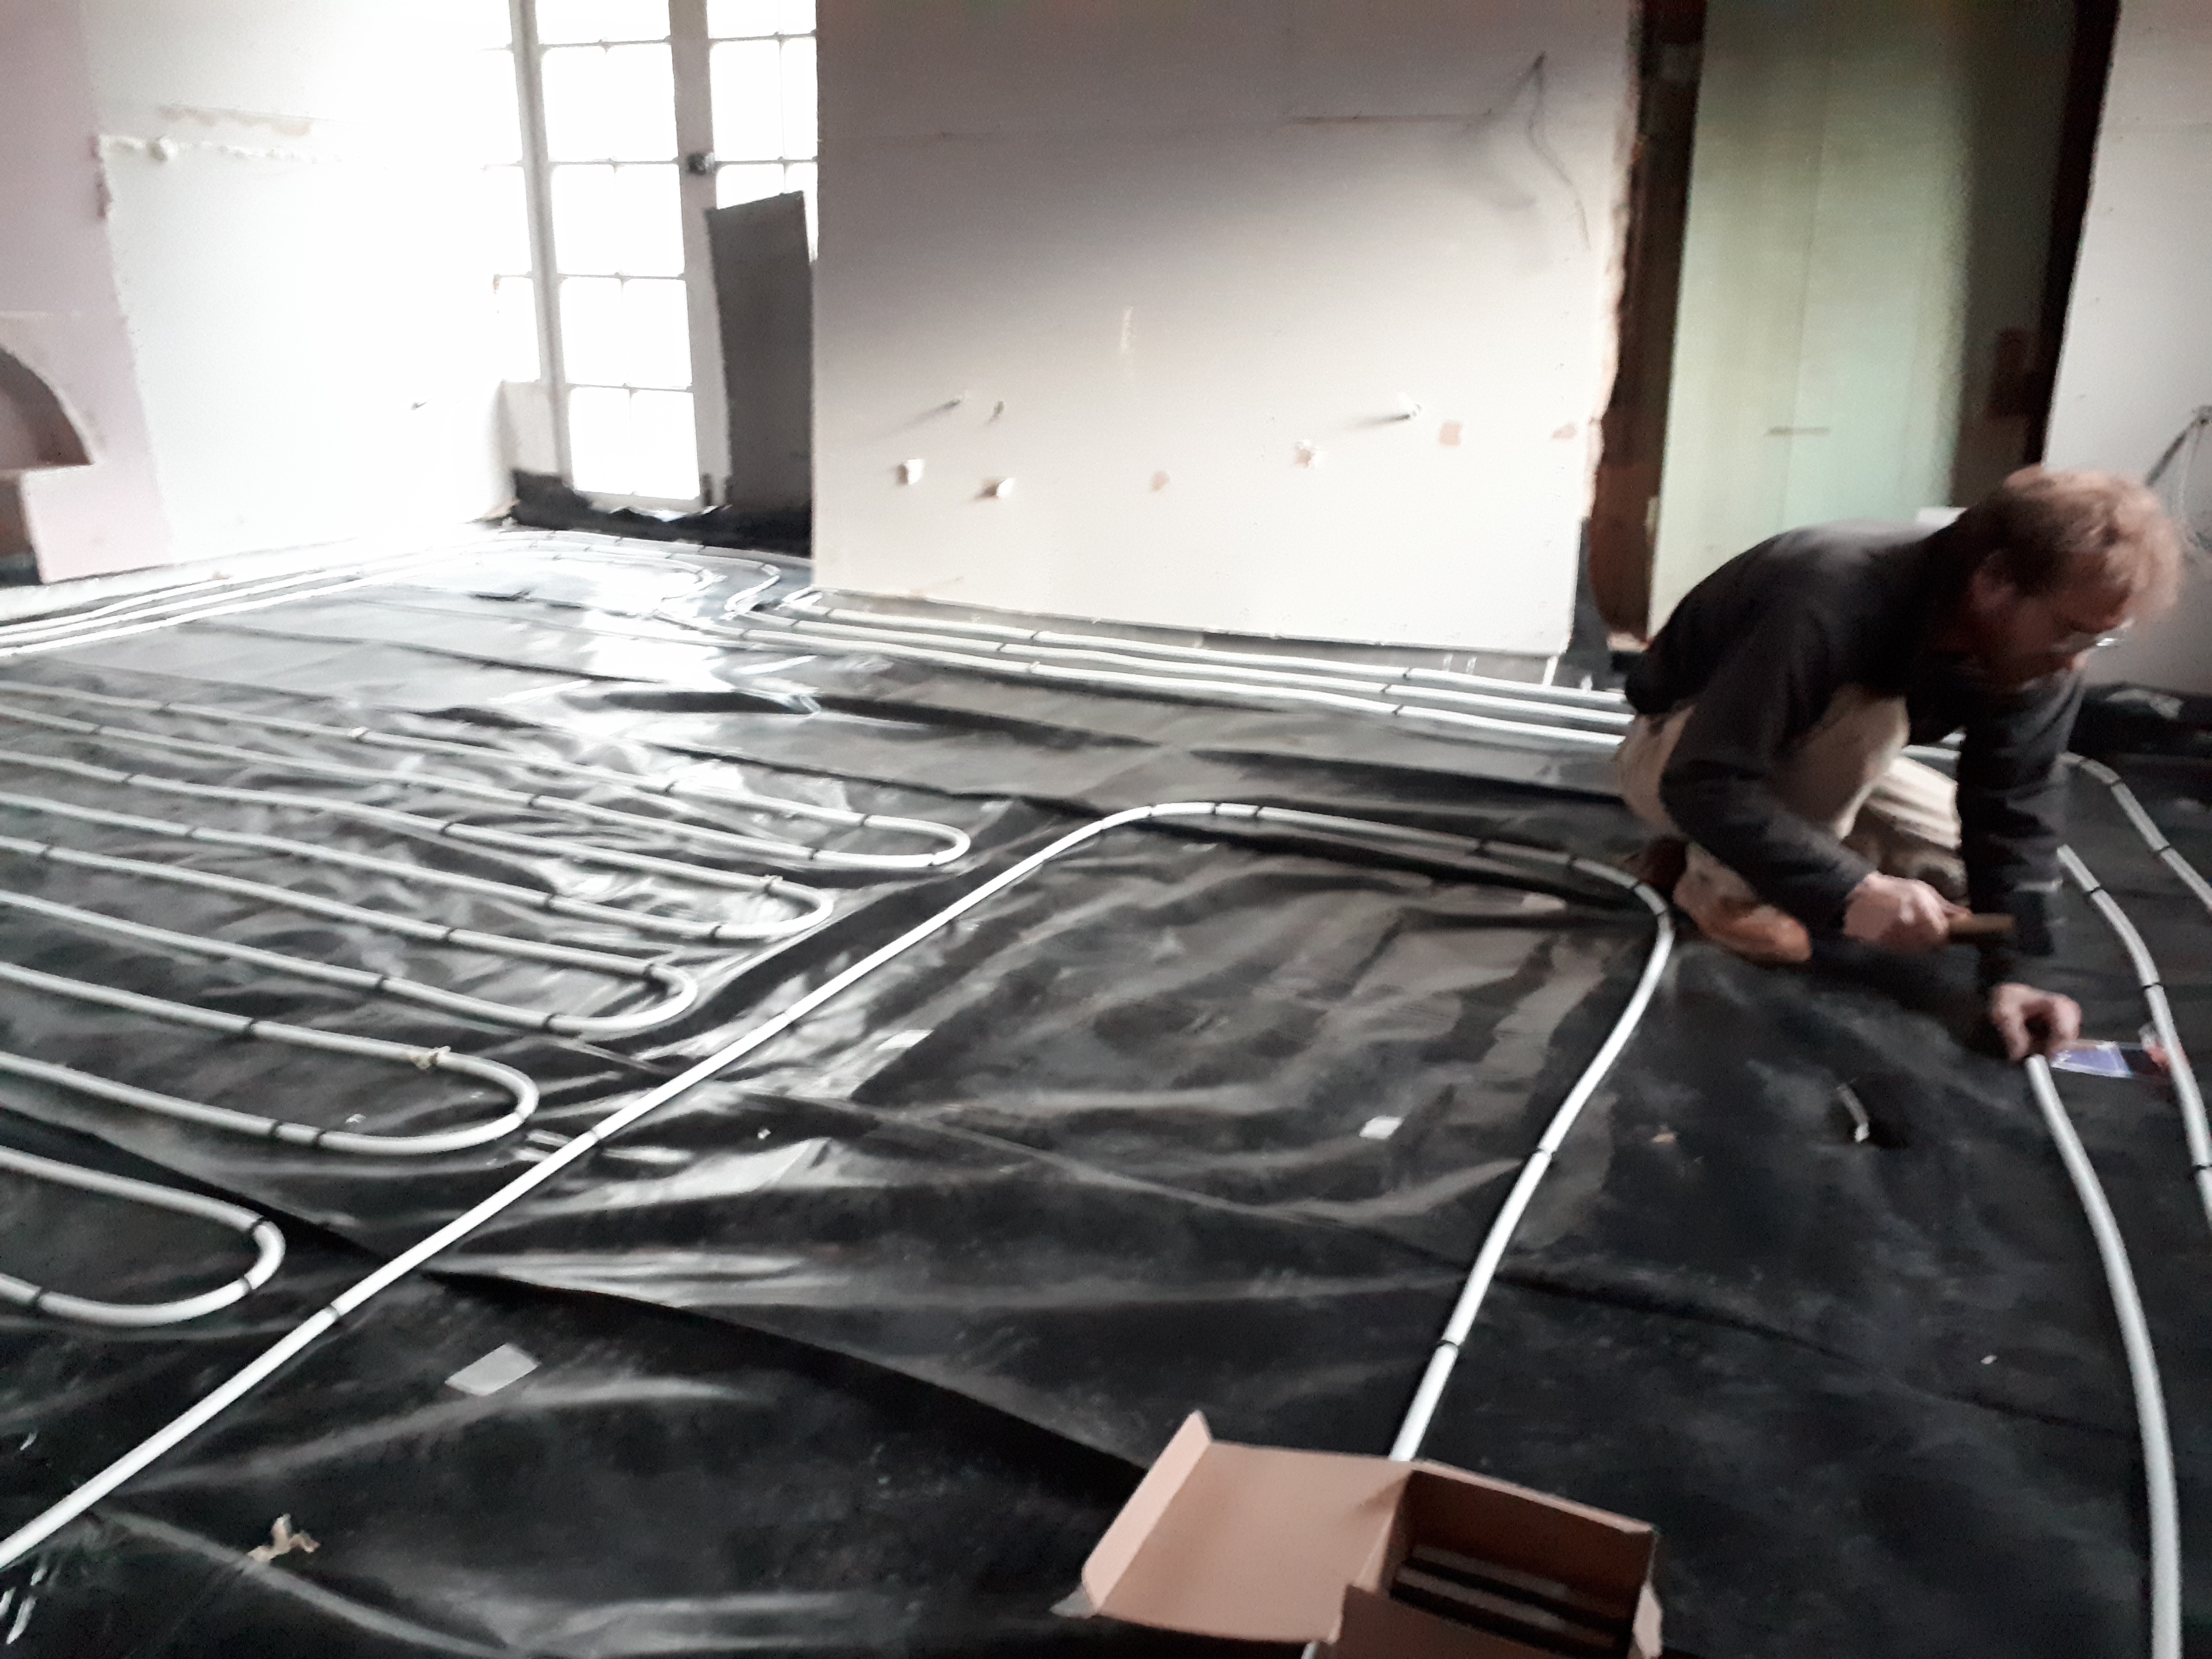
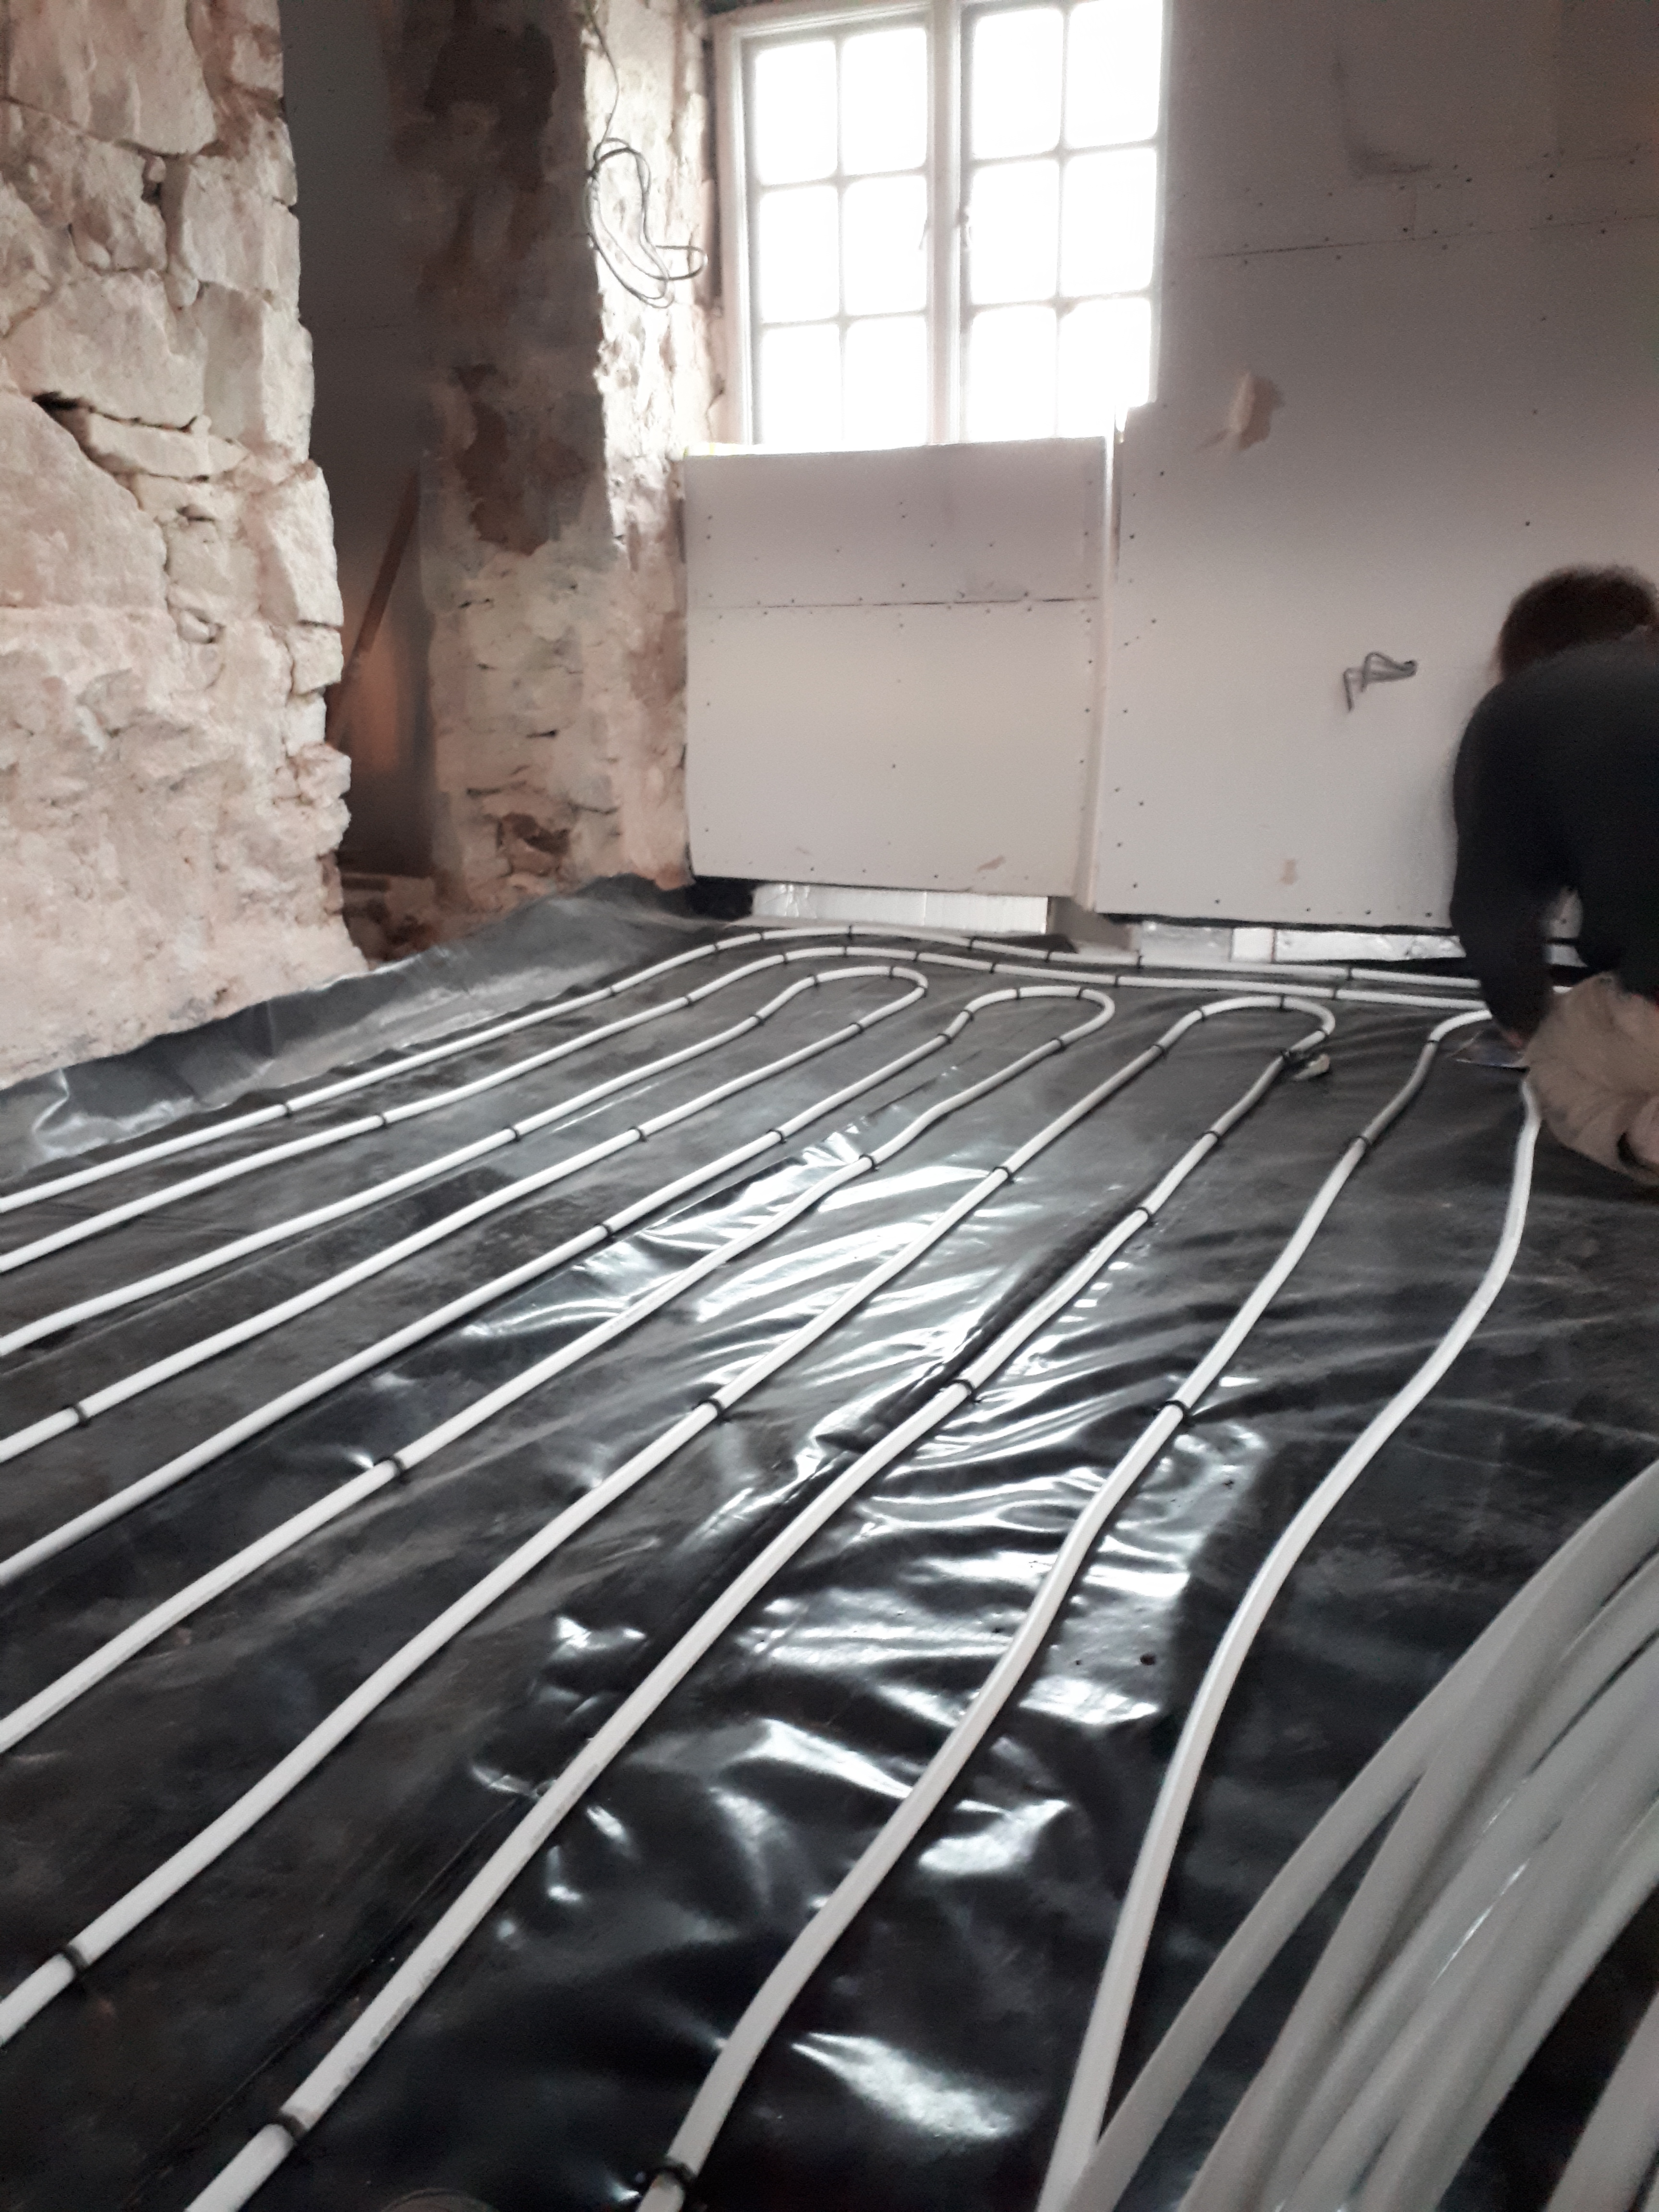
At the end it looked a pretty smart job, almost like we knew what we were doing. Finally the floor is ready for the concrete. Having initially thought we might mix the concrete ourselves we decided in the end to order a cement lorry. Always nice if someone else can do some of the hard work.
As the shell of the house slowly gets closer to completion Chris has been hunting down some bargains. He managed to win a £400 shower door and tray at an auction for £30, and picked up a toilet someone was getting rid of for free. With the concrete floor so close to completion we’re just getting ready to bid on a used kitchen. He keeps reminding me we have a lot of do still, but it’s feeling more and more like a liveable house with ever step we take. Which is lucky when our own house sale is now in the hands of the solicitors…
-
Undermining
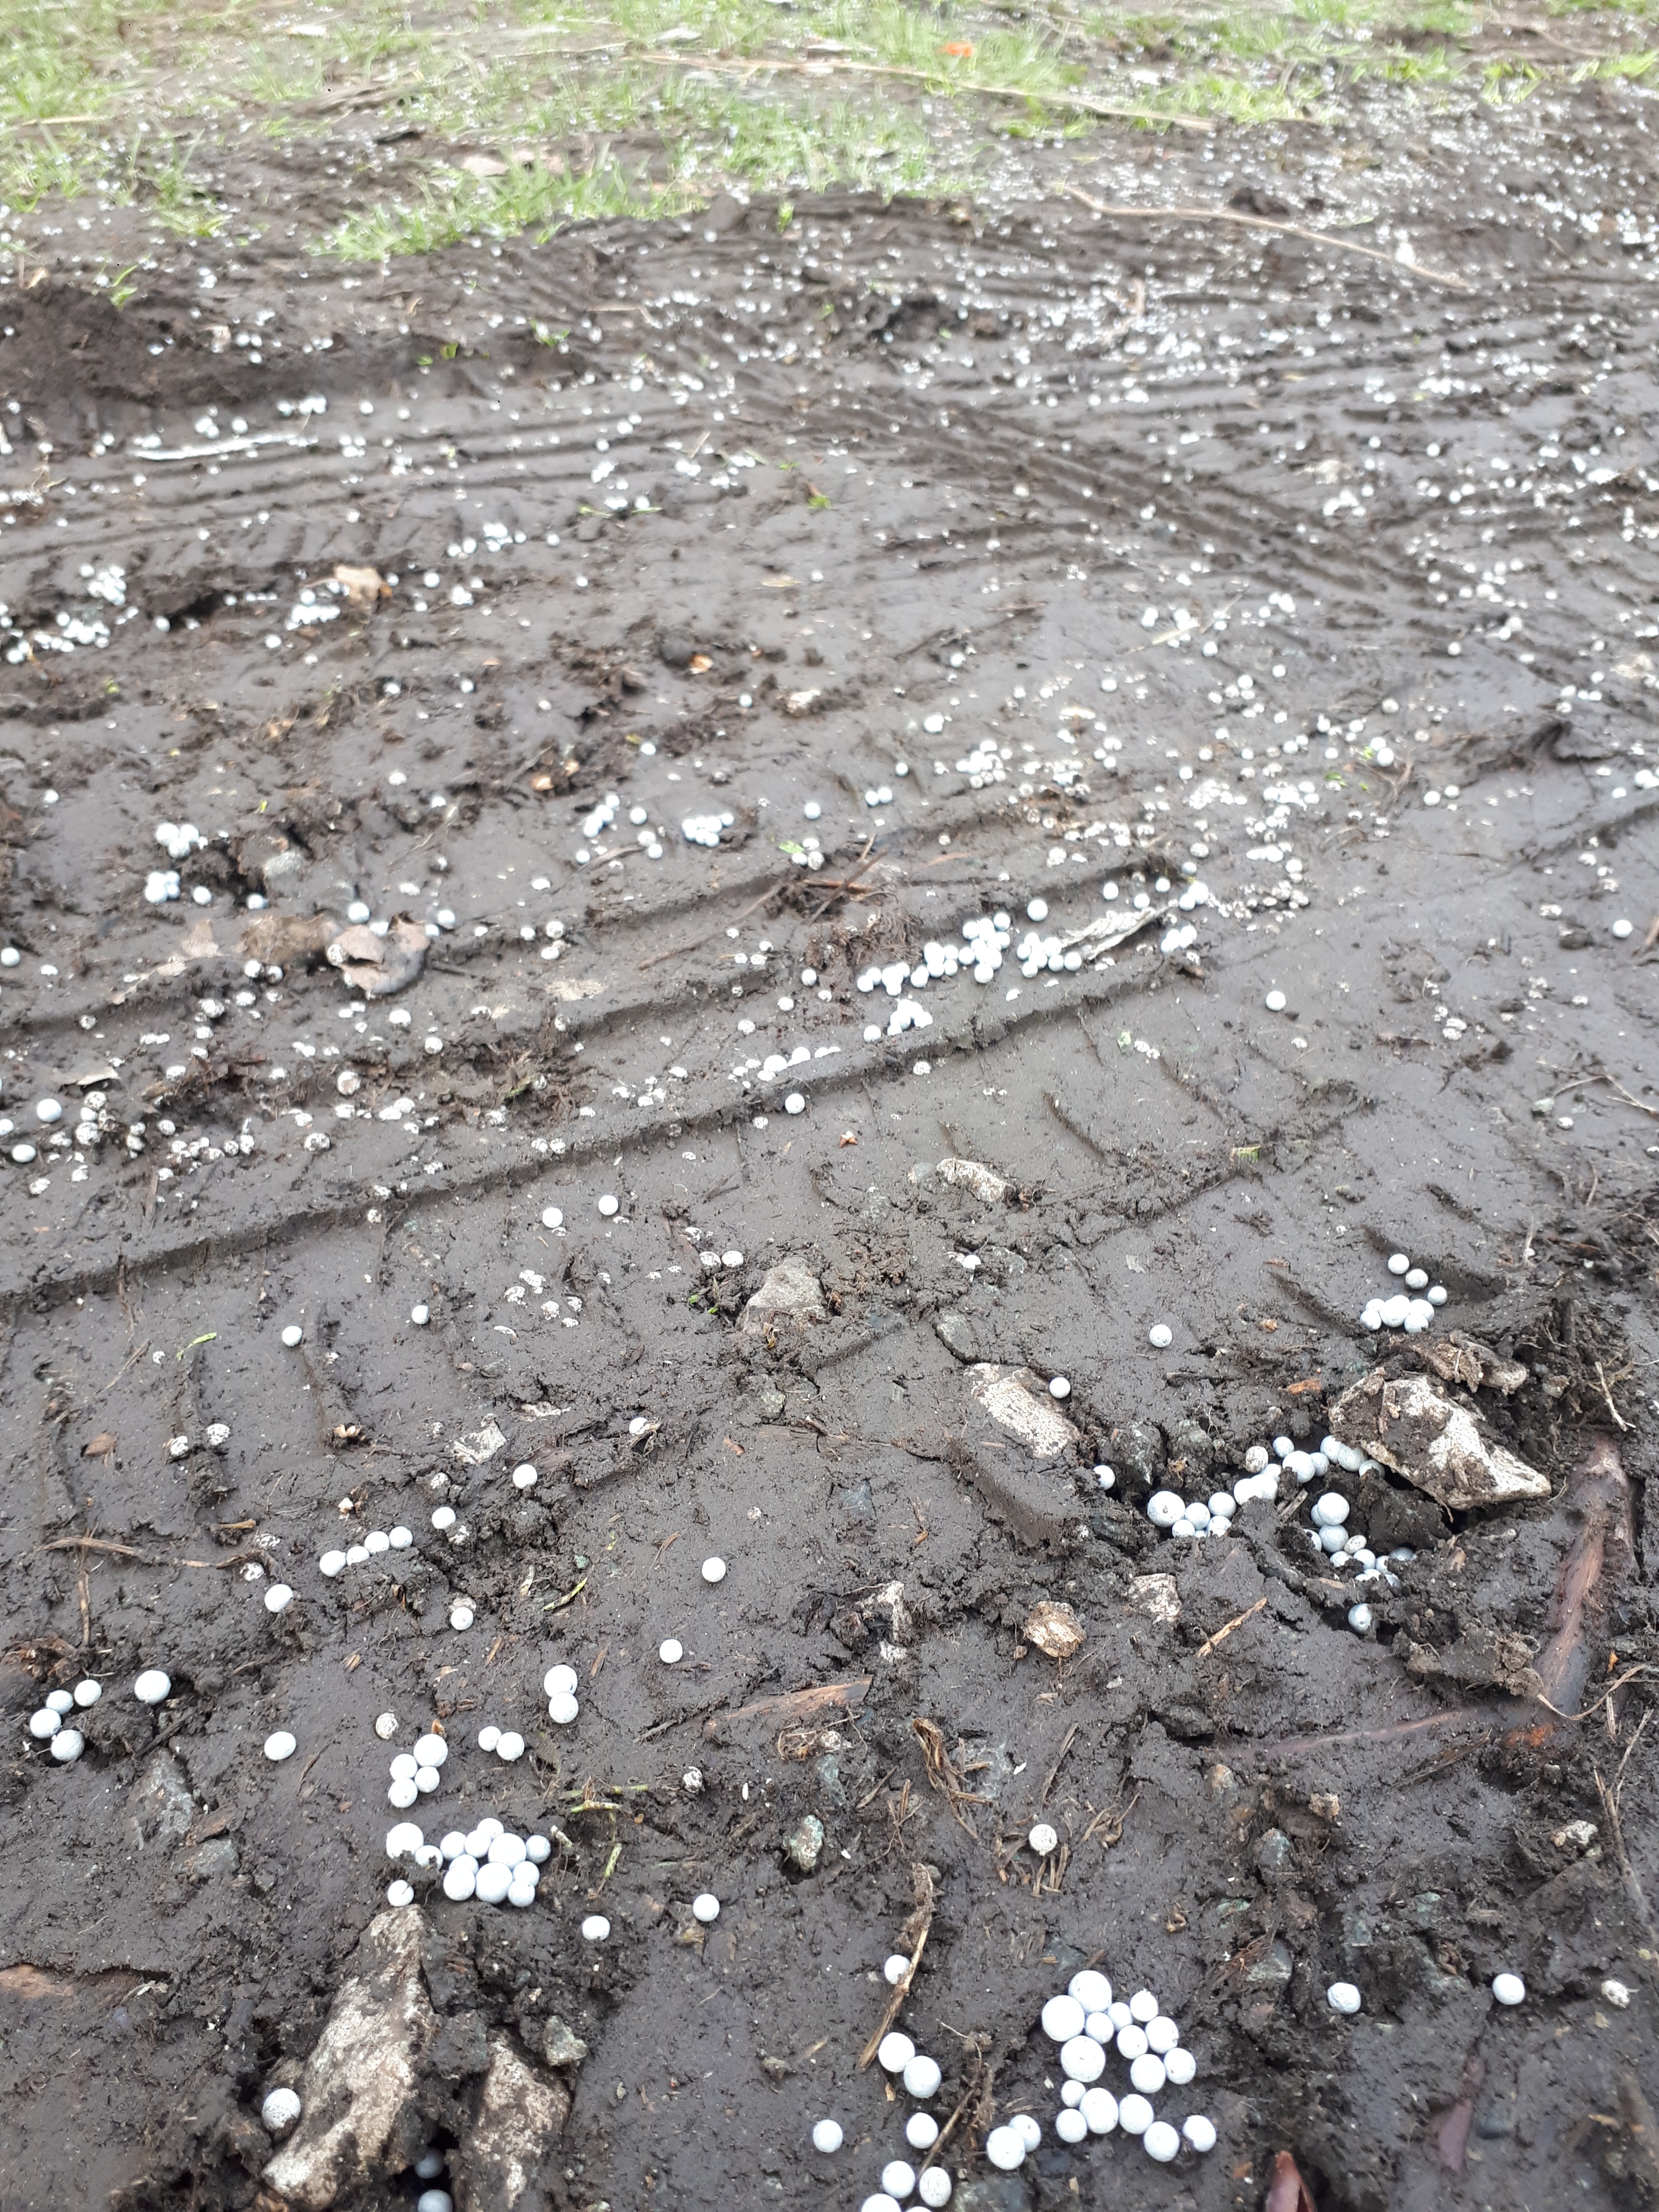
Around a week ago we arrived at the house to find our insulation installers had had a bit of an accident. Opening their van something must have tumbled out, spilling thousands of polystyrene balls onto our drive. As environmentalists the sight of all this litter was horrifying. Unfortunately, we didn’t have a hoover to attempt a clean up. Remembering this weekend to bring a hoover I set to work trying to clean up the mess. Sadly, lots of the balls had already been trodden into the mud, making it really difficult to get everything. Still the hoover did its job and I got the vast majority off our drive. Bring on the day when all polystyrene is banned!
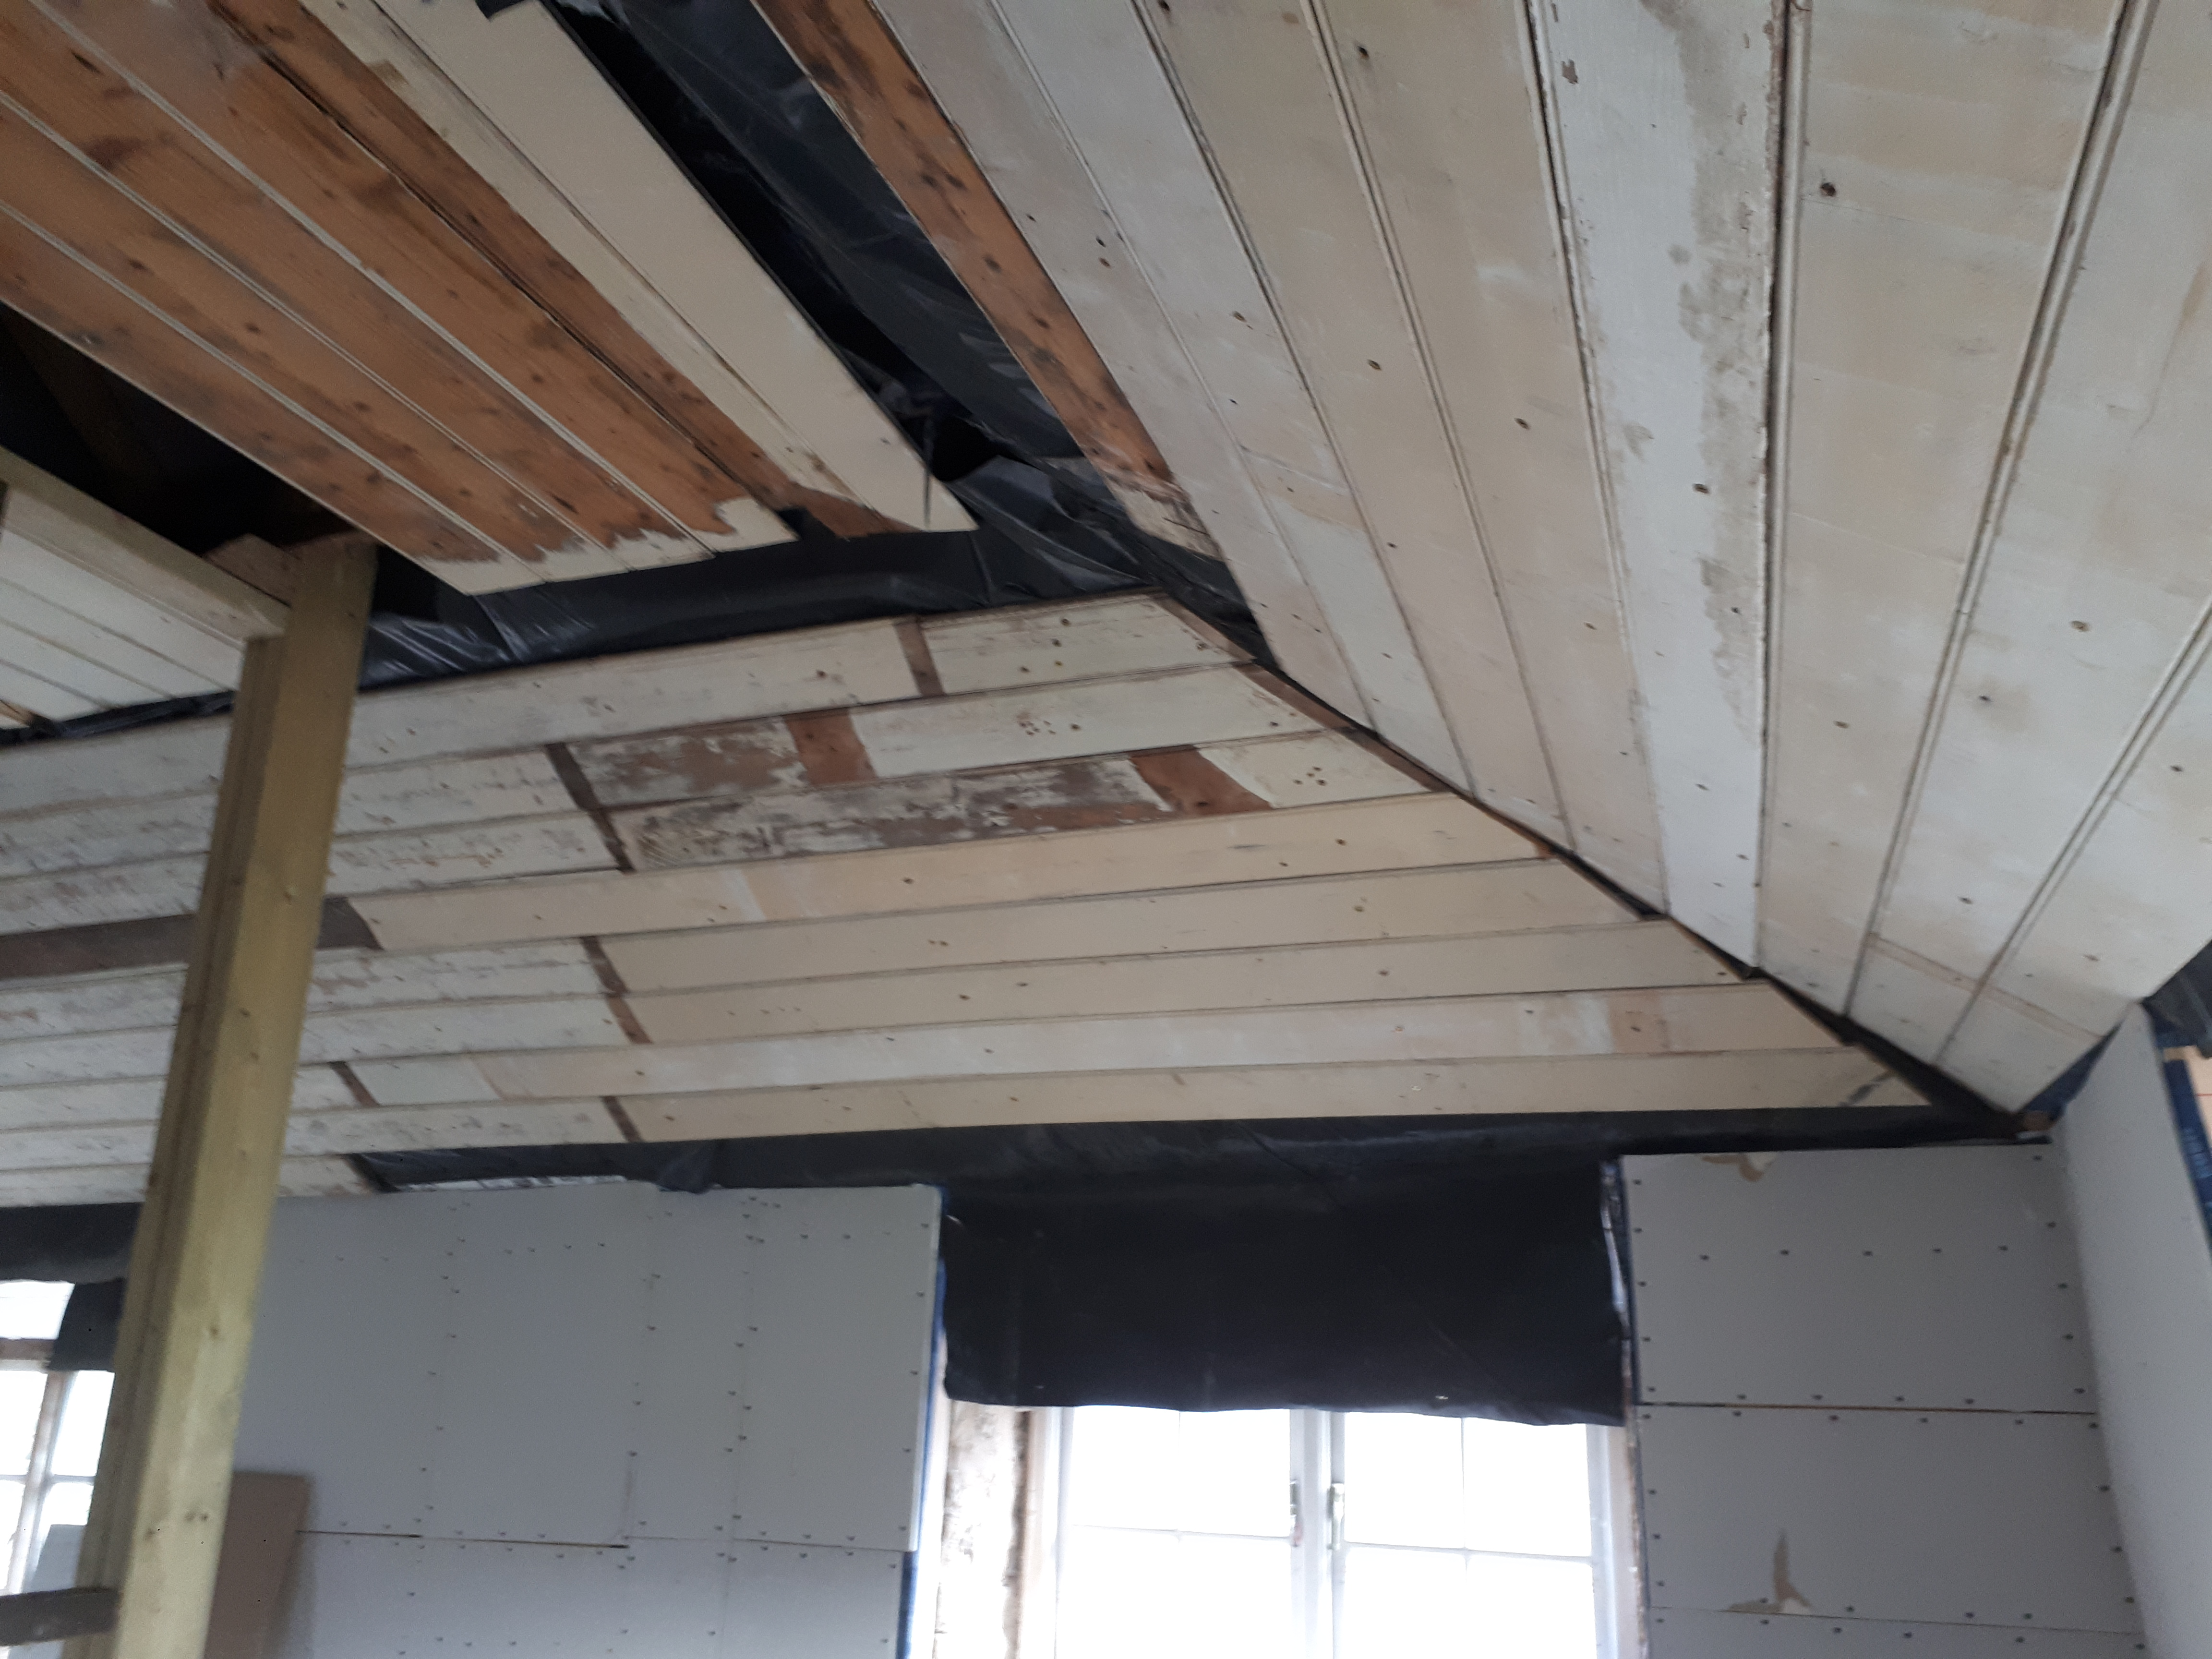
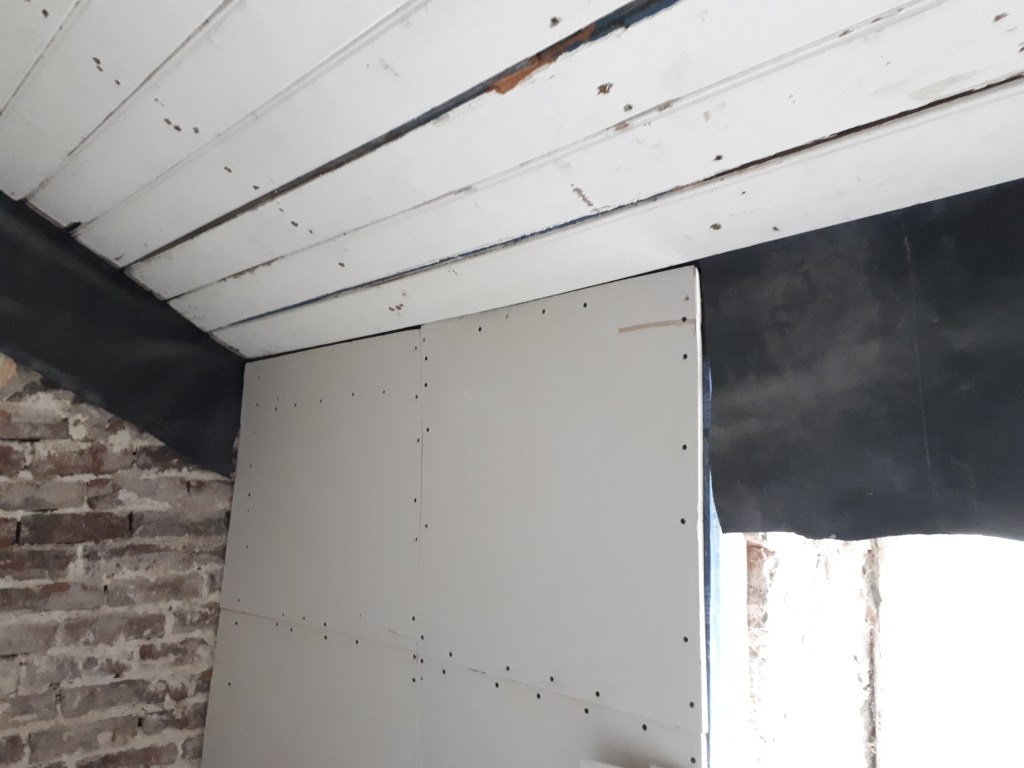
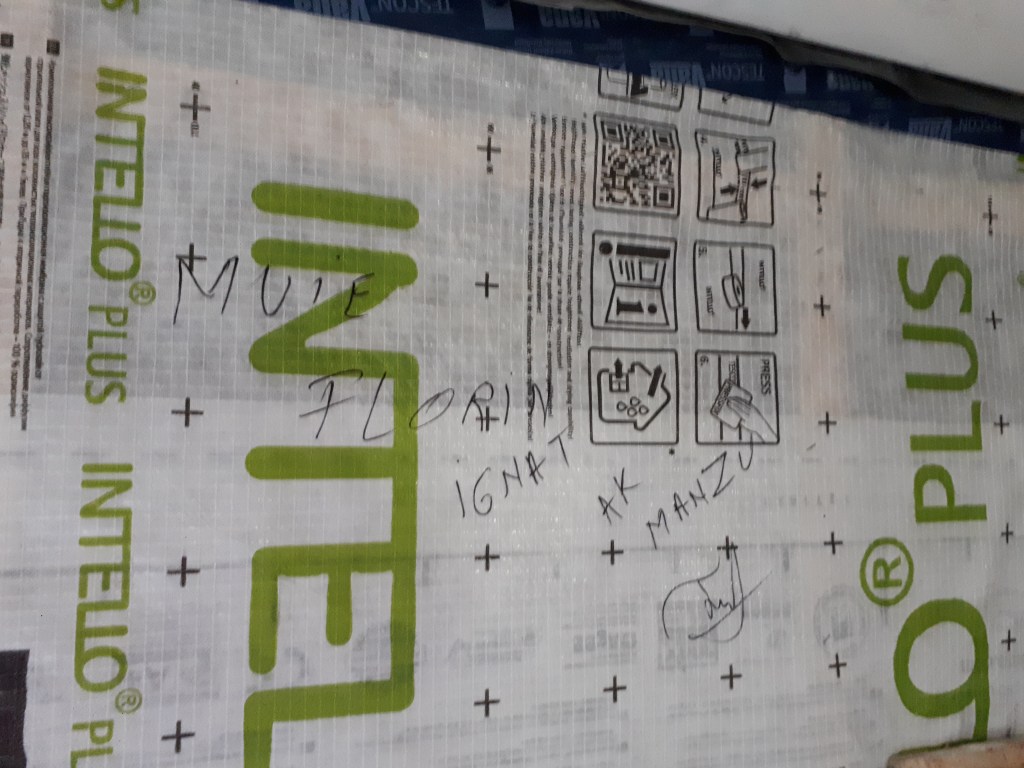
Inside the house I found the insulators had left their mark in a more pleasant way. After we placed plastic sheeting on the ceiling as a vapour membrane, the insulators were supposed to stick their wall membrane to it before adding the plaster board on top. Unfortunately they hadn’t realised that’s what we’d intended, and they put the plasterboard on without joining the two membranes together. To correct this I carefully unscrewed the board to stick down the membrane. What I found under one board was our insulator’s signatures, letting future generations know what they had contributed to the house. There is a long running tradition across the world of craftsman secretly or officially signing off their work. I taped the membranes together avoiding covering their writing, before hiding the signatures back behind the board.
While the floorboards upstairs are lovely, they are sadly too old to be easy to replace. Where the stairs were we needed to fill in the gap, but haven’t found any similar boards for sale. In the end we decided to go for more standard chipboard and put carpet down in the room that is planned to be our office. Chris did a great job filling the gaps, making the room much less of a health and safety hazard.
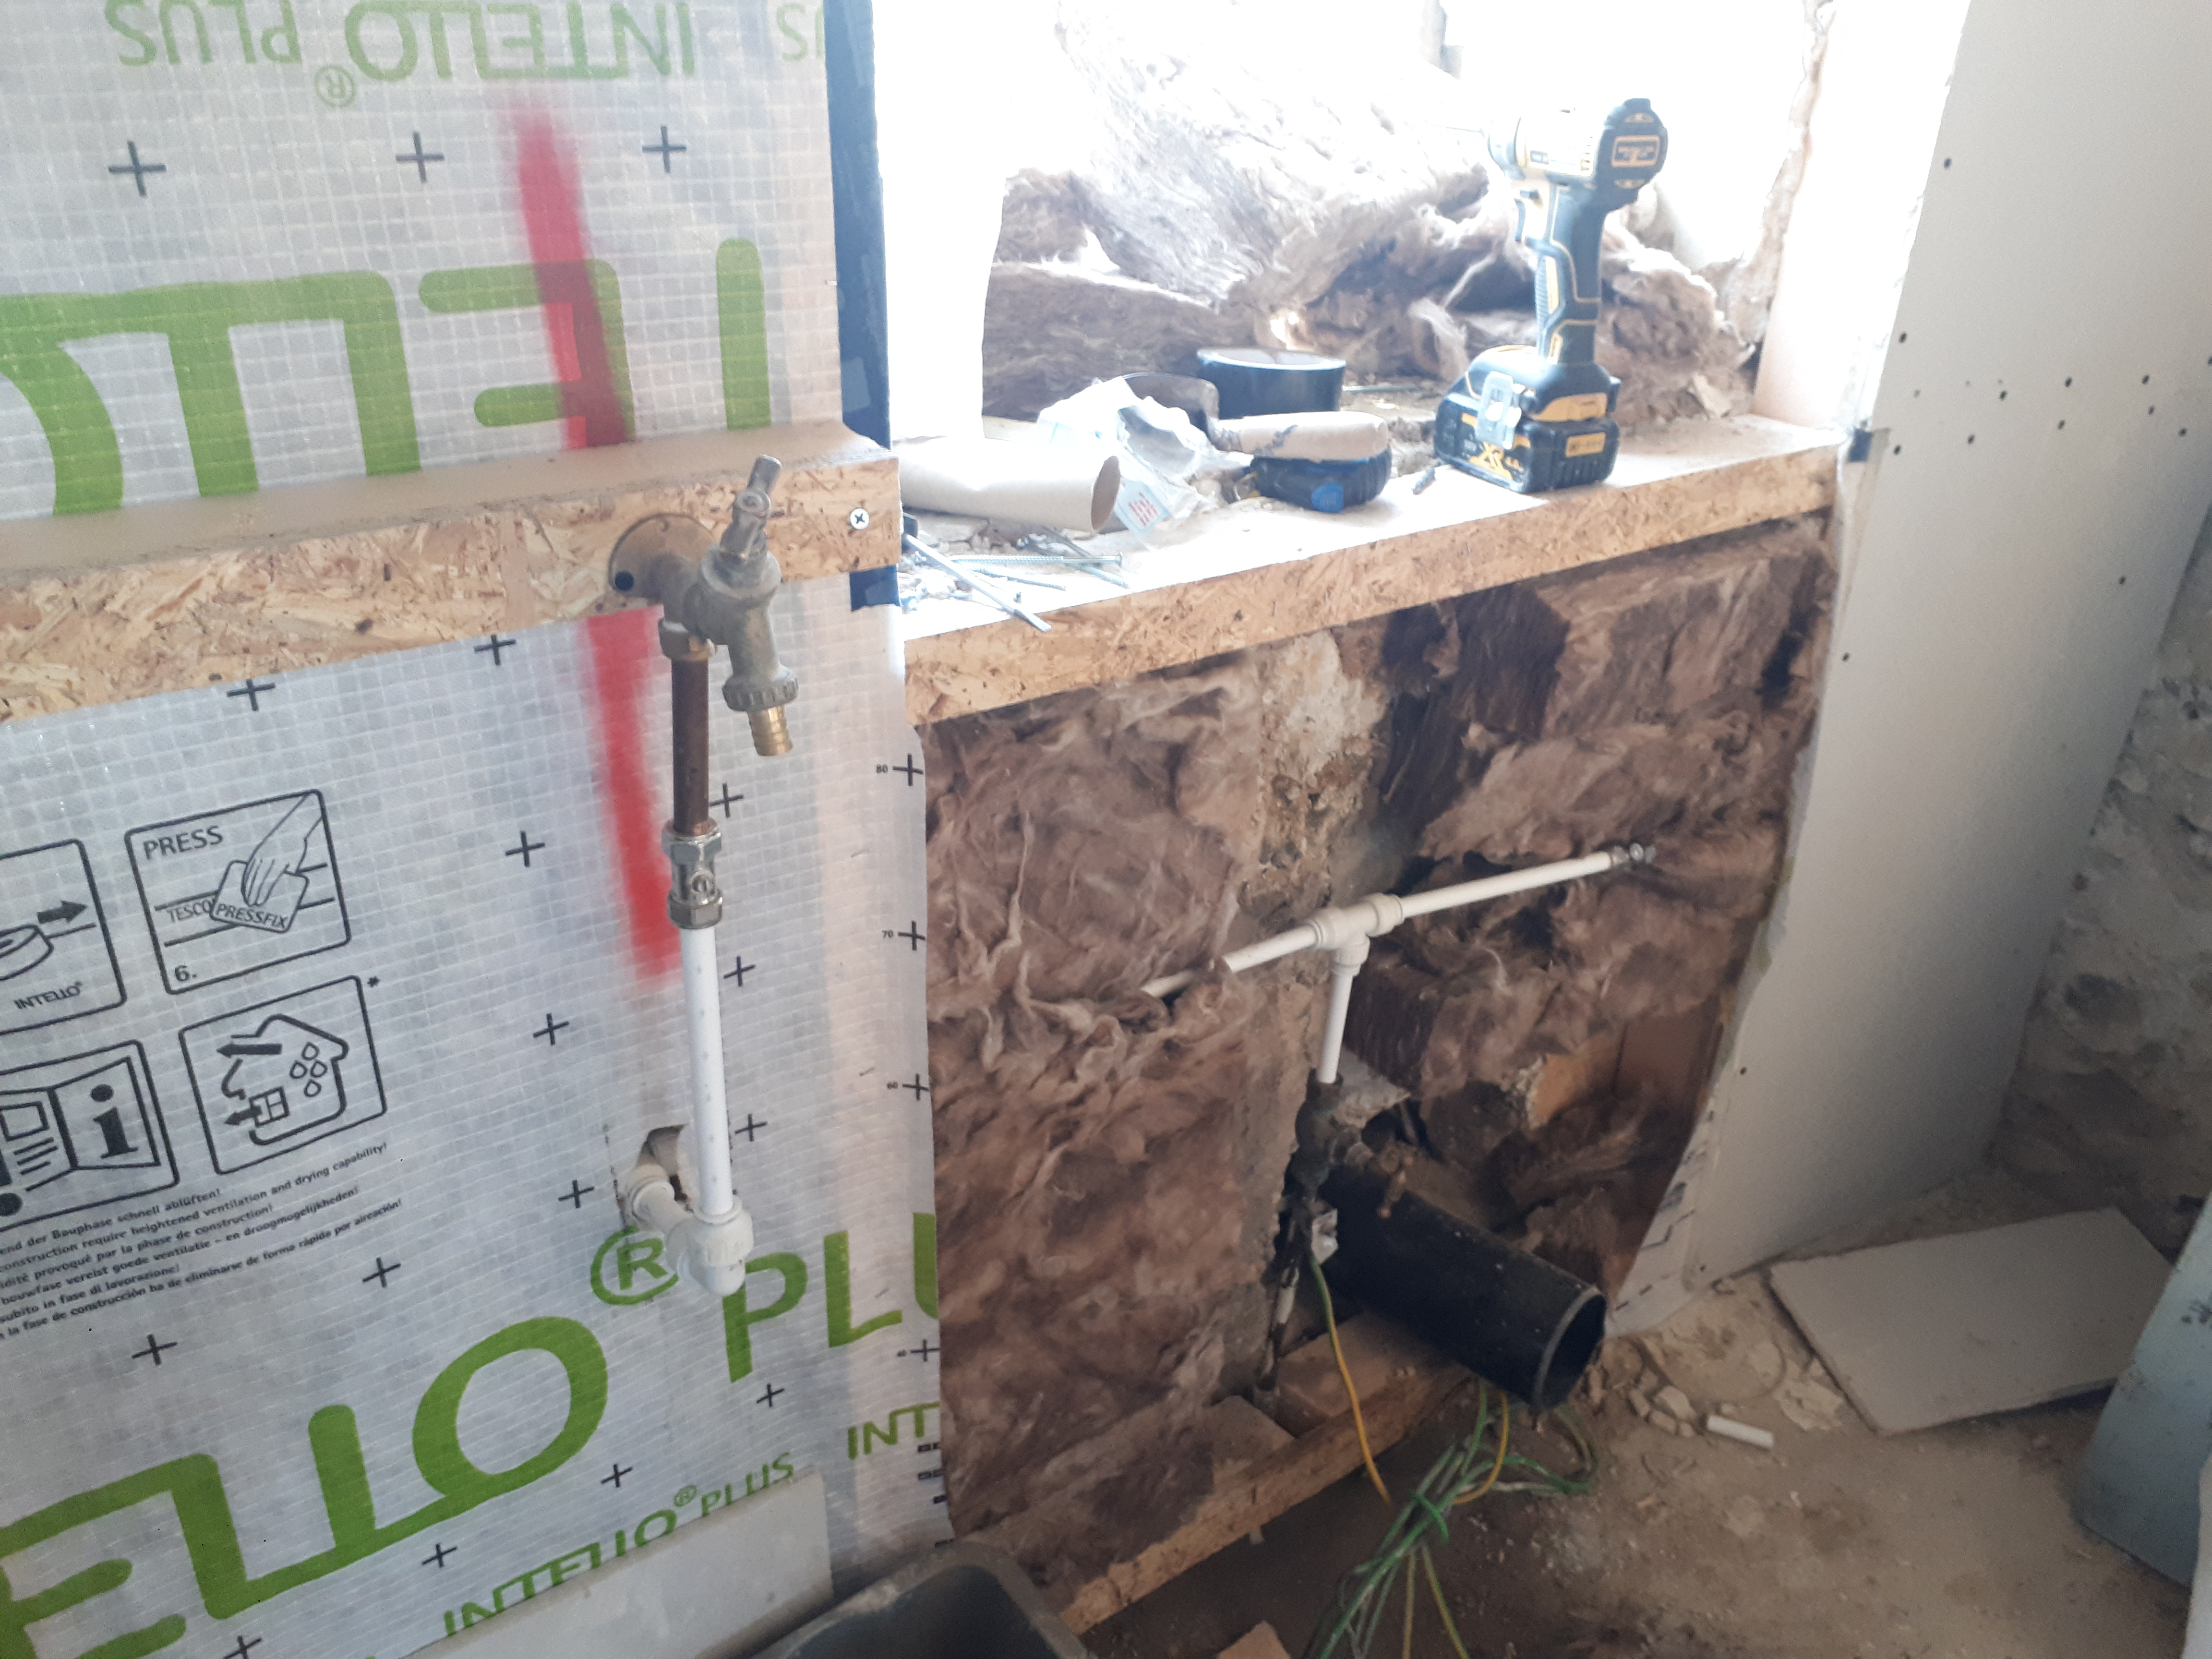
During the insulation installation the tap pipe in the old kitchen was bent, meaning the section needed to be replaced. Chris spent a bit of time planning out where the sink and toilet would go in this room before installing a new tap.
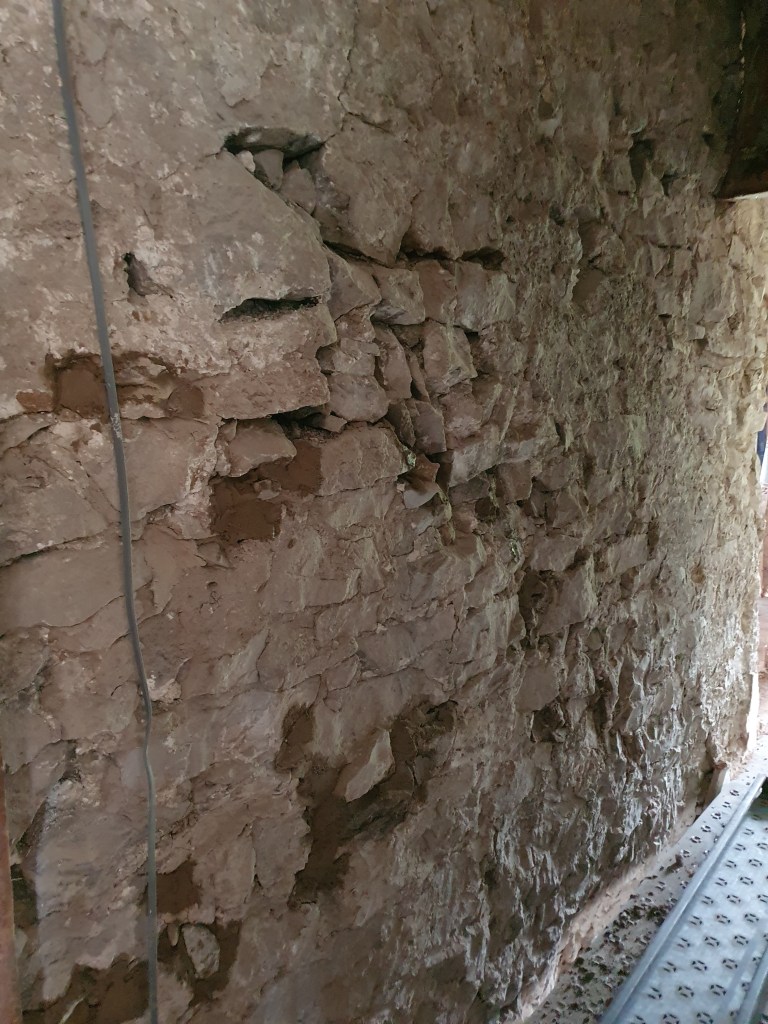
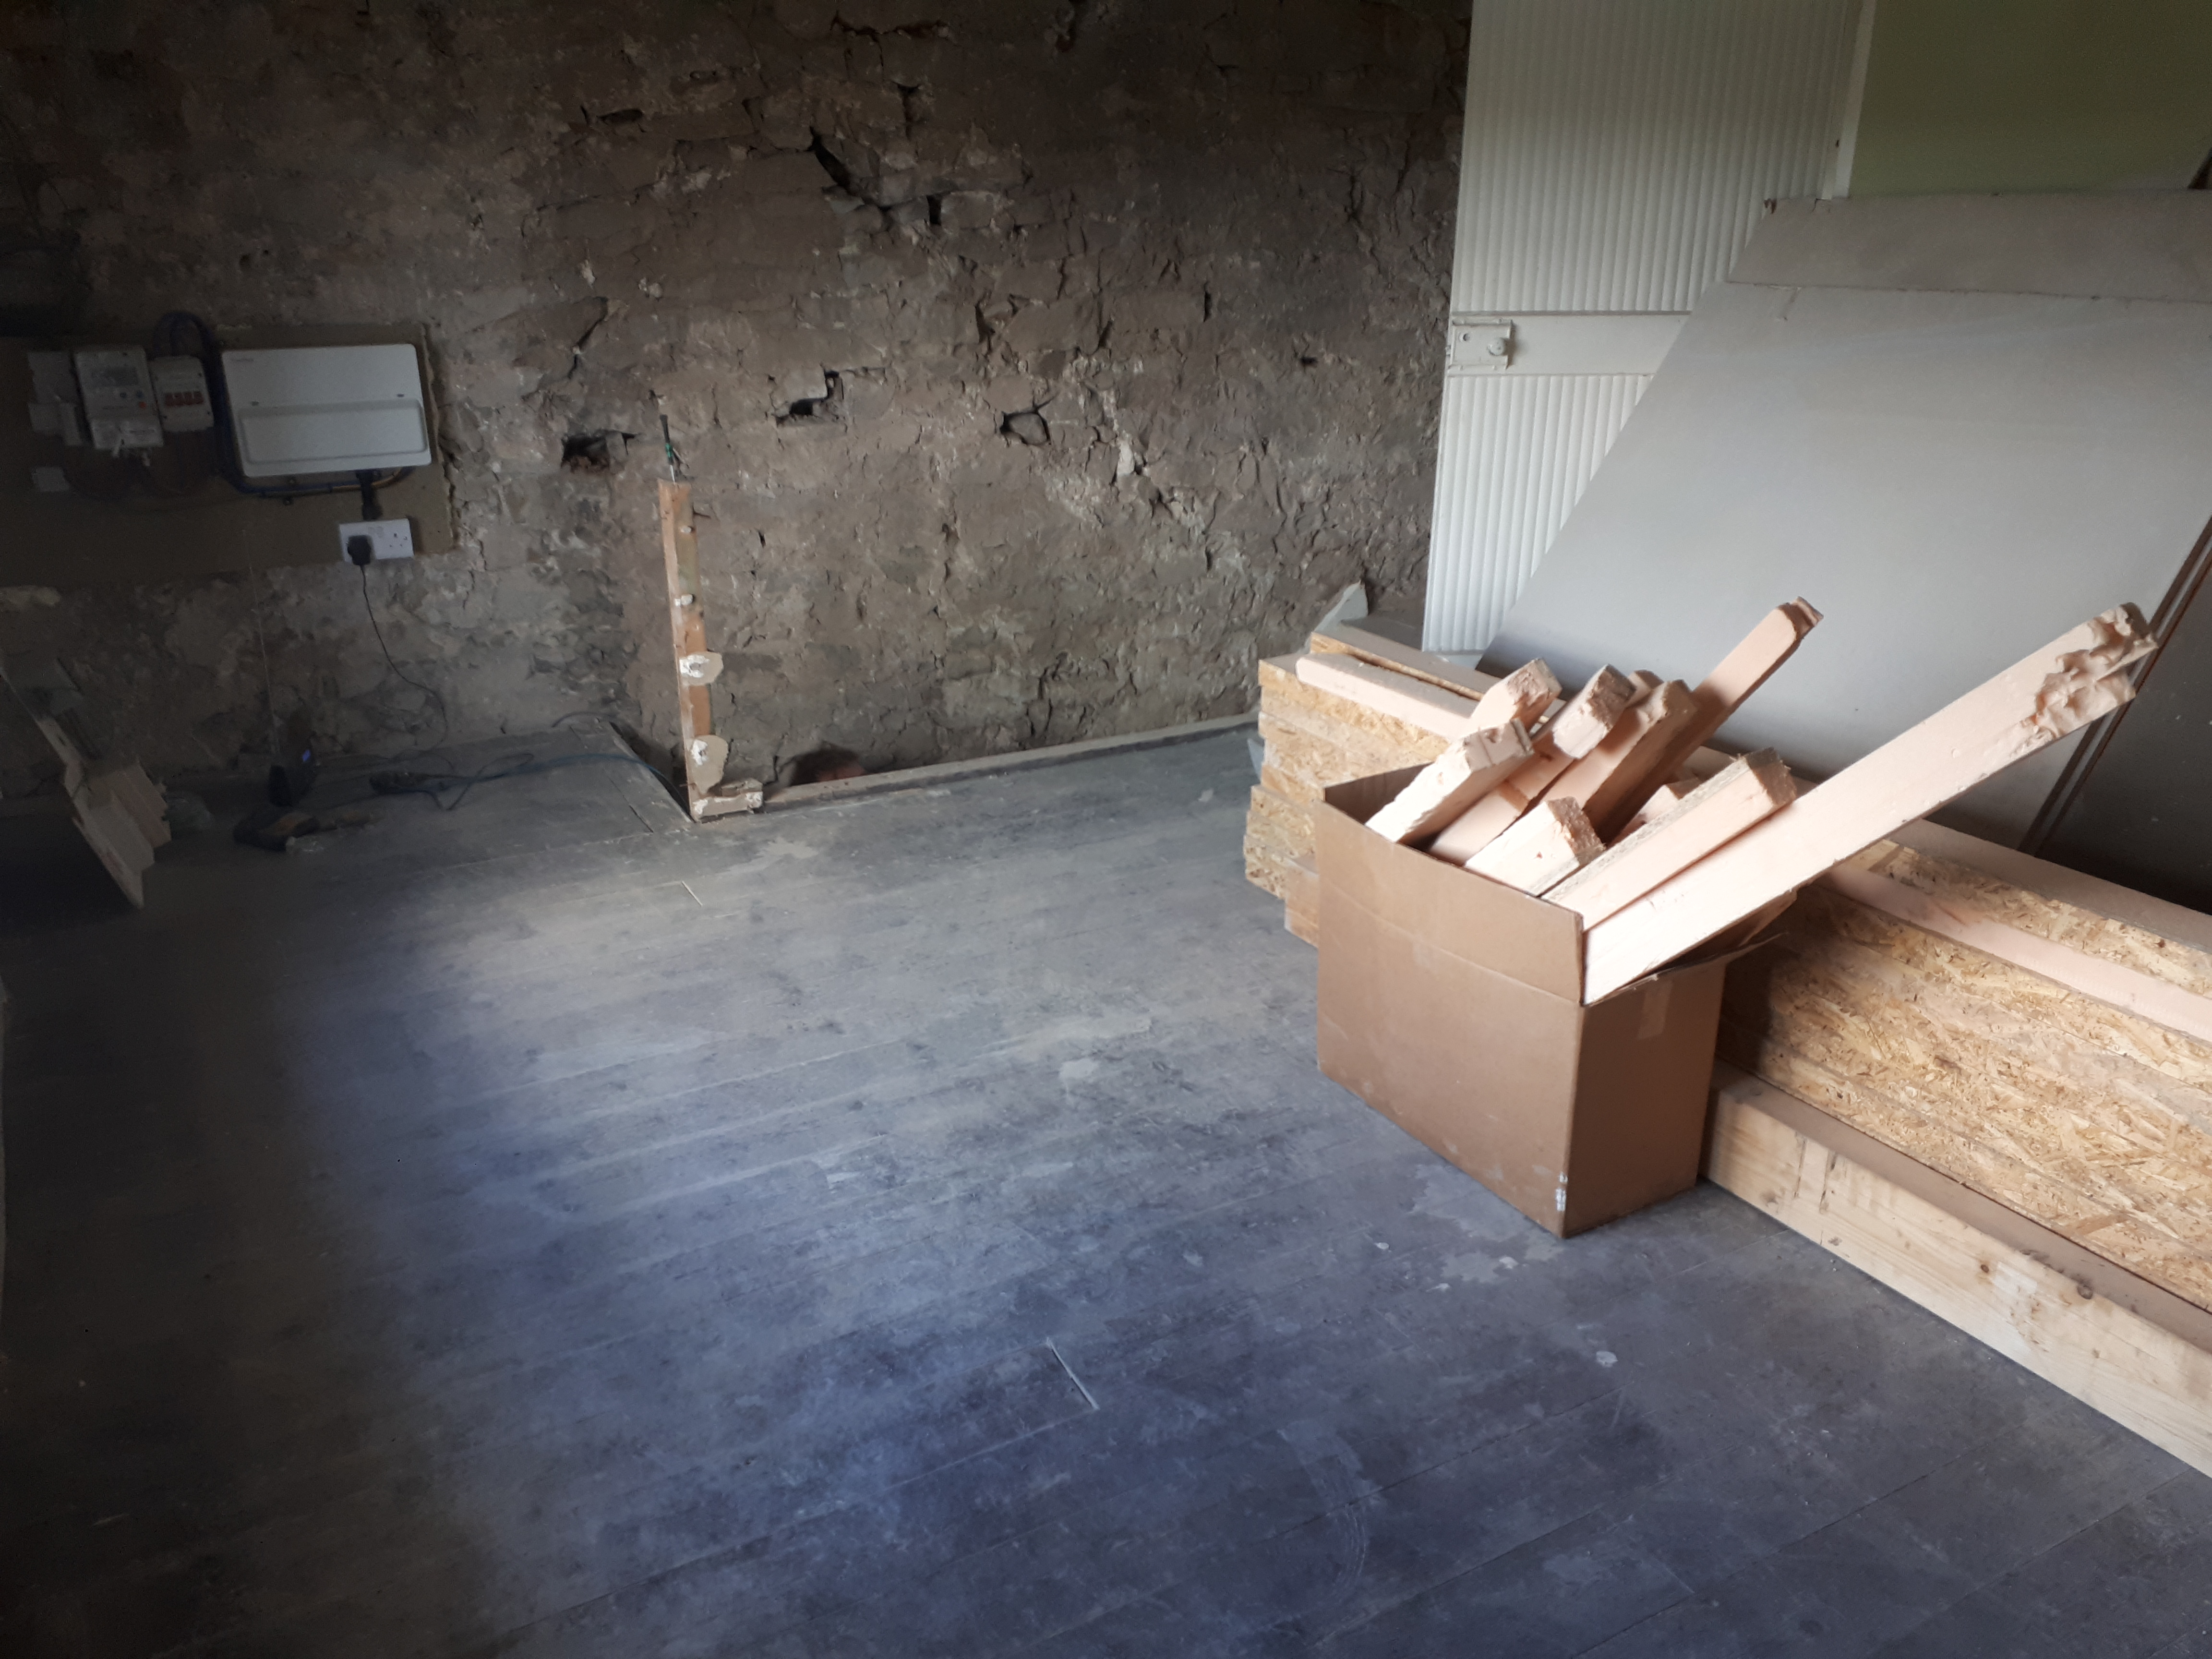
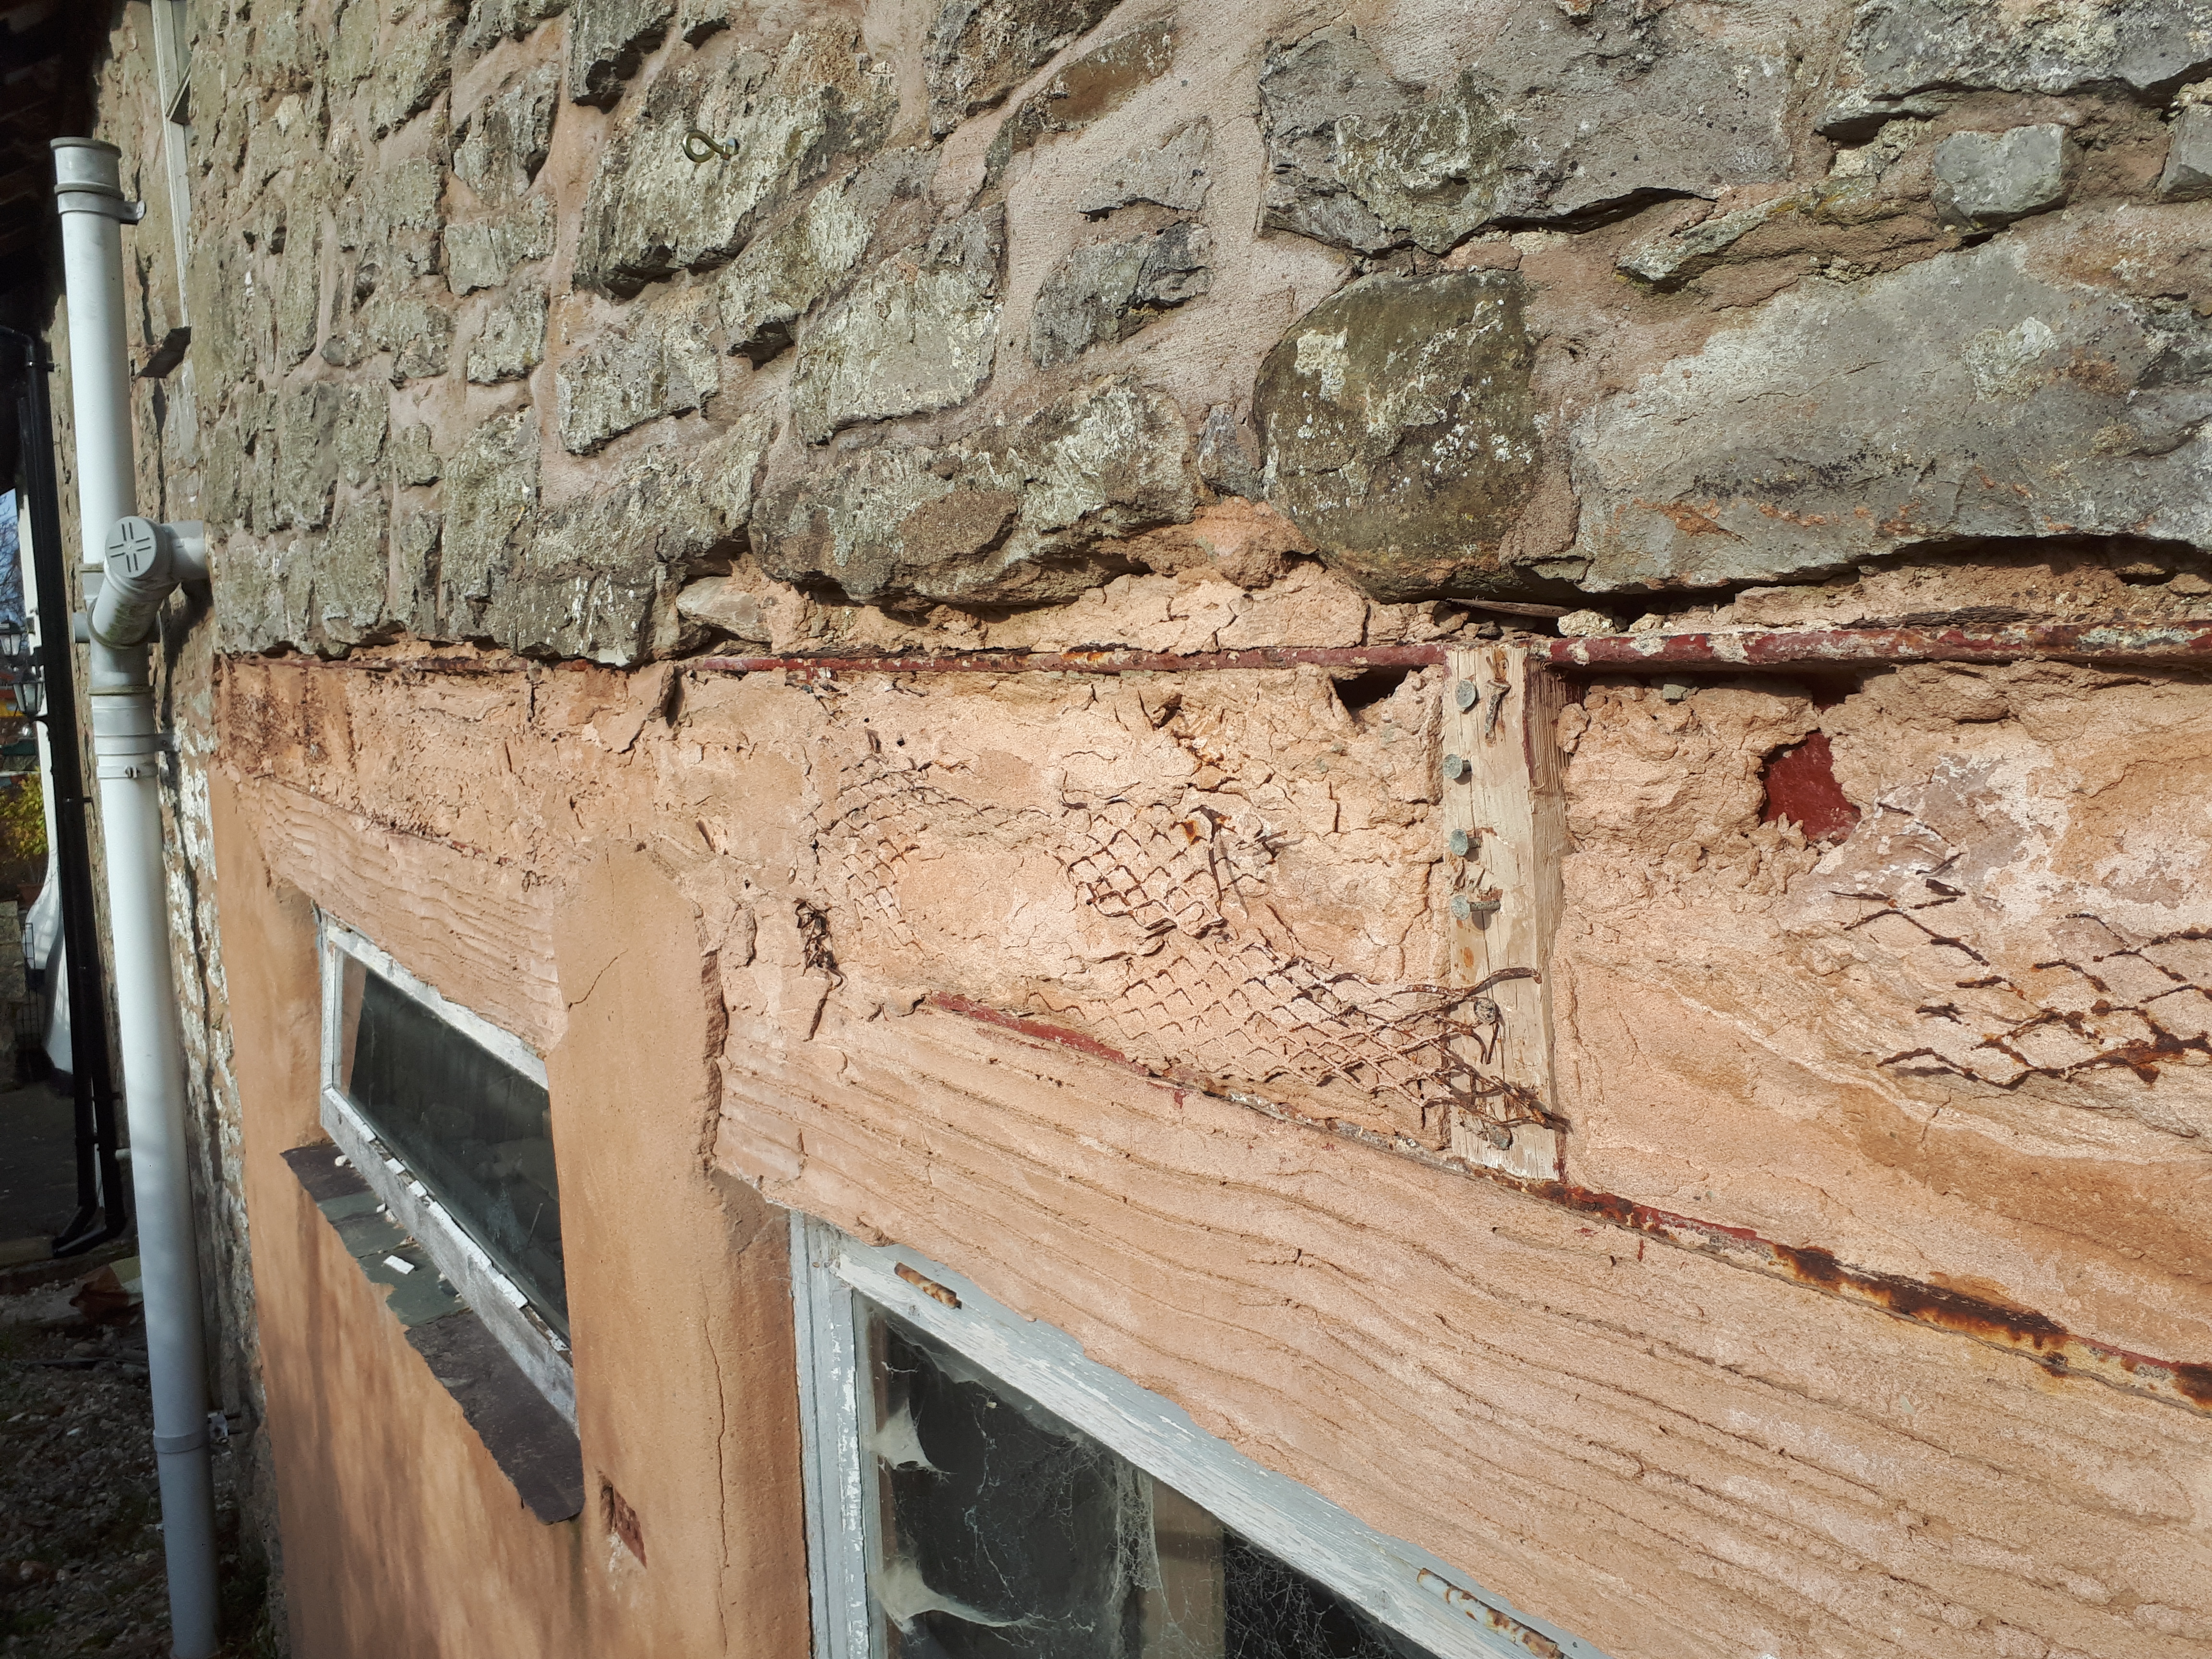
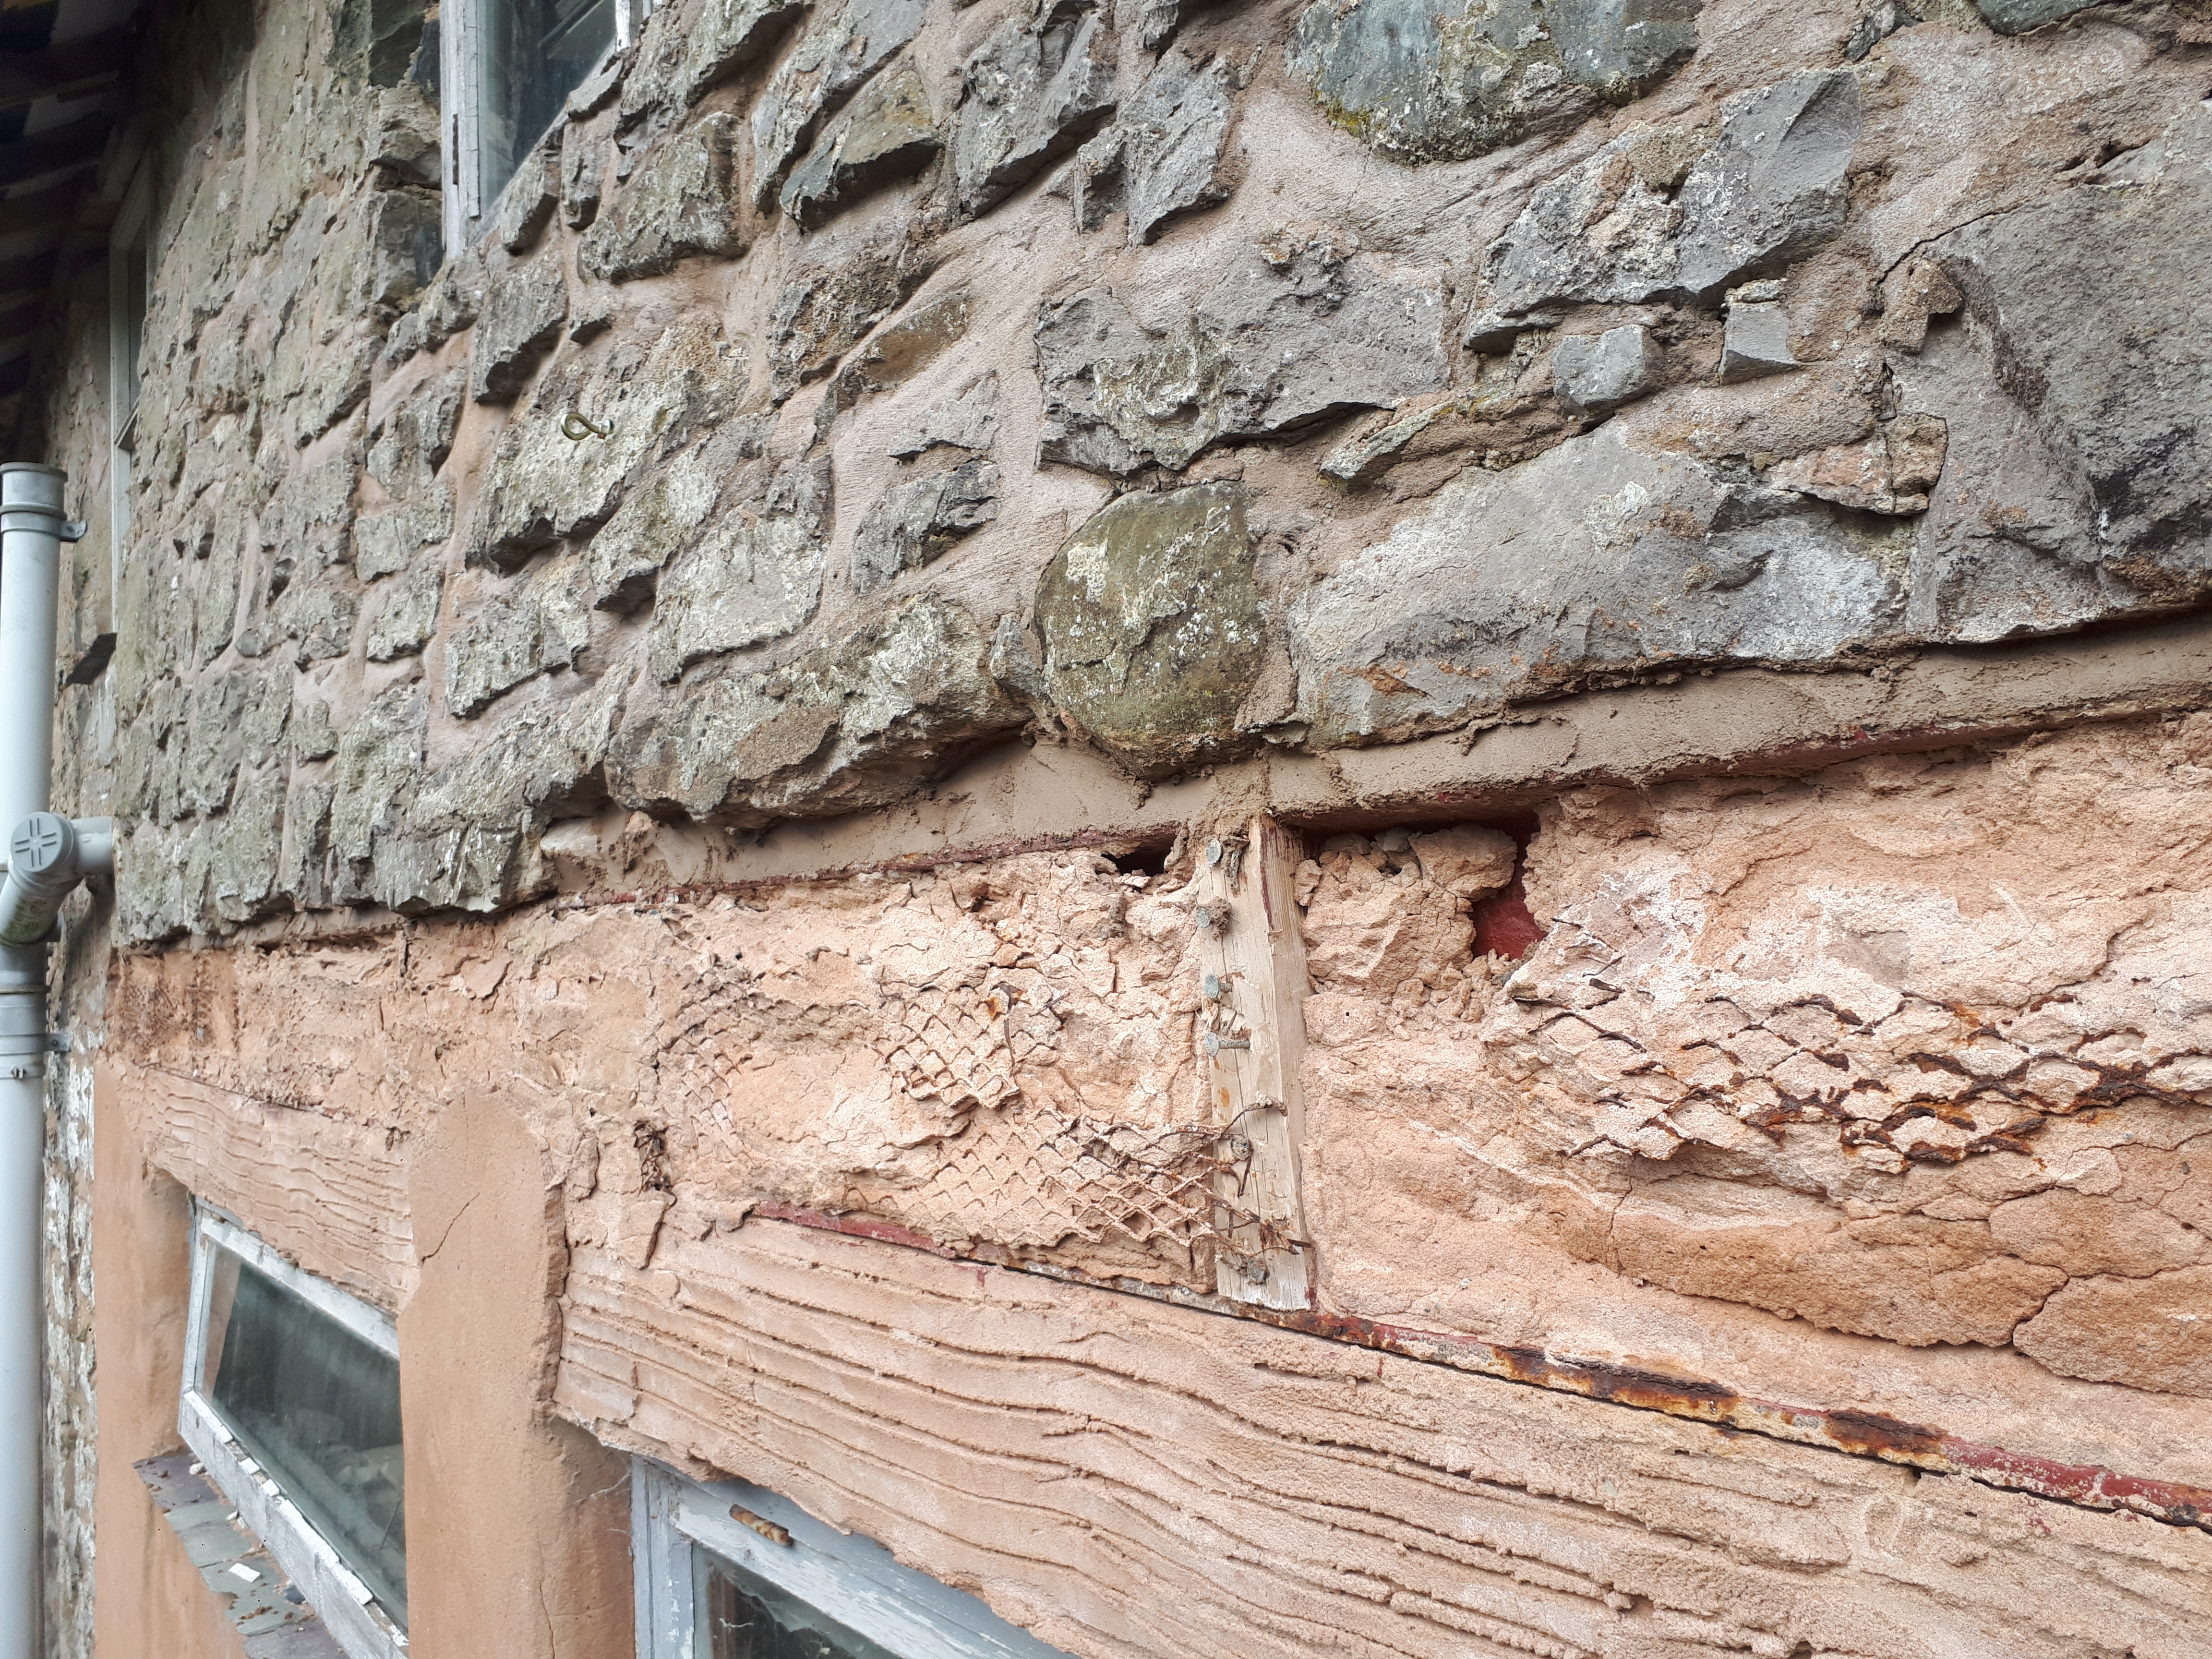
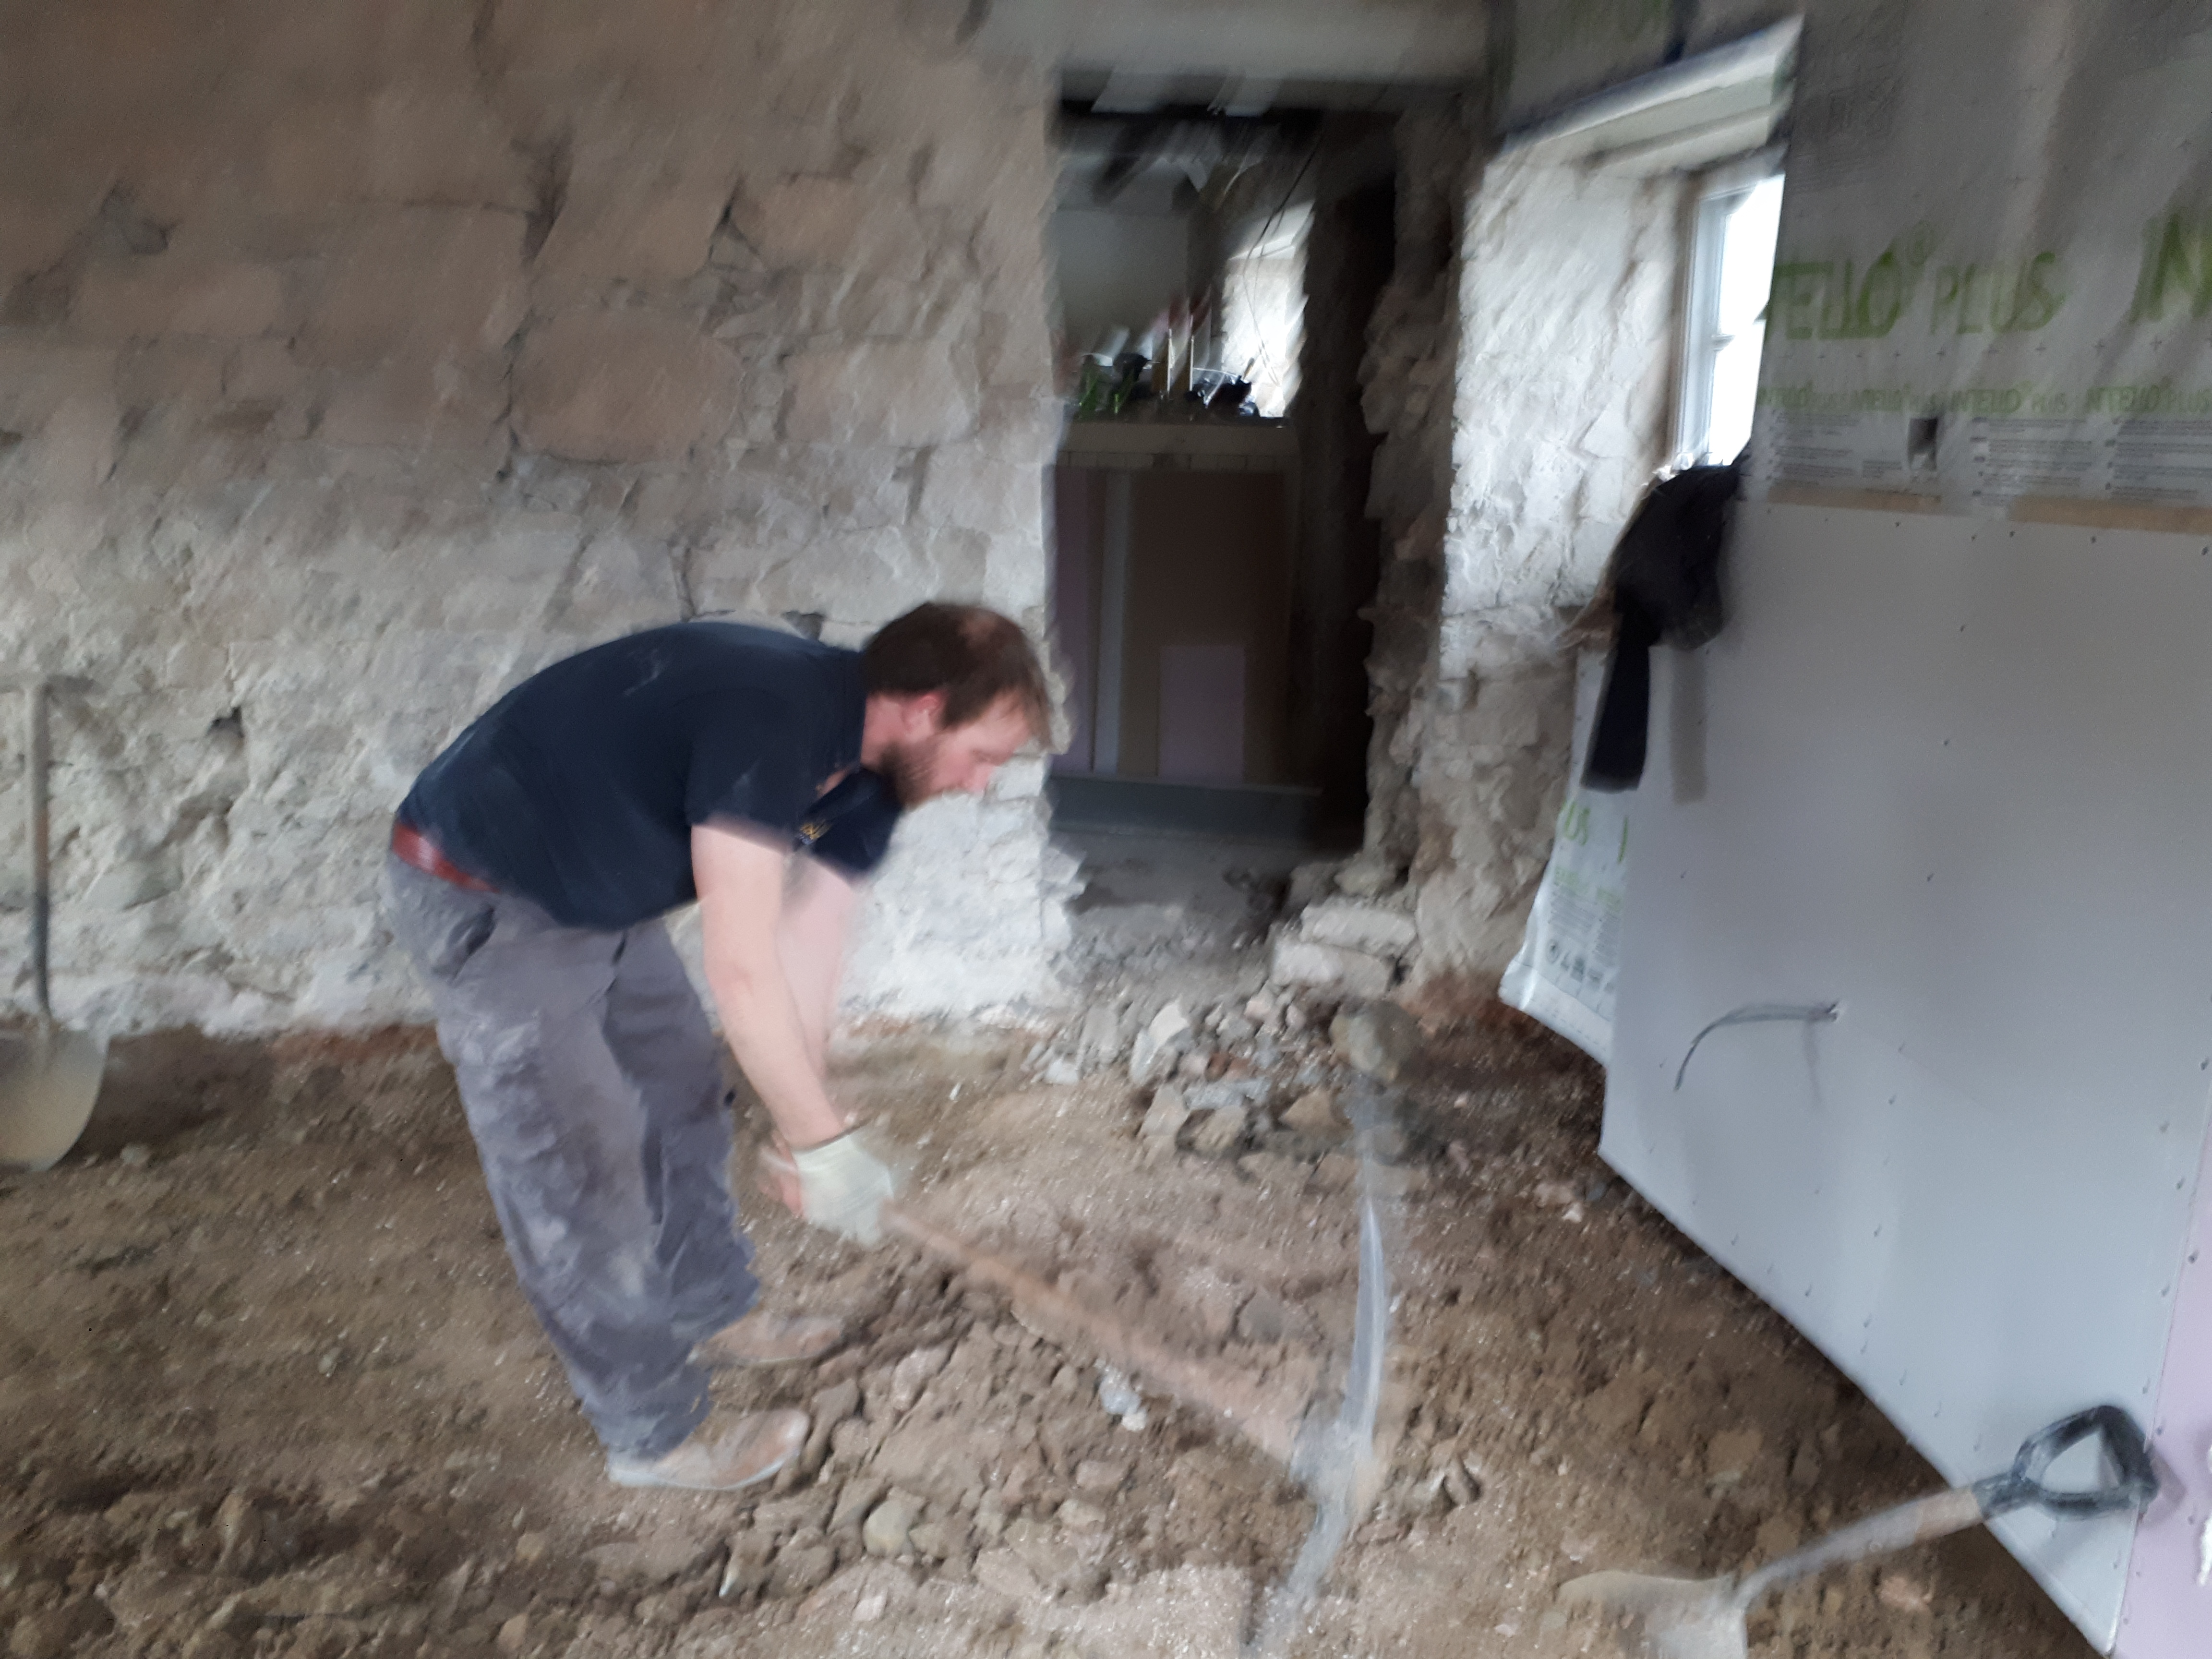
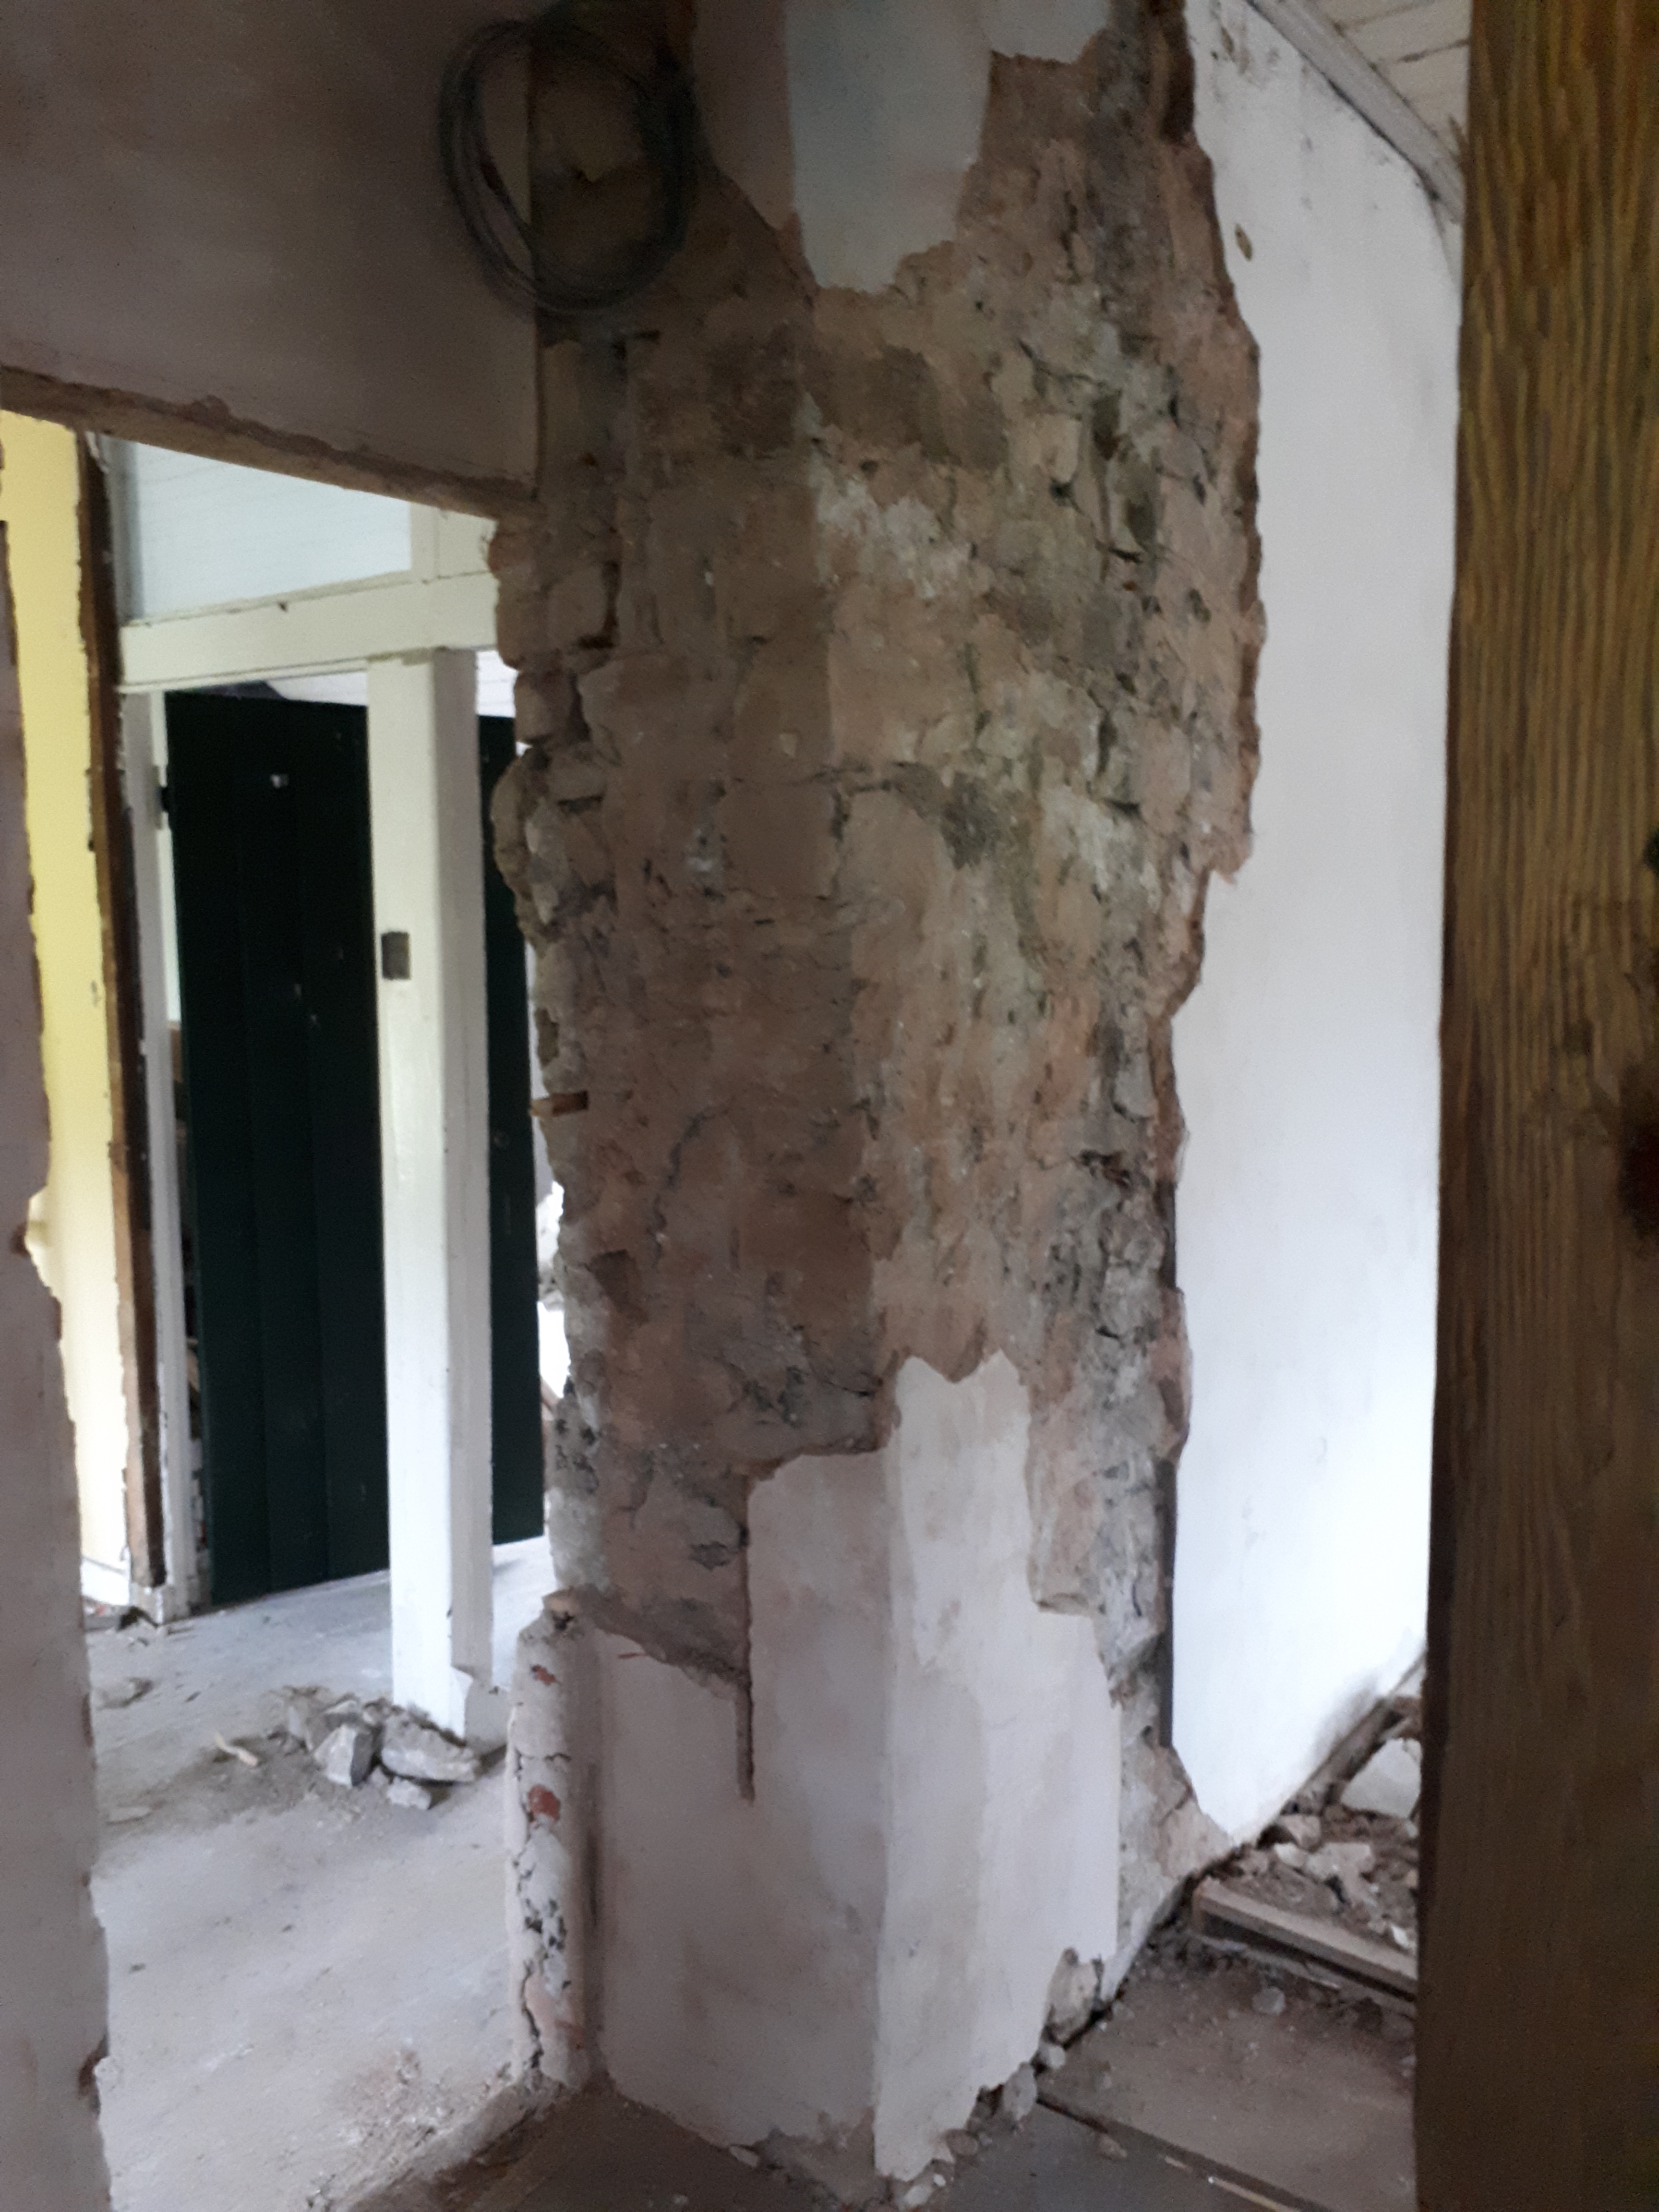
In order to avoid the dust being created by Chris’s work on the new doorway, I headed outside to plug some holes above the old steel in the back wall. At the moment this steel is rusting, as it hasn’t been properly protected from the weather. The rusting steel has the swollen, lifting up the stones above. As they lifted this has caused the various cracks in our back wall. In the long-term we need to decide what to do about this steel, but for now I spent some time scraping out the soft mortar and filling gaps, to help prevent water seeping into the wall, and causing further rusting.
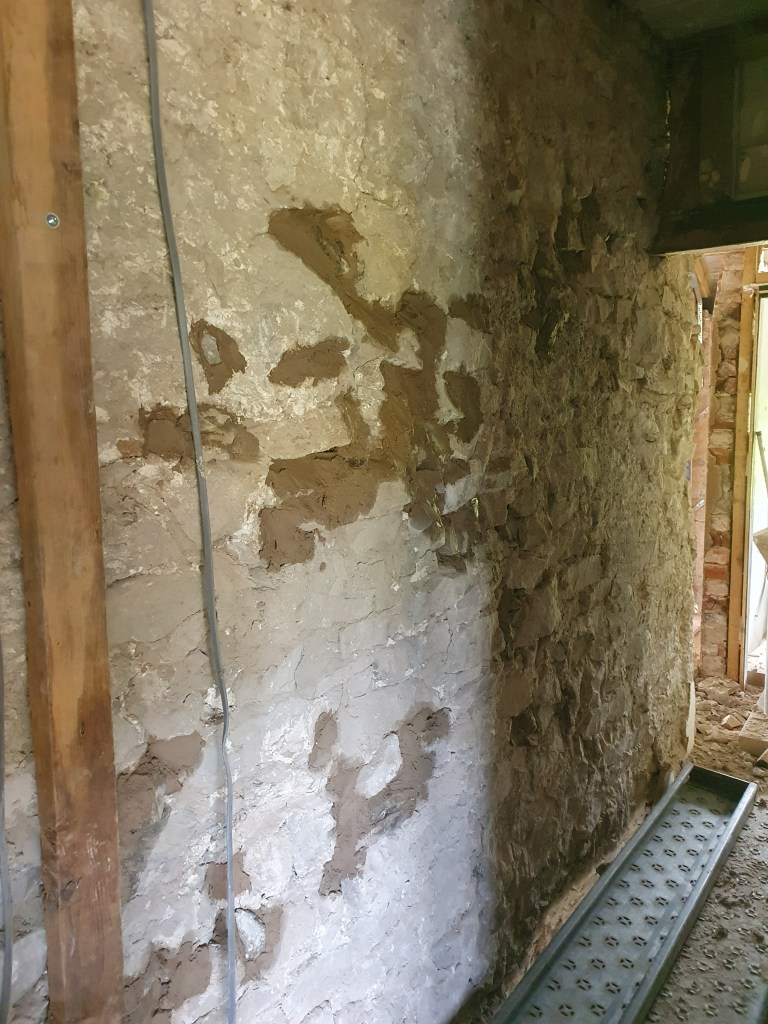
Inside, Chris cut off the last few jagged edges from the doorway, before I stepped into repoint the loosened rocks.
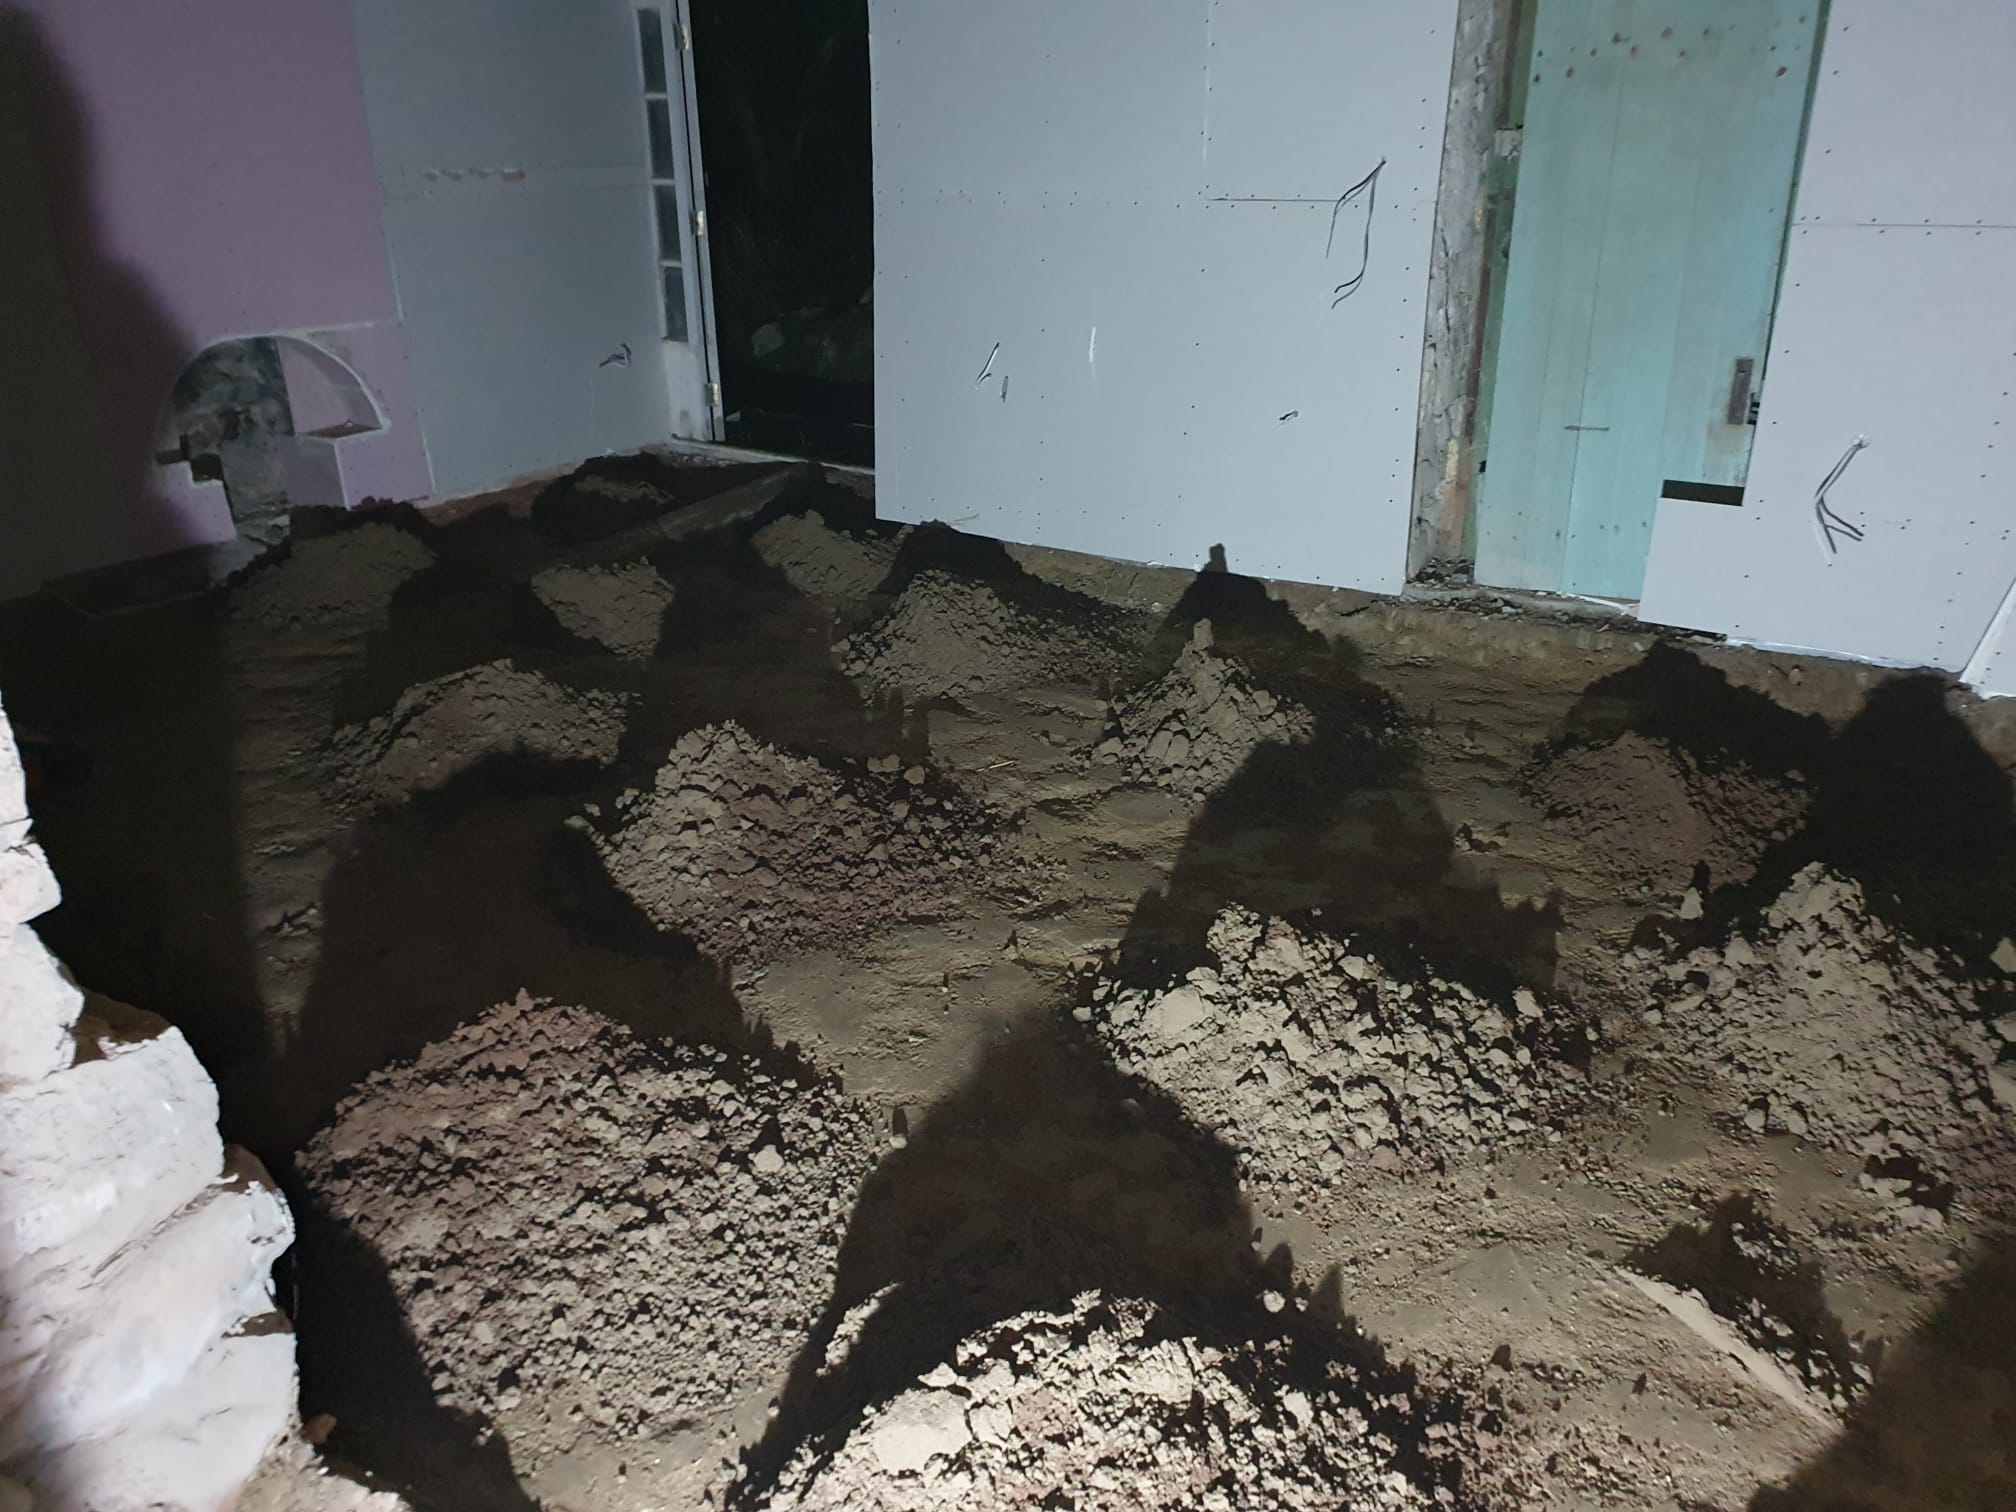
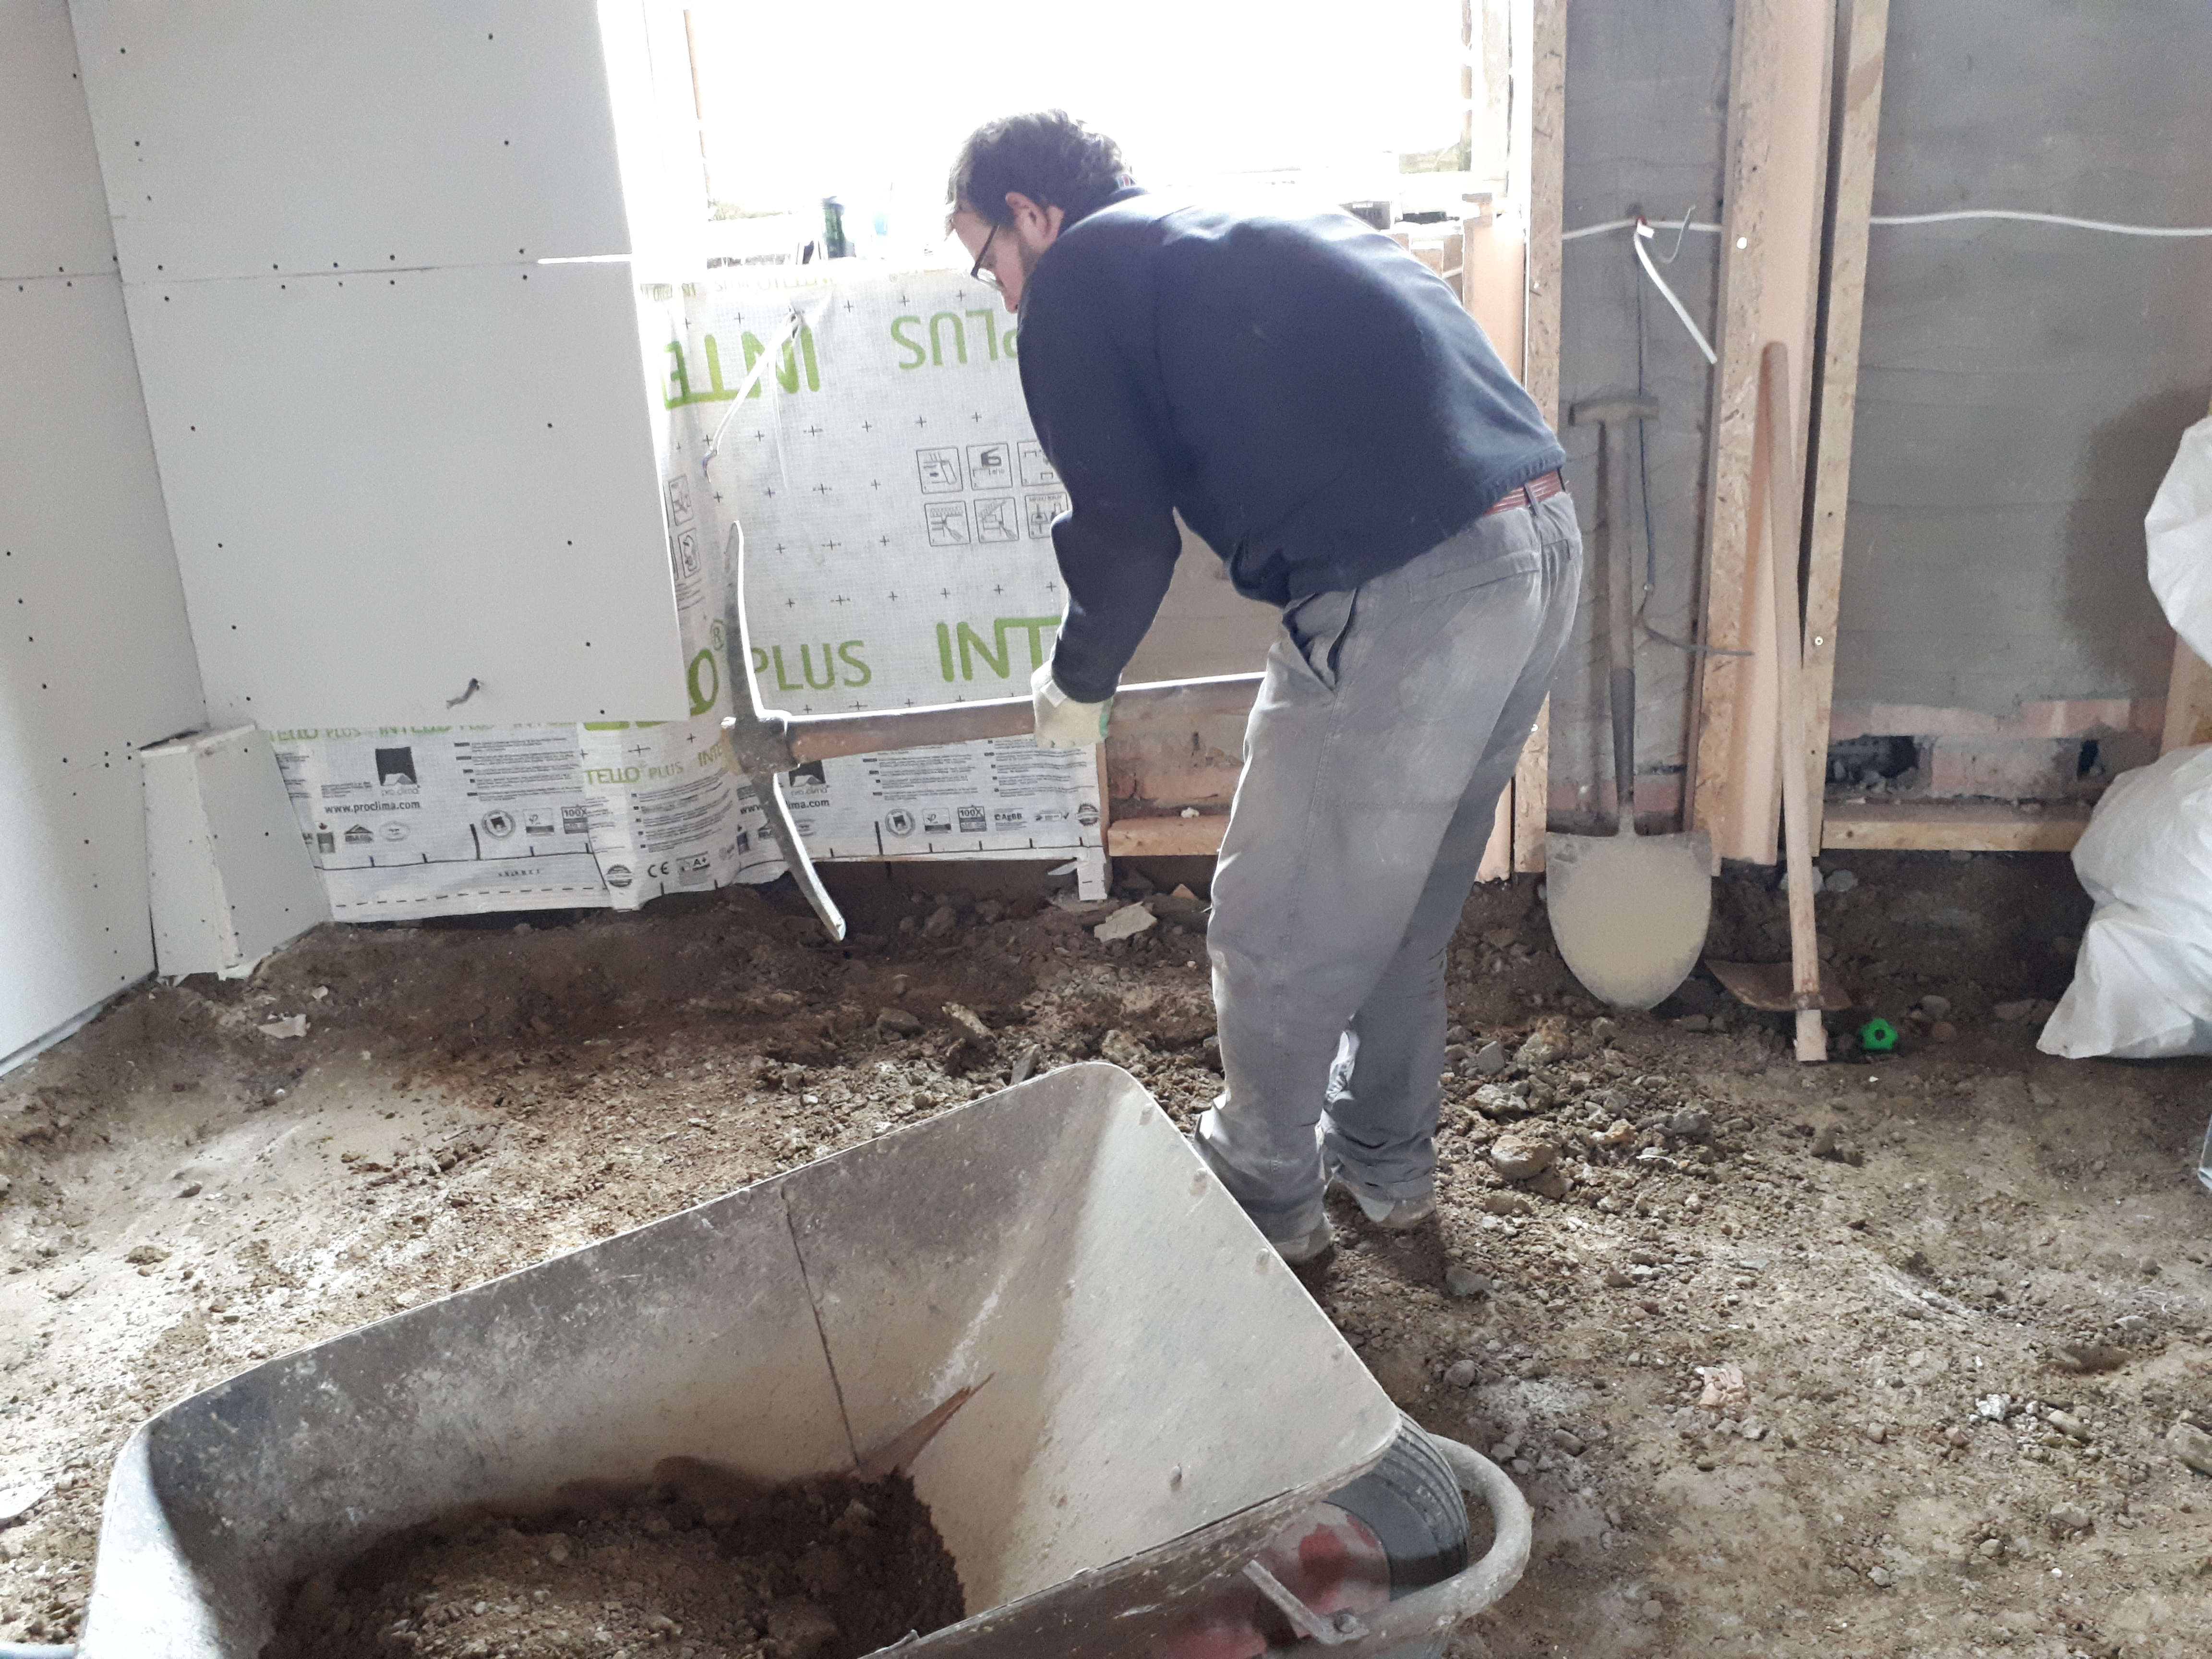
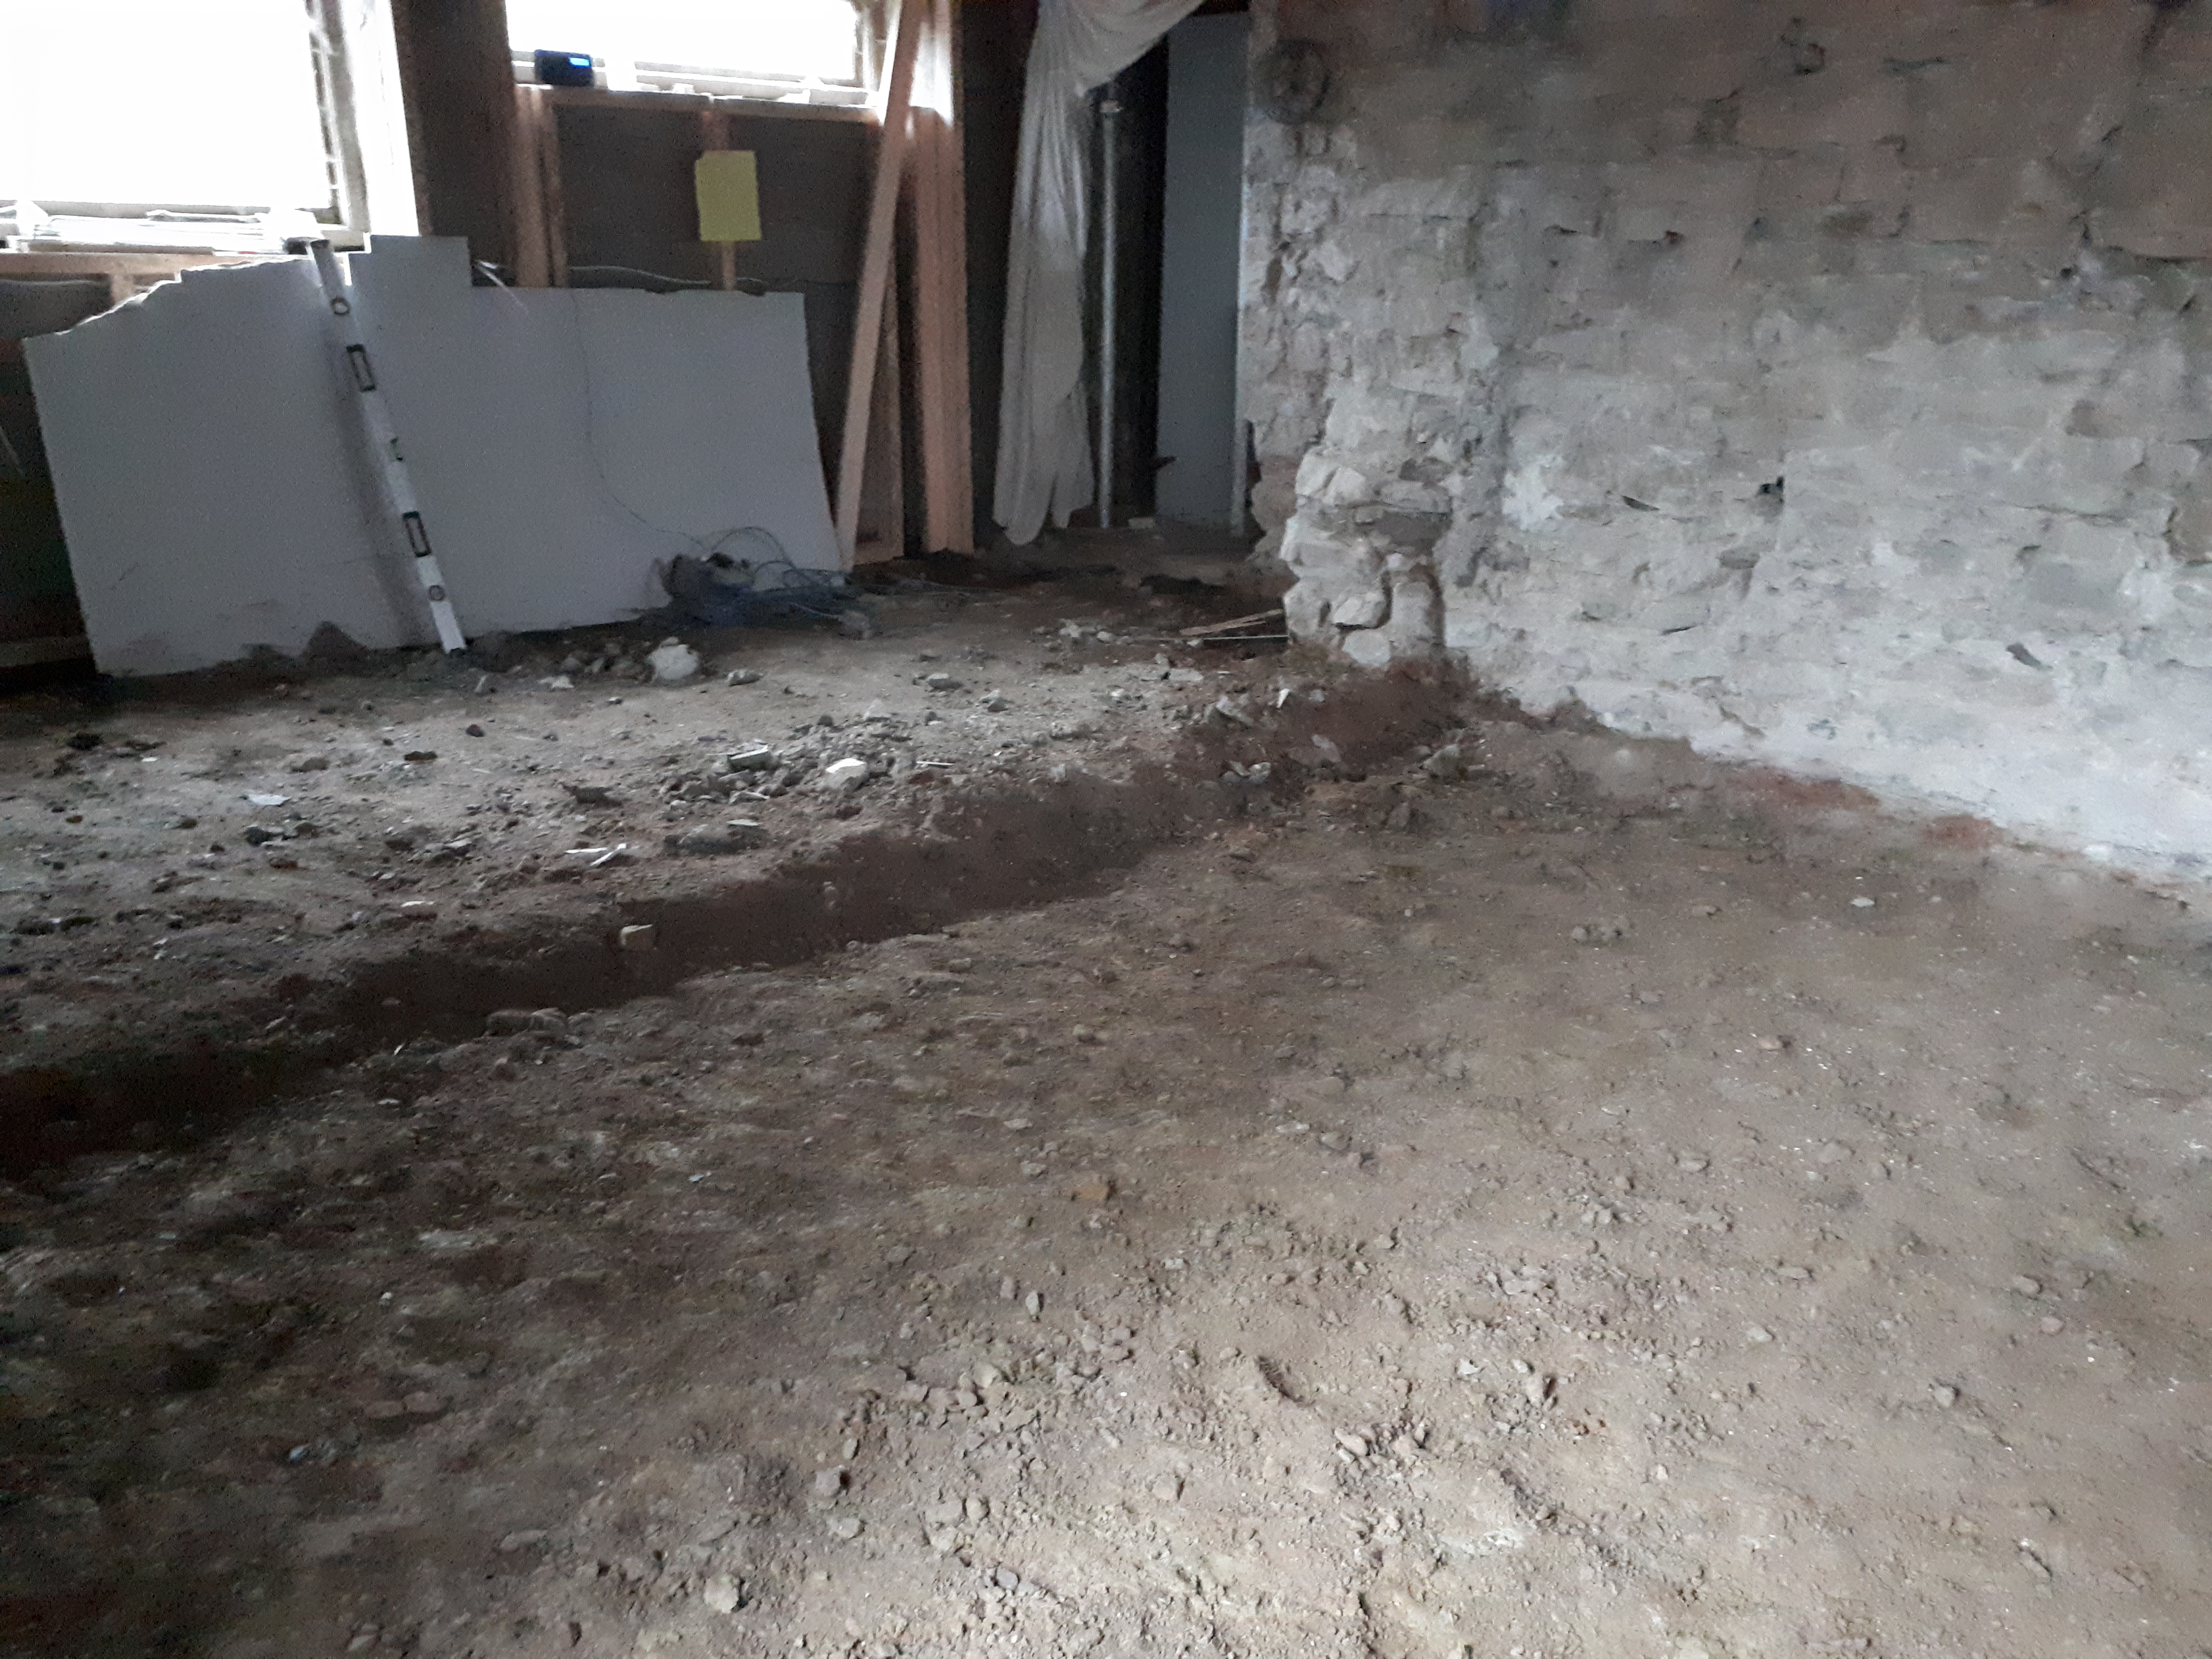
But of course much of the weekend was spent continuing with digging the floor. While the previous weekend’s digging had been physically hard, this weekend’s had an added mental strain. In order to have space for all the material going on top we needed to dig down a minimum of 18cm, ideally 20cm. While this seemed to go fairly well on half the floor, the other half just refused to go any deeper. We measured it at 15cm, and then dug and dug through the tough ground, moving one wheelbarrow after another. Stopping to measure and….15cm. Sigh.
As well as our magically regenerating floor we came to realise that in one corner of the room our stonework stops at a level higher than the final floor level…..hm not ideal. We can’t have the floor level any higher as this will result in stepping down into the adjoining room. After some debate we decided we could create a concrete buttress around this portion of the wall, which would be hidden behind the kitchen cupboards. Hopefully the wall won’t fall down in the meantime…
With all these complications we have had a bit of good news. We’ve accepted an offer on our current house. After a few weeks advertising it ourselves, we’re very pleased and hoping things continue as planned. That does mean that we need to be able to move our mortgage across to the new house, which we can only do once it’s in a mortgagable state. Let’s just hope the floor stops regenerating and let’s us finish the job so we can get a kitchen in…
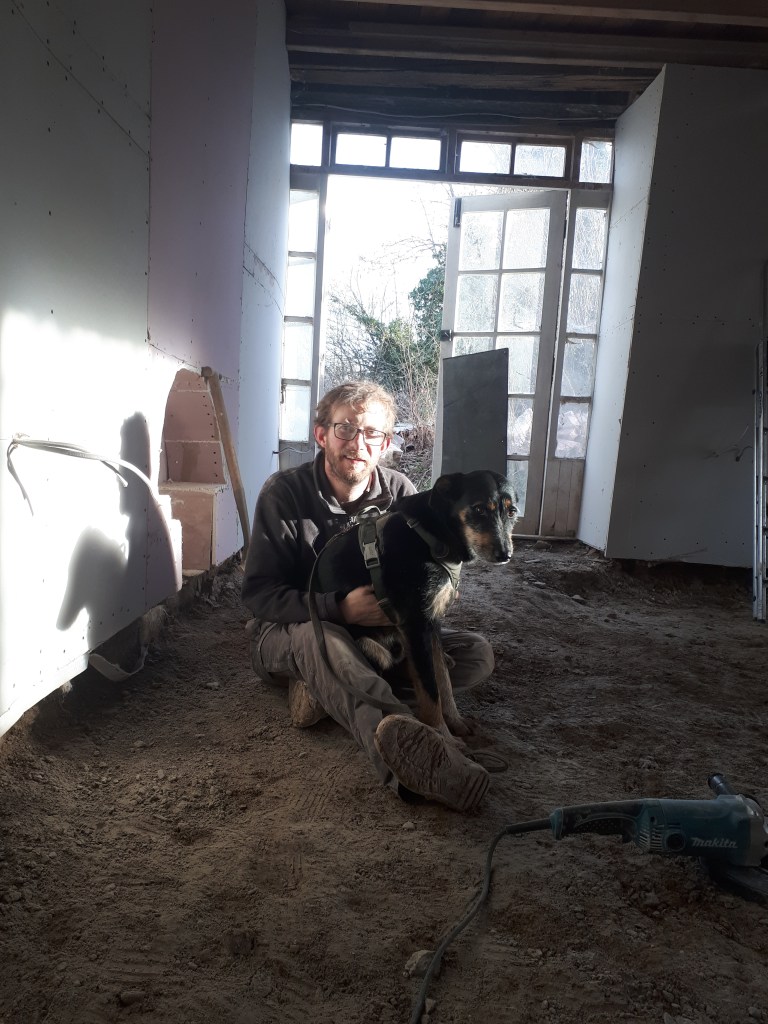
Idris supervising the work. -
Fanta-stic
As the days get longer we’re spending less time working in the dark and cold. For the first time this weekend I regretted putting on my full thermal set, always a milestone of the changing weather. The colour of the light also seems to have changed, becoming warmer, and less sharp.
Last weekend we rented the cut-saw in order to cut the stone to make a new doorway. As it was pretty much the same price to rent it for a weekend or a week, Chris opted for the longer option. This meant, once the door was done, he decided to trial cutting the concrete floor to see if it would speed up the process of removal. Having found the saw did the job remarkably well, he spend two evenings cutting out and removing the concrete, before the saw had to go back.
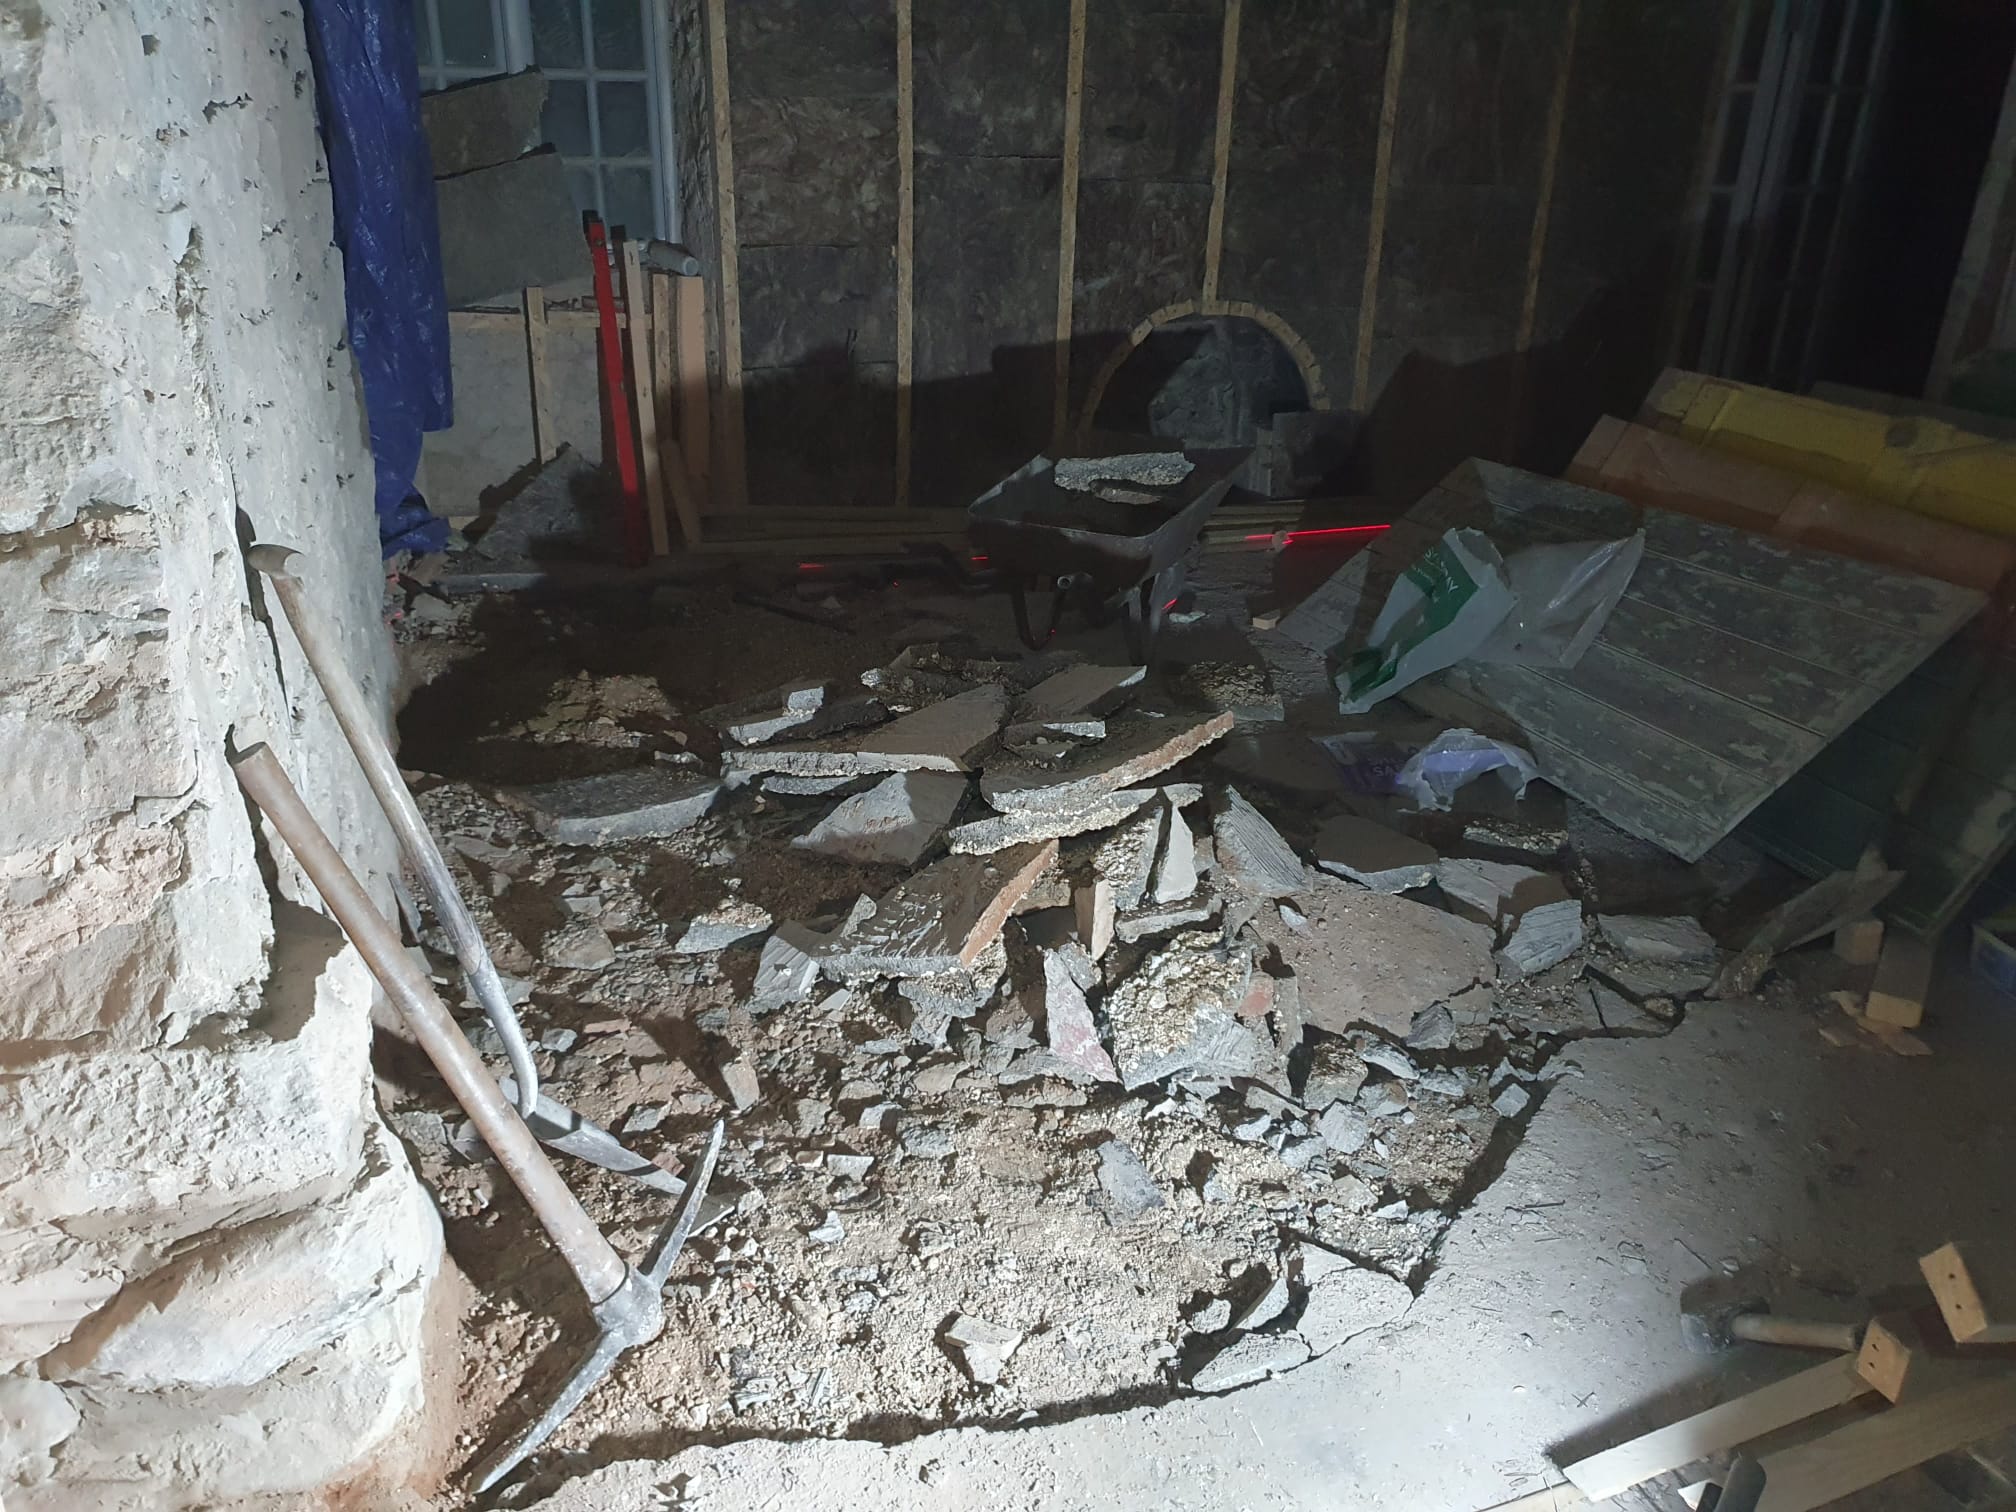

After Chris’s hard evening work we arrived on Saturday with a small amount of concrete left to remove and the then arduous task of digging the whole floor down around 20cm, ready for the insulation and concrete layer. First we had to take everything out of the room, squashing the bits and pieces in wherever we could. Rather than move them out and then back in again Chris and I finished putting up the batons Anna and I had started.

Once the room was clear we began to dig. Started on a tiny area in one corner I began to have serious doubts we’d get very far by hand. The ground was a mixture of grit and large stones, making it difficult to dig. There was another surprise in-store however, below the grit we found another concrete floor. This one was at least very thin and easily broken up with a pickaxe. Below that we hit clay, an even tougher material to scoop up.
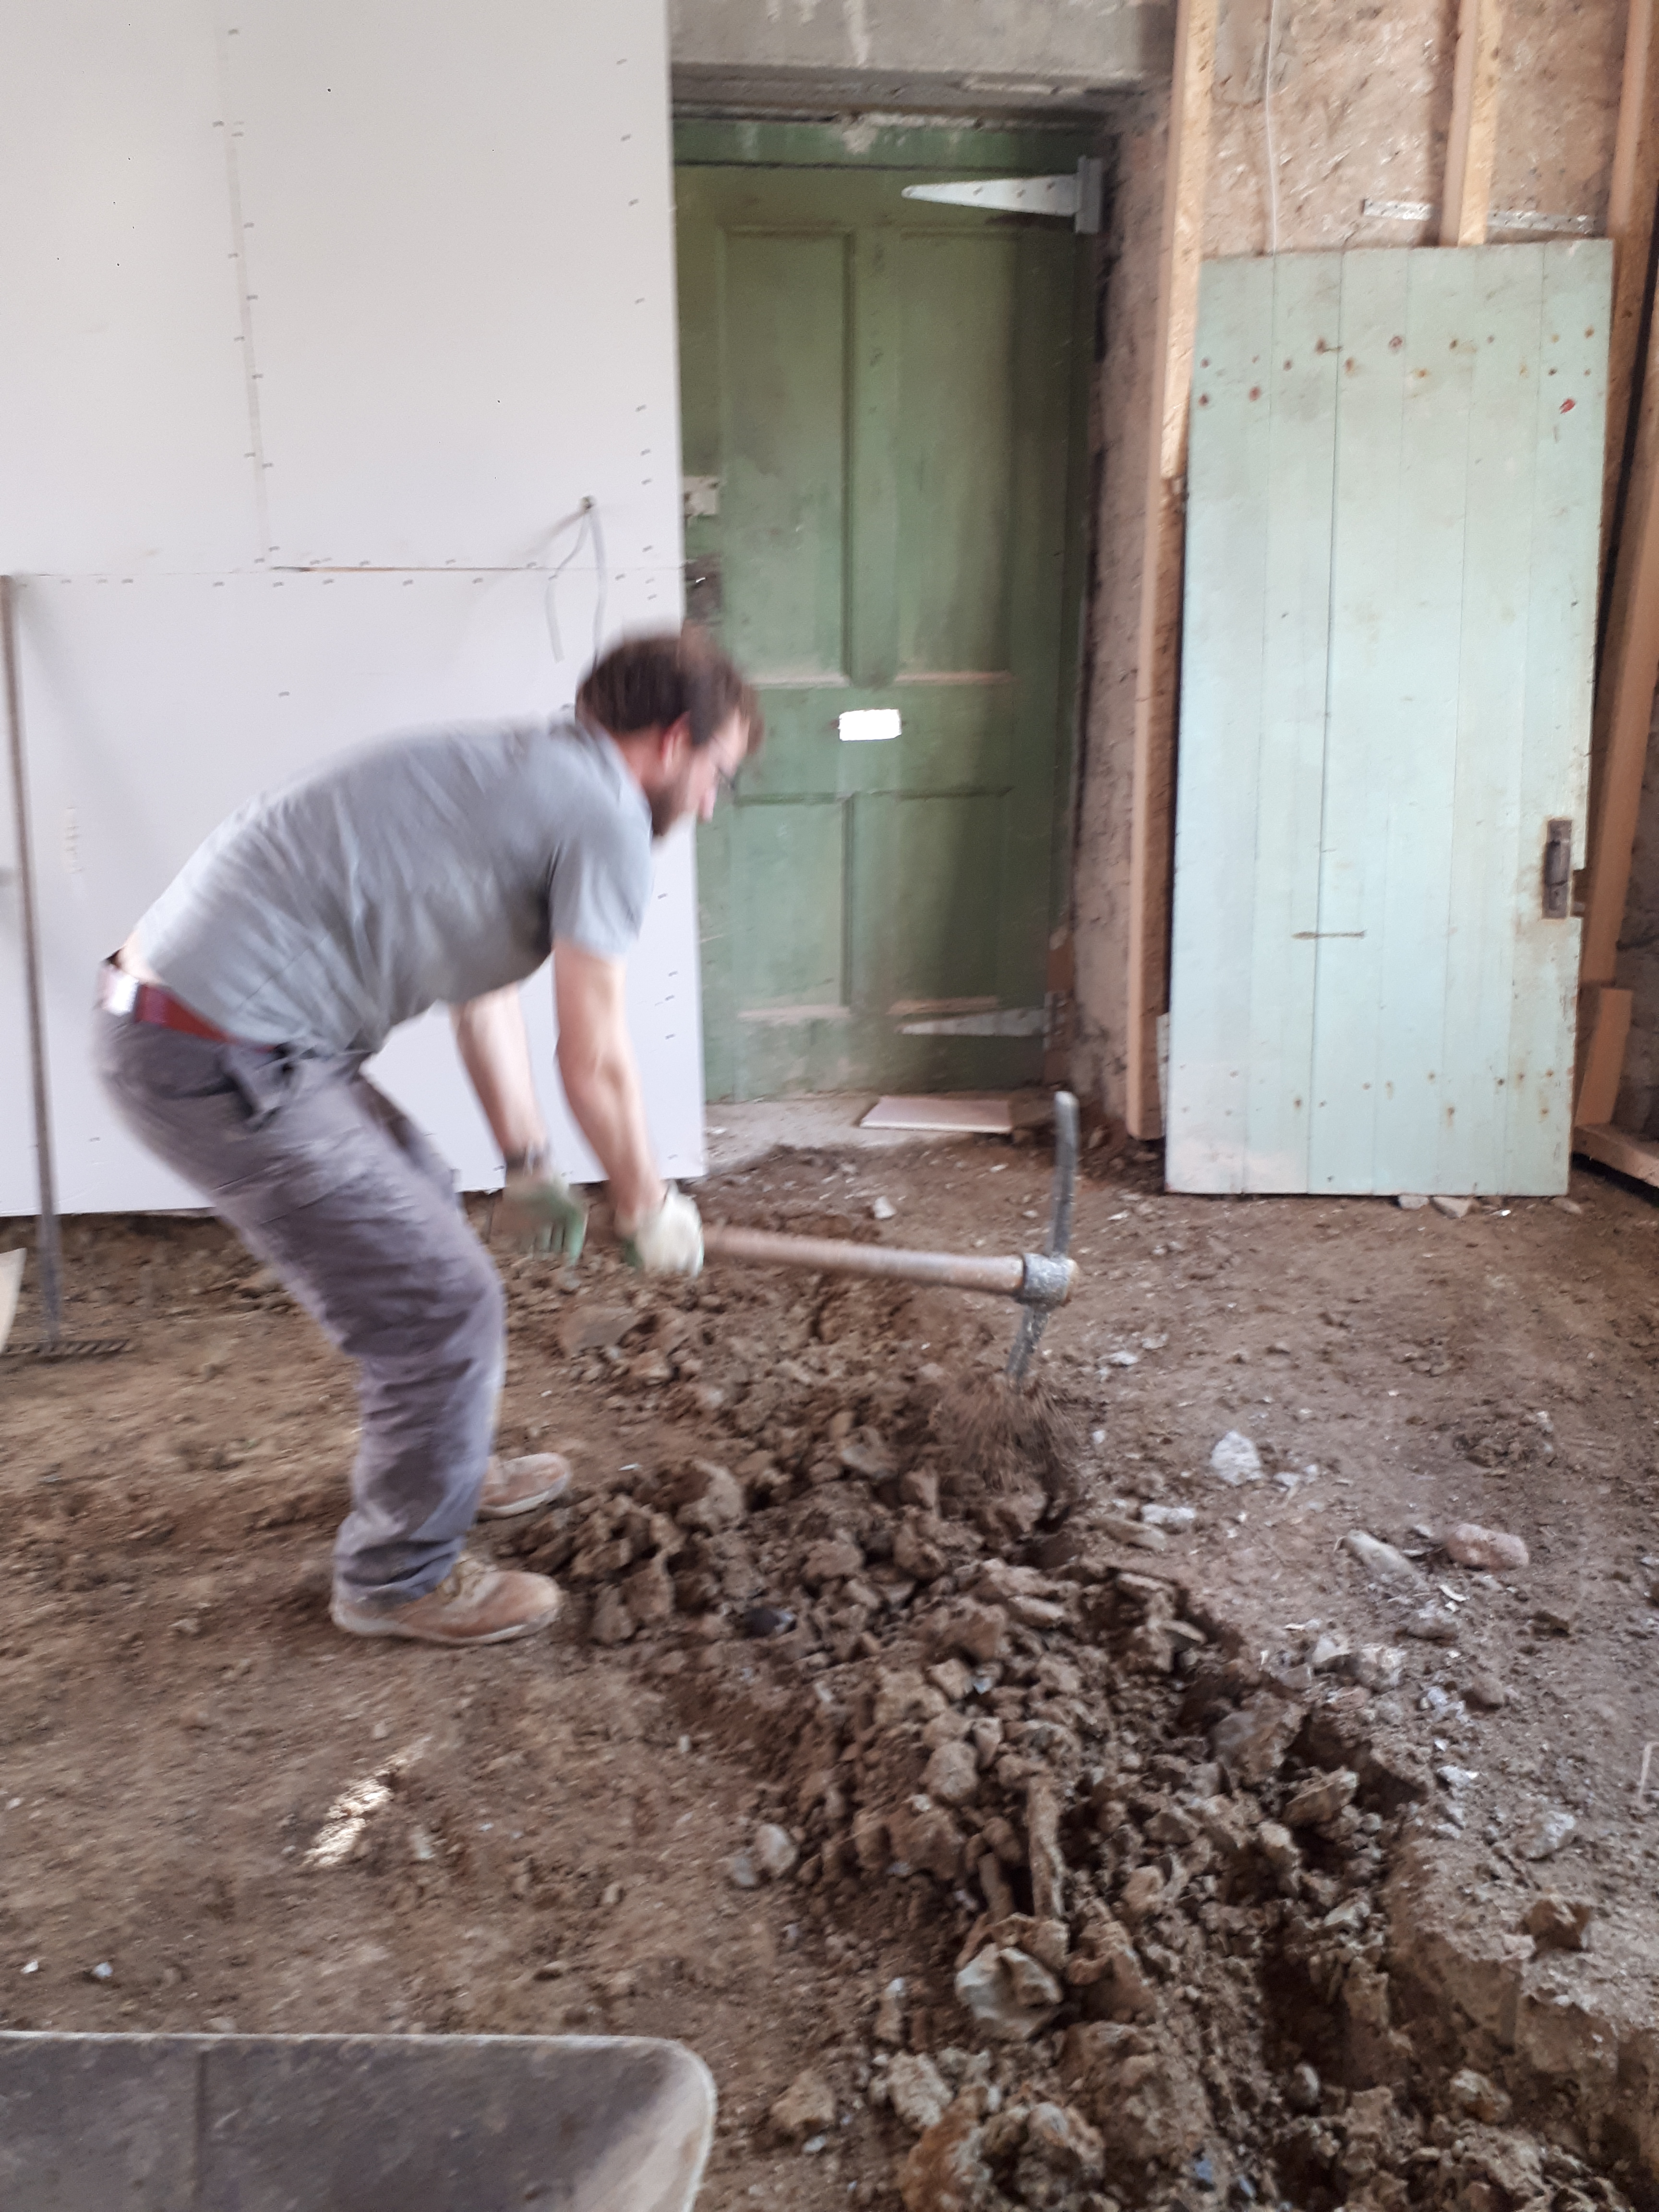
Both days, spent breaking up the ground with a pickaxe, shovelling the lumpy, stoney mess into a wheelbarrow, and transporting it outside, were exhausting. We both spent a few moments at the end of each down, laid out flat on the bare clay floor, too tired to keep going. But after two days, the floor is nearly done. With the exception of a few doorways, and lots of refining to get the levels right, we’re there. With this nearly done we can soon get rid of the massive stack of insulation that is taking up half our lounge. Slowly the kitchen/ diner is transforming into a finished room.
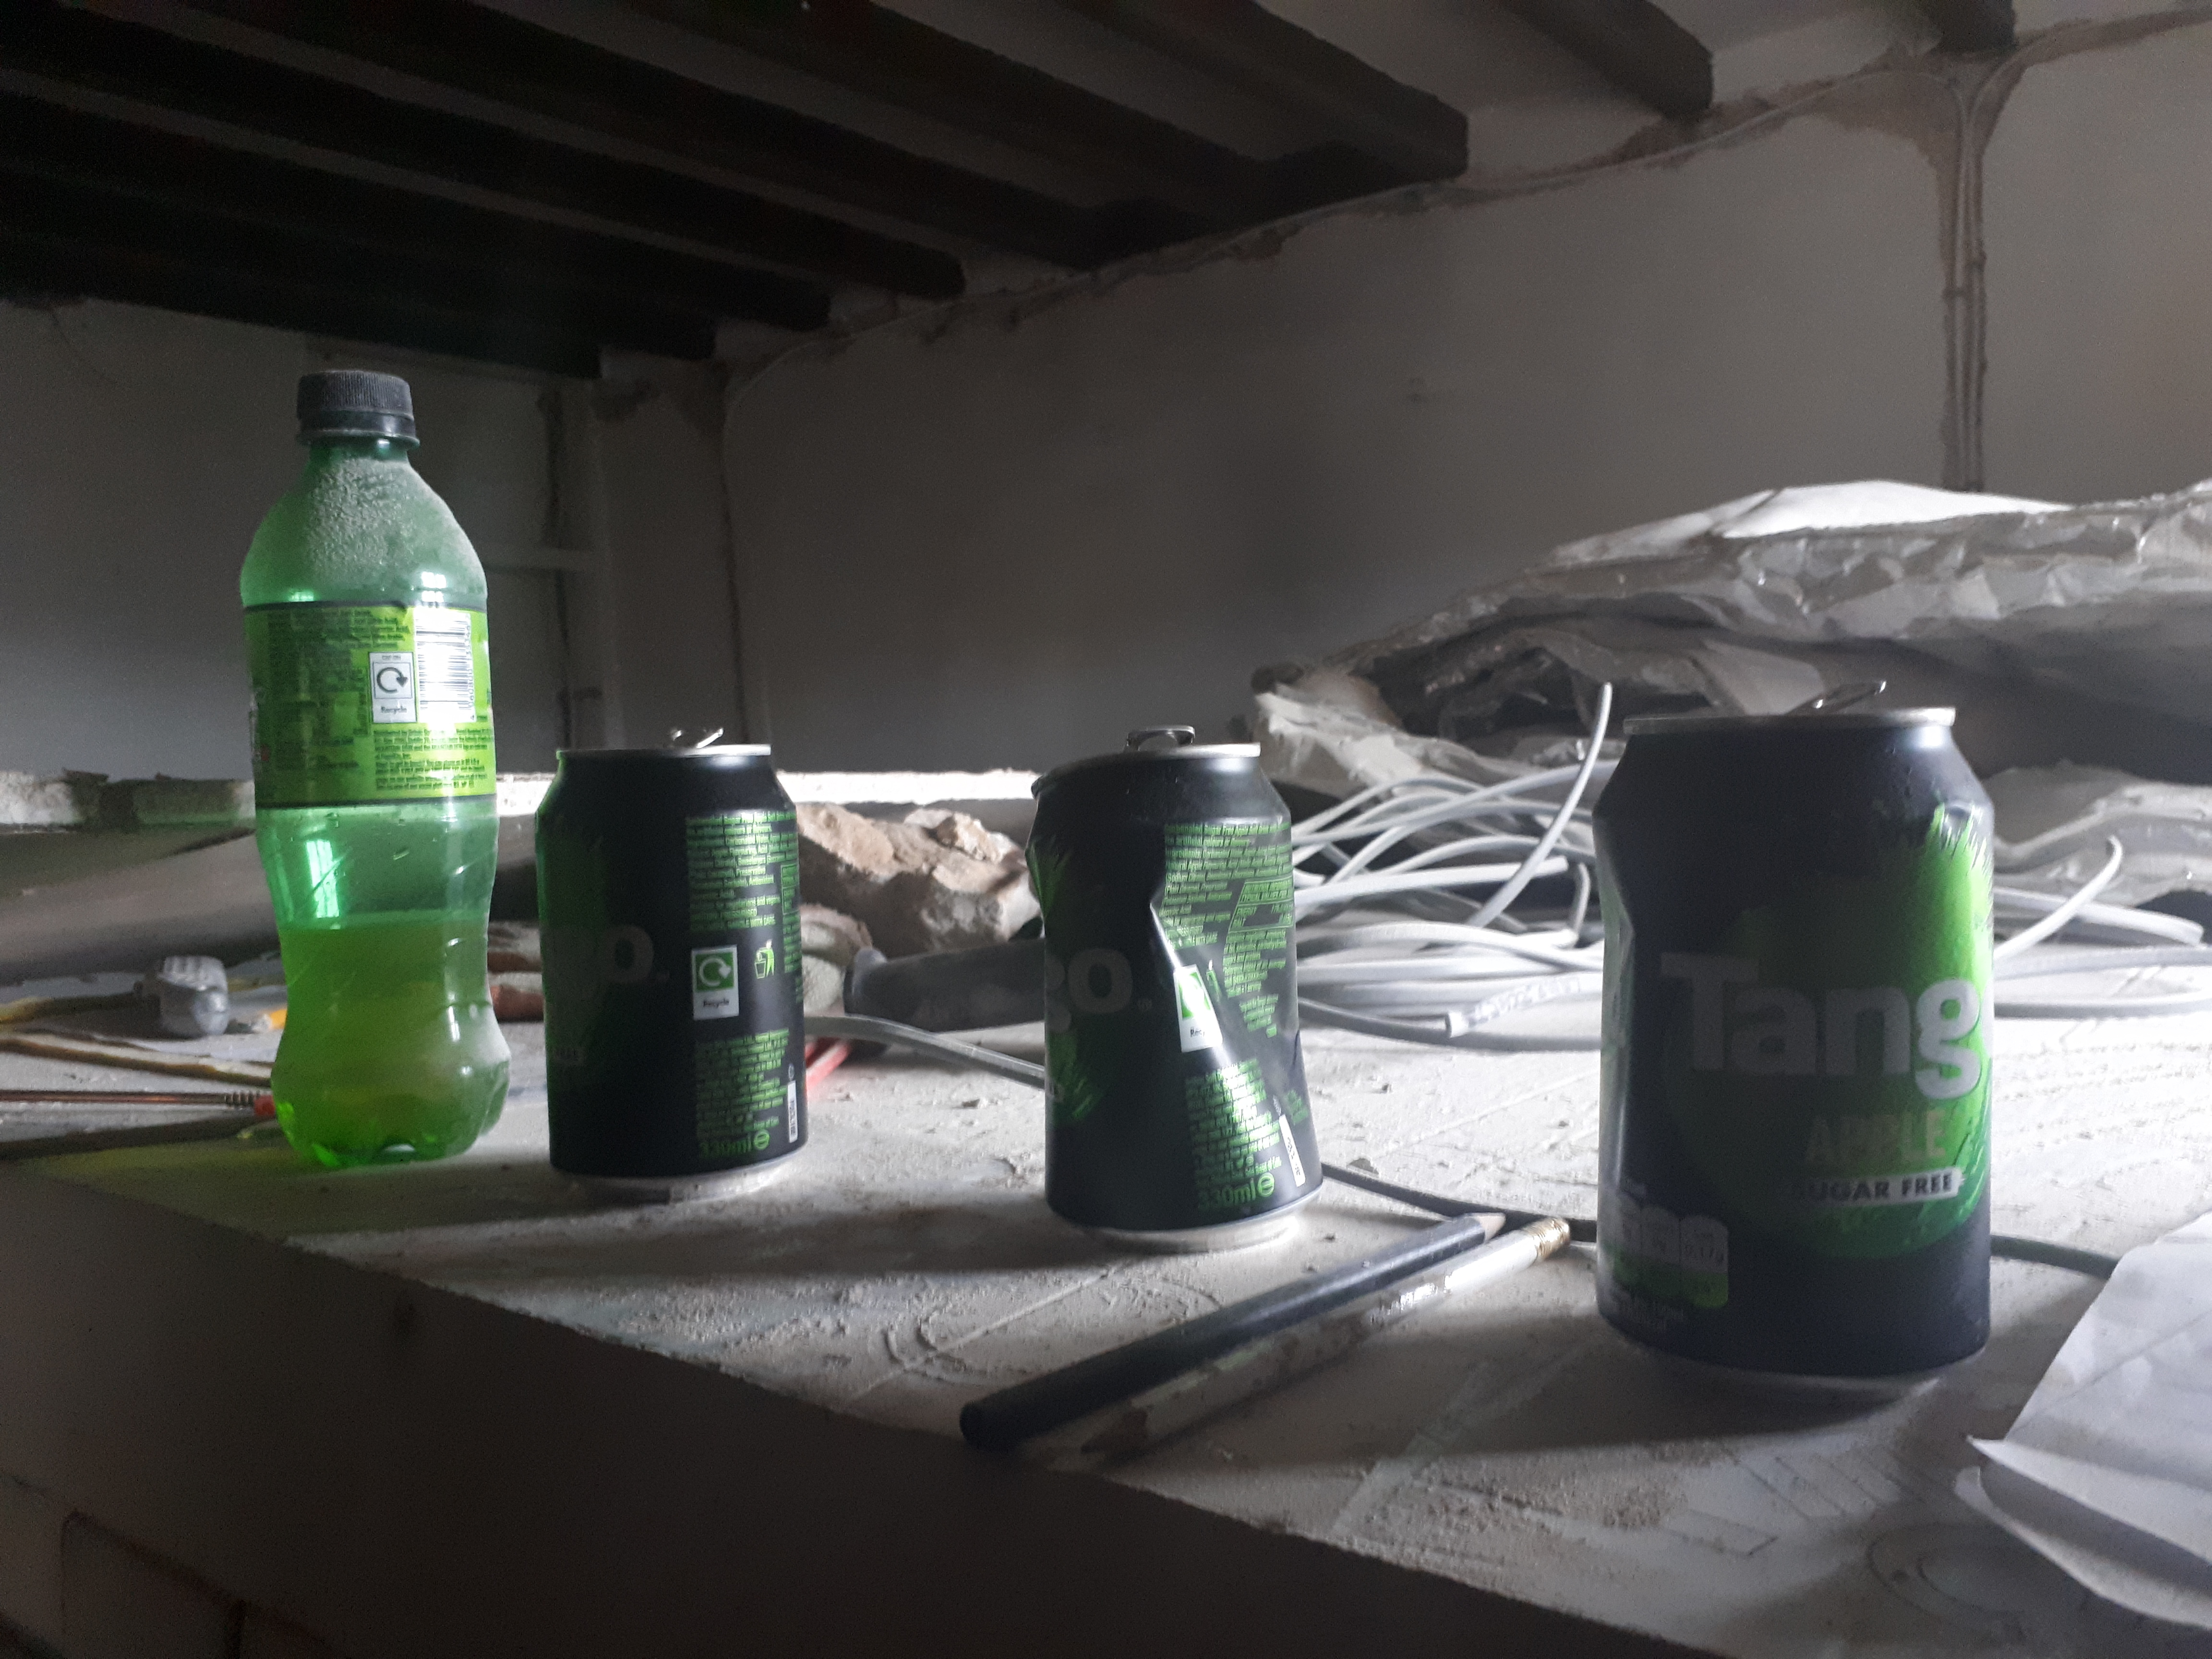
On a side note our, much appreciated, insulation team, who previously seemed to survive solely on Red bull, seem to have changed over to Tango and Fanta, with cans scattered everywhere around the house. Perhaps their doctors told them they needed more fruit in their diet? It is the time of year for a health kick afterall? Still whatever is powering them on it’s great to see more and more plaster board up on the walls – hiding all our messy mistakes out of sight.

-
Opening doors

As spring begins to arrive, our garden has filled with snowdrops. It reminds me of the first time we saw the house. In fact, February marks a year since our first viewing. When I realised, I felt a slight sense of panic, thinking we’d already had a year of working on the house. But of course the sale wasn’t completed until May, so we still have time.
It was once again great to see the builders had been busy. All of upstairs is now plasterboarded, and most of downstairs has batons and insulation. The first corner had also been completed, satisfyingly rounded, as we’d requested.
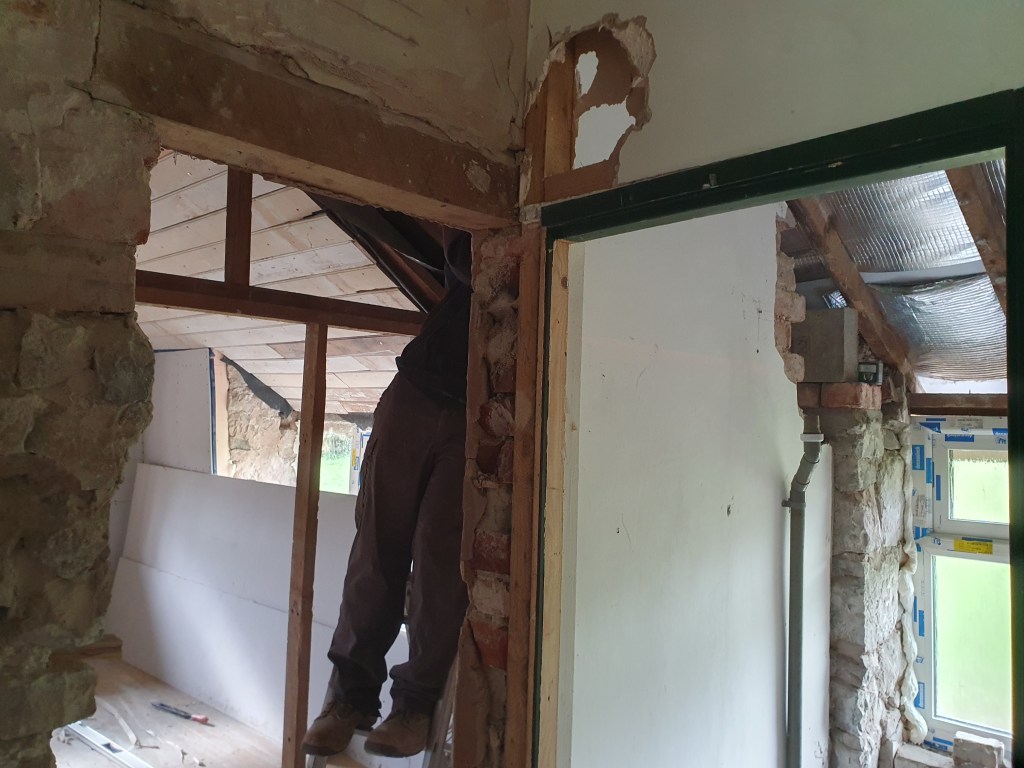
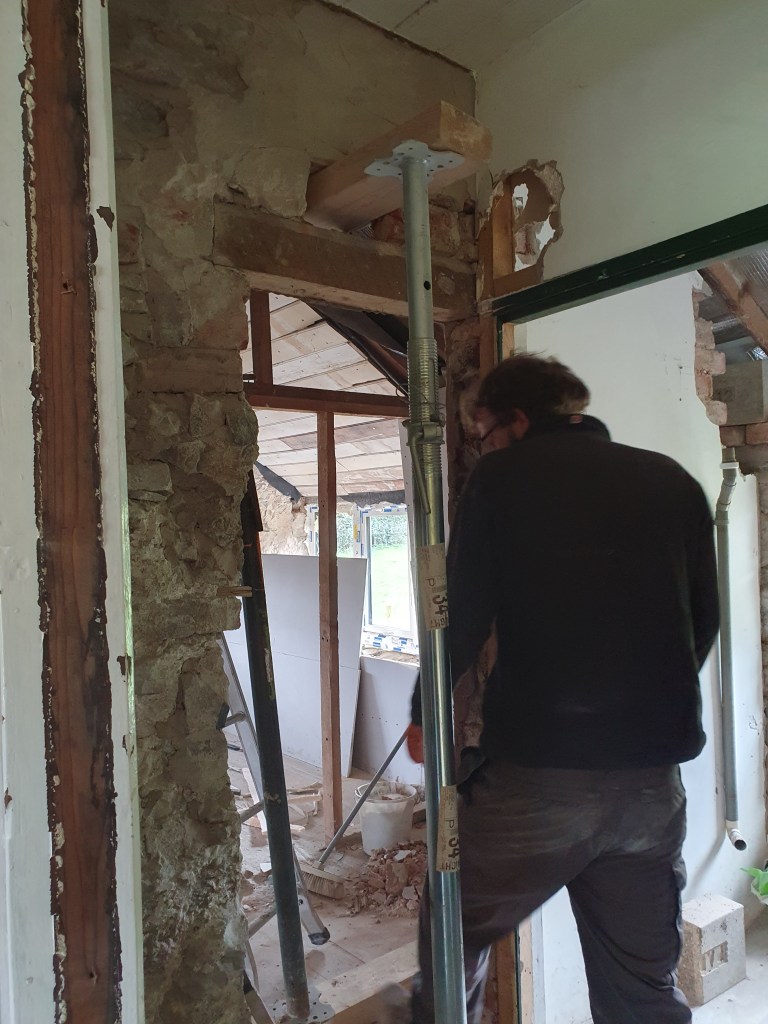
My first job was to repoint the corner of the internal wall that sits over the new steel. Chris noticed a crack appear after we got the steel in place. It’s likely the wall shifted a little when we were doing the work. As the second steel will sit on this corner, it’s important to ensure it’s well supported.
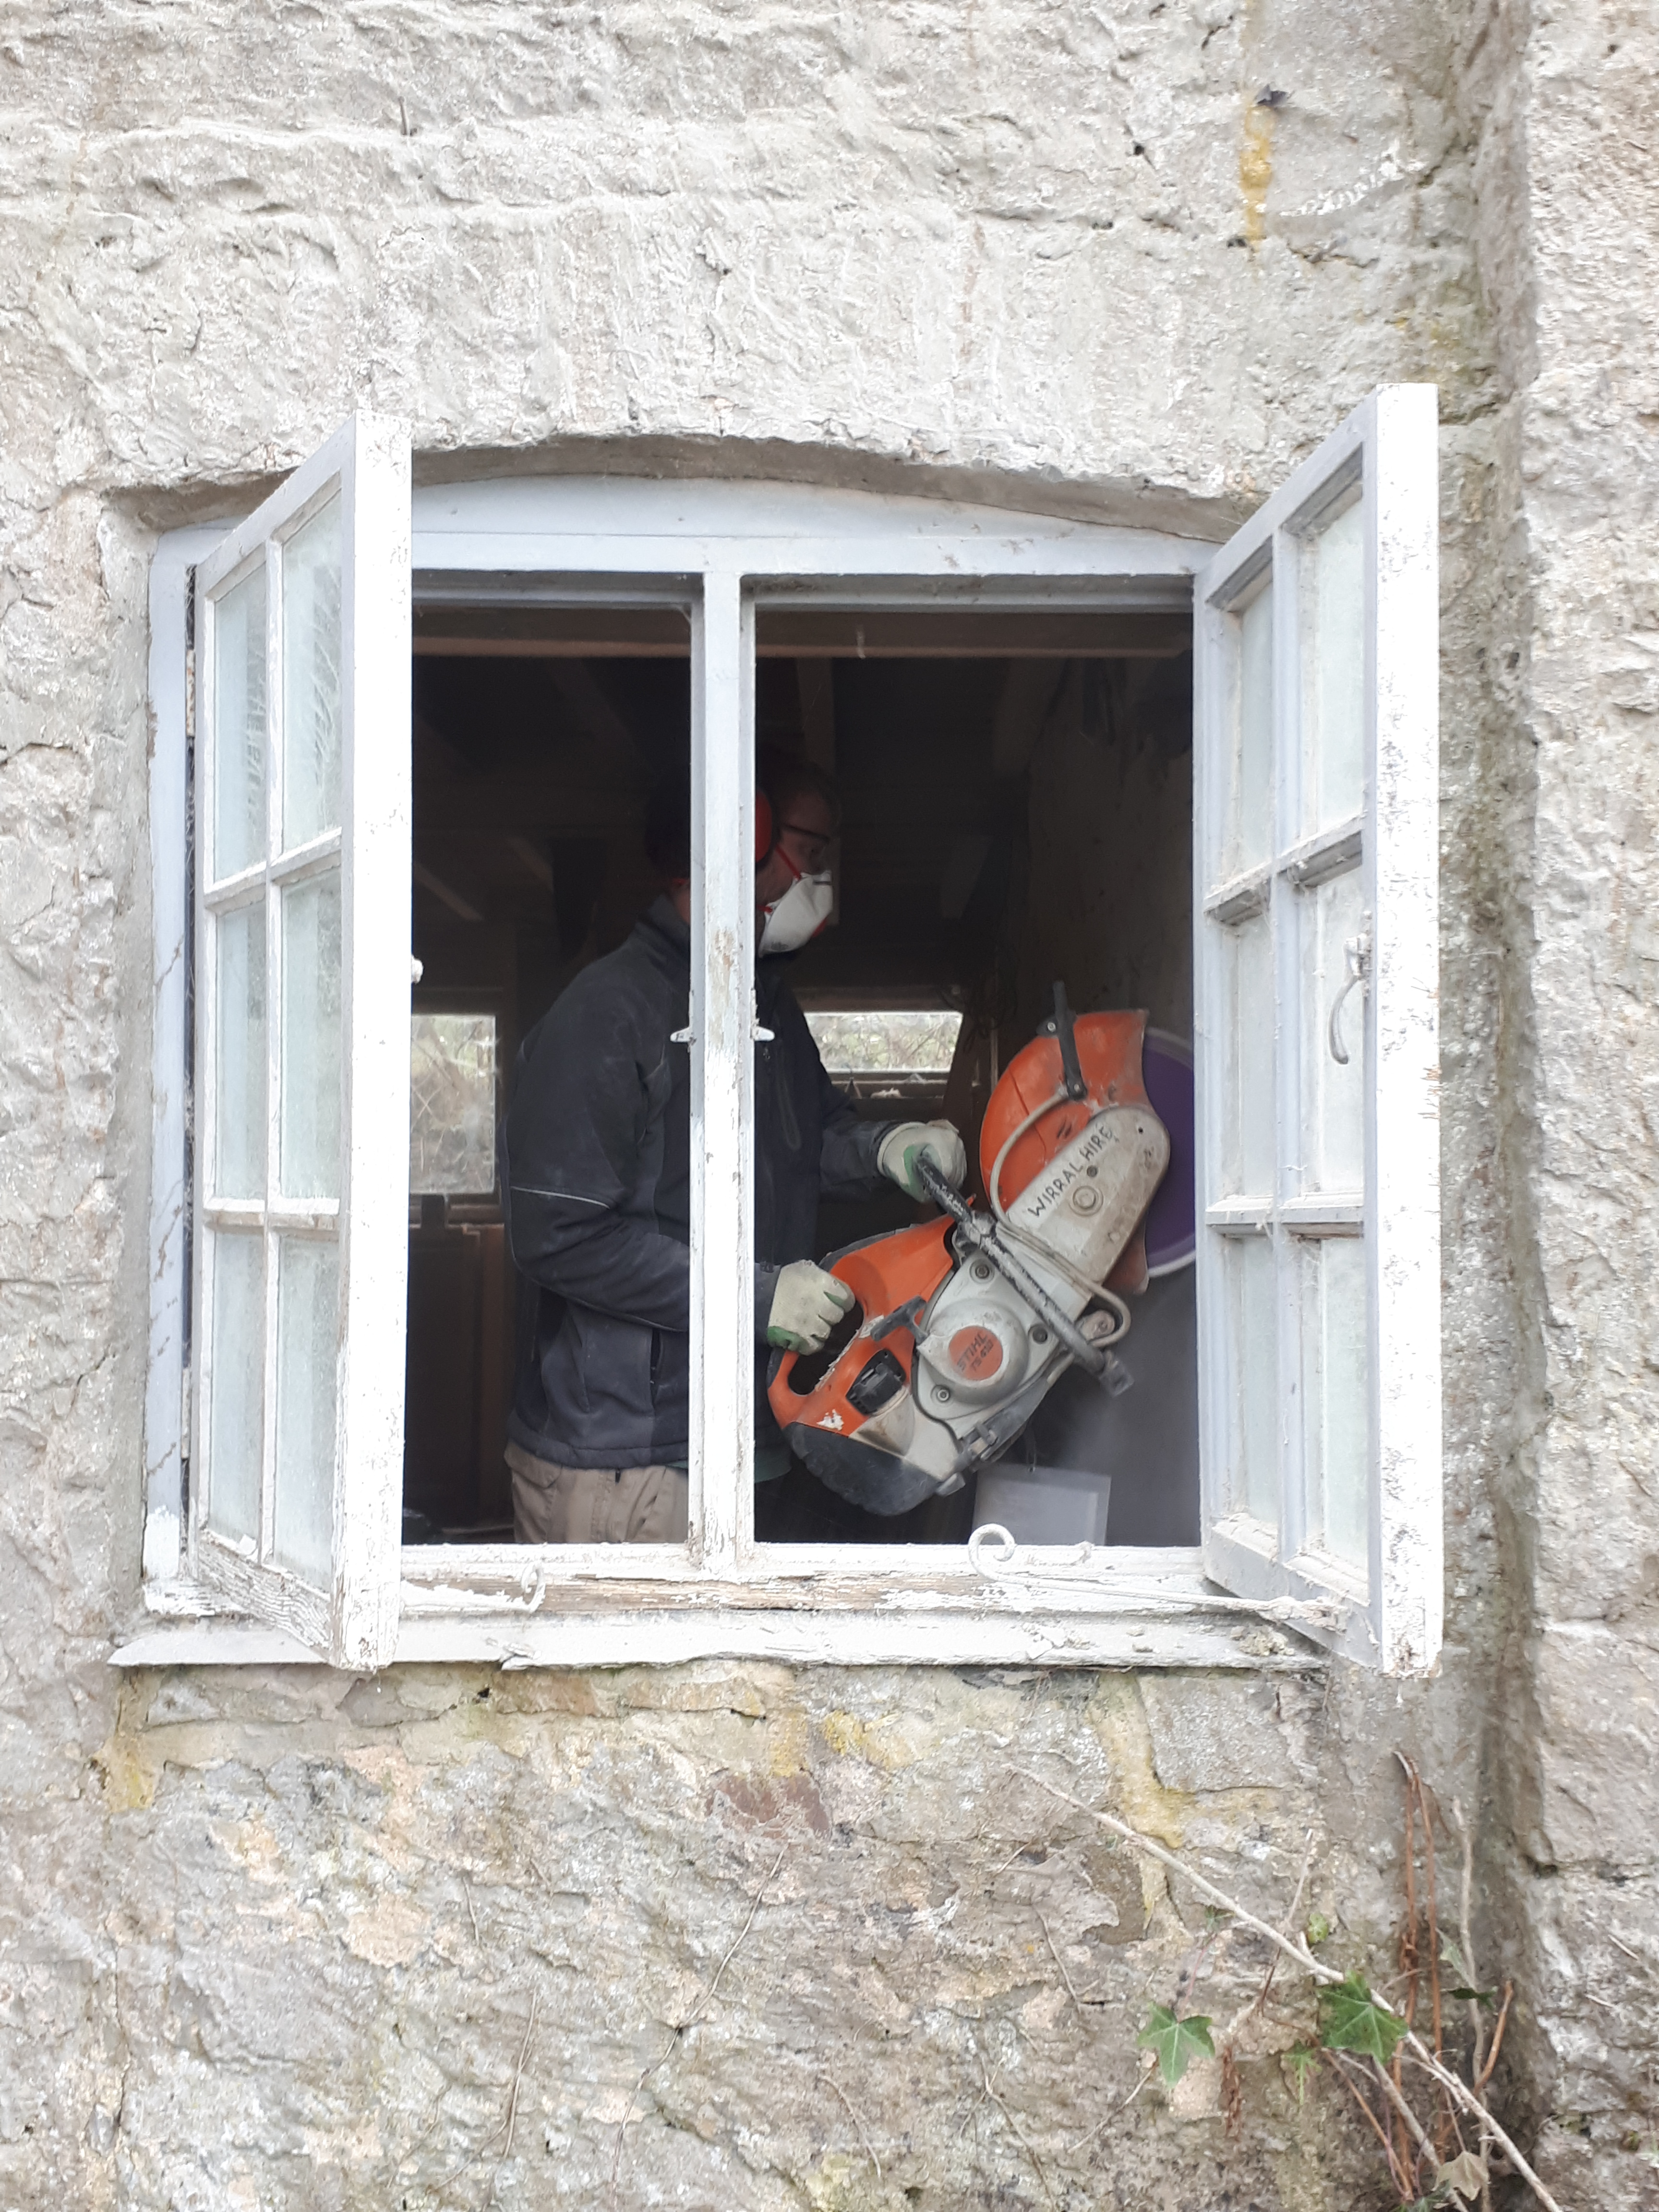
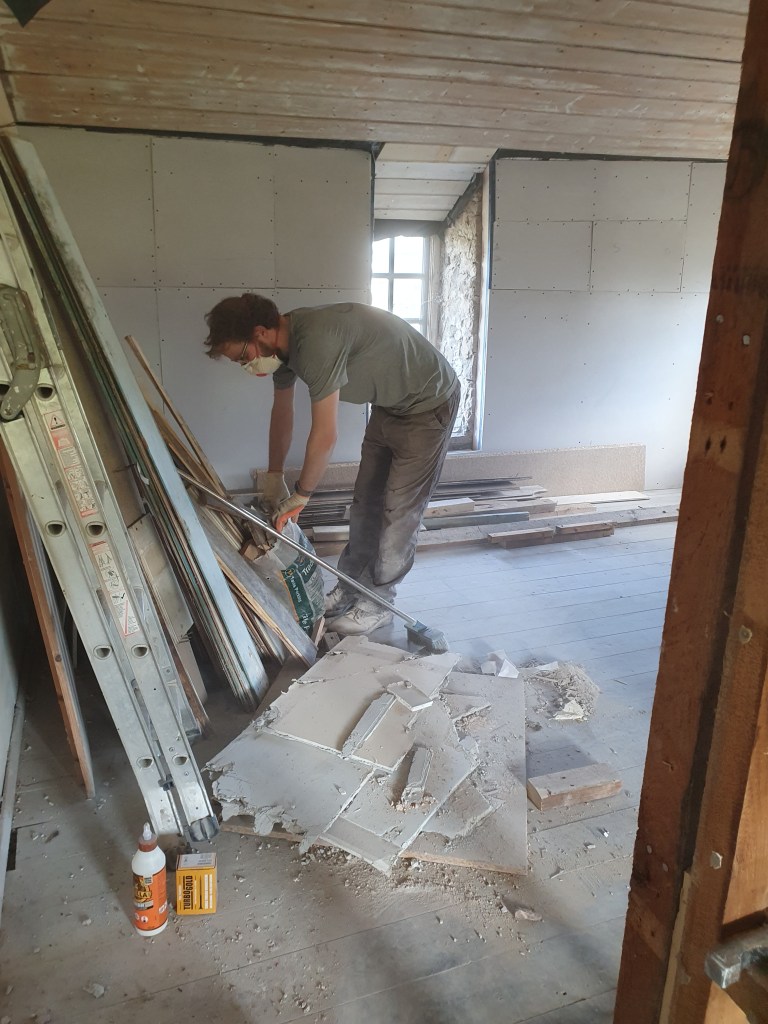
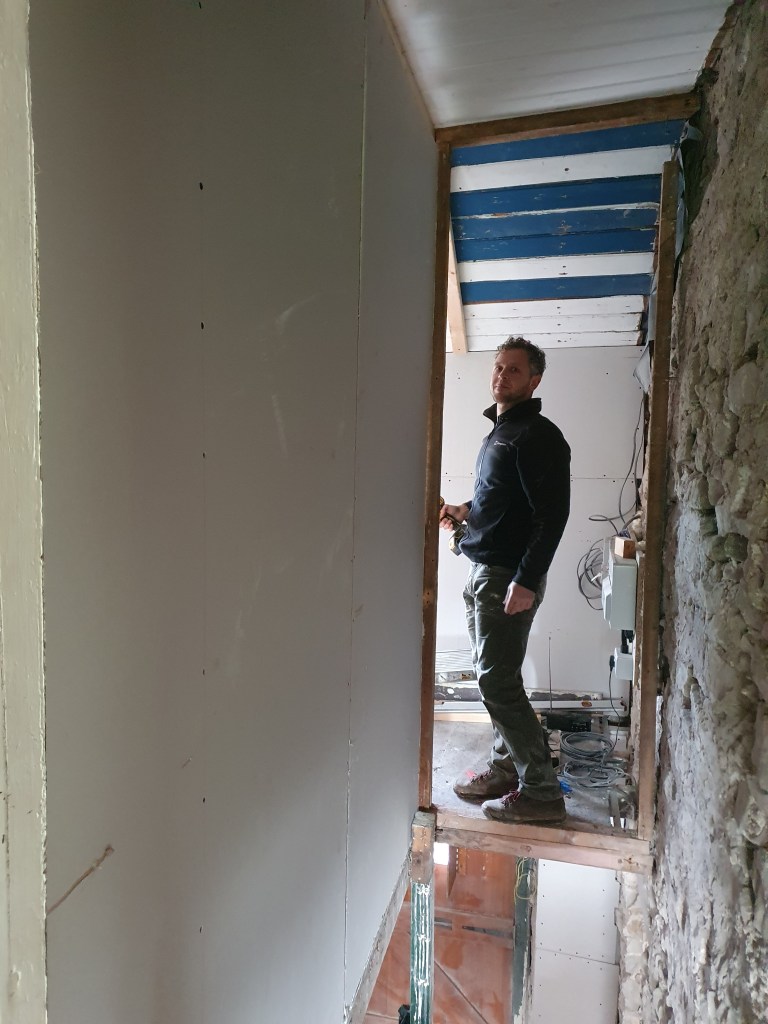
Chris on the other hand got to play with our newly rented cut-off saw. This huge saw was needed to cut through the wall to create our new doorway from the kitchen/ diner to the lounge.
While the saw was well worth the cost to help get through the hard rocks, it created so much dust that Chris had to take regular breaks. Even upstairs I had to wear a mask.
The door came along fairly speedily, with us stopping at intervals to clear rocks from either side. Chris had to stop with his cutting halfway through to let me repoint, in order to stabilise the edge, which began to come lose.
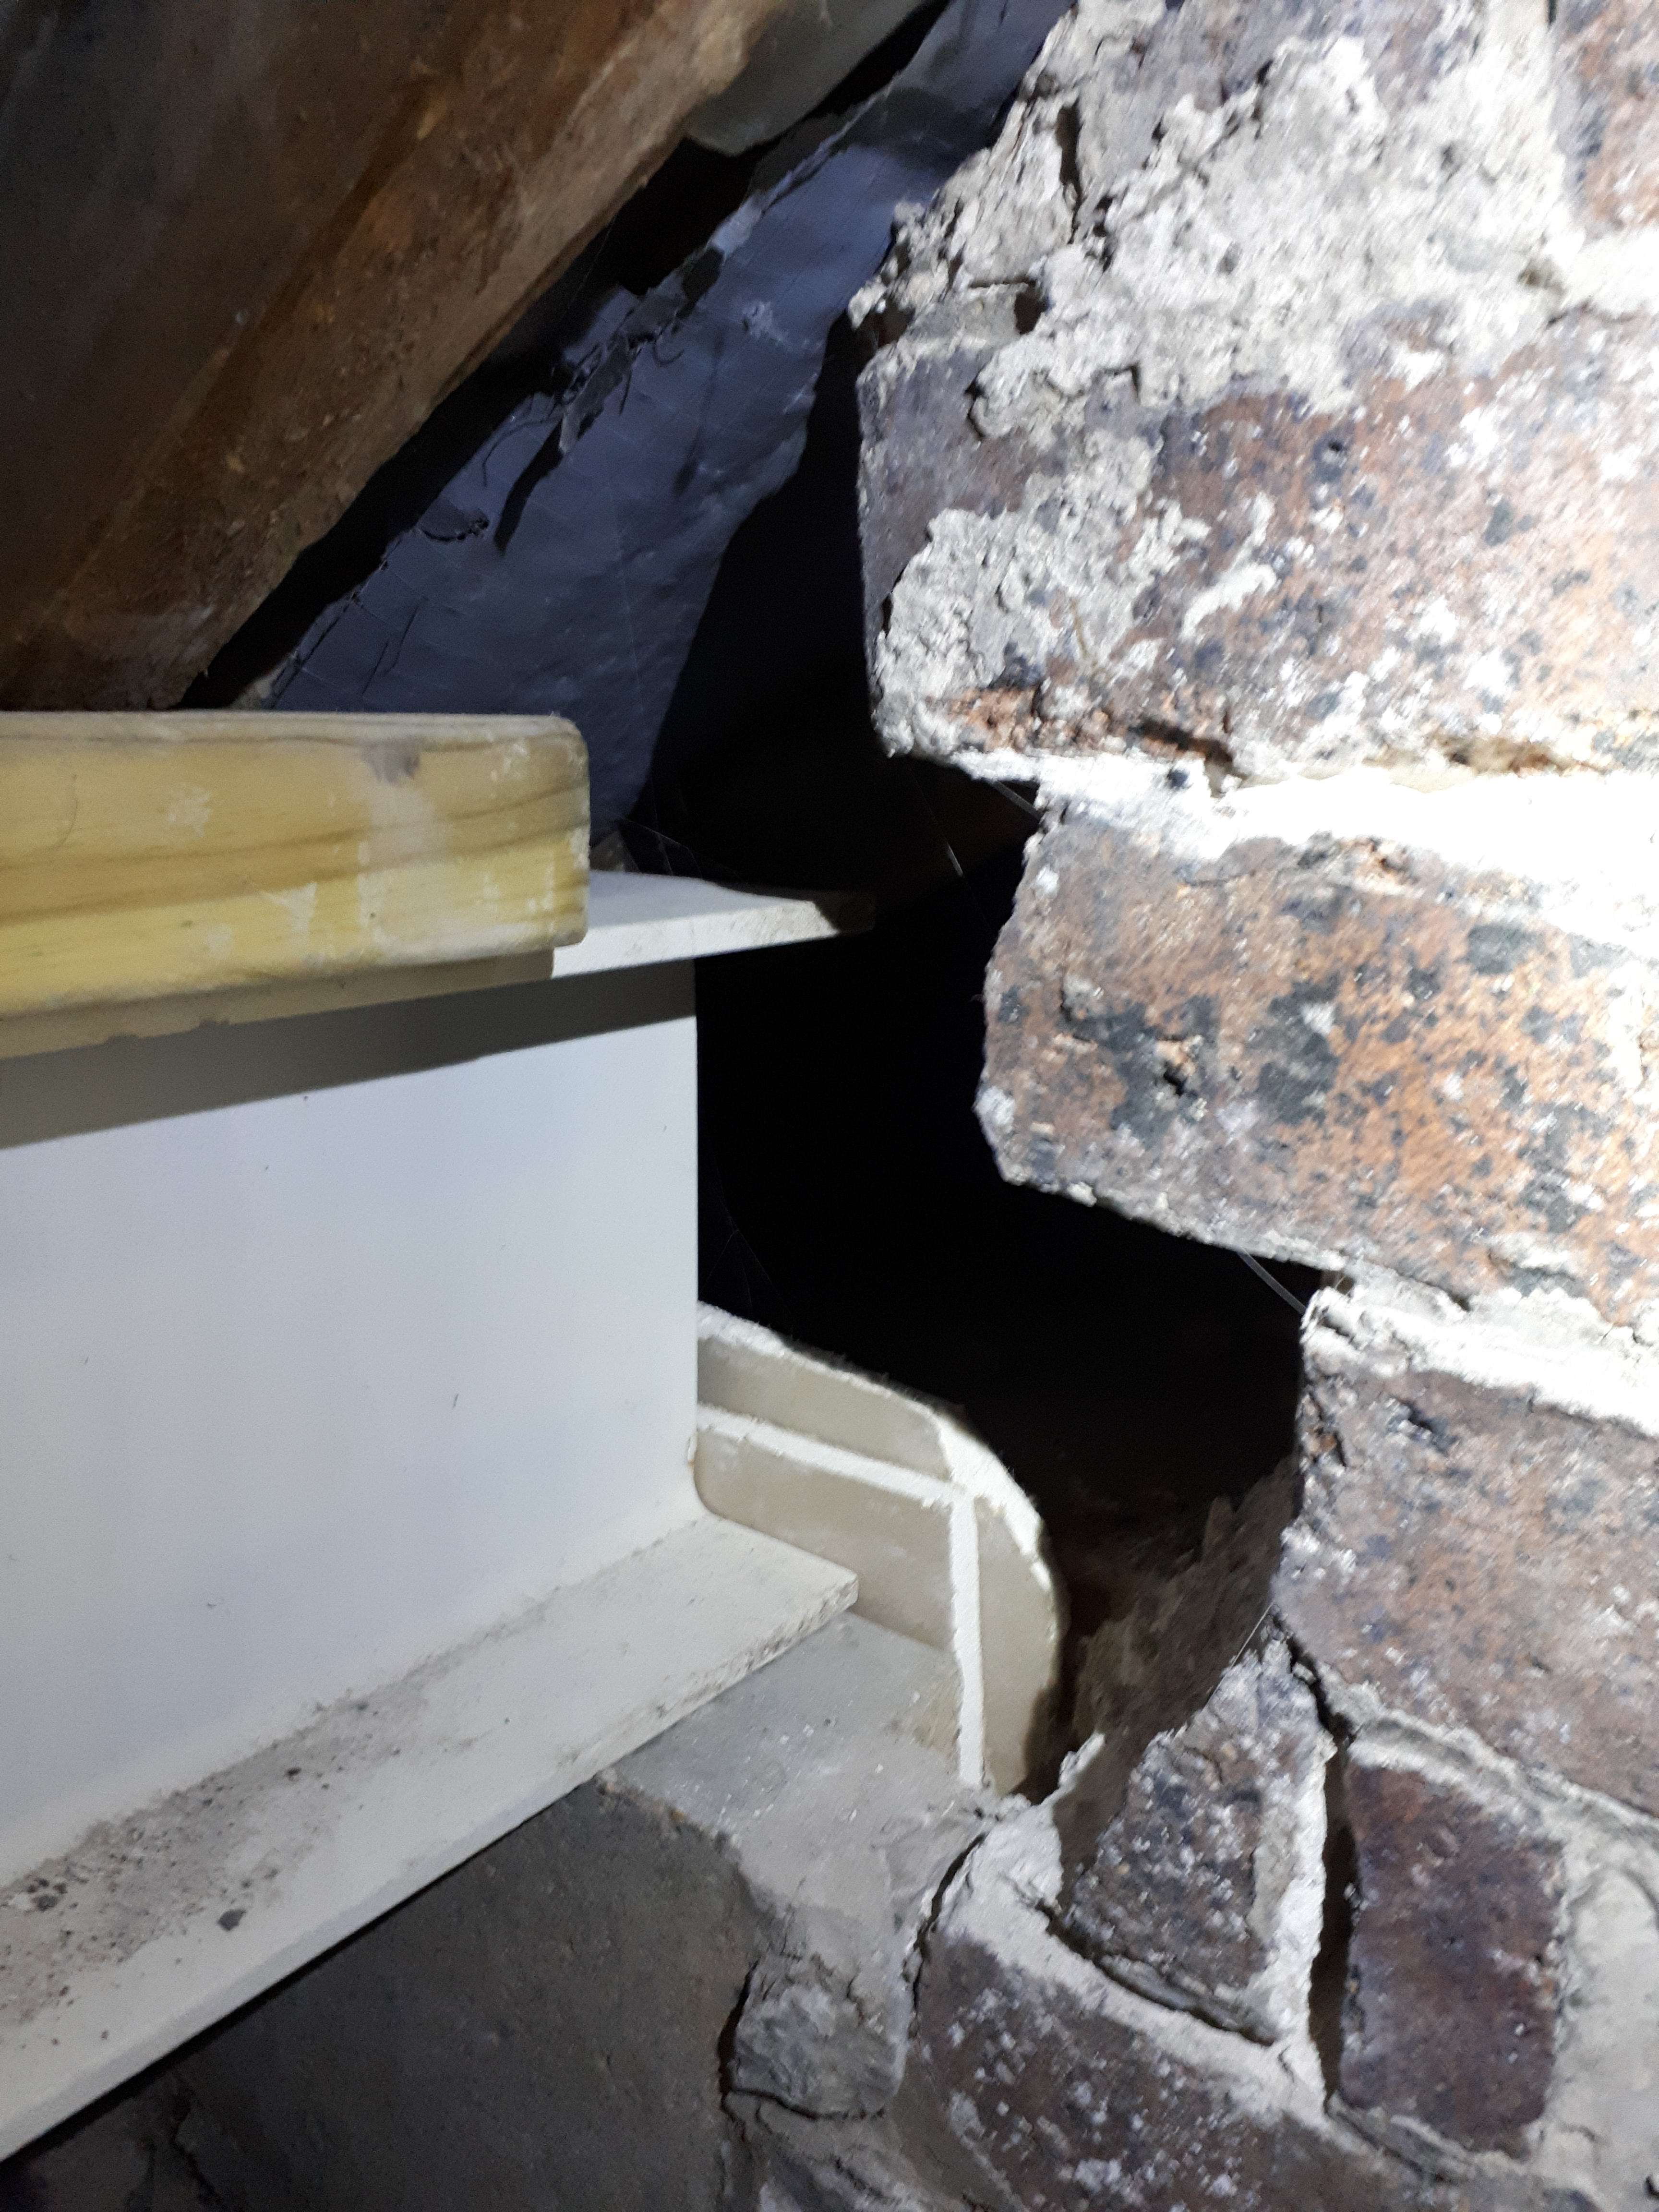
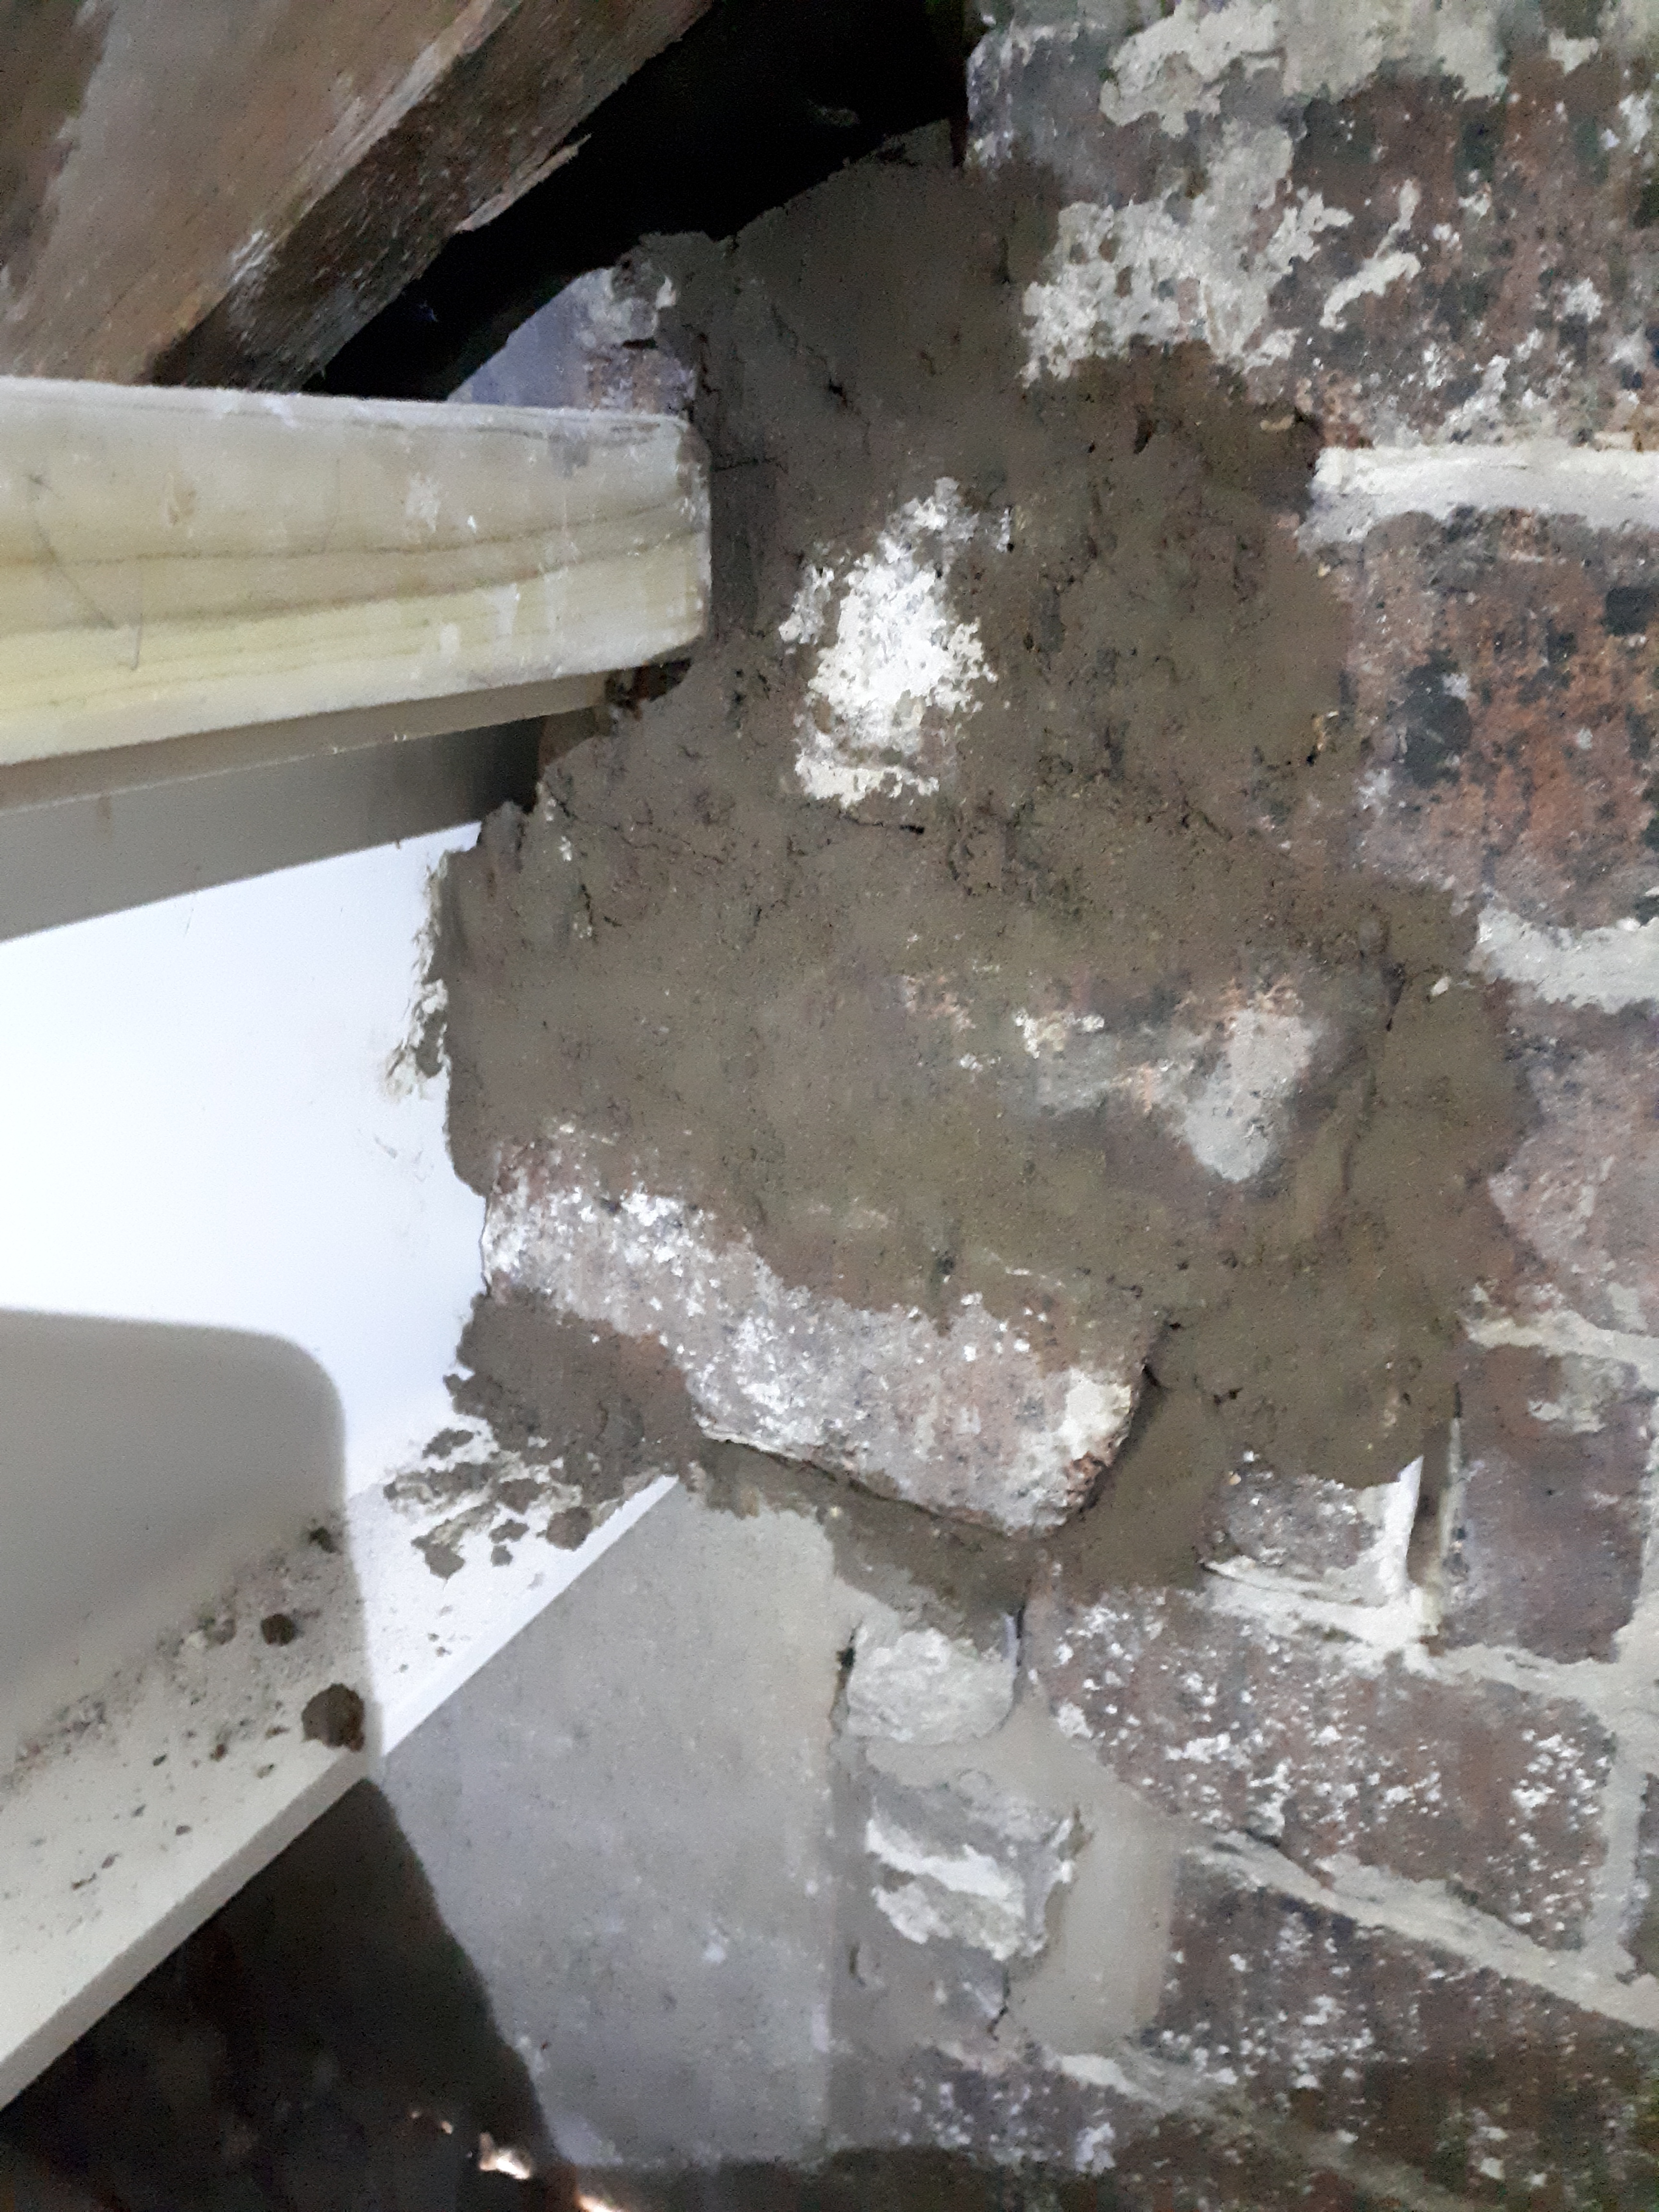
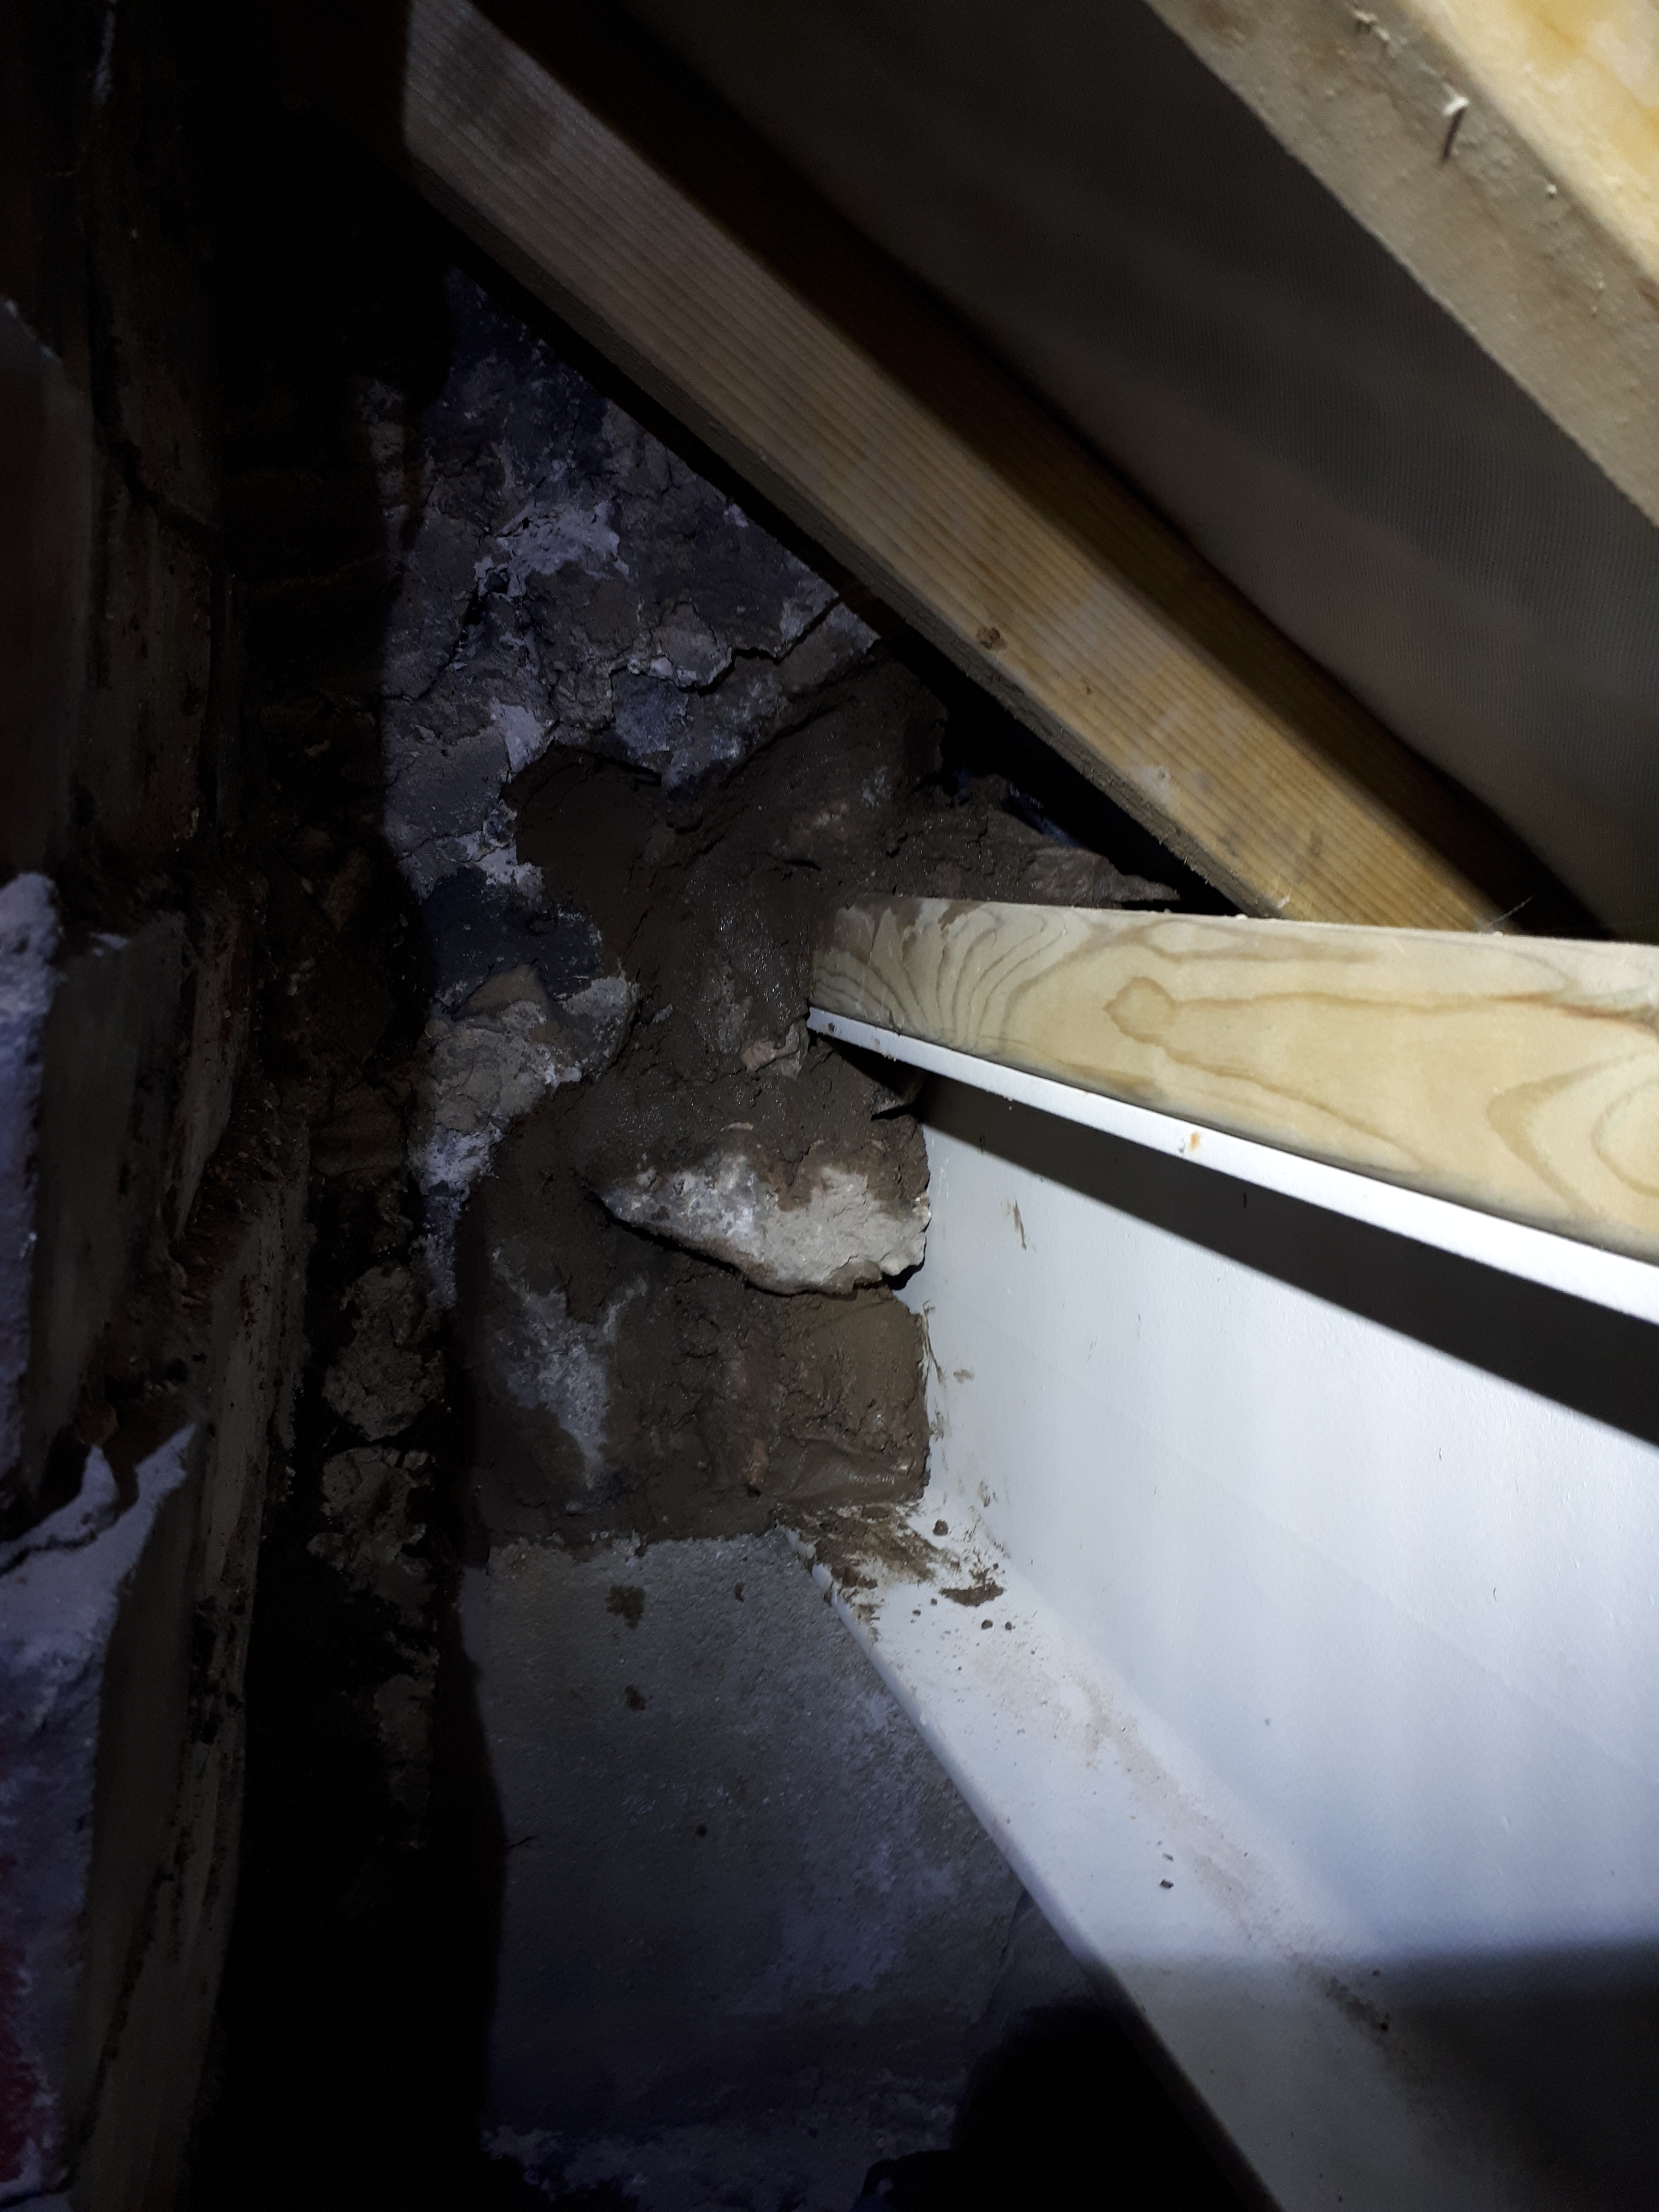
Up in the attic, I set to work plugging up the holes around our two steels. A very simple job, that is aside from the gymnastics required to work in the confined space.
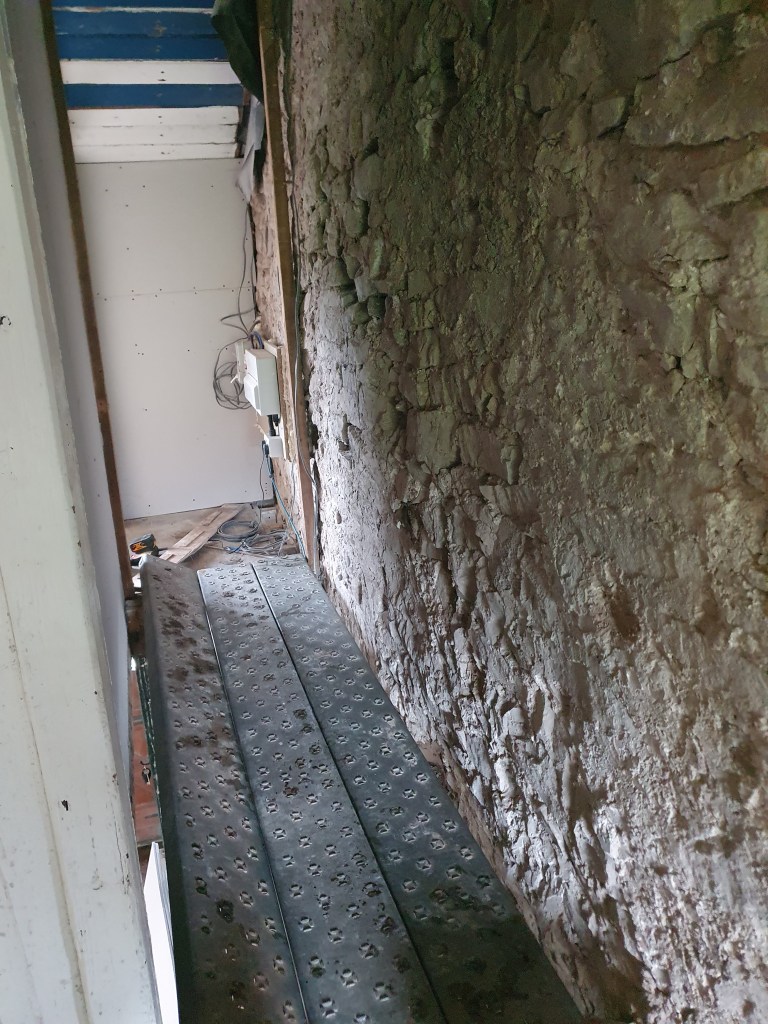
Having finished with the door, Chris began to use the cut-off saw to break into the concrete floor. Unfortunately for us, it appears the concrete was poured on top of another concrete floor. Still, the saw made quick work of the first layer. The first load is being added to our skip, now full and ready to go, but the layers below will be moved to our sinkhole, to try and refill this empty space and help create a soakaway for our rainwater.

It’s great to finally have our new doorway in place. I knew it would bring light into our slightly dark lounge, but it’s amazing what a difference it makes. The room feels instantly larger and more open. It also brings the two once seperate houses properly together.

This weekend, the work didn’t stop when we left the new house. Our old house needs some love and care. Having listed it last week, we have three viewings on Monday. To get the house ready we had a few bits of last minute DIY to take care of, plus general cleaning. If all goes well and one of the viewers decides to offer, then our deadline to get the house finished really will have solidified. Still, nothing like a deadline to get things moving.
-
Subscribe
Subscribed
Already have a WordPress.com account? Log in now.
